Create a walkthrough(创建操作指南(Walkthrough))
Configuration
- Navigate to the Walkthroughs application and select New walkthrough. You will be prompted to name the walkthrough and select a save location.

- Next, enter the walkthrough editor to configure the walkthrough contents.
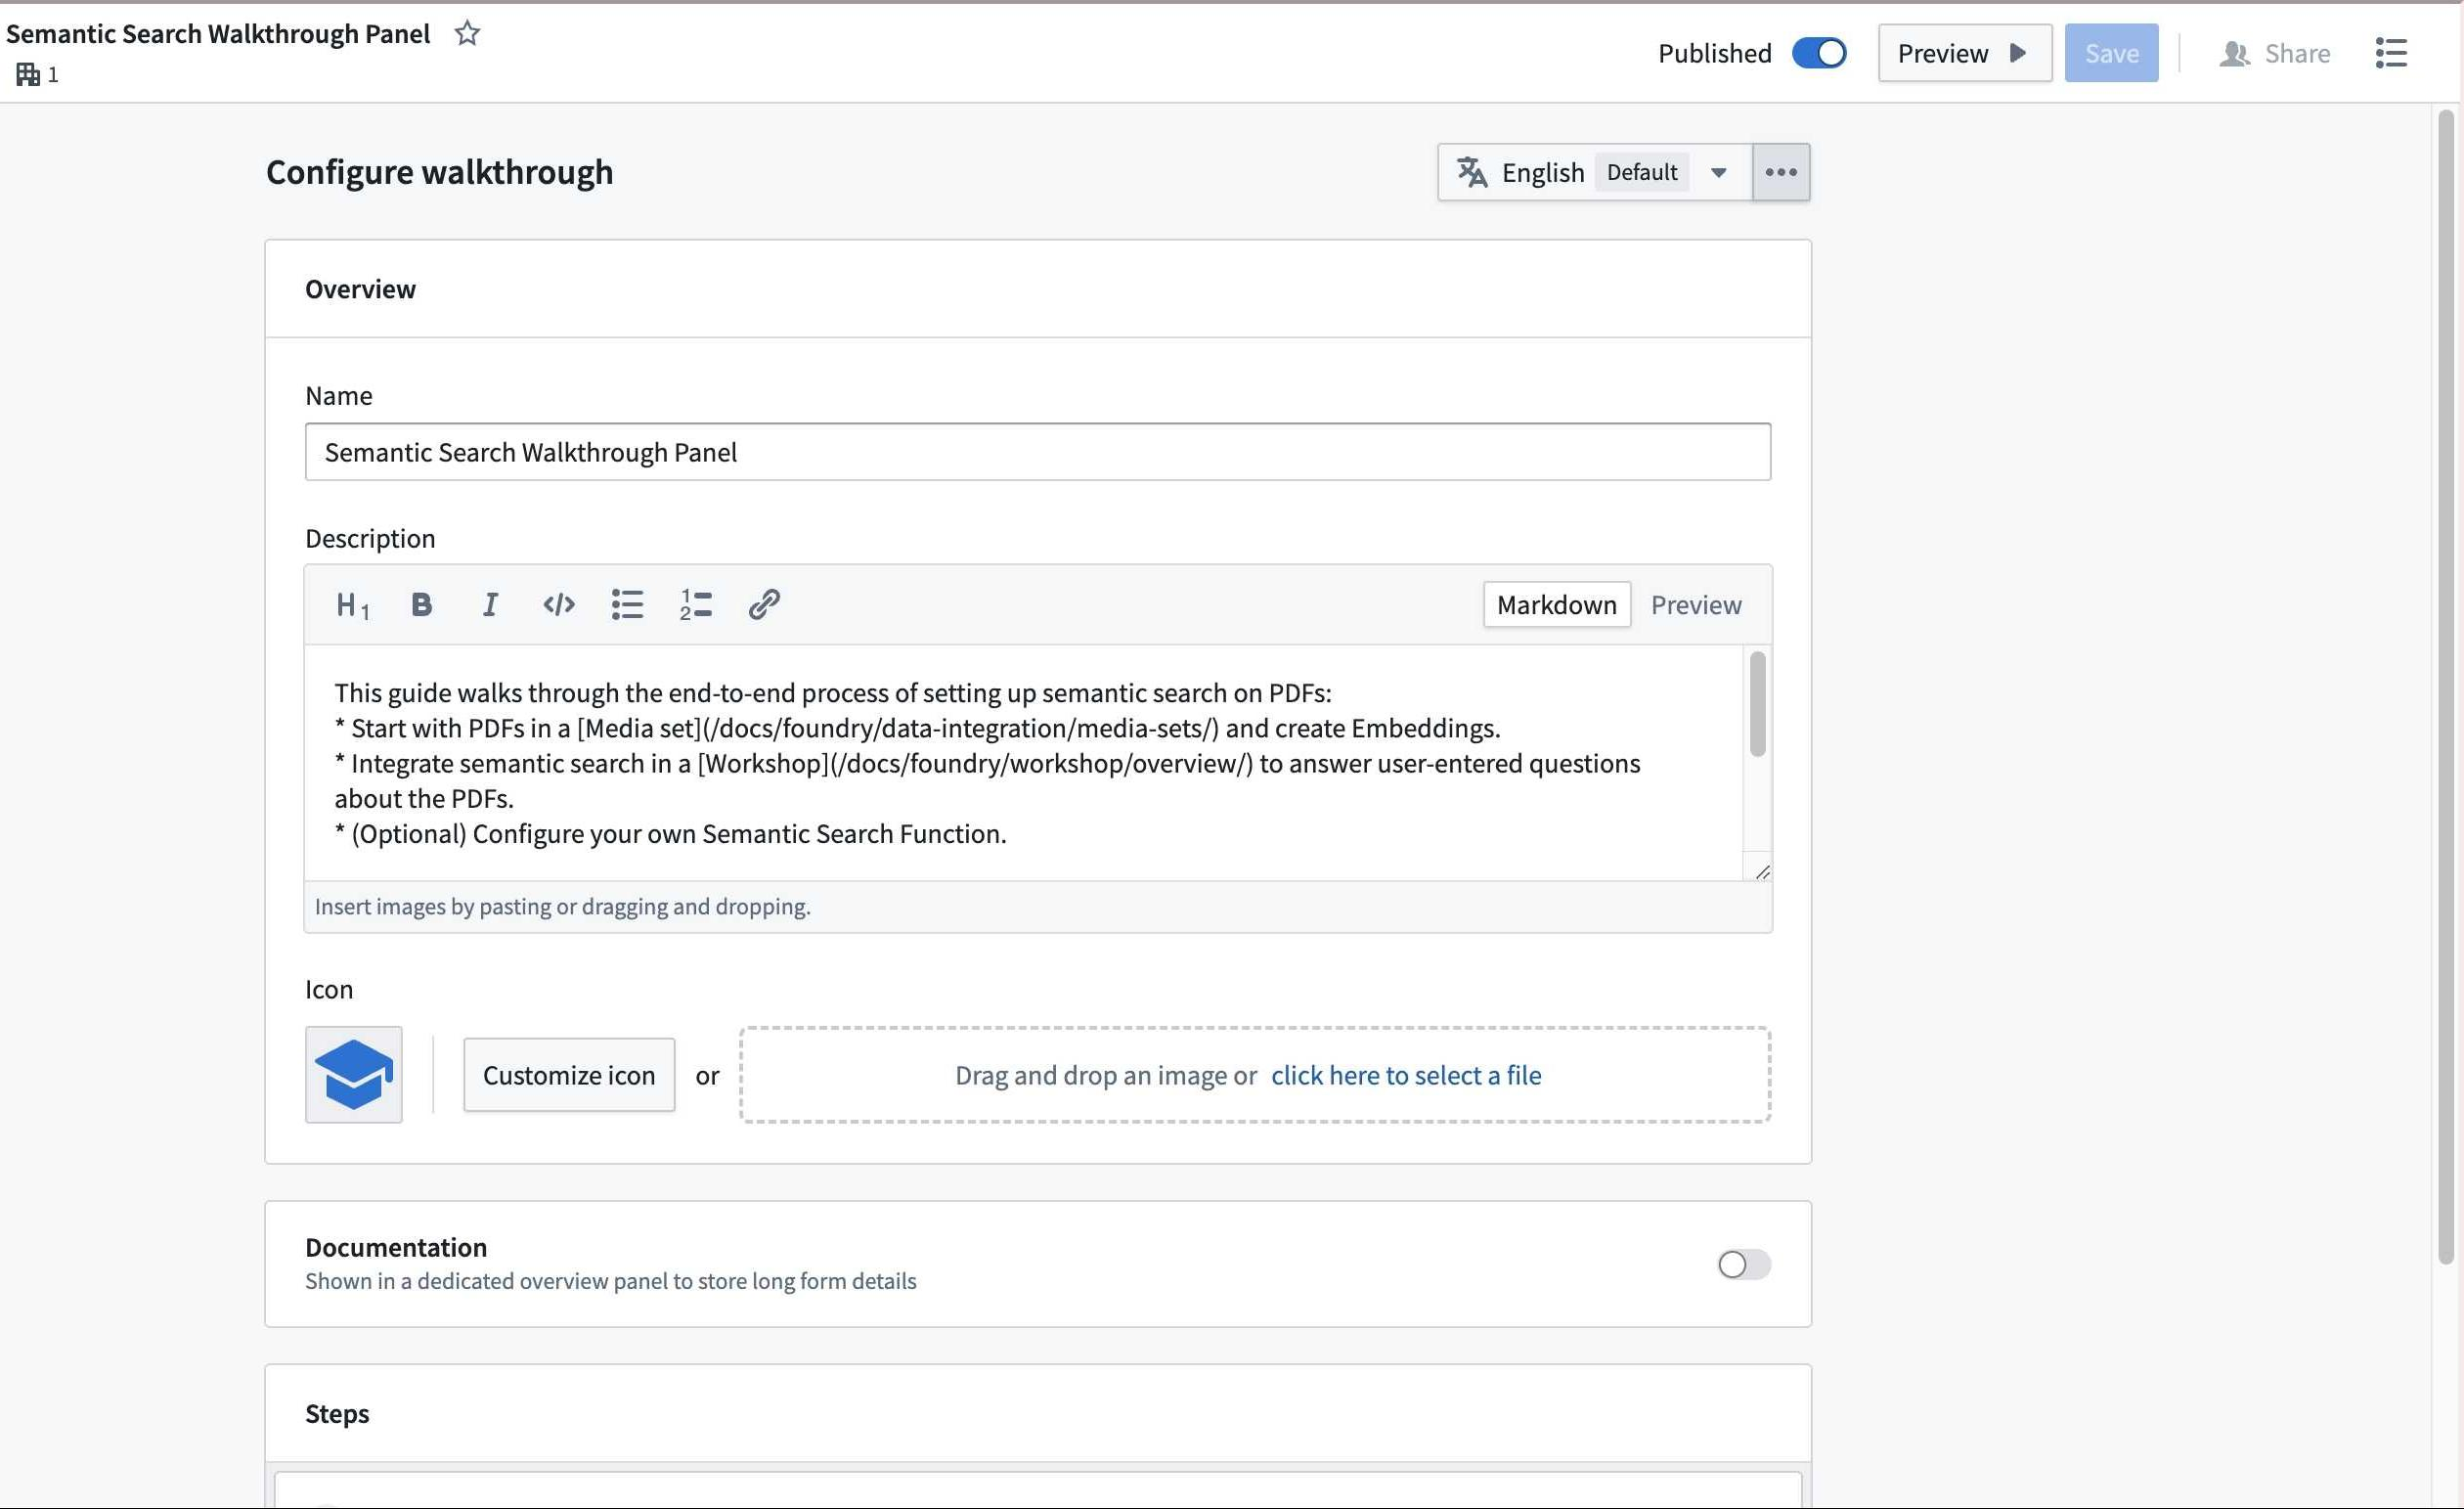
- Fill out the Name field to provide a title for your walkthrough.
- Enter a brief description in the Description field.
Note: Both the name and description will appear in the Walkthroughs landing page, and can help users determine the appropriate walkthroughs to complete.
- Optionally customize the walkthrough icon by selecting Customize icon, or by uploading a custom image.
- Optionally enable the Documentation toggle to show a dedicated overview panel for displaying long-form walkthrough details using Markdown.
Add steps
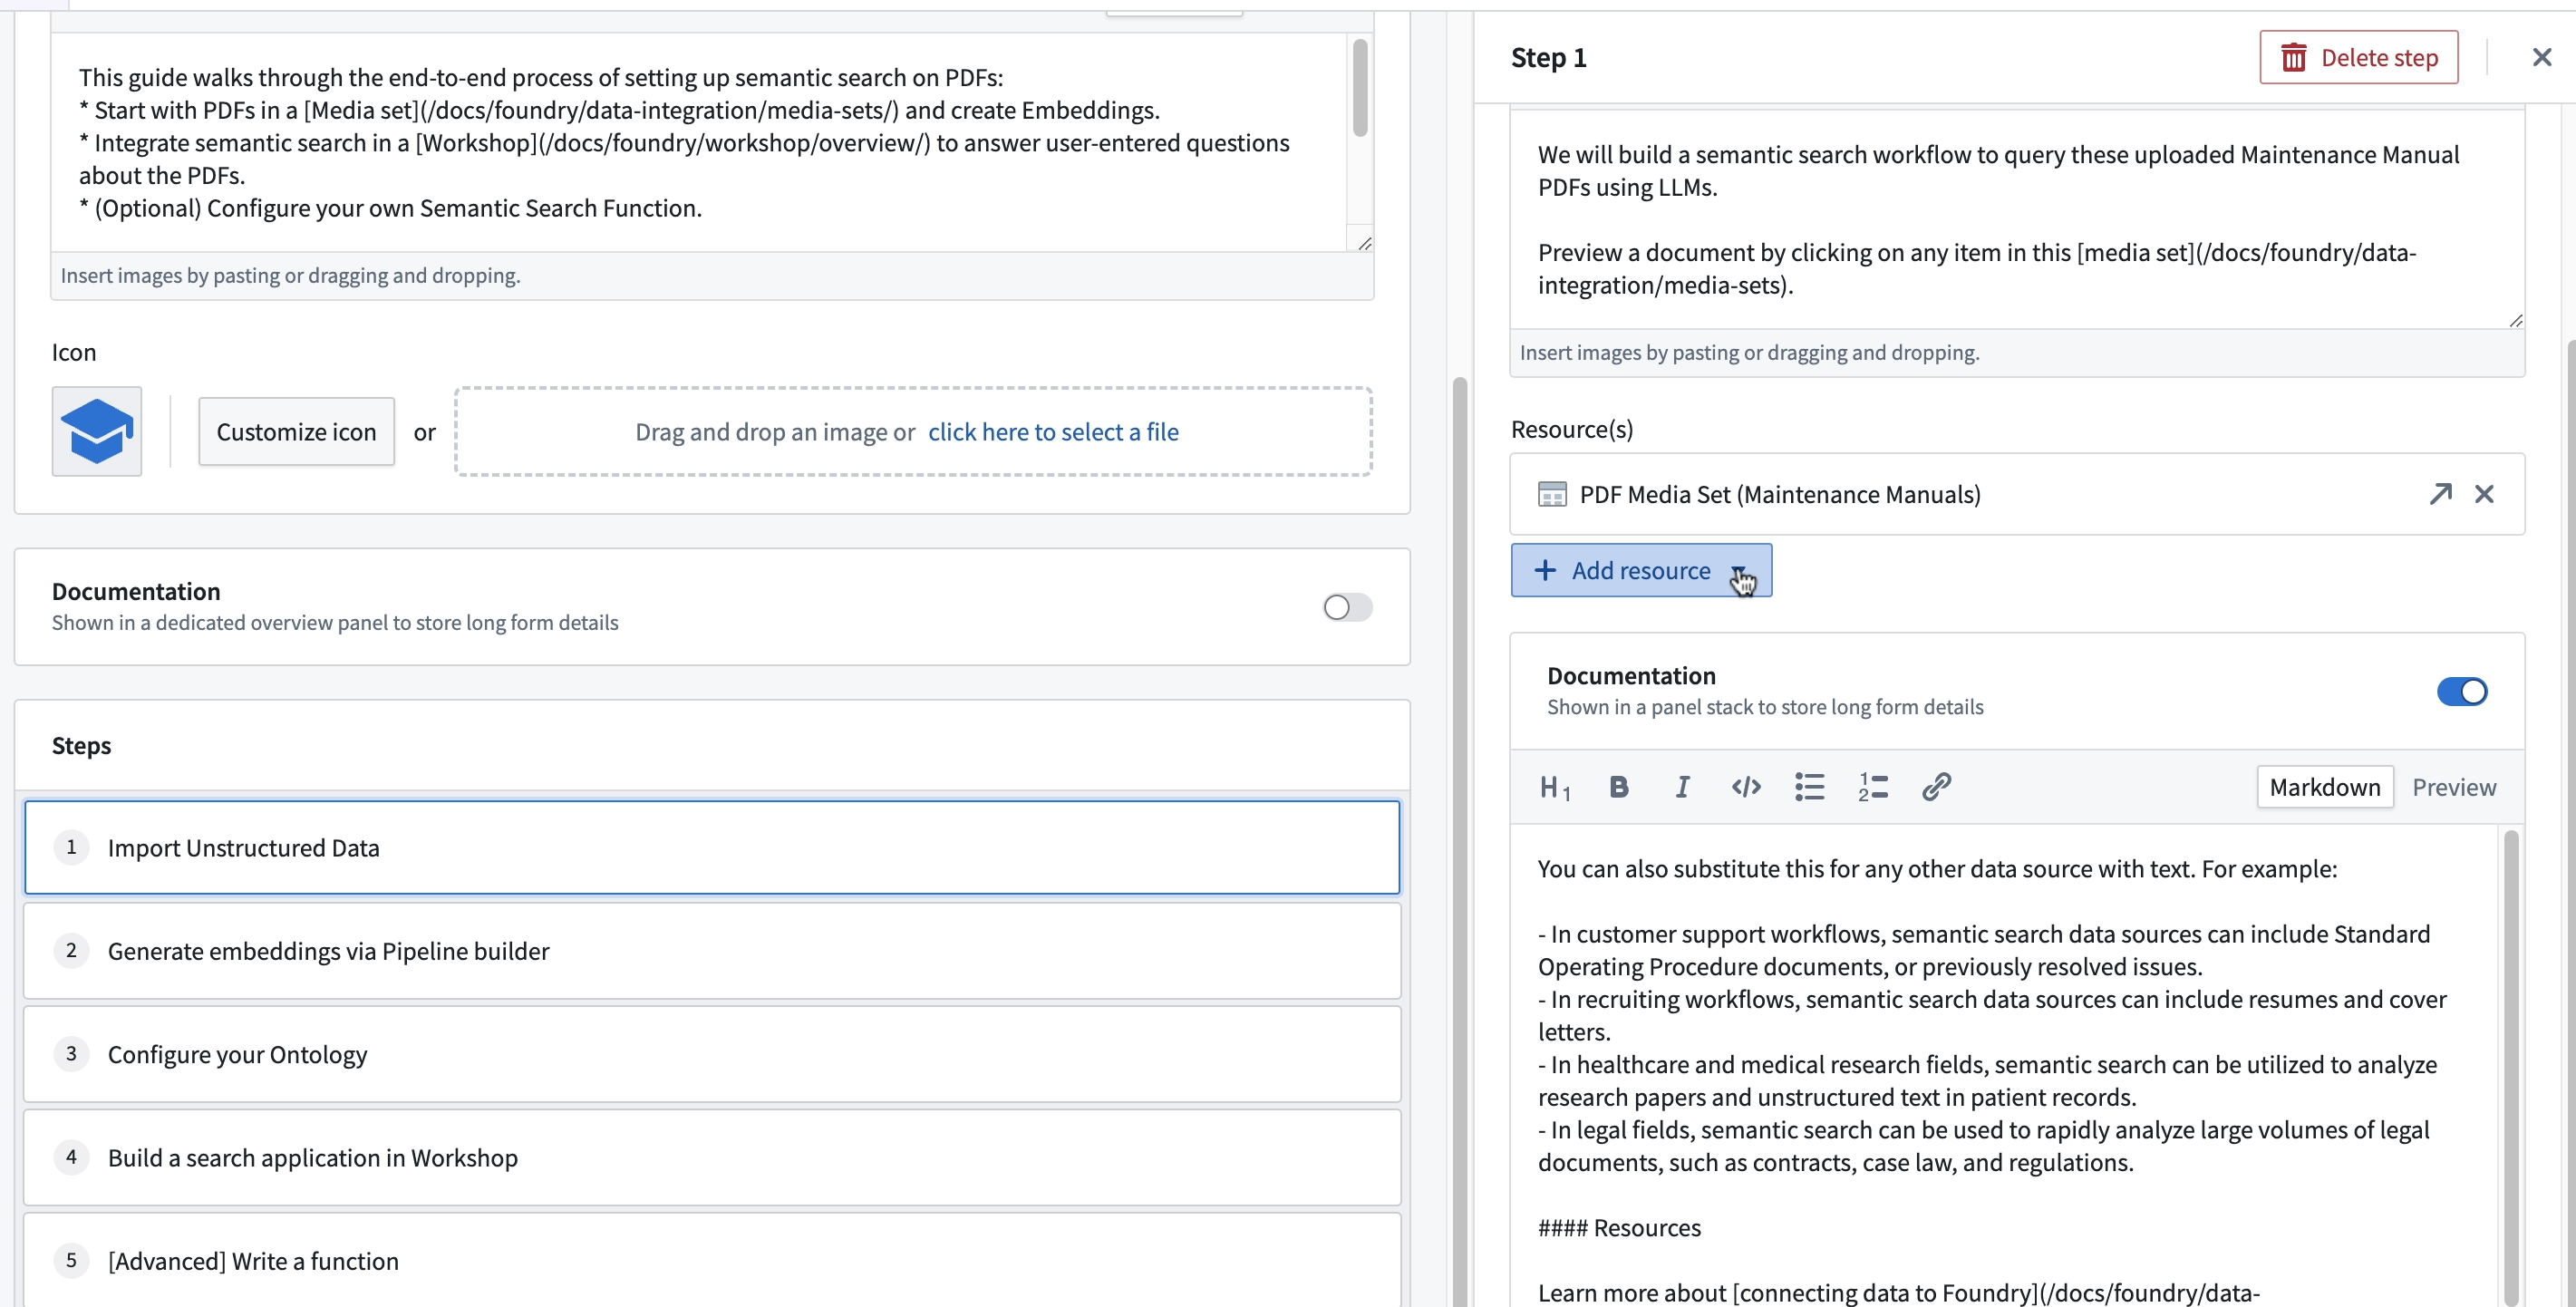
The primary elements in a walkthrough are called steps. Each step should include a thorough description of the actions that users should perform. You can optionally include links to related resources, or add documentation in the Documentation configuration during setup. This will be discoverable through the Learn more option during the walkthrough. We recommend only adding a single resource to a given step to streamline end-user experience. To preview a walkthrough, select Preview on the top right at any time.
- In the Steps section, select Click to add new step. A new panel will appear on the right side of the screen for step configuration.
- Provide a name and description for the step.
- Add associated resources by selecting the Add resource dropdown menu and selecting the type of resource you want to add. Added resources will open in the same window.
Publish your walkthrough
- Select the Preview option to test the rendering and readability of your content.
- Select Save.
- When you are ready to make your walkthrough discoverable to users with access, select Publish.
Walkthrough translations
To translate a walkthrough, select the language dropdown menu.
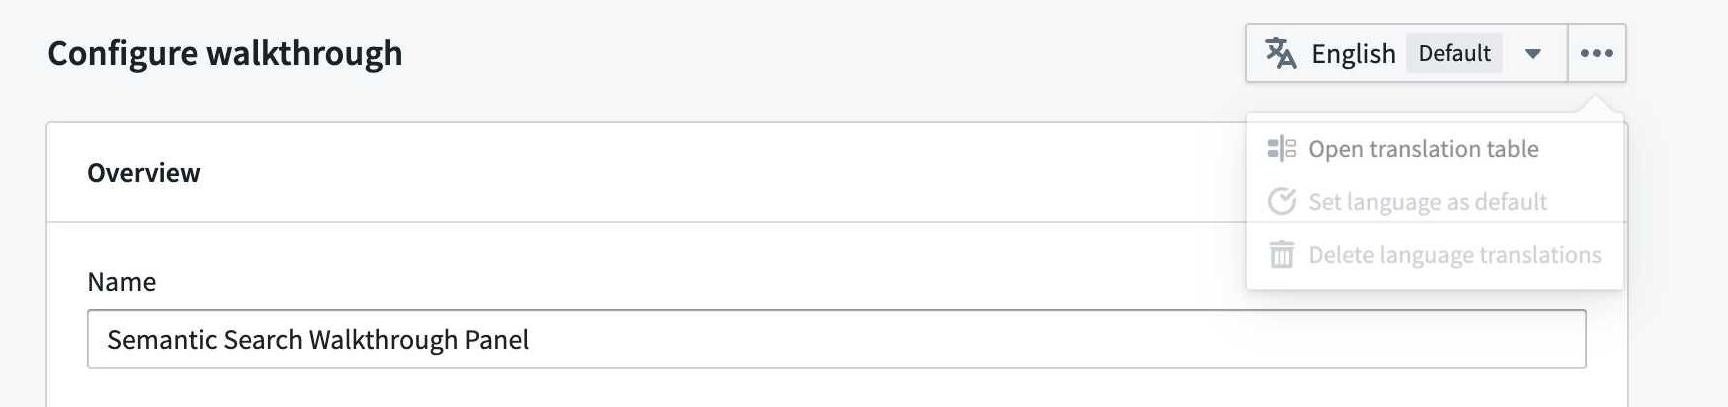
You can manually input translations, or use AIP to generate suggested translations for each description in the walkthrough.

中文翻译
创建操作指南(Walkthrough)
配置
- 导航至操作指南(Walkthroughs)应用程序,选择新建操作指南。系统将提示您为操作指南命名并选择保存位置。
- 接下来,进入操作指南编辑器以配置操作指南内容。
- 填写名称字段,为您的操作指南提供标题。
- 在描述字段中输入简要说明。
注意: 名称和描述都将显示在操作指南(Walkthroughs)的登录页面上,有助于用户确定要完成哪些合适的操作指南。
- 可选:通过选择自定义图标或上传自定义图片来定制操作指南图标。
- 可选:启用文档切换开关,以显示专用概览面板,使用Markdown格式展示长篇幅的操作指南详情。
添加步骤
操作指南中的主要元素称为步骤。每个步骤应包含用户应执行操作的详细说明。您可以选择添加相关资源的链接,或在设置过程中通过文档配置添加说明文档。这些内容将在操作指南过程中通过了解更多选项供用户发现。我们建议每个步骤仅添加一个资源,以简化最终用户体验。要预览操作指南,可随时选择右上角的预览。
- 在步骤部分,选择点击添加新步骤。屏幕右侧将出现一个新面板,用于步骤配置。
- 为步骤提供名称和描述。
- 通过选择添加资源下拉菜单,并选择要添加的资源类型来添加相关资源。添加的资源将在同一窗口中打开。
发布操作指南
- 选择预览选项,测试内容的渲染效果和可读性。
- 选择保存。
- 当您准备好让有访问权限的用户发现您的操作指南时,选择发布。
操作指南翻译
要翻译操作指南,请选择语言下拉菜单。
您可以手动输入翻译,或使用AIP为操作指南中的每个描述生成建议翻译。