Set up a Jira listener(设置 Jira 监听器)
This guide shows step-by-step how to configure a listener for Jira Cloud, to get a real-time feed of events from Jira to a Foundry streaming dataset.
Prerequisites
Prior to configuration, ensure:
-
Your enrollment's ingress policy has been appropriately configured. Learn how to Configure ingress.. Review Jira documentation pertaining to IP addresses and domains ↗.
-
You must have your own instance of Jira with administrator access.
Instructions
-
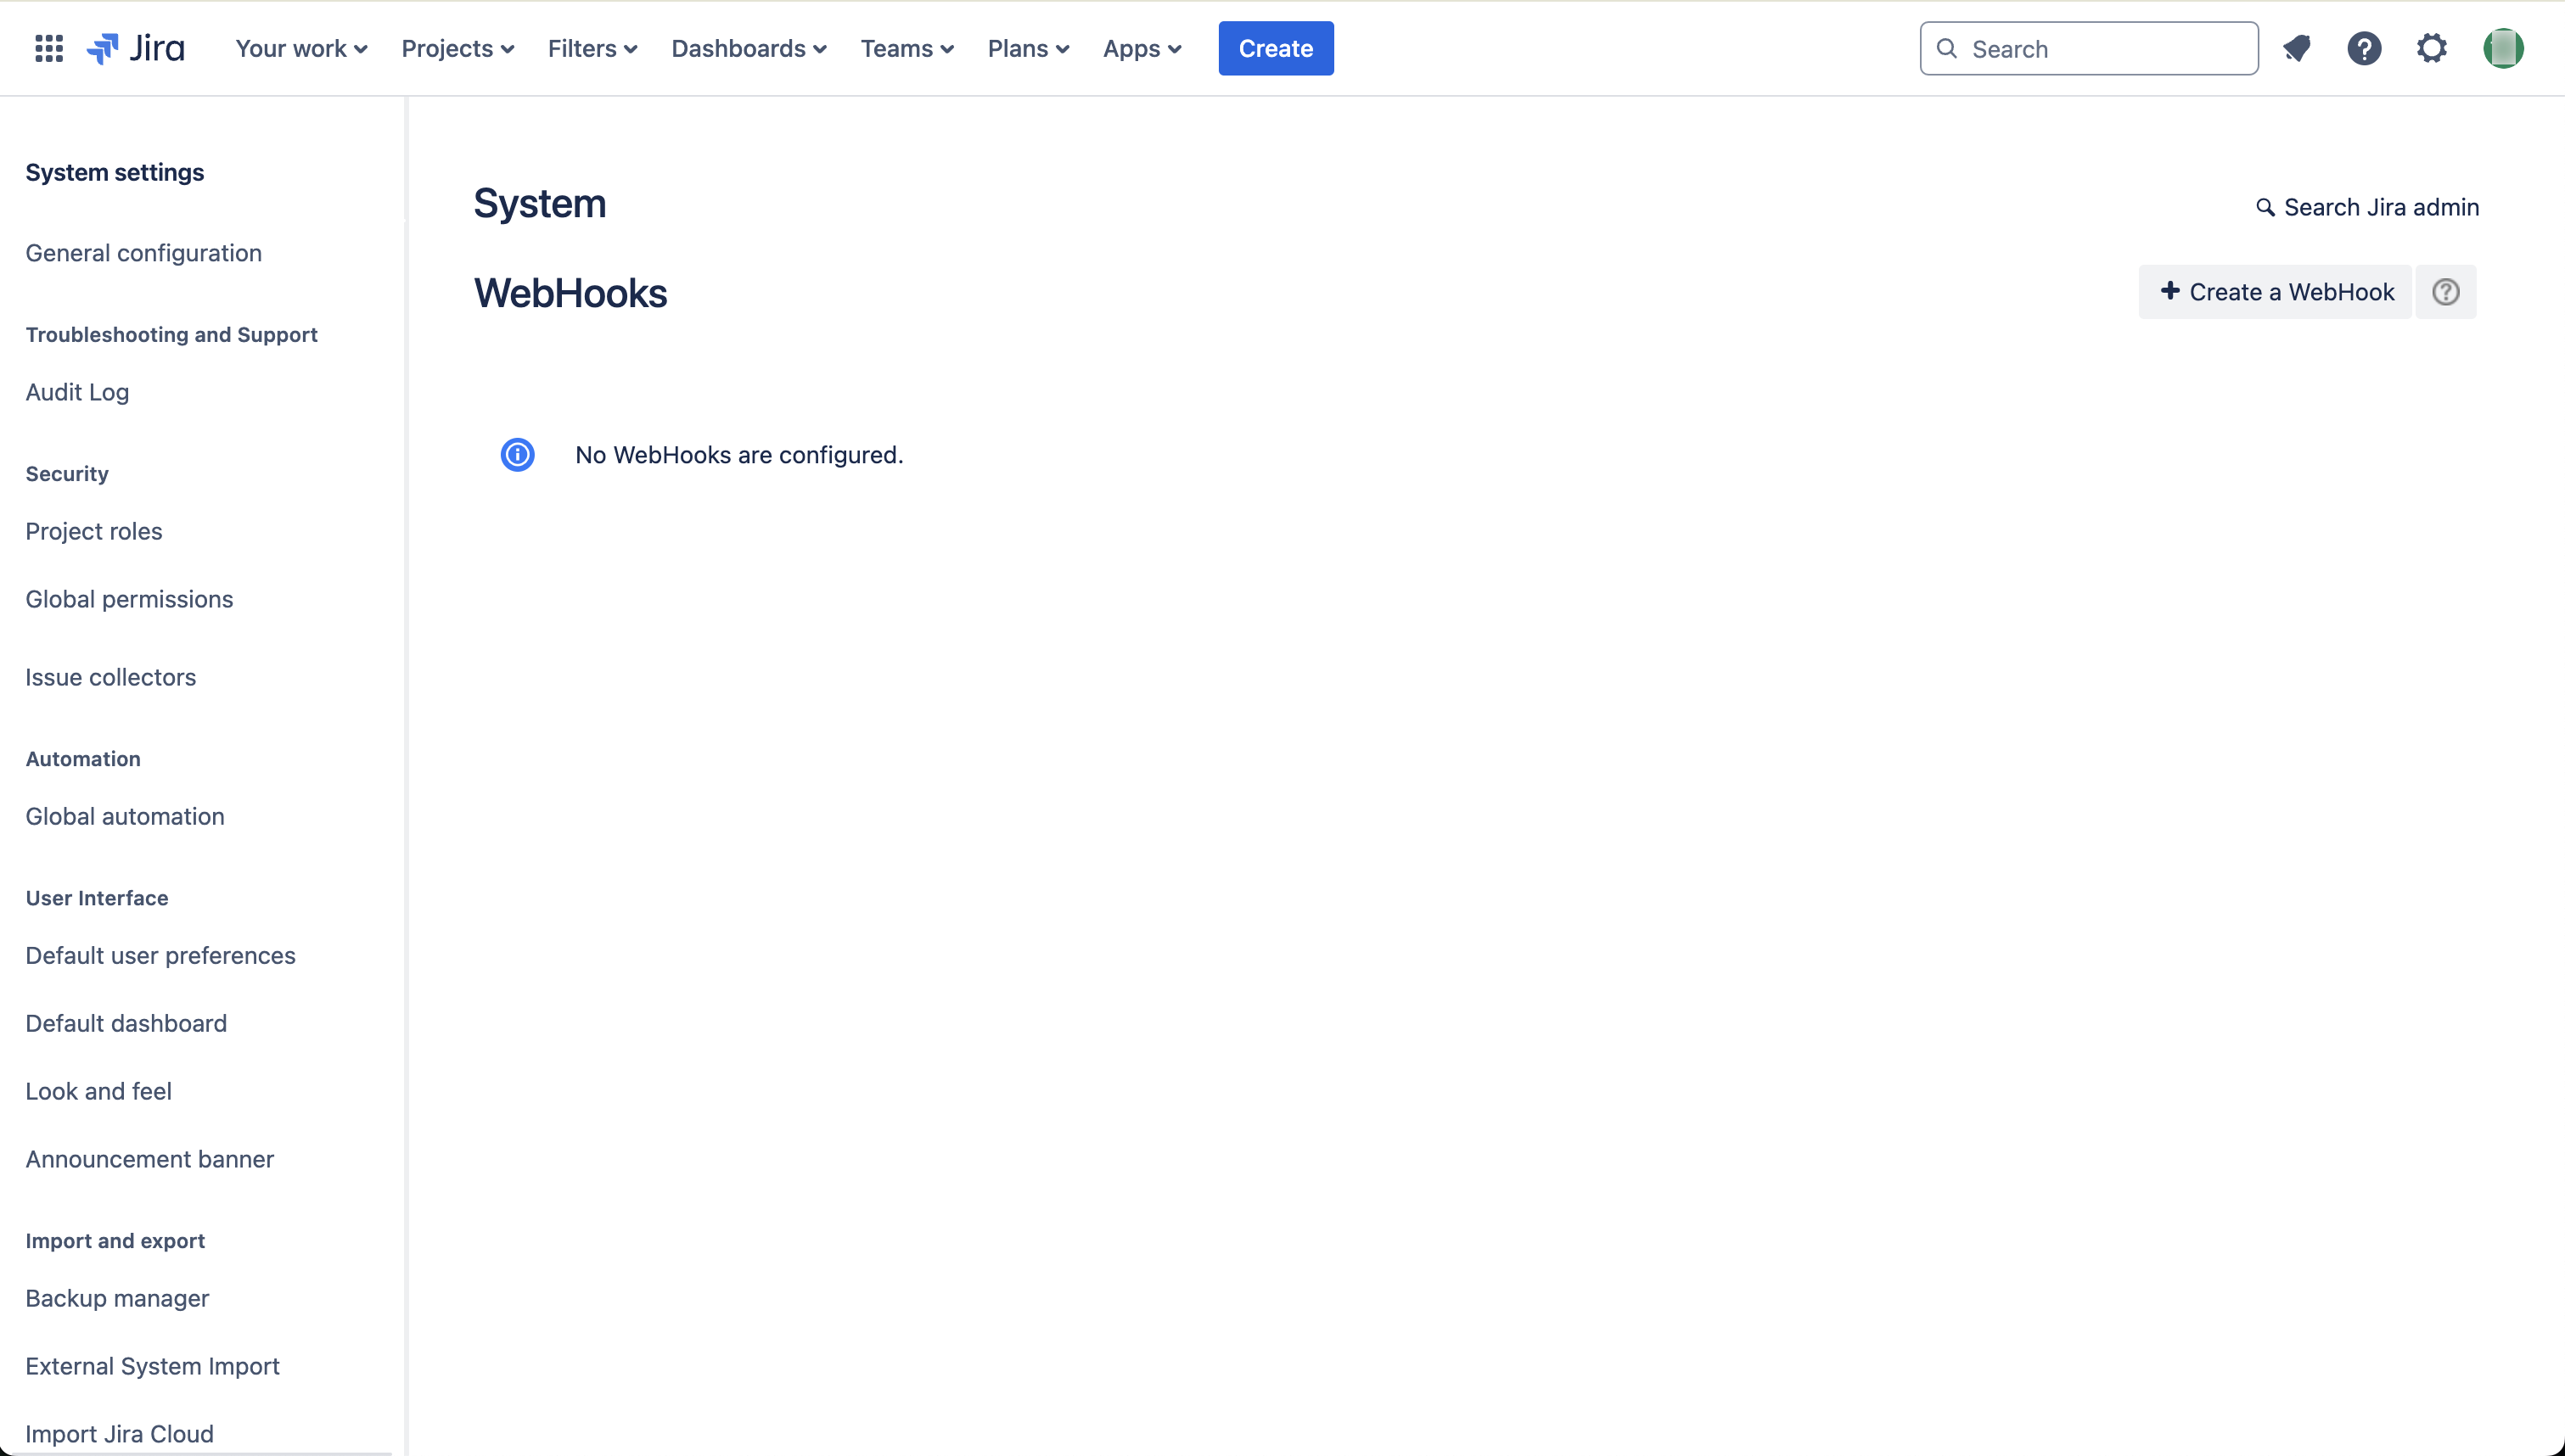
Create a WebHook in Jira. This can be done in the Jira admin panel by navigating to
https://<your jira domain>/plugins/servlet/webhooks#. Visit public Jira documentation on webhooks ↗.
-
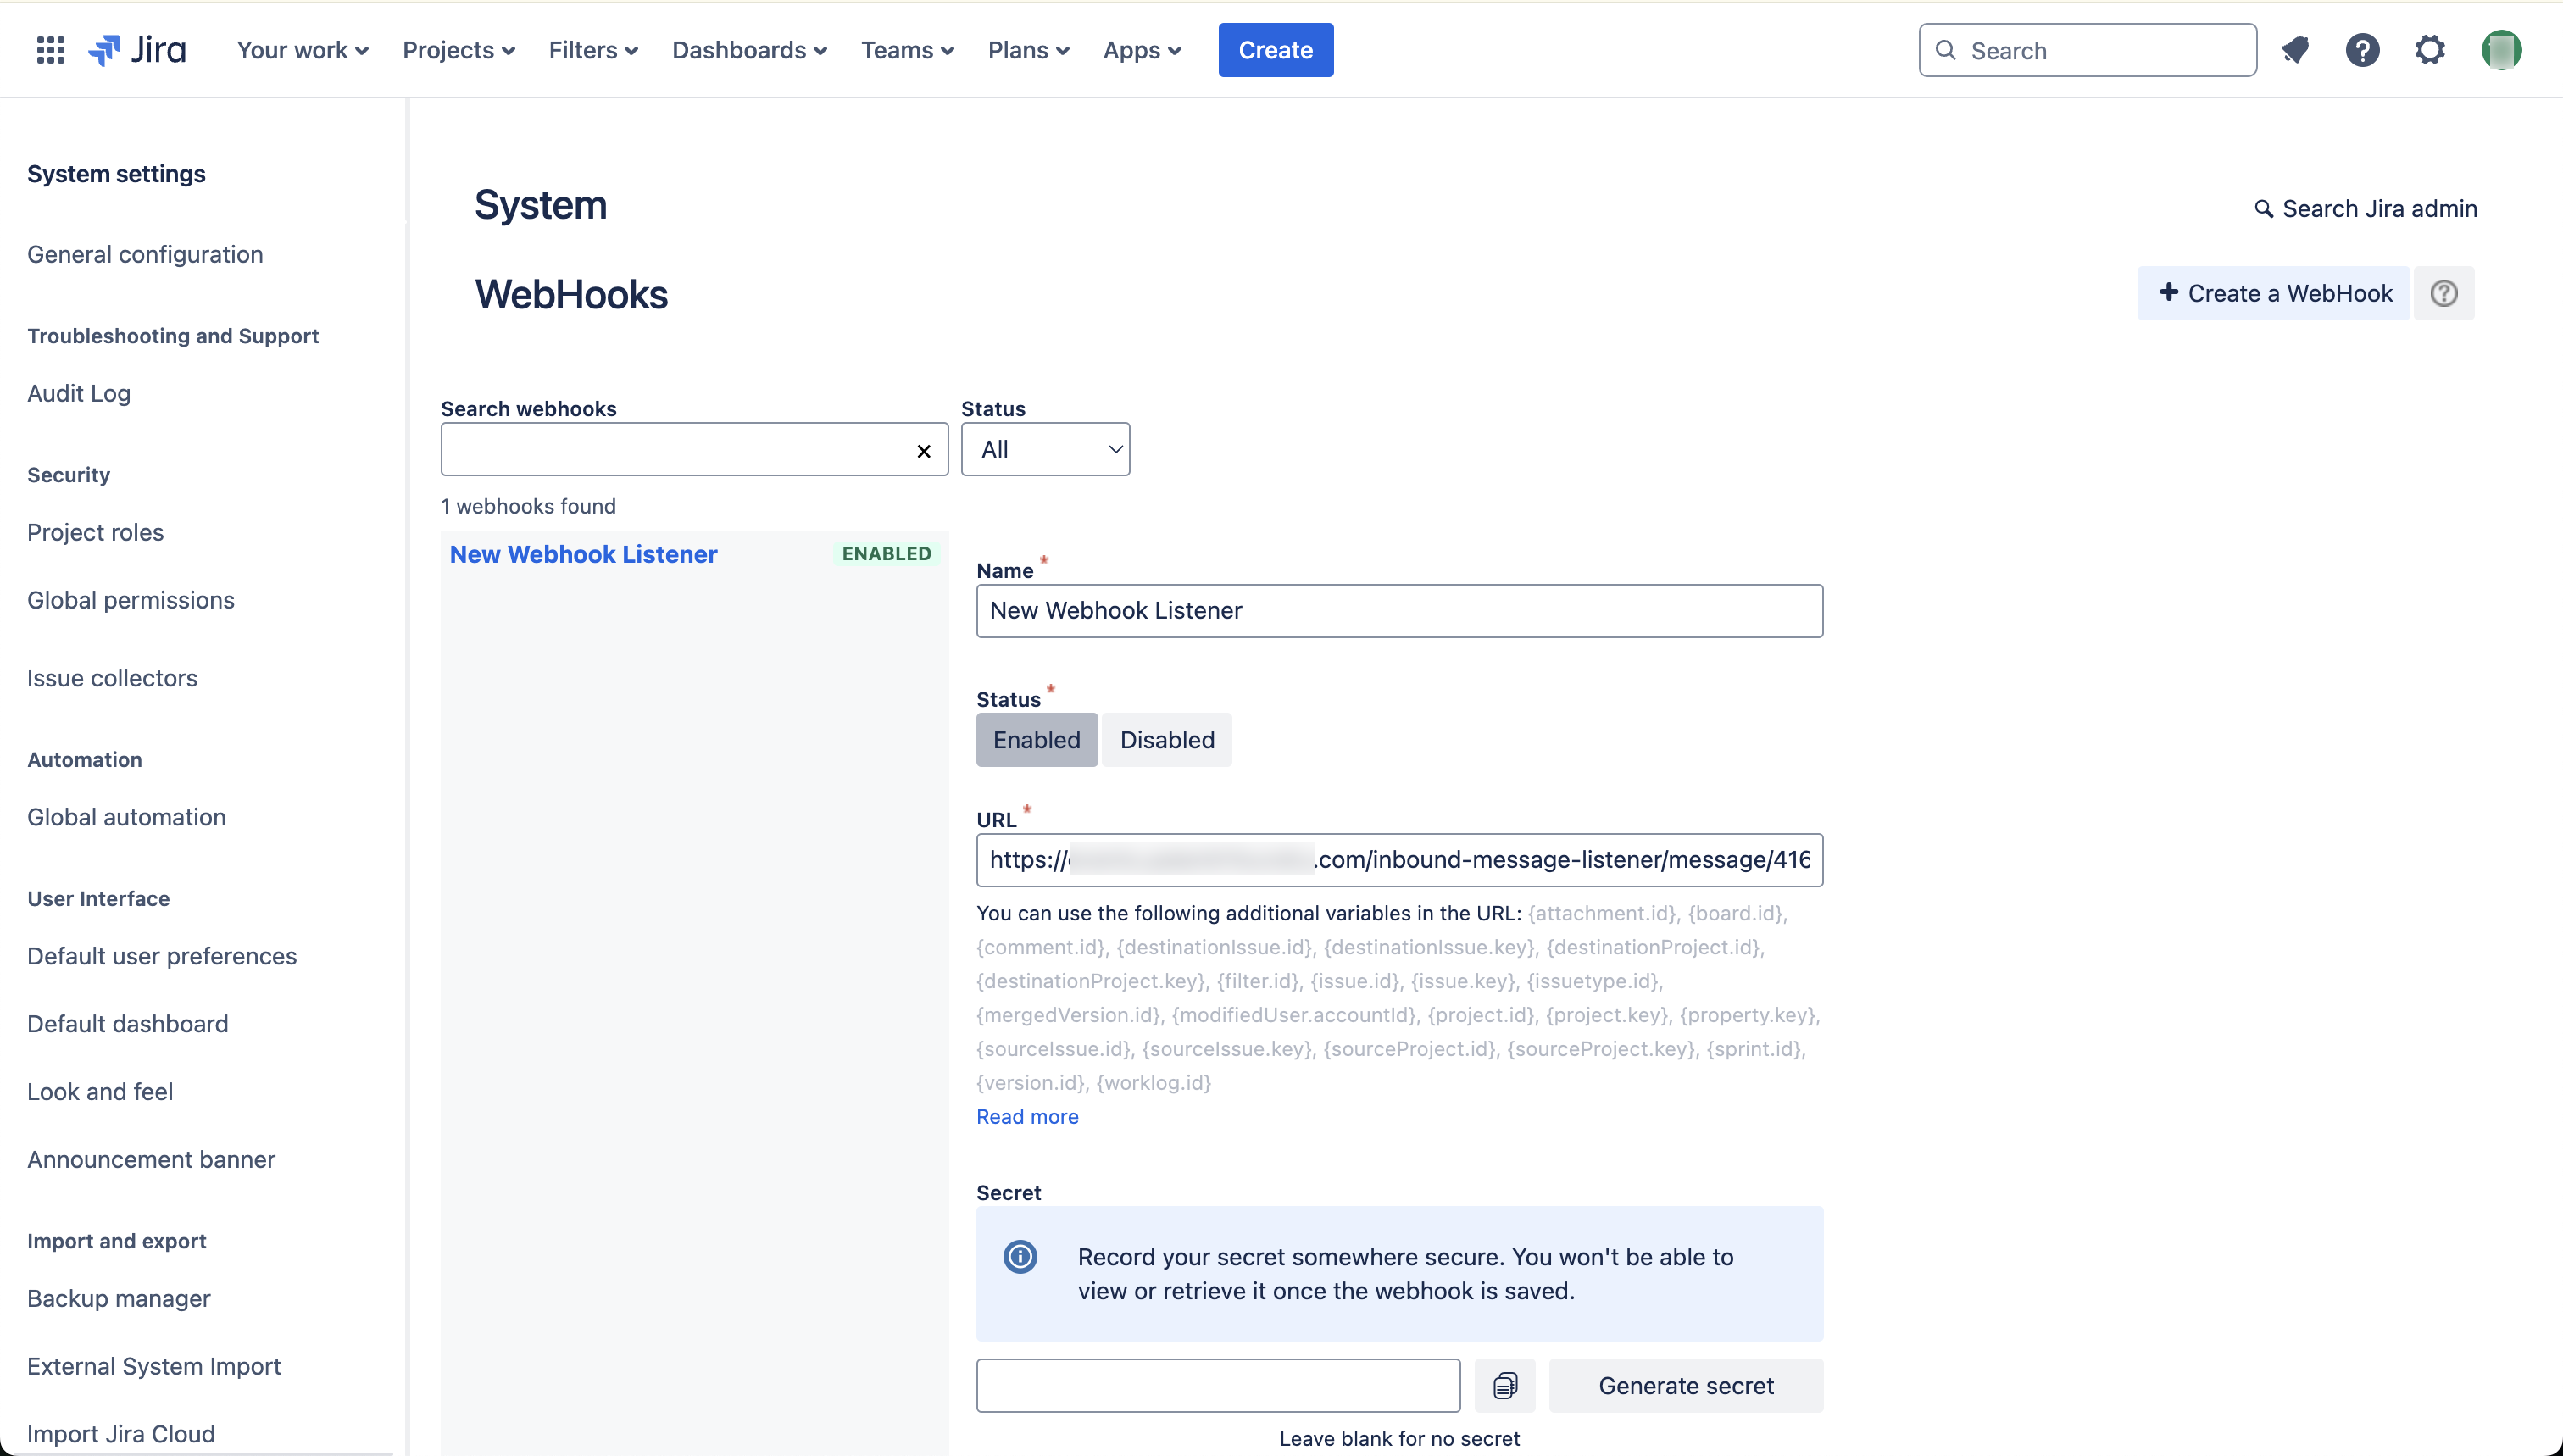
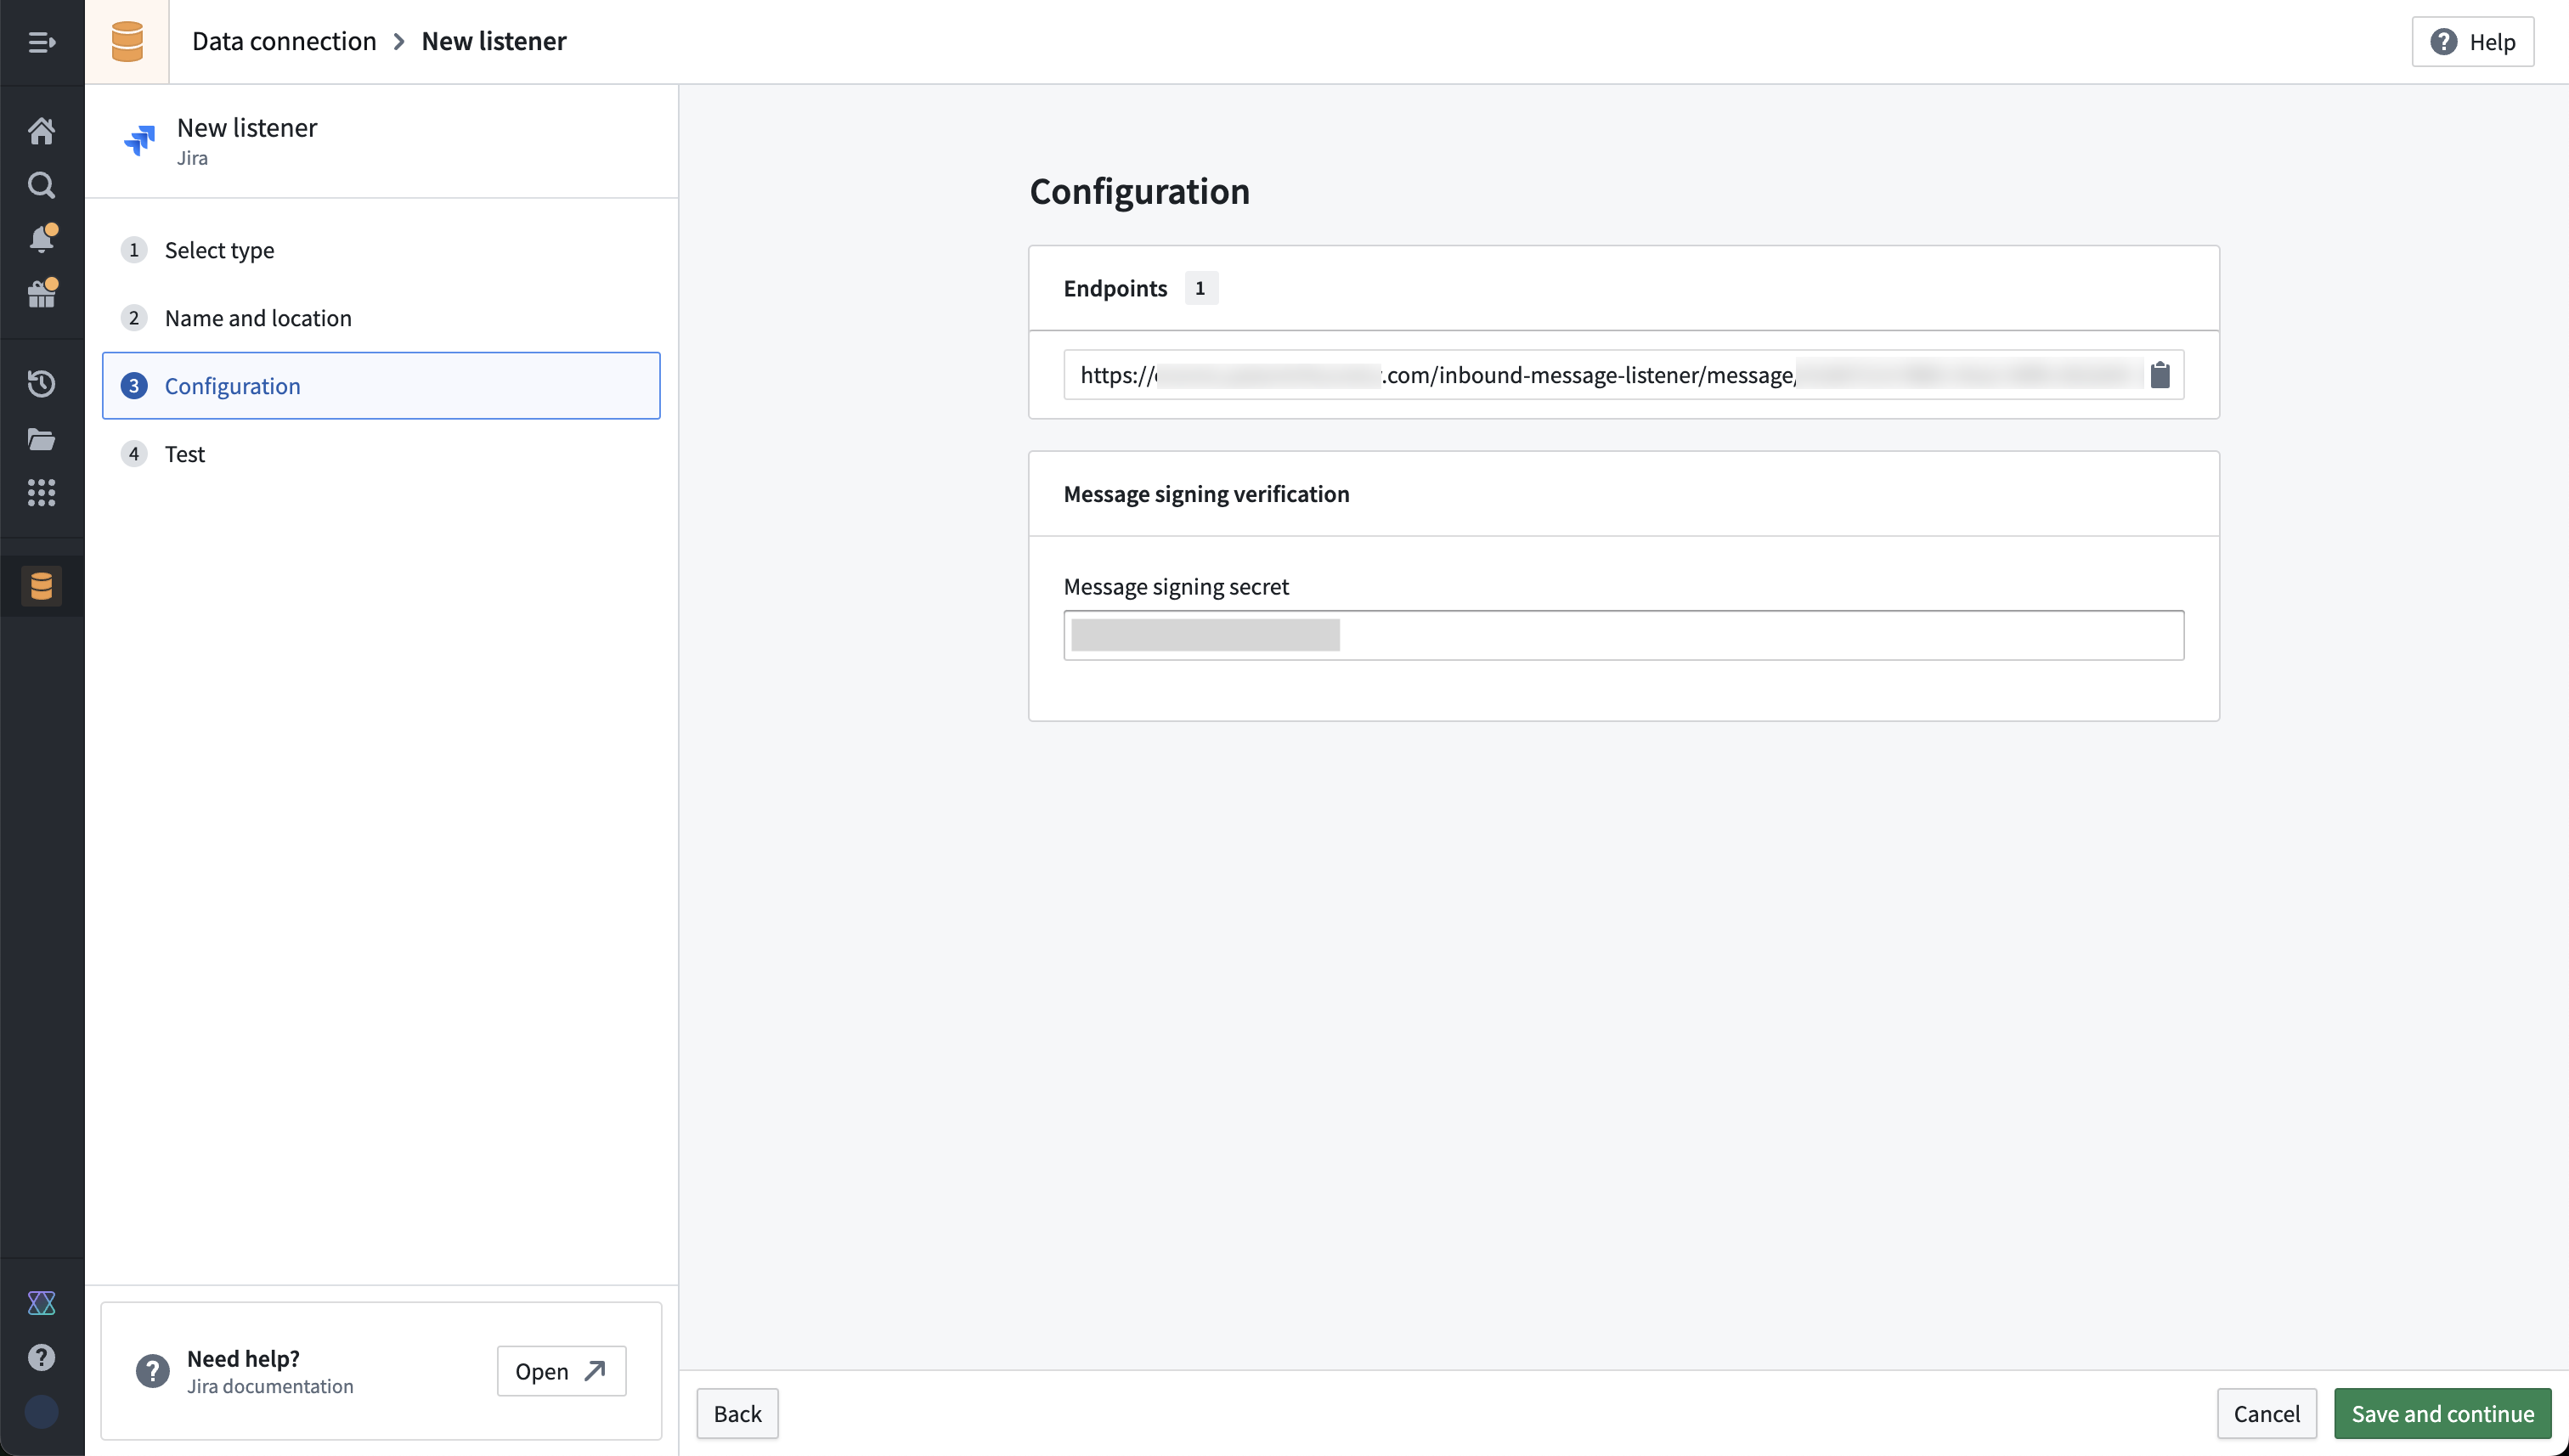
Create a Jira listener in the Palantir platform. This will generate the listener URL that you need to copy and paste into the Jira
URLfield when creating a WebHook.
a. You should also generate a message signing secret in Jira, and copy to the message signing secret in the Foundry listener configuration. You can also set up without a signing secret.
-
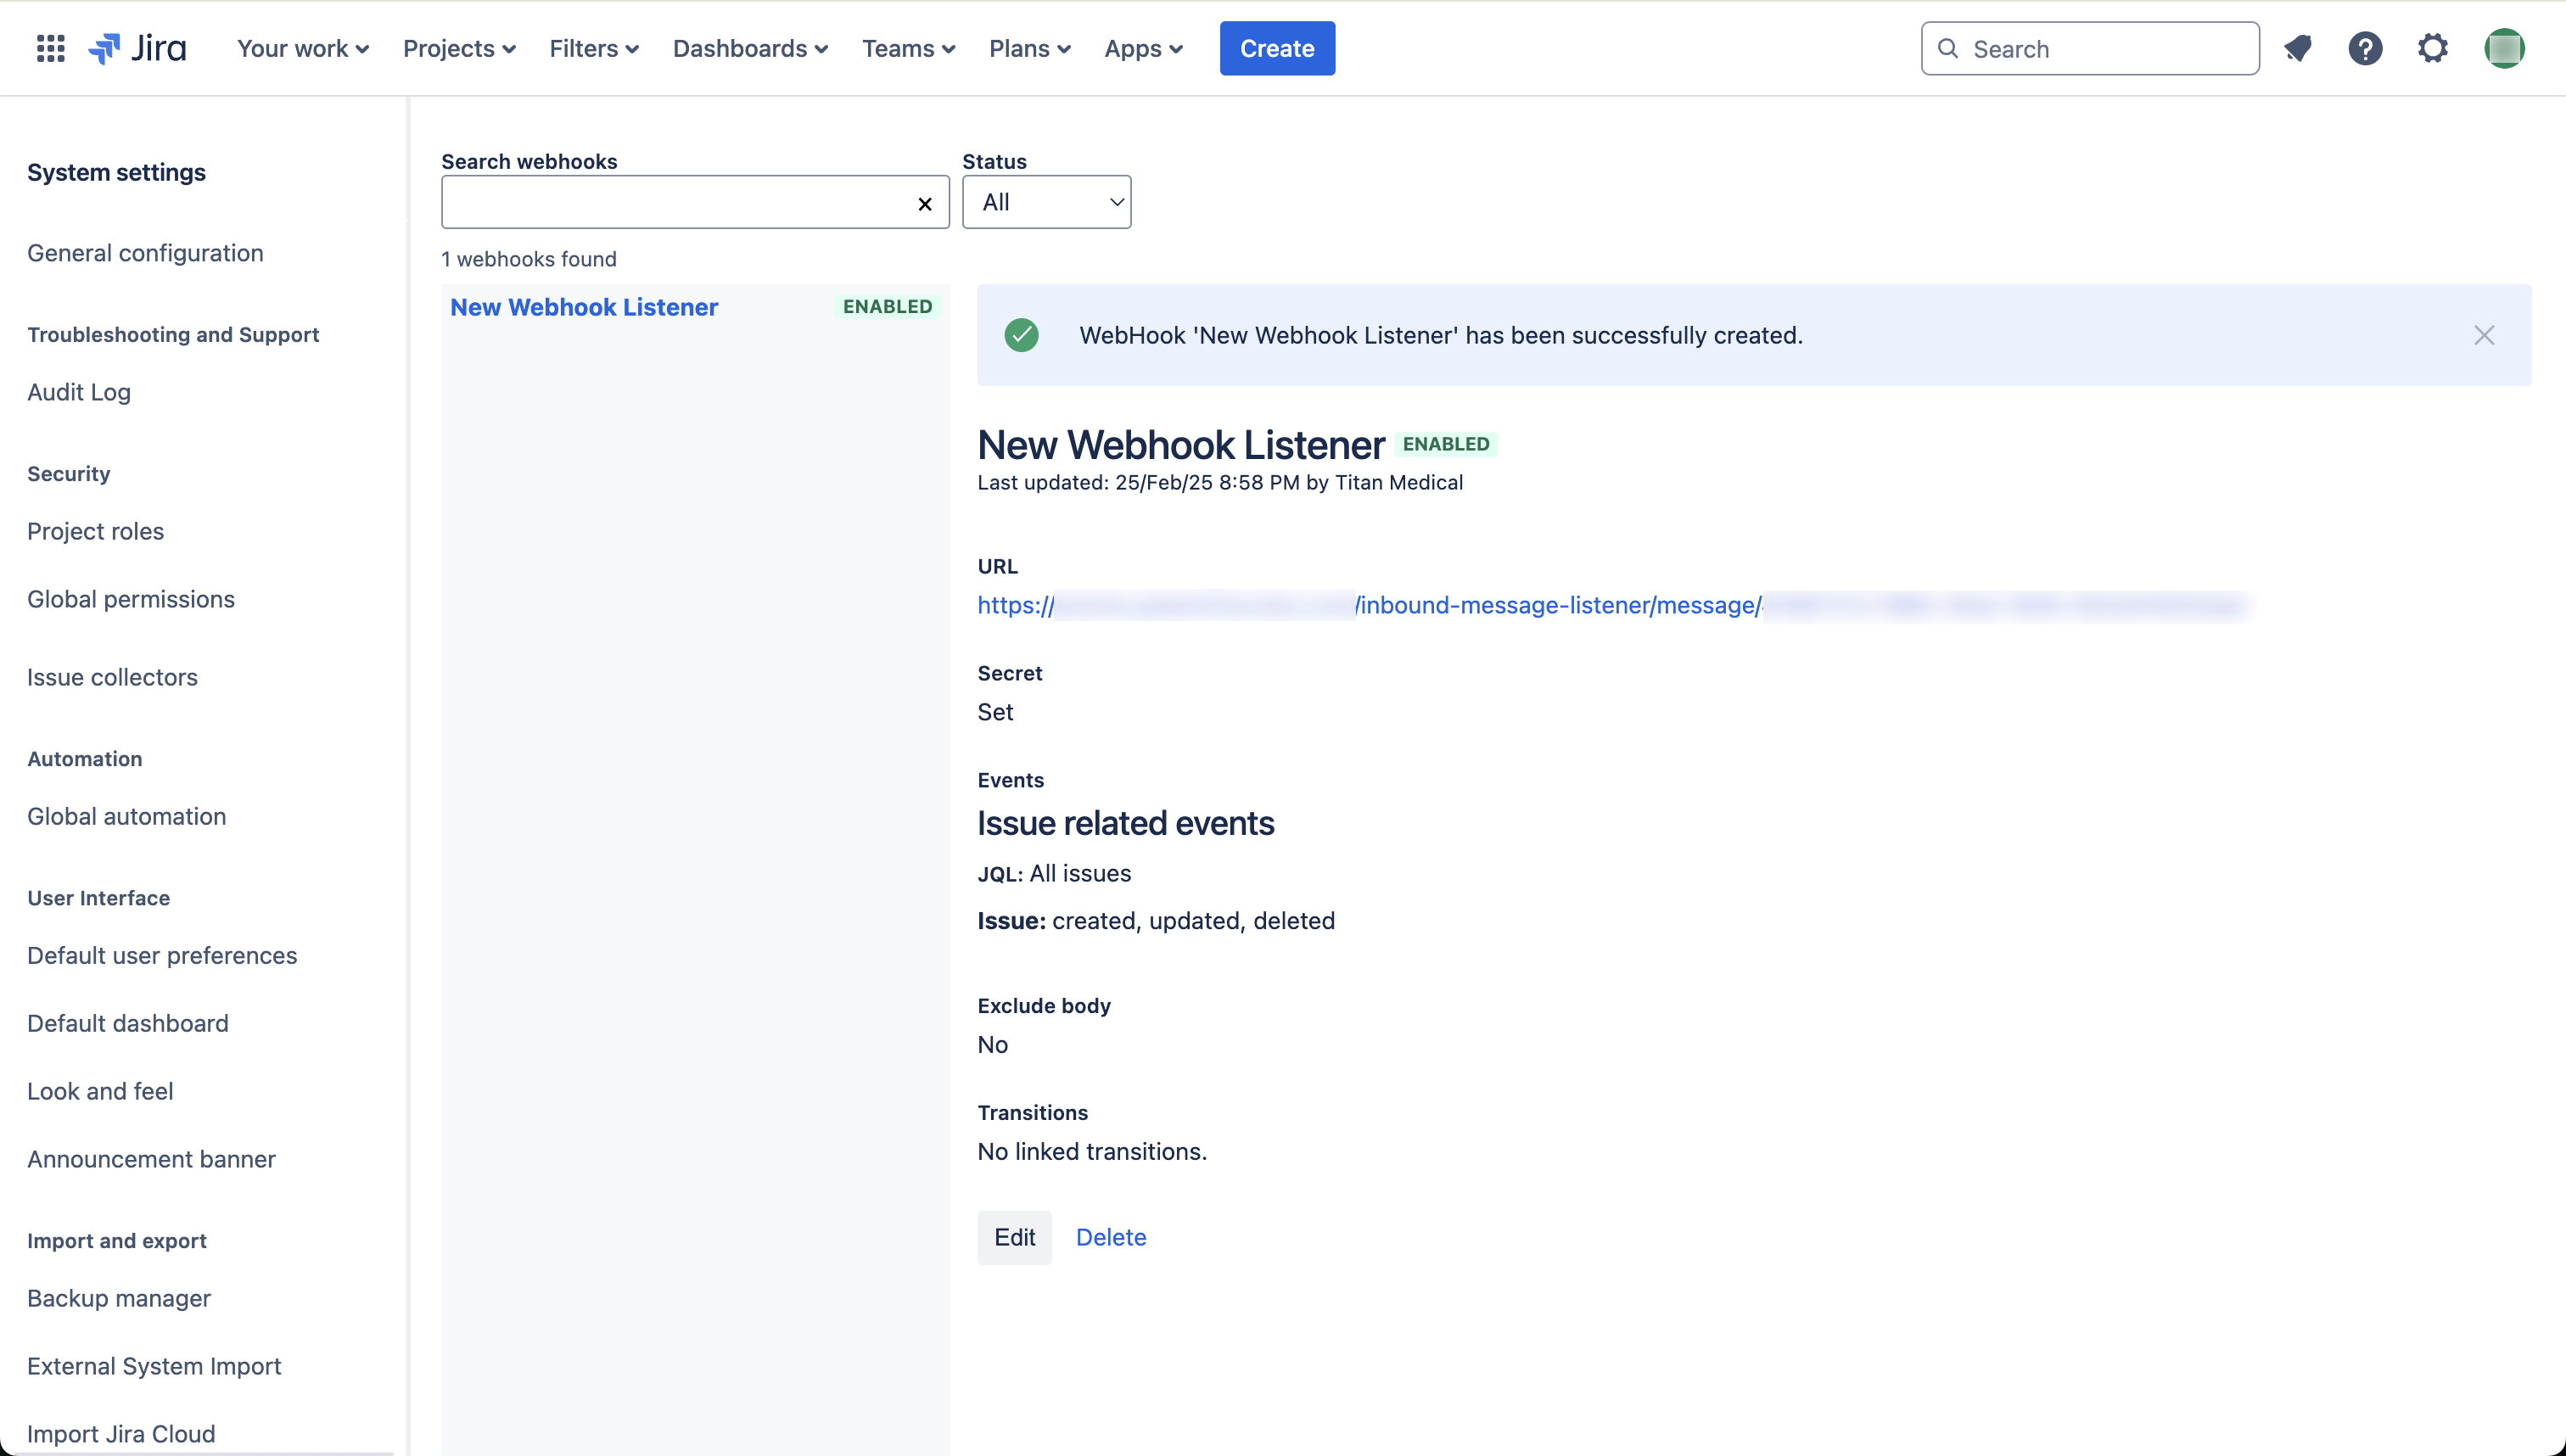
Choose the set of Jira events that should be sent to your listener and then select Create. The screenshotted example shows subscription for the issue created, updated, and deleted events:
-
Save the listener configuration in Foundry to proceed. Administrator approval is now required from the Information Security Officer. Review the toggle description.
-
Select Start in the listener test screen to start your listener.
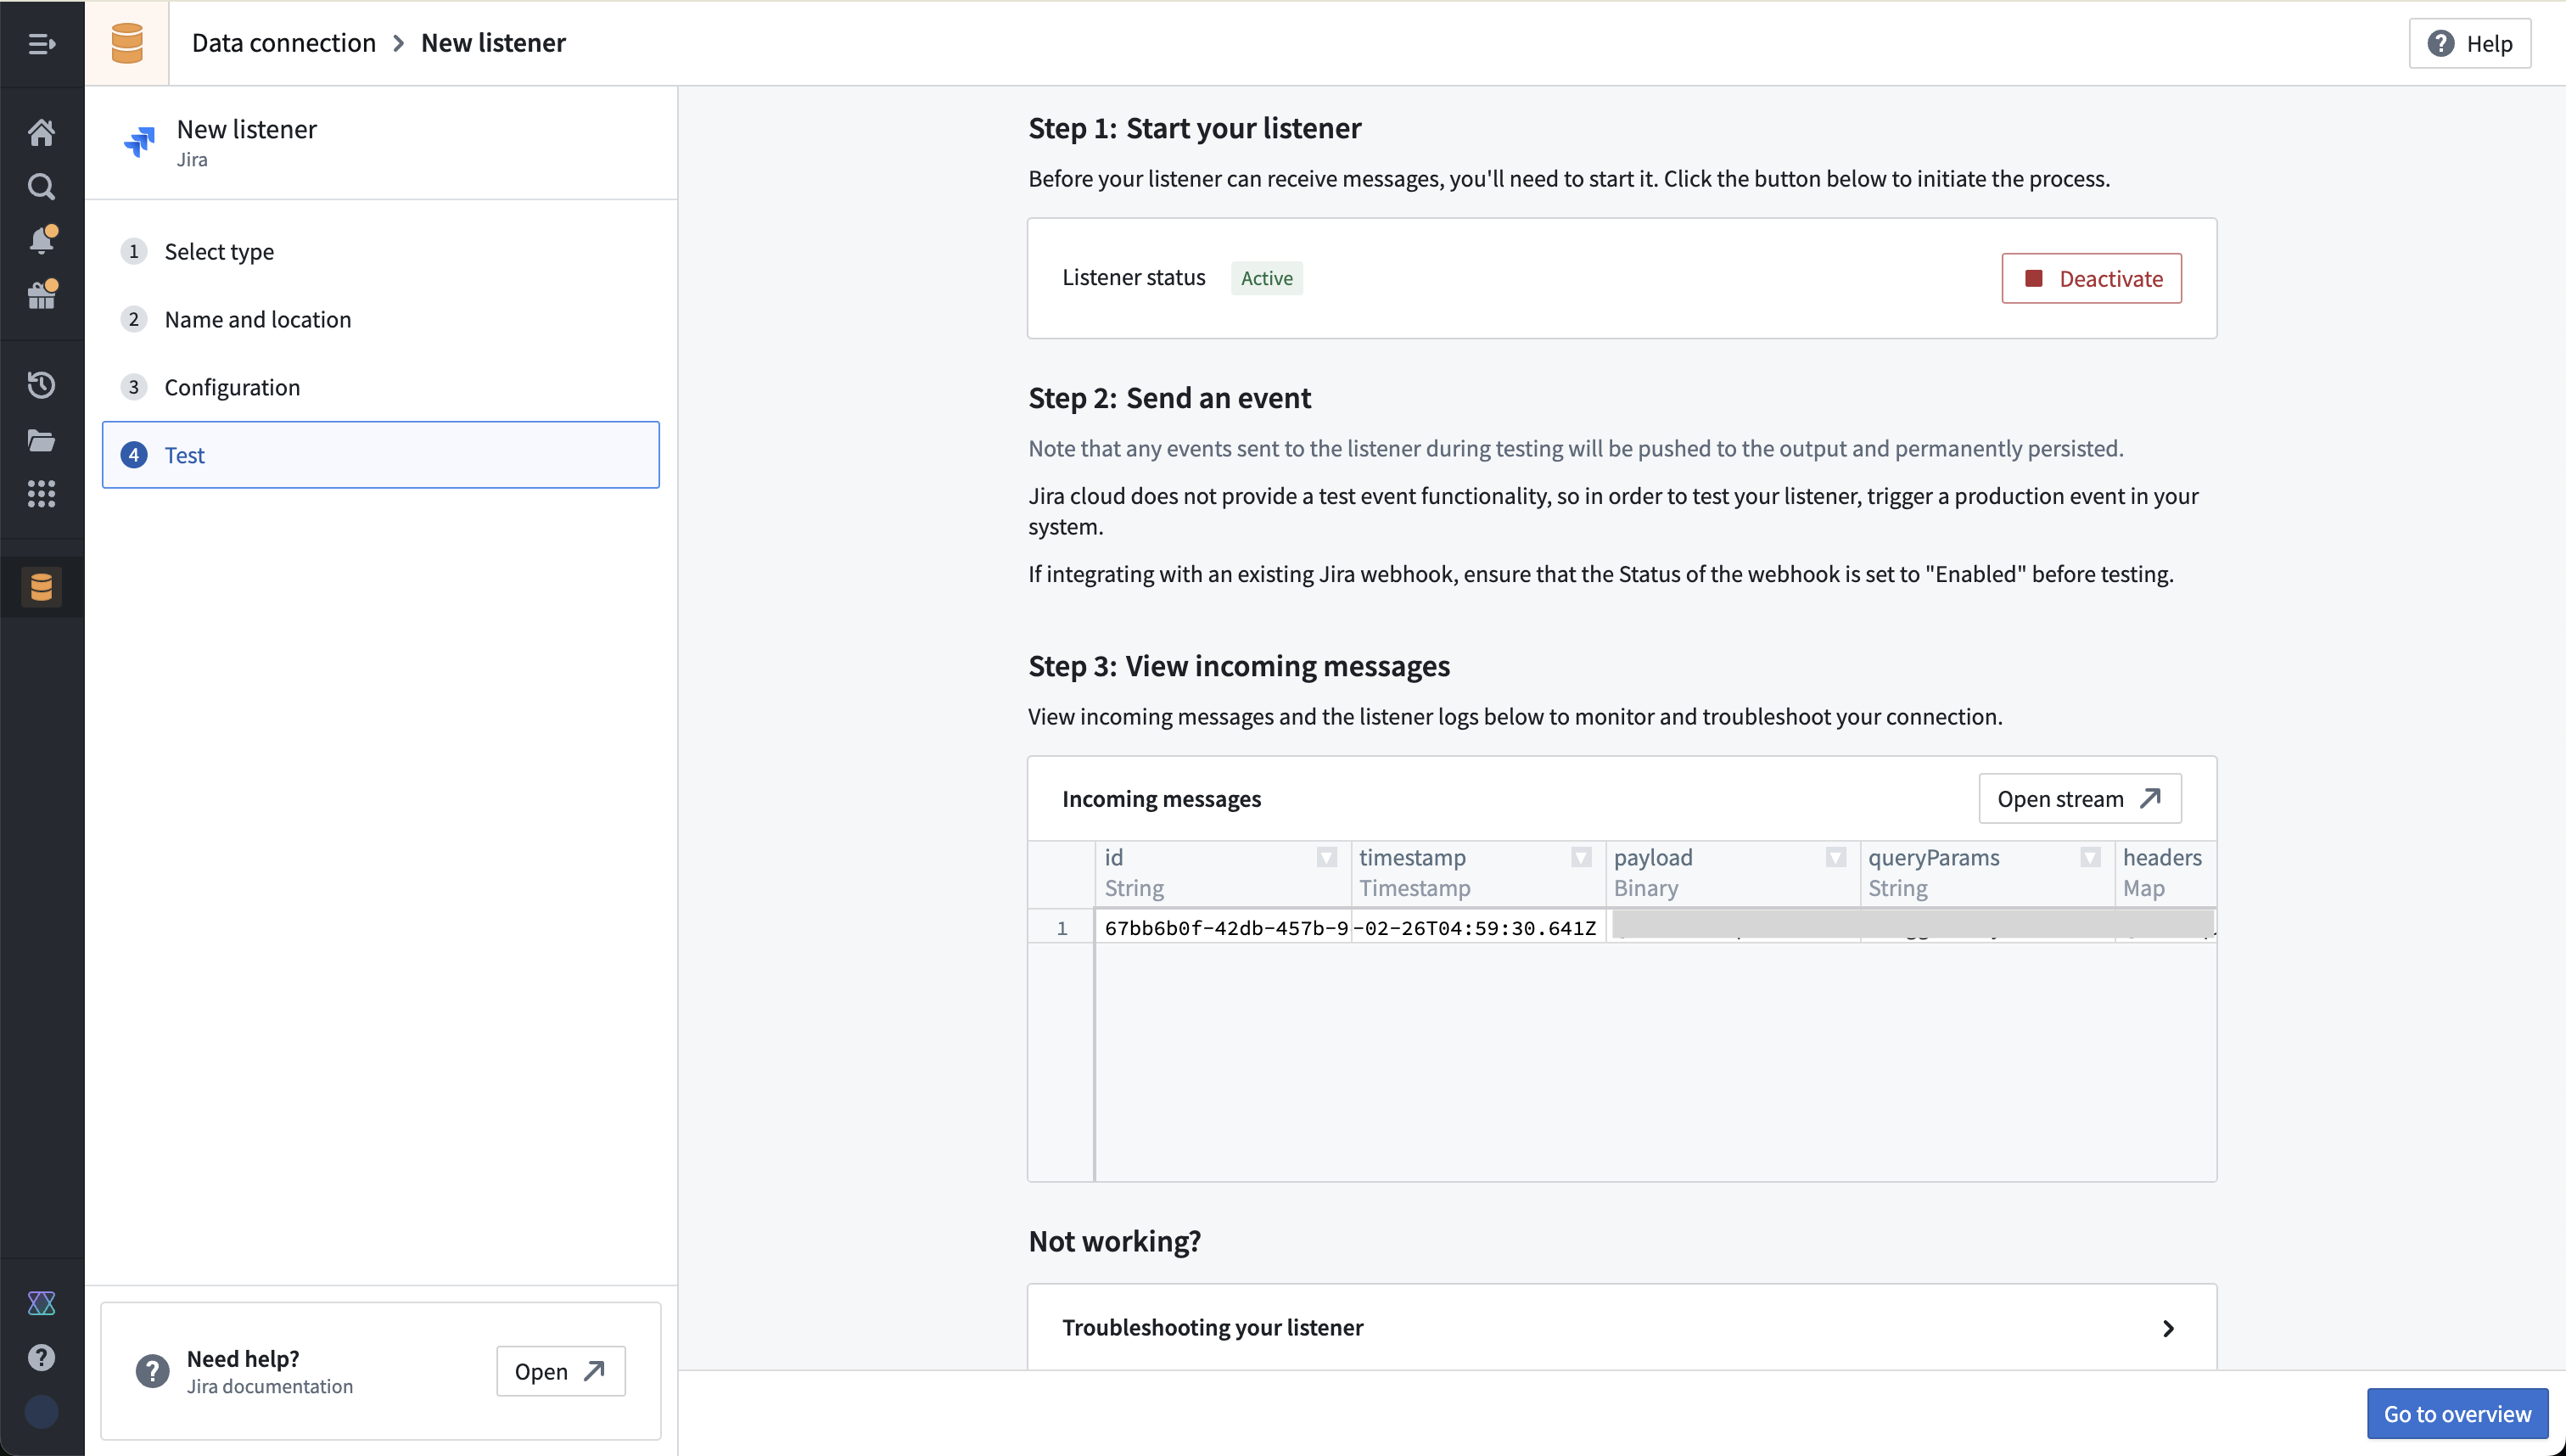
-
You will need to allow inbound traffic from the system that is pushing data to your Foundry enrollment. This can be done in Control Panel by an Information Security Officer for your Foundry enrollment. Documentation on managing ingress in the Palantir platform.
-
Test the new configuration by making a change to trigger an event to your listener. You should see it appear in the incoming messages view in data connection, as well as in the underlying stream that the listener outputs to.
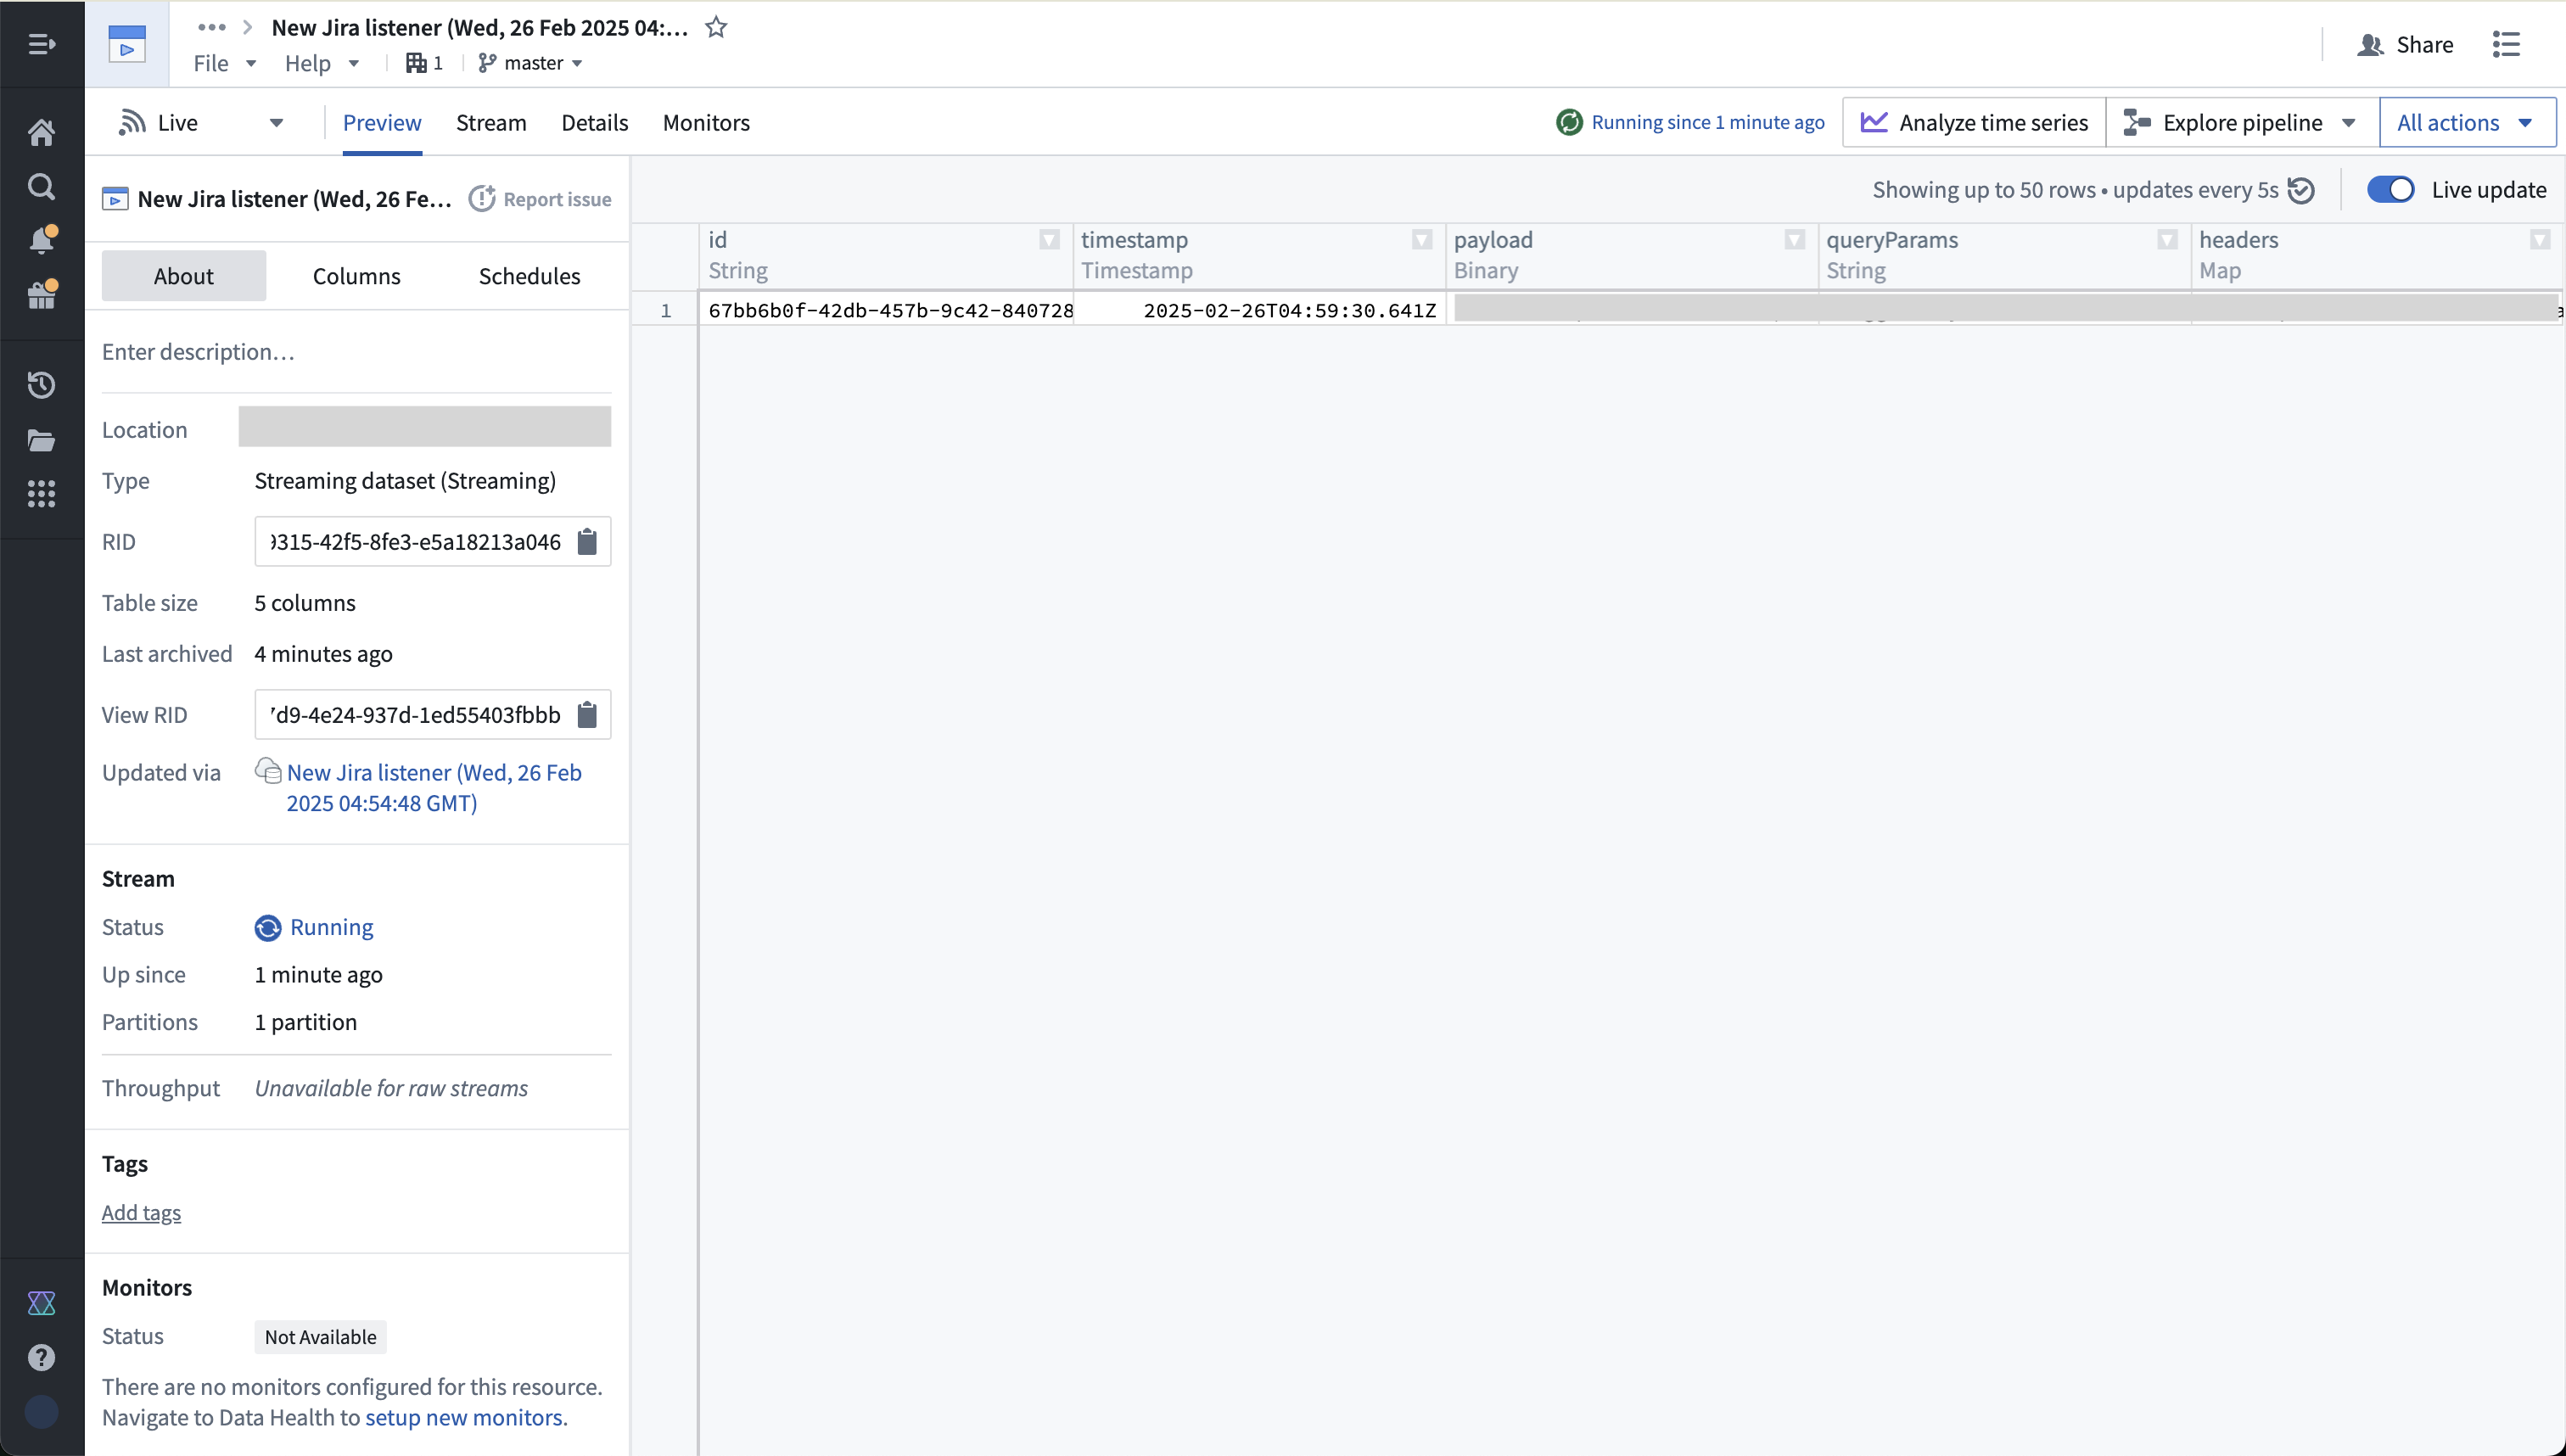
You can now use this streaming data in Foundry pipelines, to put data into the ontology, or monitor using Automate to trigger effects in real time.
All screenshots of Atlassian Jira® are provided for reference purposes only and are the property of Atlassian Corporation Plc.
中文翻译
设置 Jira 监听器
本指南将逐步介绍如何为 Jira Cloud 配置监听器,以便将 Jira 事件实时传输到 Foundry 流式数据集。
前提条件
在配置之前,请确保:
-
您的注册环境的入站策略已正确配置。了解如何配置入站策略。。请查阅 Jira 关于 IP 地址和域名的文档 ↗。
-
您拥有自己的 Jira 实例并具有管理员访问权限。
操作步骤
-
在 Jira 中创建一个 WebHook。这可以通过 Jira 管理面板完成,导航至
https://<您的 Jira 域名>/plugins/servlet/webhooks#。访问 Jira 关于 WebHook 的公开文档 ↗。
-
在 Palantir 平台中创建一个 Jira 监听器。这将生成监听器 URL,您需要将其复制并粘贴到 Jira 的
URL字段中,用于创建 WebHook。
a. 您还应在 Jira 中生成一个消息签名密钥(message signing secret),并将其复制到 Foundry 监听器配置中的消息签名密钥字段。您也可以选择不设置签名密钥。
-
选择应发送到监听器的 Jira 事件集,然后点击创建。截图示例显示了订阅问题创建、更新和删除事件的情况:
-
在 Foundry 中保存监听器配置以继续。现在需要信息安全官(Information Security Officer)的管理员批准。请查看切换开关的描述。
-
在监听器测试界面中选择启动以启动您的监听器。
-
您需要允许来自向 Foundry 注册环境推送数据的系统的入站流量。这可以由您 Foundry 注册环境的信息安全官在控制面板中完成。关于在 Palantir 平台中管理入站策略的文档。
-
通过进行更改以触发事件到监听器,测试新配置。您应该会看到该事件出现在数据连接(Data Connection)的传入消息视图中,以及监听器输出的底层流中。
您现在可以在 Foundry 管道中使用这些流式数据,将数据放入本体论(Ontology),或使用 Automate 进行监控以实时触发效果。
所有 Atlassian Jira® 的截图仅供参考,其所有权归 Atlassian Corporation Plc 所有。