WebSocket listeners(WebSocket 监听器)
:::callout{theme="warning" title="Experimental"} WebSocket listeners are an experimental capability that may not be available on your enrollment. To enable this capability, contact Palantir Support. :::
WebSocket listeners are primarily designed for real-time audio and telephony workflows, enabling bidirectional communication between external services and Foundry. Unlike HTTPS listeners that receive webhook requests and write to streams, WebSocket listeners maintain persistent connections for continuous data streaming into a custom WebSocket server hosted in a compute module. For security considerations specific to HTTPS listeners, see HTTPS listener security.
Because WebSocket connections are bidirectional, your compute module can also send responses back to the source system during an active connection. For example, in a telephony workflow, you can process incoming audio and send generated audio back to the caller in real time.
When to use WebSocket listeners
You can use WebSocket listeners in the following situations:
- The external system uses the WebSocket protocol for data delivery.
- The integration requires bidirectional communication, for example, sending responses back during a call.
- You are processing continuous audio streams from telephony systems.
Set up a WebSocket listener
1. Create a WebSocket listener
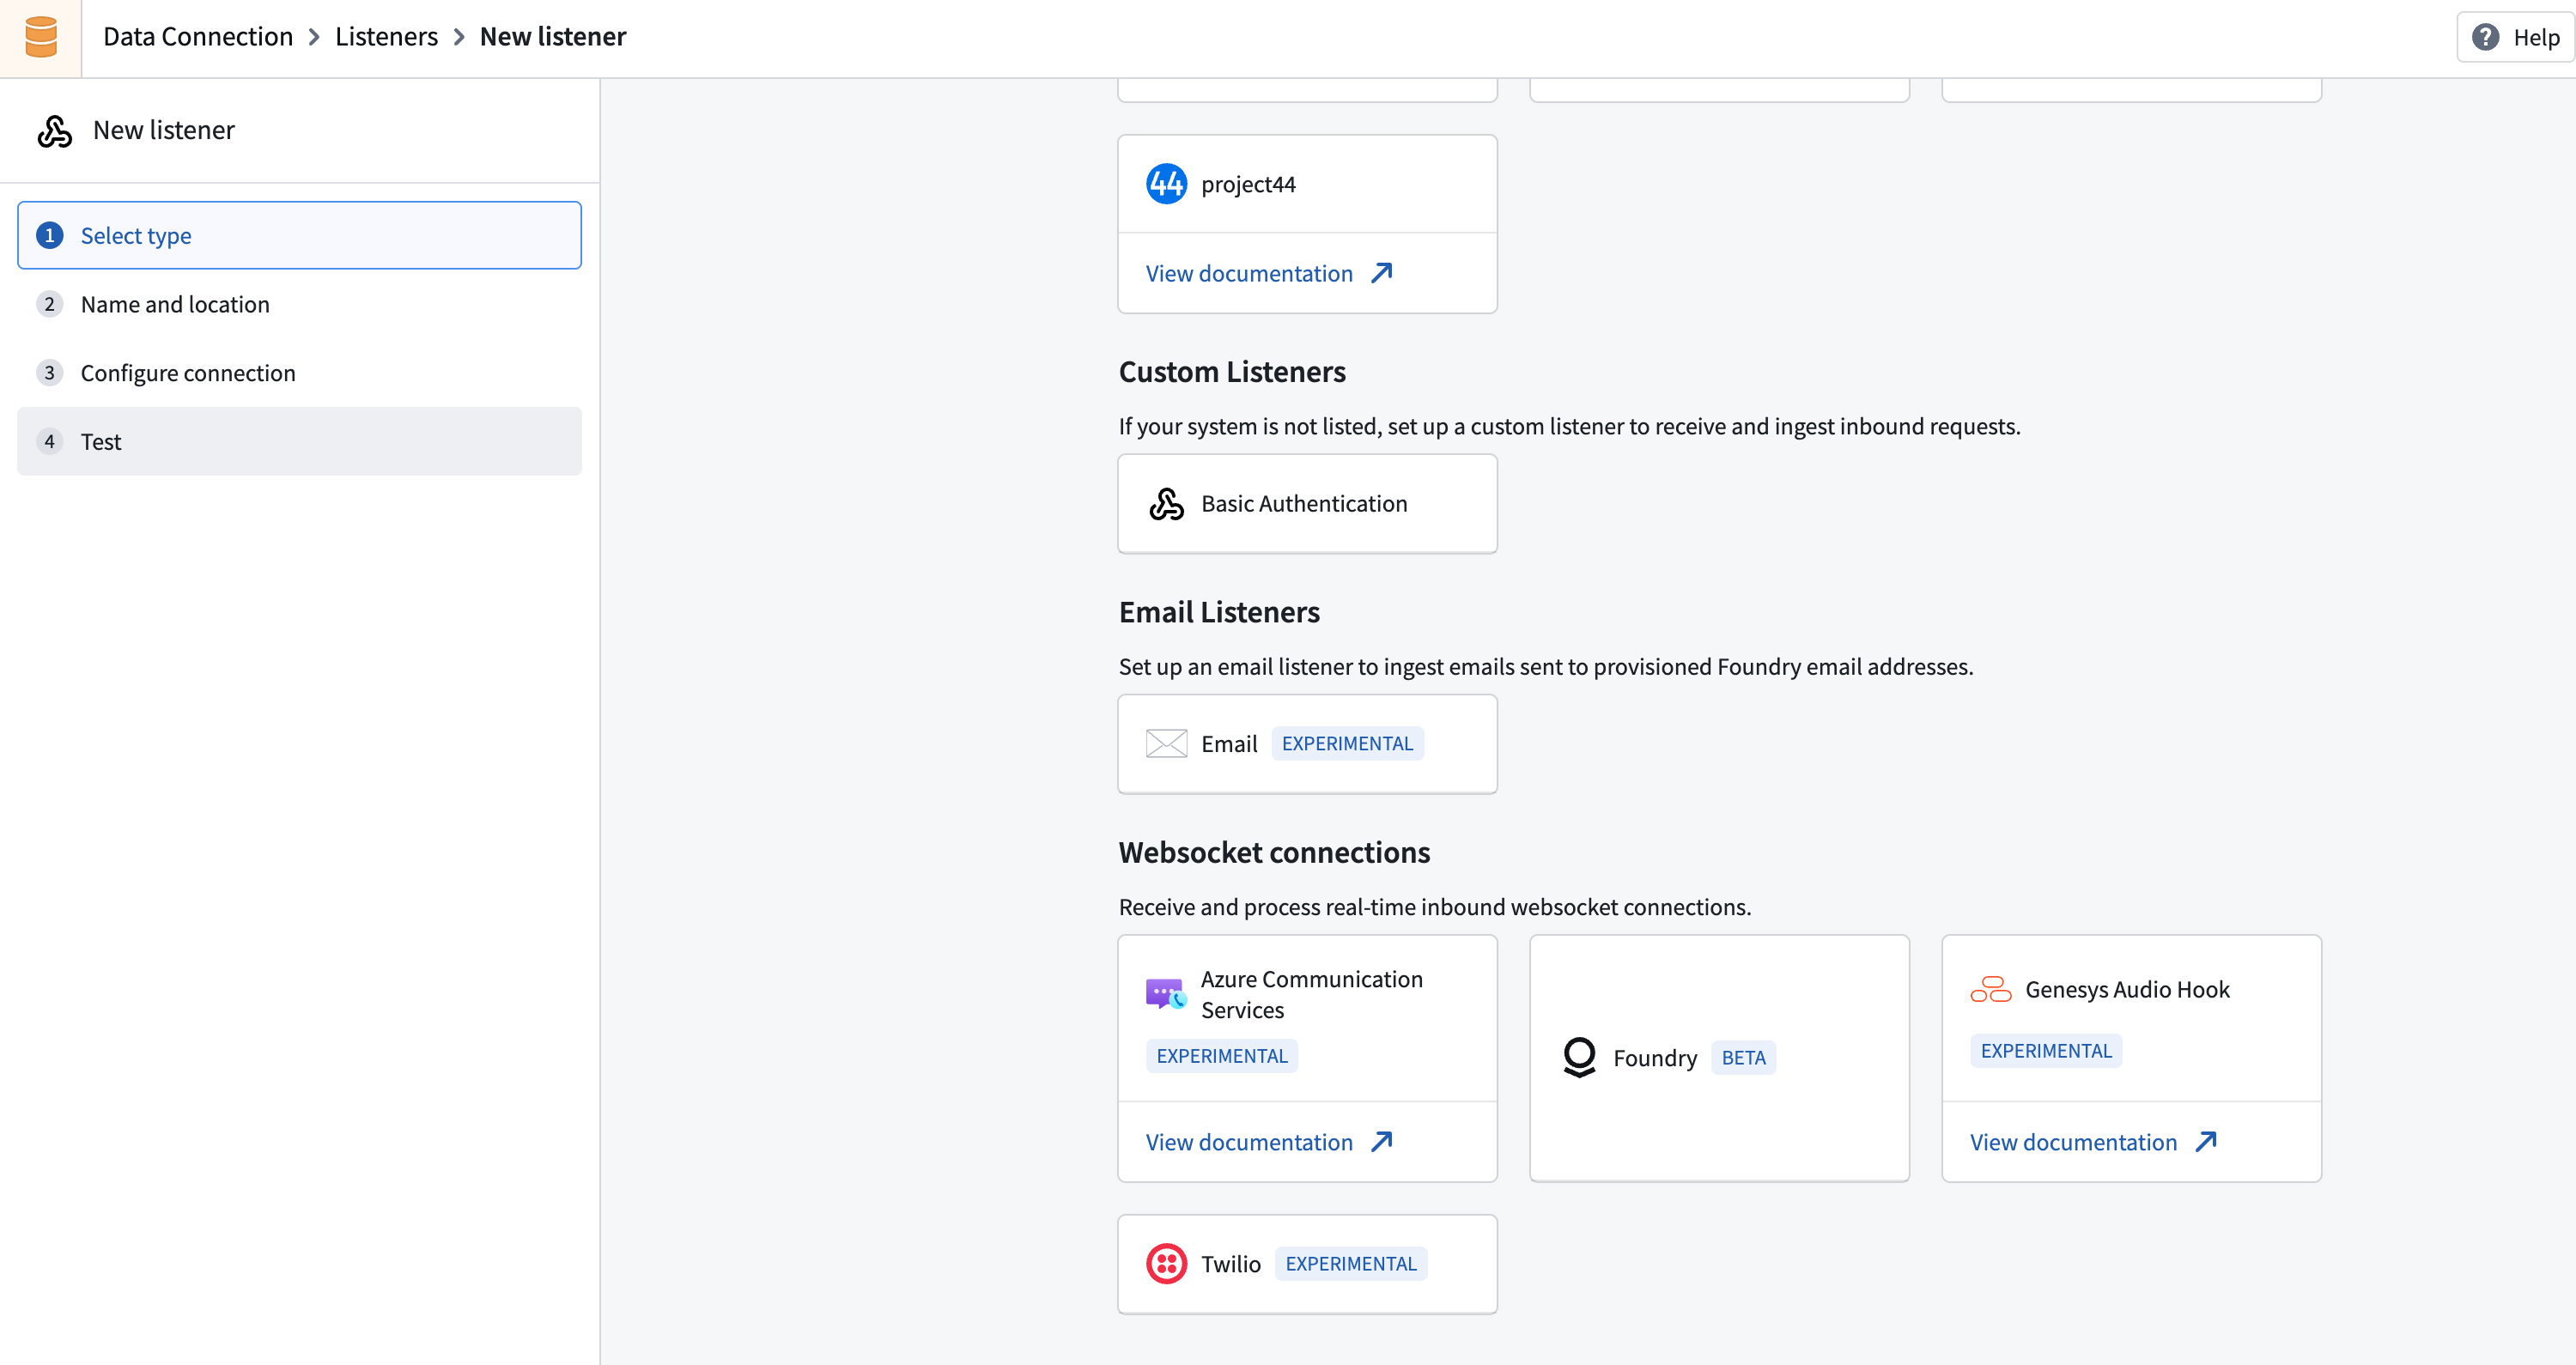
- Navigate to Data Connection > Listeners.
- Select Create new listener and choose the WebSocket connector you need.
:::callout{theme="neutral" title="Connector availability"} If the connector you require is not present, contact Palantir Support to enable it for your enrollment. :::
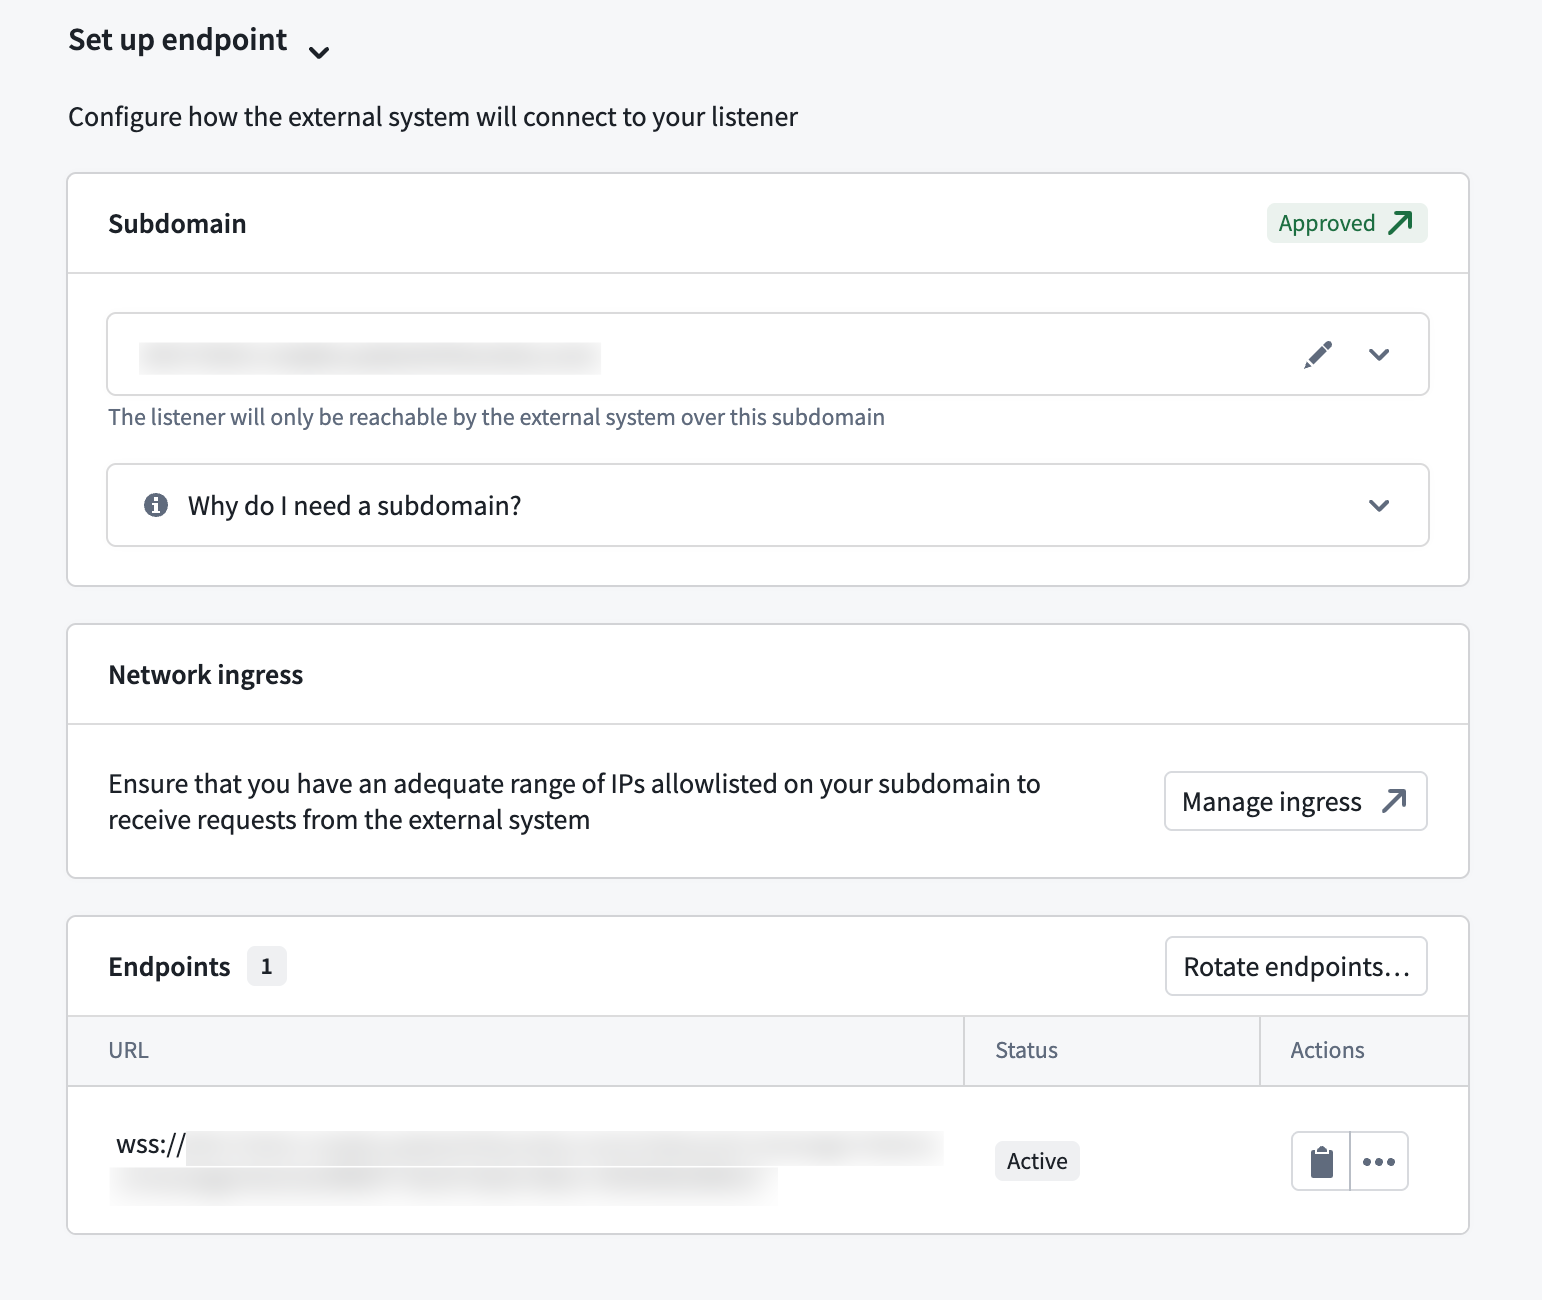
2. Configure an endpoint
All WebSocket listeners must be mounted on a dedicated subdomain. You must configure your Foundry instance to accept inbound connections from the external system's IP ranges.
- Create a listener subdomain in Control Panel > Domains & certificates. Learn more about listener subdomains.
- Configure ingress to allow connections from your external system. Refer to the Configure ingress documentation.
- Mount the subdomain to your listener. This requires approval before you can start receiving requests.
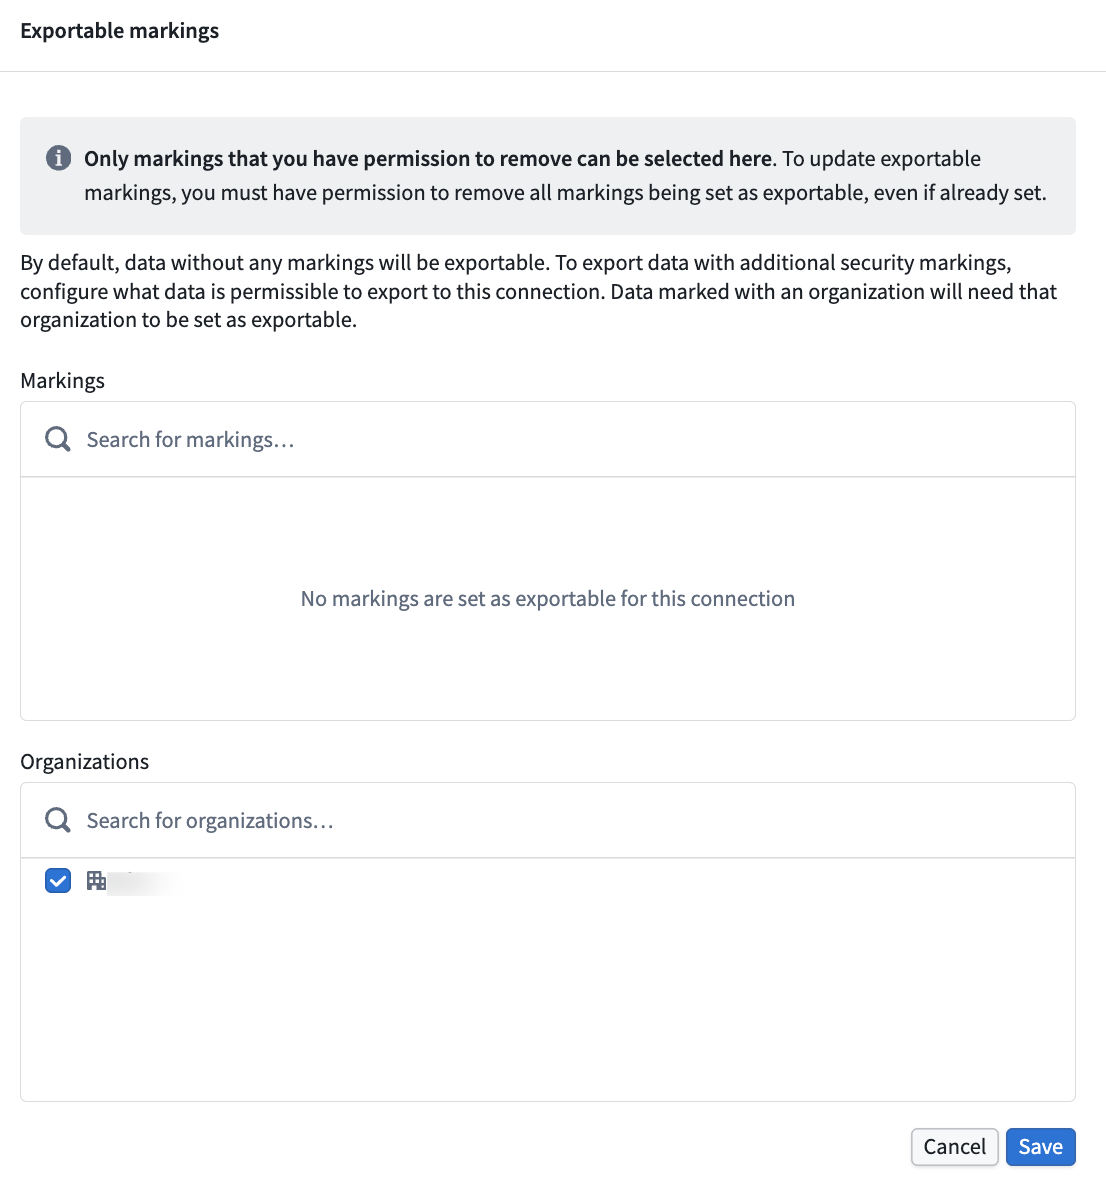
3. Configure security
Each WebSocket listener type has specific authentication requirements. Configure the appropriate credentials in the Configure security section of your listener's Configure connection page.
Next, navigate to the Configure server page and specify which exportable markings your listener should allow. Learn more about WebSocket listener security.
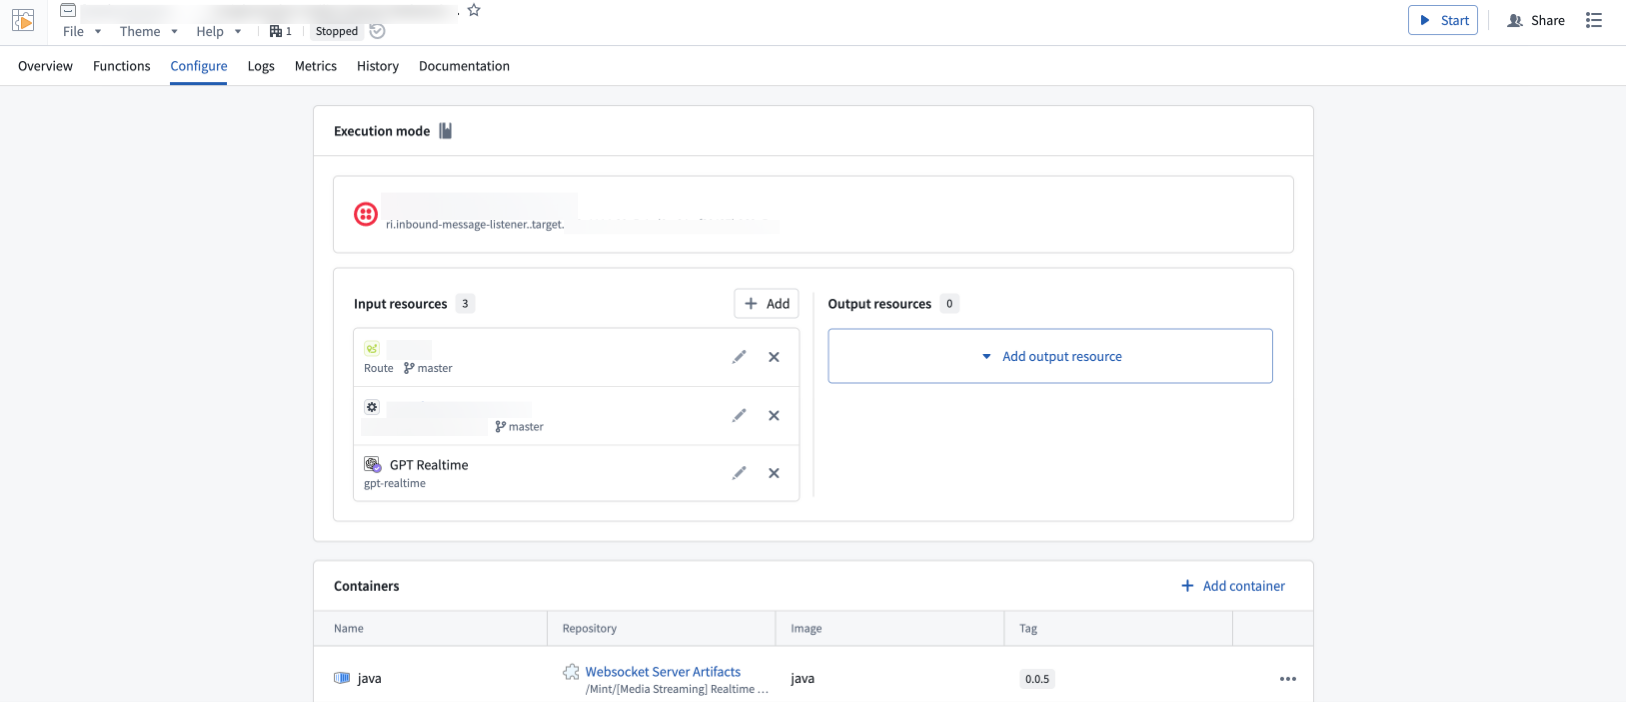
4. Configure a compute module
WebSocket listeners route incoming data to a compute module for processing. When you create a listener, a compute module is automatically created for you—this is currently the only supported way to handle WebSocket connections in listeners.
To configure the compute module, follow the steps below:
- From the listener's Configuration page, navigate to the linked compute module.
- Add the Foundry resources your compute module needs as inputs and outputs. By default, the compute module has no permissions—you must explicitly grant access to each resource. Learn more about configuring compute modules.
- Start your compute module and check the Logs tab to confirm everything is running as expected.
Supported WebSocket listeners
The following WebSocket listener types are available:
- Twilio Media Streams ↗: Streams real-time audio from Twilio voice calls over WebSocket connections.
- Azure Communication Services ↗: Streams audio from Azure Communication Services call automation workflows.
- Genesys AudioHook ↗: Streams real-time audio from Genesys Cloud voice interactions using the AudioHook protocol.
All product names, logos, and brands mentioned are trademarks of their respective owners. All company, product, and service names used in this document are for identification purposes only.
中文翻译
WebSocket 监听器
:::callout{theme="warning" title="实验性功能"} WebSocket 监听器是一项实验性功能,您的实例可能尚未支持。如需启用此功能,请联系 Palantir 支持团队。 :::
WebSocket 监听器主要面向实时音频和电话工作流设计,支持外部服务与 Foundry 之间的双向通信。与接收 Webhook 请求并写入数据流的 HTTPS 监听器 不同,WebSocket 监听器通过持久连接将连续数据流式传输到托管在计算模块(compute module)中的自定义 WebSocket 服务器。有关 HTTPS 监听器的安全注意事项,请参阅 HTTPS 监听器安全。
由于 WebSocket 连接是双向的,您的计算模块也可以在活动连接期间将响应发送回源系统。例如,在电话工作流中,您可以处理传入的音频,并实时将生成的音频发送回呼叫方。
何时使用 WebSocket 监听器
您可以在以下场景中使用 WebSocket 监听器:
- 外部系统使用 WebSocket 协议进行数据传输。
- 集成需要双向通信,例如在通话过程中发送响应。
- 您正在处理来自电话系统的连续音频流。
设置 WebSocket 监听器
1. 创建 WebSocket 监听器
- 导航至 数据连接(Data Connection) > 监听器(Listeners)。
- 选择 创建新监听器(Create new listener),然后选择所需的 WebSocket 连接器。
:::callout{theme="neutral" title="连接器可用性"} 如果所需的连接器未显示,请联系 Palantir 支持团队为您的实例启用该连接器。 :::
2. 配置端点
所有 WebSocket 监听器必须挂载到专用子域上。您需要配置 Foundry 实例以接受来自外部系统 IP 范围的入站连接。
- 在 控制面板(Control Panel) > 域名与证书(Domains & certificates) 中创建监听器子域。了解更多关于监听器子域的信息。
- 配置入站规则以允许来自外部系统的连接。请参阅配置入站规则文档。
- 将子域挂载到您的监听器。此操作需要审批后才能开始接收请求。
3. 配置安全设置
每种 WebSocket 监听器类型都有特定的身份验证要求。在监听器的 配置连接(Configure connection) 页面的 配置安全设置(Configure security) 部分配置相应的凭据。
接下来,导航至 配置服务器(Configure server) 页面,指定监听器应允许哪些可导出标记(exportable markings)。了解更多关于 WebSocket 监听器安全的信息。
4. 配置计算模块
WebSocket 监听器将传入数据路由到计算模块进行处理。创建监听器时,系统会自动为您创建一个计算模块——这是当前唯一支持的 WebSocket 连接处理方式。
请按照以下步骤配置计算模块:
- 从监听器的 配置(Configuration) 页面,导航至关联的计算模块。
- 将计算模块所需的 Foundry 资源添加为输入和输出。默认情况下,计算模块没有任何权限——您需要显式授予每个资源的访问权限。了解更多关于配置计算模块的信息。
- 启动计算模块,并检查 日志(Logs) 选项卡以确认一切运行正常。
支持的 WebSocket 监听器
以下 WebSocket 监听器类型可用:
- Twilio Media Streams ↗:通过 WebSocket 连接流式传输来自 Twilio 语音通话的实时音频。
- Azure Communication Services ↗:从 Azure Communication Services 通话自动化工作流中流式传输音频。
- Genesys AudioHook ↗:使用 AudioHook 协议从 Genesys Cloud 语音交互中流式传输实时音频。
本文提及的所有产品名称、徽标和品牌均为其各自所有者的商标。本文档中使用的所有公司、产品和服务名称仅用于标识目的。