Set up a webhook(设置 Webhook)
This tutorial guides you through how to set up webhooks to send HTTP requests to external systems.
Prerequisites
This tutorial will walk through creating a REST API source and a webhook associated with that source. If you have already created a source, you can skip ahead to the Create a webhook step.
:::callout{theme="warning"}
If you are trying to connect to a system that is not accessible from Foundry's network, we recommend using a Foundry worker source with agent proxy egress policies. If the system can only be referenced by IP address and not hostname, use an agent proxy runtime.
Using an agent worker source for webhooks comes with additional complexity to configure and manage. In particular, we recommend provisioning a dedicated agent for webhooks running on an agent worker. Agents execute tasks in the order received; if bulk syncs and webhooks are executed on the same agent, short-running webhook tasks may end up queued behind long-running bulk syncs.
Lean more about agent workers and their configuration. :::
Ensure that you have a Project to manage permissions for the source you will create in this tutorial. If you have not yet created a Project, learn how in the Project documentation.
Tutorial
This tutorial assumes you will be using a REST API for a system available over the open Internet.
:::callout{theme="neutral"}
Some sources, including SAP, legacy Salesforce, and legacy magritte-rest-v2 use a more complex task configuration. For more information on configuring webhook tasks, see the webhooks reference.
:::
Create a source
Start by navigating to Data Connection and selecting the Sources tab. Then, select New source and REST API.
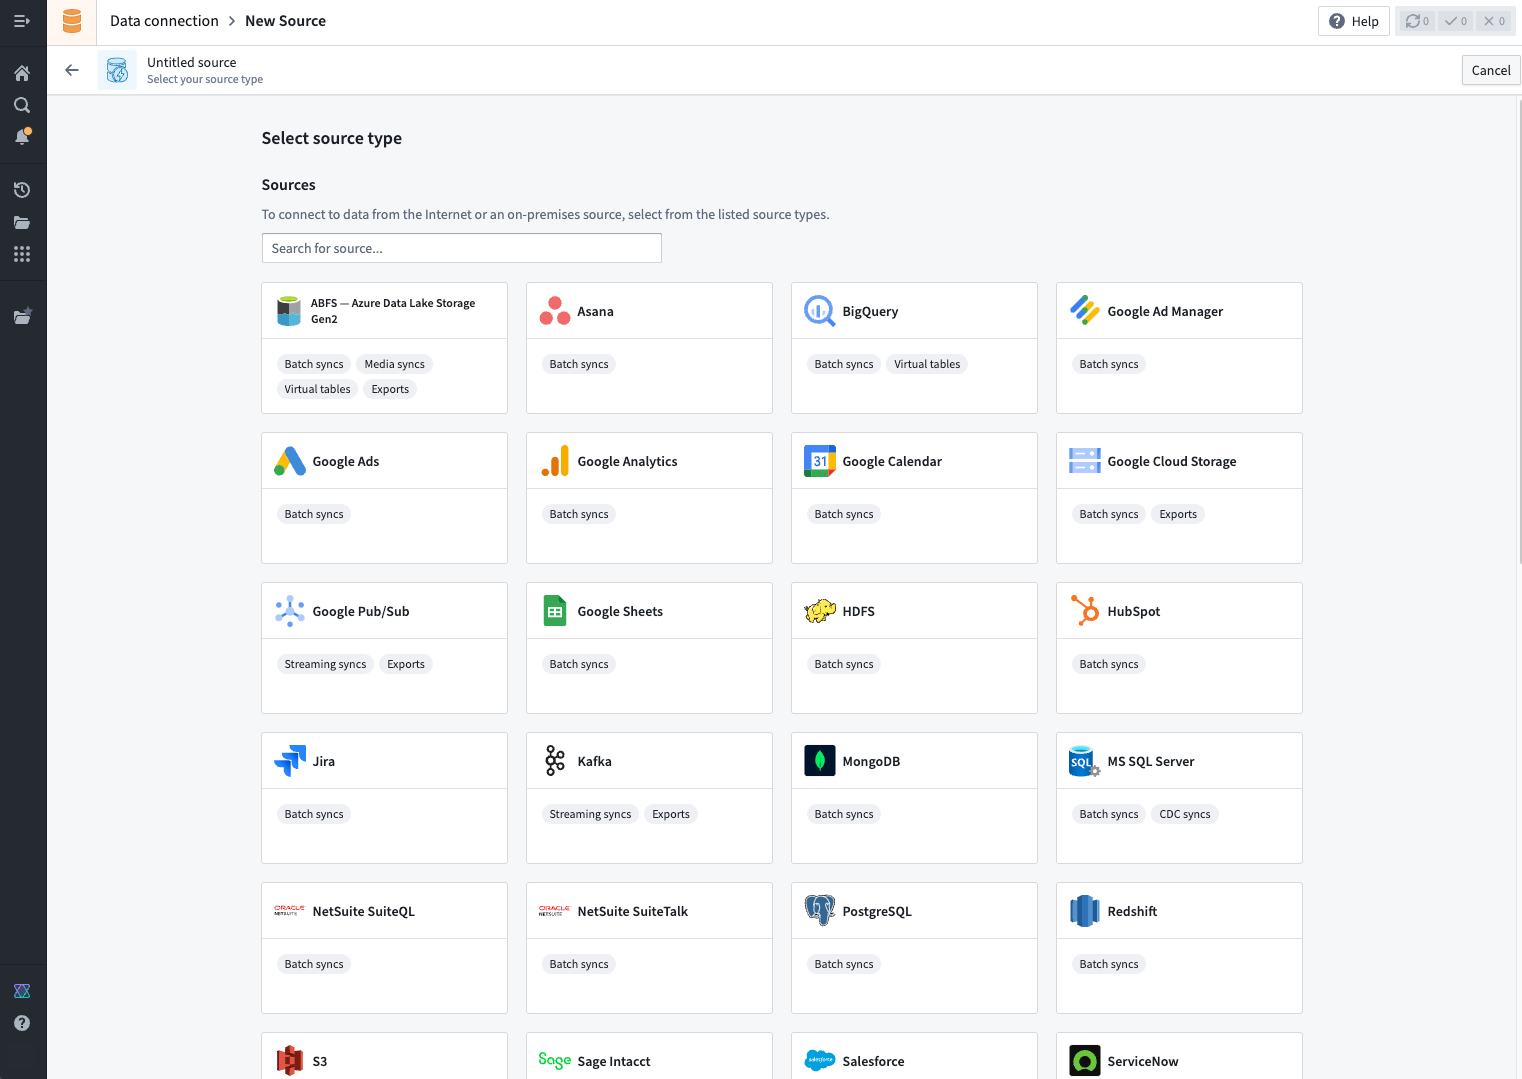
Use the source editor to fill in configuration details for the REST API to which you are connecting. More details on the REST API source type can be found in the source type reference.
The source is meant to contain the minimal set of secrets and connection details required to establish a connection. When configuring individual webhooks using this source, you will have an opportunity to add additional request details, including the relative path, query parameters, headers, and body content.
Other source types
Some other source types also support webhooks. For more details, review the reference page for the specific source type.
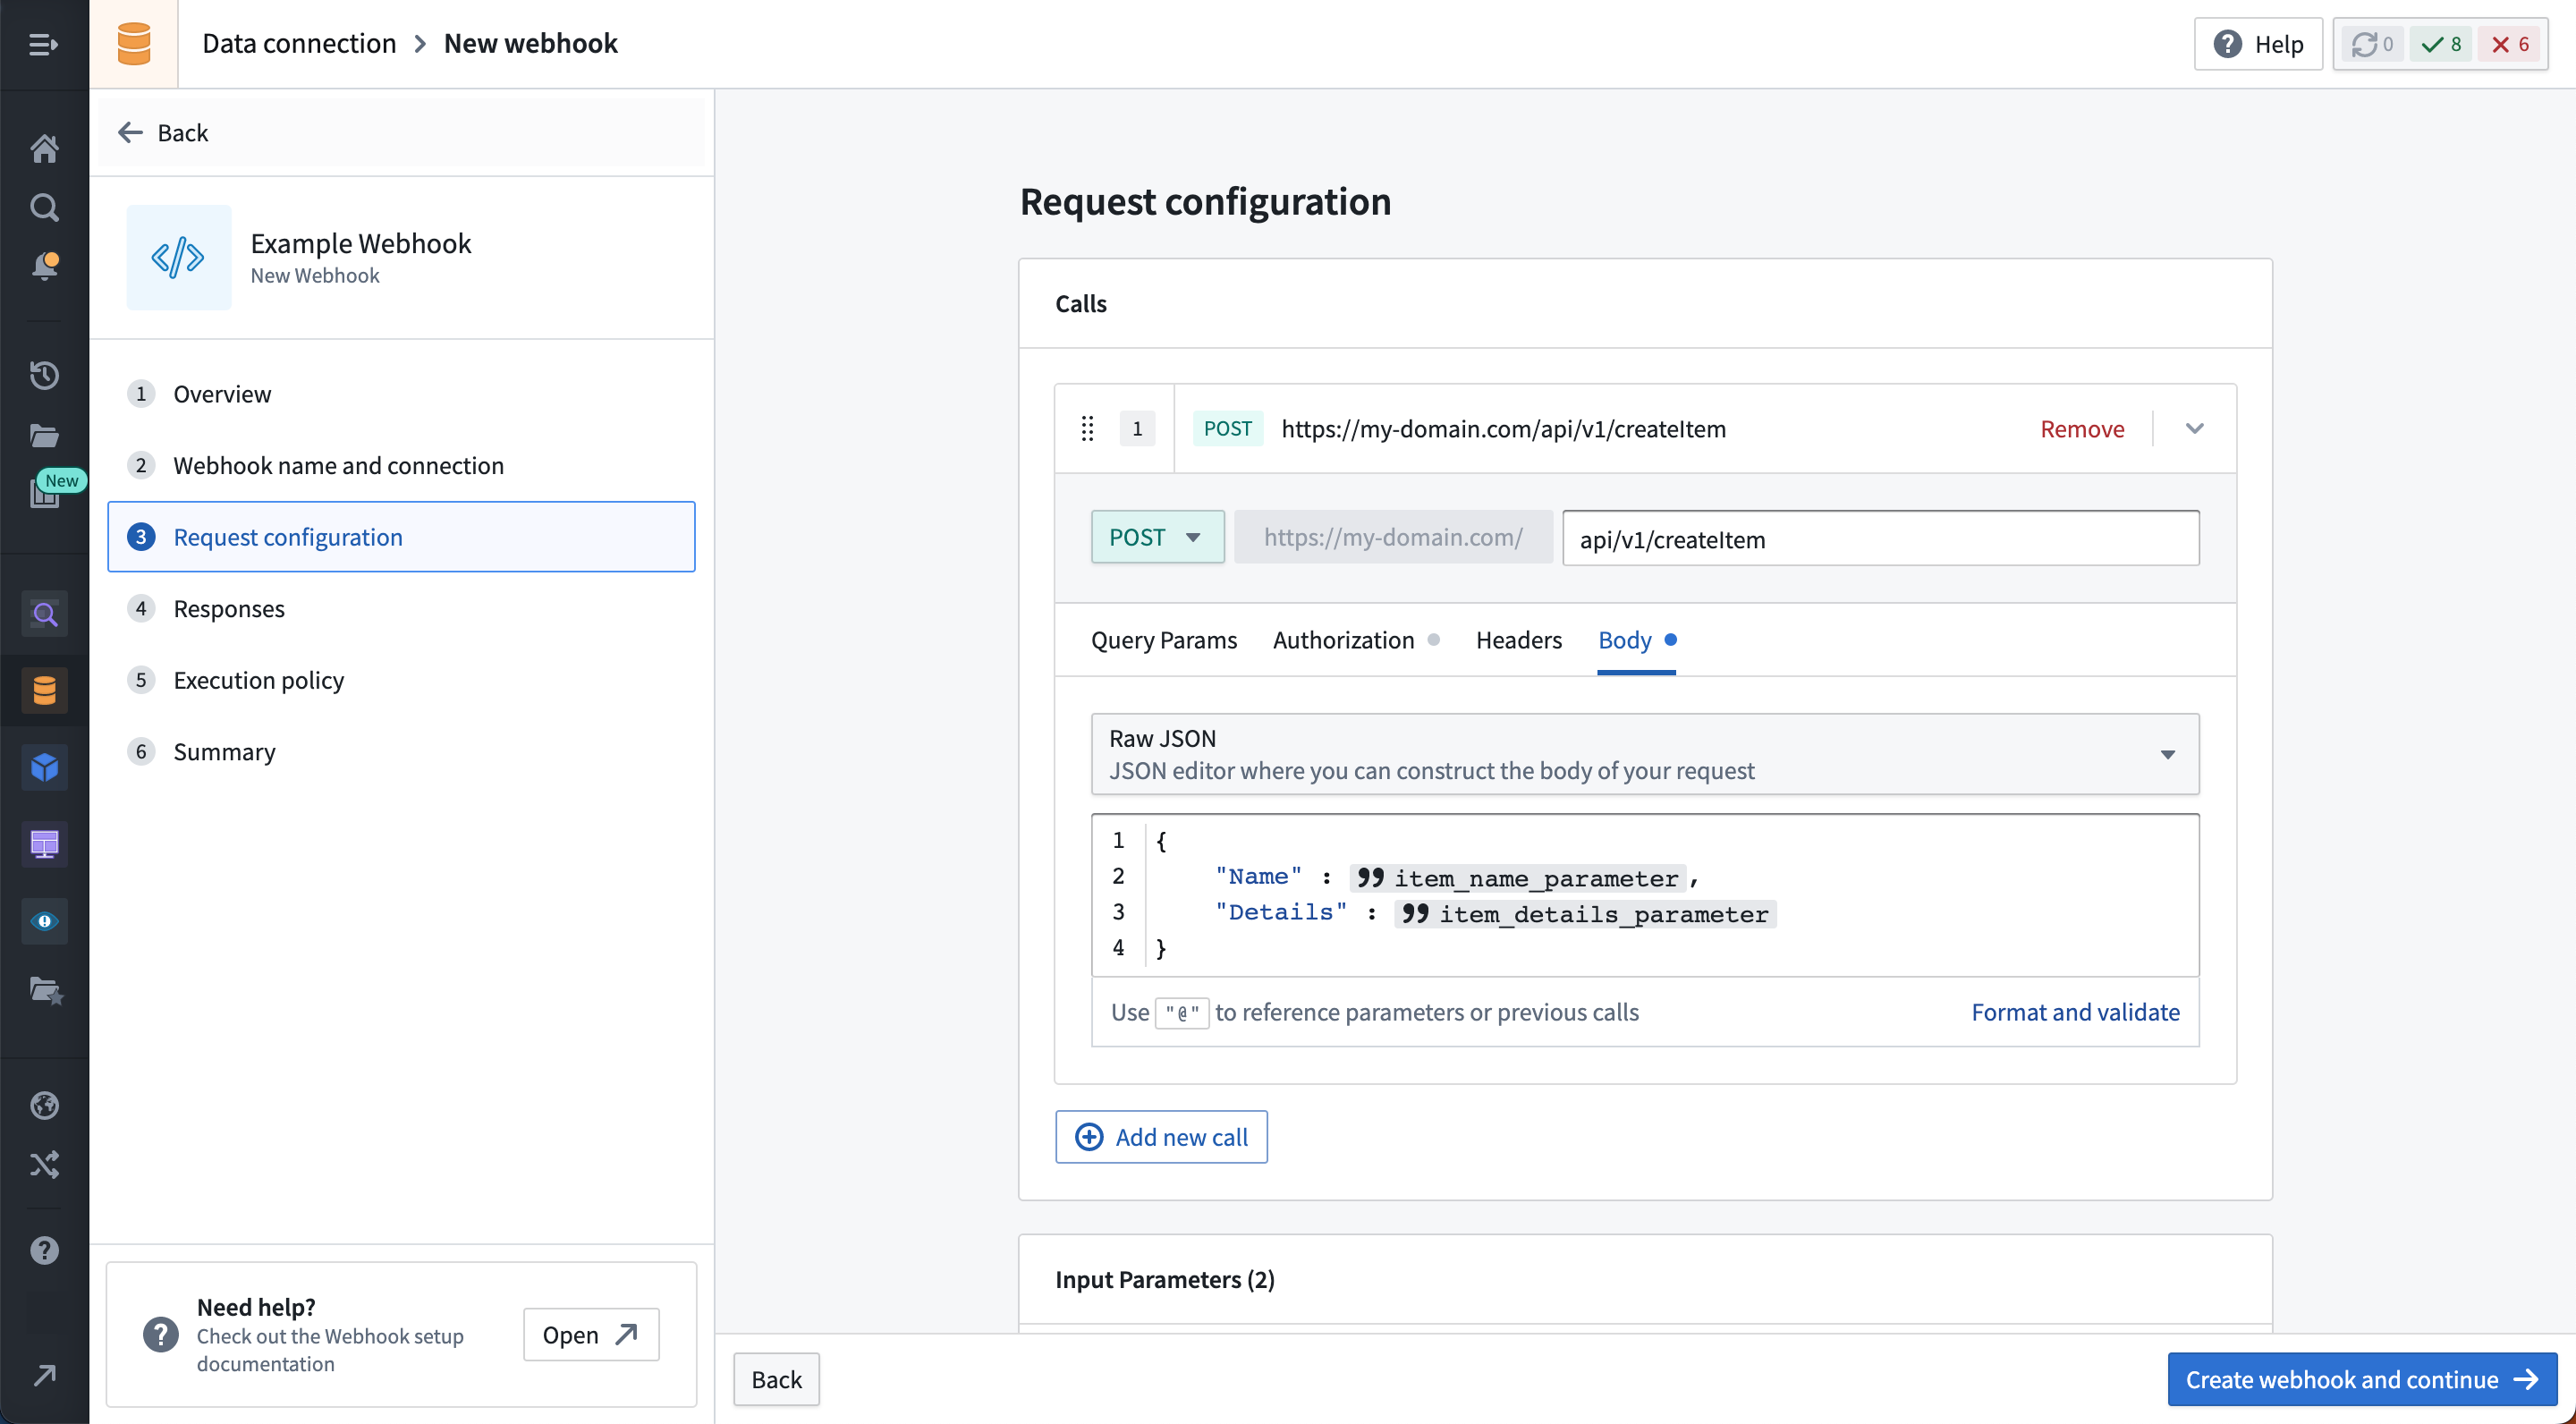
Create a webhook
Once the source has been created, select the Webhooks tab and select New webhook.

Follow the steps in the New webhook wizard to create a webhook that makes an external request. The example below illustrates a POST request to the /api/v1/createItem endpoint on our example domain. The body is constructed as Raw JSON and, in this case, is configured to accept two string input parameters.
Duplicate a webhook
If you are looking to create a new webhook that has a similar configuration to an existing webhook (for example, two similar endpoints on the same API), you may choose to duplicate the existing webhook. To duplicate a webhook, open the Actions menu from the Webhooks tab of the source overview or use the Actions button on the webhook page, then select Duplicate.
Configuration options
- Enter a name for the webhook, and add a description if desired.
- Optionally, toggle on Function configuration to publish the webhook as a function. Provide an Ontology and API name for your function. See the Webhook functions reference for details.
- Select the source you created in the previous step of the tutorial. If you landed in the wizard directly from a source page, the source will be pre-selected.
- Add any input parameters that you want to use in the external request.
- Populate any required parts of the request configuration. You can reference input parameters in the path, query params, headers, and body configuration sections.
- Optionally, set any Limits you want to apply to the webhook. Refer to the Limits reference for details.
- Select Create to complete creating the webhook.
Direct import from cURL commands
Alternatively, you can also create a request Call by directly importing a cURL command. To do this, choose the Import from cURL option and put your cURL command in the TextArea. If your cURL uses the supported options and relates to a domain already in Source, selecting Import cURL will create a new Call.
Test the webhook
After saving, you will be able to run a test request to see if your configuration is correct. This may be done at any time by using the Test Connection side panel.
After a test request is made, you may use the response to parse output parameters. For more information on output parameters, see the webhooks reference page.
Next steps
In this tutorial, you learned how to create a Source and create a Webhook associated with that Source. Here are some resources we recommend to learn more:
-
View the Action types tutorial to learn how to configure a Webhook for use in end-user applications.
-
Read the Webhooks reference to see the full details about options available for configuring Webhooks.
-
Follow the step-by-step guide to set up a webhook for the Microsoft Graph API for a concrete example of integrating with Microsoft Cloud services.
中文翻译
设置 Webhook
本教程将指导您如何设置 Webhook,以便向外部系统发送 HTTP 请求。
前提条件
本教程将逐步引导您创建 REST API 源(Source)以及与该源关联的 Webhook。如果您已经创建了源,可以直接跳转到创建 Webhook步骤。
:::callout{theme="warning"}
如果您尝试连接的系统无法从 Foundry 网络访问,我们建议使用带有代理出口策略(agent proxy egress policies)的 Foundry Worker 源。如果系统只能通过 IP 地址而非主机名引用,请使用代理运行时(agent proxy runtime)。
使用代理 Worker(agent worker)源配置 Webhook 会带来额外的管理和配置复杂性。特别建议为运行在代理 Worker 上的 Webhook 配置专用代理。代理按接收顺序执行任务;如果批量同步和 Webhook 在同一代理上执行,短时运行的 Webhook 任务可能会排在长时间运行的批量同步之后。
确保您拥有一个项目(Project)来管理本教程中创建的源的权限。如果您尚未创建项目,请参阅项目文档了解如何创建。
教程
本教程假设您将使用可通过开放互联网访问的系统的 REST API。
:::callout{theme="neutral"}
某些源(包括 SAP、旧版 Salesforce 和旧版 magritte-rest-v2)使用更复杂的任务配置。有关配置 Webhook 任务的更多信息,请参阅 Webhook 参考文档。
:::
创建源
首先导航至 Data Connection,选择 Sources 选项卡。然后选择 New source 和 REST API。
使用源编辑器填写您要连接的 REST API 的配置详情。有关 REST API 源类型的更多详细信息,请参阅源类型参考文档。
源旨在包含建立连接所需的最少机密信息和连接详情。在配置使用此源的单个 Webhook 时,您将有机会添加额外的请求详情,包括相对路径、查询参数、标头和请求体内容。
其他源类型
其他一些源类型也支持 Webhook。有关更多详细信息,请查看特定源类型的参考页面。
创建 Webhook
创建源后,选择 Webhooks 选项卡,然后选择 New webhook。
按照 New webhook wizard 中的步骤创建发出外部请求的 Webhook。以下示例演示了向示例域上的 /api/v1/createItem 端点发送 POST 请求。请求体以原始 JSON 格式构建,在此示例中配置为接受两个字符串输入参数。
复制 Webhook
如果您希望创建与现有 Webhook 配置相似的新 Webhook(例如,同一 API 上的两个相似端点),可以选择复制现有 Webhook。要复制 Webhook,请从源概览的 Webhooks 选项卡打开 Actions 菜单,或使用 Webhook 页面上的 Actions 按钮,然后选择 Duplicate。
配置选项
- 为 Webhook 输入名称,并可选择添加描述。
- 可选地,开启 Function configuration 将 Webhook 发布为函数。为您的函数提供本体论(Ontology)和 API 名称。详情请参阅 Webhook 函数参考文档。
- 选择您在本教程上一步中创建的源。如果您直接从源页面进入向导,源将被预选。
- 添加您希望在外部请求中使用的任何输入参数。
- 填写请求配置中所需的任何部分。您可以在路径、查询参数、标头和请求体配置部分引用输入参数。
- 可选地,设置您希望应用于 Webhook 的任何限制(Limits)。详情请参阅限制参考文档。
- 选择 Create 完成 Webhook 的创建。
从 cURL 命令直接导入
或者,您也可以通过直接导入 cURL 命令来创建请求调用(Call)。为此,请选择 Import from cURL 选项,并将您的 cURL 命令放入文本区域。如果您的 cURL 使用了支持的选项,并且与源中已有的域相关,选择 Import cURL 将创建一个新的调用。
测试 Webhook
保存后,您可以运行测试请求来检查配置是否正确。您可以随时使用 Test Connection 侧面板执行此操作。
发出测试请求后,您可以使用响应来解析输出参数。有关输出参数的更多信息,请参阅 Webhook 参考页面。
后续步骤
在本教程中,您学习了如何创建源以及创建与该源关联的 Webhook。以下是我们推荐进一步学习的资源:
-
查看操作类型(Action types)教程,了解如何配置 Webhook 以在最终用户应用程序中使用。
-
阅读 Webhook 参考文档,了解配置 Webhook 可用选项的完整详情。
-
按照分步指南为 Microsoft Graph API 设置 Webhook,获取与 Microsoft 云服务集成的具体示例。