Create a media set batch pipeline with Pipeline Builder(使用 Pipeline Builder 创建媒体集批次管道(Media Set Batch Pipeline))
In this tutorial, you will use Pipeline Builder to create a standard batch pipeline with media sets to extract text from PDF.
This example uses PDFs of publicly available documents published by Palantir.
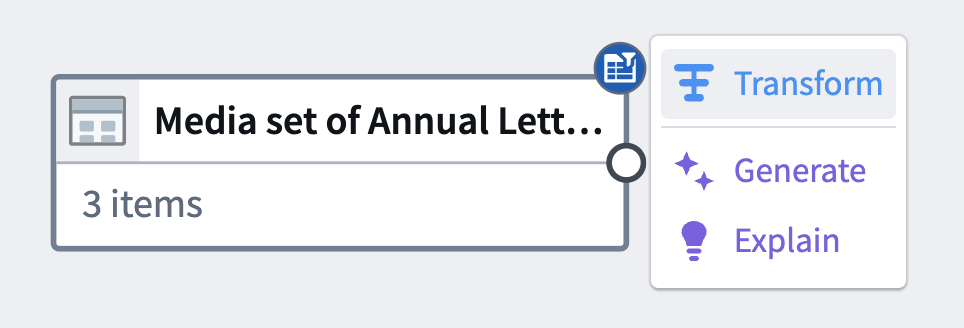
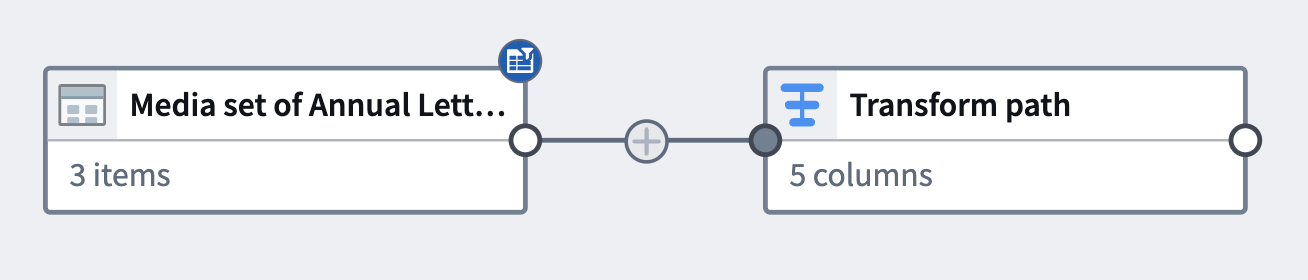
At the end of this tutorial, you will have a pipeline that looks like the following:
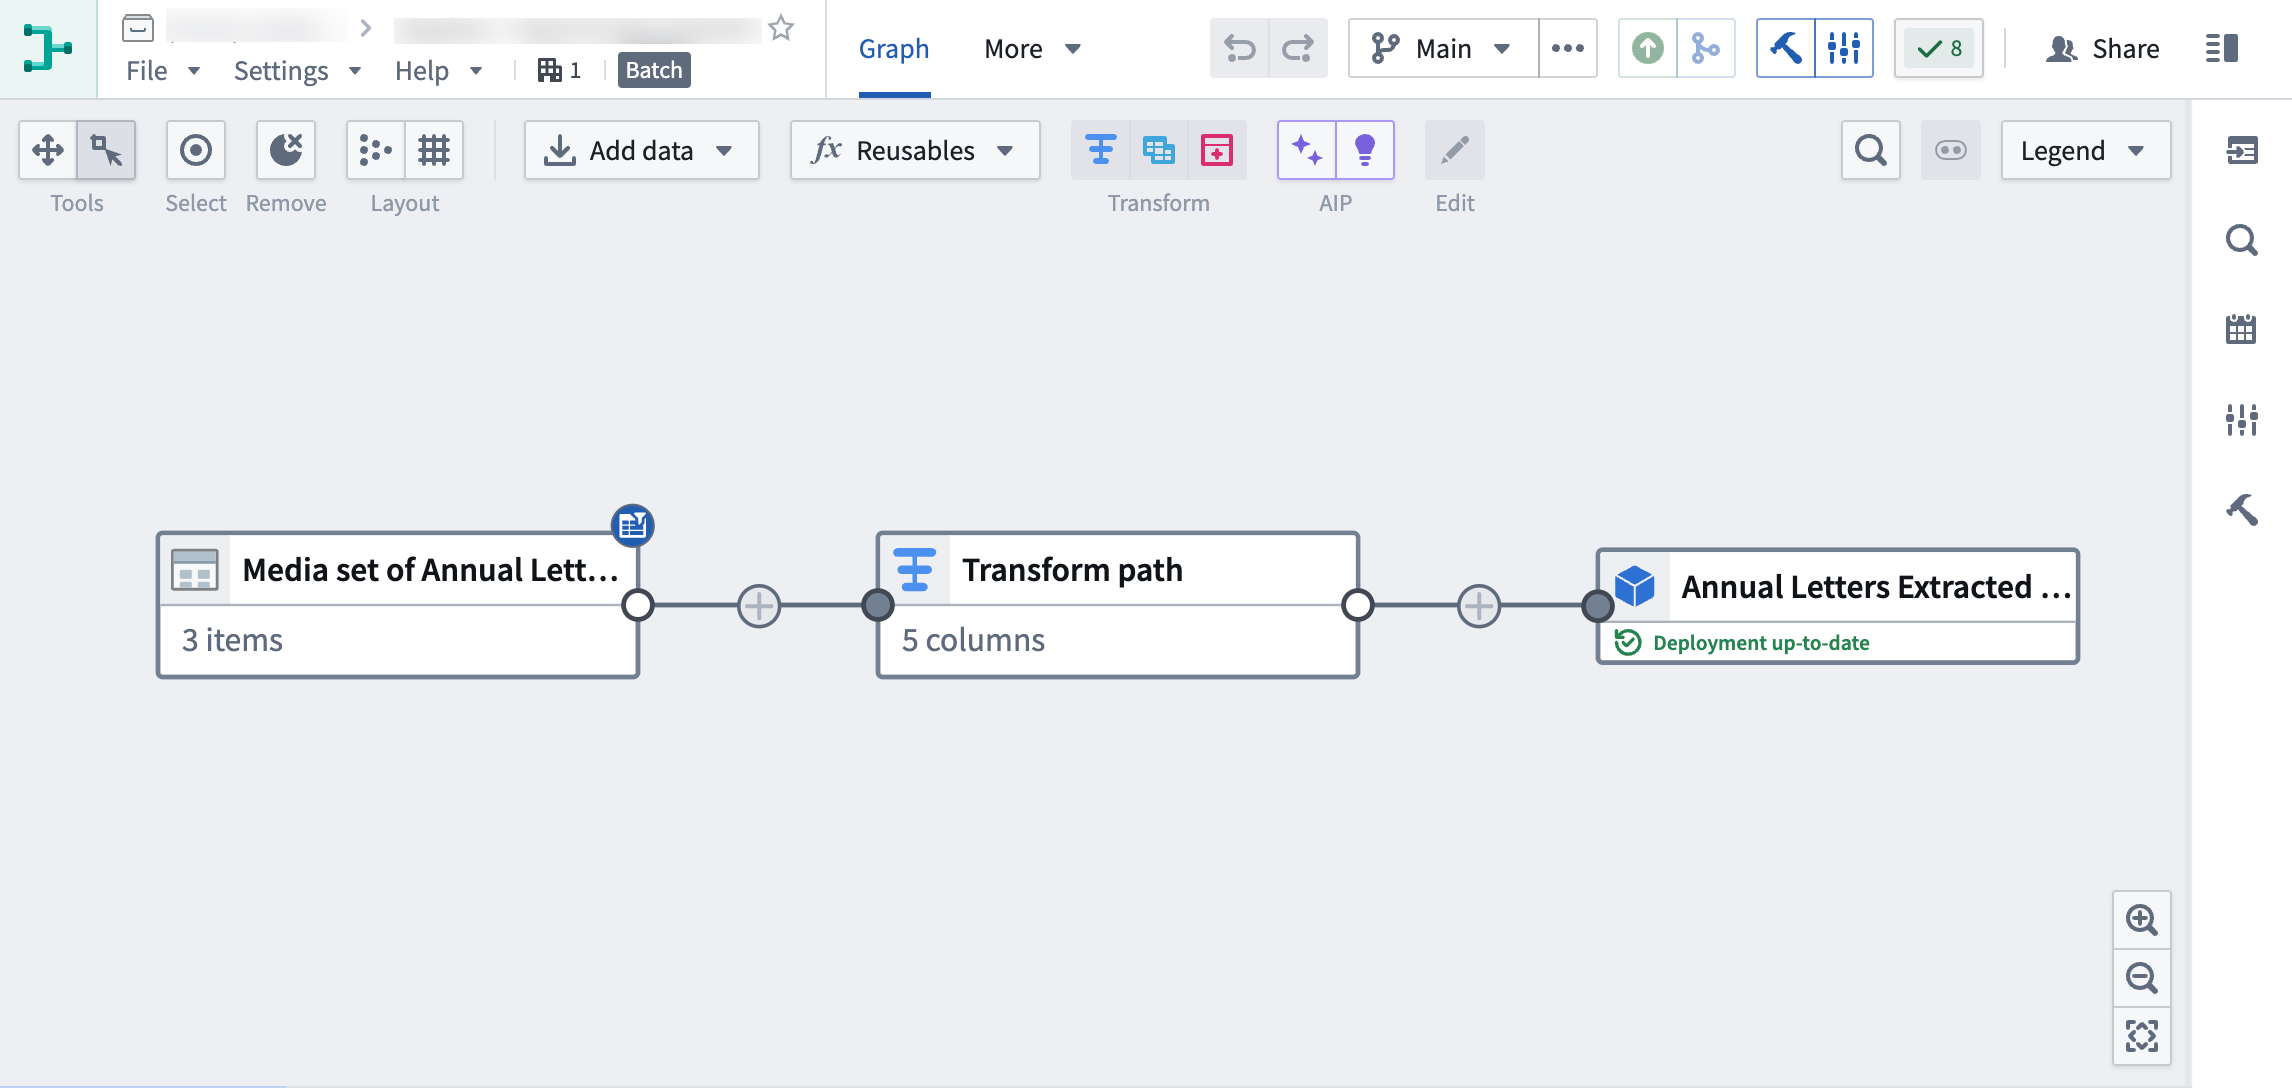
The pipeline will produce a new Object output of the extracted PDF text, which can be used for further exploration.
Part 1: Initial setup
First, create a new pipeline.
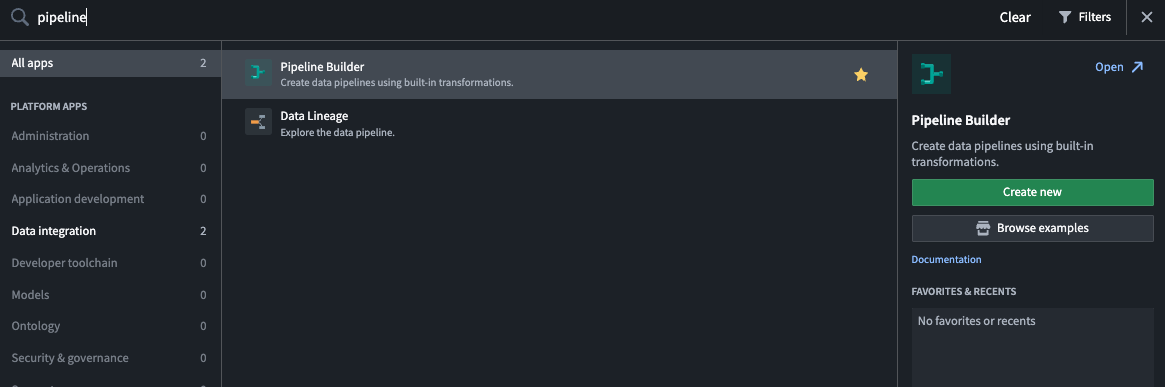
- When logged into Foundry, access Pipeline Builder from the left navigation bar. If Pipeline Builder is not in the list of applications, select View all and find Pipeline Builder under the Build & Monitor Pipelines section.
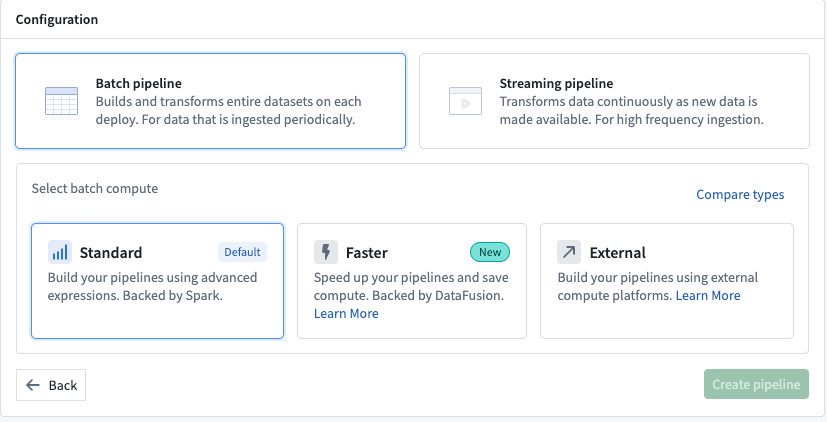
- Next, on the top right of the Pipeline Builder landing page, create a new pipeline by selecting New pipeline, then choose Batch pipeline. Under Select batch compute, choose Standard or Faster. For this example, choose Standard.
:::callout{theme="neutral"} The ability to create a streaming pipeline is not available on all Foundry environments. Contact Palantir Support for more information if your use case requires it. :::
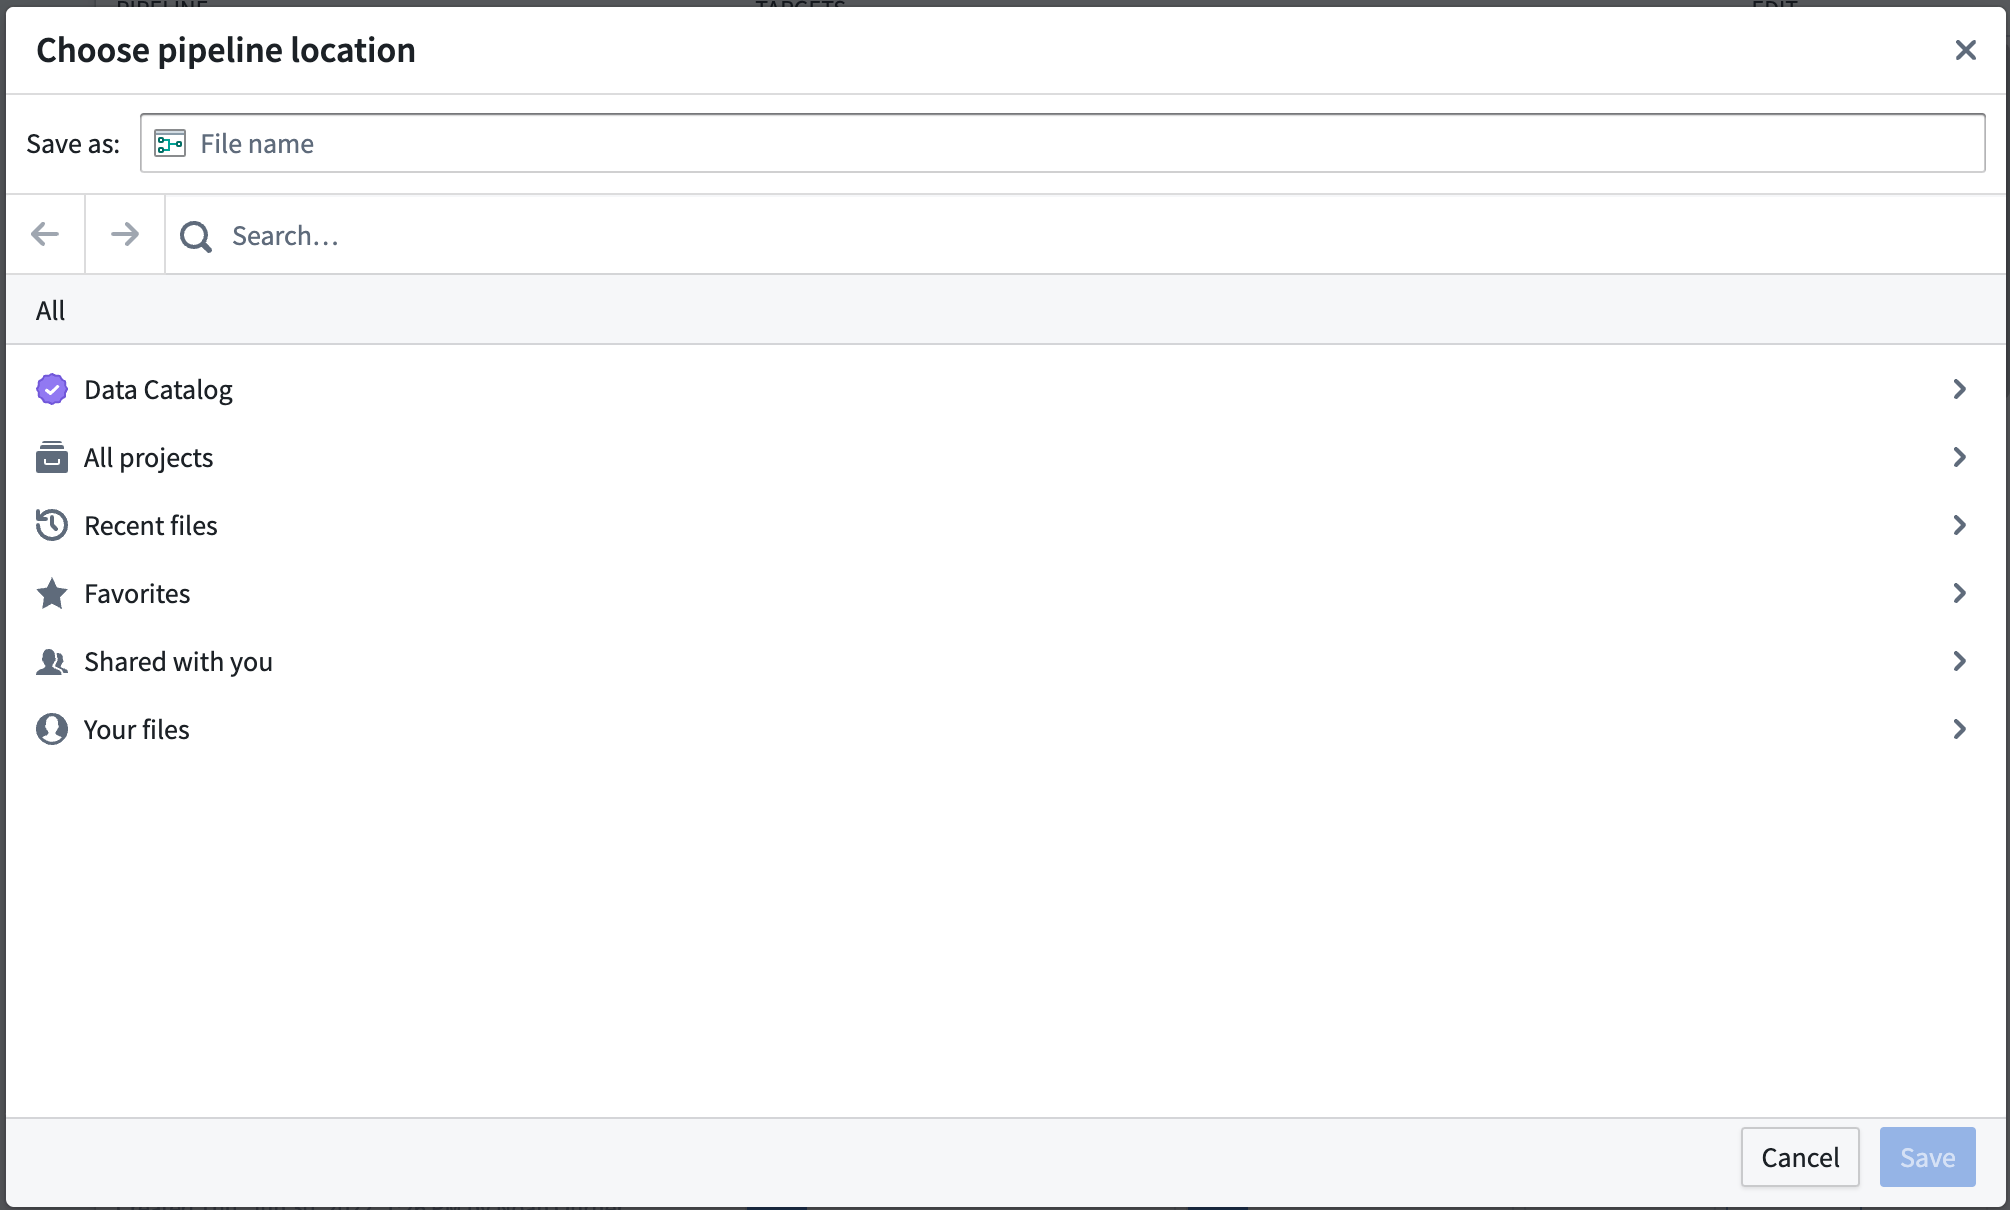
- Select a location to save your pipeline. Note that pipelines cannot be saved in personal folders.
- Choose Create pipeline.
Part 2: Add media sets
Now, you can add datasets to your pipeline workflow. For this tutorial, you will use PDFs of publicly available documents from Palantir.
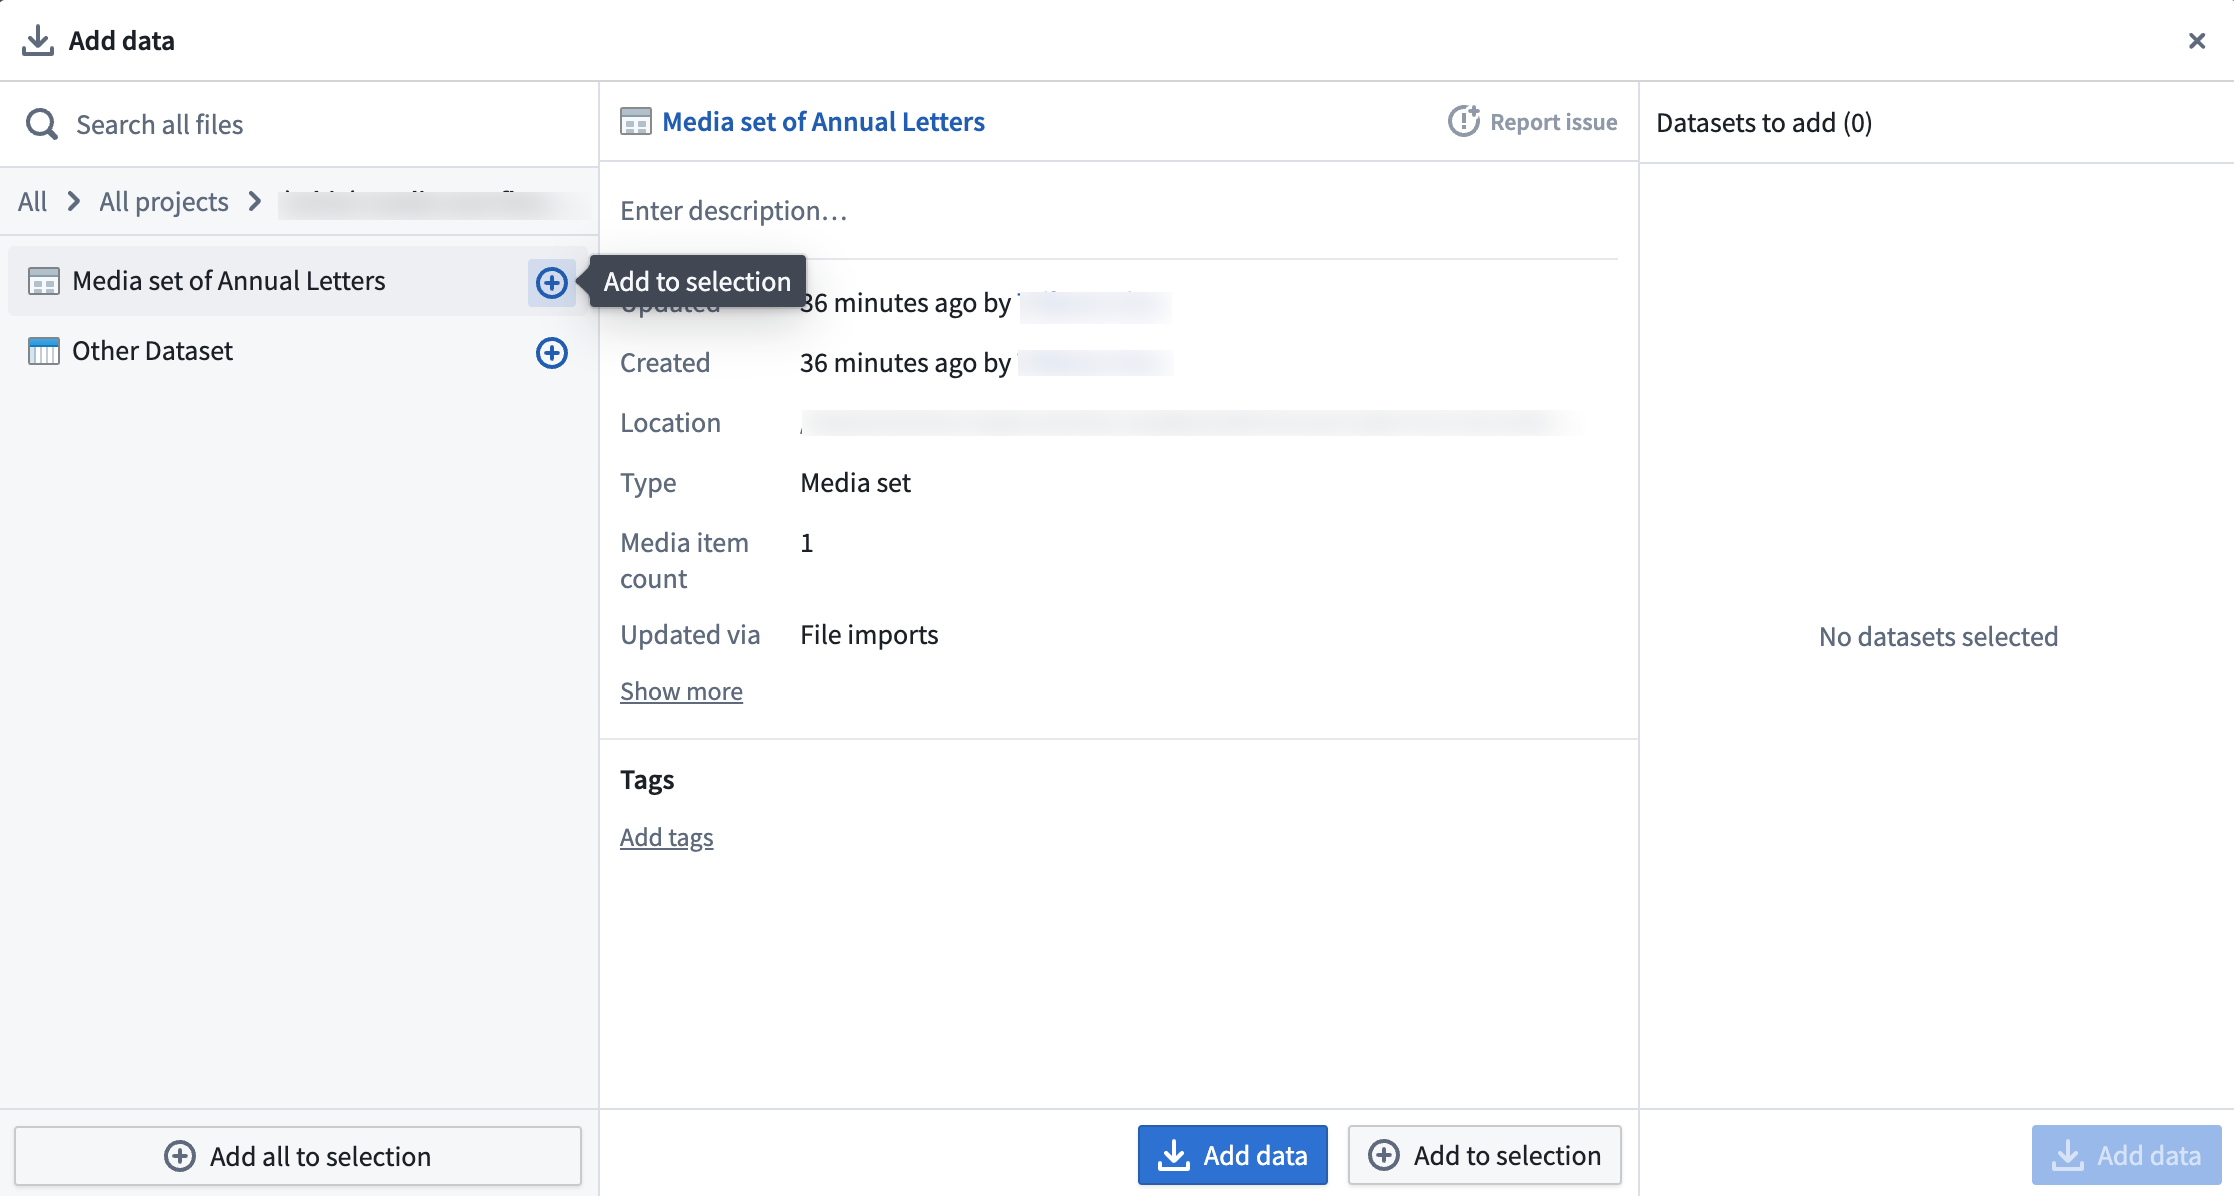
- From the Pipeline Builder page, select Add Foundry data on the home page.

You can also select the Add data action on the top panel.

Alternatively, you can drag and drop a file from your computer to use as your media set.
-
If you selected Add data or Add Foundry data, you will have the option to select your desired media sets.
-
When all media sets are selected, choose Add data.
-
When you have imported your media set you will be able to see the media set with thumbnail preview.

Part 3: Media set transformations
After adding raw media sets, you can perform some basic transformations. For this workflow, you will extract the text from these PDF files.
Extract text from PDF
You can directly transform media or extract information from media using media references. In this example, you will extract text from the Media set of Annual Letters media set.
-
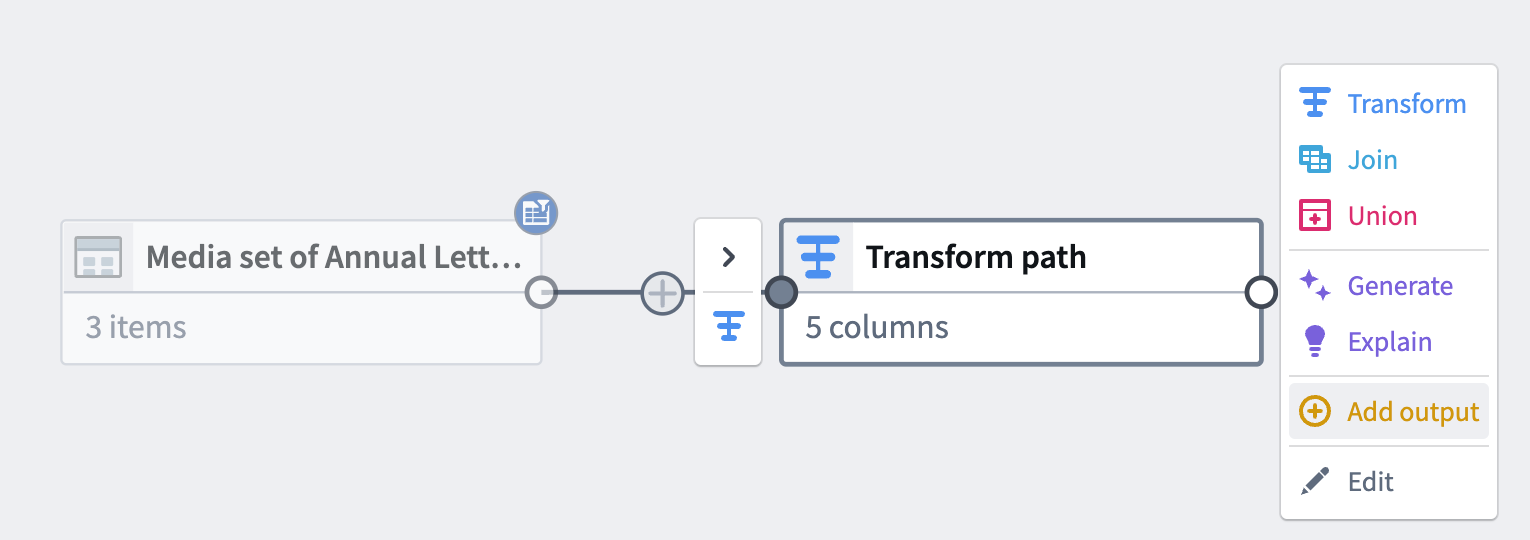
Choose the
Media set of Annual Lettersnode in your graph. -
Select Transform.
-
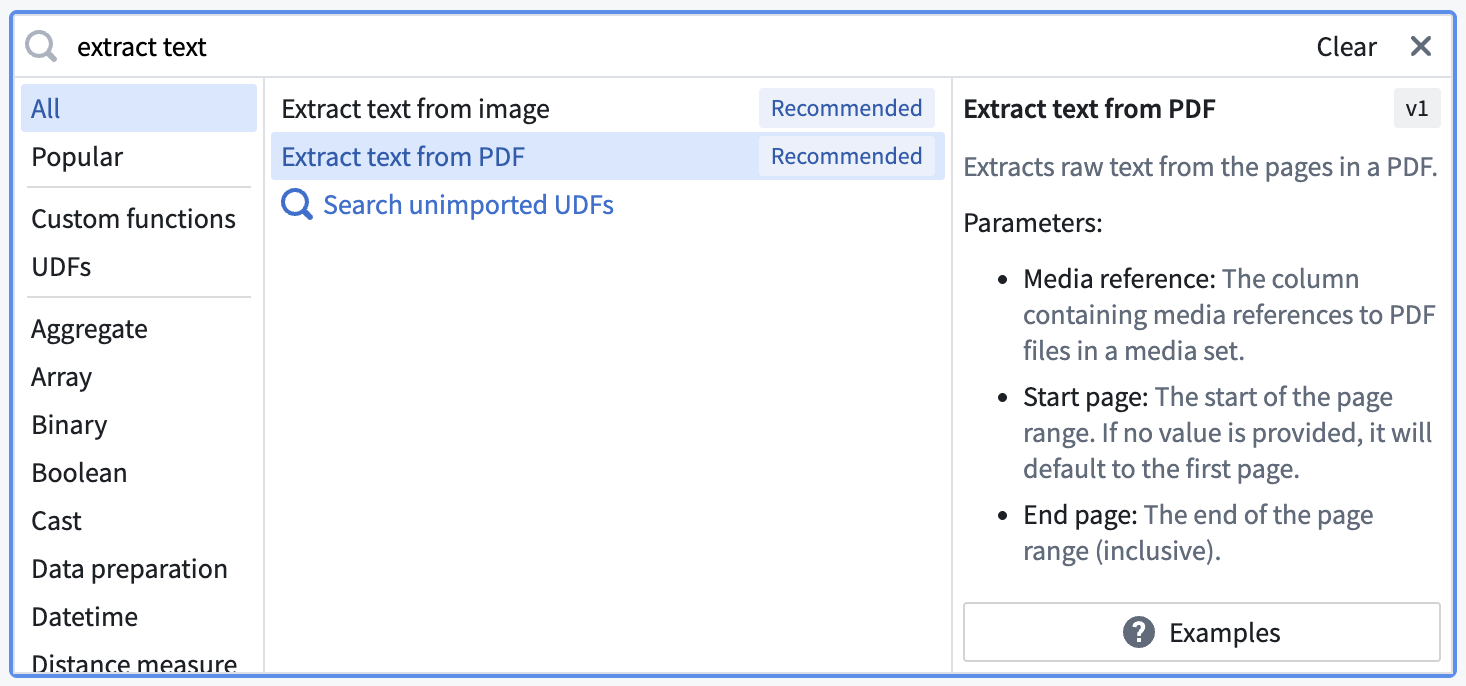
Search for and select the Extract text from PDF transform from the dropdown to open the board.
-
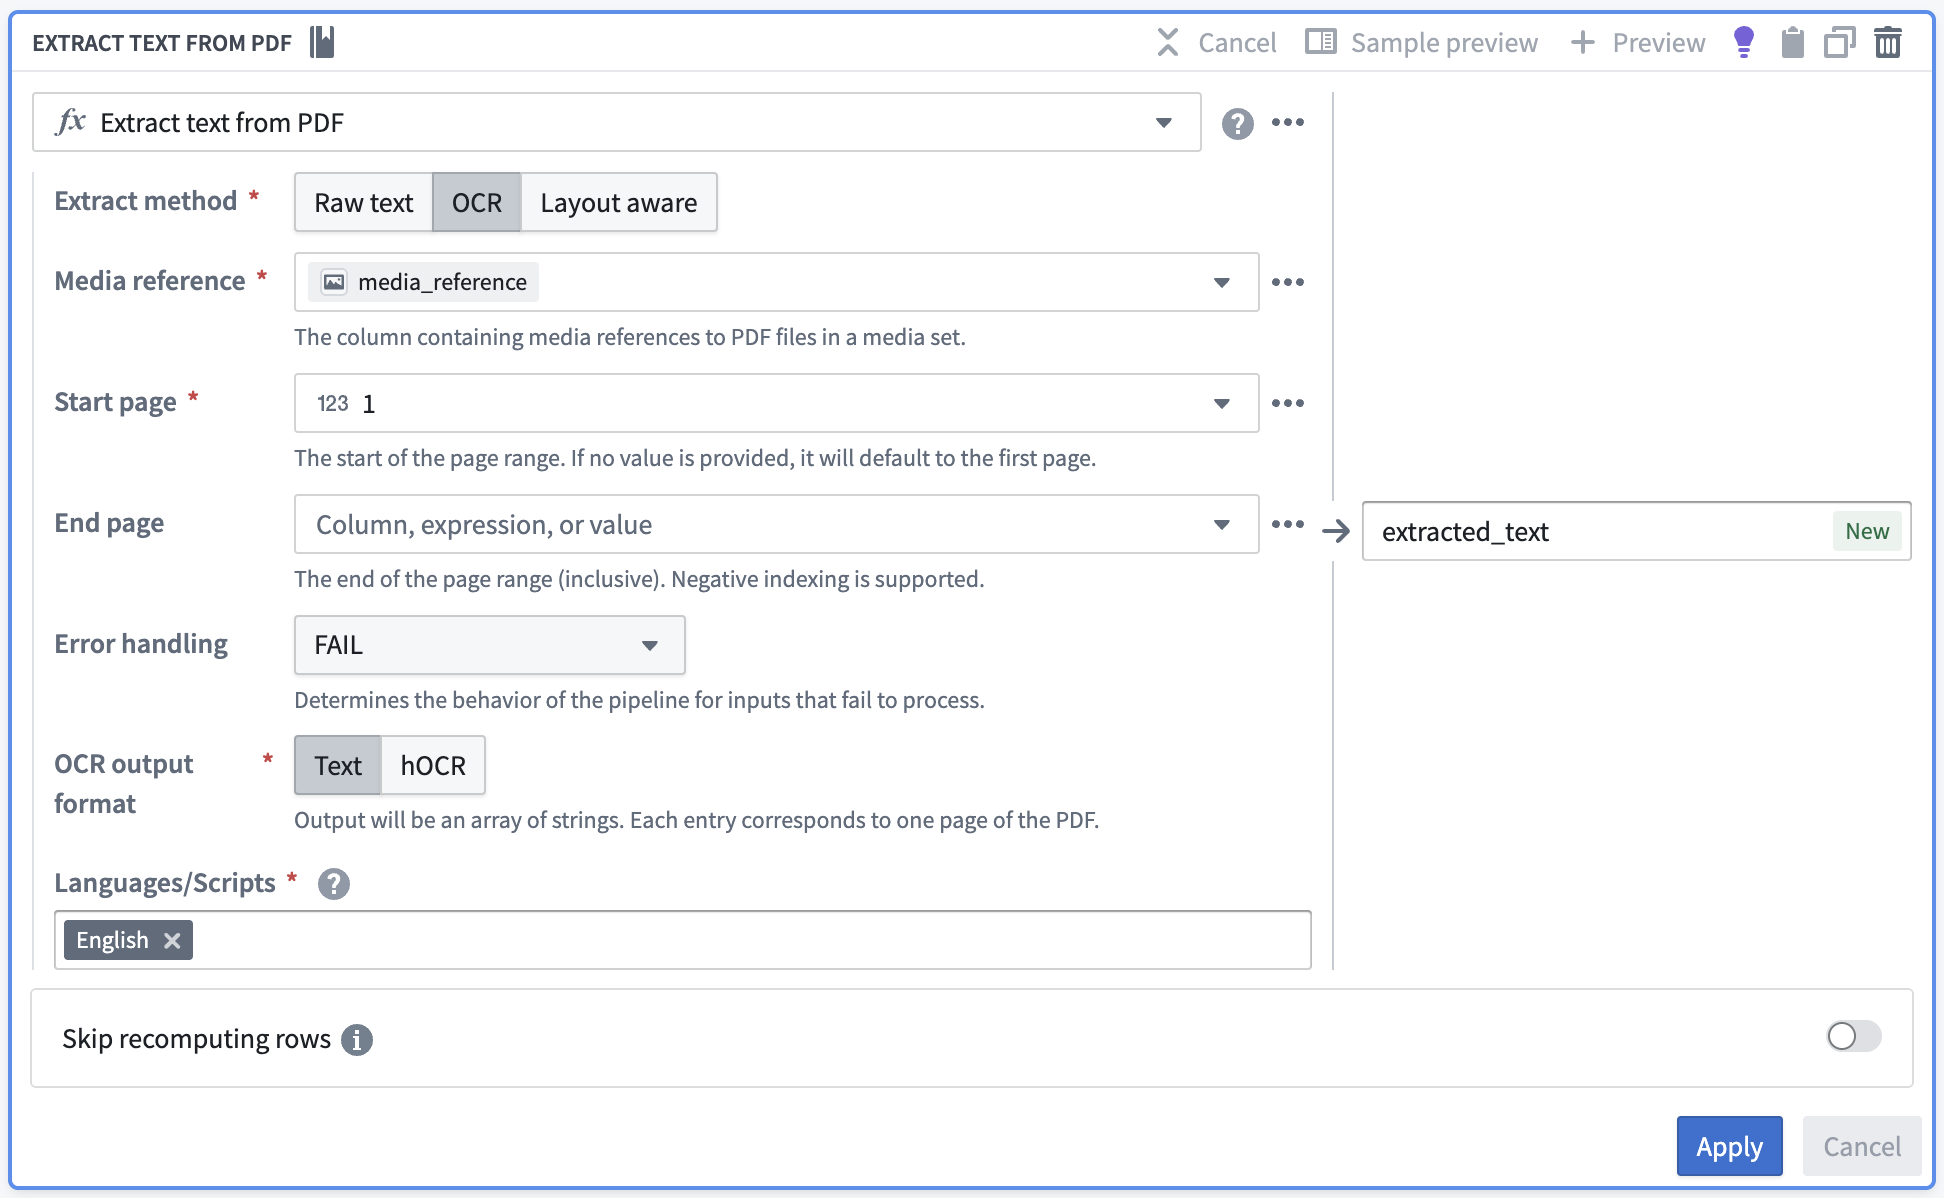
Select the extract method according to your needs and fill out the rest of the parameters.
-
Raw text: Computer-generated PDFs OCR: Photocopies-
Layout aware: Text and bounding boxes
-
Choose Apply to add the transform to your pipeline.
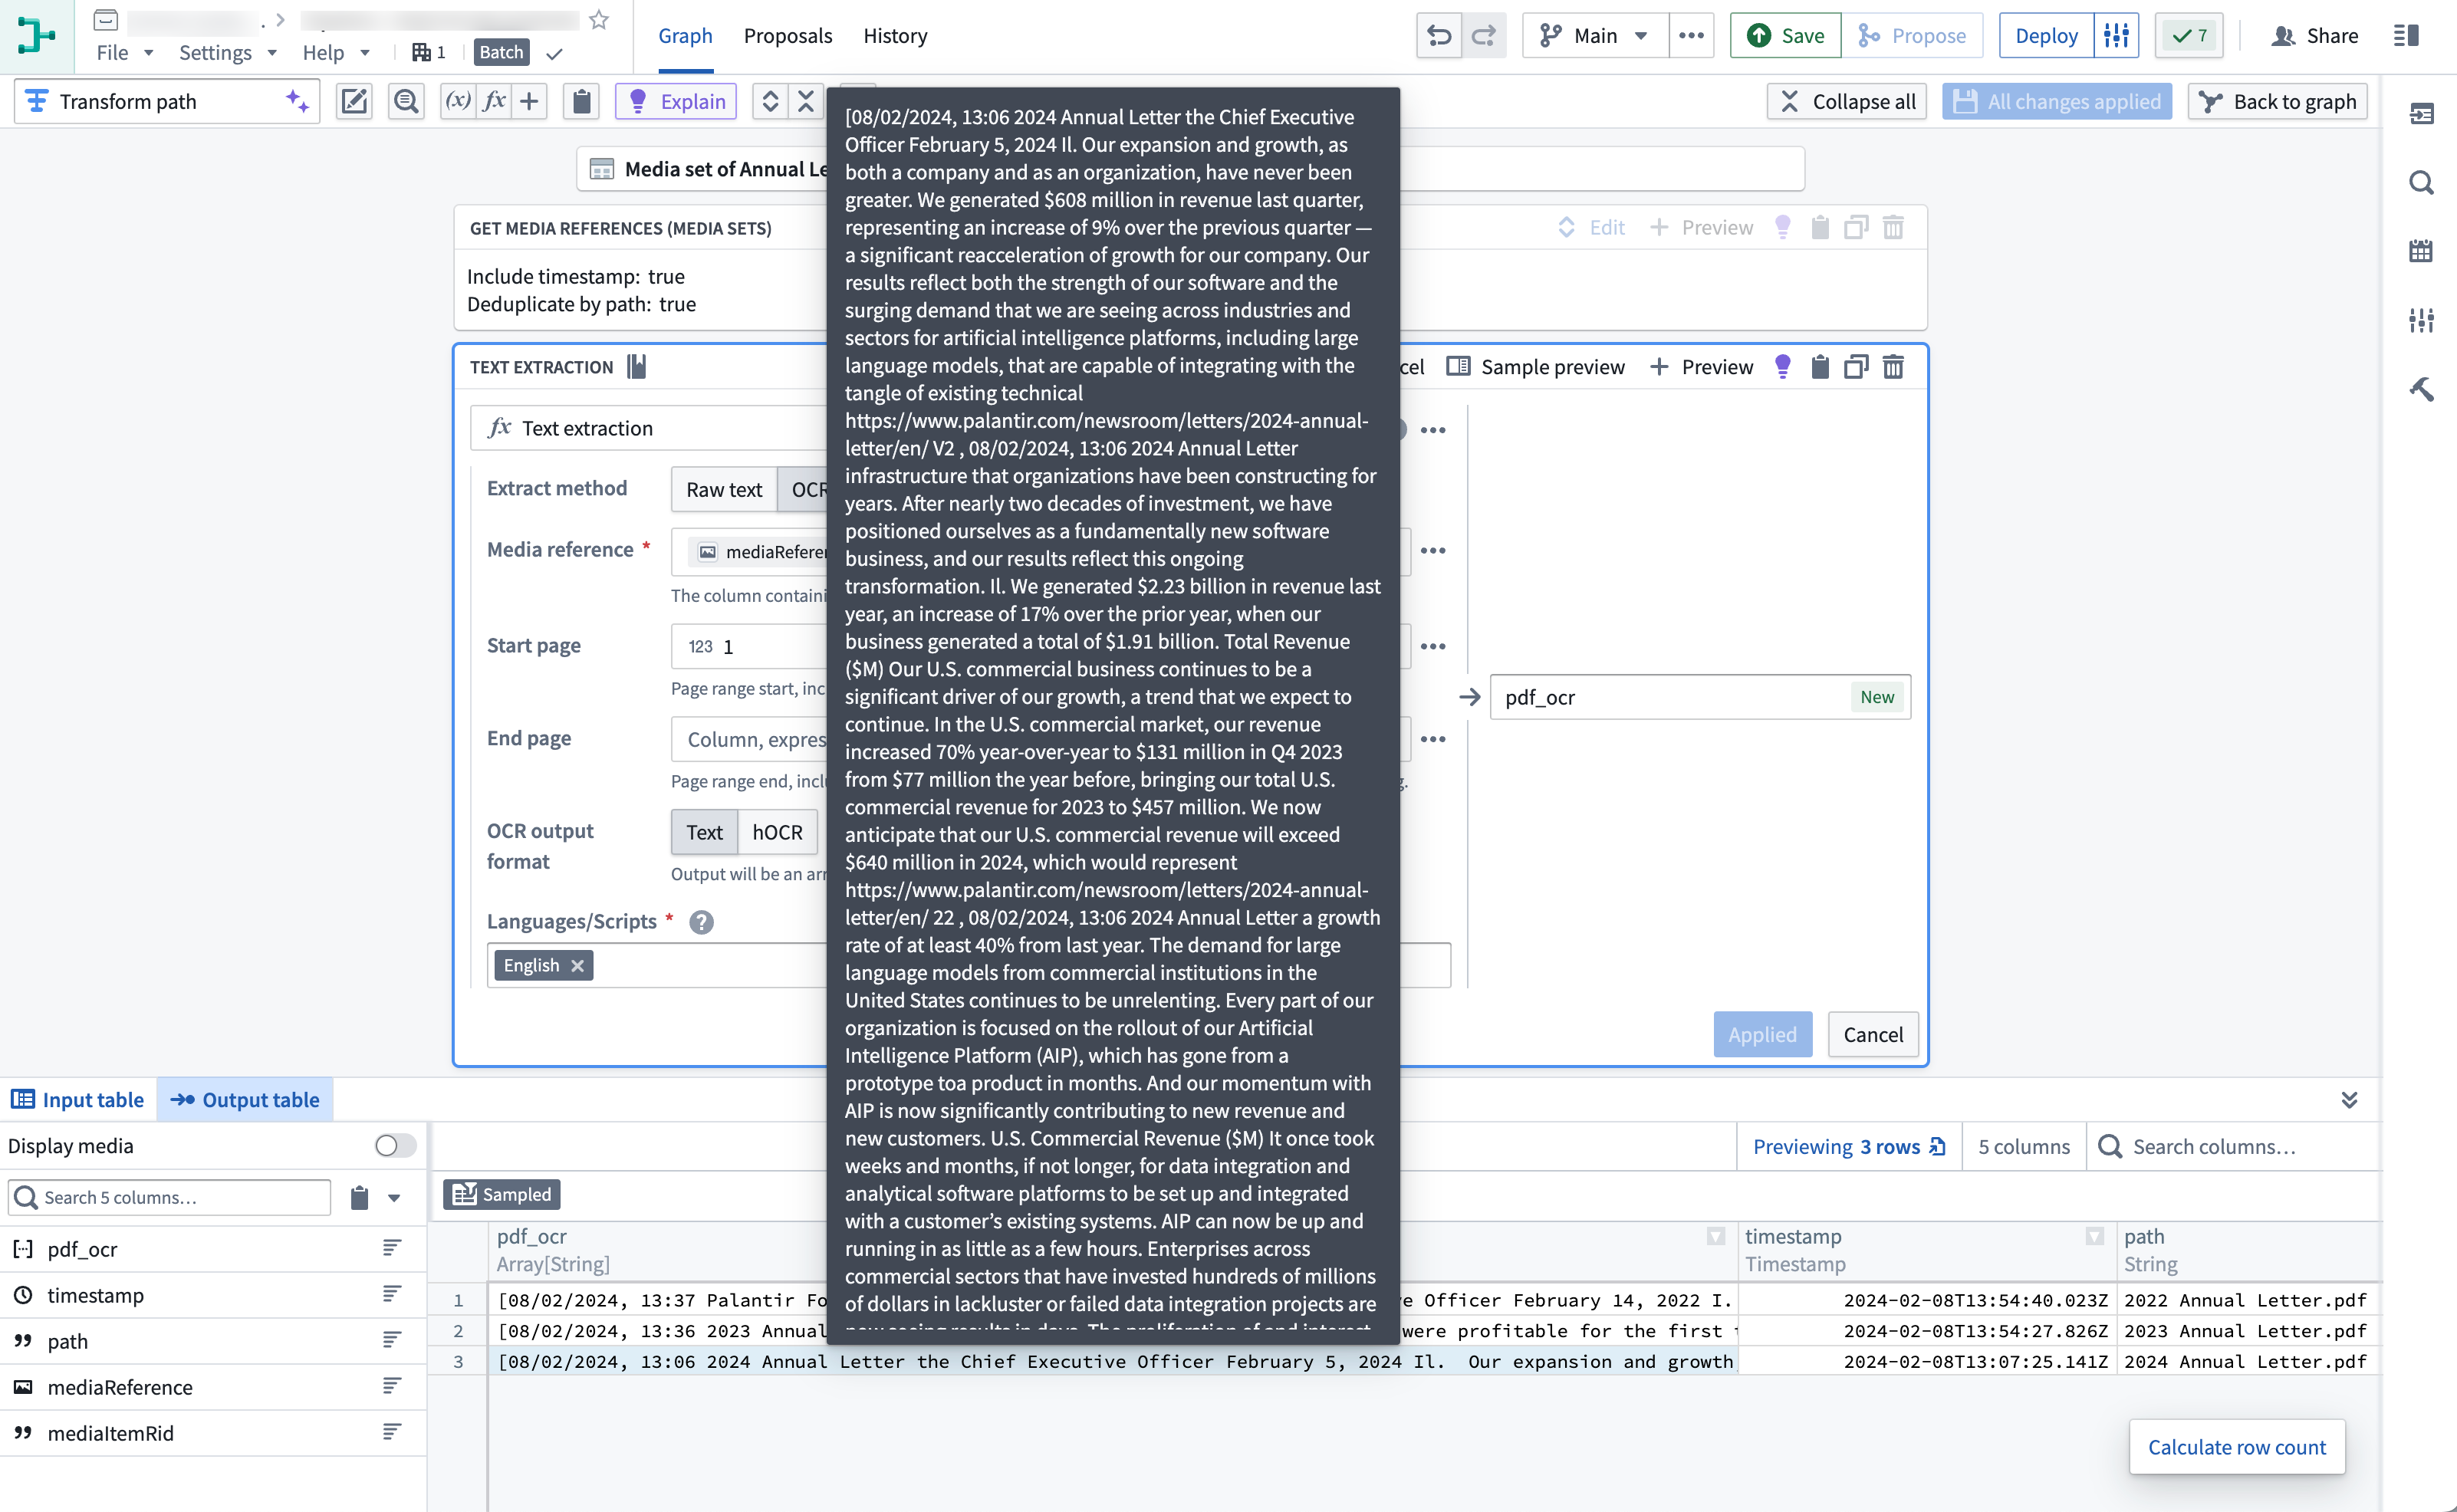
- Your output should look like this when you hover over the extracted text:
You can now run available string transformations on the extracted text column.
7. Select Close at the top right to return to your pipeline graph.
(Optional) Semantic search workflow
If desired, you can continue with a semantic search workflow with your extracted text.
Part 4: Add an output
Now that you have finished extracting text from your PDFs and potentially running extra string transformations, you can add an output. For this tutorial, you will add an object output.
-
In the
Transformsnode where you have completed your transformations, select Add output.
-
Select New object type.

-
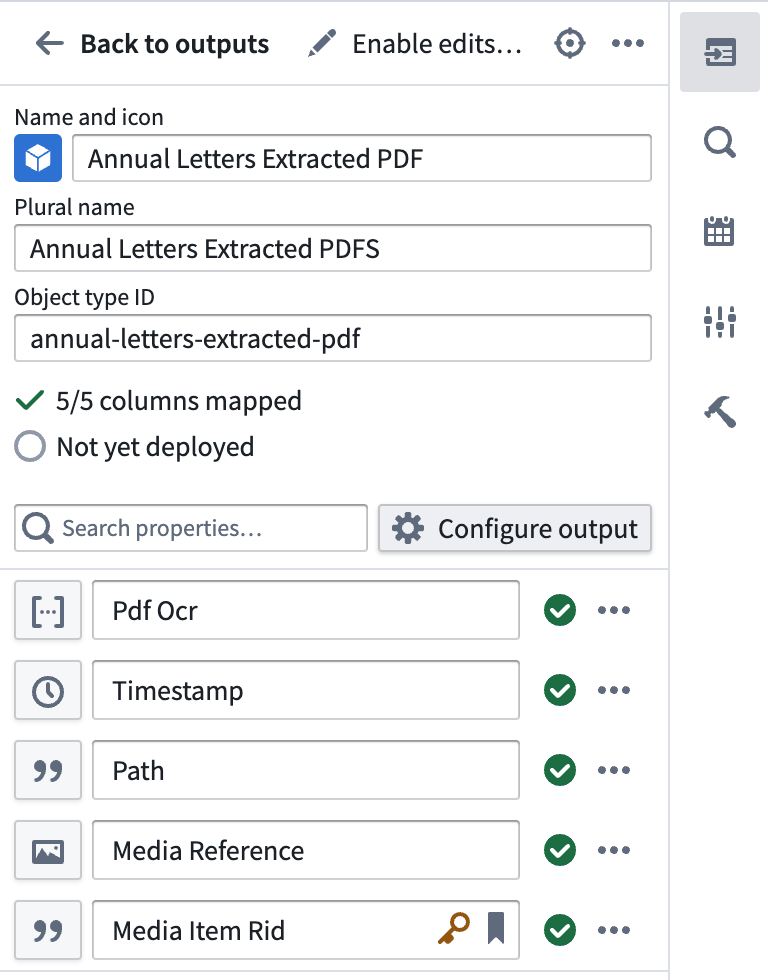
Name your object type and set the Ontology by choosing Please select an ontology.
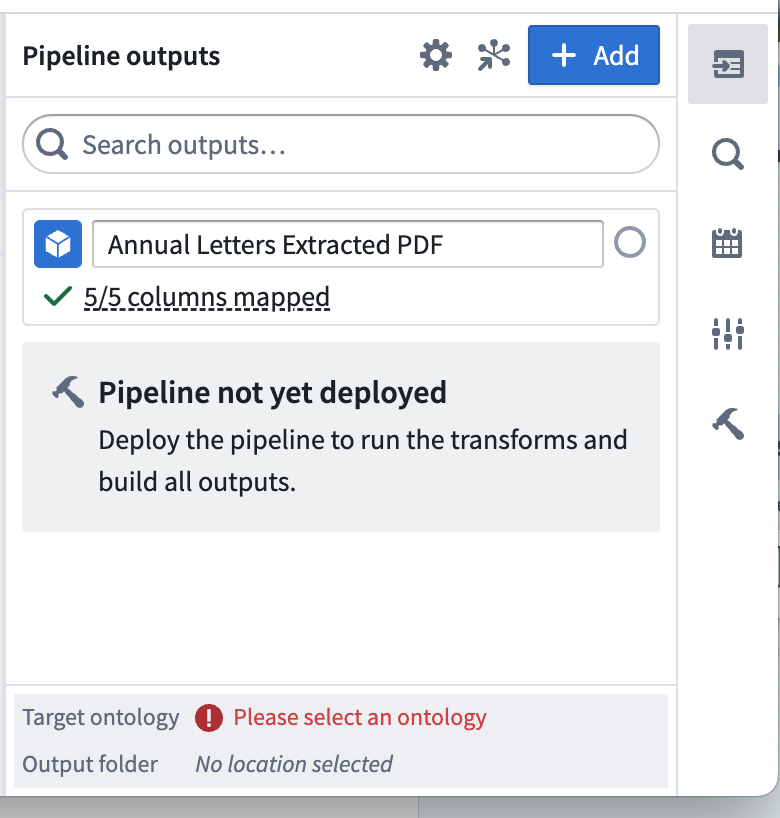
-
Select Edit and edit any column mapping. Ensure that you choose a valid column for the primary key.
Part 5: Build the pipeline
-
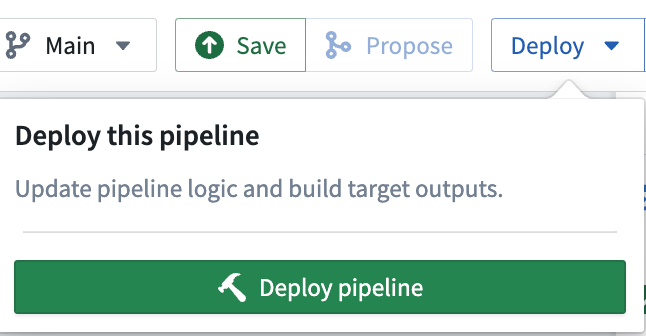
To build your pipeline, make sure to select Save, then Deploy > Deploy pipeline.
-
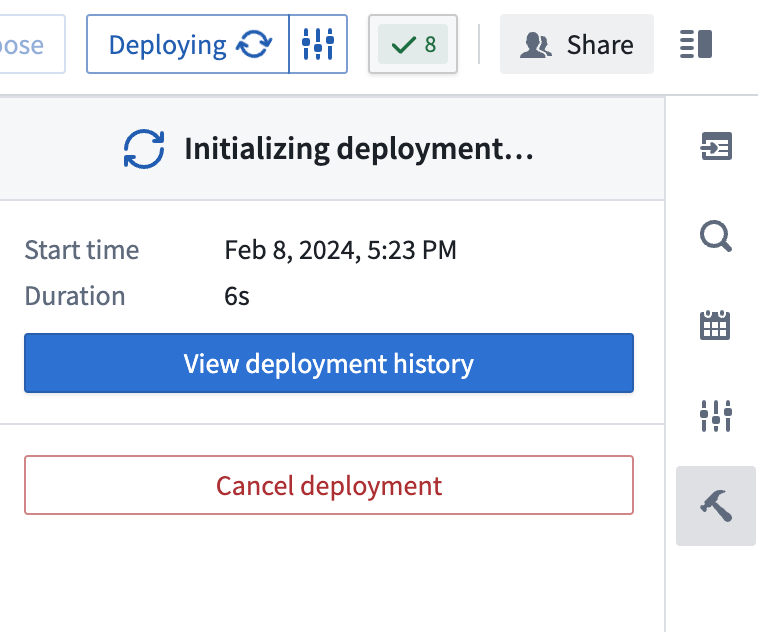
You should see
Intializing deploymentunder theDeploy Pipelinesidebar option.
-
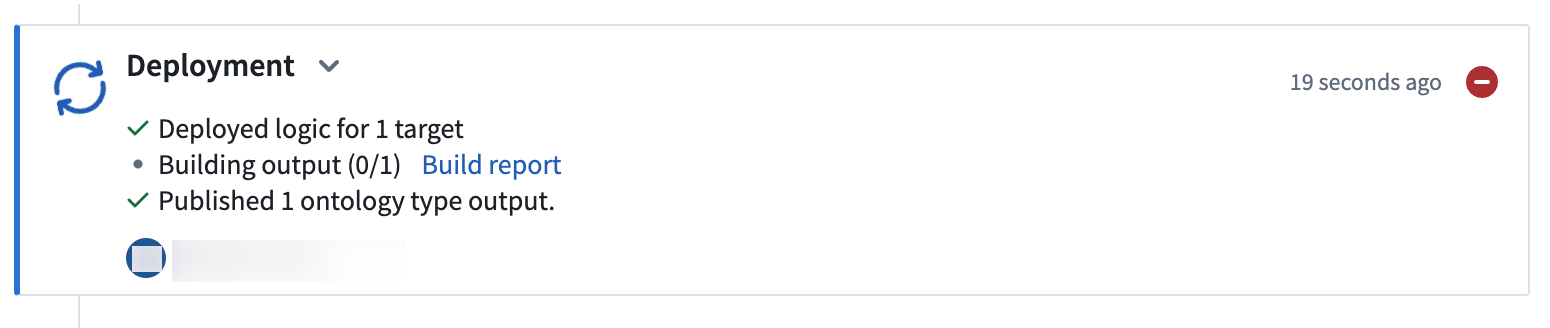
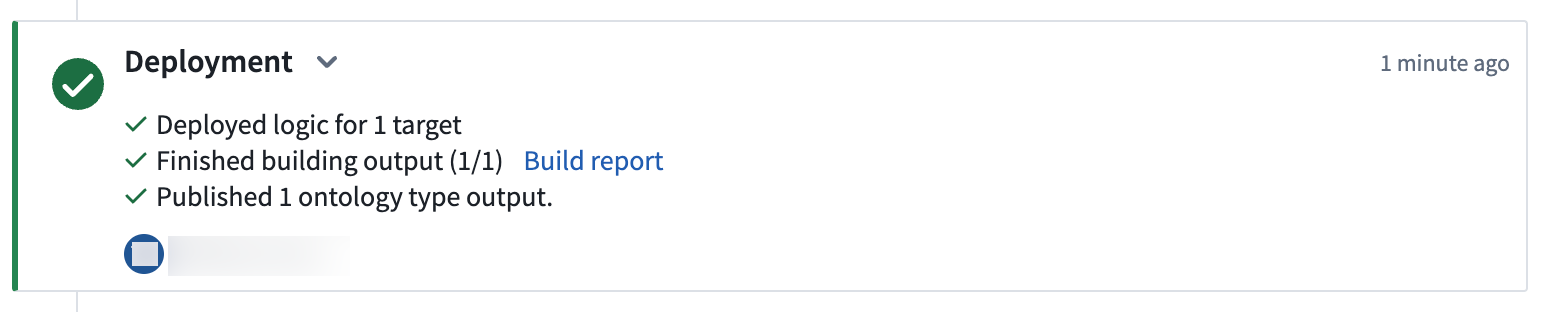
Select View deployment history to track the progress of your deployment. You should be led to the
Historytab in your pipeline where you can view the statuses and history of your deployments:
(Optional) Part 6: North of the Ontology
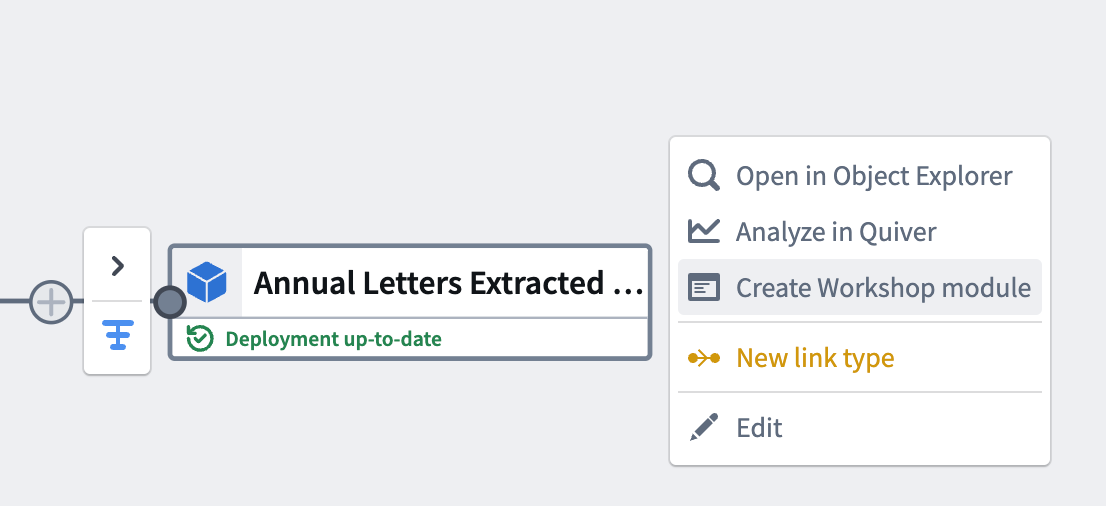
Once deployment has completed and your object is initialized, you should be able to directly action on your object output. Select Create Workshop module to generate a Workshop module with your pipeline output.
With this last step, you have generated your pipeline output and a Workshop module.
FAQ
Can I transform media before extracting data from it?
Yes, you can transform media before extracting data from it, and this works with many extraction operations including extracting text and using large language models (LLMs). As an example, consider a media set containing landscape-oriented images that need to be rotated clockwise 90 degrees before performing OCR-based text extraction. You can add an expression to rotate images and subsequently add an expression to extract text with OCR.

:::callout{theme="warning"} To safely write the pipeline results to a dataset output, you must remove the media reference column from the output schema as transformed media references are not valid column outputs.
To do this, remove the column using the output dialog. :::
中文翻译
使用 Pipeline Builder 创建媒体集批次管道(Media Set Batch Pipeline)
在本教程中,您将使用 Pipeline Builder 创建一个包含媒体集(Media Set)的标准批次管道(Batch Pipeline),用于从 PDF 文件中提取文本。
本示例使用 Palantir 发布的公开 PDF 文档。
教程结束时,您将得到一个如下图所示的数据管道:
该管道将生成一个新的对象输出(Object Output),其中包含提取的 PDF 文本,可用于进一步探索。
第一部分:初始设置
首先,创建一个新的管道。
- 登录 Foundry 后,从左侧导航栏访问 Pipeline Builder。如果 Pipeline Builder 不在应用程序列表中,请选择 查看全部(View all),然后在 构建与监控管道(Build & Monitor Pipelines) 部分找到 Pipeline Builder。
- 接下来,在 Pipeline Builder 着陆页的右上角,选择 新建管道(New pipeline) 创建新管道,然后选择 批次管道(Batch pipeline)。在 选择批次计算(Select batch compute) 下,选择 标准(Standard) 或 更快(Faster)。本示例选择 标准(Standard)。
:::callout{theme="neutral"} 并非所有 Foundry 环境都支持创建流式管道(Streaming Pipeline)。如果您的用例需要此功能,请联系 Palantir 支持团队获取更多信息。 :::
- 选择保存管道的位置。请注意,管道不能保存在个人文件夹中。
- 选择 创建管道(Create pipeline)。
第二部分:添加媒体集(Media Set)
现在,您可以将数据集添加到管道工作流中。本教程将使用 Palantir 的公开 PDF 文档。
- 在 Pipeline Builder 页面中,选择主页上的 添加 Foundry 数据(Add Foundry data)。
您也可以选择顶部面板上的 添加数据(Add data) 操作。
或者,您可以直接从计算机拖放文件作为媒体集使用。
-
如果您选择了 添加数据(Add data) 或 添加 Foundry 数据(Add Foundry data),您将可以选择所需的媒体集。
-
选择所有媒体集后,选择 添加数据(Add data)。
-
导入媒体集后,您将看到带有缩略图预览的媒体集。
第三部分:媒体集转换(Media Set Transformation)
添加原始媒体集后,您可以执行一些基本转换。在本工作流中,您将从这些 PDF 文件中提取文本。
从 PDF 提取文本
您可以直接转换媒体或使用媒体引用(Media Reference)从媒体中提取信息。在本示例中,您将从 年度信件媒体集(Media set of Annual Letters) 中提取文本。
-
在图中选择
年度信件媒体集(Media set of Annual Letters)节点。 -
选择 转换(Transform)。
-
从下拉菜单中搜索并选择 从 PDF 提取文本(Extract text from PDF) 转换,以打开面板。
-
根据需求选择提取方法,并填写其余参数。
-
原始文本(Raw text):计算机生成的 PDF OCR:复印件-
布局感知(Layout aware):文本和边界框
-
选择 应用(Apply) 将转换添加到管道中。
- 当您悬停在提取的文本上时,输出应如下所示:
现在,您可以对提取的文本列运行可用的字符串转换。
7. 选择右上角的 关闭(Close) 返回管道图。
![]()
(可选)语义搜索工作流(Semantic Search Workflow)
如果需要,您可以继续使用提取的文本进行语义搜索工作流(Semantic Search Workflow)。
第四部分:添加输出(Output)
现在您已完成从 PDF 中提取文本并可能运行了额外的字符串转换,可以添加输出了。本教程将添加一个对象输出(Object Output)。
-
在完成转换的
转换(Transforms)节点中,选择 添加输出(Add output)。
-
选择 新建对象类型(New object type)。
-
命名您的对象类型,并通过选择 请选择本体论(Please select an ontology) 设置本体论(Ontology)。
-
选择 编辑(Edit) 并编辑任何列映射。确保为主键选择有效的列。
第五部分:构建管道(Build the Pipeline)
-
要构建管道,请确保选择 保存(Save),然后选择 部署(Deploy) > 部署管道(Deploy pipeline)。
-
您应该在
部署管道(Deploy Pipeline)侧边栏选项下看到正在初始化部署(Initializing deployment)。
-
选择 查看部署历史(View deployment history) 以跟踪部署进度。您将被引导至管道的
历史(History)选项卡,在那里可以查看部署的状态和历史:
(可选)第六部分:本体论以北(North of the Ontology)
部署完成且对象初始化后,您应该能够直接对对象输出进行操作。选择 创建 Workshop 模块(Create Workshop module),使用管道输出生成一个 Workshop 模块。
通过这最后一步,您已生成了管道输出和一个 Workshop 模块。
常见问题解答(FAQ)
我可以在提取数据之前转换媒体吗?
可以,您可以在提取数据之前转换媒体,这适用于许多提取操作,包括提取文本和使用大型语言模型(LLM)。例如,考虑一个包含横向图像的媒体集,这些图像需要在执行基于 OCR 的文本提取之前顺时针旋转 90 度。您可以添加一个表达式来旋转图像,然后添加另一个表达式来使用 OCR 提取文本。
:::callout{theme="warning"} 为了安全地将管道结果写入数据集输出,您必须从输出模式中移除媒体引用列(Media Reference Column),因为转换后的媒体引用不是有效的列输出。
为此,请使用输出对话框移除该列。 :::