Create a schedule(创建调度(Schedule))
The Data Lineage schedule editor is where you can create new schedules and edit existing schedules. You can also view metrics on existing schedules and see how the schedule will build your datasets.
Navigate to the schedule editor
The following steps guide you to the Data Lineage schedule editor, where you can create a new schedule:
-
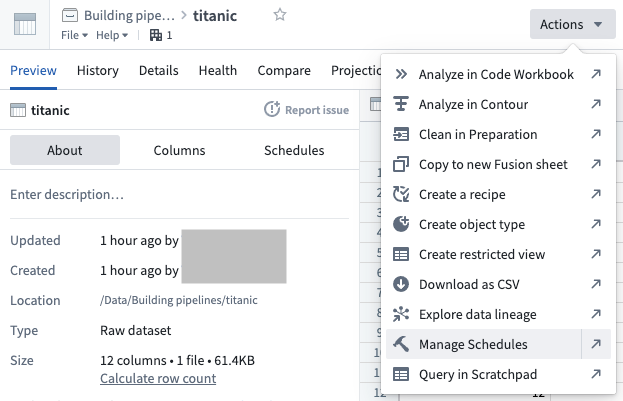
Navigate to the dataset preview of the dataset for which you would like to schedule a build, open the Actions menu, and select Manage Schedules.
-
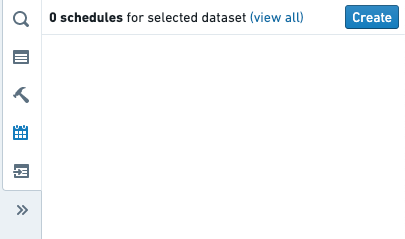
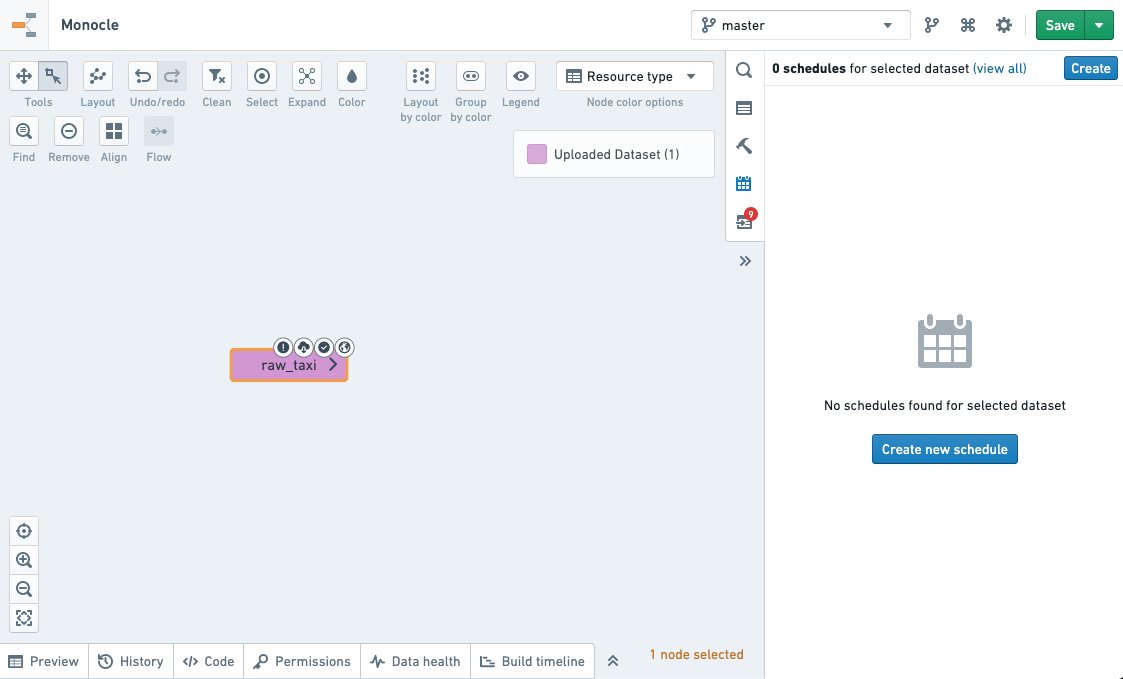
This will bring you to a Data Lineage graph, with the schedules panel to the right listing all current schedules that affect the dataset.
To create a schedule, click the Create schedule button.
- This will bring you to the schedule editor.
Define the schedule
To define a schedule, you will need to complete the following sections.
:::callout{theme="neutral" title="Branch selection"} When creating schedules in Data Lineage, the schedules apply to the branches (including fallback branches) configured in the graph. :::
Target dataset(s)
The target datasets specify the datasets at the end of the build. By default, only these datasets will be built. In other configurations, these datasets may be the last in a line of datasets being built.
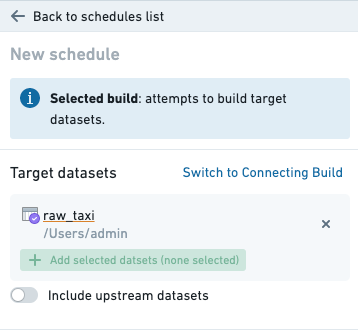
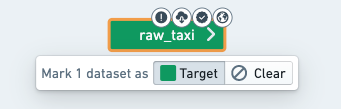
Target datasets can be selected by adding them to the graph and marking them as a target.
The datasets will be built on the branch set in the top right of the Data Lineage window. Datasets on the graph will be colored according to how they will affect or be affected by the schedule.
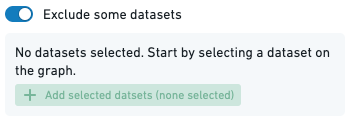
Excluded datasets
Excluded datasets specify the datasets that will be ignored during graph traversal when determining which datasets to build. All datasets upstream of ignored datasets will not be built.
When to build
The trigger specifies when the build should run. The build will be run when the condition defined in the trigger is satisfied.
There are two basic types of triggers:
- Time: A time trigger is satisfied at specified instants in time.
Learn more about time triggers.
- When dataset(s) update: Satisfied once a specified datasets update has occurred in the platform.
Learn more about event triggers.
Triggers may be combined to create a more complex compound trigger. The method used to combine triggers can be selected using the menu in the trigger editor:
-
Any of these triggers: The trigger will be satisfied when any of the component triggers are satisfied.
-
All of these triggers: The trigger will be satisfied when all of the component triggers are satisfied.
-
Advanced configuration: Explicitly configure how to combine the component triggers.
When advanced configuration is selected, the component triggers are combined by inserting the keywords AND and OR between two triggers. A compound trigger can be further combined by putting it inside parenthesis ( and ).
-
ANDindicates that the compound trigger will be satisfied when both of the component triggers are satisfied. -
ORindicates that the compound trigger will be satisfied when either of the component triggers are satisfied.
Learn more about compound triggers.
Build type
The build type specifies how to build the selected datasets:
-
Single build: Build the target datasets (no other datasets will be built).
-
Full build (include upstream): Build all target datasets and all upstream datasets of this target, except excluded datasets. Datasets built may change if upstream dependencies change.
-
Connecting build: Build all datasets between the input datasets (excluded) and target datasets (included). If a dataset is between an input dataset and a target dataset but is explicitly added as an input, it will still be built by the schedule. If a dataset is chosen as a target dataset, but there is no build path from an input dataset to the target dataset, the target dataset will not be built.
For a connecting build, all of the datasets connecting the target datasets and upstream datasets must be connected by a job spec path on the branch on which the schedule is set.
We illustrate the above with an example lineage below with datasets D1, ..., D6, where two different branches of the dataset D2 are used as inputs to D3 and D4. A connecting build schedule on the master branch with input D1 and targets D5 and D6 will attempt to build only D2, D4 and D6.
This behavior occurs because a connecting build selection between input D1 to target D6 on the master branch will select datasets D2, D4, and D6, since a job spec path exists between datasets D1 and D6. However, a connecting build selection between input D1 to target D5 will not exist, as the job spec path along the master branch is broken.
D1 (master) --> D2 (master) --> D4 (master) --> D6 (master)
                 |
                 | D2 (develop)
                 |
                  --> D3 (master) --> D5 (master)
To include dataset D3 in the scheduled build for this example, the build should be changed to a full build, which would include D3 as well as the input D1 as it is upstream of D5. Alternatively, to remain as a connecting build selection, the transform which has D2 (develop) as an input and D3 as an output can be edited to include an additional dummy input D7 on the master branch, as below. The connecting scheduled build on the master branch with input D1 and targets D5 and D6 will now build D2, D3, D4, D5, and D6.
D1 (master) --> D2 (master) --> D4 (master) --> D6 (master)
                 |
                 | D2 (develop)
                 |
D7 (master) -------> D3 (master) --> D5 (master)
:::callout{theme="neutral" title="Connecting build branch selection"} For a connecting build schedule, if you are using datasets from different branches than the branch containing the schedule, then a connecting job spec path on the same branch must exist between the input and target builds in order for these datasets to be included in the build. :::
Build scope
To account for the dynamic nature of data pipelines, the set of datasets to be included in the build is evaluated every time the schedule is triggered. The build scope defines the boundaries for the schedule build, these boundaries will remain fixed even as the content of the pipeline changes. There are two scoping options available:
- By Projects: The schedule will be allowed to build only eligible datasets within the selected Projects.
- By user account: The schedule will be allowed to build only datasets that the schedule creator/editor is allowed to build.
Project scoping
Project scoping assures the schedule runs only on datasets within the selected Projects. It allows the schedule to run unaffected by changing user permissions. This option is most reliable when the build content is unlikely to change to the extent that it can no longer run within the selected Projects (as described below).
A build cannot be Project scoped in the following cases:
- You do not have permissions to create schedules on the Project.
- You do not have sufficient permissions to build the datasets.
- The schedule settings cover datasets that remove markings (you can see this in Data Lineage when the graph is colored by Permissions).
- The schedule settings cover datasets that must build with a user account.
- The schedule content cannot be resolved to a distinct set of Projects.
User scoping
With user scoping, the schedule build will be triggered on behalf of the user who last edited (or created) the schedule. Therefore, the build will only include datasets that the user is permitted to build. This option is most reliable when the scheduled pipeline is likely to change and render Project scoping impossible (e.g. datasets are moved to another Project, new datasets require to run with a user account, etc.).
:::callout{theme="warning" title="Warning"} If the user is deactivated or loses permission to datasets that are essential to the build, the schedule build will fail to start. When scoping by user account, make sure the account has reliable permissions and remember to change the ownership if the user is about to be deactivated. :::
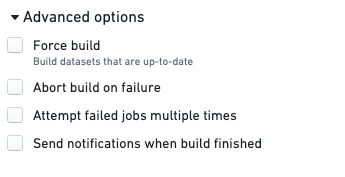
Advanced settings
The advanced settings specify additional build options:
-
Abort build on failure: If any job in the build is unsuccessful, immediately finish the build by canceling all other jobs.
-
Customize the number of attempts for failed jobs: The number of run attempts for failed jobs. Retried jobs are run as part of the same build. A job is not considered failed until all retries have been attempted or an error occurs indicating that retries cannot be performed. Setting this value to 1 will prevent retries, as the job will only be attempted once. Be aware that not all types of failures can be retried. The number of retries when the schedule runs will be capped to a maximum configured by your administrator.
-
Force build: Ignore staleness information when running the build. All datasets will be built whether or not they are stale. This option is almost never required. The rare instances in which this option is necessary are:
- Data Connection syncs: Data Connection syncs are always marked as up to date because they have externally originating inputs; Foundry does not know whether there have been updates to the external data or not. We recommend scheduling Data Connection syncs separately from the rest of a build to ensure that only the syncs get force-built.
- Object Storage V1 (Phonograph) syncs
:::callout{theme="warning" title="External transform schedules"} Transforms that make API calls behave differently from Data Connection syncs. These transforms are always considered stale, and any build schedule will trigger them without requiring the Force build option. :::
- Re-trigger upon successful build: Repeatedly triggers the schedule to keep building until all the inputs have been processed and the targets of the schedule are no longer stale. For this setting to have an effect, the schedule must:
- Contain at least one target output that uses either incremental transaction limits for datasets or incremental batch limits for media sets. If there are no such outputs in the schedule, a warning with the text
No resources in this schedule require re-triggeringwill be displayed. - Have the Force build setting disabled.
Save the schedule
When you have finished defining your schedule, click the Save schedule button.
This will bring you back to the schedules page where you should see the saved schedule.
中文翻译
创建调度(Schedule)
数据沿袭(Data Lineage)调度编辑器可用于创建新调度和编辑现有调度。您还可以查看现有调度的指标,并了解调度将如何构建您的数据集。
导航至调度编辑器
以下步骤将引导您进入数据沿袭(Data Lineage)调度编辑器,您可以在其中创建新调度:
-
导航至您想要为其调度构建的数据集的数据集预览(dataset preview),打开 操作(Actions) 菜单,然后选择 管理调度(Manage Schedules)。
-
这将带您进入数据沿袭(Data Lineage)图,右侧的调度面板列出了所有影响该数据集的当前调度。
要创建调度,请点击 创建调度(Create schedule) 按钮。
- 这将带您进入调度编辑器。
定义调度
要定义调度,您需要完成以下部分。
:::callout{theme="neutral" title="分支选择(Branch selection)"} 在数据沿袭(Data Lineage)中创建调度时,调度适用于图中配置的分支(包括回退分支)。 :::
目标数据集(Target dataset(s))
目标数据集指定了构建结束时的数据集。默认情况下,只会构建这些数据集。在其他配置中,这些数据集可能是一系列被构建数据集的最后一个。
可以通过将数据集添加到图中并将其标记为目标来选择目标数据集。
数据集将在数据沿袭(Data Lineage)窗口右上角设置的分支上构建。图中的数据集将根据它们如何影响或受调度影响而着色。
排除的数据集(Excluded datasets)
排除的数据集指定了在确定要构建哪些数据集时,在图遍历过程中将被忽略的数据集。被忽略数据集的所有上游数据集将不会被构建。
构建时间(When to build)
触发器(Trigger)指定了构建应在何时运行。当触发器中定义的条件满足时,构建将运行。
有两种基本类型的触发器:
- 时间(Time): 时间触发器在指定的时间点满足。
- 数据集更新时(When dataset(s) update): 当平台中指定的数据集发生更新时满足。
触发器可以组合以创建更复杂的复合触发器。可以使用触发器编辑器中的菜单选择组合触发器的方法:
-
任一触发器(Any of these triggers): 当任一组件触发器满足时,触发器即满足。
-
所有触发器(All of these triggers): 当所有组件触发器都满足时,触发器即满足。
-
高级配置(Advanced configuration): 显式配置如何组合组件触发器。
选择高级配置时,通过在两个触发器之间插入关键字 AND 和 OR 来组合组件触发器。复合触发器可以通过将其放在括号 ( 和 ) 内进一步组合。
-
AND表示当两个组件触发器都满足时,复合触发器才满足。 -
OR表示当任一组件触发器满足时,复合触发器即满足。
构建类型(Build type)
构建类型指定了如何构建所选数据集:
-
单次构建(Single build): 构建目标数据集(不会构建其他数据集)。
-
完整构建(包含上游)(Full build (include upstream)): 构建所有目标数据集以及该目标的所有上游数据集,排除的数据集除外。如果上游依赖关系发生变化,构建的数据集可能会改变。
-
连接构建(Connecting build): 构建输入数据集(排除的)和目标数据集(包含的)之间的所有数据集。如果某个数据集位于输入数据集和目标数据集之间,但被显式添加为输入,它仍将由调度构建。如果某个数据集被选为目标数据集,但不存在从输入数据集到该目标数据集的构建路径,则该目标数据集将不会被构建。
对于连接构建,连接目标数据集和上游数据集的所有数据集必须通过调度所在分支上的作业规范路径(job spec path)连接。
我们通过以下示例沿袭来说明上述情况,数据集为 D1, ..., D6,其中数据集 D2 的两个不同分支被用作 D3 和 D4 的输入。在 master 分支上,以 D1 为输入、D5 和 D6 为目标的连接构建调度将仅尝试构建 D2、D4 和 D6。
出现此行为的原因是,在 master 分支上,从输入 D1 到目标 D6 的连接构建选择将选择数据集 D2、D4 和 D6,因为数据集 D1 和 D6 之间存在作业规范路径。然而,从输入 D1 到目标 D5 的连接构建选择将不存在,因为沿 master 分支的作业规范路径已中断。
D1 (master) --> D2 (master) --> D4 (master) --> D6 (master)
                 |
                 | D2 (develop)
                 |
                  --> D3 (master) --> D5 (master)
要在此示例中将数据集 D3 包含在调度构建中,应将构建更改为完整构建,这将包括 D3 以及作为 D5 上游的输入 D1。或者,要保持为连接构建选择,可以编辑以 D2 (develop) 为输入、D3 为输出的转换,在 master 分支上添加一个额外的虚拟输入 D7,如下所示。在 master 分支上,以 D1 为输入、D5 和 D6 为目标的连接调度构建现在将构建 D2、D3、D4、D5 和 D6。
D1 (master) --> D2 (master) --> D4 (master) --> D6 (master)
                 |
                 | D2 (develop)
                 |
D7 (master) -------> D3 (master) --> D5 (master)
:::callout{theme="neutral" title="连接构建分支选择(Connecting build branch selection)"} 对于连接构建调度,如果您使用的数据集来自与包含调度的分支不同的分支,则必须在输入和目标构建之间的同一分支上存在连接作业规范路径,才能将这些数据集包含在构建中。 :::
构建范围(Build scope)
考虑到数据管道的动态特性,每次触发调度时都会评估要包含在构建中的数据集集合。构建范围(Build scope) 定义了调度构建的边界,即使管道内容发生变化,这些边界也将保持固定。有两种可用的范围选项:
- 按项目(By Projects): 调度将仅允许在所选项目内构建符合条件的数据集。
- 按用户账户(By user account): 调度将仅允许构建调度创建者/编辑者有权构建的数据集。
项目范围(Project scoping)
项目范围确保调度仅在所选项目内的数据集上运行。它允许调度不受用户权限变化的影响而运行。当构建内容不太可能变化到无法在所选项目内运行的程度时(如下所述),此选项最为可靠。
在以下情况下,构建不能按项目范围限定:
- 您没有在该项目上创建调度的权限。
- 您没有足够的权限来构建数据集。
- 调度设置涵盖了移除标记(remove markings)的数据集(当图按权限着色时,您可以在数据沿袭(Data Lineage)中看到这一点)。
- 调度设置涵盖了必须使用用户账户构建的数据集。
- 调度内容无法解析为不同的项目集合。
用户范围(User scoping)
使用用户范围时,调度构建将代表最后编辑(或创建)调度的用户触发。因此,构建将仅包含该用户有权构建的数据集。当计划中的管道可能发生变化且无法进行项目范围限定时(例如,数据集被移动到另一个项目,新数据集需要使用用户账户运行等),此选项最为可靠。
:::callout{theme="warning" title="警告(Warning)"} 如果用户被停用或失去对构建所必需的数据集的权限,调度构建将无法启动。当按用户账户进行范围限定时,请确保该账户具有可靠的权限,并记住在用户即将被停用时更改所有权。 :::
高级设置(Advanced settings)
高级设置指定了额外的构建选项:
-
构建失败时中止(Abort build on failure): 如果构建中的任何作业不成功,则通过取消所有其他作业立即完成构建。
-
自定义失败作业的重试次数(Customize the number of attempts for failed jobs): 失败作业的运行尝试次数。重试的作业作为同一构建的一部分运行。在尝试所有重试或发生指示无法执行重试的错误之前,作业不被视为失败。将此值设置为 1 将阻止重试,因为作业只会被尝试一次。请注意,并非所有类型的失败都可以重试。调度运行时的重试次数将上限为管理员配置的最大值。
-
强制构建(Force build): 运行构建时忽略过时信息。无论数据集是否过时,都将构建所有数据集。此选项几乎从不必要。需要此选项的罕见情况是:
- 数据连接同步(Data Connection syncs): 数据连接同步始终标记为最新,因为它们具有外部来源的输入;Foundry 不知道外部数据是否已更新。我们建议将数据连接同步与构建的其余部分分开调度,以确保只有同步被强制构建。
- 对象存储 V1 (Phonograph) 同步
:::callout{theme="warning" title="外部转换调度(External transform schedules)"} 进行 API 调用的转换与数据连接同步的行为不同。这些转换始终被视为过时,任何构建调度都会触发它们,而无需 强制构建(Force build) 选项。 :::
- 成功构建后重新触发(Re-trigger upon successful build): 重复触发调度以持续构建,直到所有输入都被处理且调度的目标不再过时。要使此设置生效,调度必须:
- 包含至少一个使用增量事务限制(incremental transaction limits)(针对数据集)或增量批处理限制(incremental batch limits)(针对媒体集)的目标输出。如果调度中没有此类输出,将显示警告文本
此调度中无需重新触发的资源(No resources in this schedule require re-triggering)。 - 禁用 强制构建(Force build) 设置。
保存调度
完成调度定义后,点击 保存调度(Save schedule) 按钮。
这将带您返回调度页面,您应该会看到已保存的调度。