Create a streaming pipeline with Pipeline Builder(使用 Pipeline Builder 创建流式管道(Streaming Pipeline))
In this tutorial, we will use Foundry Streaming and Pipeline Builder to create a simple pipeline with an output of a single dataset with information on sensor temperatures. You will learn how to create a stream in Foundry, push records into that stream, and transform them in Pipeline Builder.
Part 1. Initial setup
First, we need to create a new stream.
- When logged into Foundry, navigate to a Project in Foundry, select + New in the top right corner, then select Stream.

- Next, you will need to define your stream. For this guide, we will create a simple one partition stream and manually push records to it.
On the Define page, select Normal for the throughput and define a basic schema as: sensor_id: String, temperature: Double.
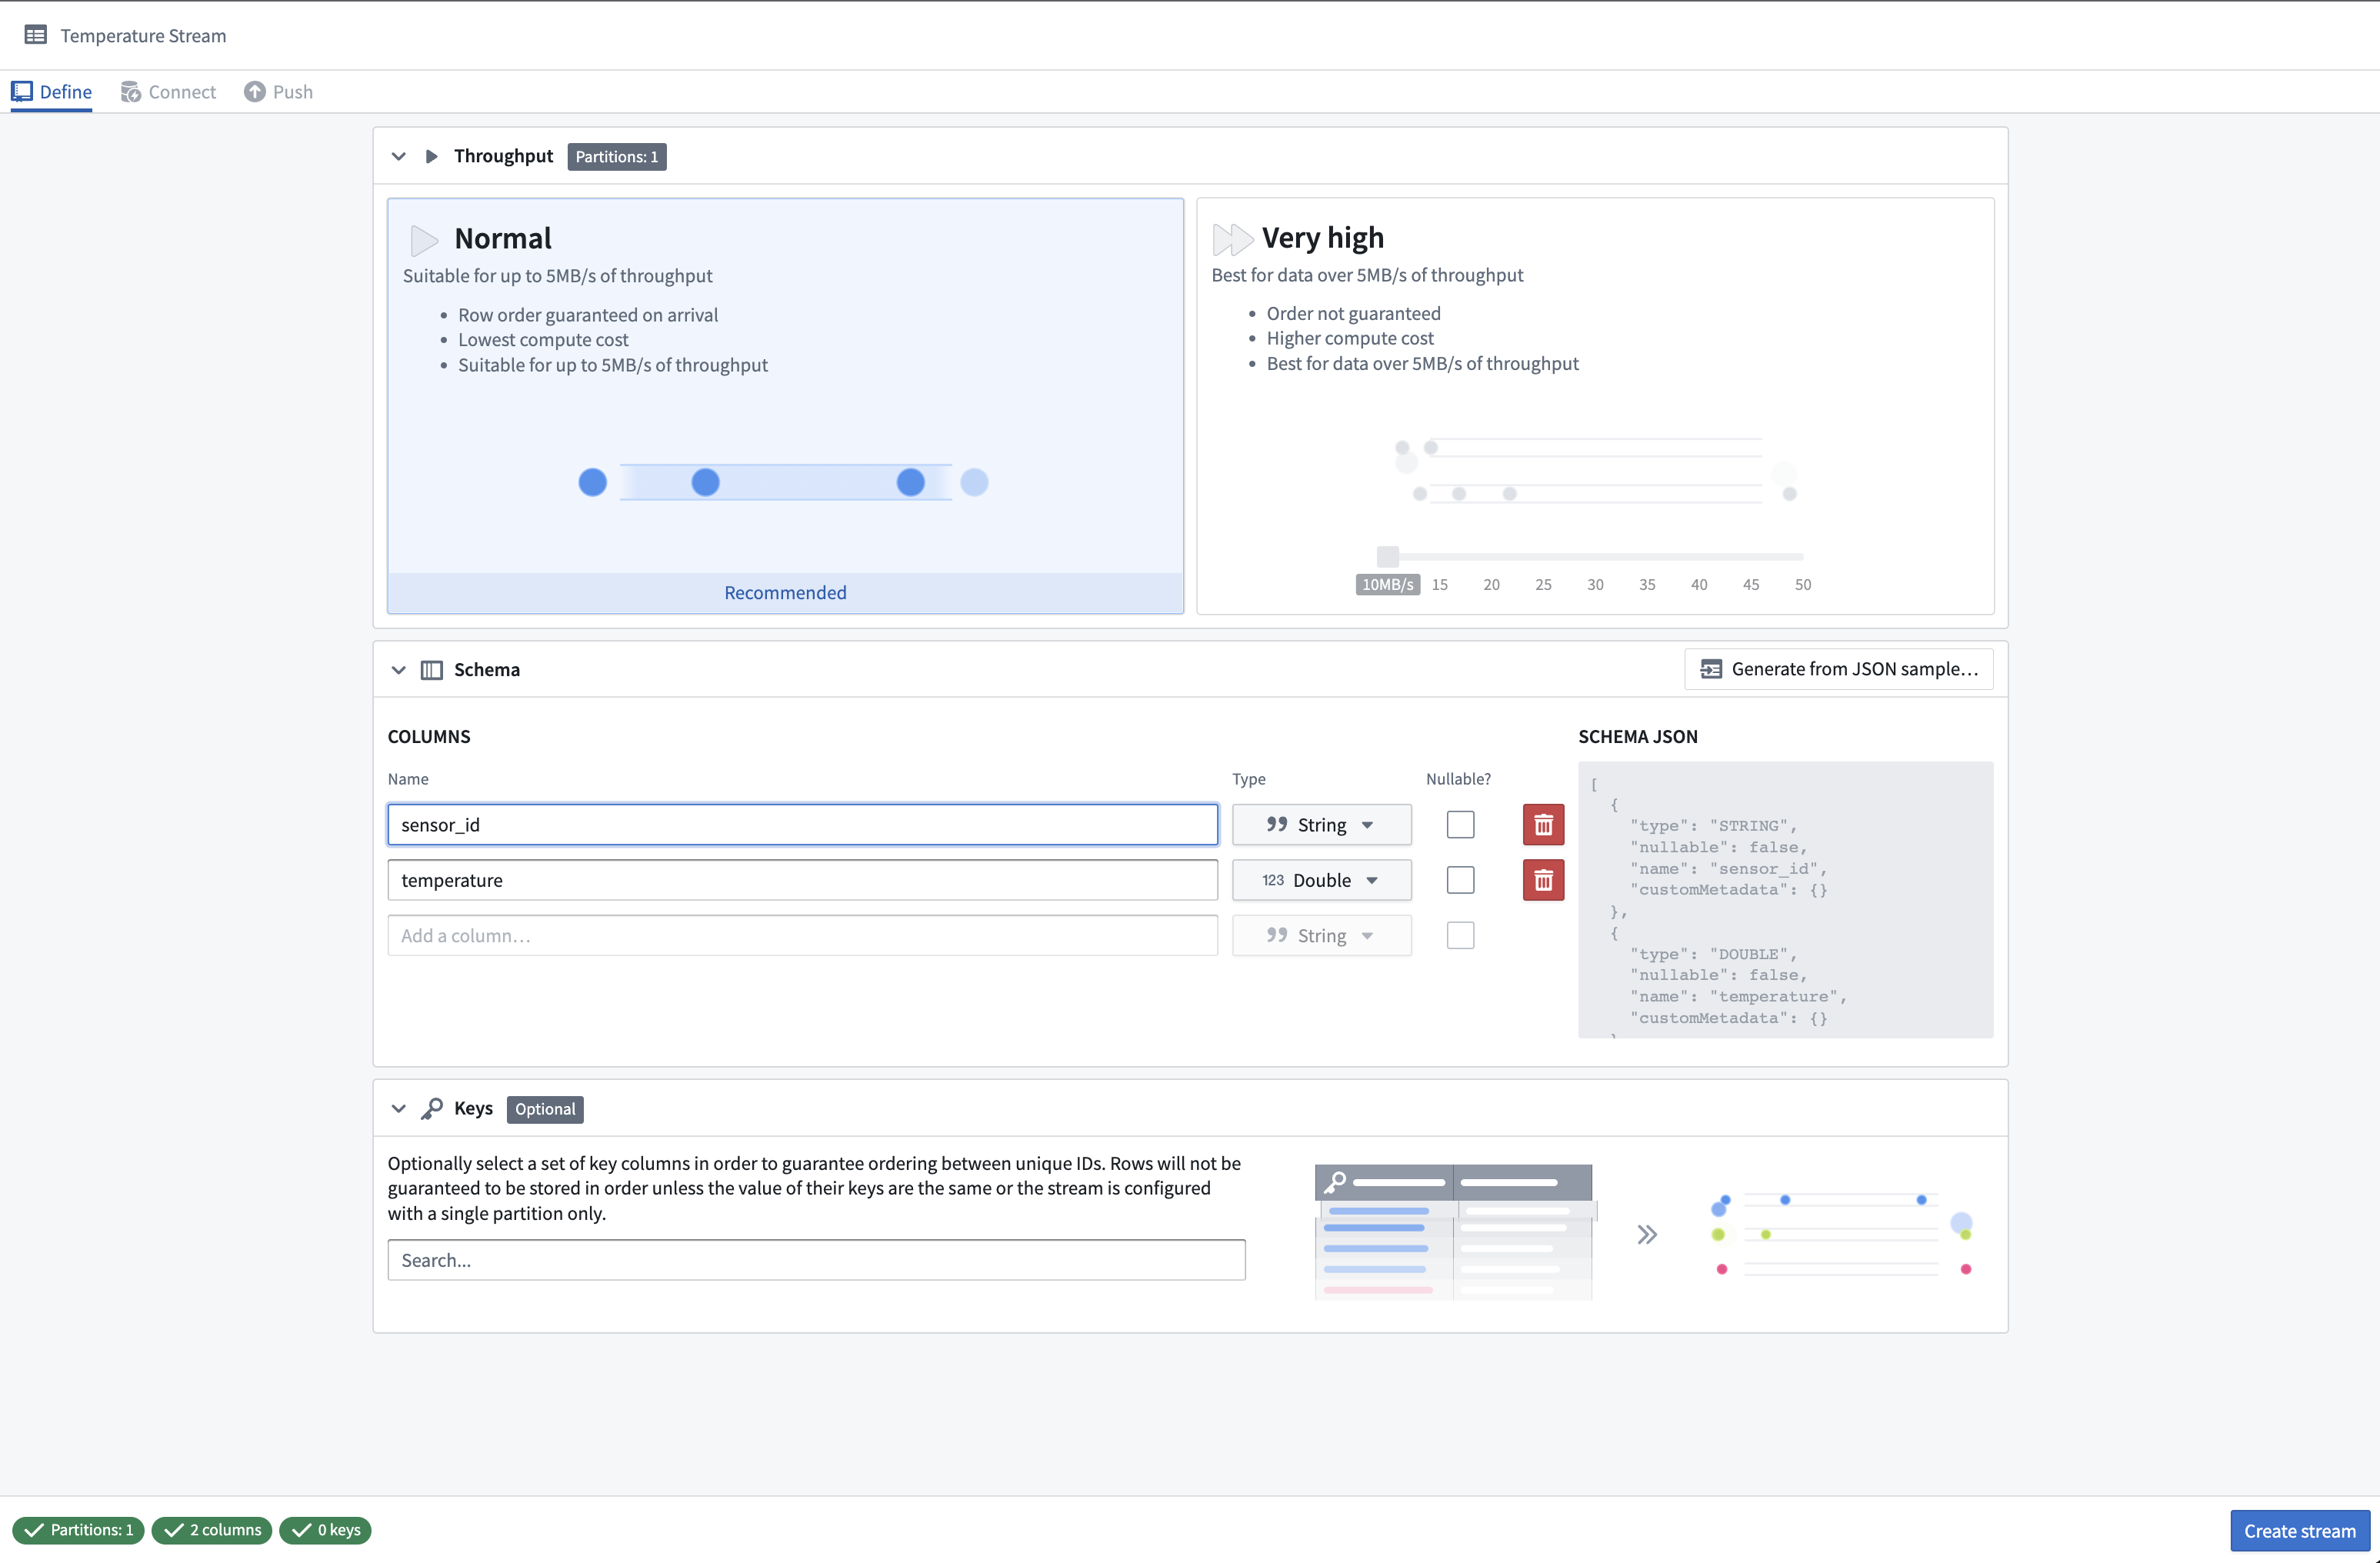
- Select Create stream. This will take you to the Connect page where you can specify how to connect to the streaming data.
Part 2. Push records into the stream
We are now ready to connect our stream. At this point, we could set up a streaming data ingestion task with a source. For this tutorial, we will instead manually push records to the stream with Curl.
- First, select Curl (Bash) under the Connect via API section to set up authentication for your stream. We will use a personal token to submit records.
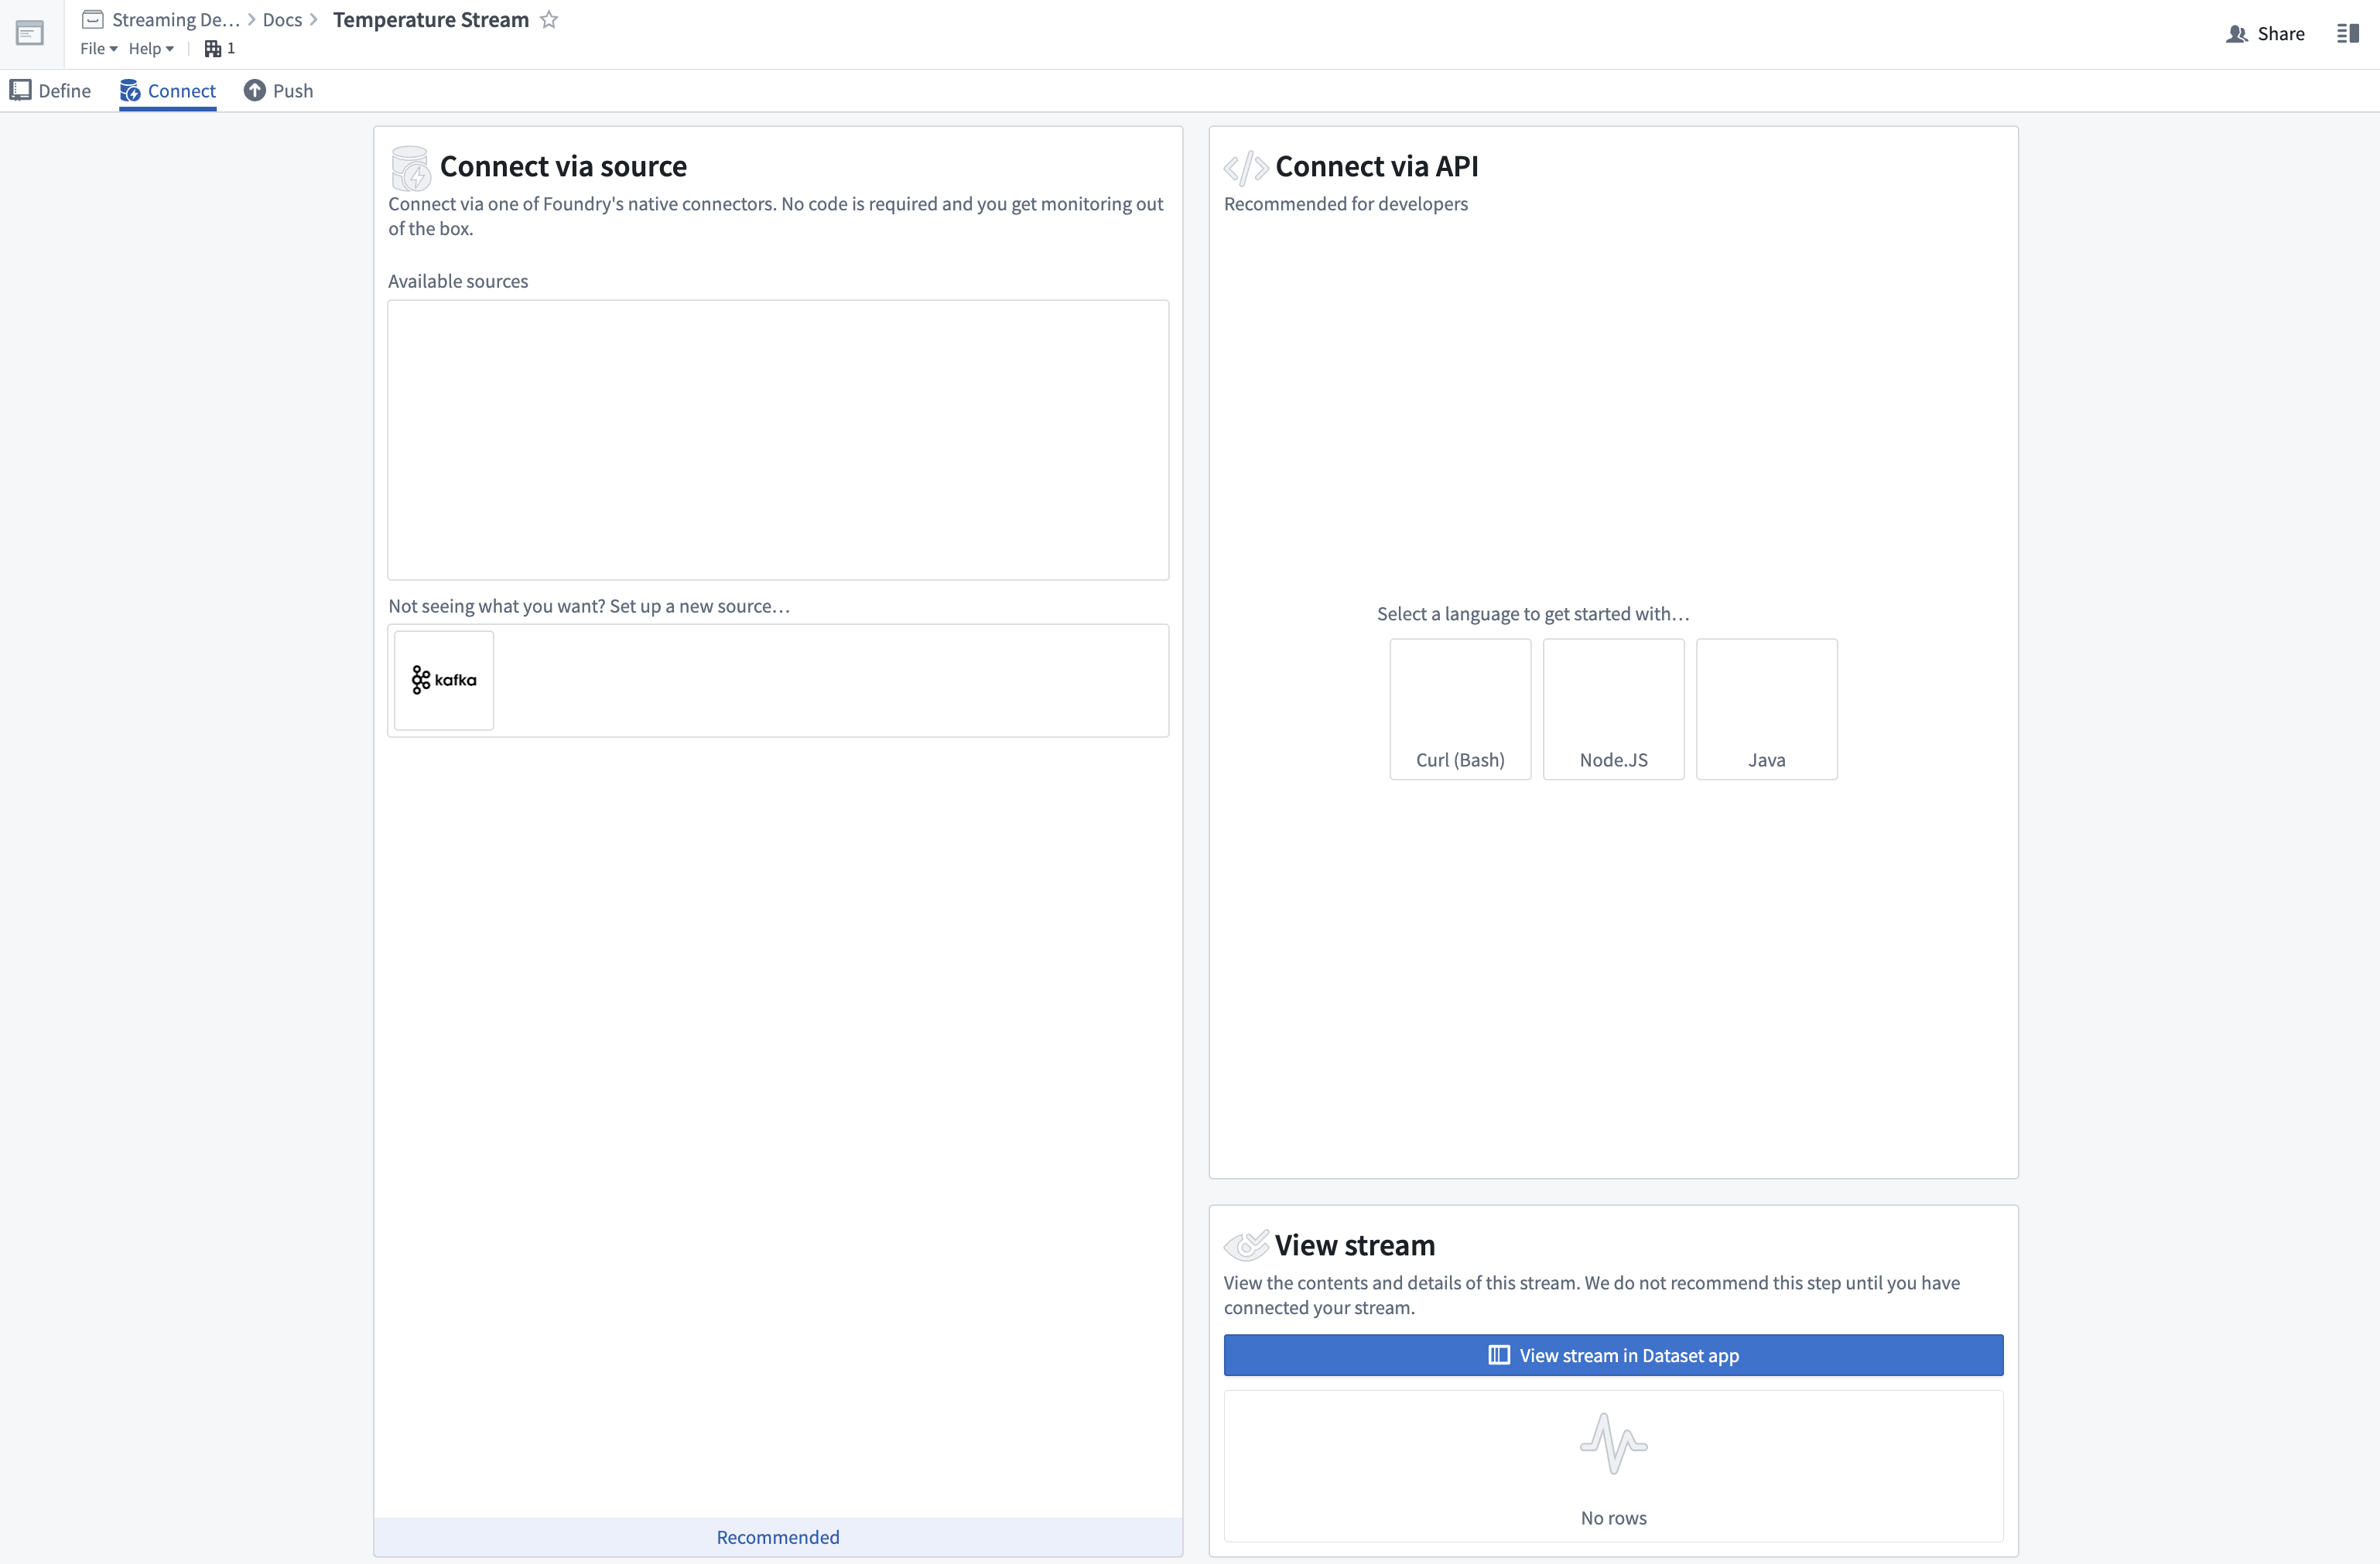
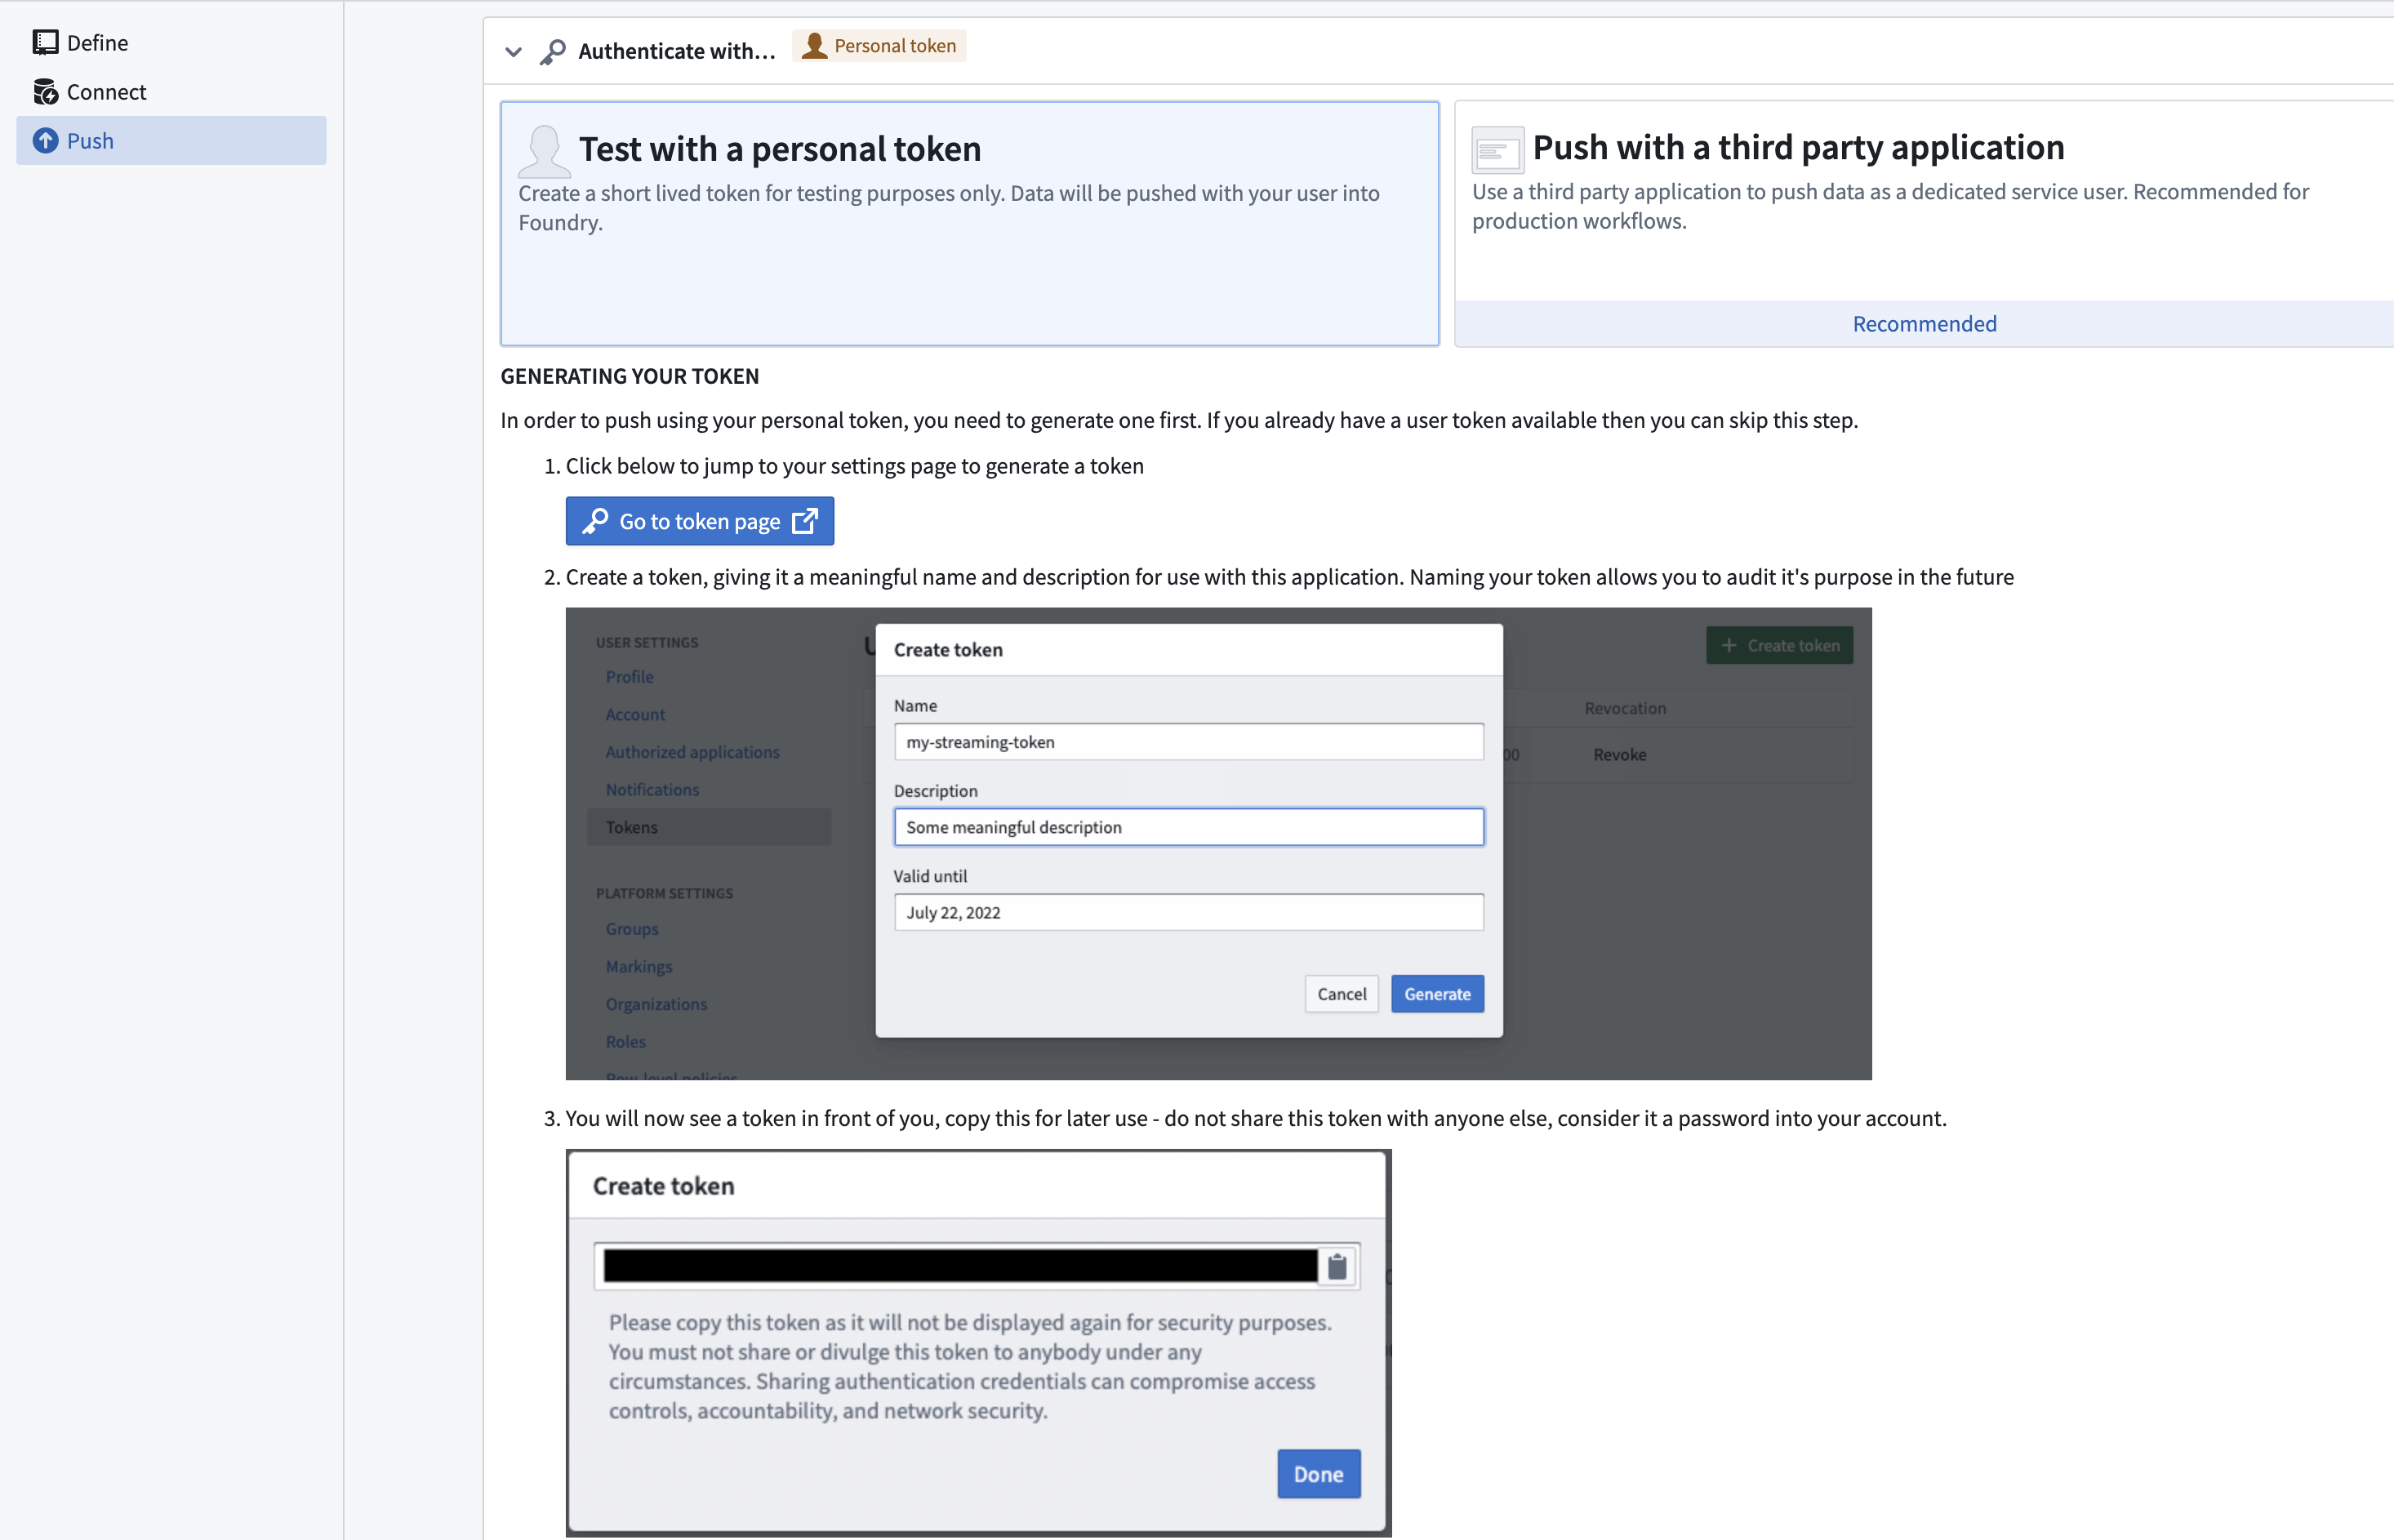
- Select Test with a personal token and follow the on-screen prompts for generating a short-lived personal token.
:::callout{theme="neutral"} Personal tokens should not be used for production pipelines. Production pipelines should use an OAuth token workflow. :::
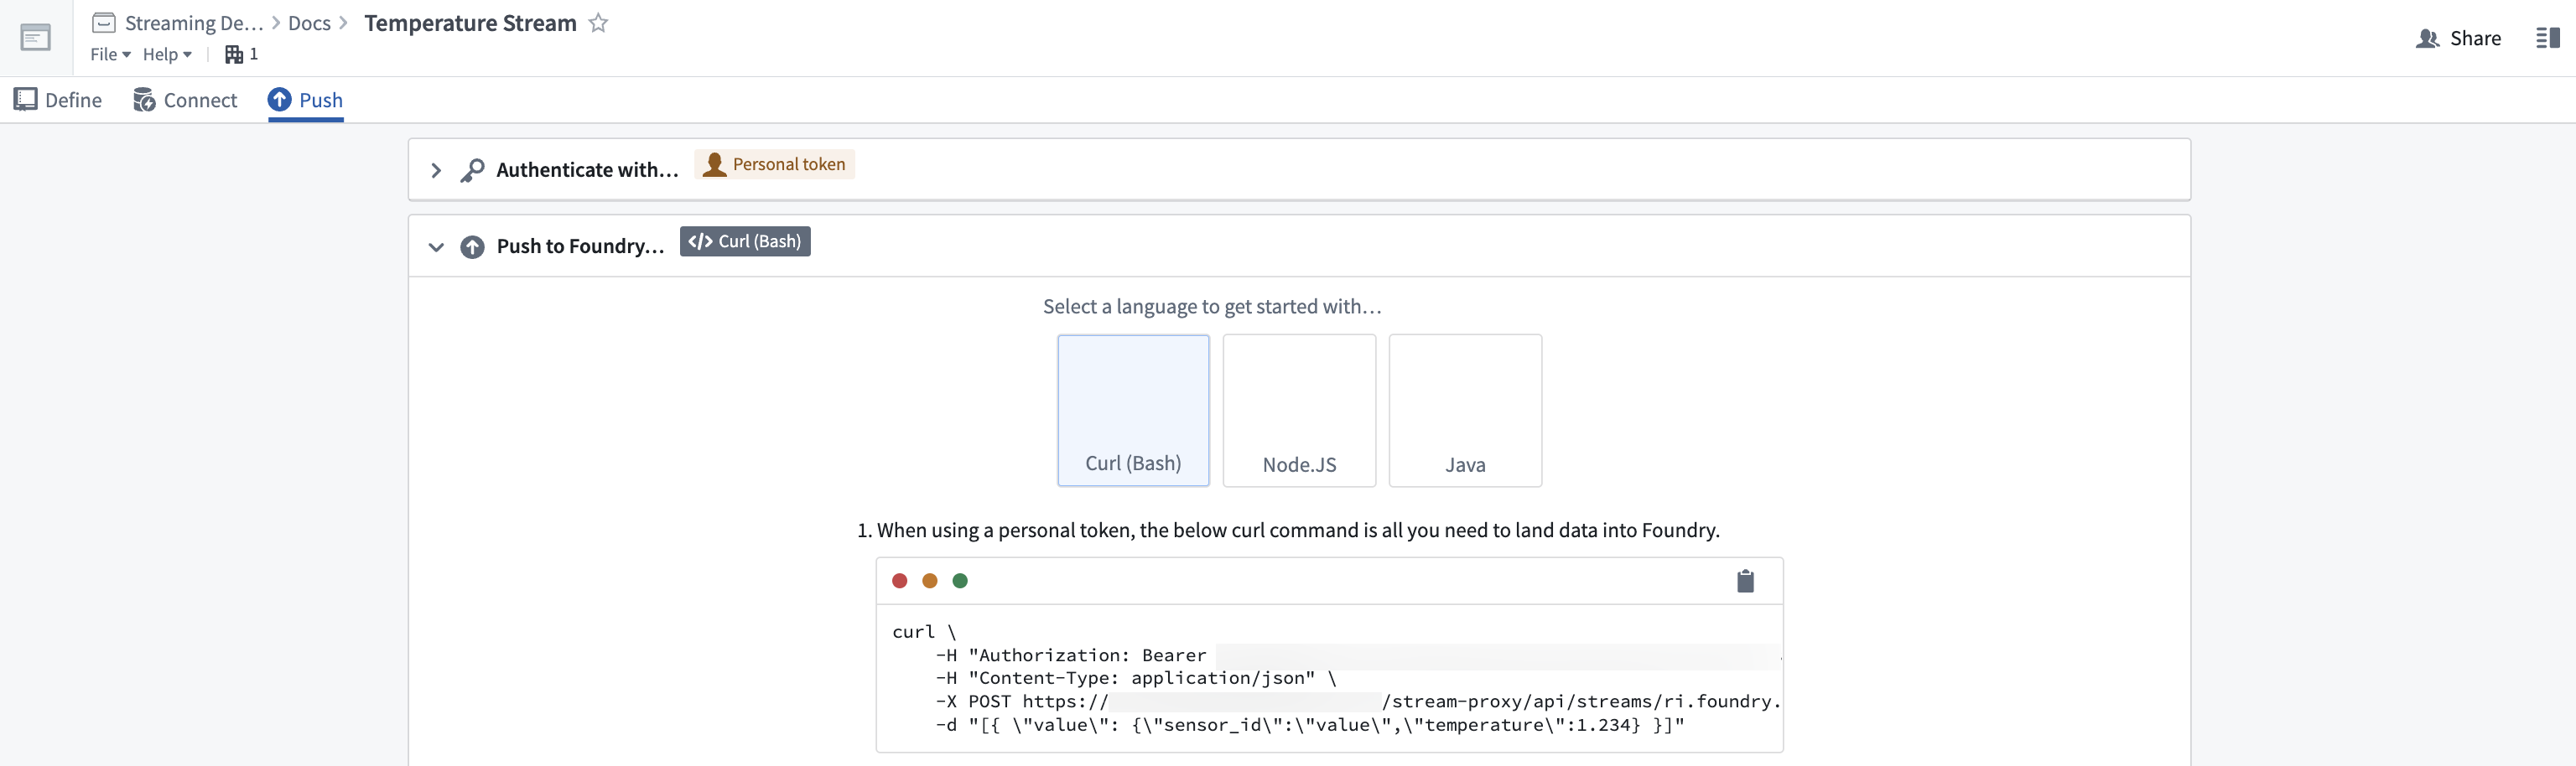
- Paste your generated token into the text box, then click Next Step.
- Copy the Curl command. Open a terminal on your computer that can execute Bash and paste the command. Run the command in your terminal.
Within seconds, you will see a record appear in the stream viewer on the page:
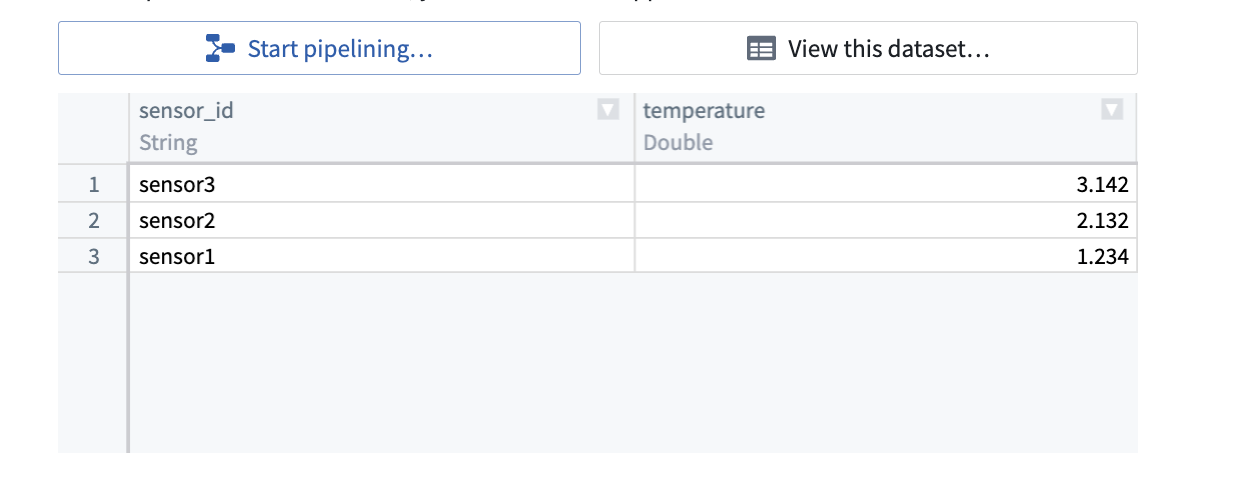
We have now ingested streaming data in real time. Let’s transform that data now.
Part 3. Transform a stream
- Select the Start pipelining button to begin writing a basic streaming transform in Pipeline Builder.

- In the Create new pipeline modal, select the Streaming pipeline type, and click Create Pipeline.

This will create a pipeline for the input stream, displayed on a graph.
Selecting the input stream node will display a preview of the data. Note that the preview runs on a cold storage view of the stream; records from the stream will be delayed before they appear.
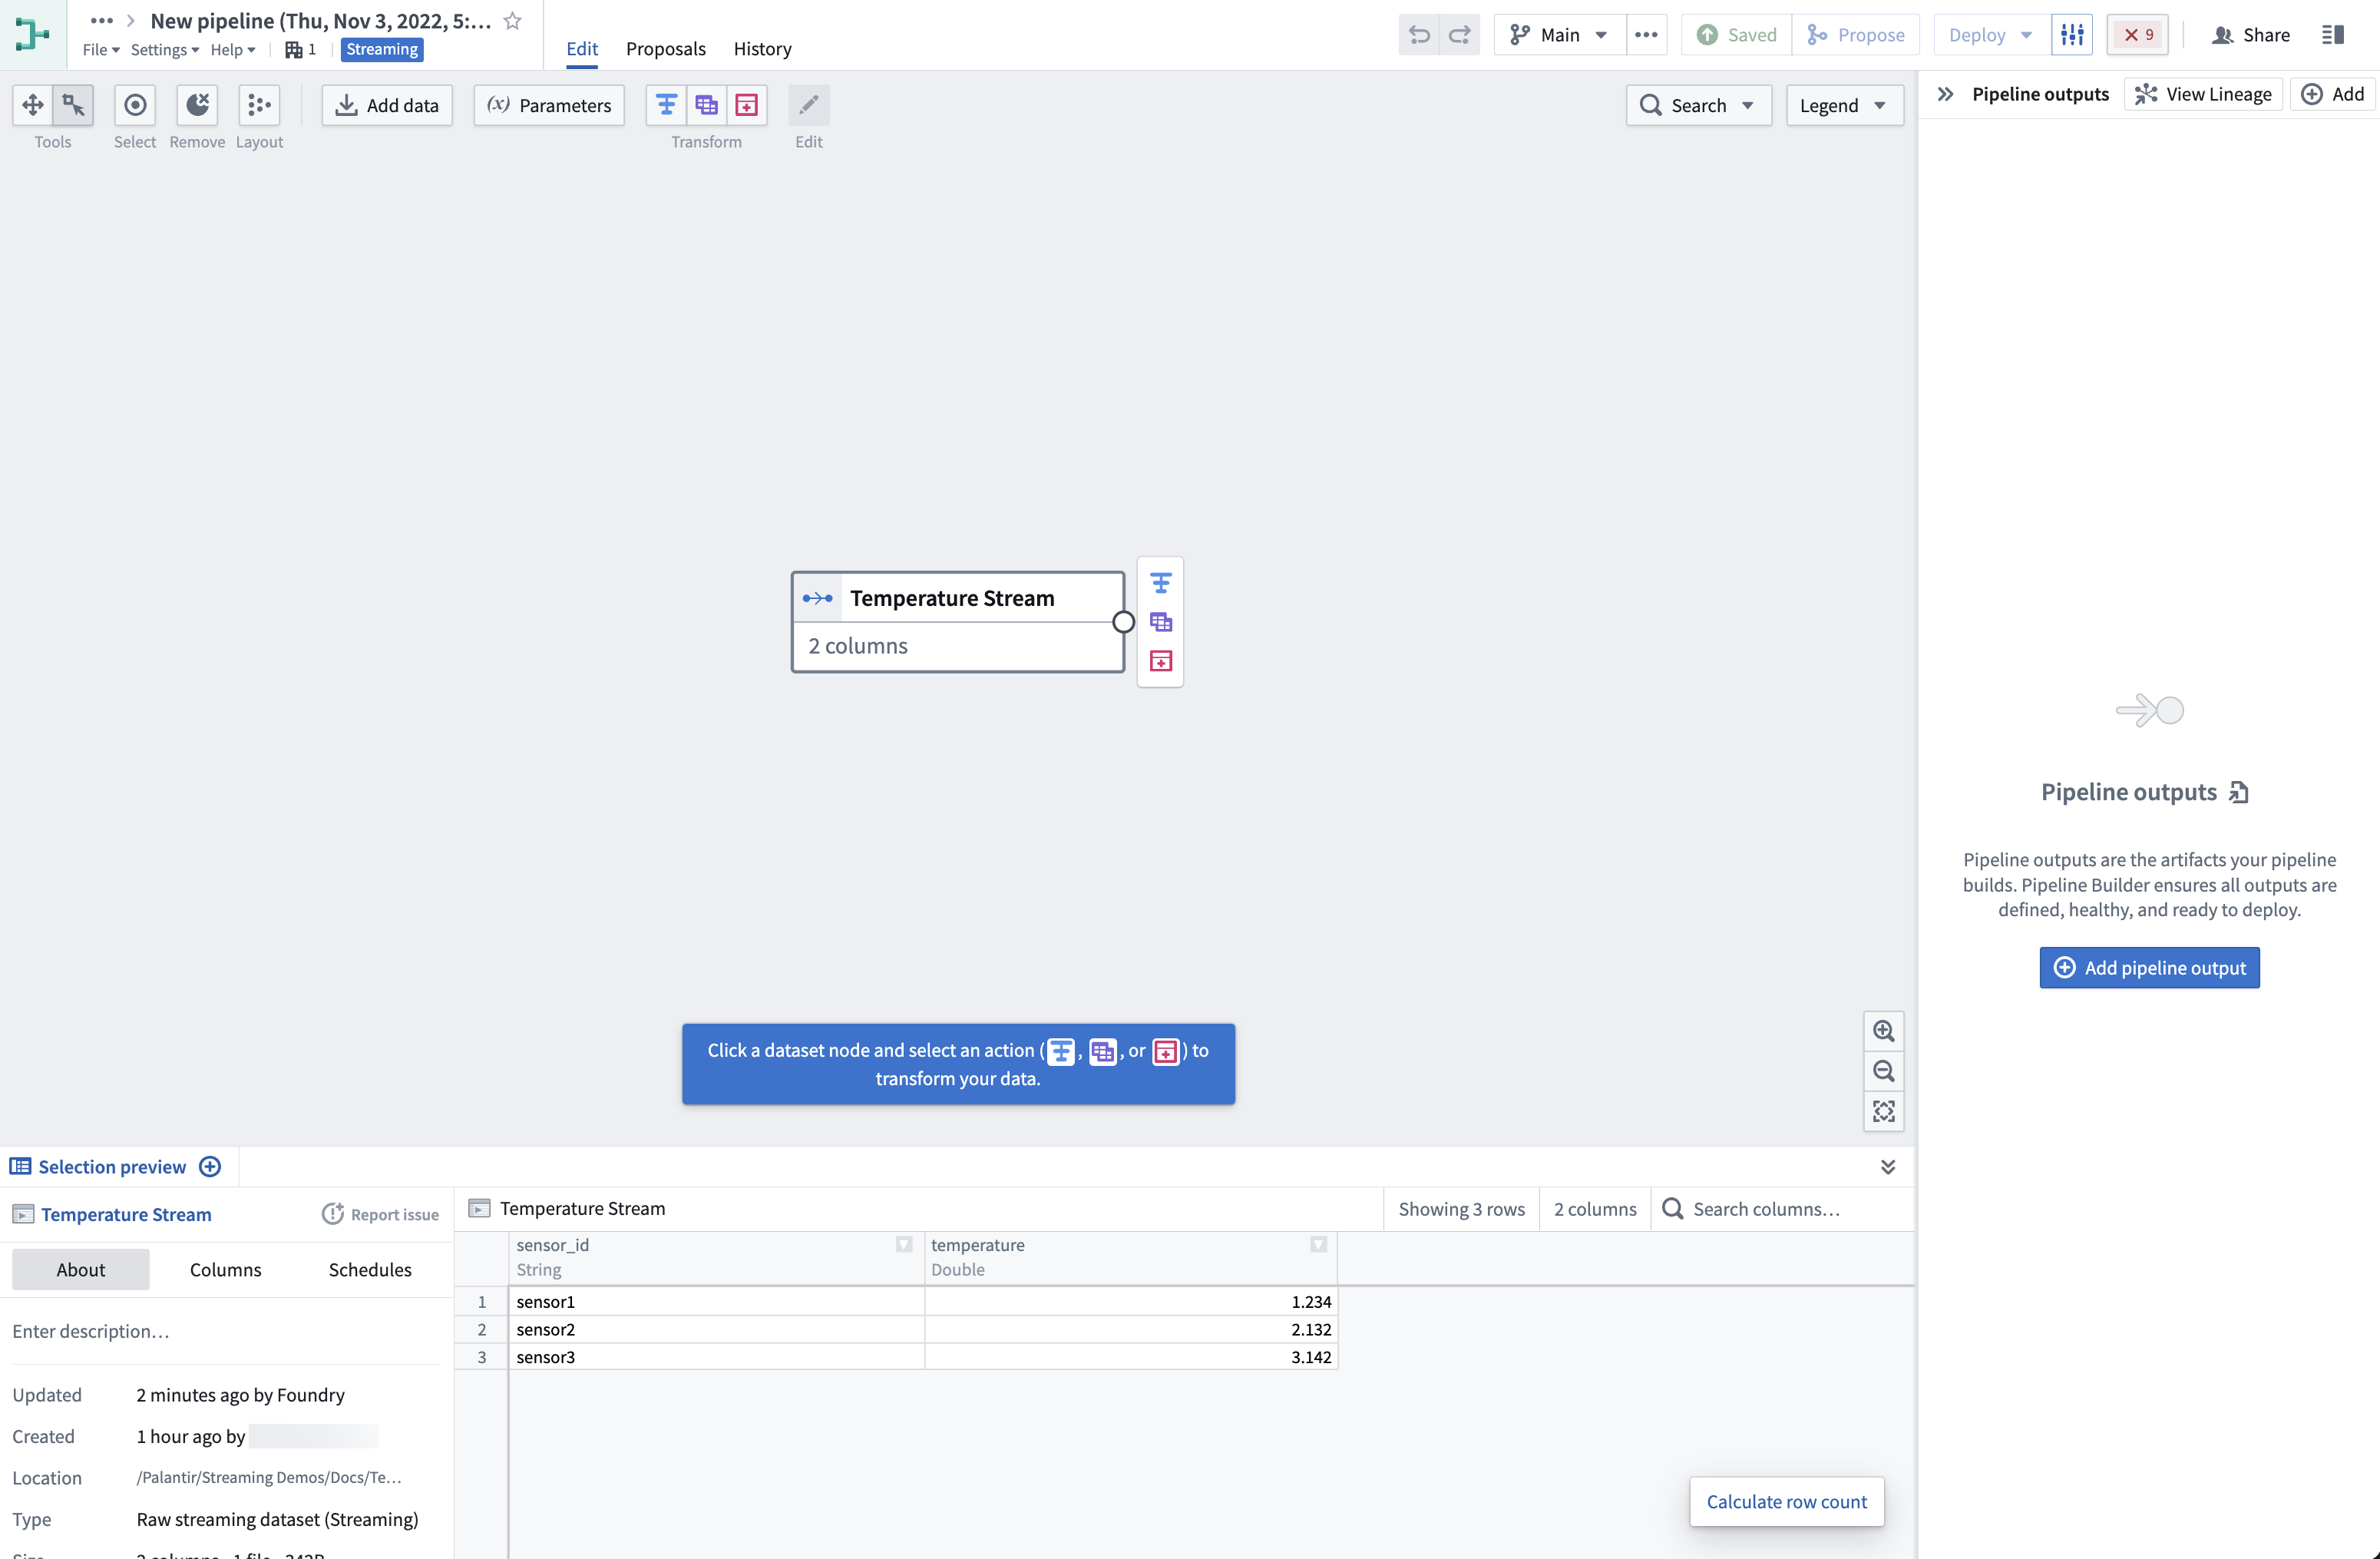
- Click on the input stream node on the graph and select the Transform action (the blue T icon next to the input node).
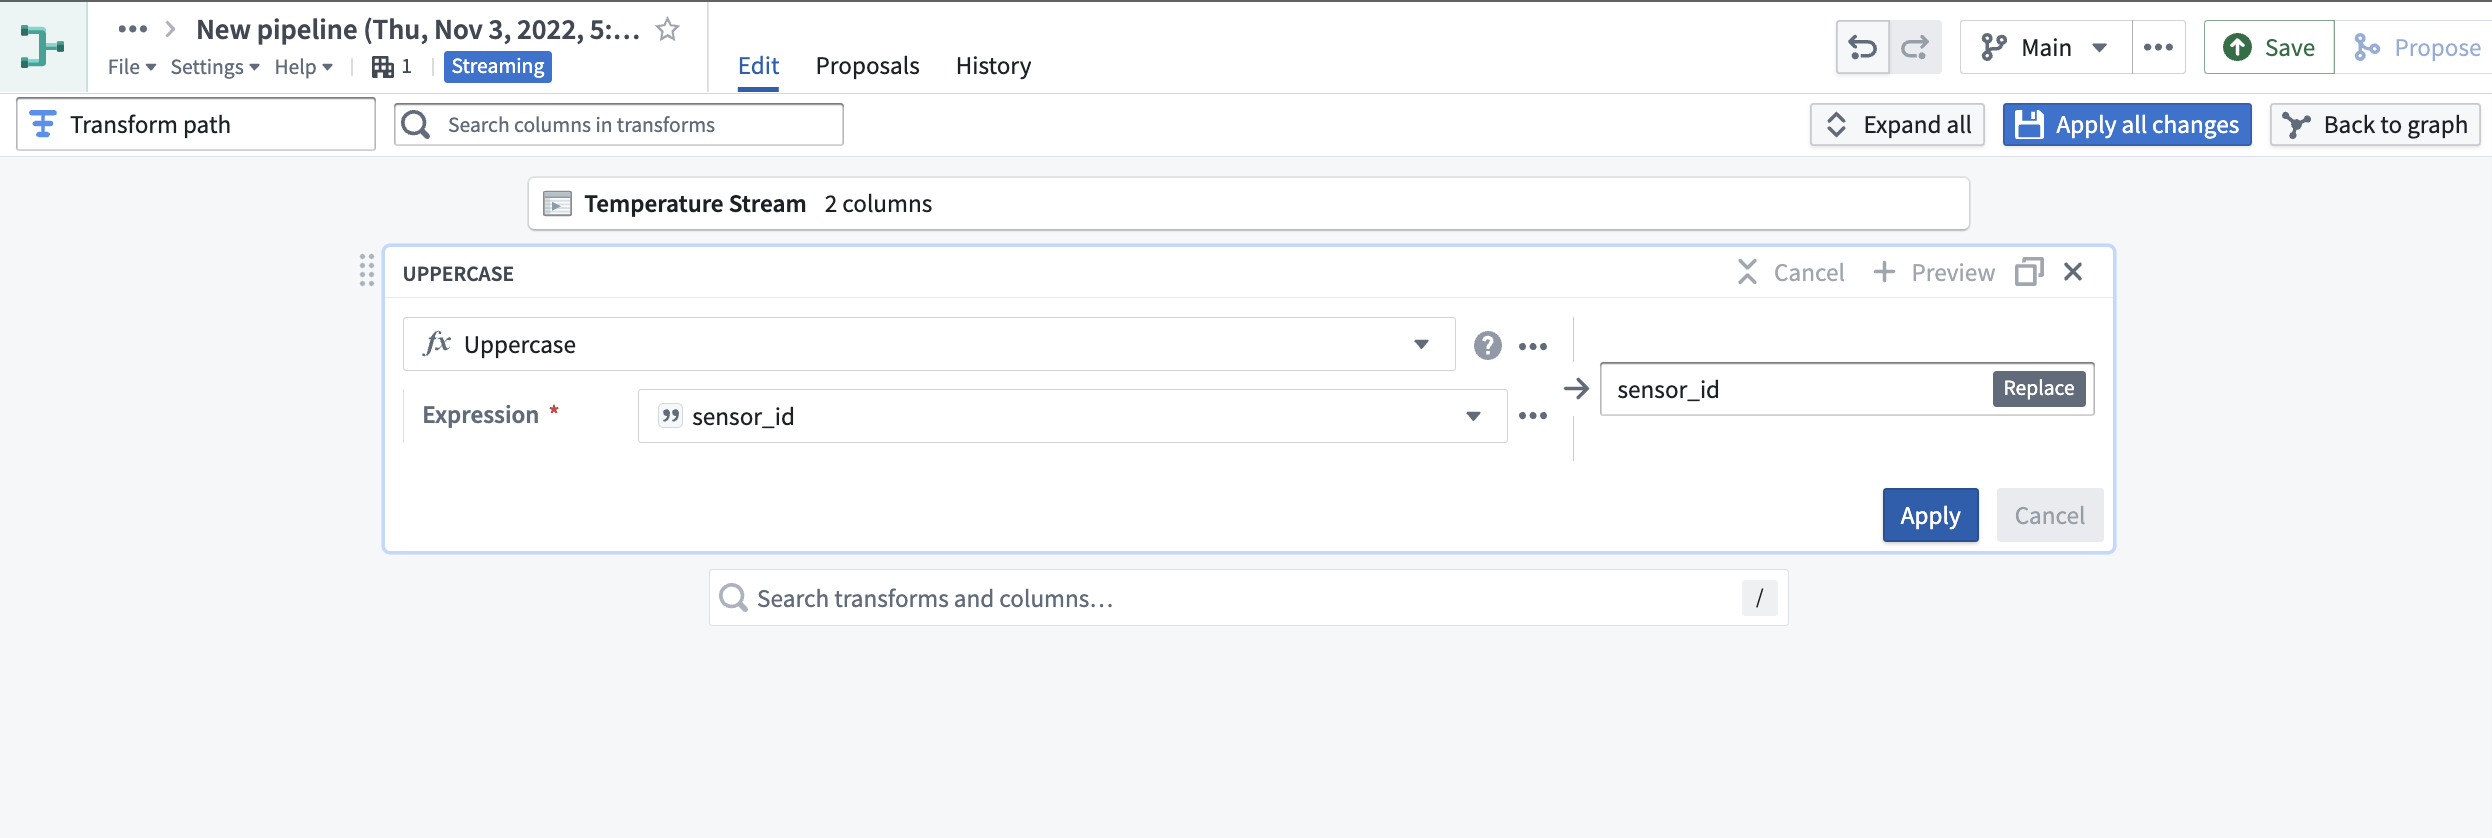
This will open a list of all transforms currently supported for streams based on the input types of the columns in the stream. For this tutorial, we will convert all sensor_ids to uppercase, remove any whitespace on them, and filter by temperatures exceeding three degrees.

- Select the Uppercase transform, choose the
sensor_idcolumn, and click Apply.
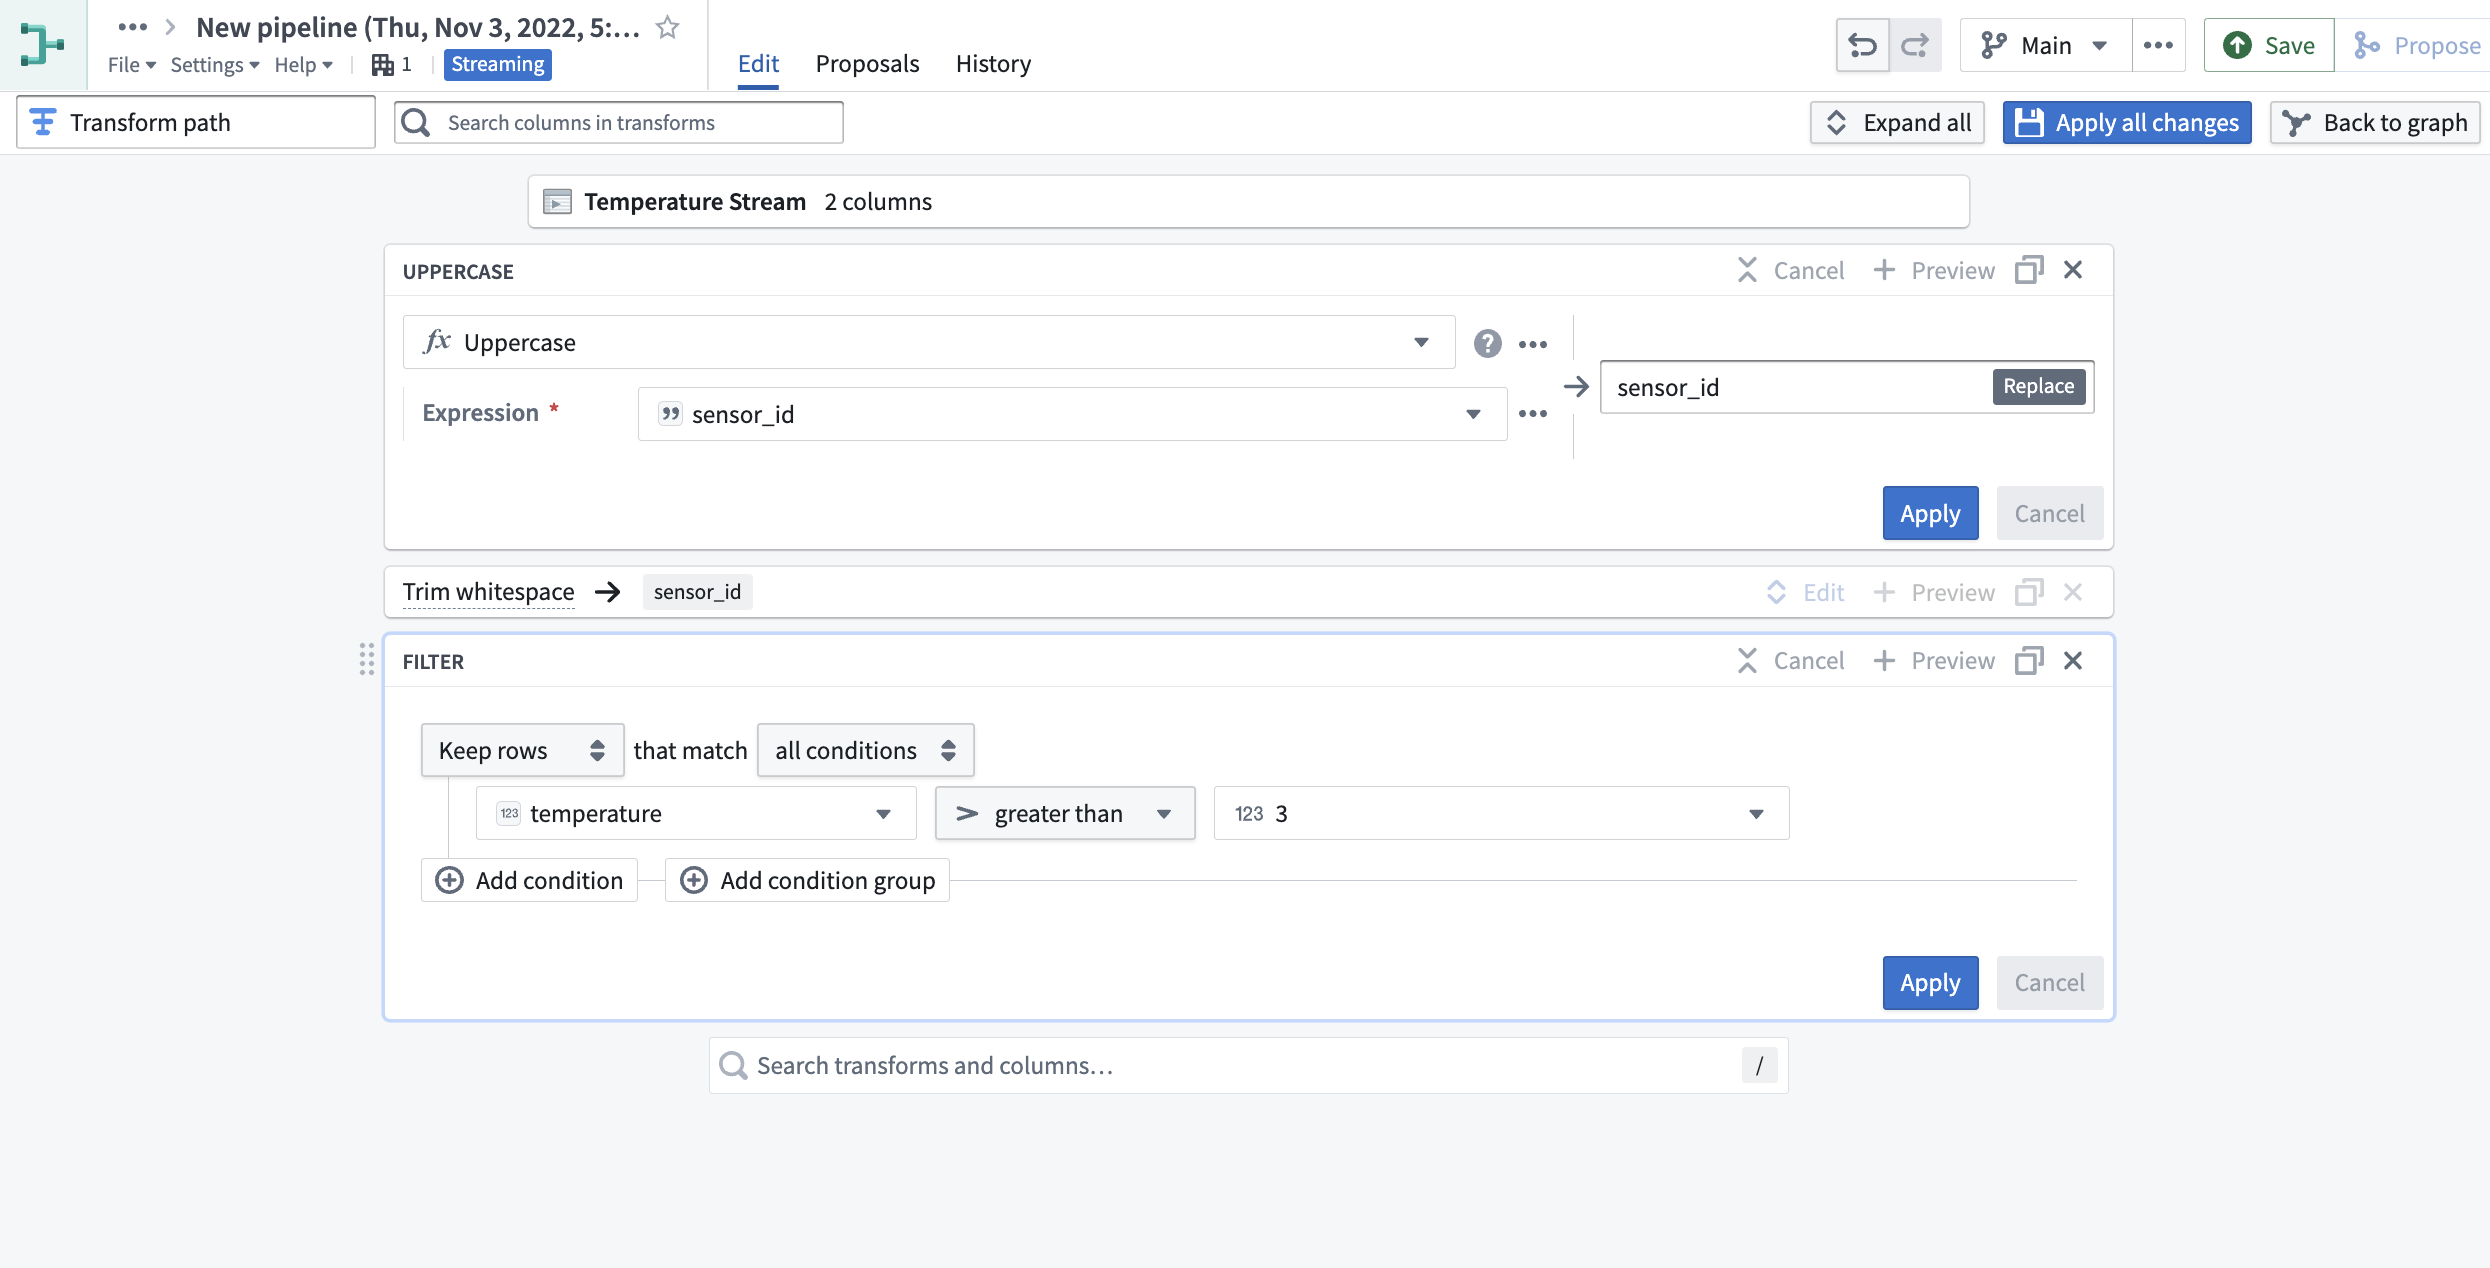
- Then, search for the Trim whitespace transform and select it. Choose the
sensor_idcolumn again, and click Apply.

- For the final transform, first search for the Filter transform and choose Keep rows. Then, select the
temperaturecolumn, set the filter to greater than3, and select Apply.
- Click Apply all changes to the top right of your screen. Then, select Back to graph to return to your pipeline.
- Select the Transform path node we just created, then click New dataset.
- In the top right corner of the application, first click Save to apply all new changes to your pipeline. Then, click Deploy and Deploy pipeline.
:::callout{theme="warning"} If you save your changes without deploying them, your pipeline logic will not update to the latest changes. You must deploy the pipeline to capture changes to transform logic. :::
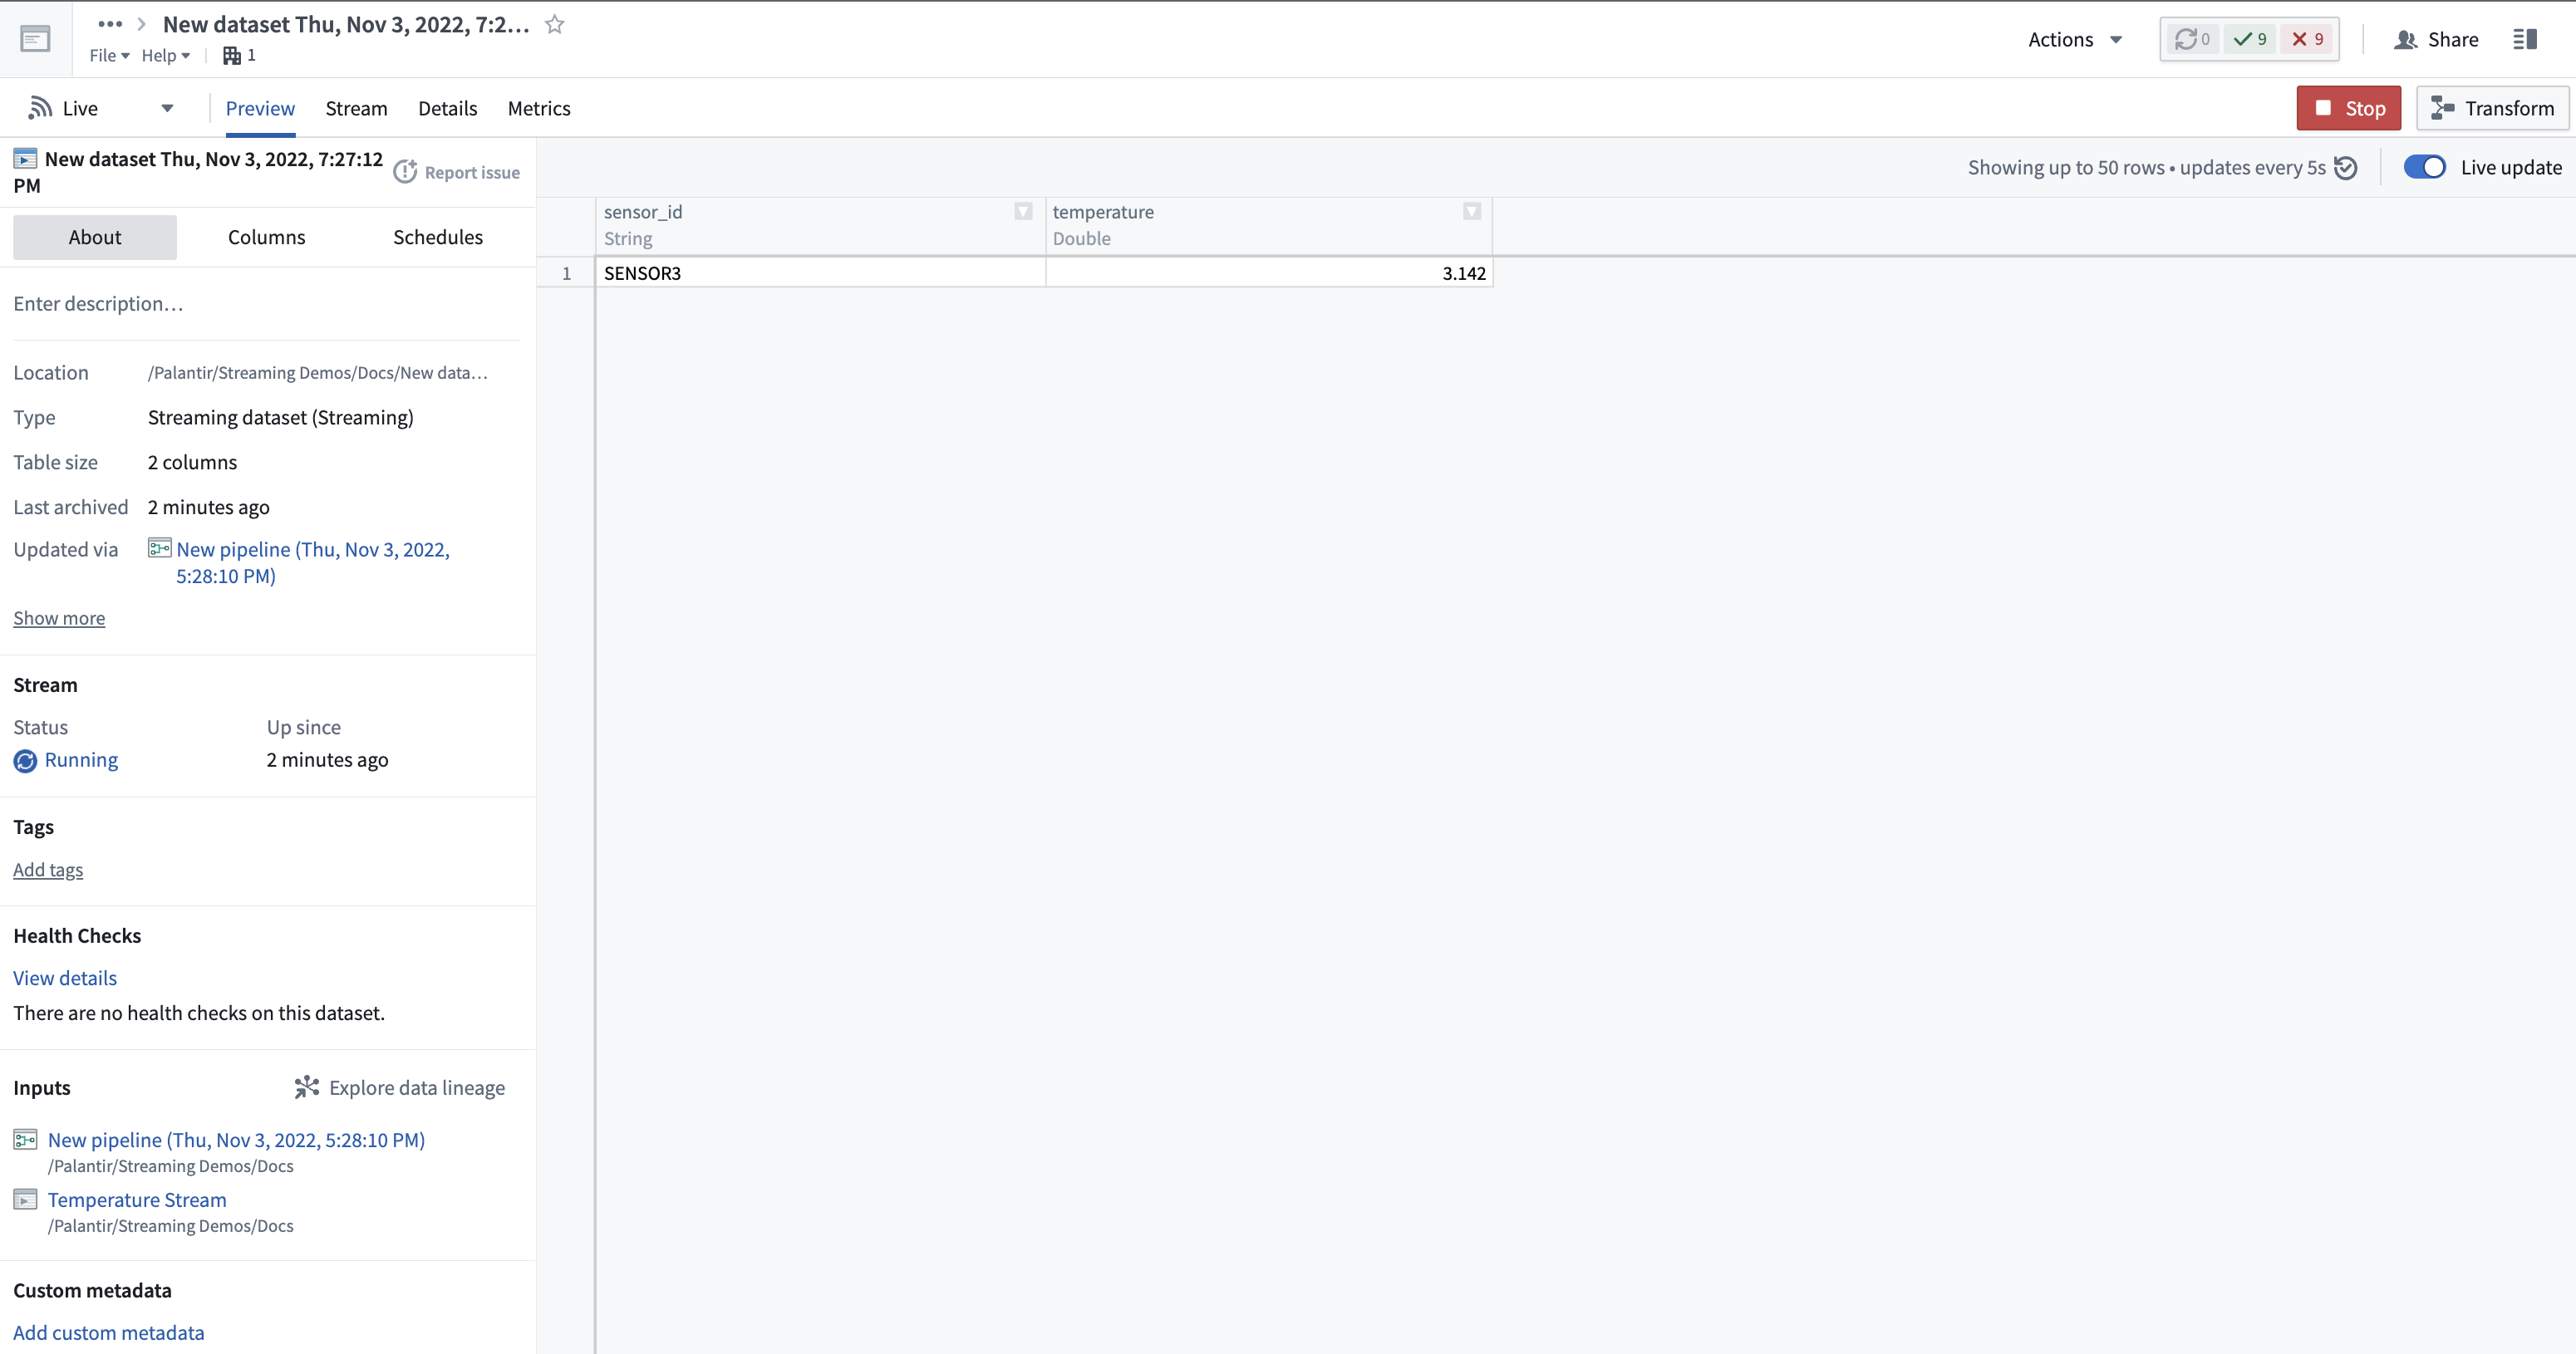
- Select the output stream node you just created, then click on the stream name above the Data preview section at the bottom of your graph.
This will take you to the stream preview page with the output stream from your transform.
:::callout{theme="neutral"} The streaming cluster takes about one minute to start, so you may not see records immediately. Once running, however, the cluster will process all new records in real time. :::
Next steps
Now that you know how to create a simple streaming pipeline, learn more about managing streams by exploring how to debug a failing stream. For more advanced transform functionality, learn more about Pipeline Builder.
中文翻译
使用 Pipeline Builder 创建流式管道(Streaming Pipeline)
在本教程中,我们将使用 Foundry Streaming 和 Pipeline Builder 创建一个简单的管道,输出一个包含传感器温度信息的单一数据集。您将学习如何在 Foundry 中创建流(Stream)、向该流推送记录,并在 Pipeline Builder 中对其进行转换。
第一部分:初始设置
首先,我们需要创建一个新的流。
- 登录 Foundry 后,导航至 Foundry 中的项目(Project),选择右上角的 + New,然后选择 Stream。
- 接下来,您需要定义您的流。在本指南中,我们将创建一个简单的单分区流,并手动向其中推送记录。
在 Define 页面上,选择 Normal 作为吞吐量,并定义一个基本模式(Schema):sensor_id: String,temperature: Double。
- 选择 Create stream。这将带您进入 Connect 页面,您可以在该页面指定如何连接到流数据。
第二部分:向流中推送记录
我们现在准备连接我们的流。此时,我们可以使用数据源(Source)设置一个流式数据摄取任务。在本教程中,我们将改用 Curl 手动向流推送记录。
- 首先,在 Connect via API 部分下选择 Curl (Bash),为您的流设置身份验证。我们将使用个人令牌(Personal Token)来提交记录。
- 选择 Test with a personal token,并按照屏幕提示生成一个短期有效的个人令牌。
:::callout{theme="neutral"} 个人令牌不应用于生产管道。生产管道应使用 OAuth 令牌工作流(OAuth token workflow)。 :::
- 将生成的令牌粘贴到文本框中,然后点击 Next Step。
- 复制 Curl 命令。在您的计算机上打开一个可以执行 Bash 的终端,粘贴该命令,并在终端中运行。
几秒钟内,您将看到一条记录出现在页面上的流查看器(Stream Viewer)中:
我们现在已经实时摄入了流式数据。接下来让我们转换这些数据。
第三部分:转换流
- 选择 Start pipelining 按钮,开始在 Pipeline Builder 中编写一个基本的流式转换。
- 在 Create new pipeline 模态框中,选择 Streaming pipeline 类型,然后点击 Create Pipeline。
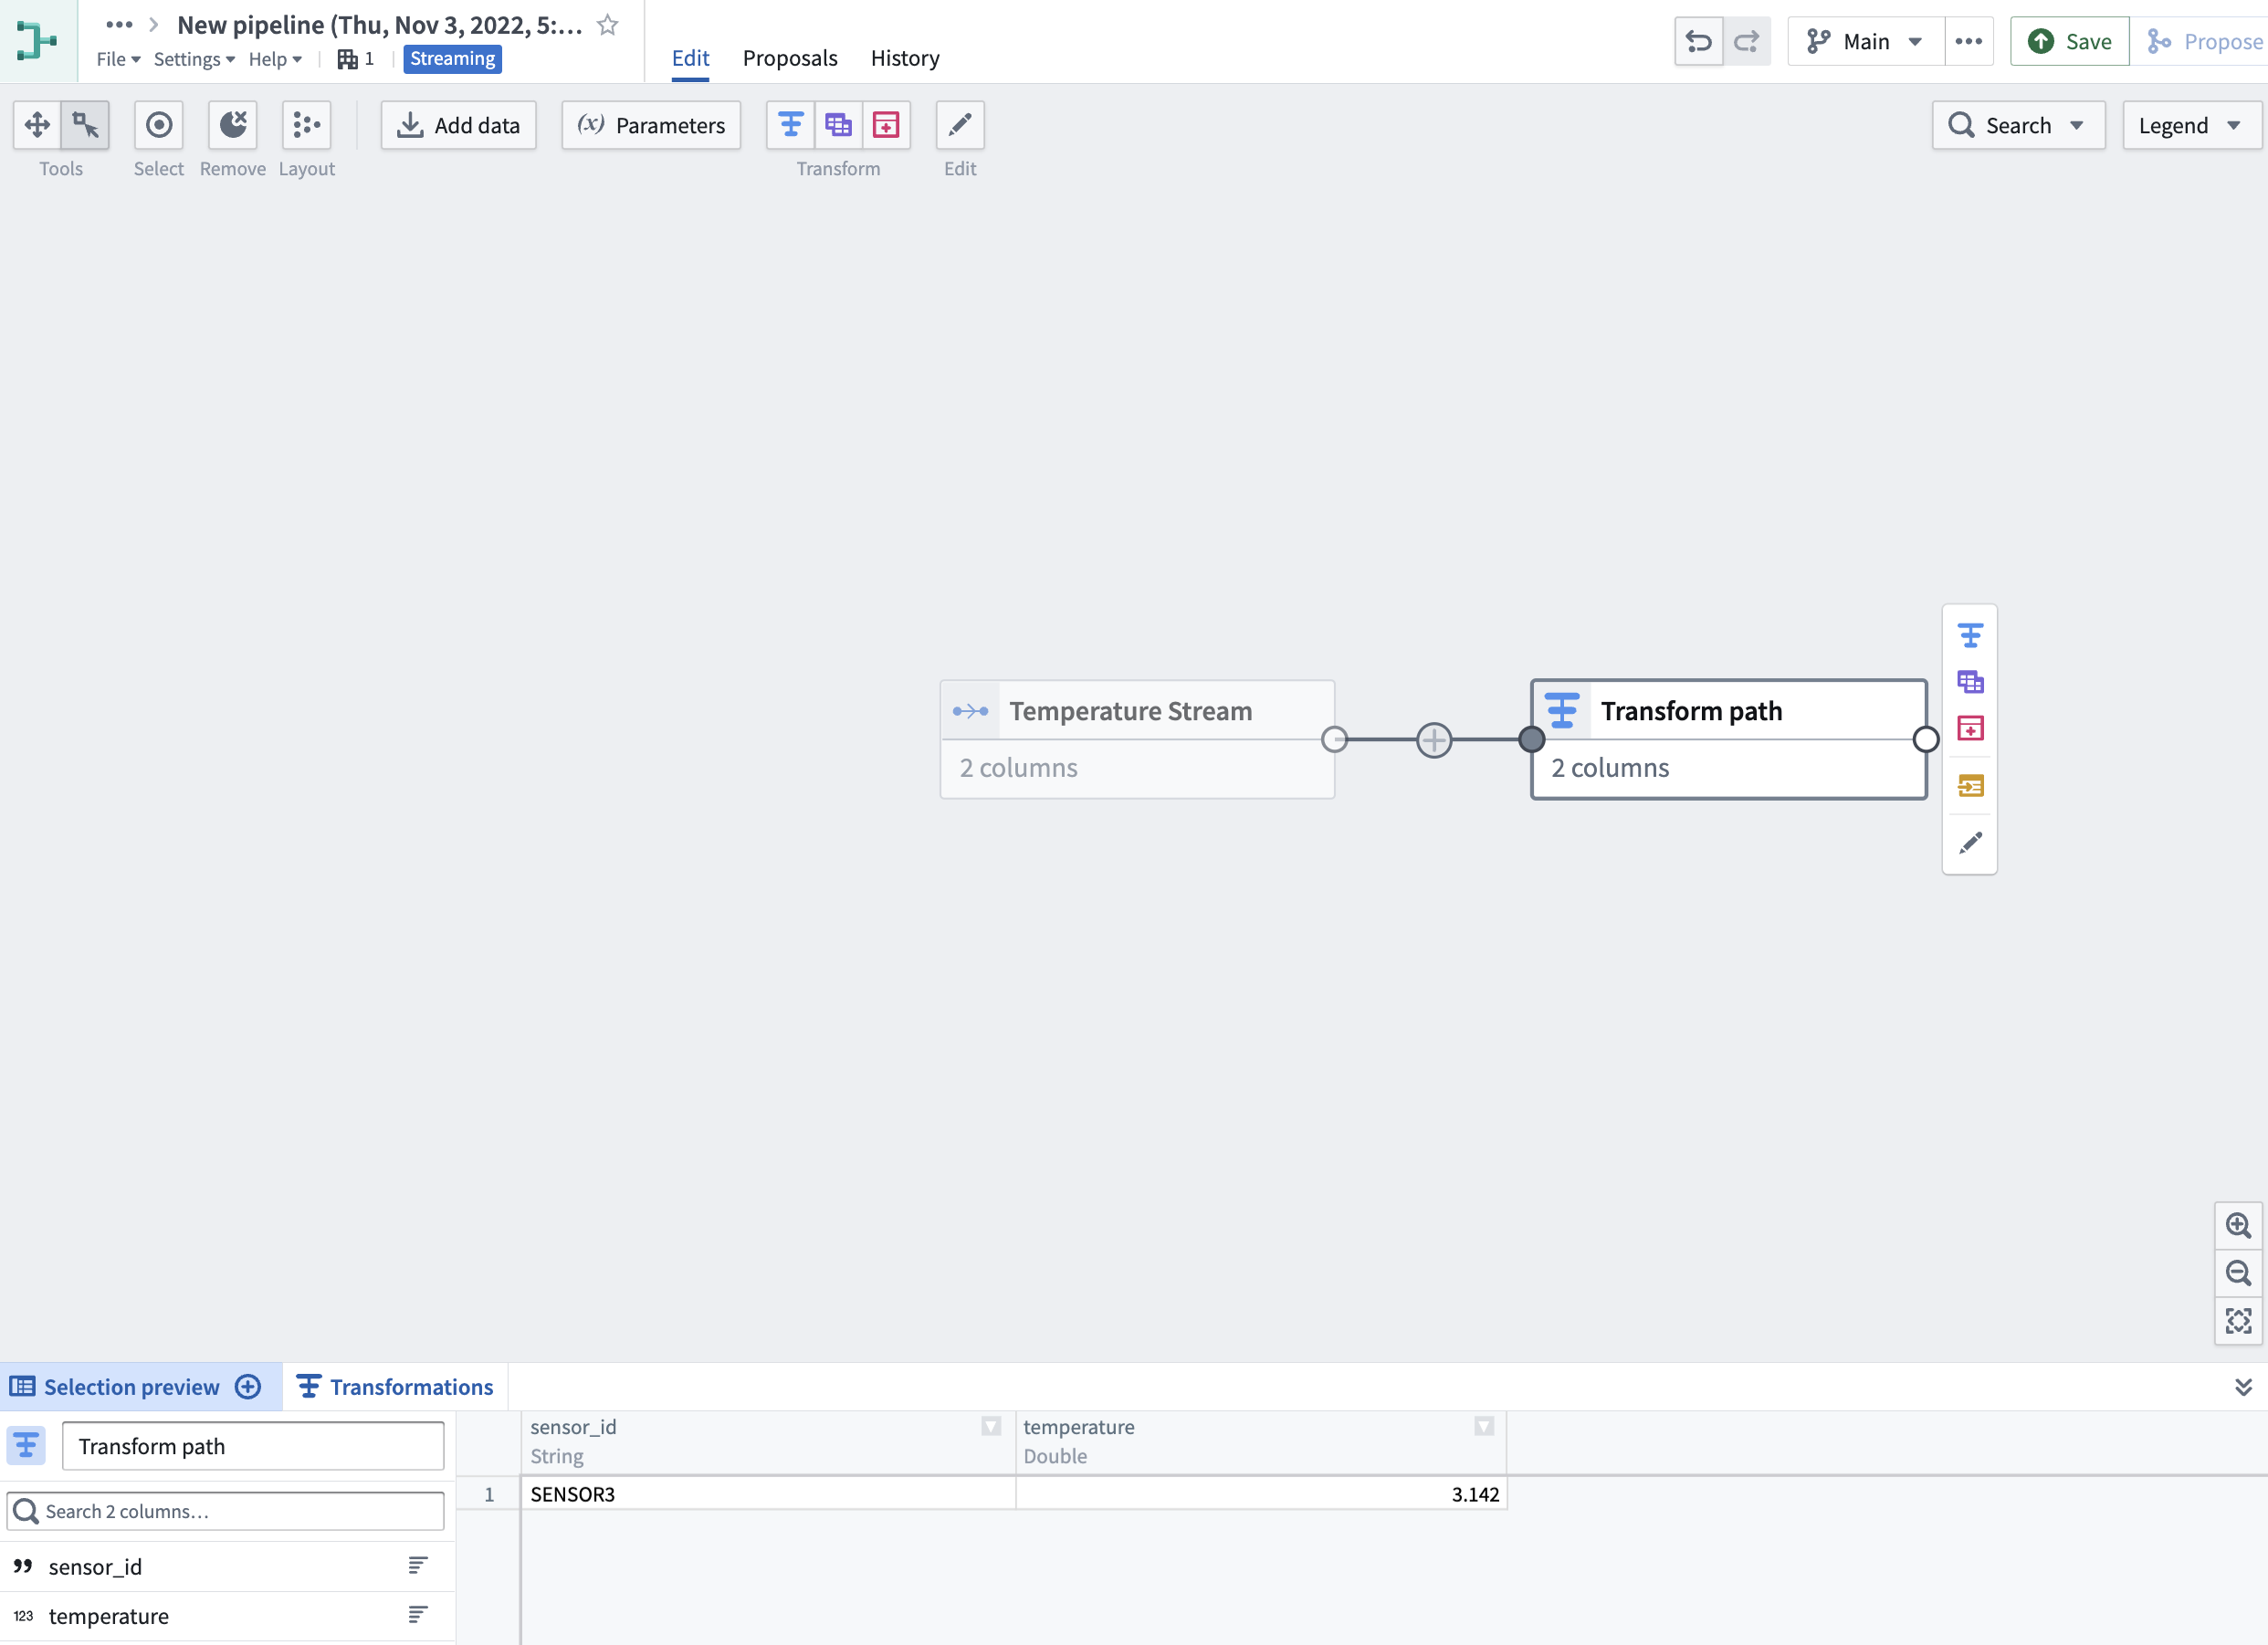
这将为输入流创建一个管道,并以图形方式显示。
选择输入流节点将显示数据的预览。请注意,预览运行在流的冷存储视图(Cold Storage View)上;流中的记录在显示之前会有延迟。
- 点击图形上的输入流节点,选择 Transform 操作(输入节点旁边的蓝色 T 图标)。
这将打开一个列表,显示当前基于流中列输入类型所支持的所有转换。在本教程中,我们将把所有 sensor_ids 转换为大写,去除其中的所有空白字符,并筛选出温度超过三度的记录。
- 选择 Uppercase 转换,选择
sensor_id列,然后点击 Apply。
- 然后,搜索 Trim whitespace 转换并选择它。再次选择
sensor_id列,然后点击 Apply。
- 对于最后一个转换,首先搜索 Filter 转换并选择 Keep rows。然后,选择
temperature列,将筛选条件设置为 greater than3,然后选择 Apply。
- 点击屏幕右上角的 Apply all changes。然后,选择 Back to graph 返回您的管道。
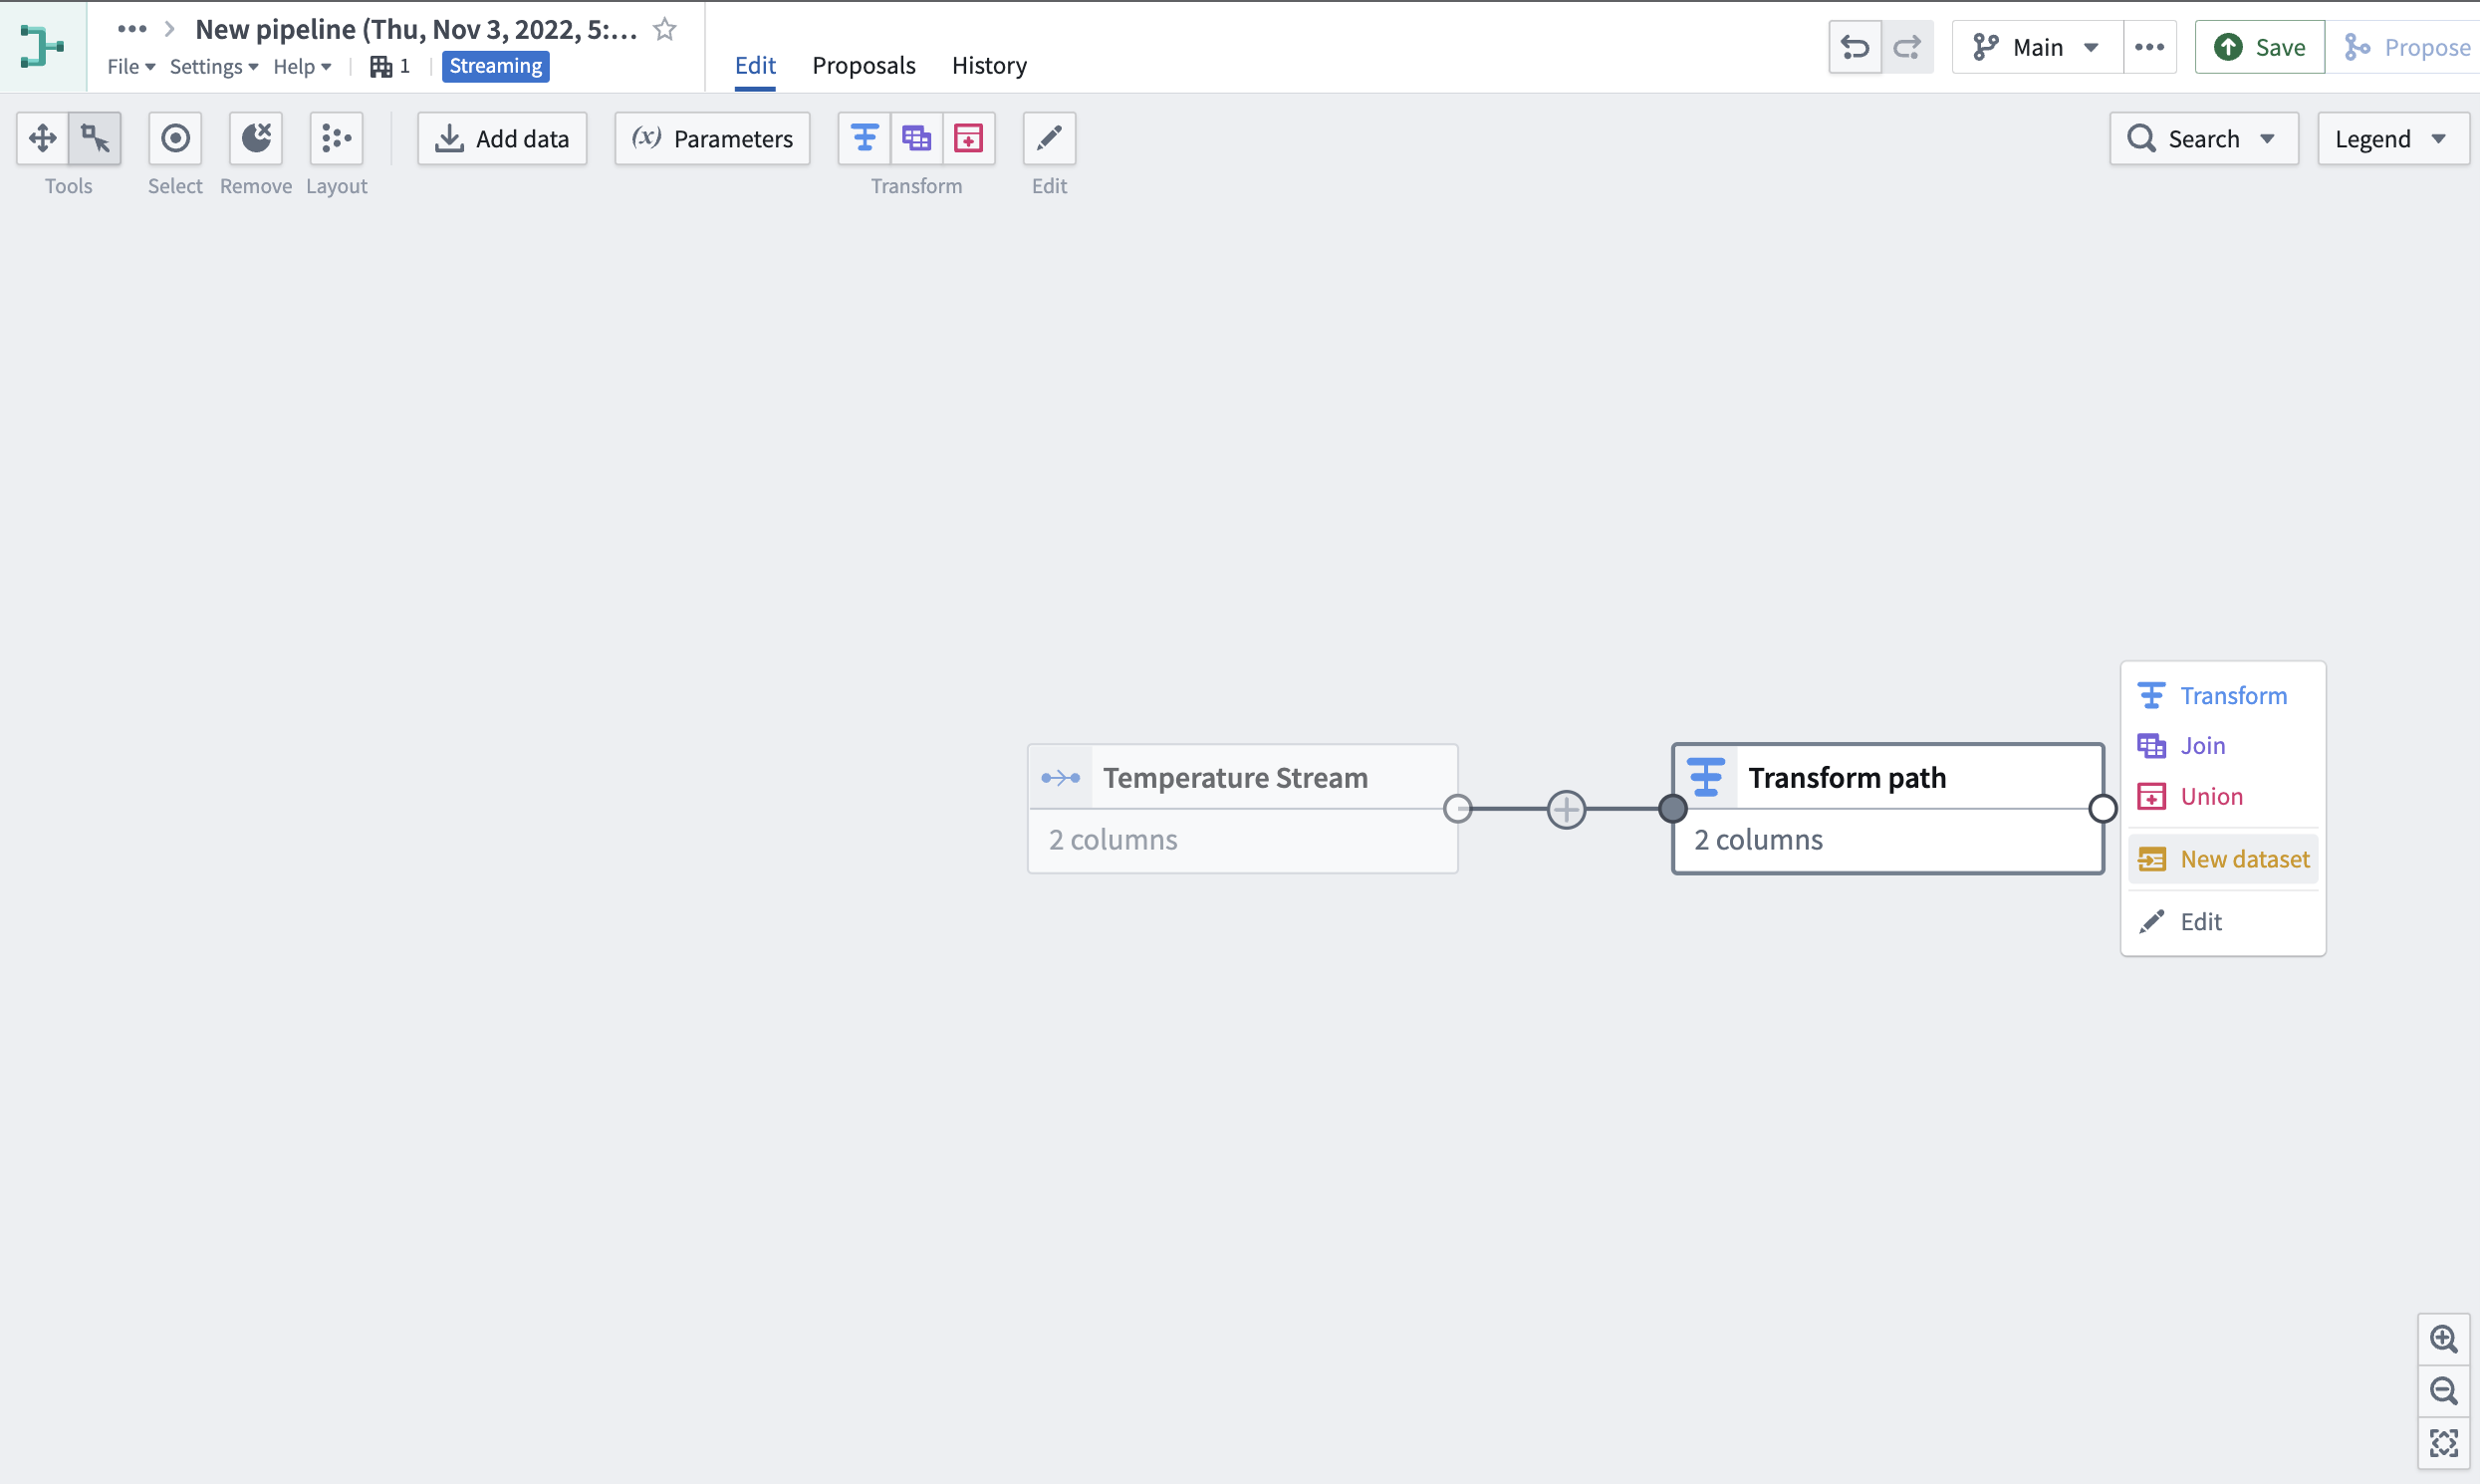
- 选择我们刚刚创建的 Transform path 节点,然后点击 New dataset。
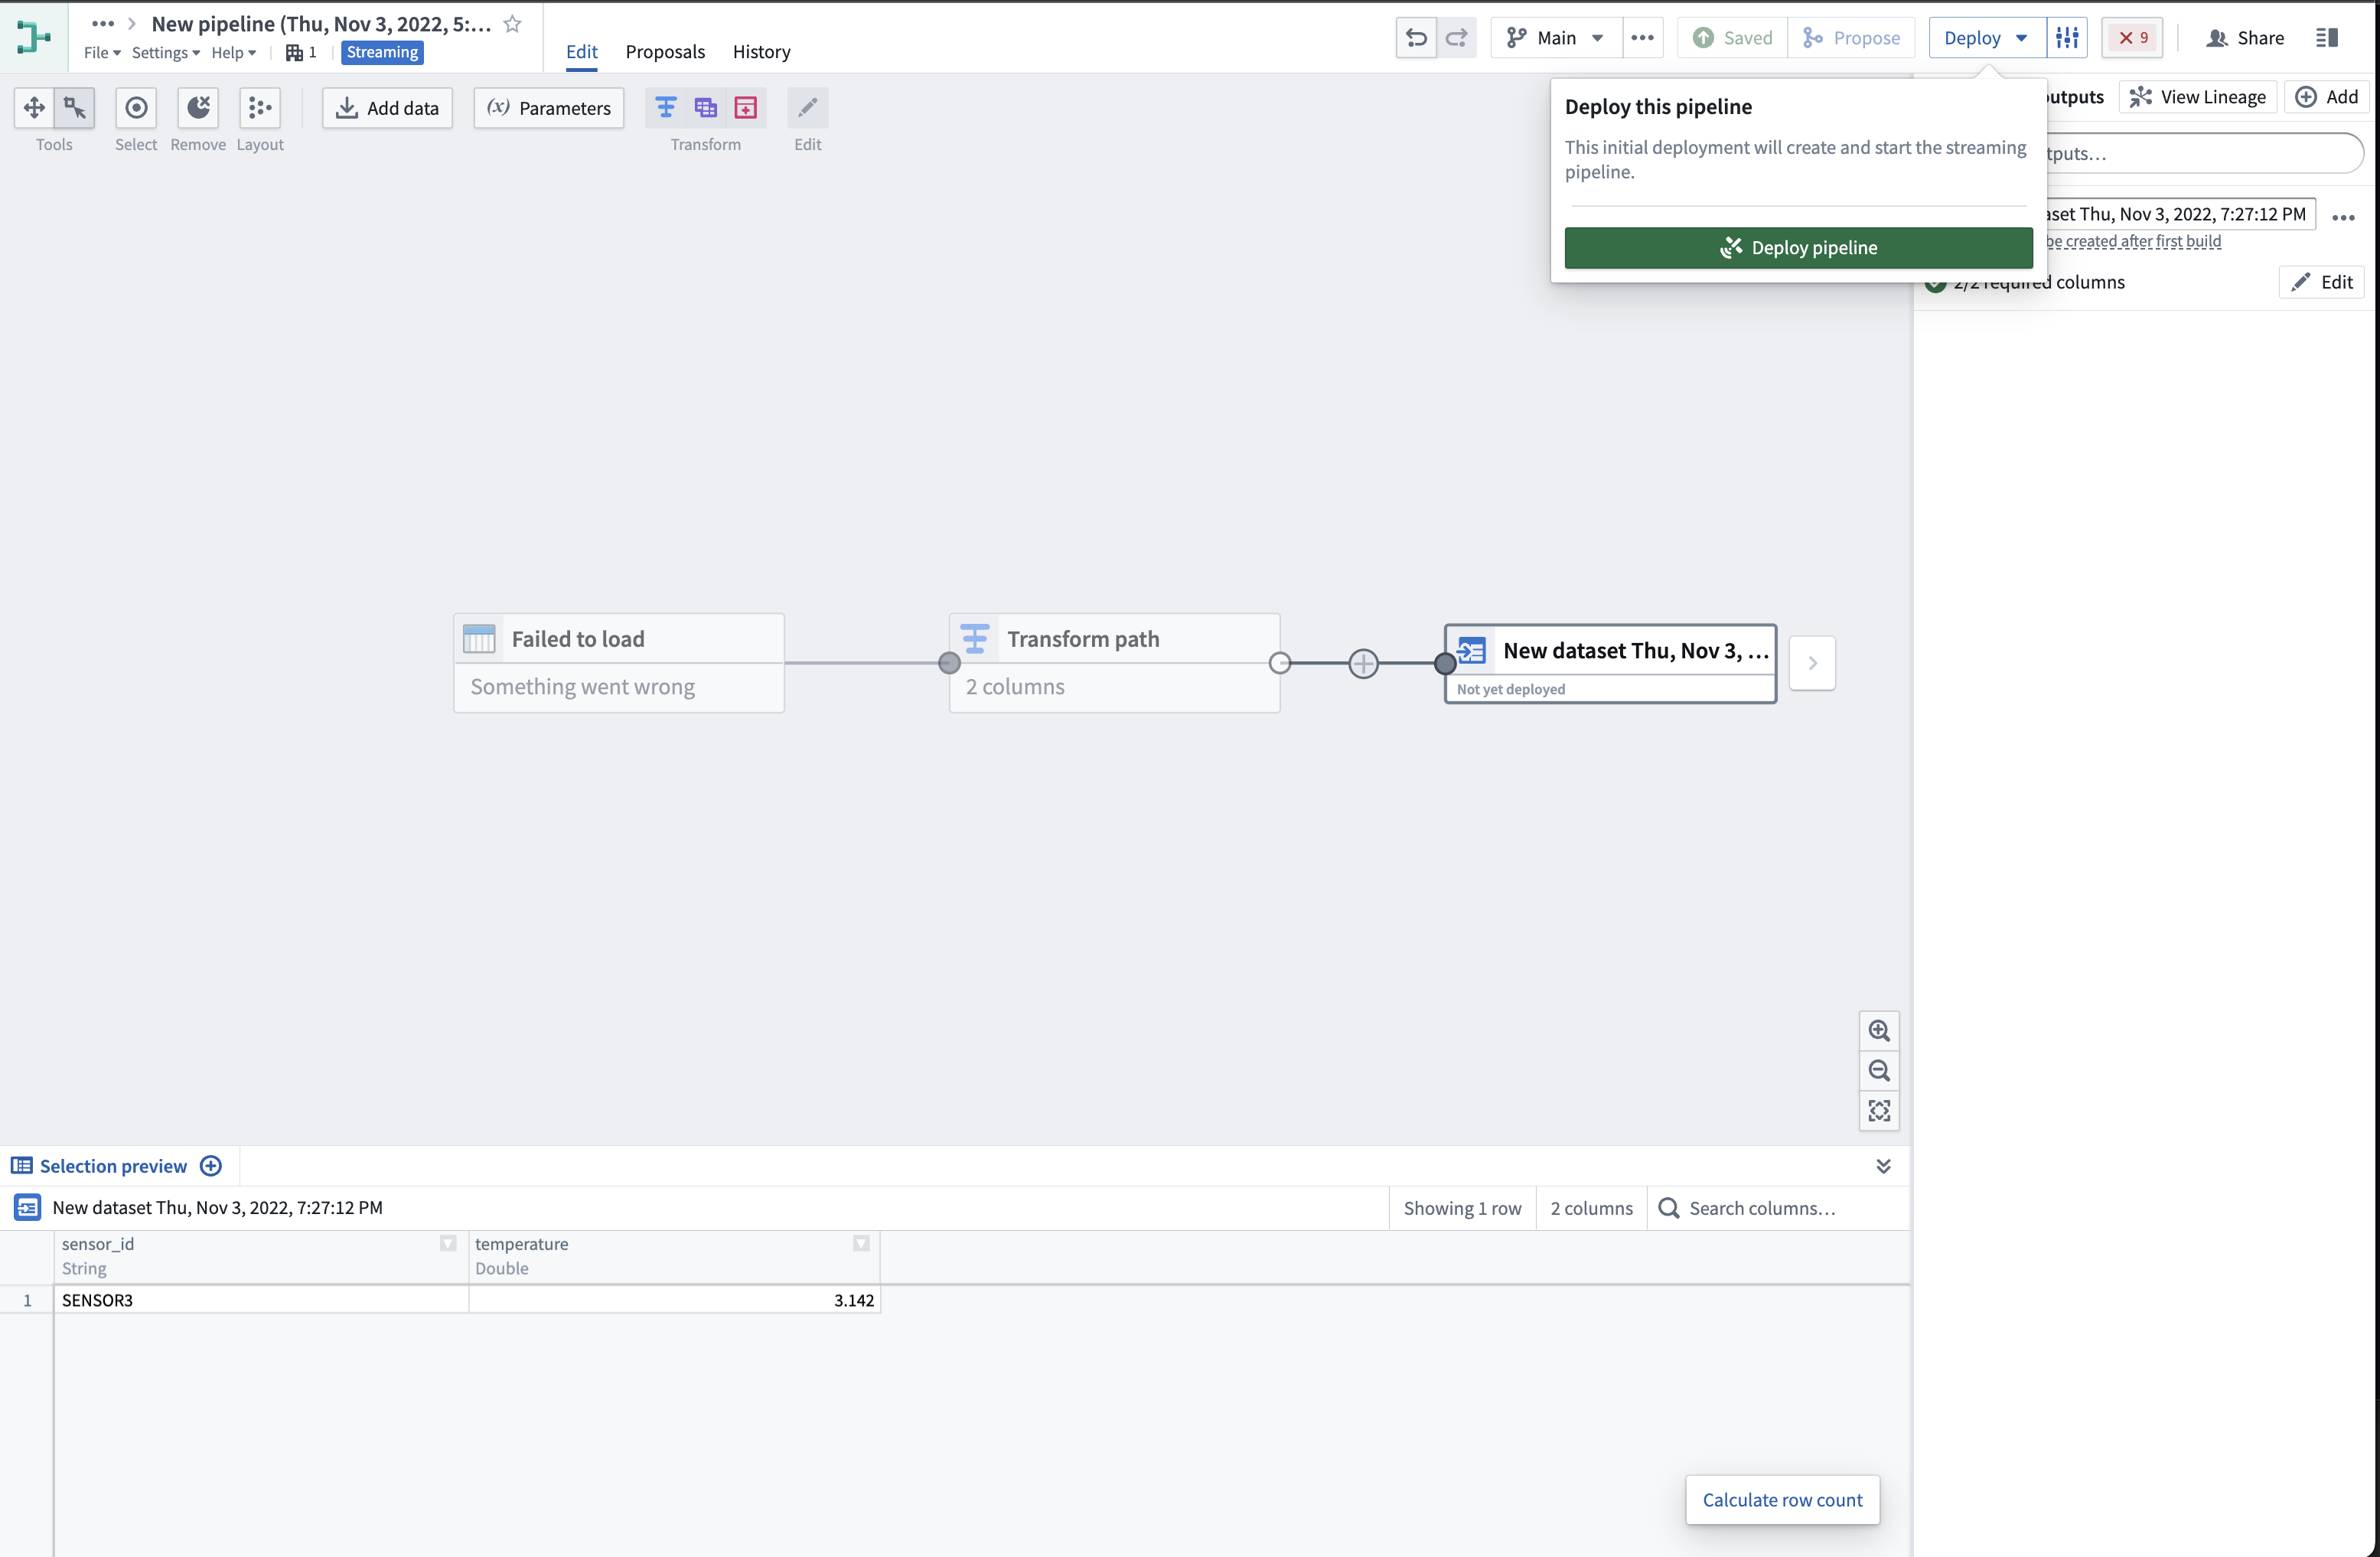
- 在应用程序的右上角,首先点击 Save 以将所有新更改应用到您的管道。然后,点击 Deploy 和 Deploy pipeline。
:::callout{theme="warning"} 如果您保存更改但不部署它们,您的管道逻辑将不会更新为最新更改。您必须部署管道才能捕获转换逻辑的更改。 :::
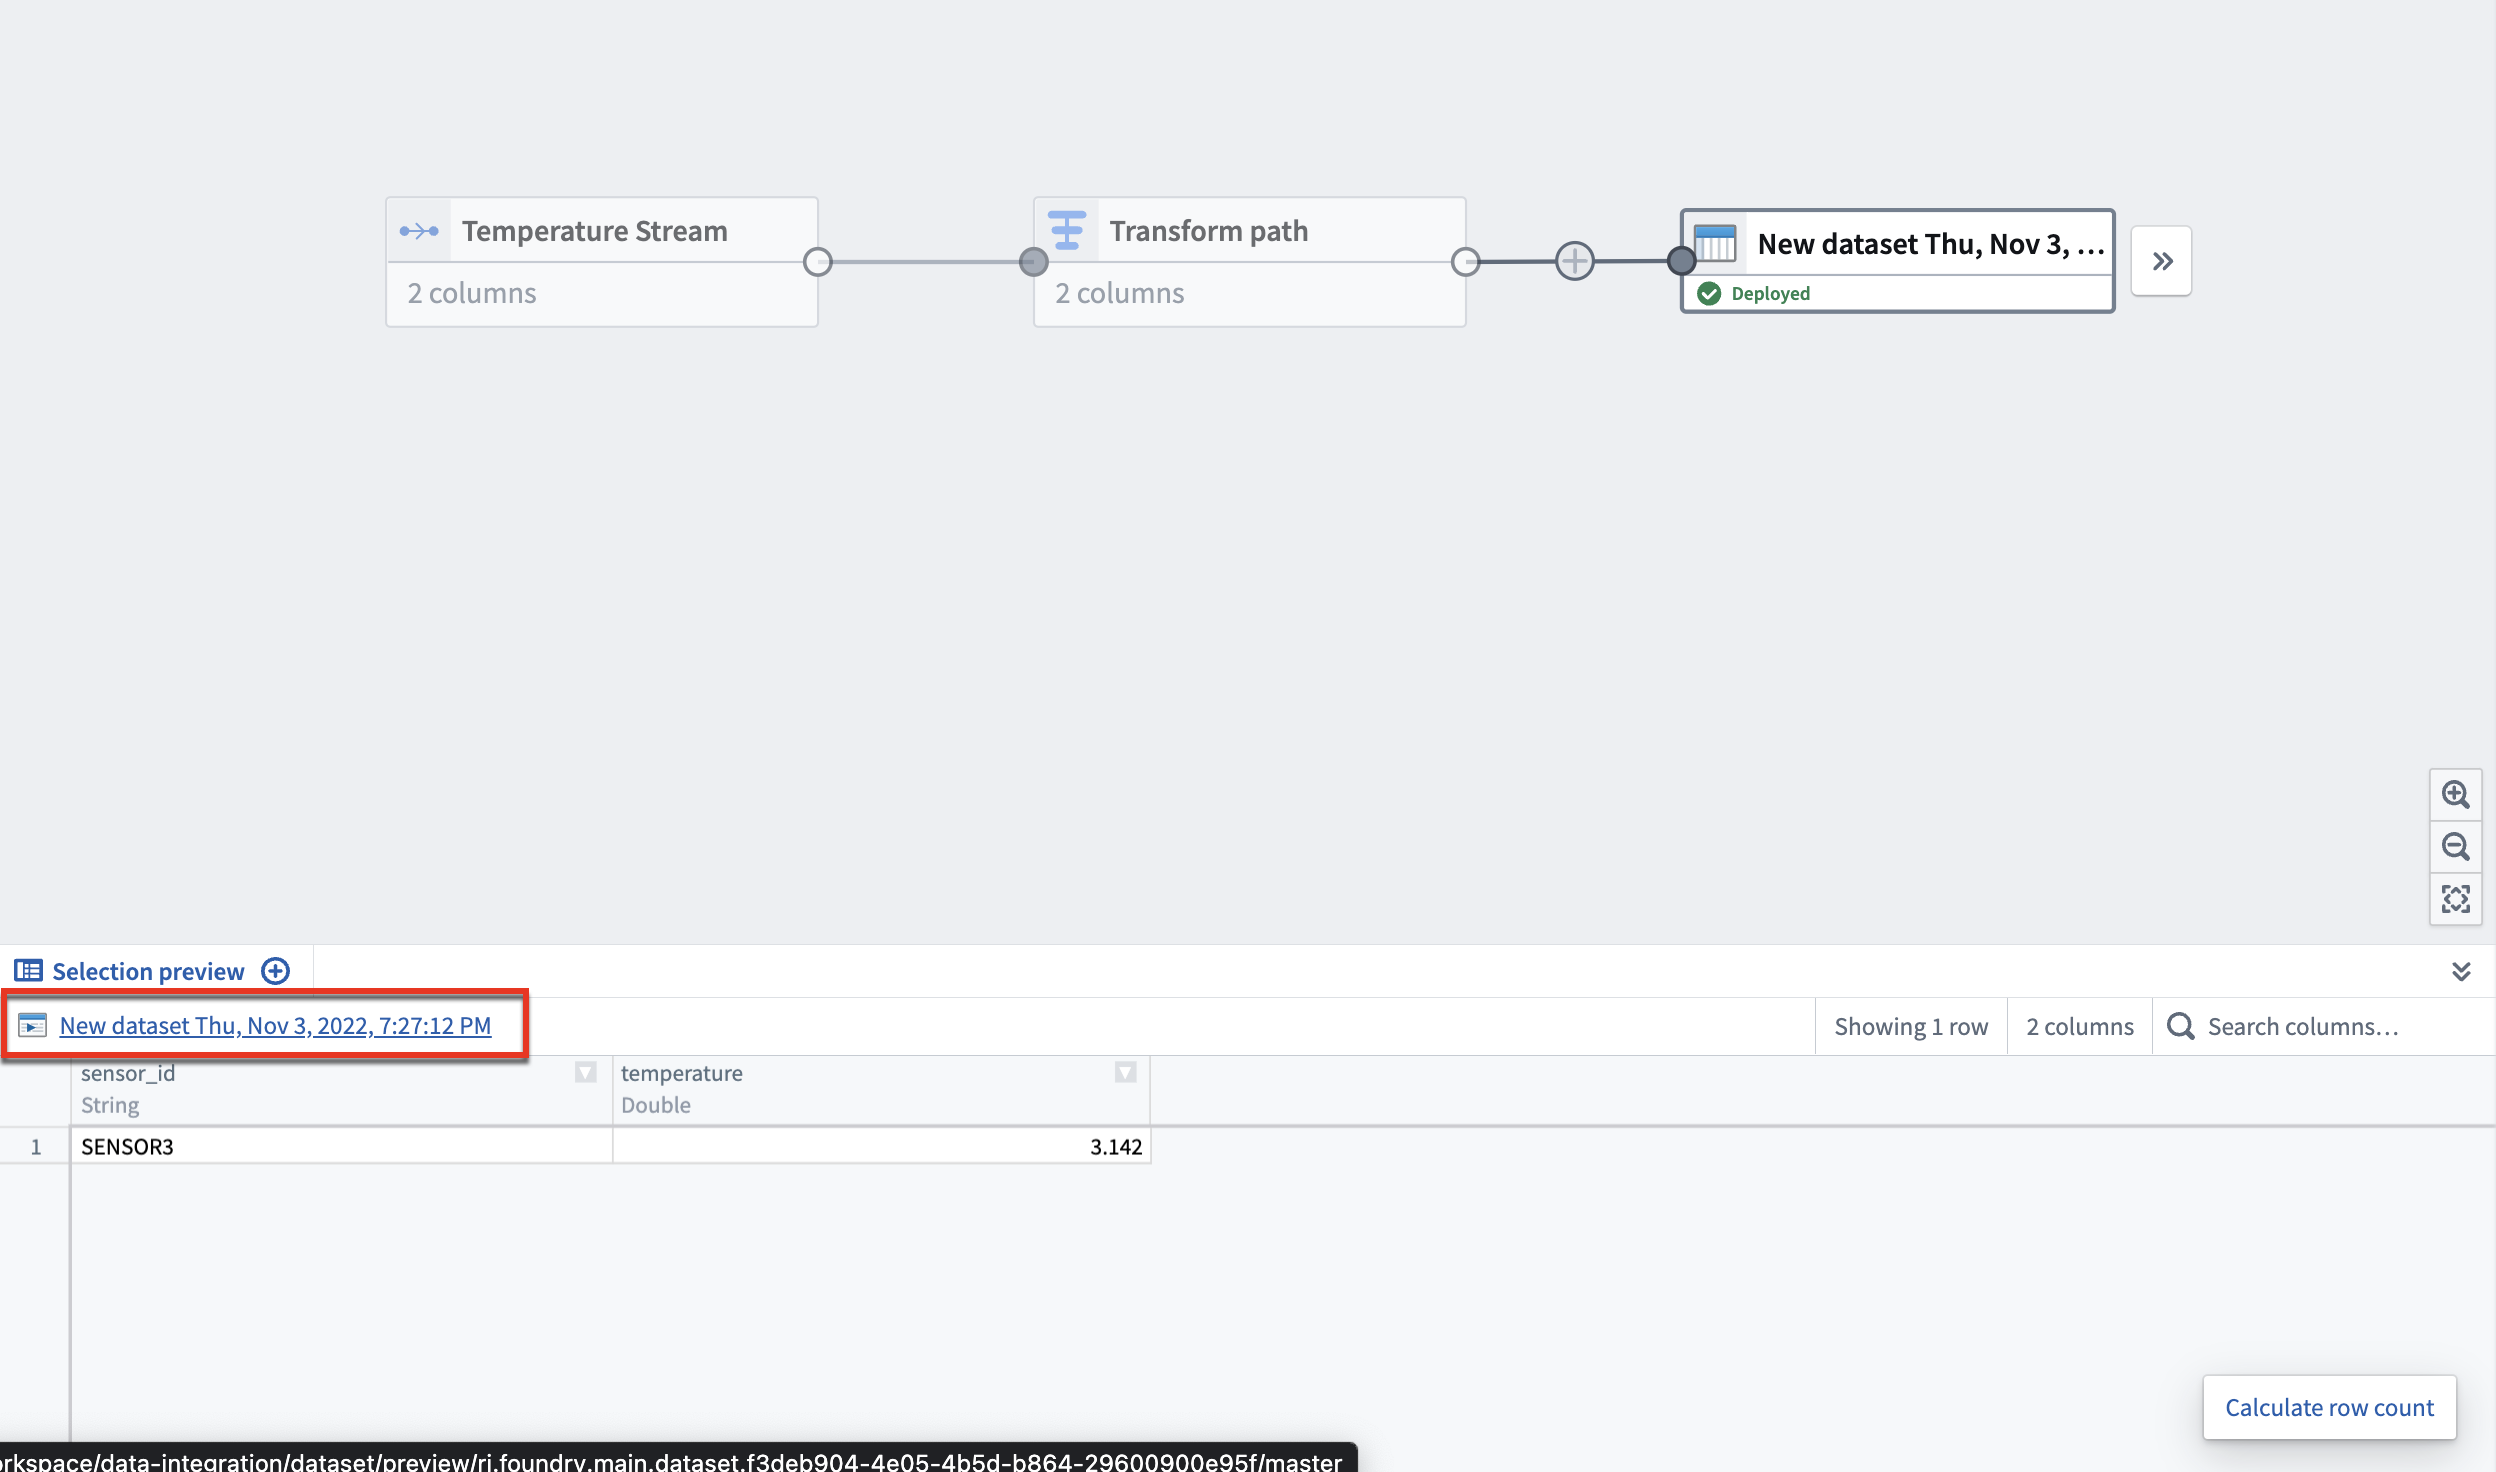
- 选择您刚刚创建的输出流节点,然后点击图形底部 Data preview 部分上方的流名称。
这将带您进入流预览页面,其中显示来自您转换的输出流。
:::callout{theme="neutral"} 流式集群大约需要一分钟启动,因此您可能不会立即看到记录。但一旦运行,集群将实时处理所有新记录。 :::
后续步骤
现在您已经知道如何创建一个简单的流式管道,可以通过探索如何调试故障流(Debug a Failing Stream)来了解更多关于管理流的知识。有关更高级的转换功能,请进一步了解 Pipeline Builder。