Unit testing in Pipeline Builder(Pipeline Builder 中的单元测试(Unit testing))
Improve the reliability of your pipeline in Pipeline Builder through unit tests. These tests serve as a valuable tool for debugging, detecting breaking changes, and ultimately ensuring higher quality pipelines.
What is a unit test?
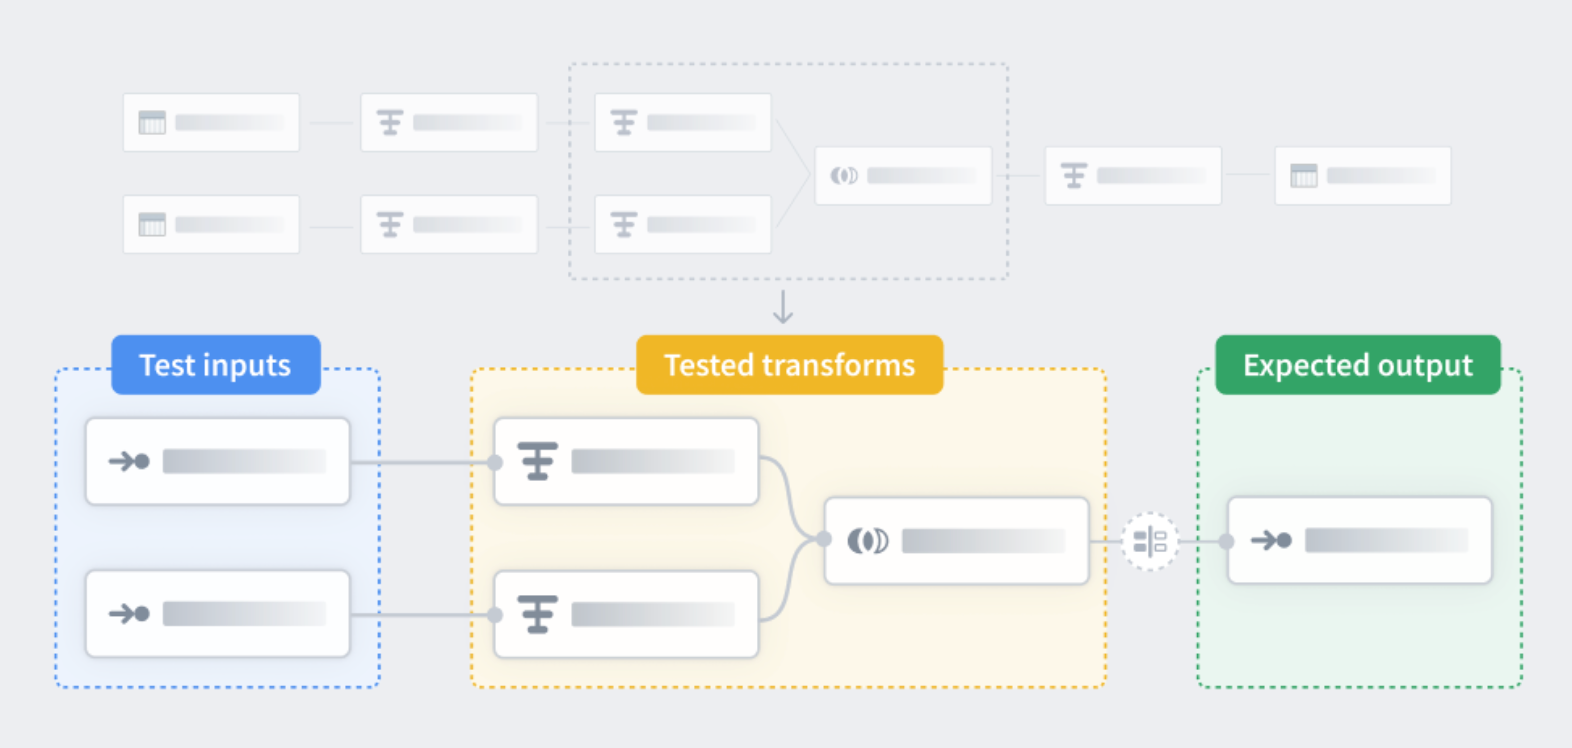
Similar to unit tests in code, unit tests in Pipeline Builder are a way to check that your pipeline logic produces the expected outputs when tested with predefined inputs. Unit tests consist of:
- Test inputs
- Transform nodes
- Expected outputs
Test inputs and expected outputs are created with manually entered tables, but you can copy and paste for faster creation. The transform nodes you want to test can be selected in your main Pipeline Builder workspace. To learn more about creating a unit test see below.
Create a unit test
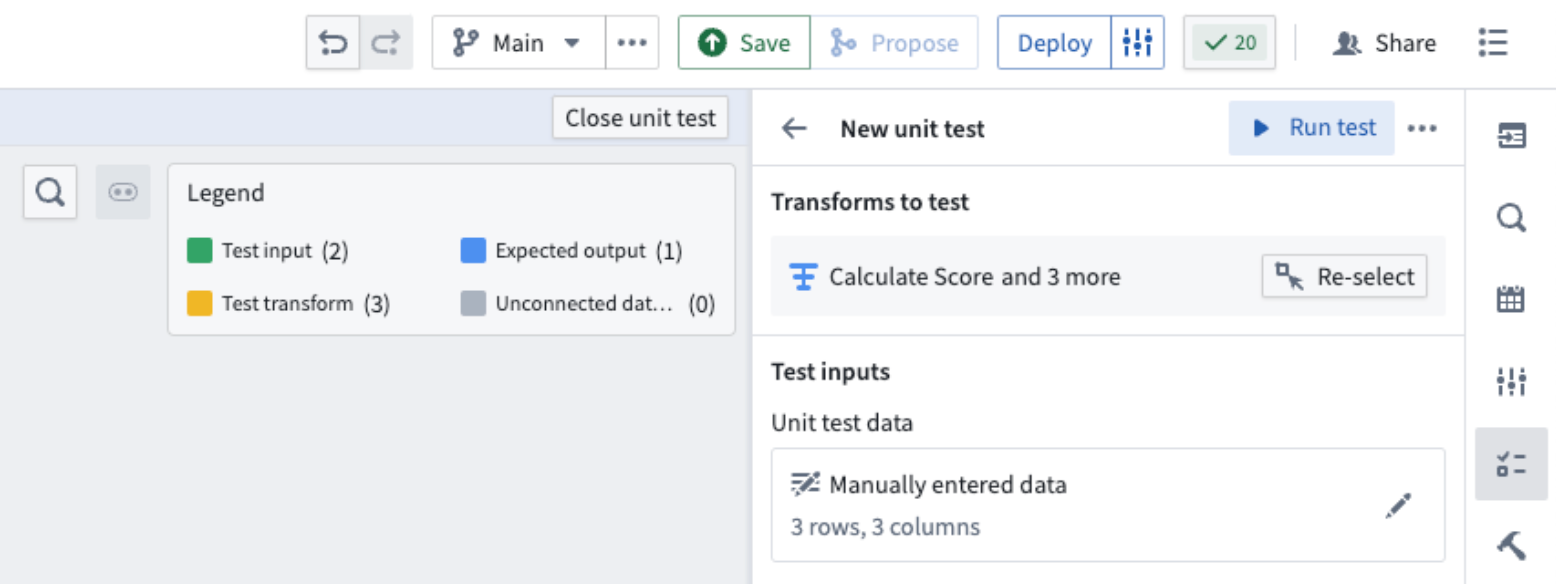
-
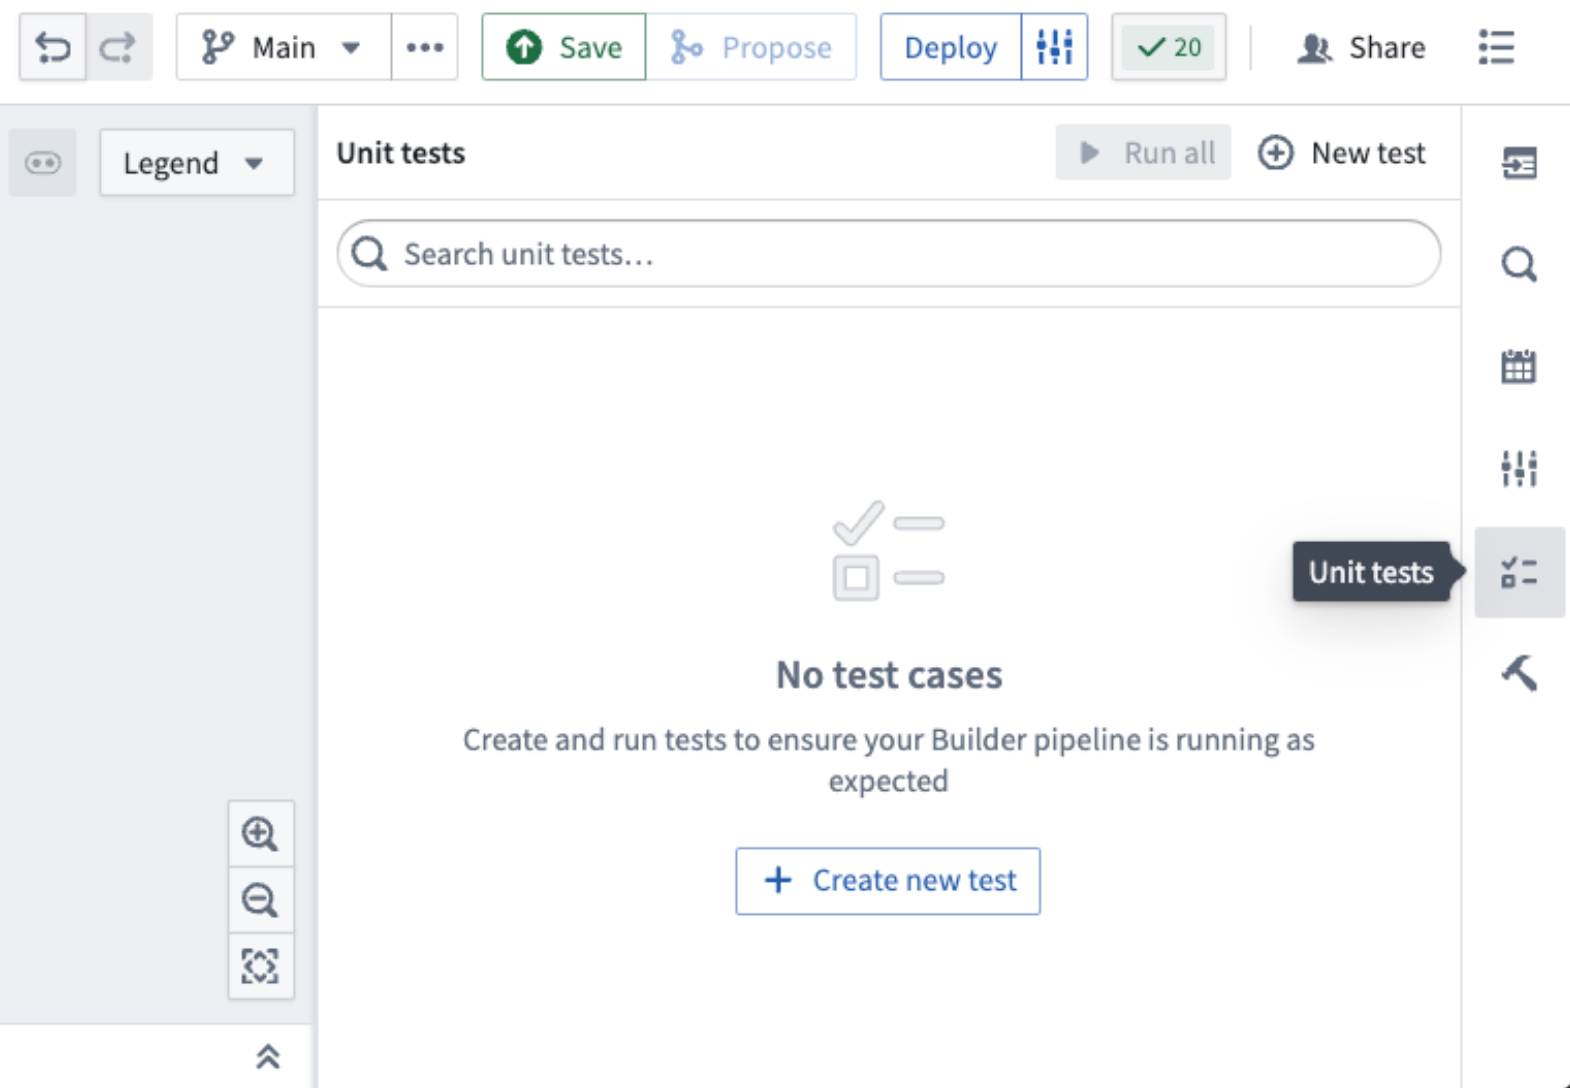
In the main workspace on the right side panel, select the Unit tests icon.
-
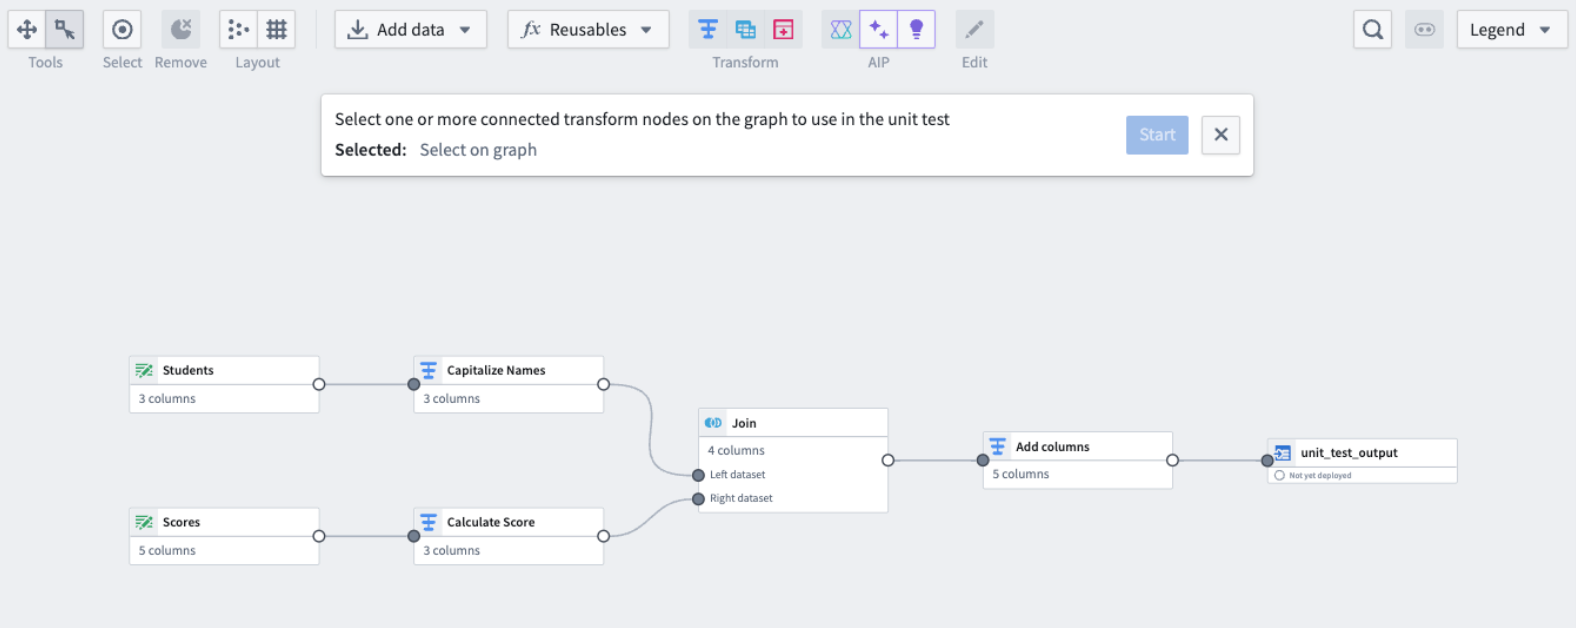
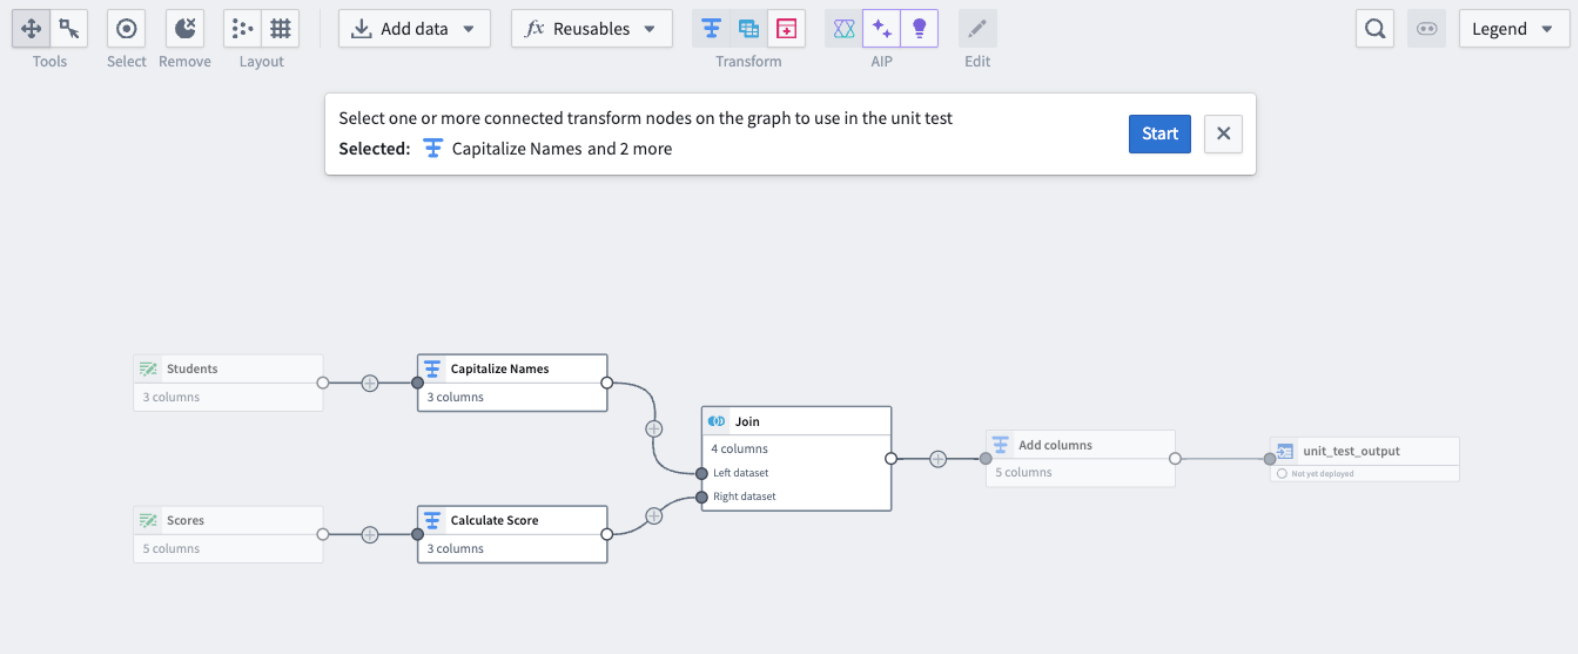
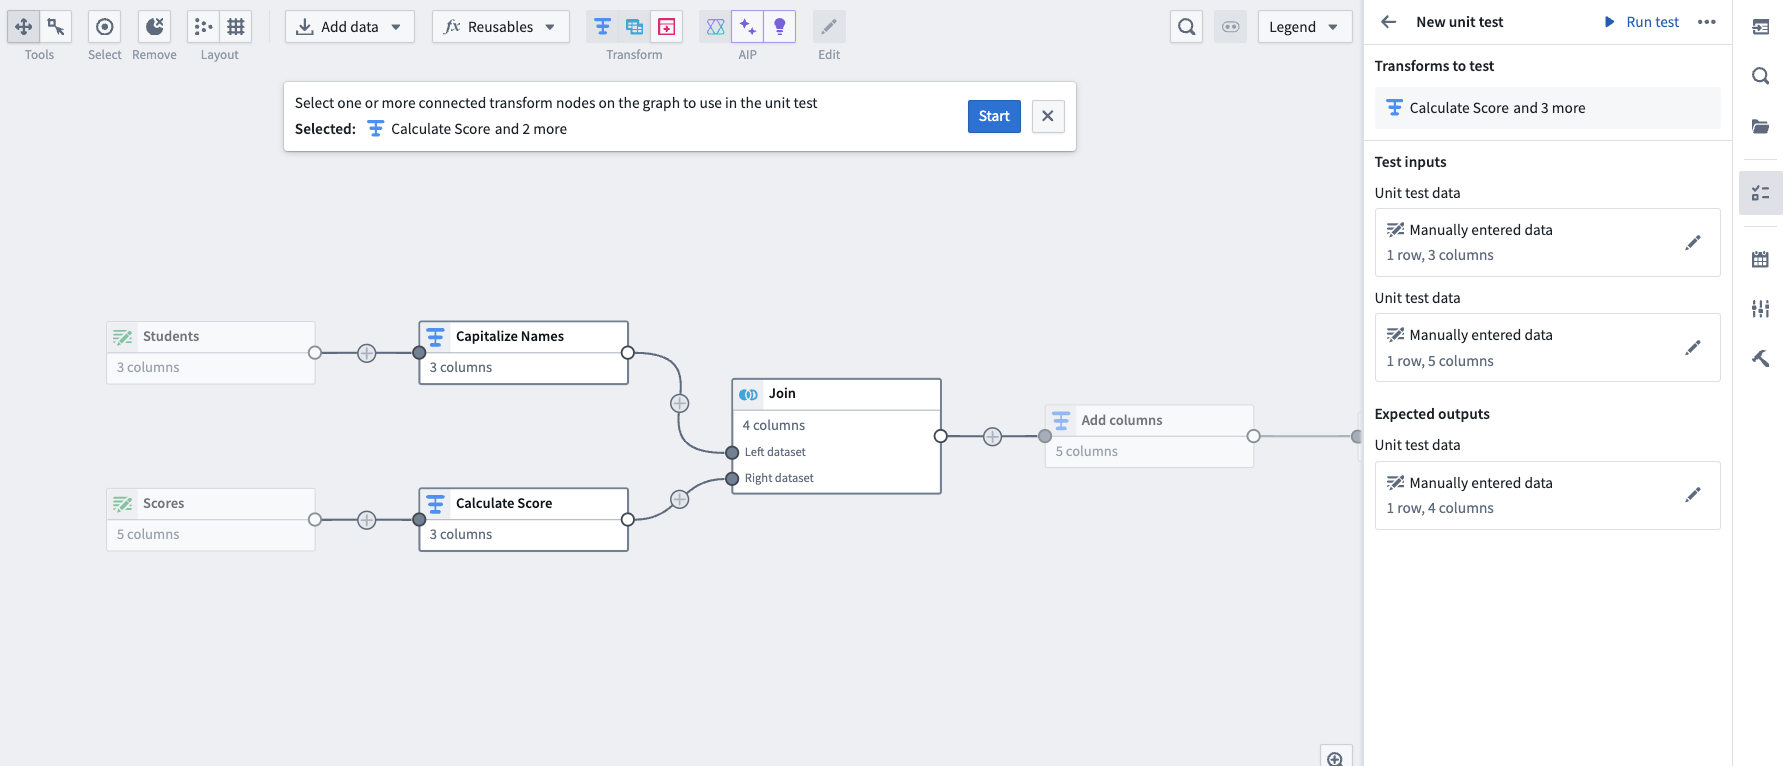
Select Create new test in the center of the screen or New test in the top right. This will open a dialog at the top of your workspace, prompting you to choose the relevant nodes.
-
Once all relevant nodes are chosen, select Start.
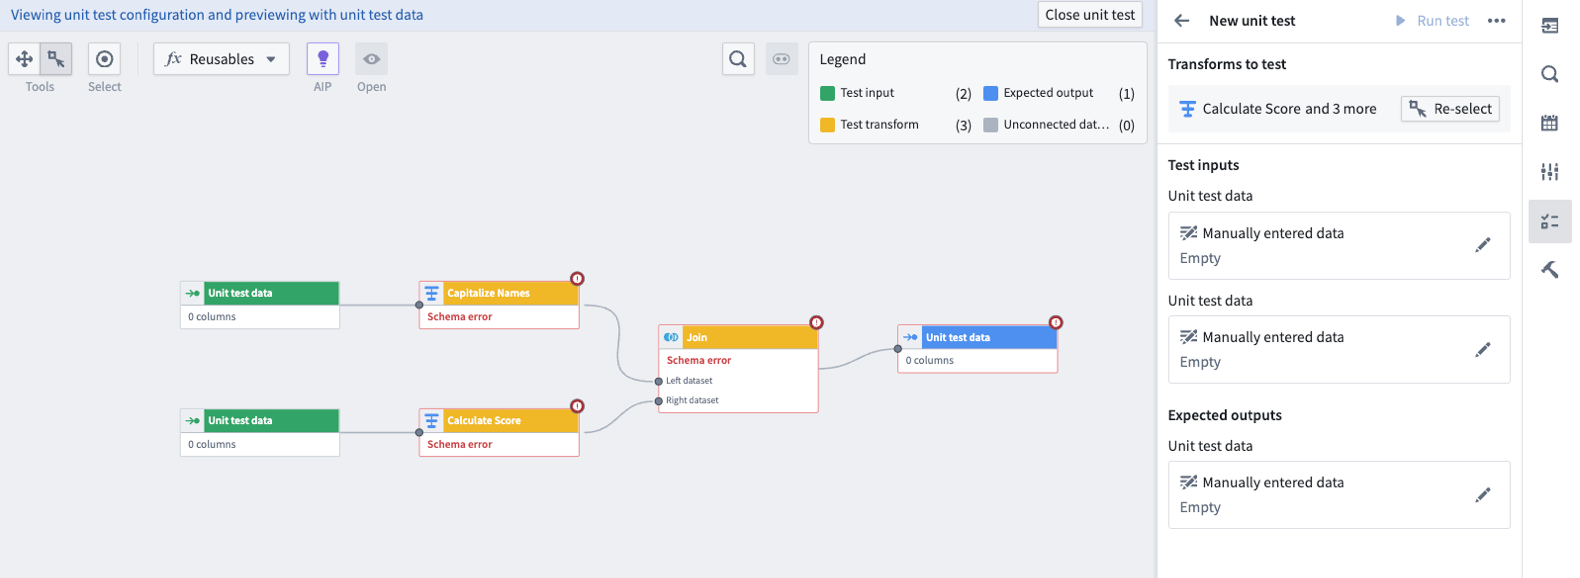
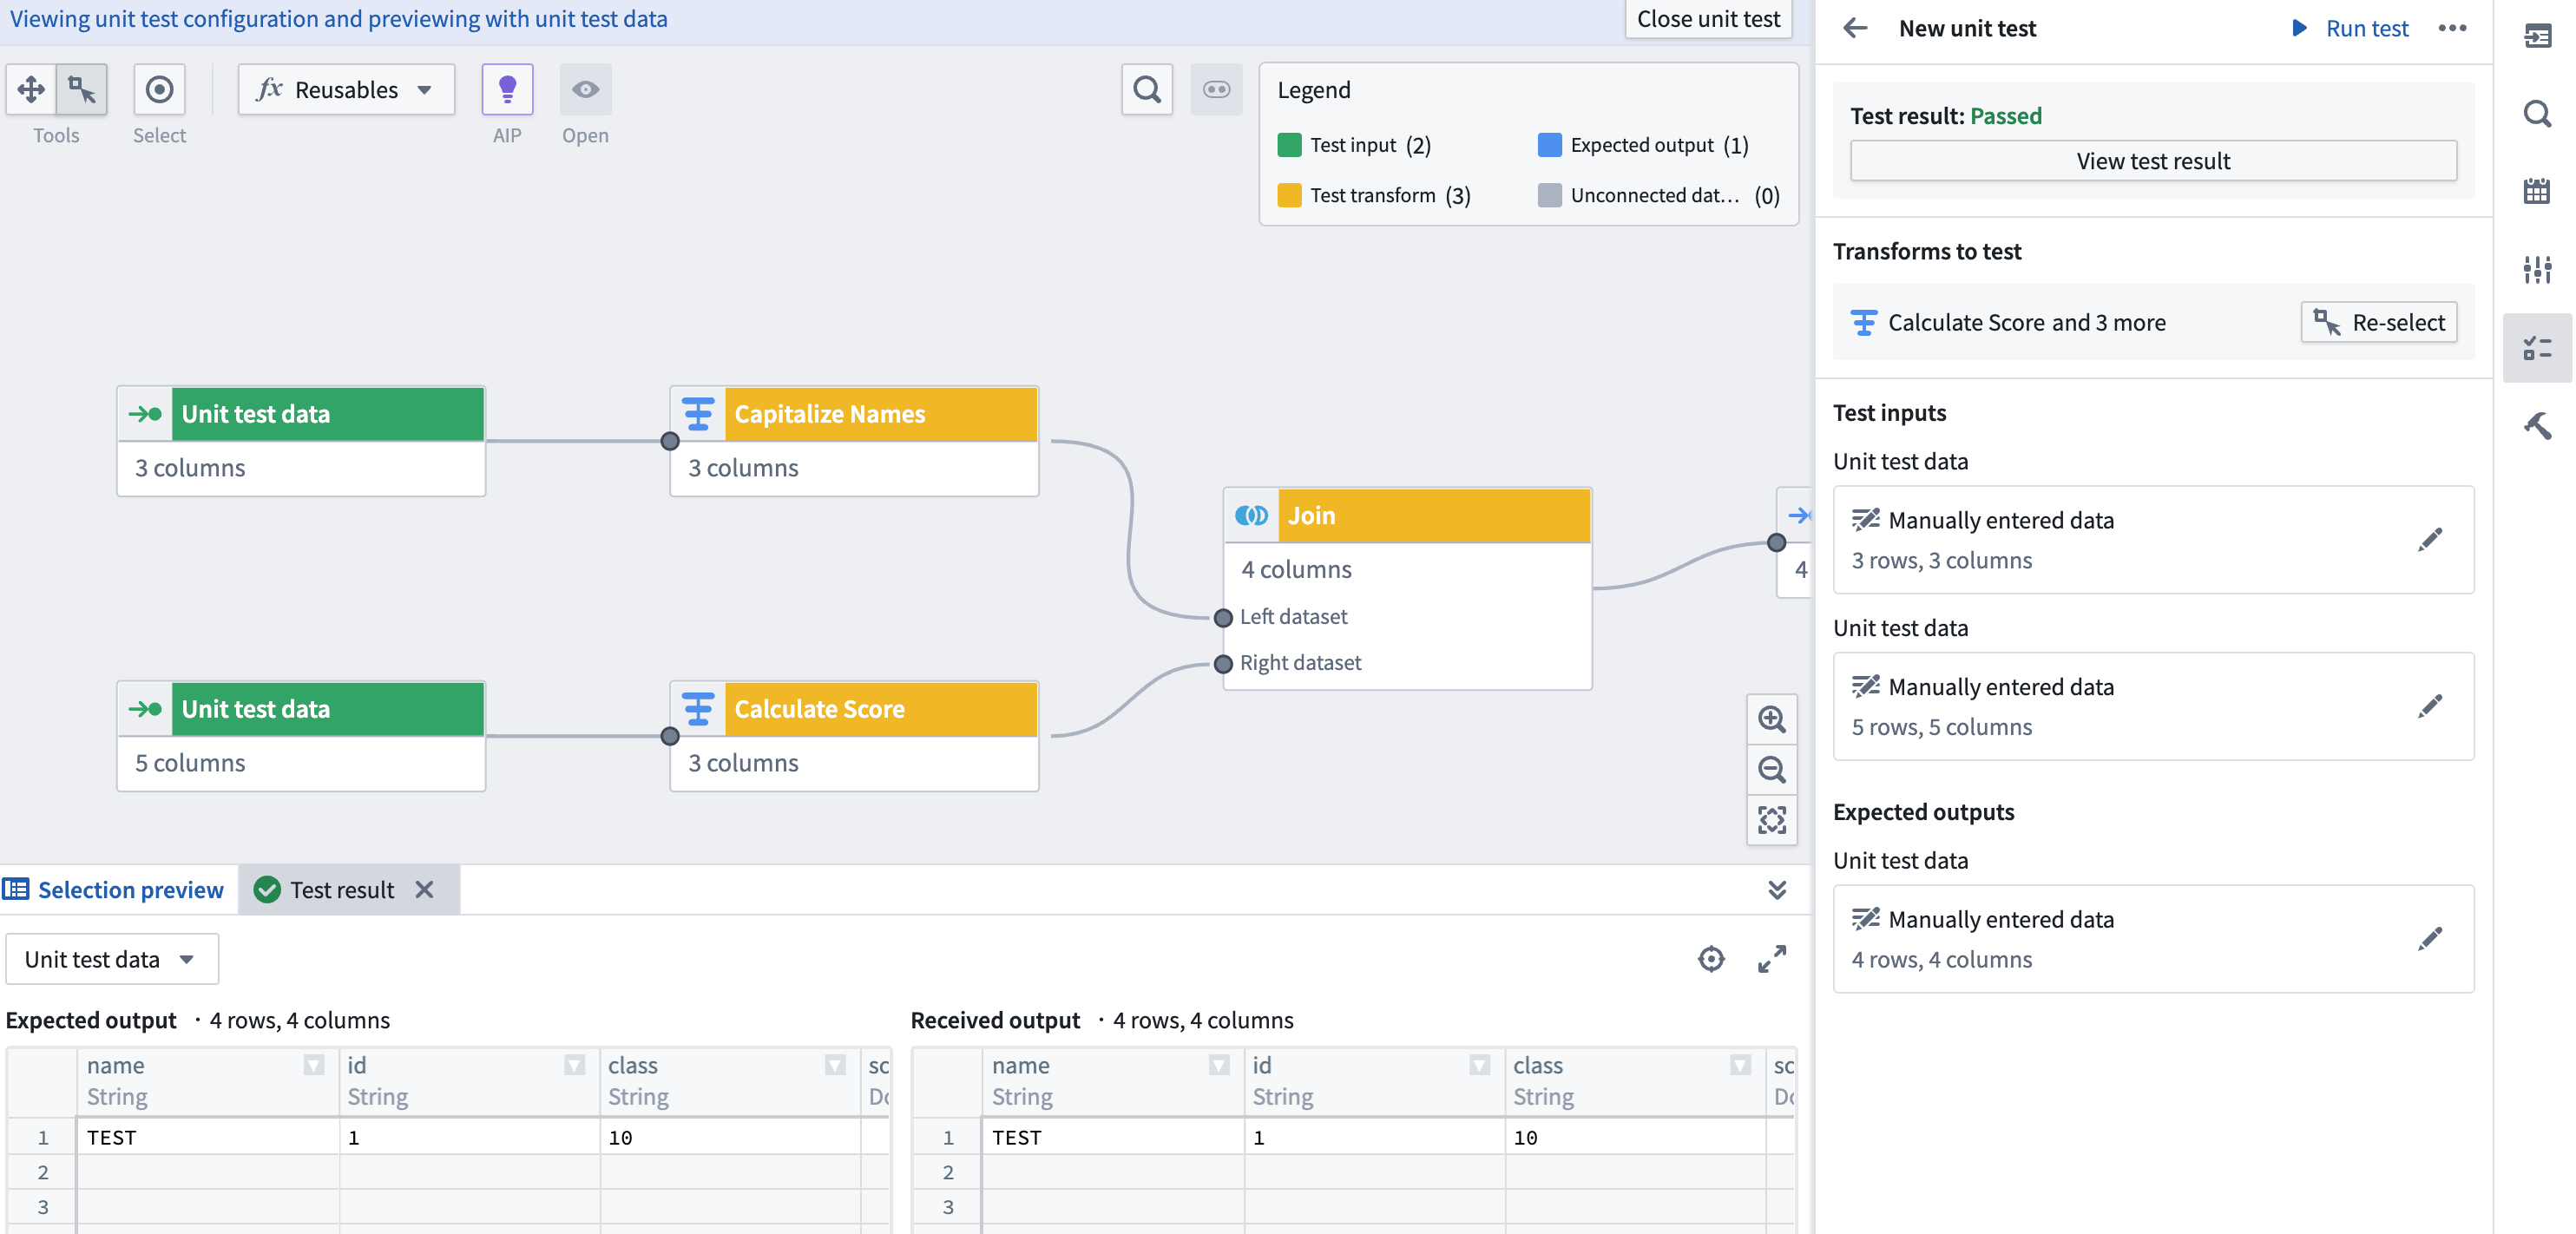
This will take you to the unit test configuration window.
- Yellow nodes correspond to previously selected transform nodes.
- Green nodes correspond to test inputs.
- Blue nodes correspond to test outputs.
For every unit test, you must fill out the input and output data.
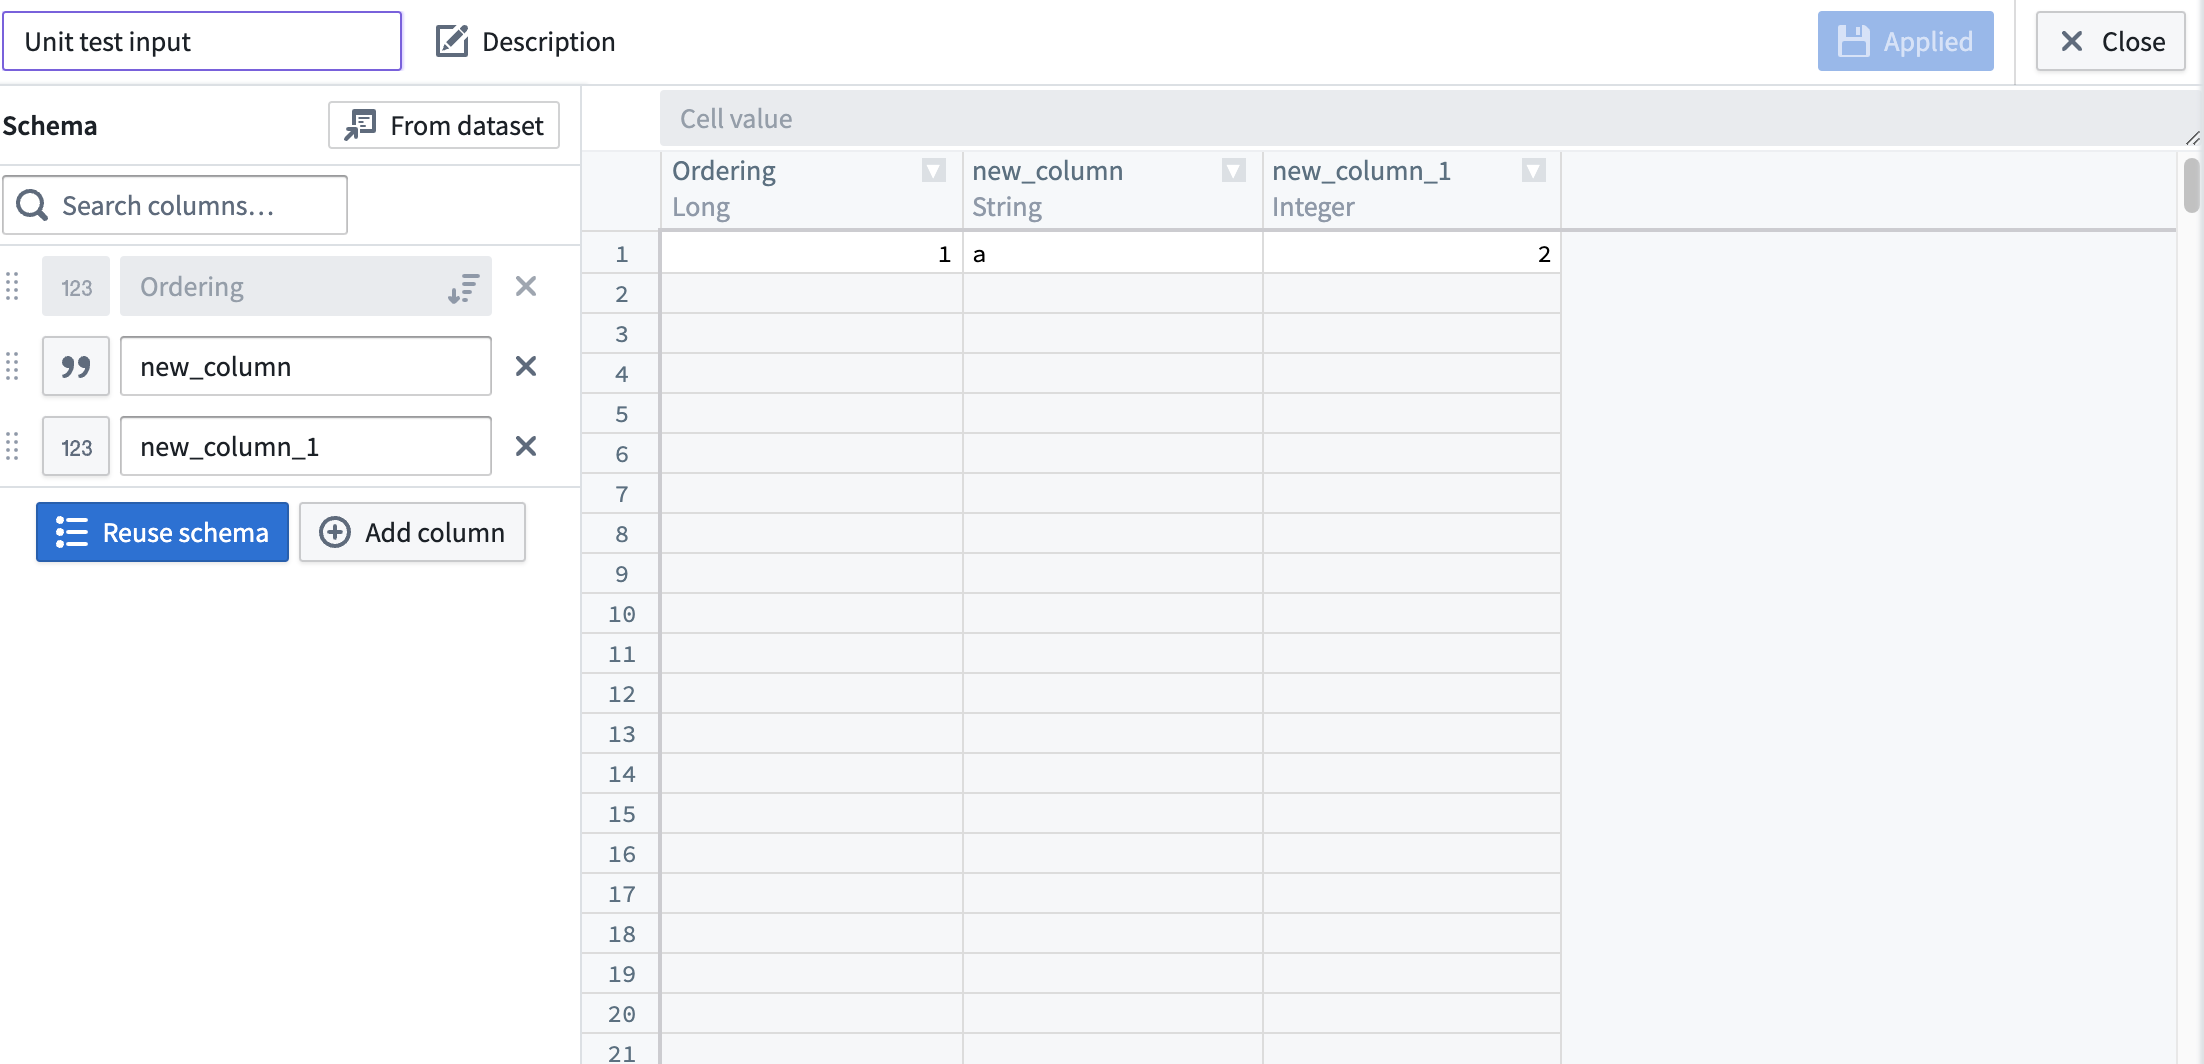
- Fill out the input data or expected output data by double clicking on the node. This will take you to the page below:
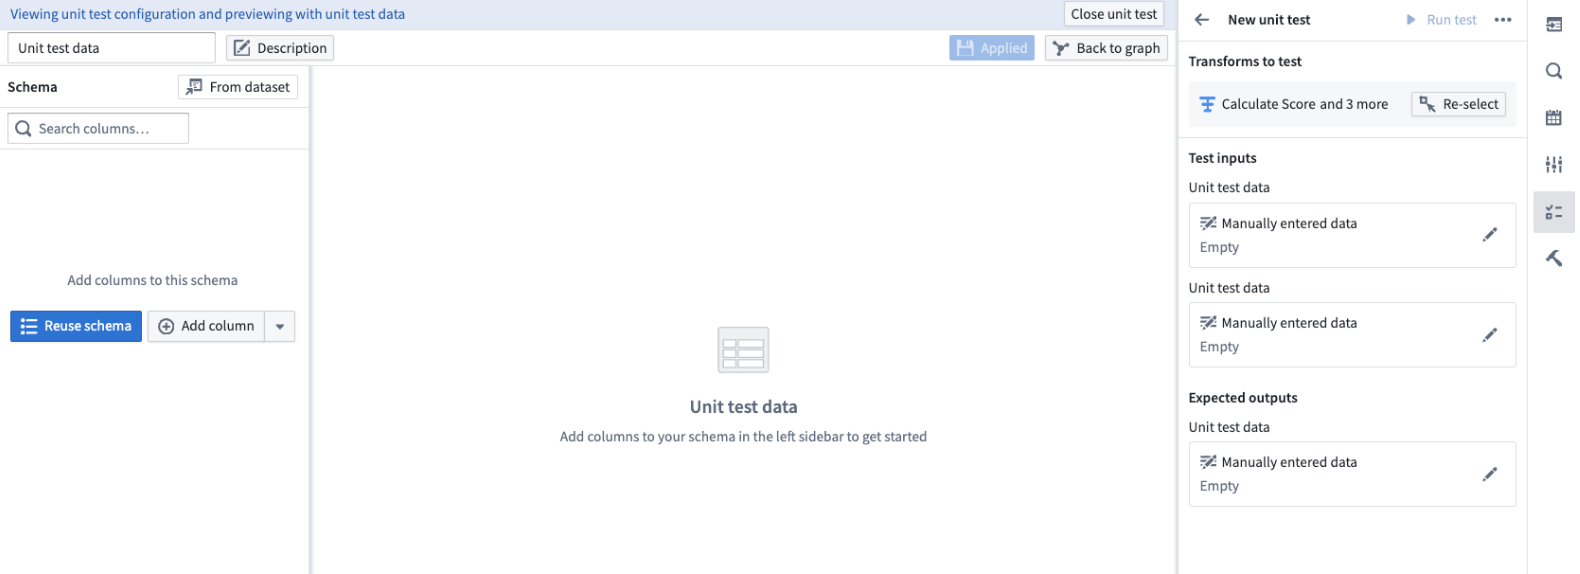
On the left side select:
- Reuse schema: To set the output schema to match the schema of the connected table.
- From dataset: To use a schema from an existing dataset.
- Add column: To manually enter the data schema.
Once the schema is set, fill out the rows in the center table and select Apply, then Back to graph.
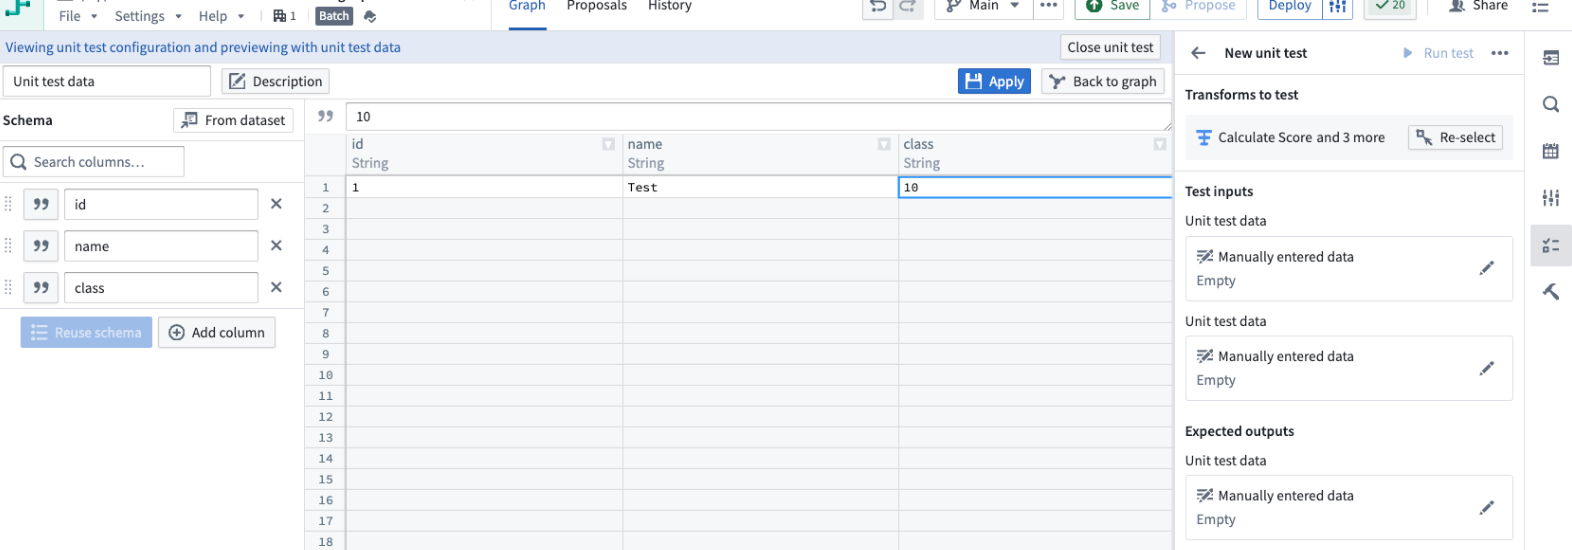
- Repeat this step for all input and output datasets.
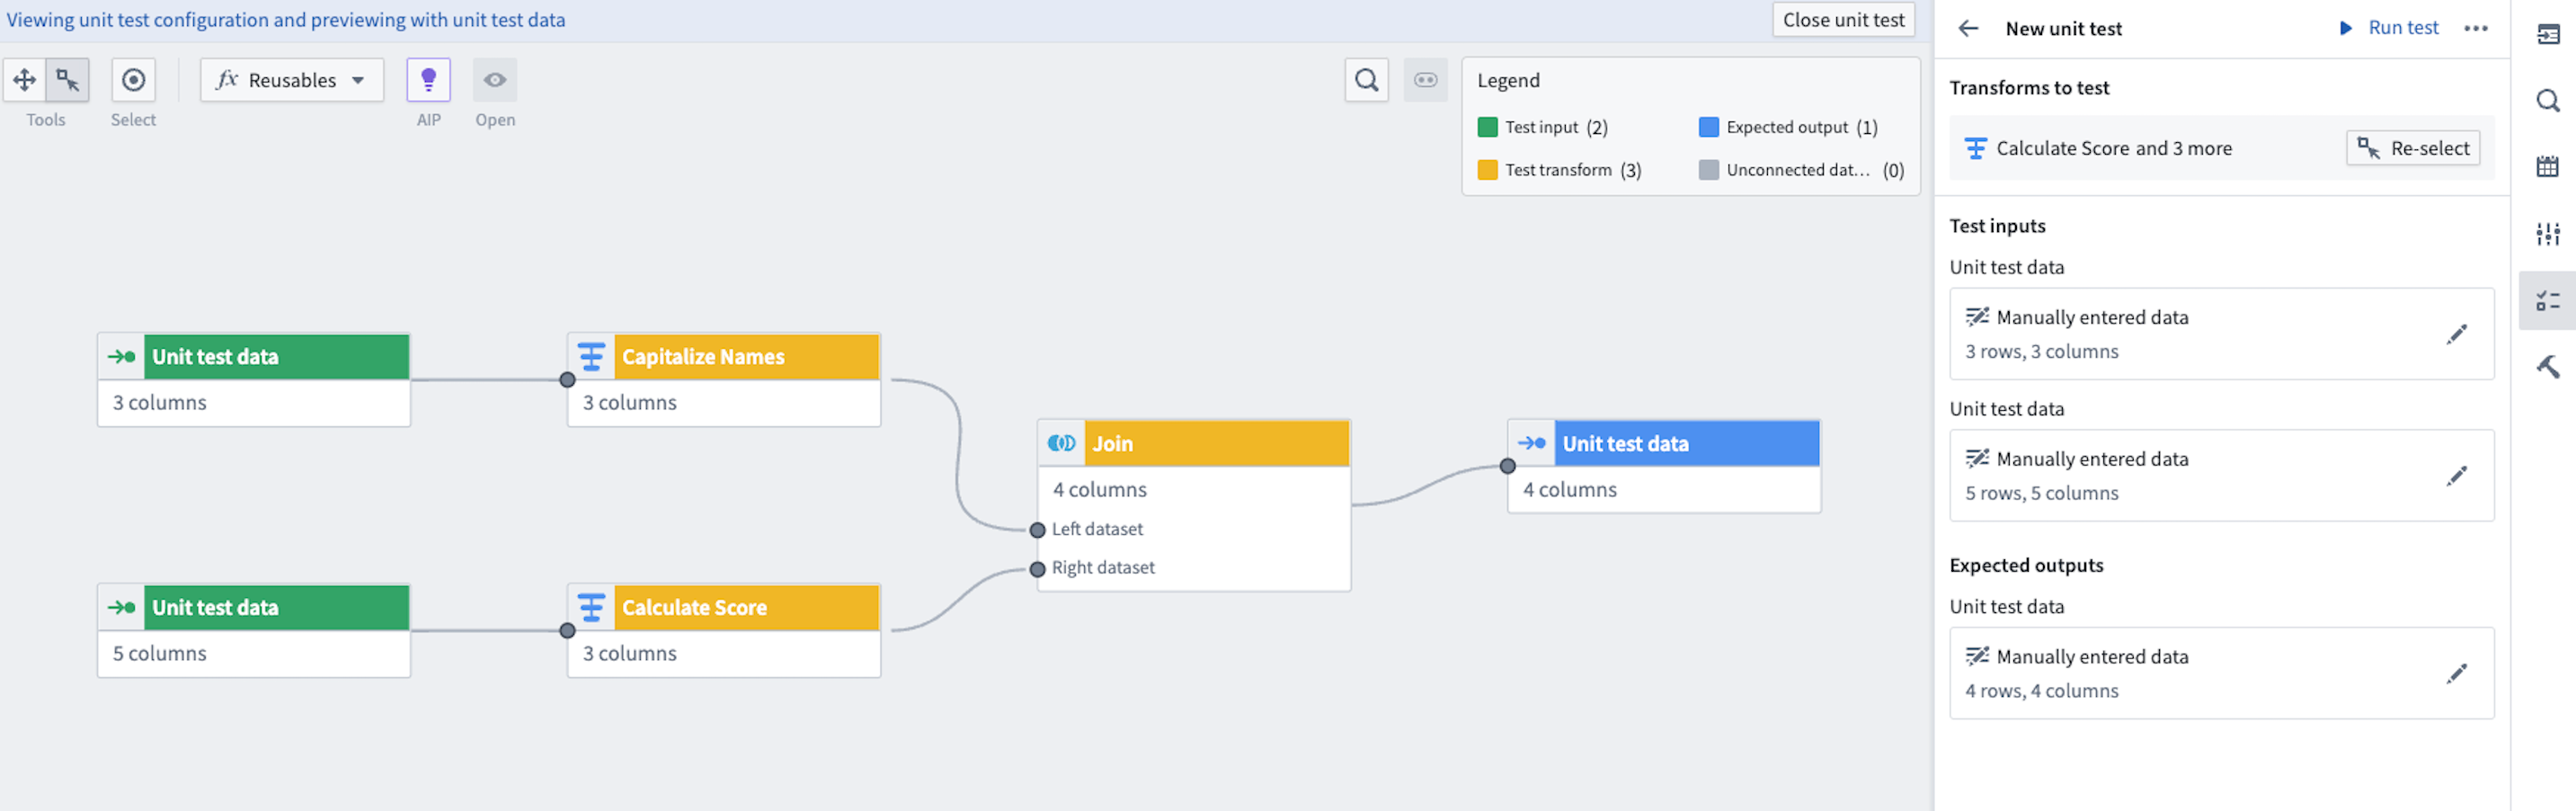
When you are done, you will be able to see the manually entered data on the right side panel detailing the number of rows and columns in each table.
Run a unit test
For each unit test, you have the option to Run test on the top right.
Once the test runs, you can see the test results underneath. To view the exact table results, select View test result.

This will open a view of the expected and received output at the bottom of your screen.
When you are done editing and viewing your unit test, you can select Close unit test in the top right.
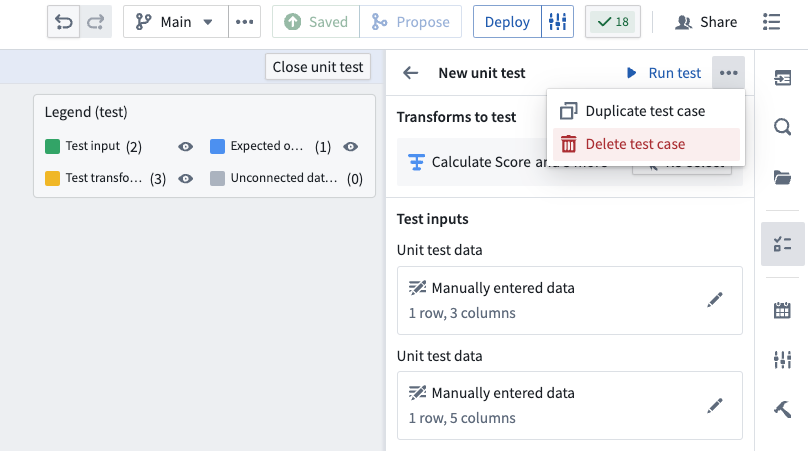
Delete a unit test
To delete a unit test, select it and open the options menu using the three dots in the top right corner. Select Delete test case.
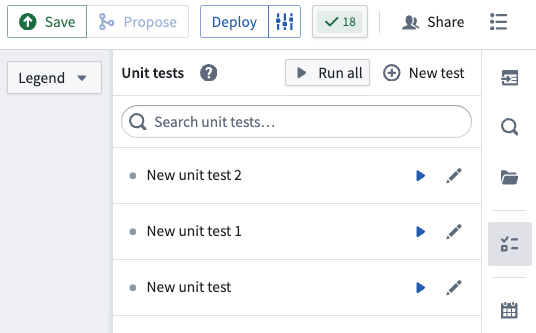
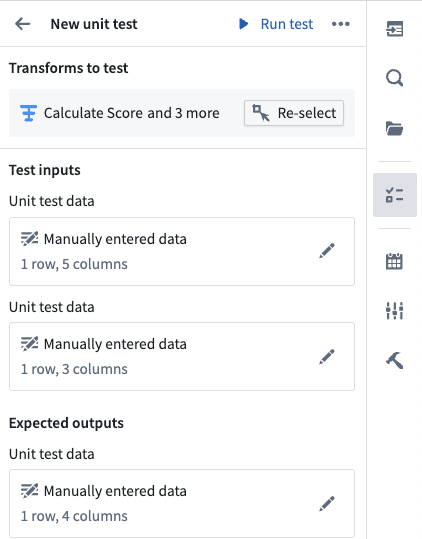
Edit existing unit tests
Select the Unit tests icon to see a list of the unit tests in your pipeline. Select the pencil icon to edit the selected unit tests.
To change the selected test transforms in a unit test, use the Re-select button. This will take you back to the selection page.
:::callout{theme="neutral"} If you add nodes between nodes that are already included as test transforms in a unit test, the added nodes will automatically show up in the existing unit test. :::
To change any of the test inputs or expected outputs, you can double click directly on the nodes in the graph view, or select the pencil icon on the right side panel.
When you are done editing the unit test, select Close unit test on the top right to return to the main graph.
Unit testing in proposals
Any changes to unit tests will also show up in the proposals page under the Unit Test tab on the left side panel.
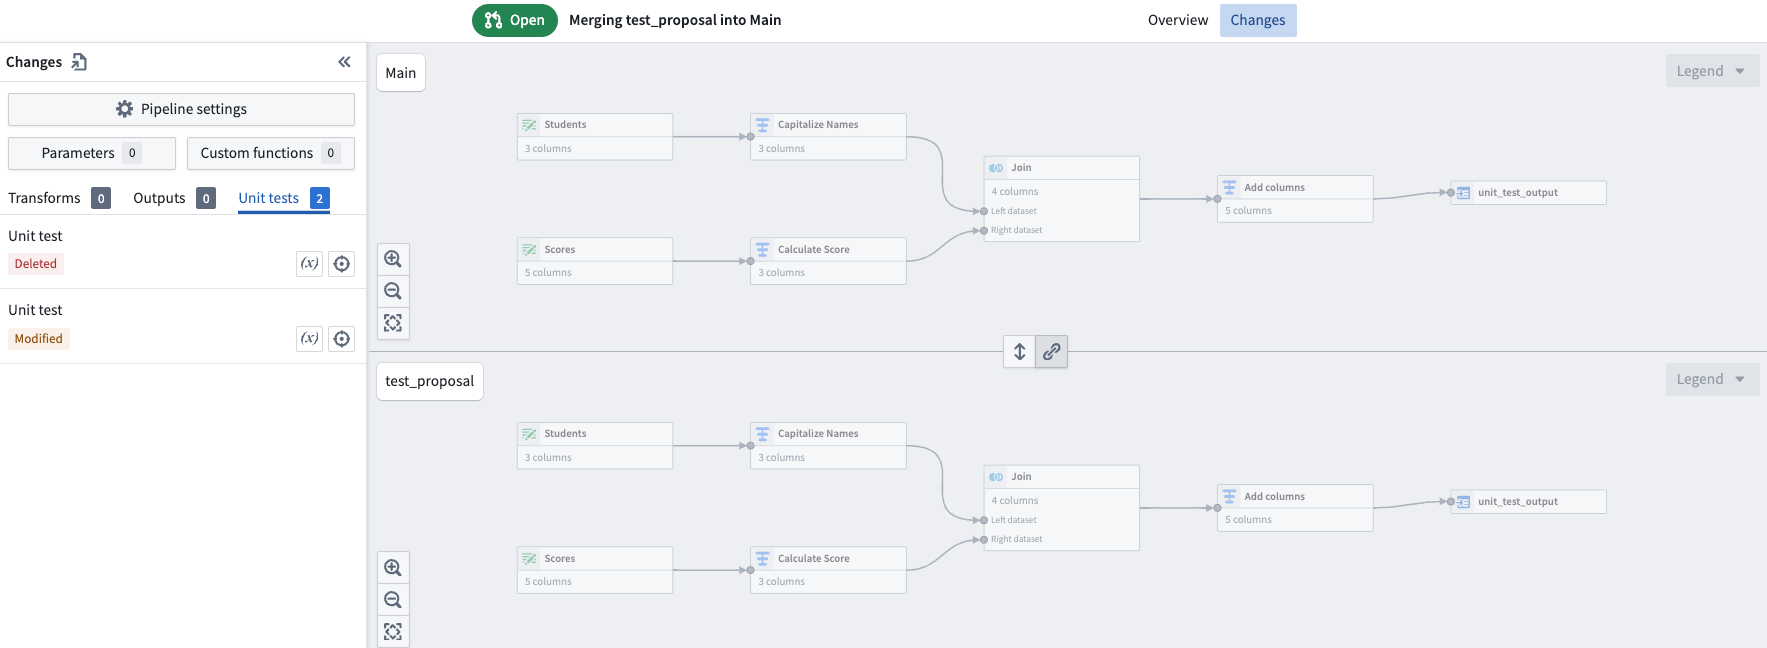
On the proposal page, you will see the Unit tests succeeded section. Pipeline Builder will check that unit tests pass before merging a proposal.

Unit testing in streaming
For streaming unit tests, test input data requires an additional ordering long type value for each row.
The ordering column is a required metadata column for streaming unit tests that controls the global order in which the rows will be emitted, but does not impact the actual contents or schema of the test data. The ordering value should be a unique long type value for each row in all test data sources in a test, and rows will be emitted from the sources in order from lowest ordering value to highest.
Ordering is important to achieve deterministic and desired outputs from streaming transforms, especially for joins and unions.
中文翻译
Pipeline Builder 中的单元测试(Unit testing)
通过单元测试(unit tests)提高 Pipeline Builder 中管道的可靠性。这些测试是调试、检测破坏性变更(breaking changes)以及最终确保更高质量管道的宝贵工具。
什么是单元测试(Unit test)?
与代码中的单元测试类似,Pipeline Builder 中的单元测试是一种在预定义输入下测试管道逻辑是否产生预期输出的方法。单元测试包括:
- 测试输入(Test inputs)
- 转换节点(Transform nodes)
- 预期输出(Expected outputs)
测试输入和预期输出通过手动输入表格创建,但您可以复制粘贴以加快创建速度。您可以在主 Pipeline Builder 工作区中选择要测试的转换节点。有关创建单元测试的更多信息,请参见下文。
创建单元测试(Create a unit test)
-
在右侧面板的主工作区中,选择 单元测试(Unit tests) 图标。
-
选择屏幕中央的 创建新测试(Create new test) 或右上角的 新测试(New test)。这将在工作区顶部打开一个对话框,提示您选择相关节点。
-
选择所有相关节点后,选择 开始(Start)。
这将带您进入单元测试配置窗口。
- 黄色节点对应之前选择的转换节点。
- 绿色节点对应测试输入。
- 蓝色节点对应测试输出。
对于每个单元测试,您必须填写输入和输出数据。
- 双击节点填写输入数据或预期输出数据。这将带您进入以下页面:
在左侧选择:
- 重用模式(Reuse schema): 将输出模式设置为与连接表模式匹配。
- 来自数据集(From dataset): 使用现有数据集的模式。
- 添加列(Add column): 手动输入数据模式。
设置模式后,在中央表格中填写行,然后选择 应用(Apply),再选择 返回图形(Back to graph)。
- 对所有输入和输出数据集重复此步骤。
完成后,您将在右侧面板中看到手动输入的数据,其中详细说明了每个表格的行数和列数。
运行单元测试(Run a unit test)
对于每个单元测试,您可以选择右上角的 运行测试(Run test)。
测试运行后,您可以在下方看到测试结果。要查看确切的表格结果,请选择 查看测试结果(View test result)。
这将在屏幕底部打开预期输出和实际输出的视图。
完成单元测试的编辑和查看后,您可以选择右上角的 关闭单元测试(Close unit test)。
删除单元测试(Delete a unit test)
要删除单元测试,请选择它并使用右上角的三个点打开选项菜单。选择 删除测试用例(Delete test case)。
编辑现有单元测试(Edit existing unit tests)
选择 单元测试(Unit tests) 图标查看管道中的单元测试列表。选择铅笔图标编辑选定的单元测试。
要更改单元测试中选定的测试转换,请使用 重新选择(Re-select) 按钮。这将带您返回选择页面。
:::callout{theme="neutral"} 如果您在已包含为单元测试中测试转换的节点之间添加节点,则添加的节点将自动显示在现有单元测试中。 :::
要更改任何测试输入或预期输出,您可以直接双击图形视图中的节点,或选择右侧面板上的铅笔图标。
完成单元测试编辑后,选择右上角的 关闭单元测试(Close unit test) 返回主图形。
提案中的单元测试(Unit testing in proposals)
对单元测试的任何更改也会显示在提案页面左侧面板的 单元测试(Unit Test) 选项卡下。
在提案页面上,您将看到 单元测试已通过(Unit tests succeeded) 部分。Pipeline Builder 会在合并提案之前检查单元测试是否通过。
流式处理中的单元测试(Unit testing in streaming)
对于流式单元测试,测试输入数据需要为每行添加一个额外的 ordering 长整型值。
排序列(ordering column)是流式单元测试必需的元数据列,用于控制行发出的全局顺序,但不影响测试数据的实际内容或模式。排序值应为测试中所有测试数据源中每行的唯一长整型值,行将按排序值从低到高的顺序从数据源发出。
排序对于实现流式转换的确定性和期望输出非常重要,尤其是在连接(joins)和联合(unions)操作中。