AIP features in Pipeline Builder(Pipeline Builder 中的 AIP 功能)
Pipeline Builder has a collection of AIP assistance features designed to help you better understand, build, and manage your pipeline. The features allow you to generate new data transformation logic with a single prompt, explain steps in your pipeline development, suggest names and descriptions, create and edit regular expressions, and cast timestamps.
Pipeline Builder assistant features
Generate
Use the Generate feature to create new data transformation logic given a user prompt. AIP can access the full suite of data transformations available to you across Pipeline Builder, recommending the most suitable ones for your specific needs. This provides transparency into the reasoning and rationale used to suggest transformations, using metadata to generate logic, without exposing the underlying data. Finally, AIP transformations are saved into your pipeline logic like regular data transformations, enabling seamless integration into existing workflows.
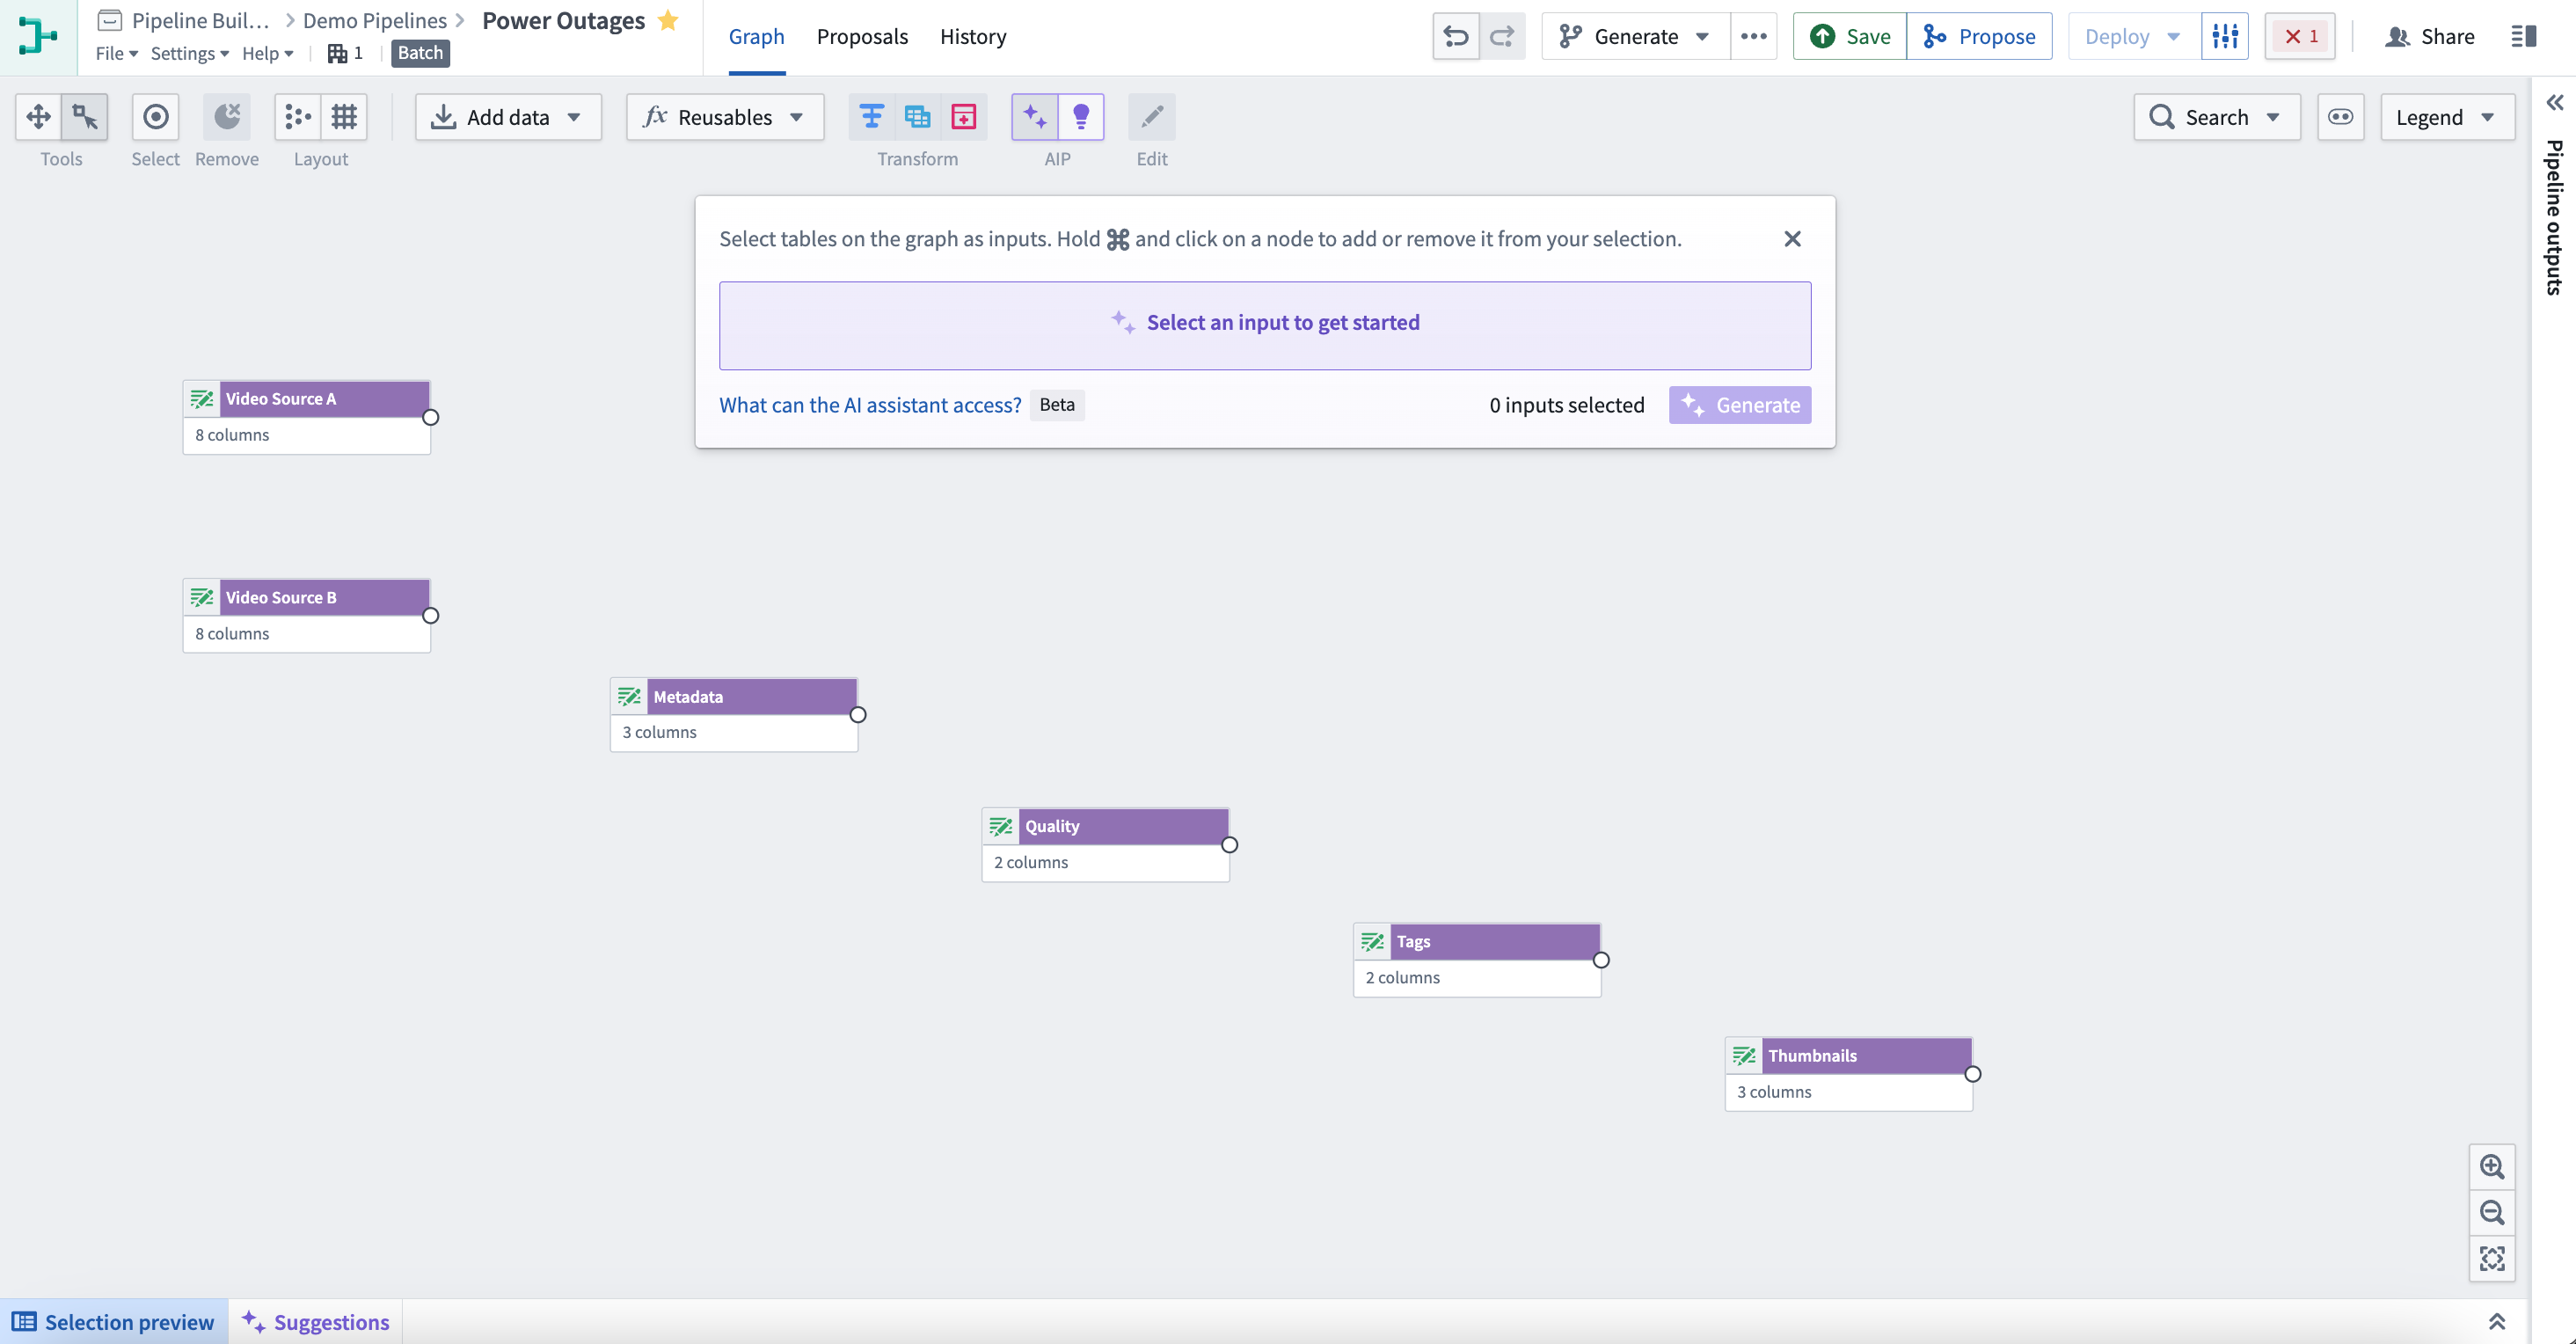
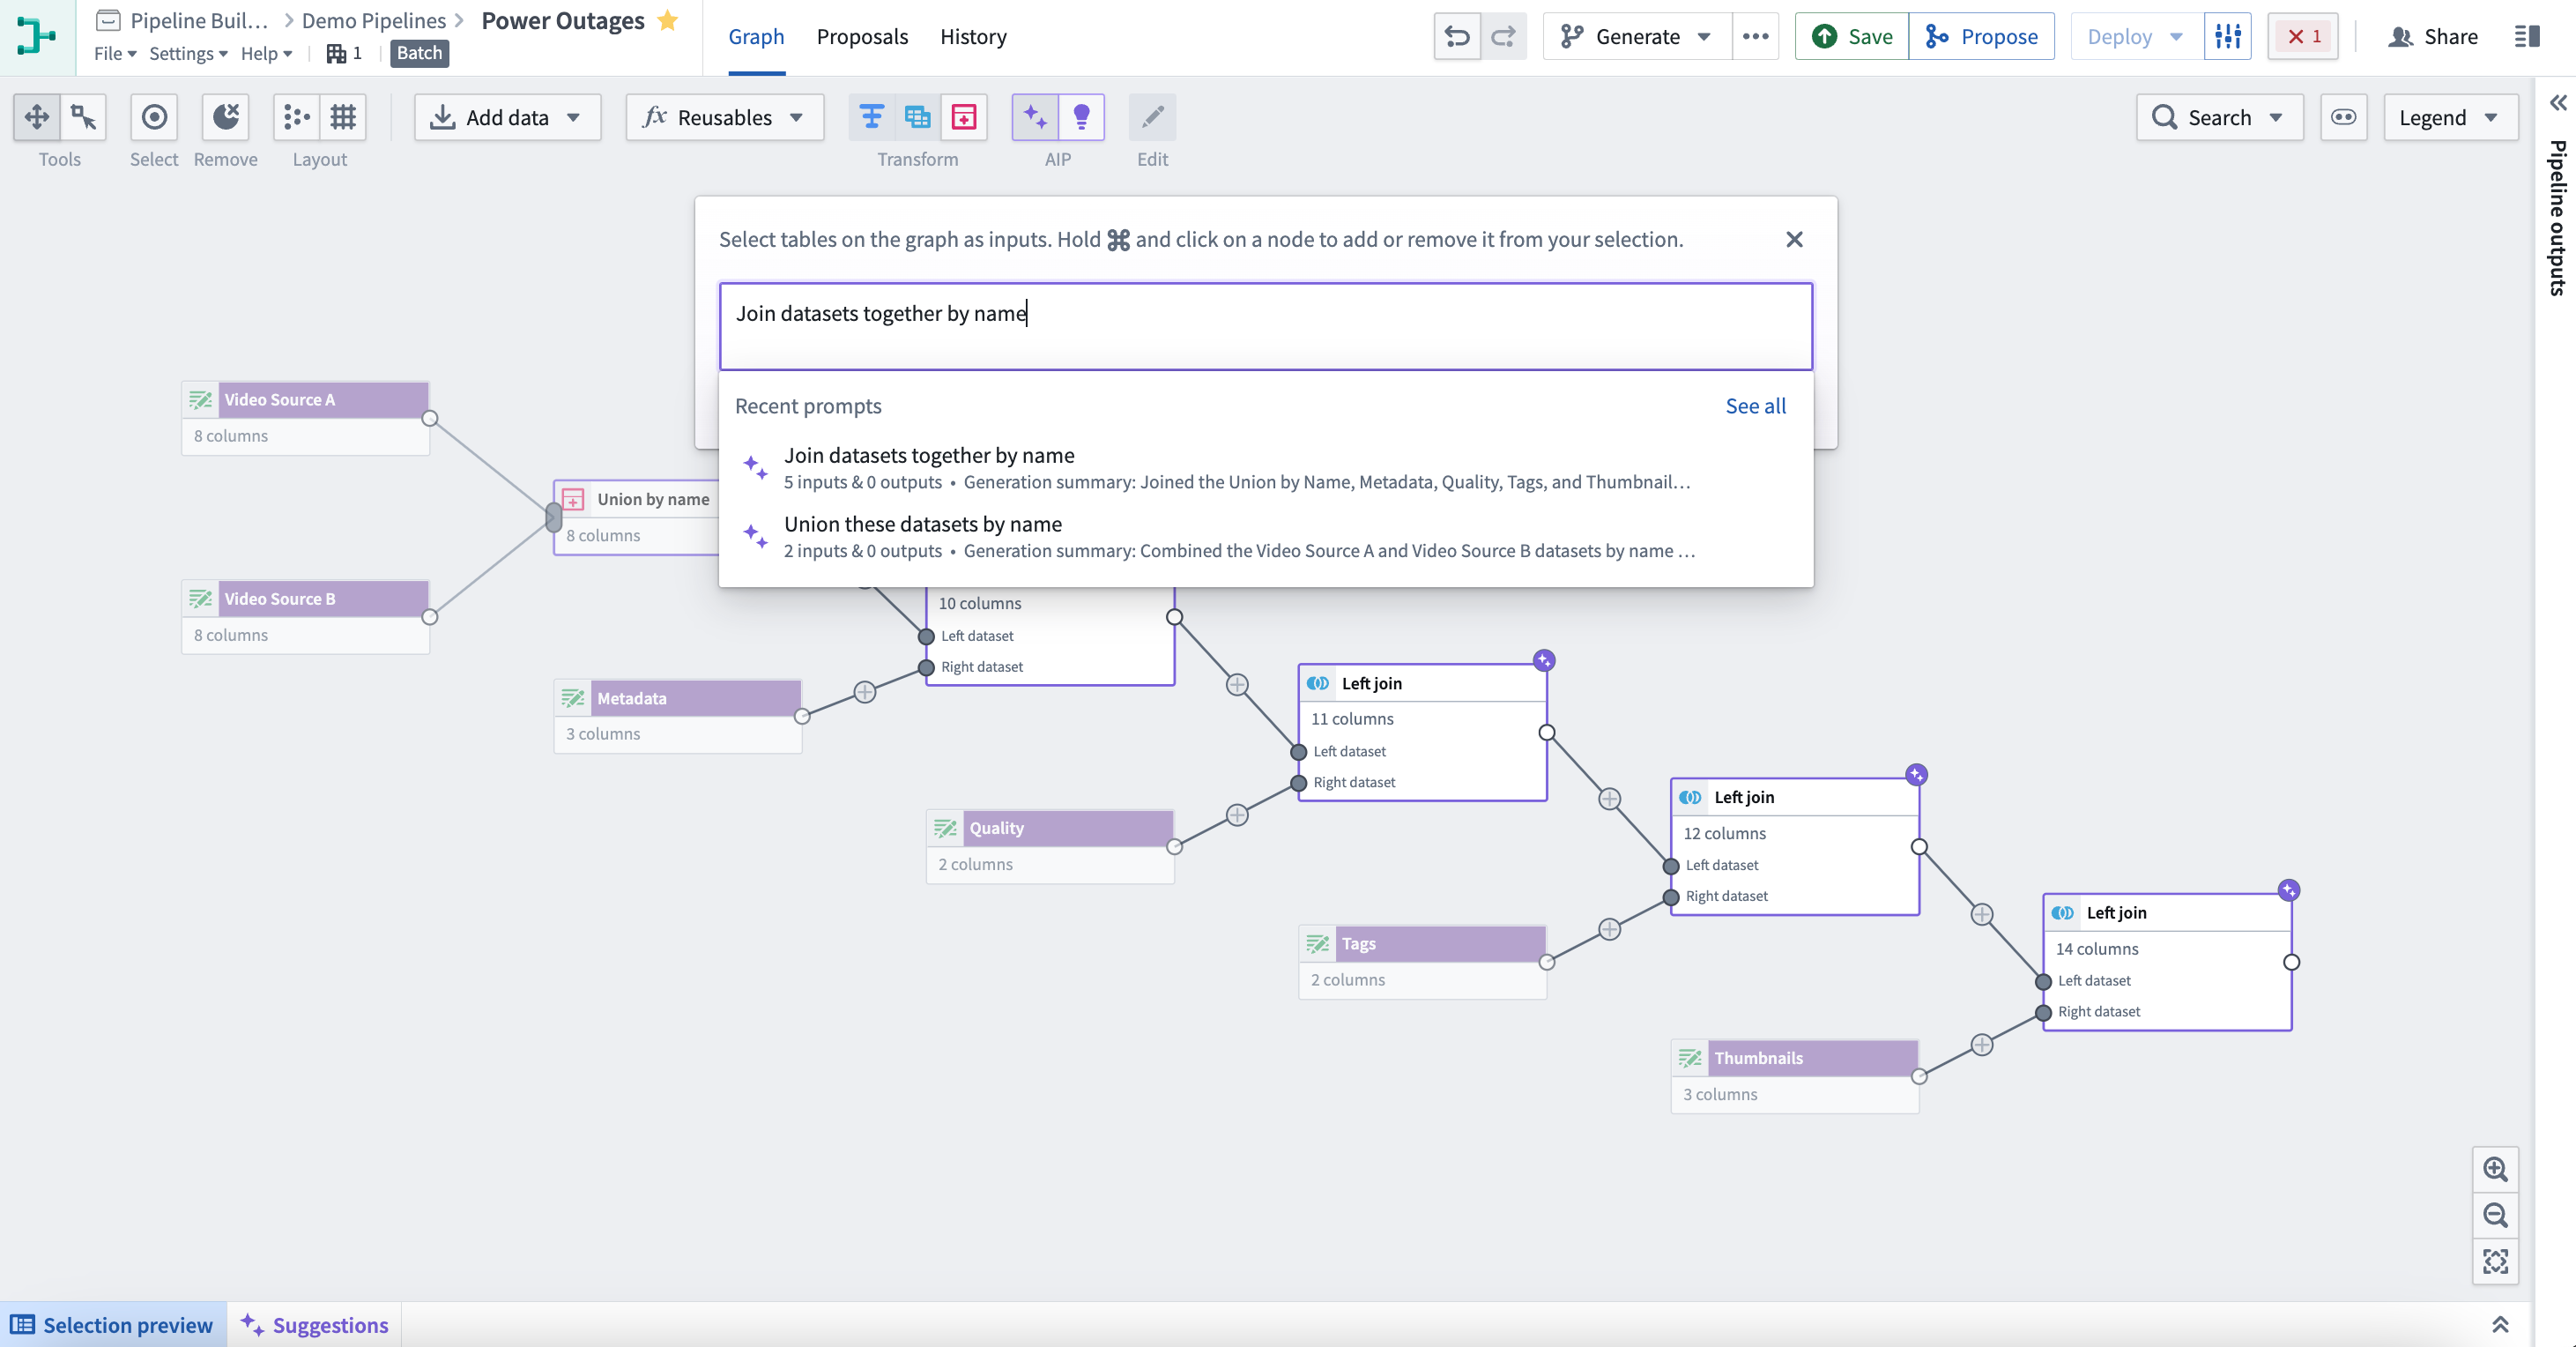
To use the generate feature, select the purple icon with two stars AIP at the top center of your Pipeline Builder graph. Following the instructions in the pop-up window, select nodes on the graph as inputs. Hold cmd (MacOS) or ctrl (Windows) and select on a node to add or remove it from your selection.
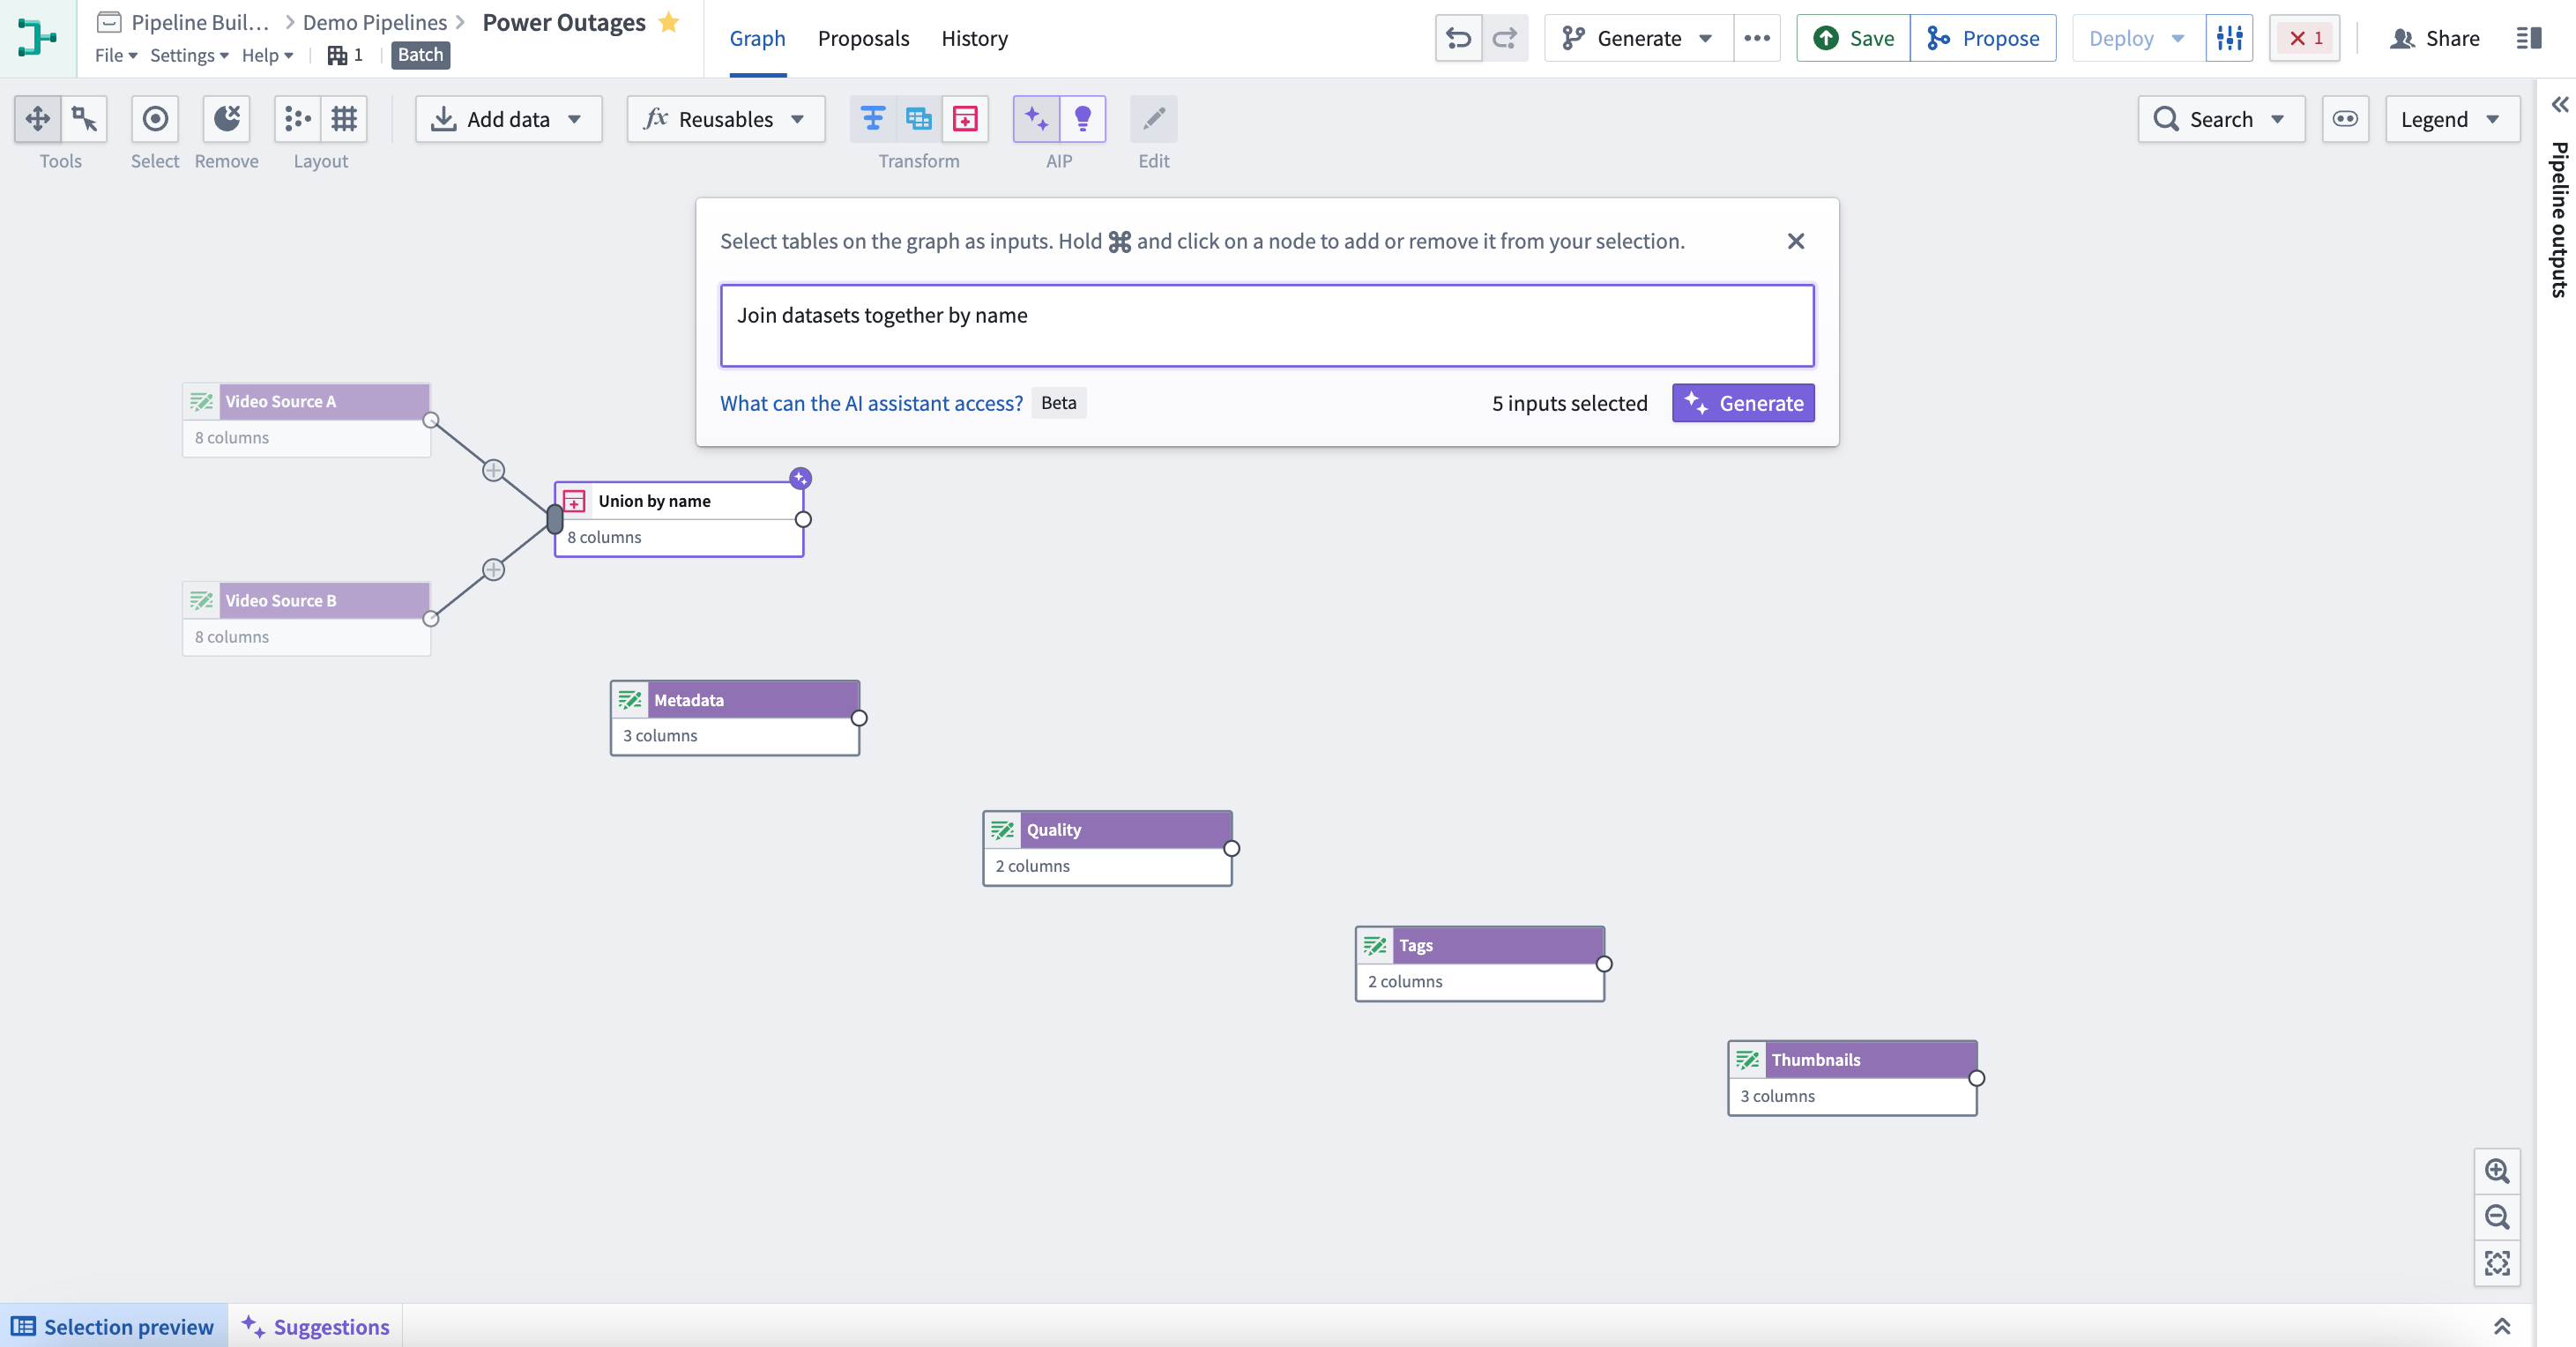
Next, enter the prompt for AIP to evaluate, then select Generate to start the run.

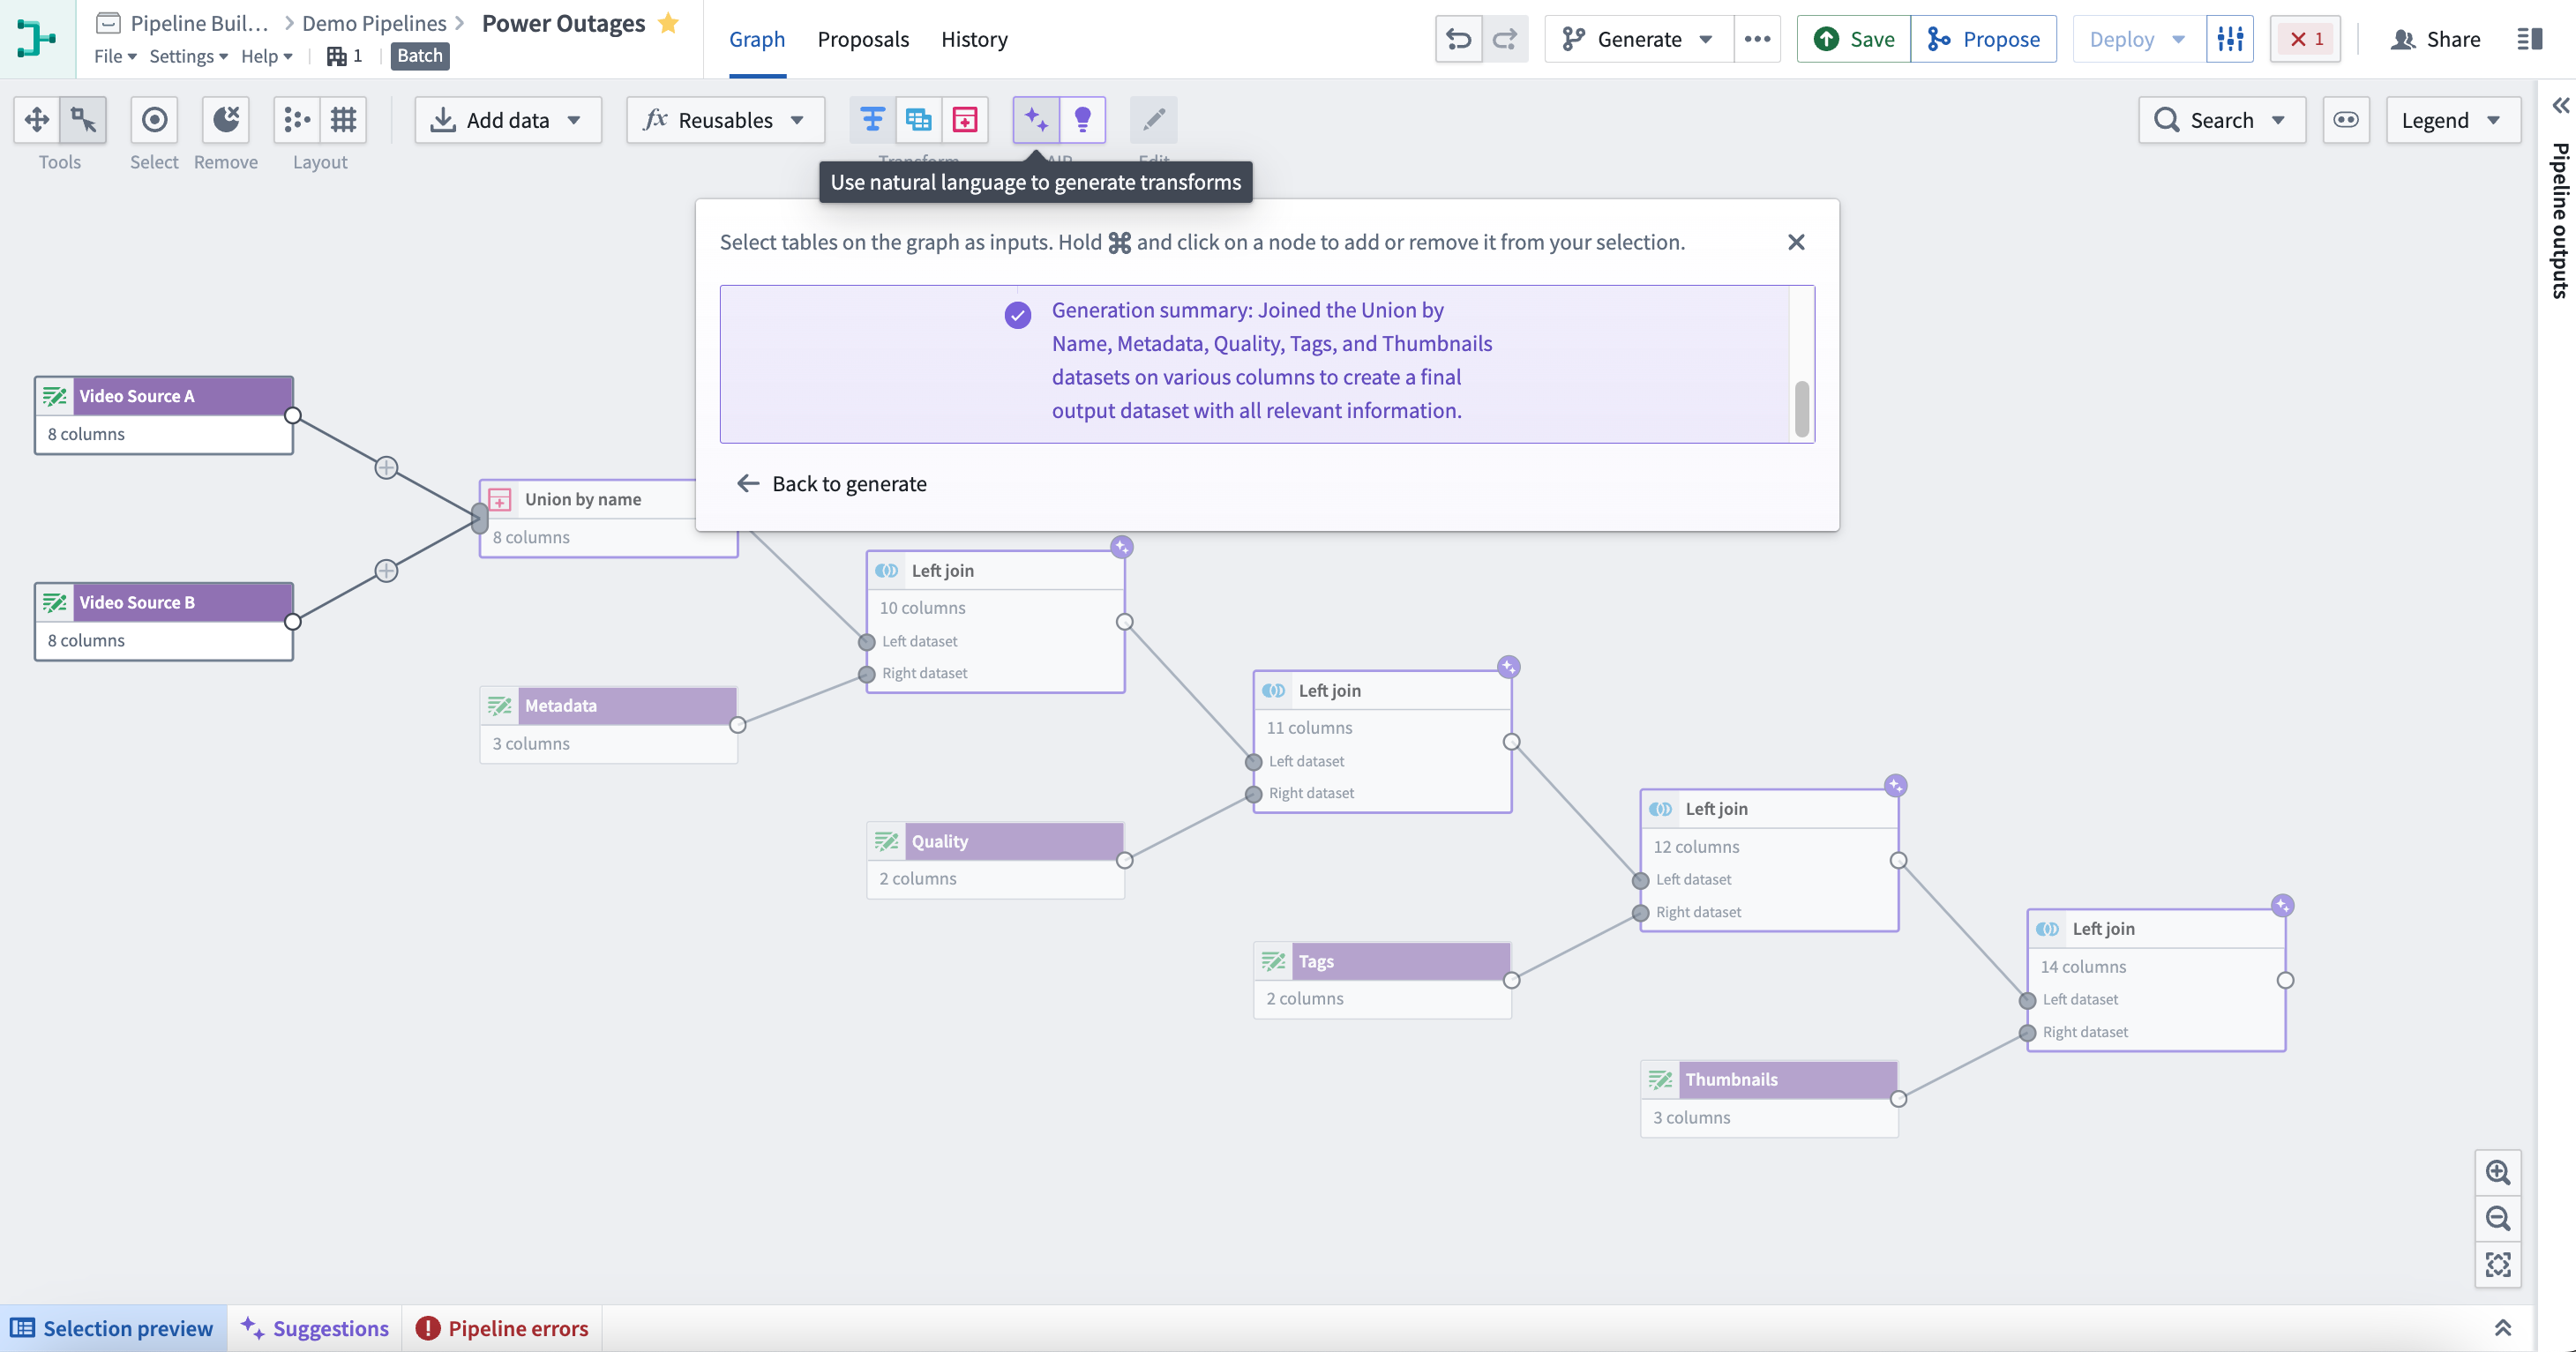
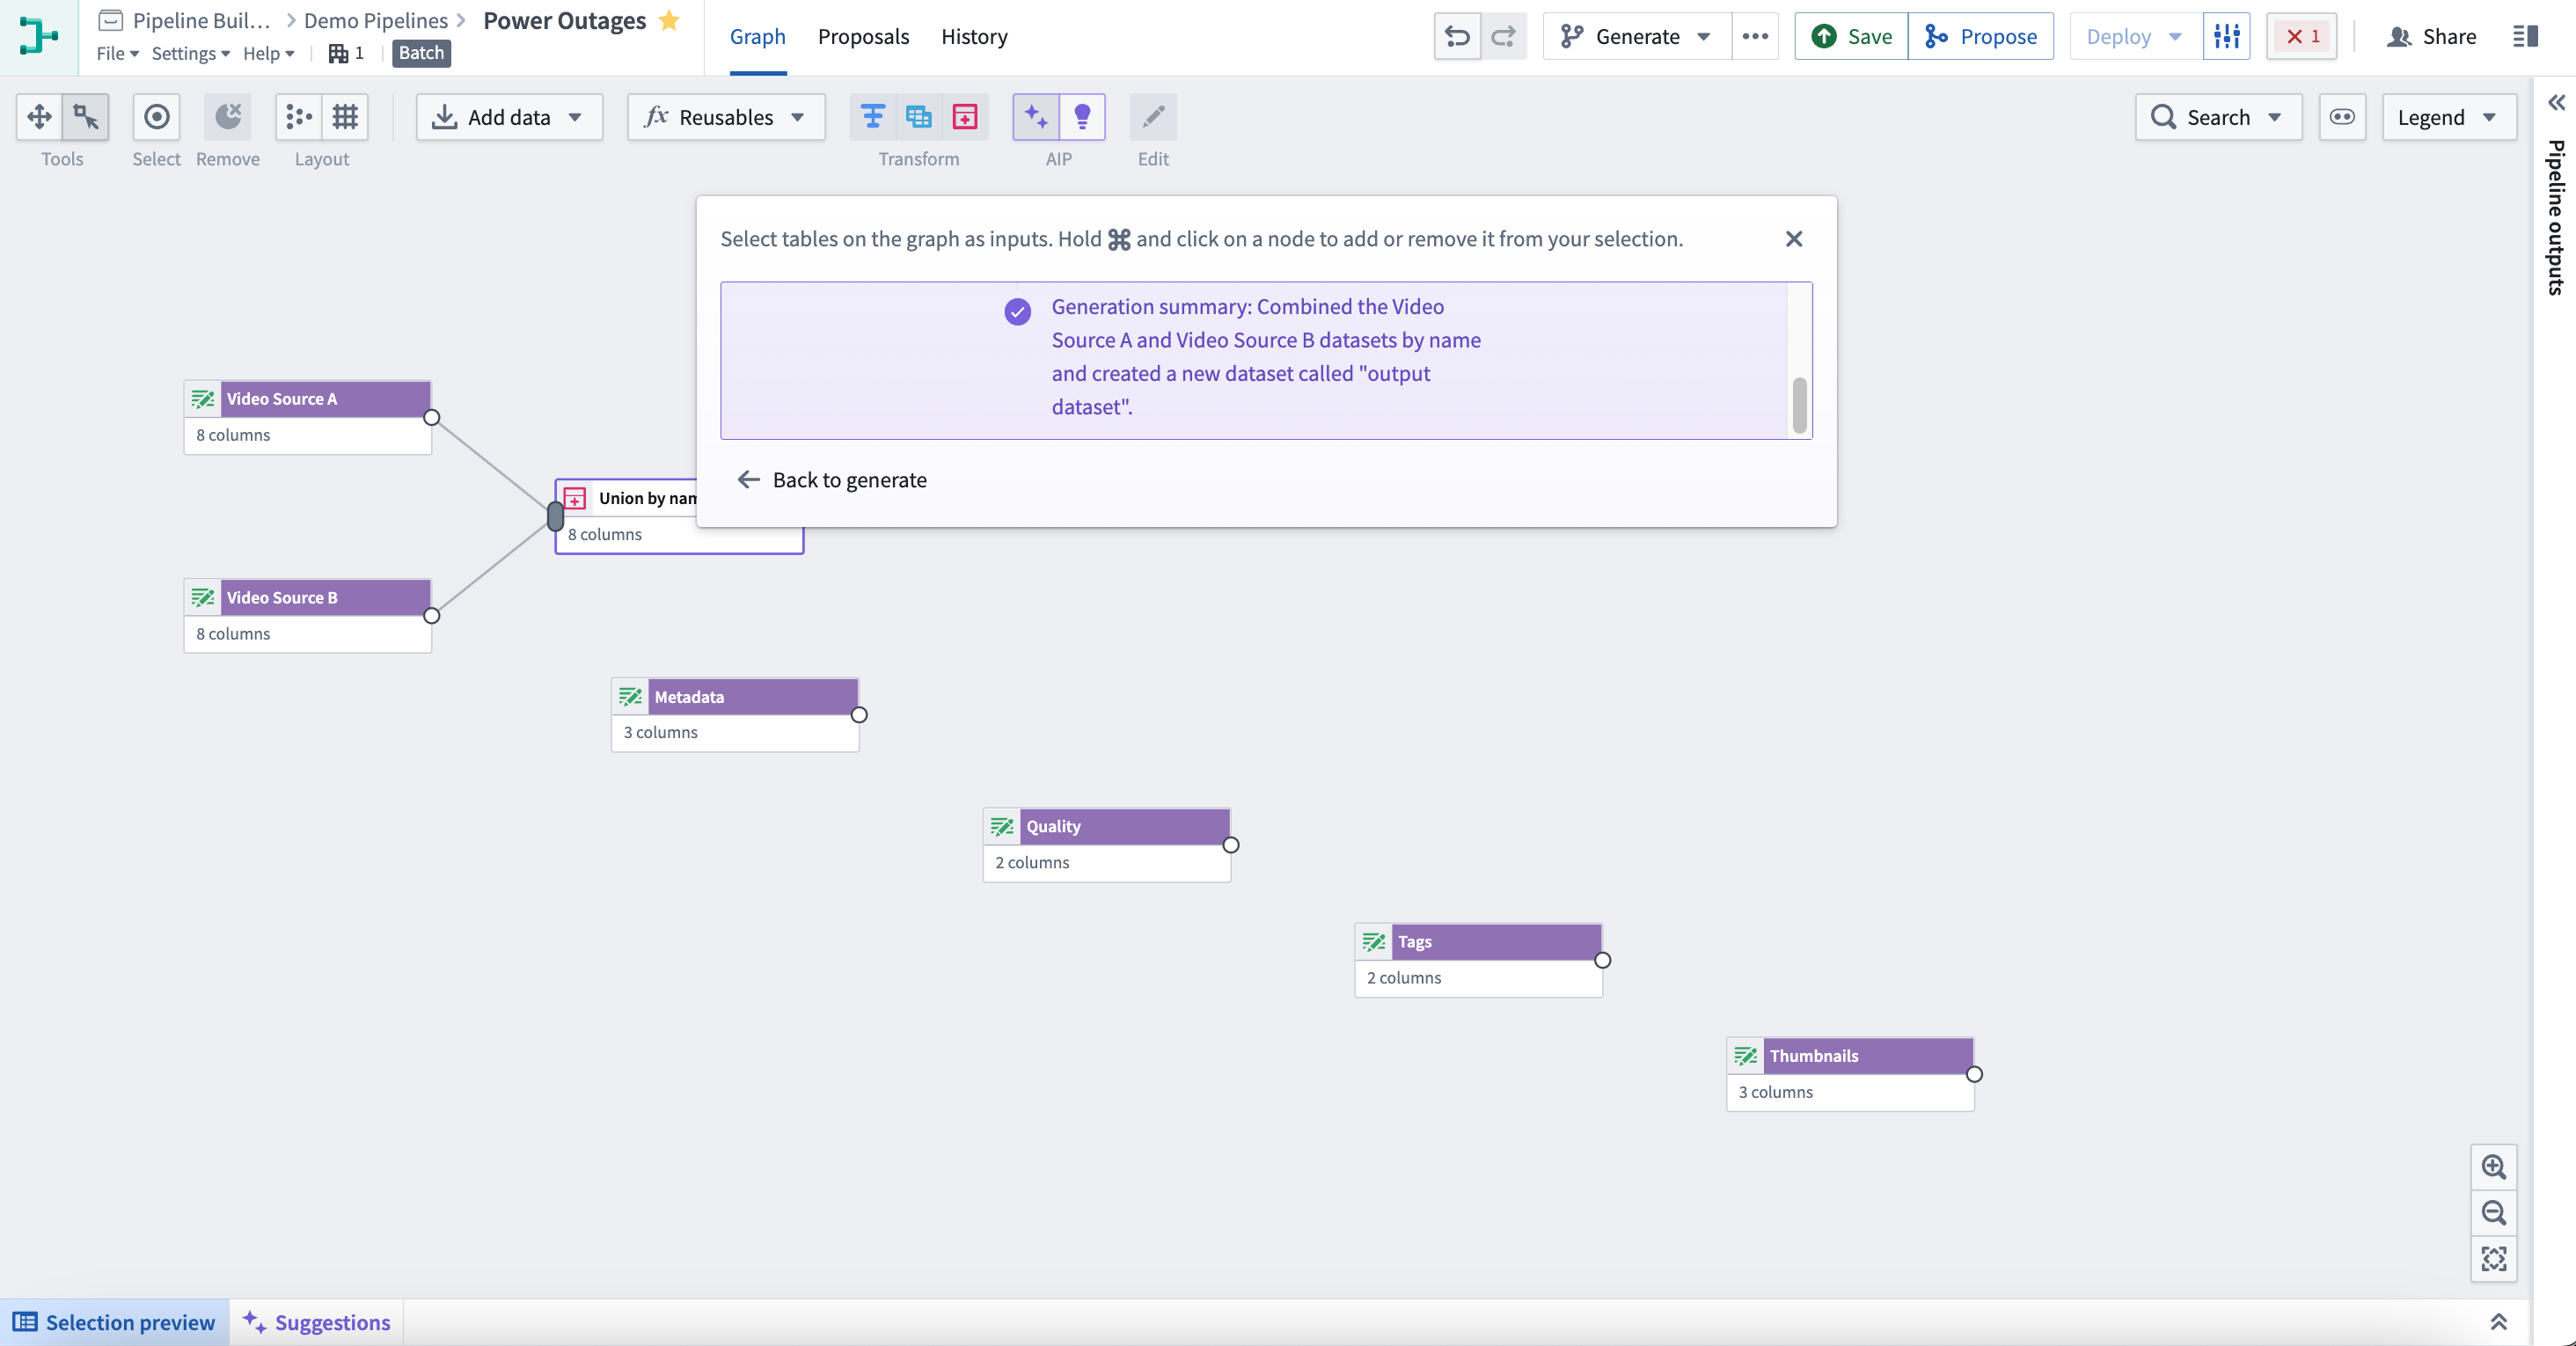
This will return one or more transform nodes highlighted in purple alongside a description of the generated transforms.
To continue transforming, select Back to generate. Choose the next set of nodes and enter the next prompt to continue building your pipeline.
To look back at your recent prompts, select the input box. You can retry any prompt by choosing a historical entry which will automatically select the original inputs.
Explain
Use the Explain feature to dynamically obtain descriptions for your pipelines through every step of the development process. Keep your collaborators in sync on the current state, provide valuable context for new approvers, or facilitate knowledge transfer between new team members with minimal maintenance effort.
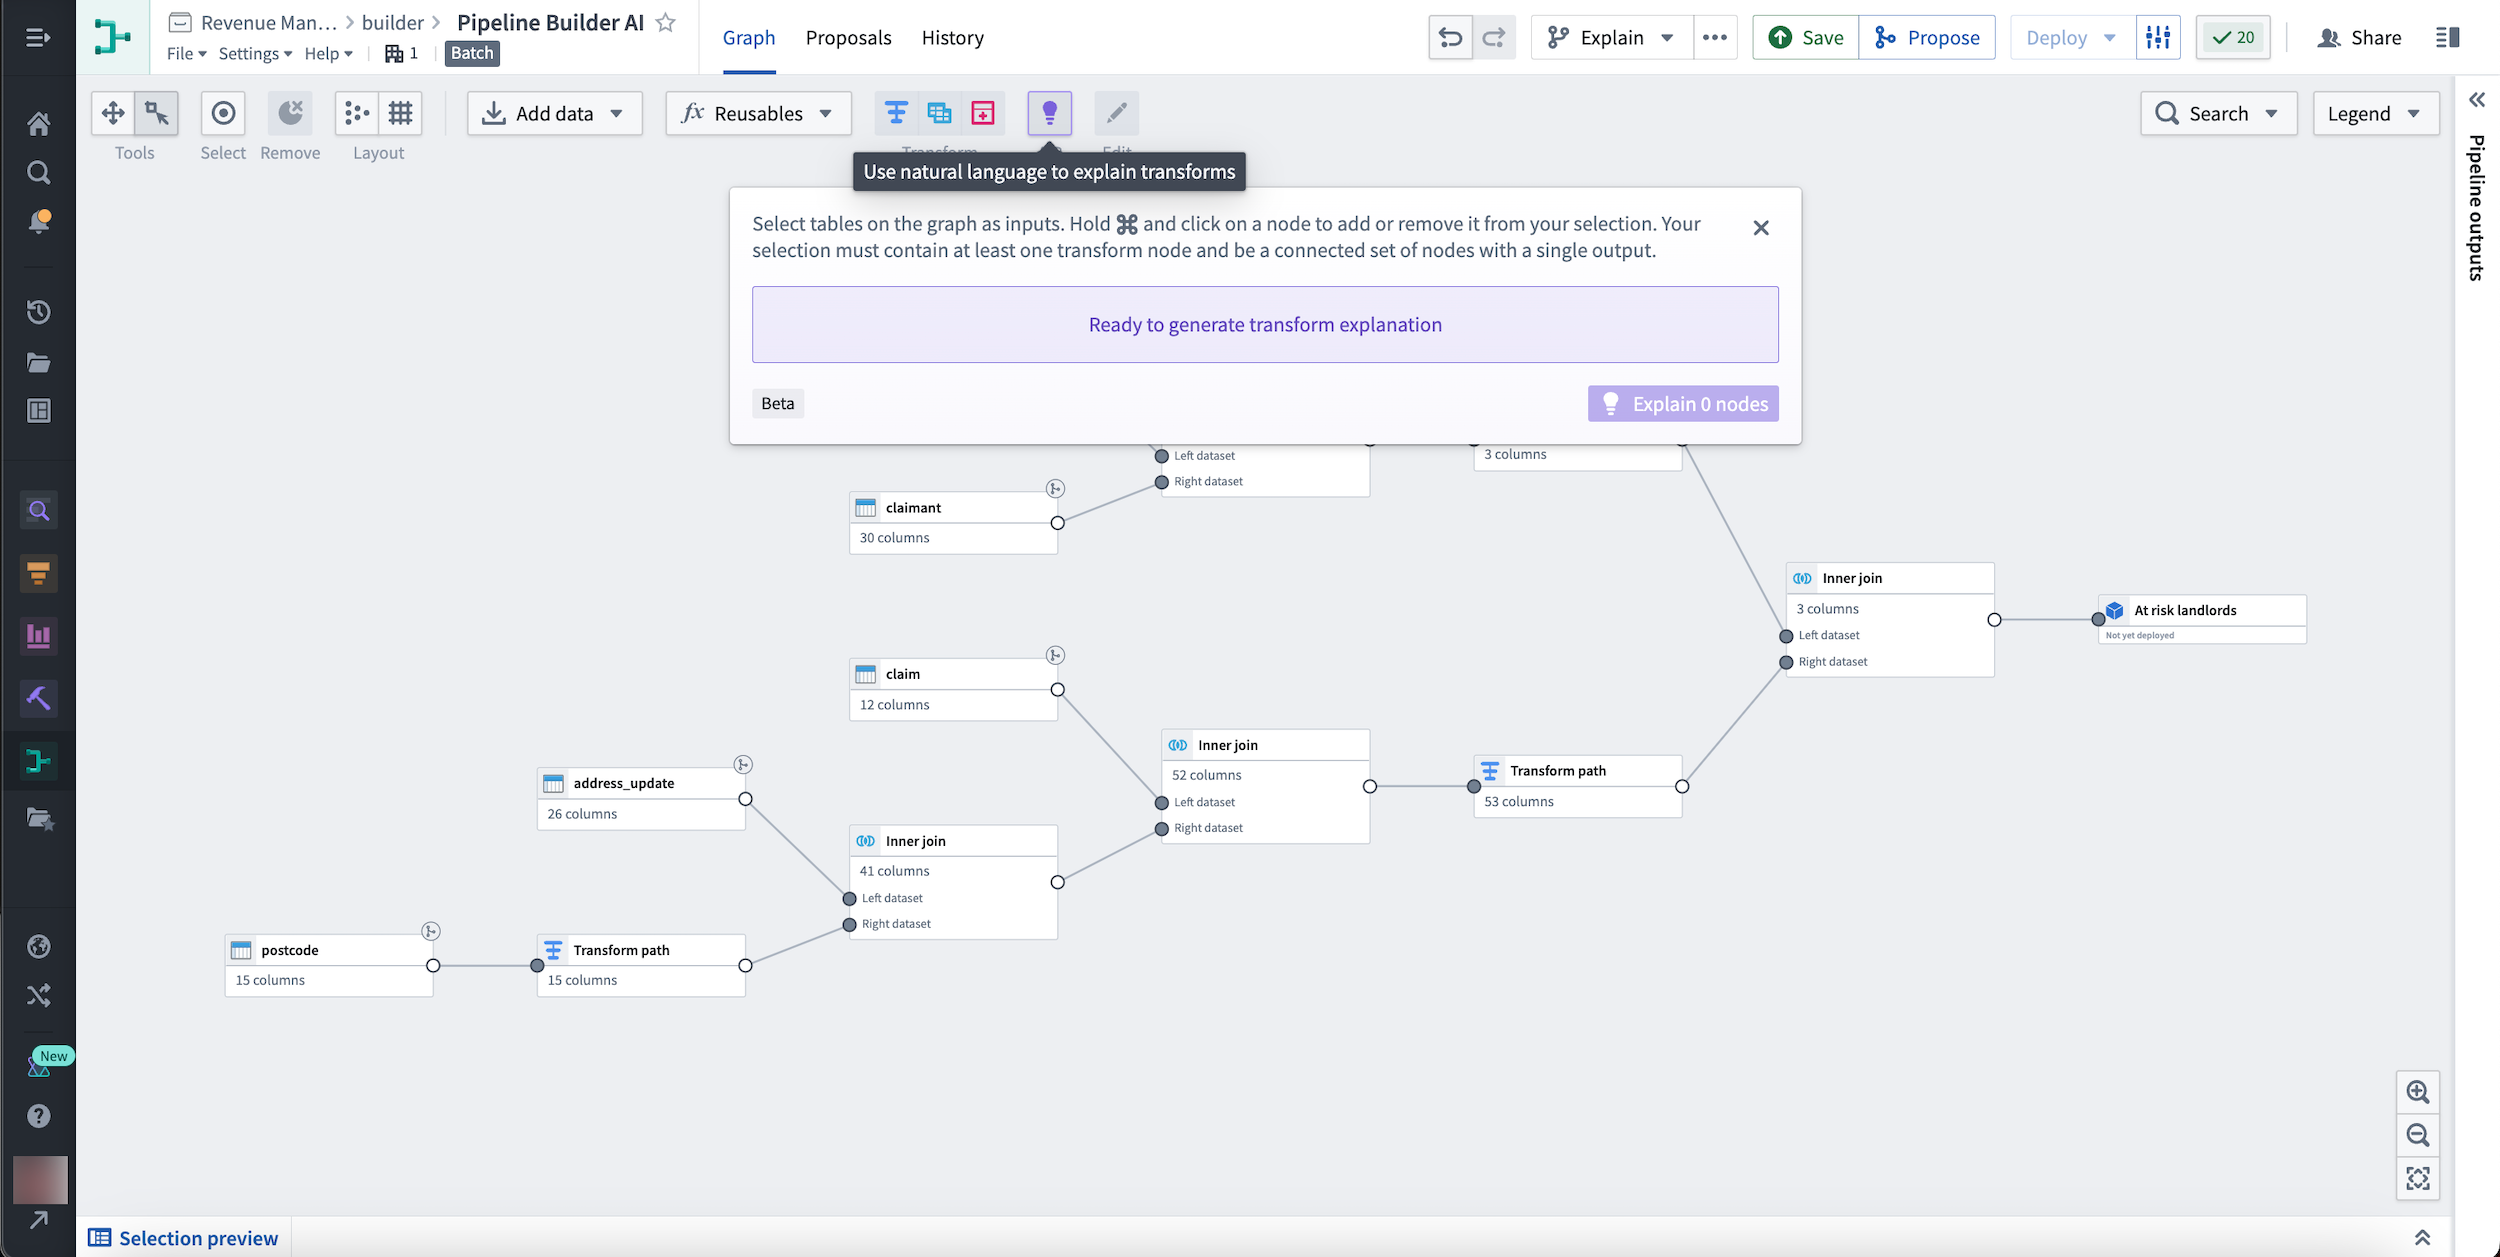
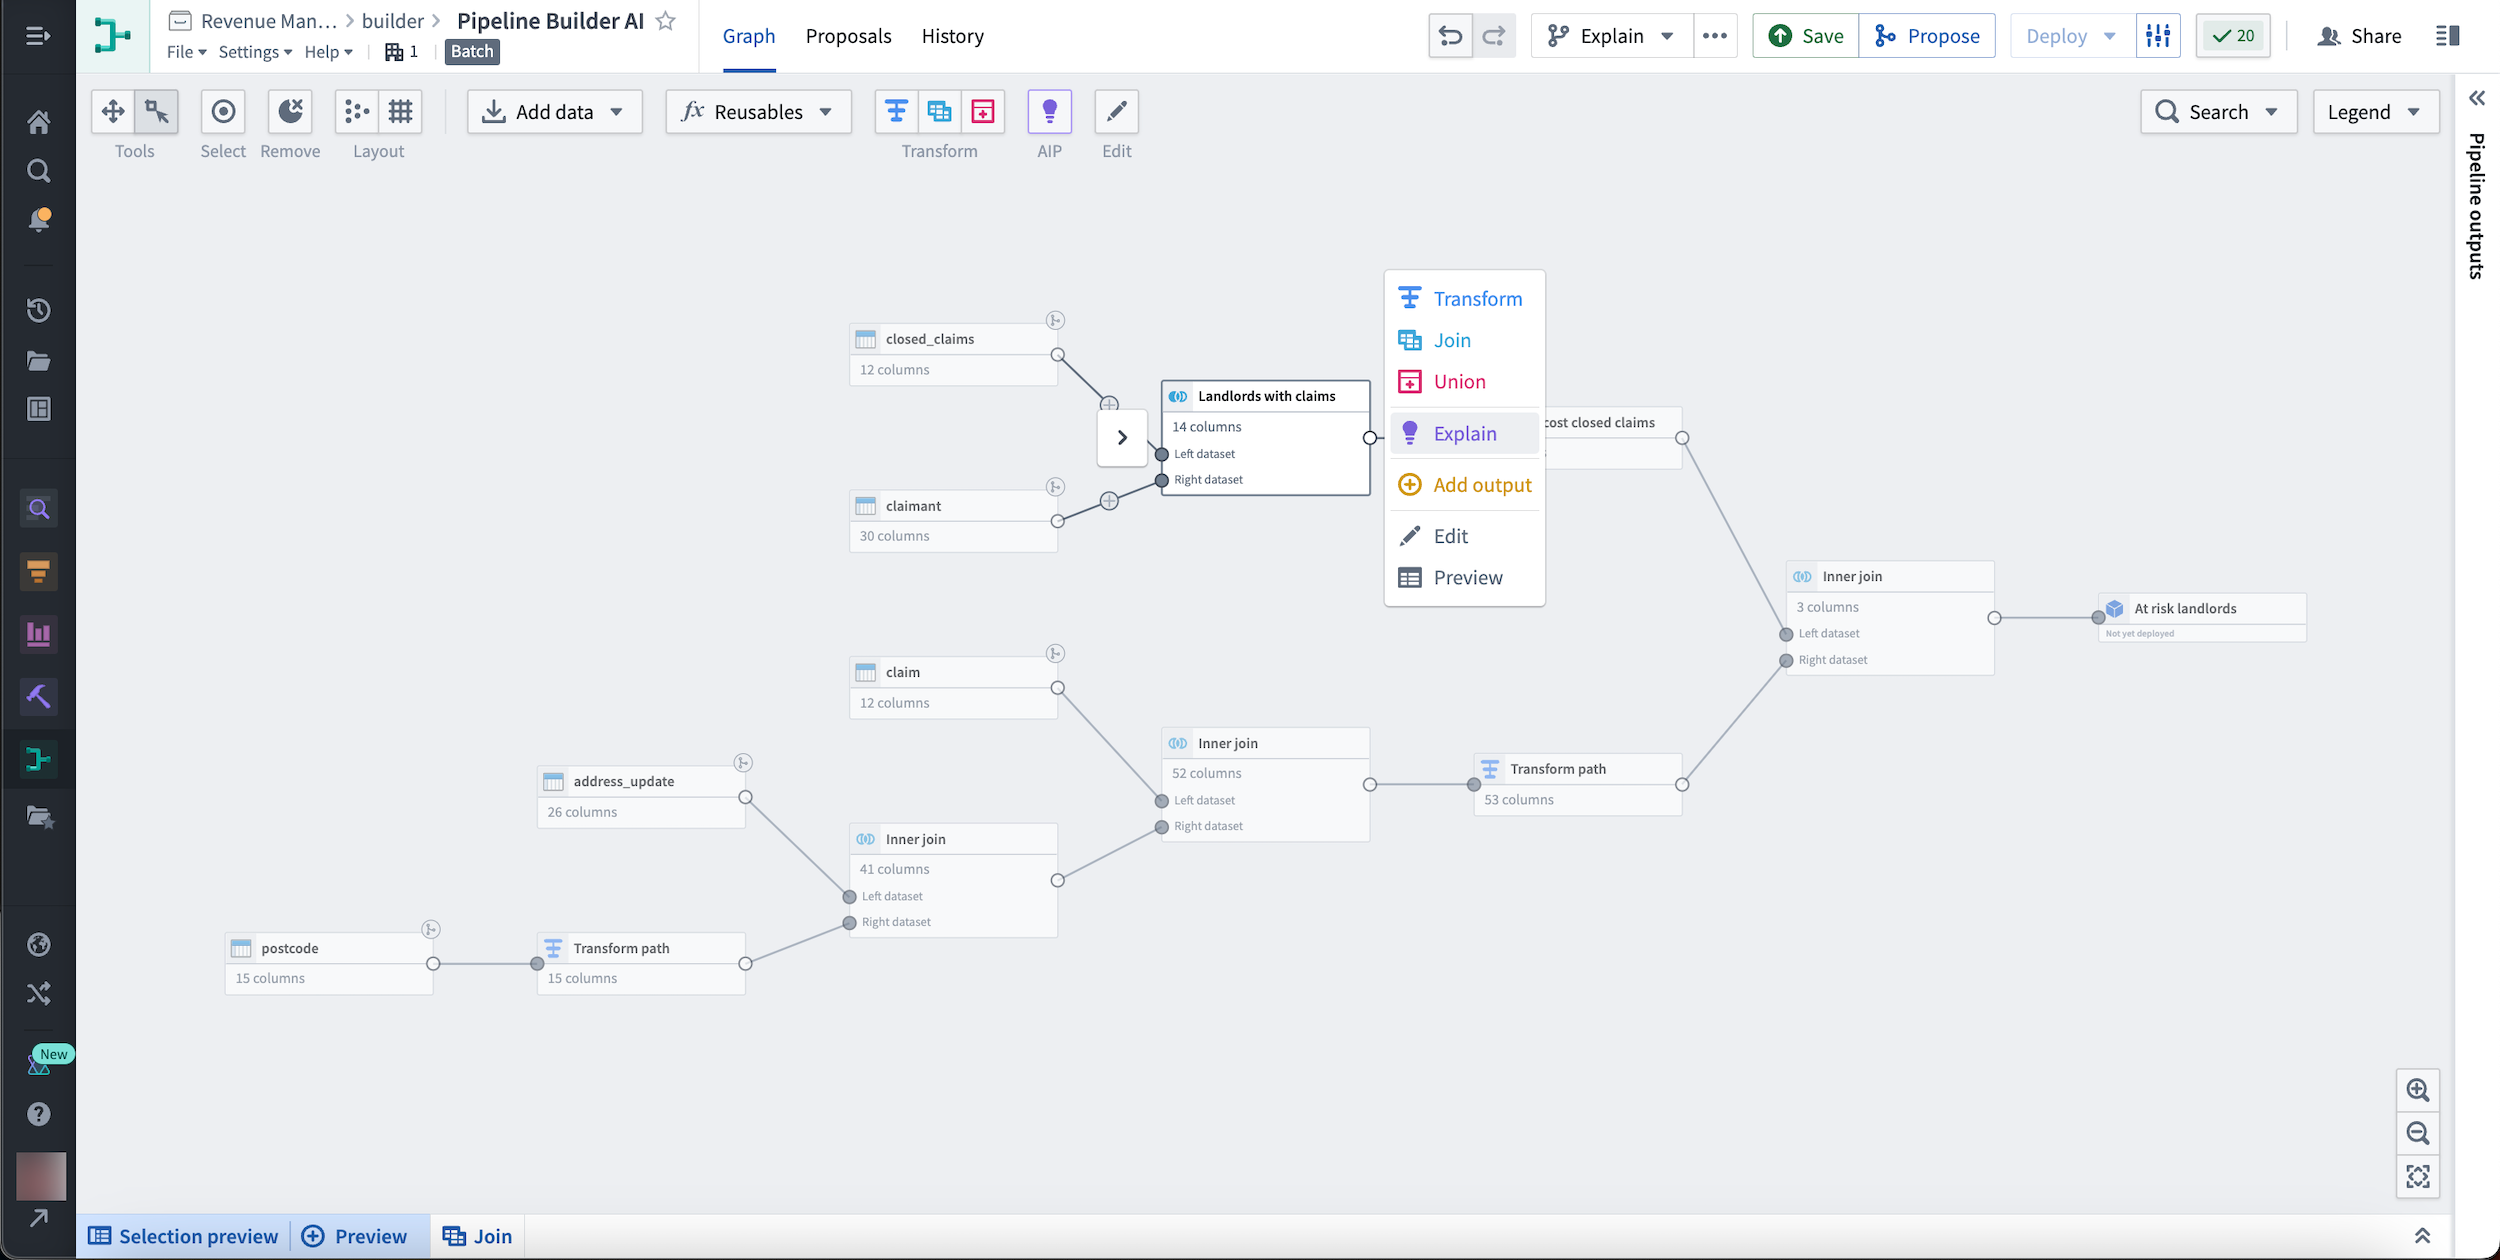
To use Explain, select the purple lightbulb labeled AIP in the top center of your Pipeline Builder graph. Following the instructions in the pop-up window, select tables on the graph as inputs. Hold and select on a node to add or remove it from your selection. Your selection must contain at least one transform node and be a connected set of nodes with a single output.
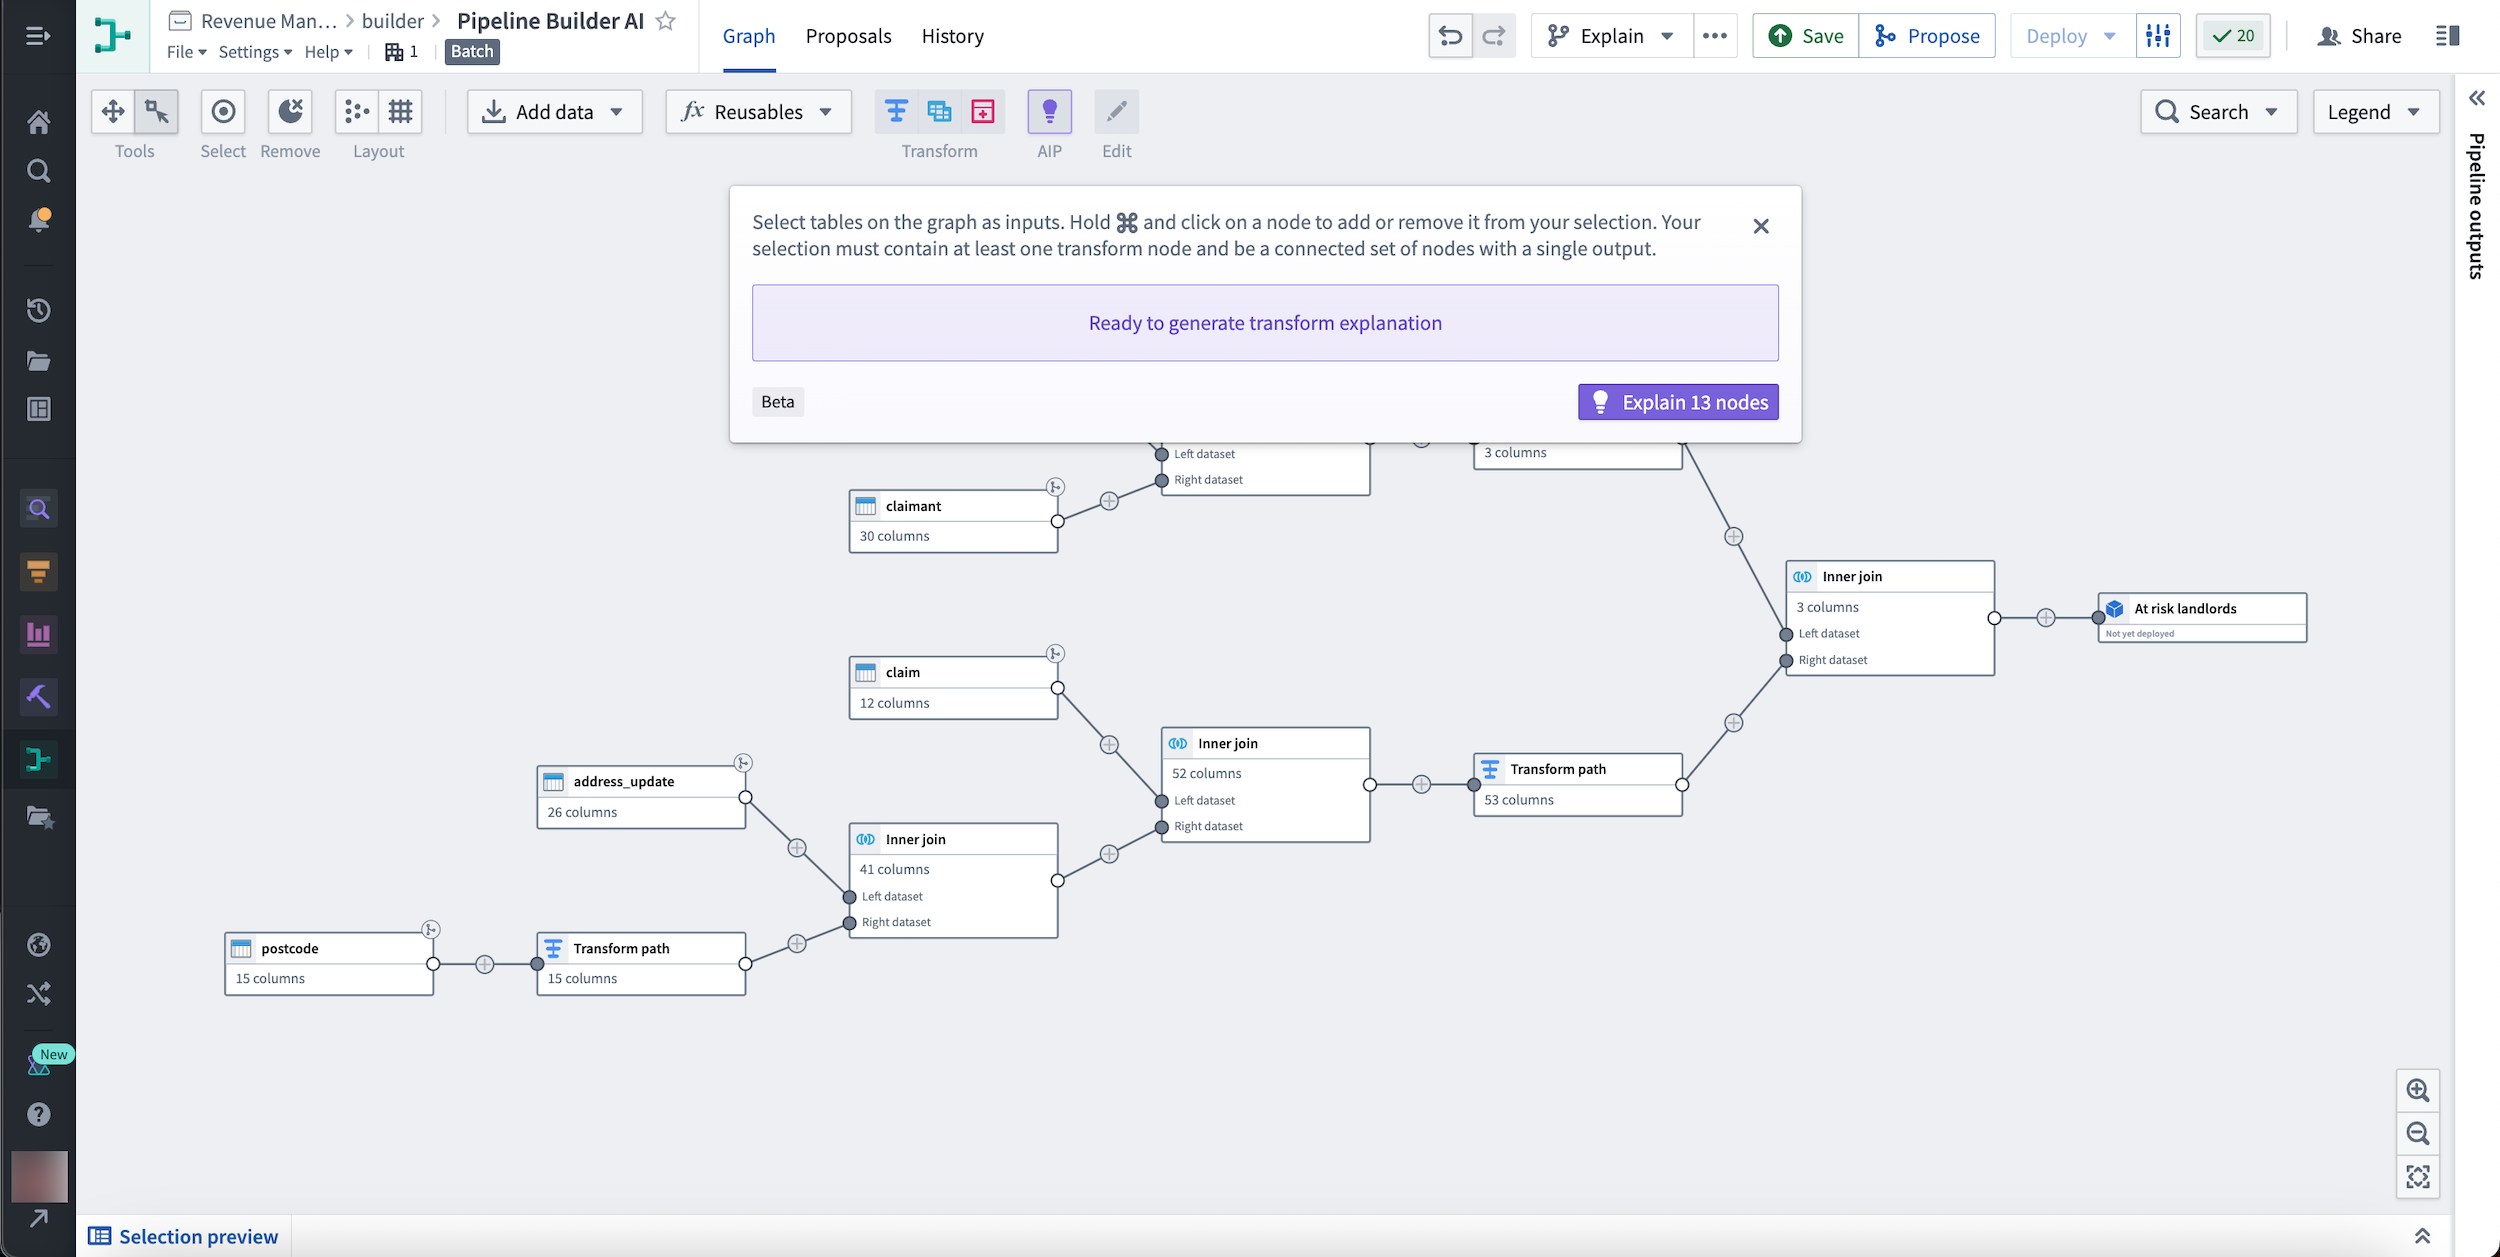
Hold and select a node to add or remove it from your selection. Your selection must contain at least one transform node and be a connected set of nodes with a single output.
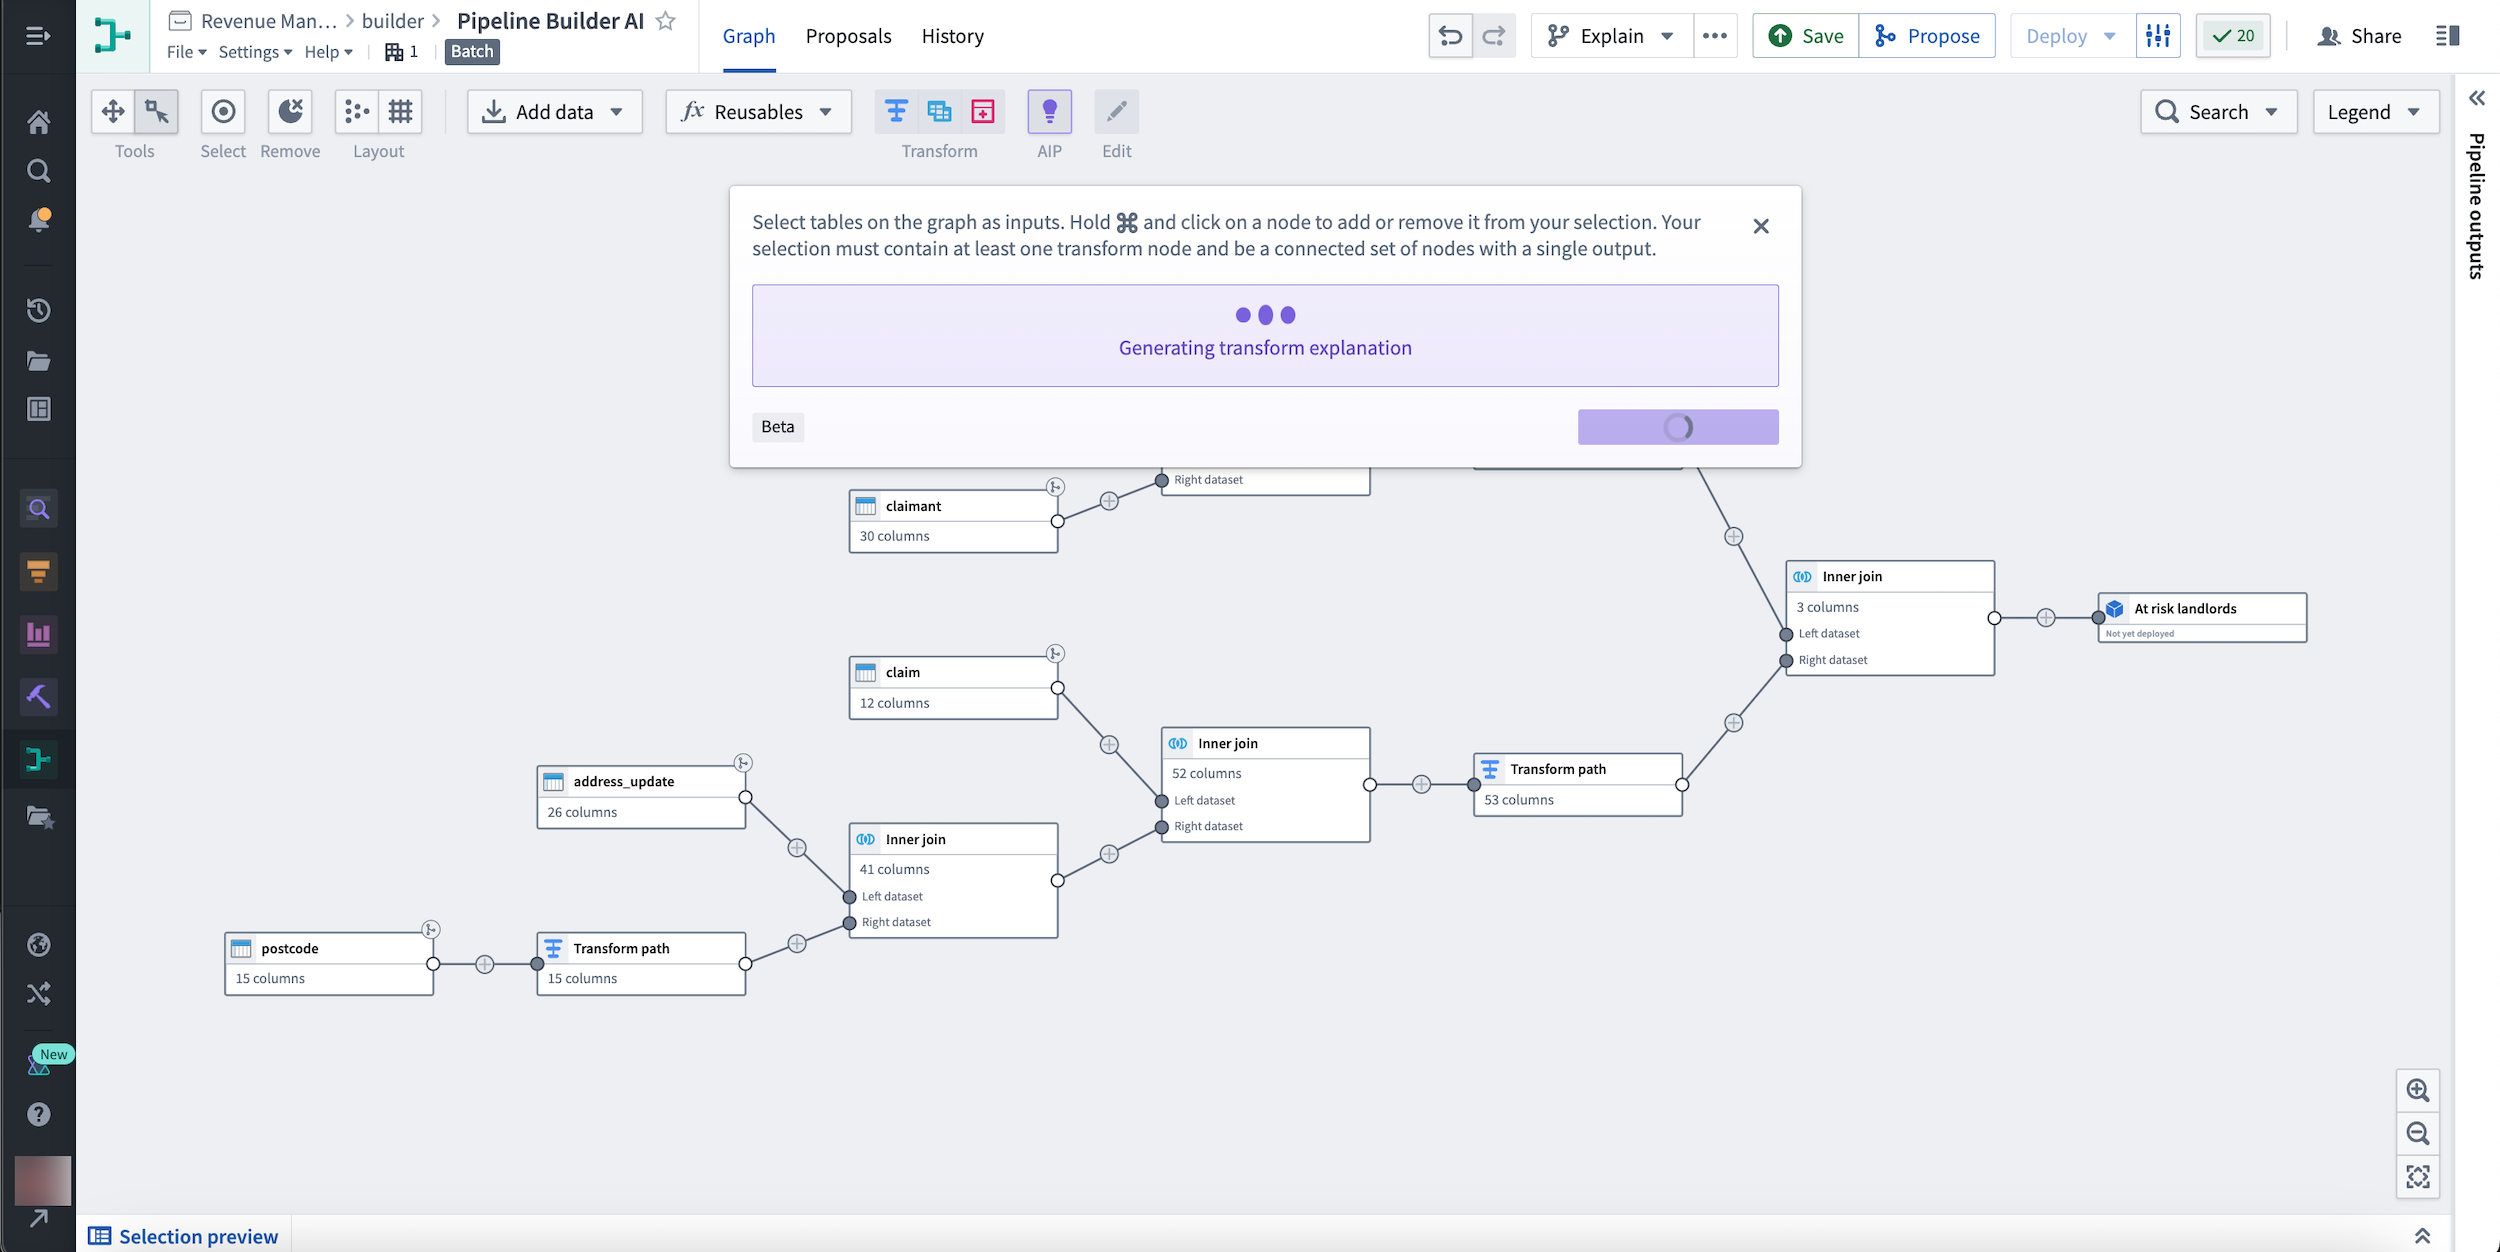
Finally, select Explain xx nodes to generate a transform explanation.

You can also explain a single node by selecting it and choosing the purple Explain button from the menu that appears to the right.
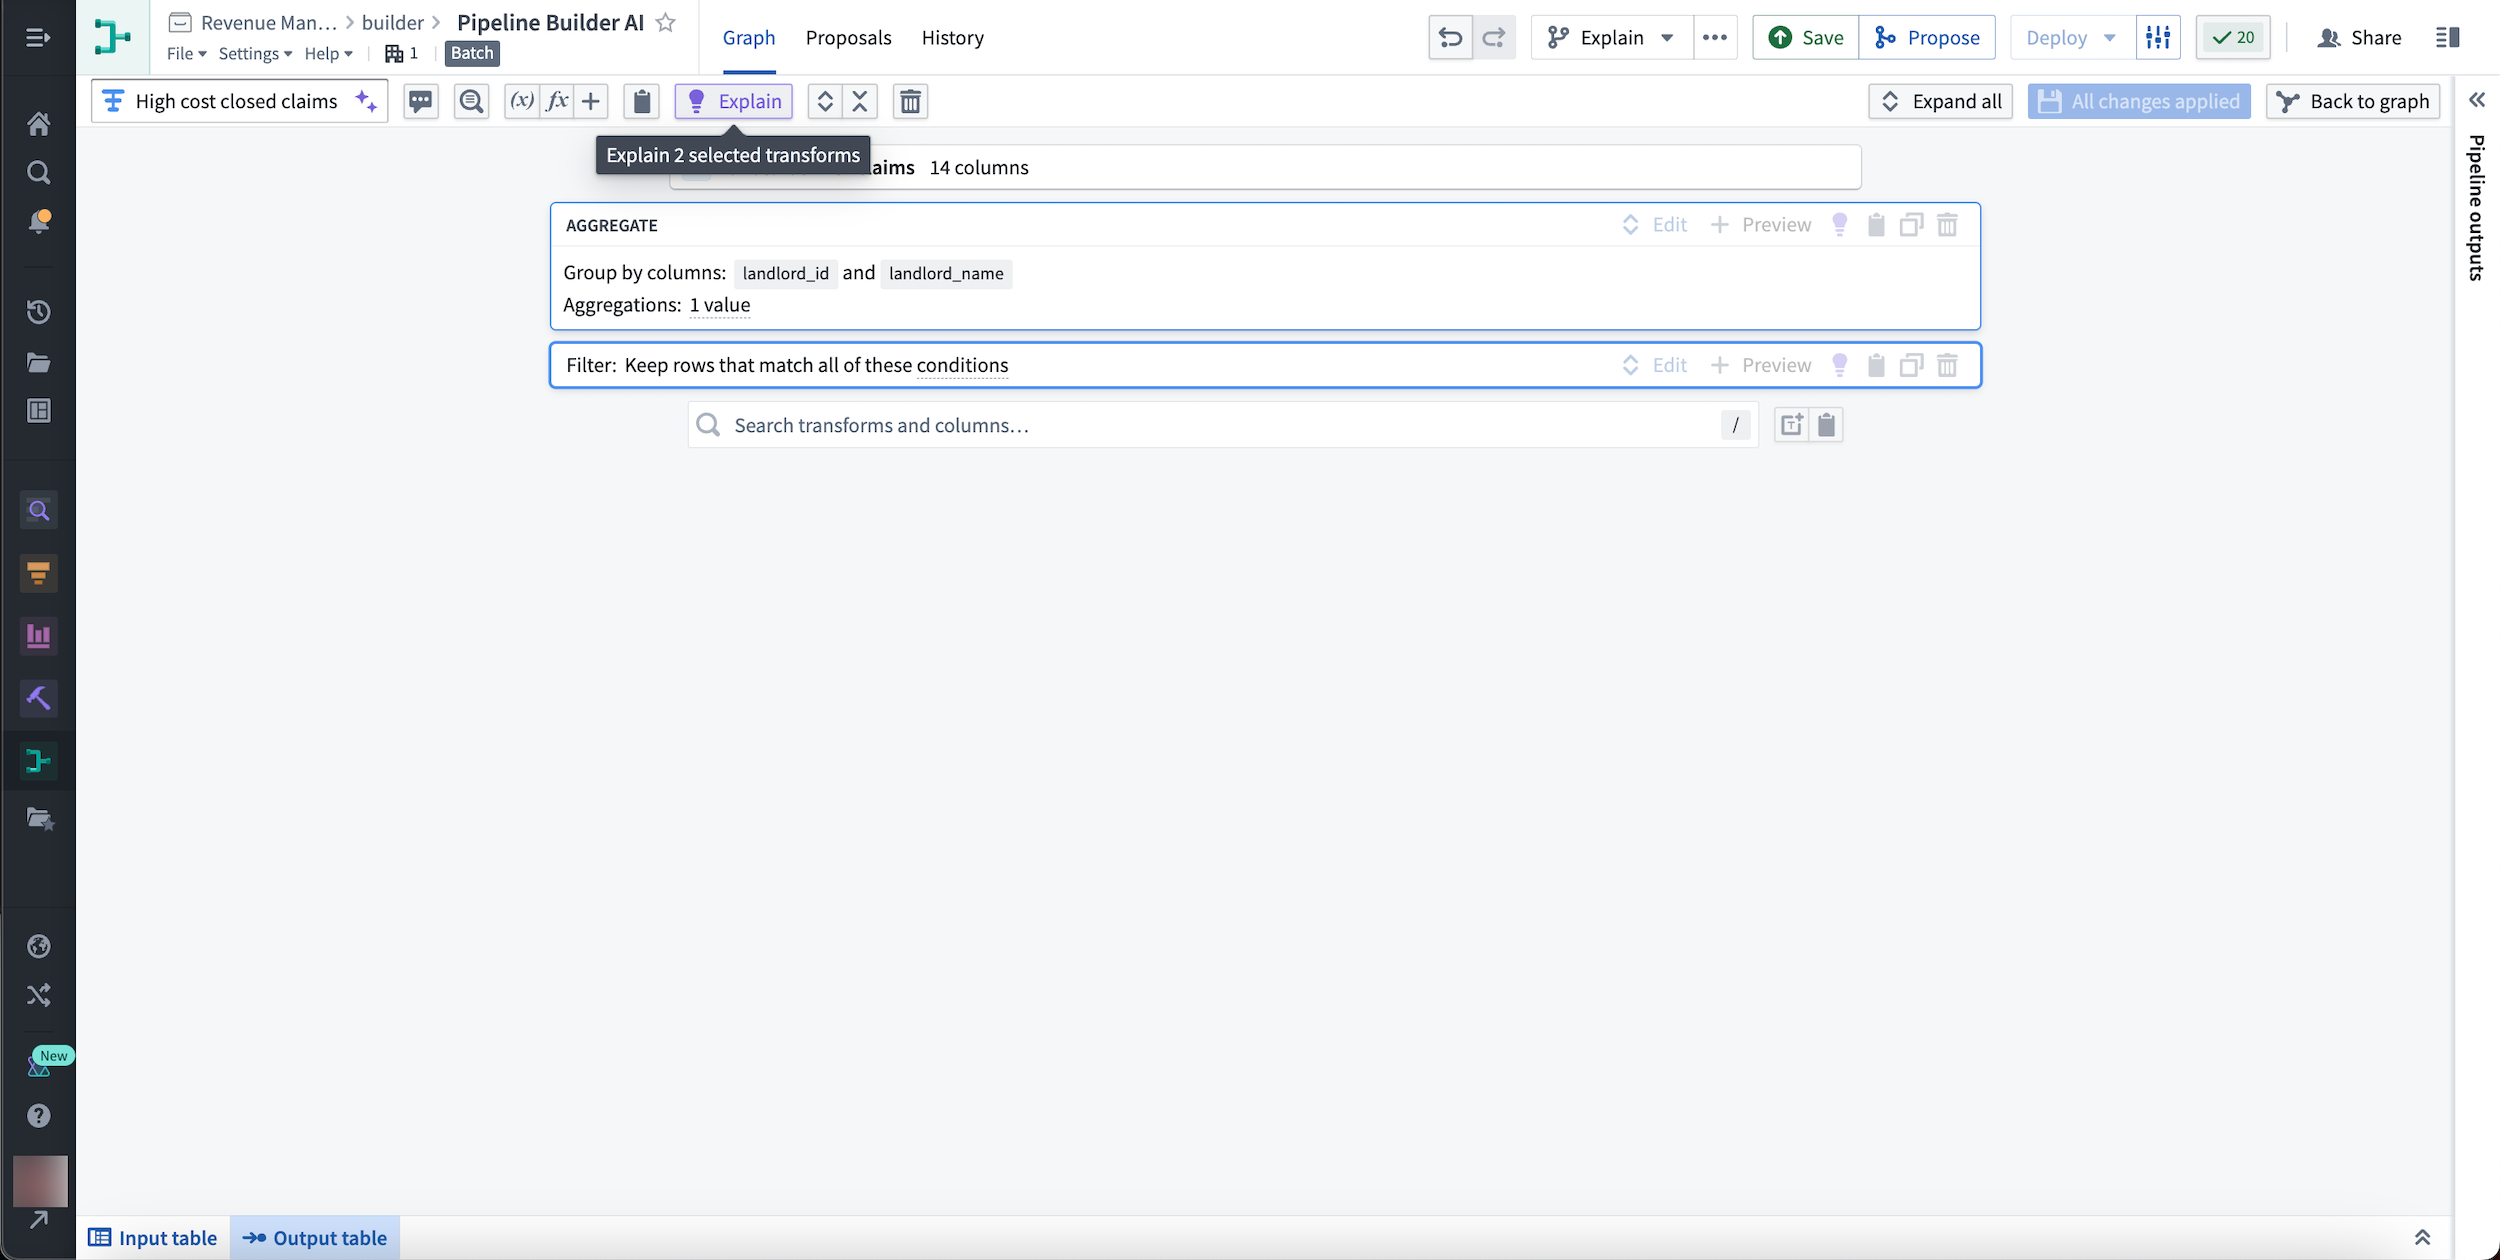
Additionally, you can choose to explain any set of transforms within a node.
Learn more about transforms in Pipeline Builder.
Suggest names and descriptions
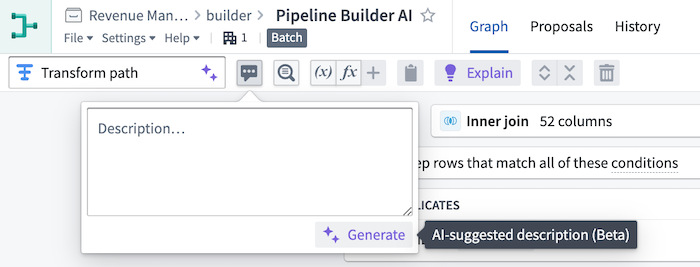
You can also use AIP in Pipeline Builder to quickly document your work by generating a suggested name and description for any transform node.
Select the purple AIP star icon next to the default transform name to generate a suggested name.
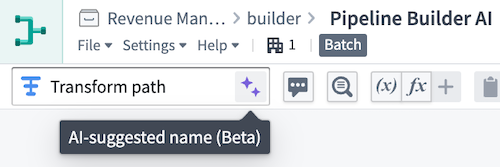
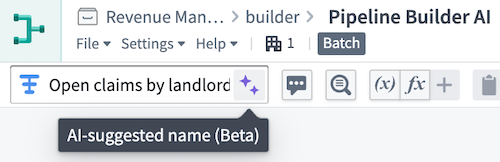
In this example, the suggested name of Open claims by landlord... adds more information than Transform path:
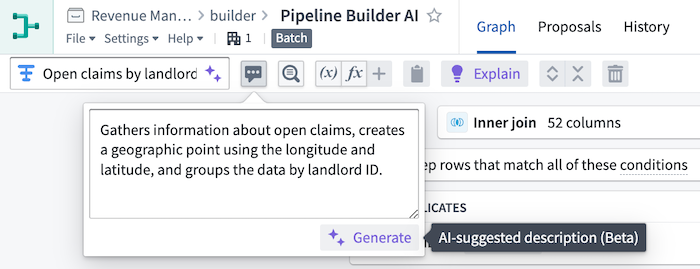
Select the purple Generate button to generate a suggested description.
In this example, the description provides more details about a transform that groups claims data by landlord ID:
The generated suggestions are short summaries of the transform path. Once you save a generated name or description, the information is automatically persisted in the pipeline and visible to collaborators.
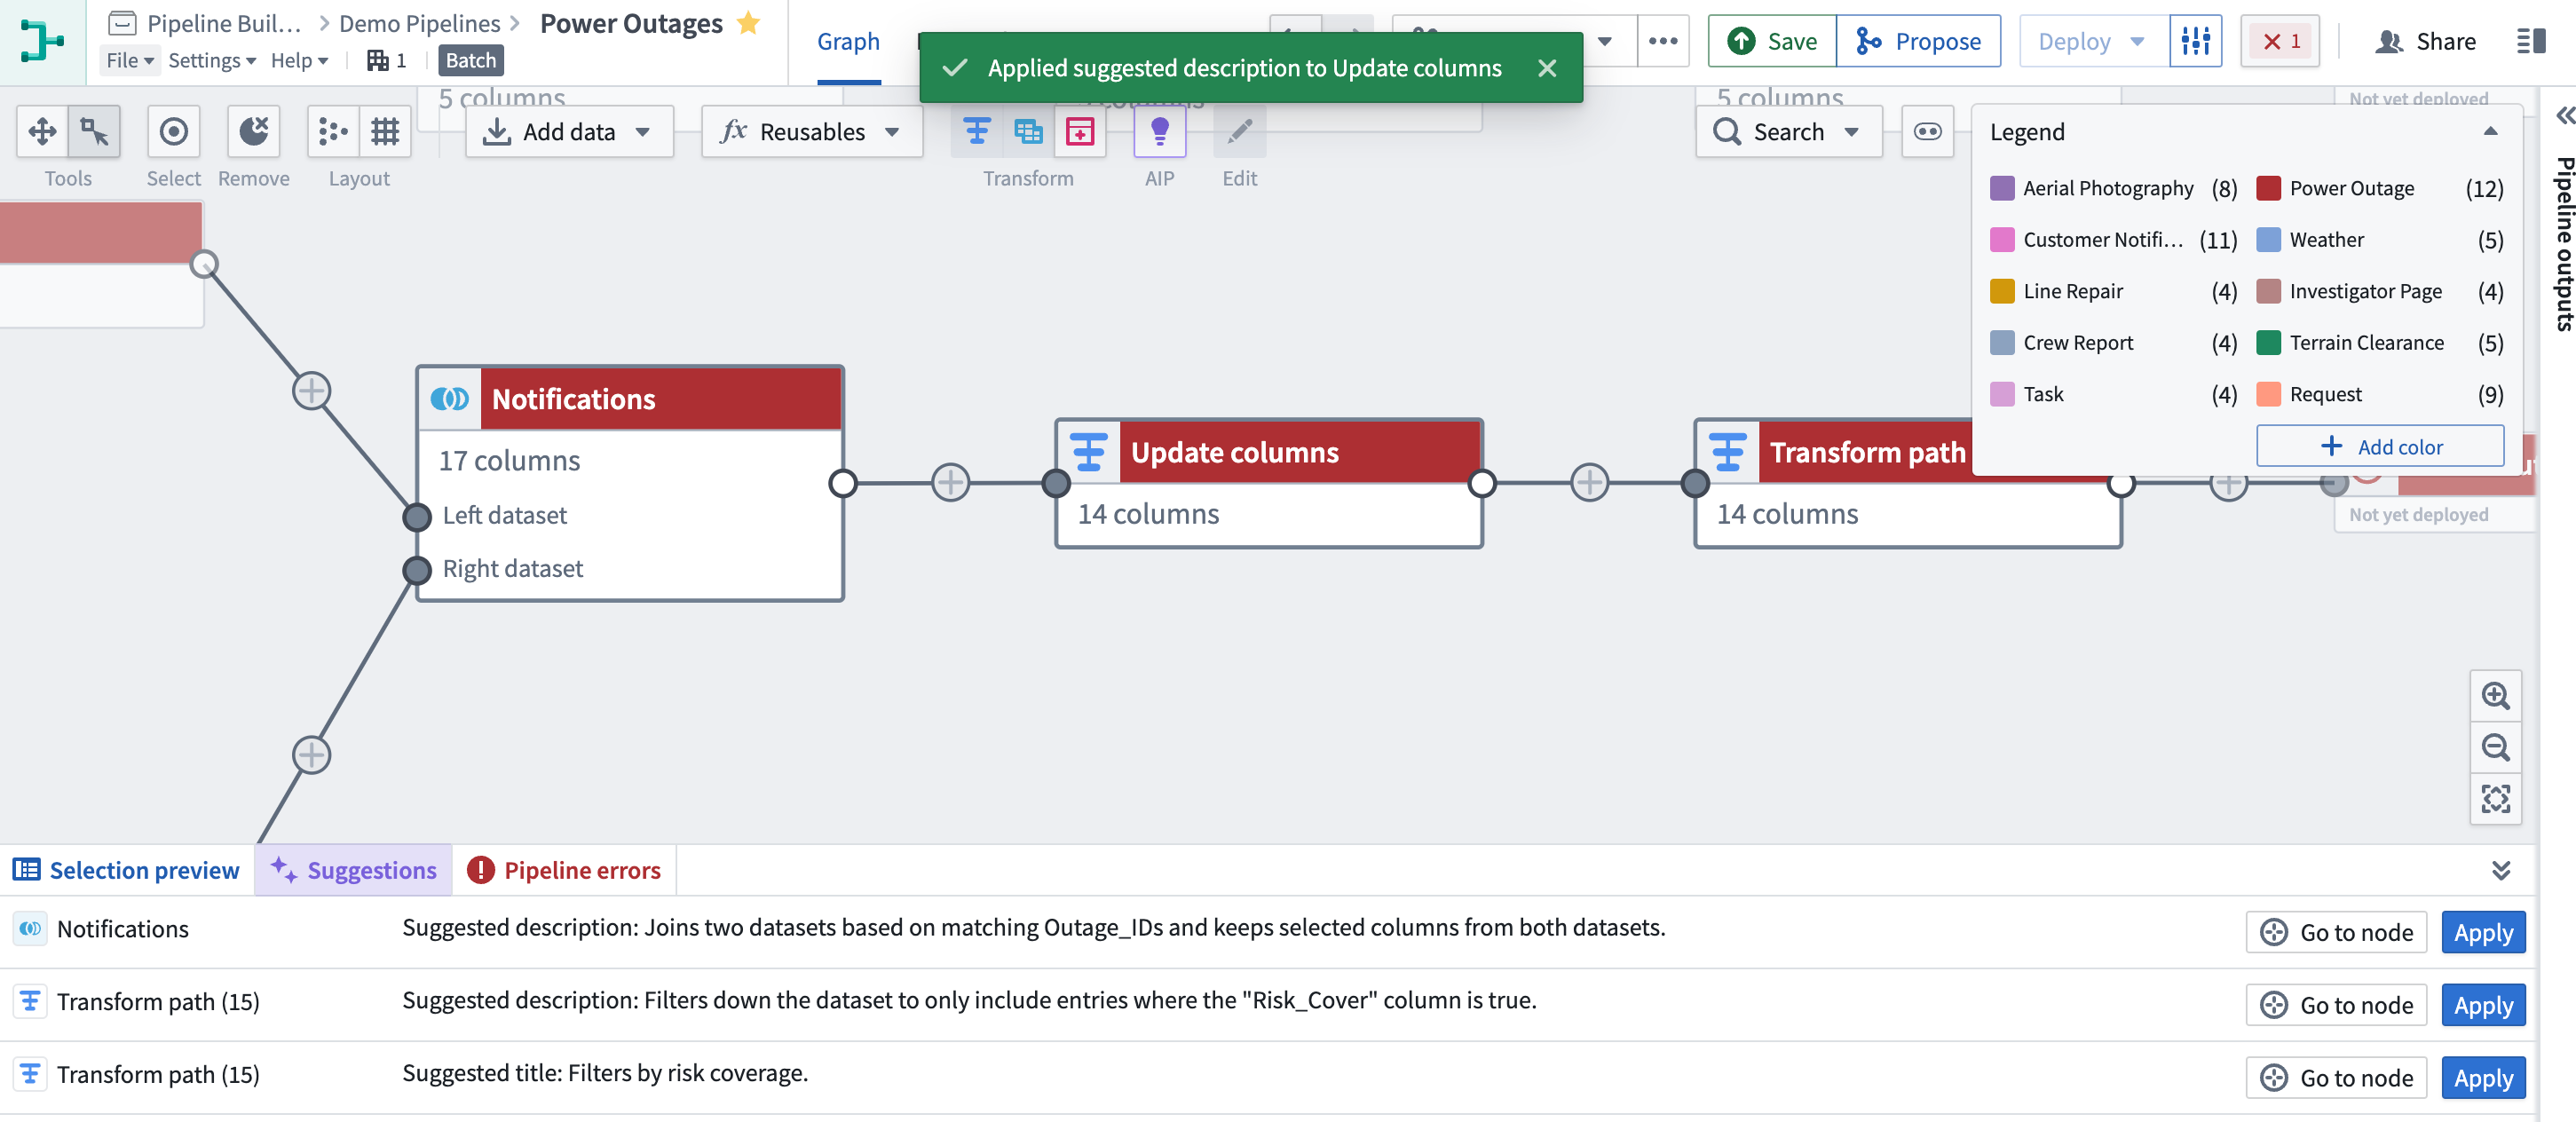
To suggest up to 10 nodes at a time, open the Suggestions tab at the bottom of the screen.
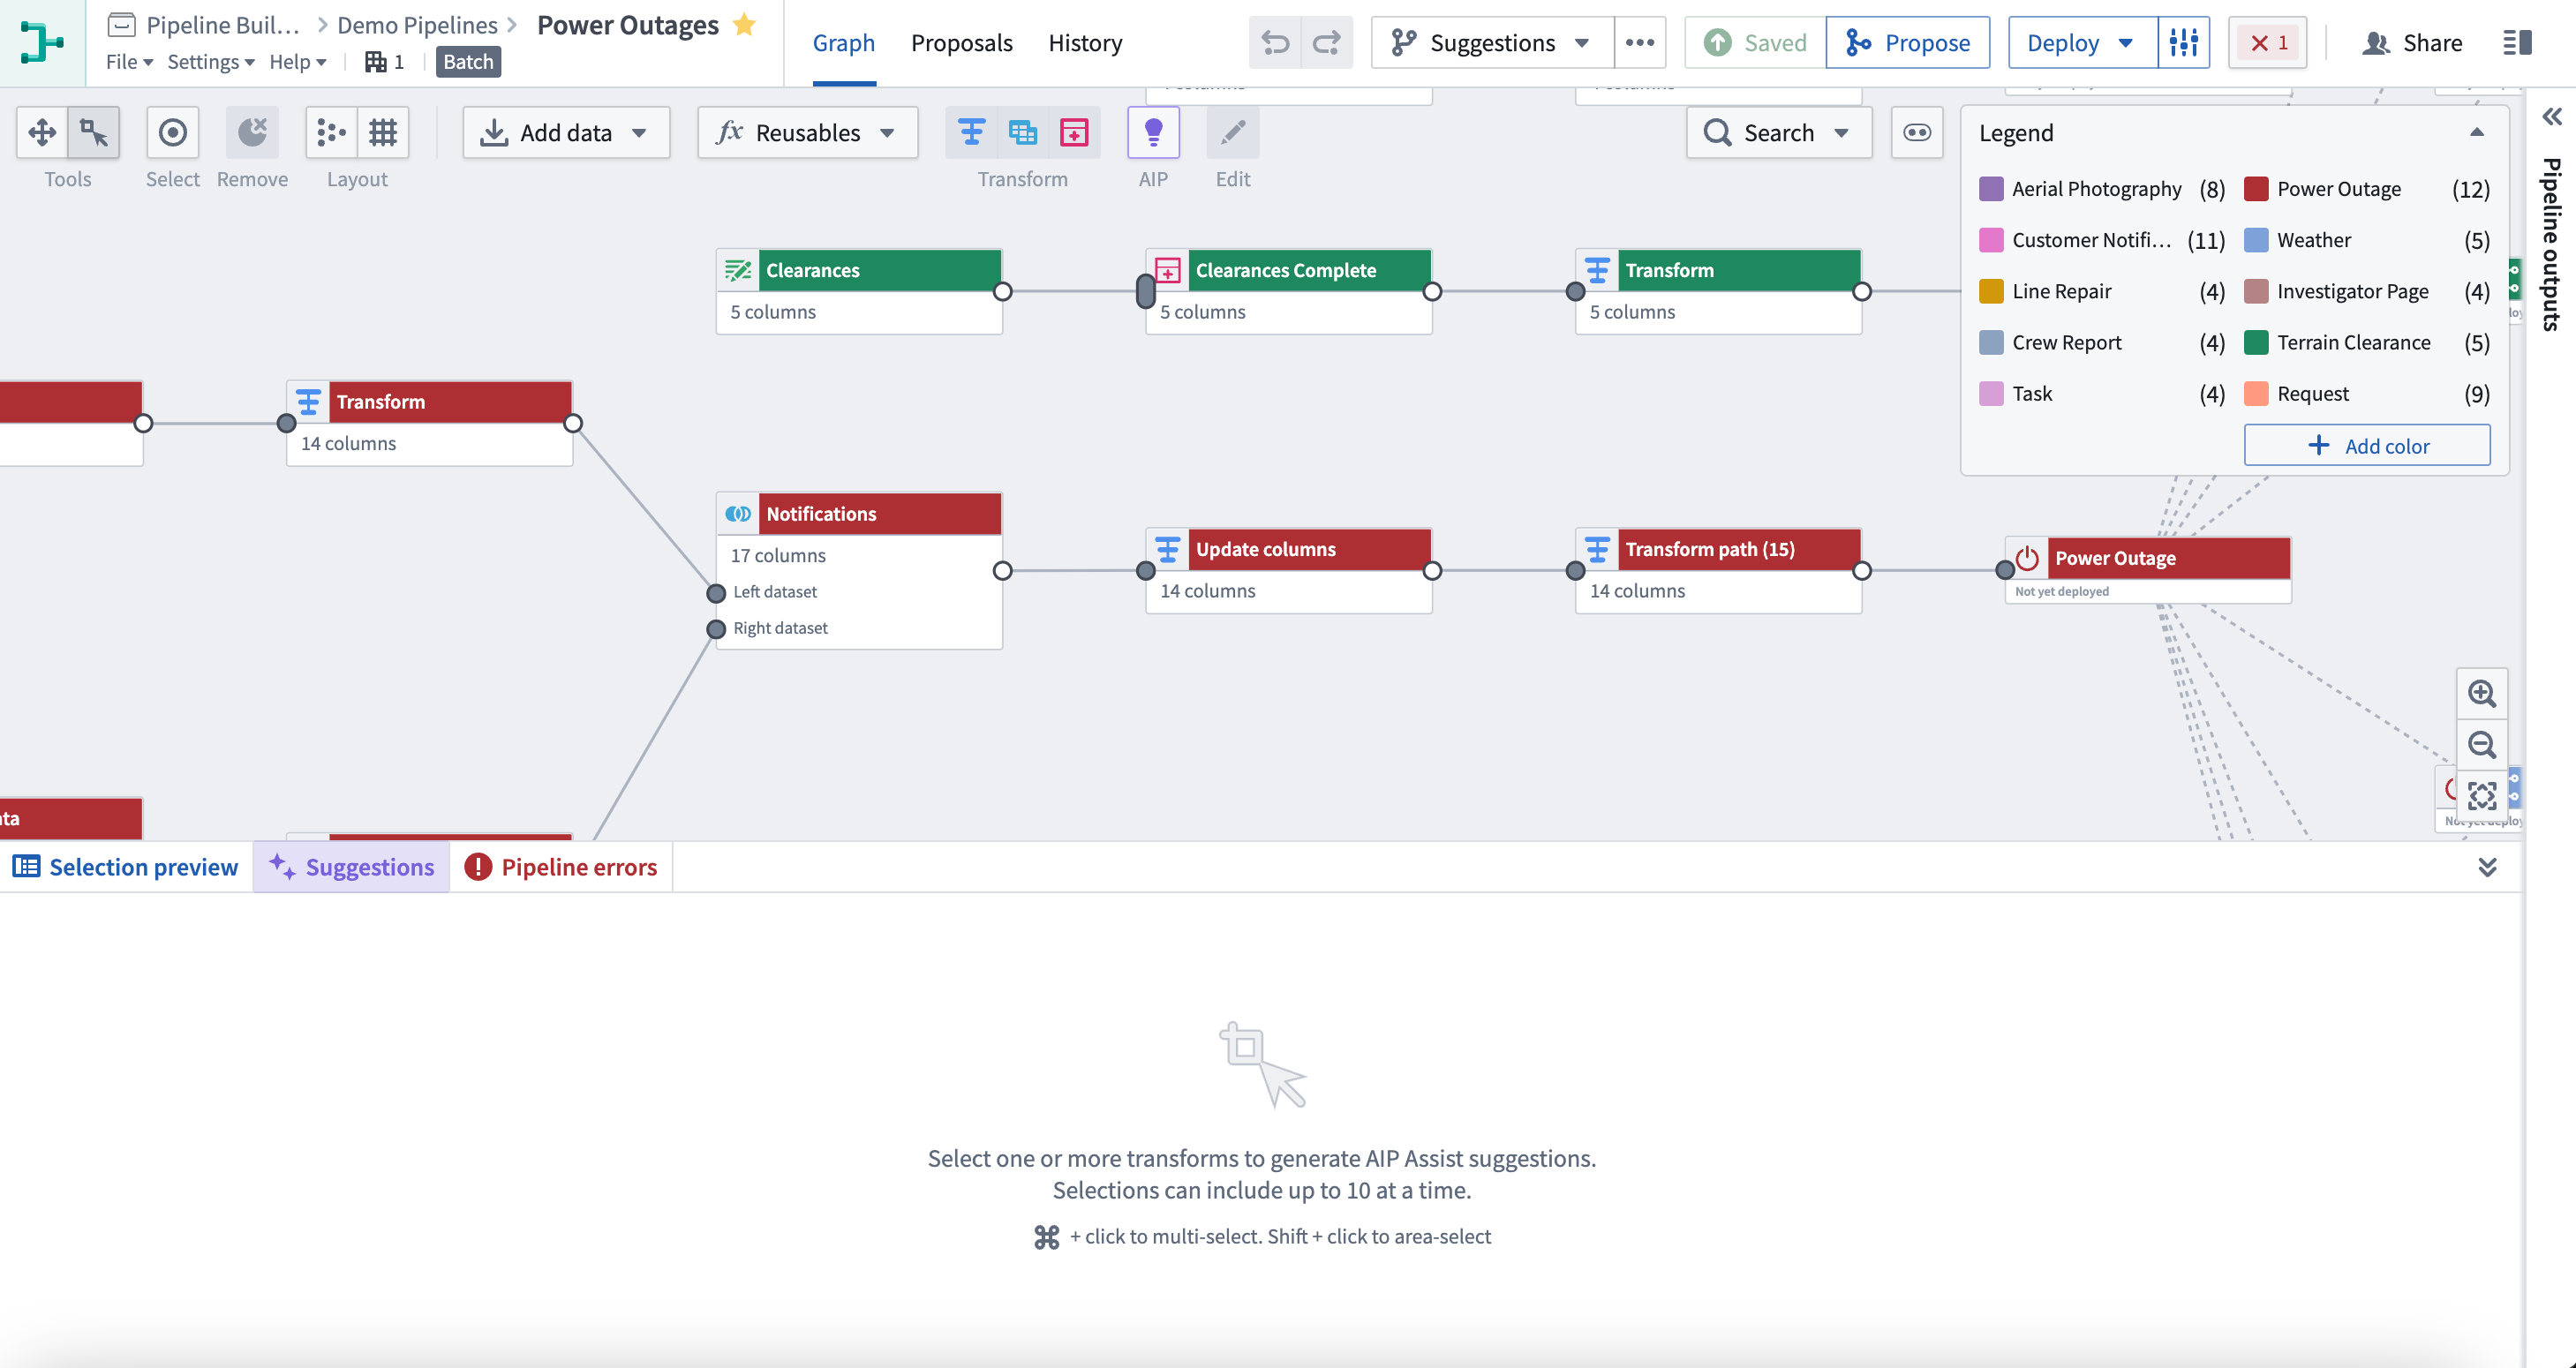
Select one or more nodes on your pipeline to generate a name and description if they do not already exist.
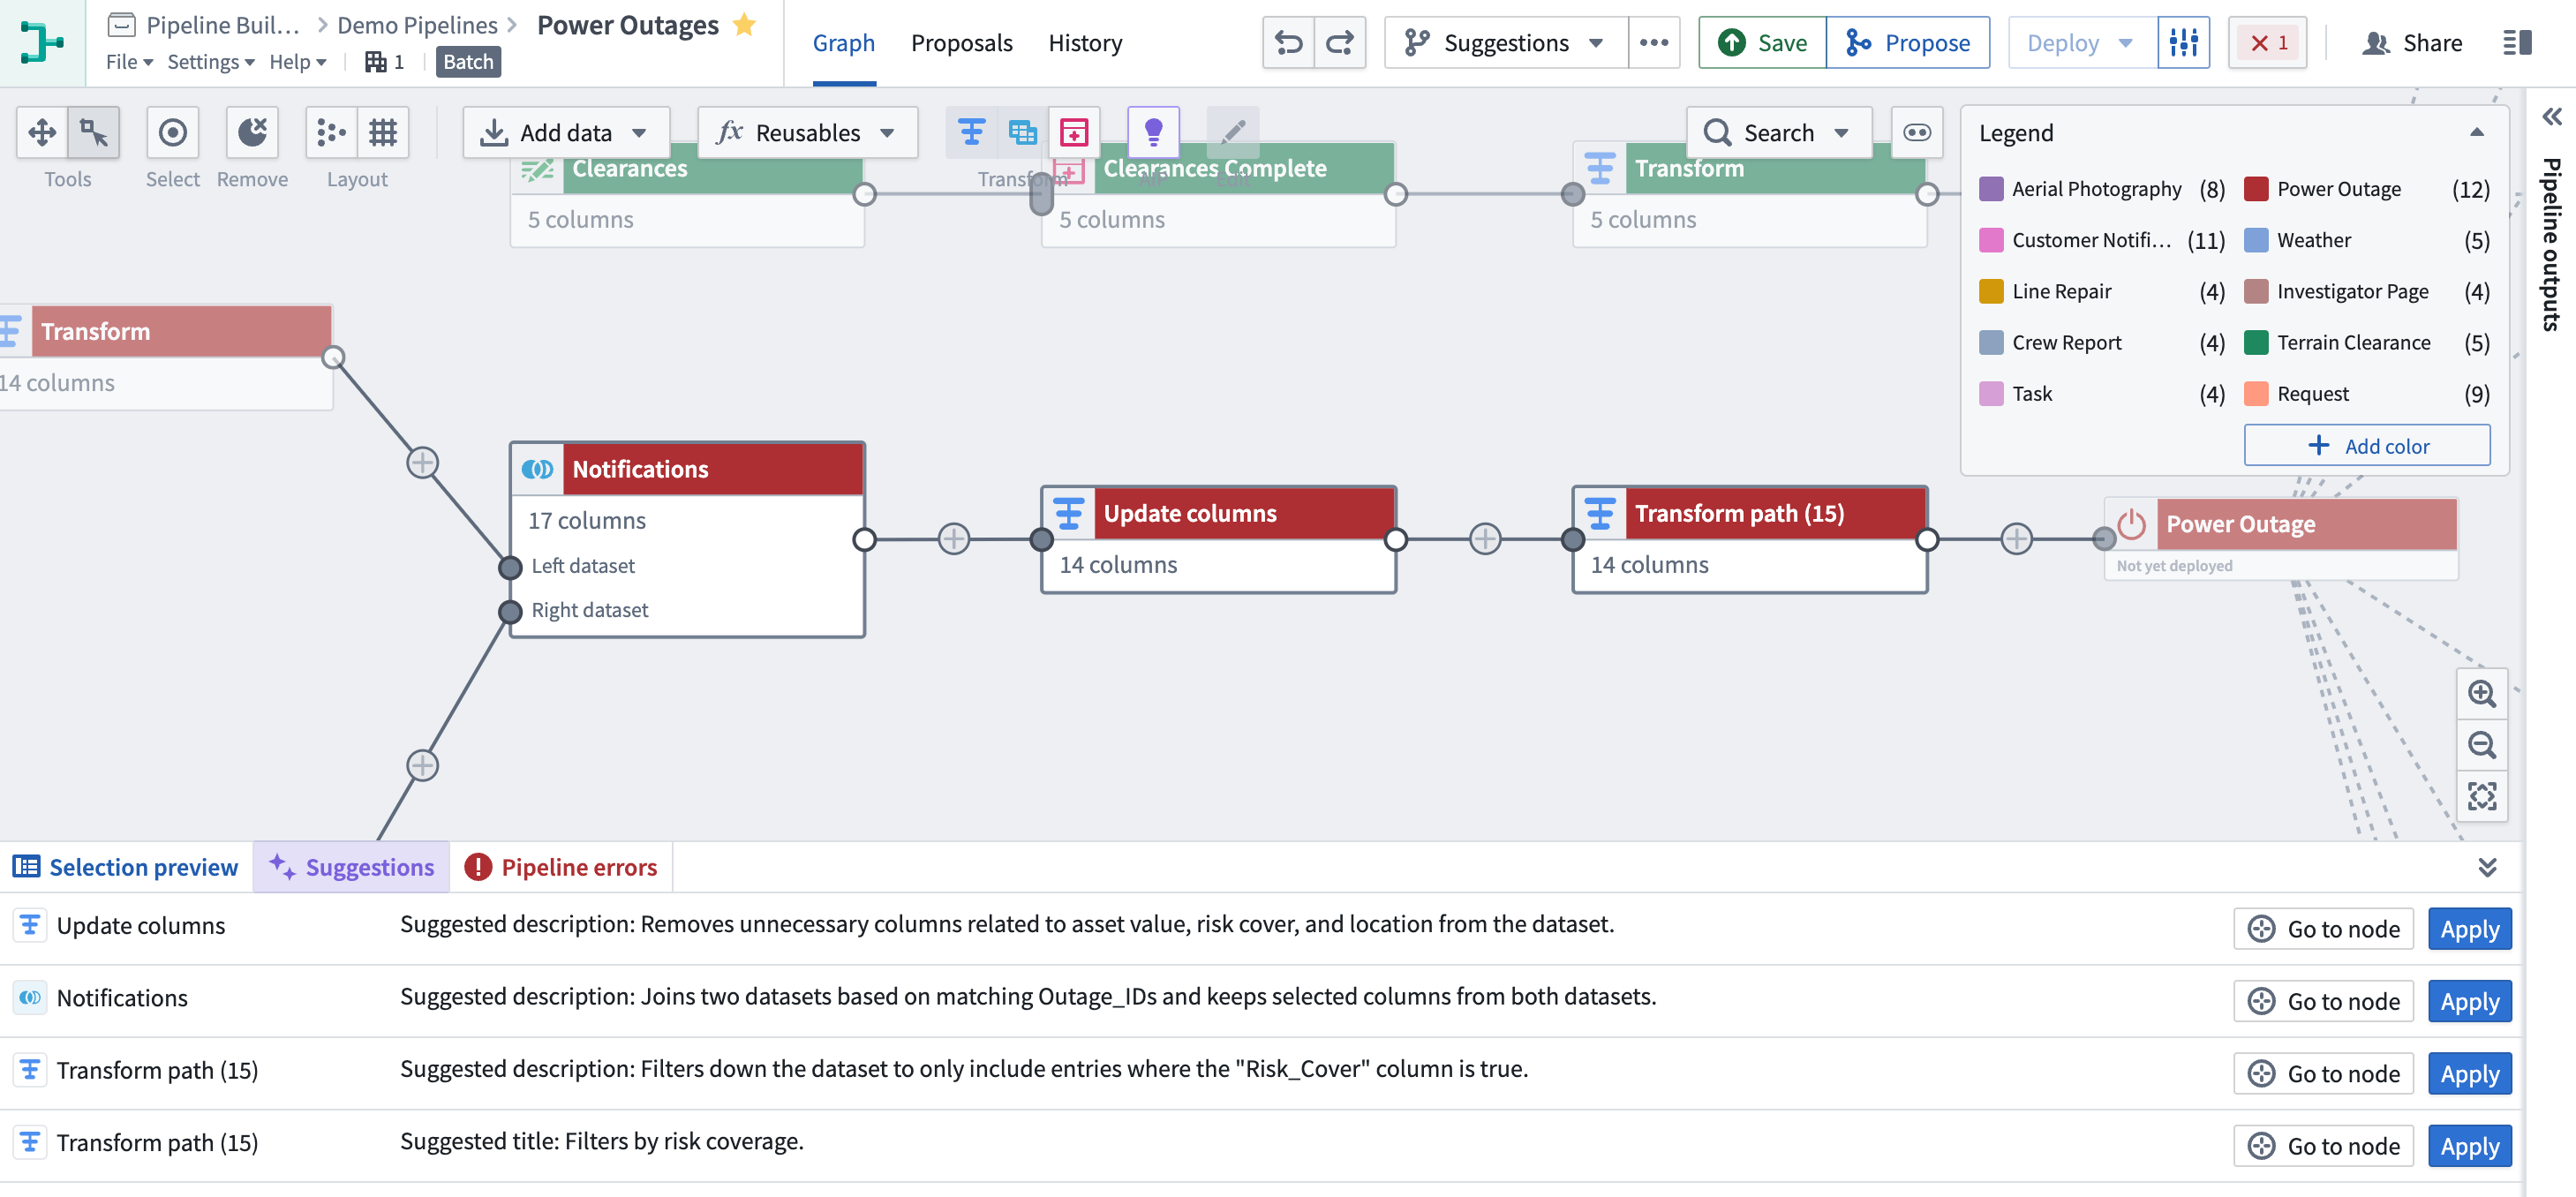
Select Apply on each suggestion to save the change to the node.
Transform Assist
The Transform Assist feature can help you make the best use of the many transformation options available to you in Pipeline Builder. Using the power of AIP, the regex helper can generate regular expressions based on your input and update existing expressions. Additionally, with the timestamp formatter, you can quickly transform cast board values from string into timestamp.
Regex helper
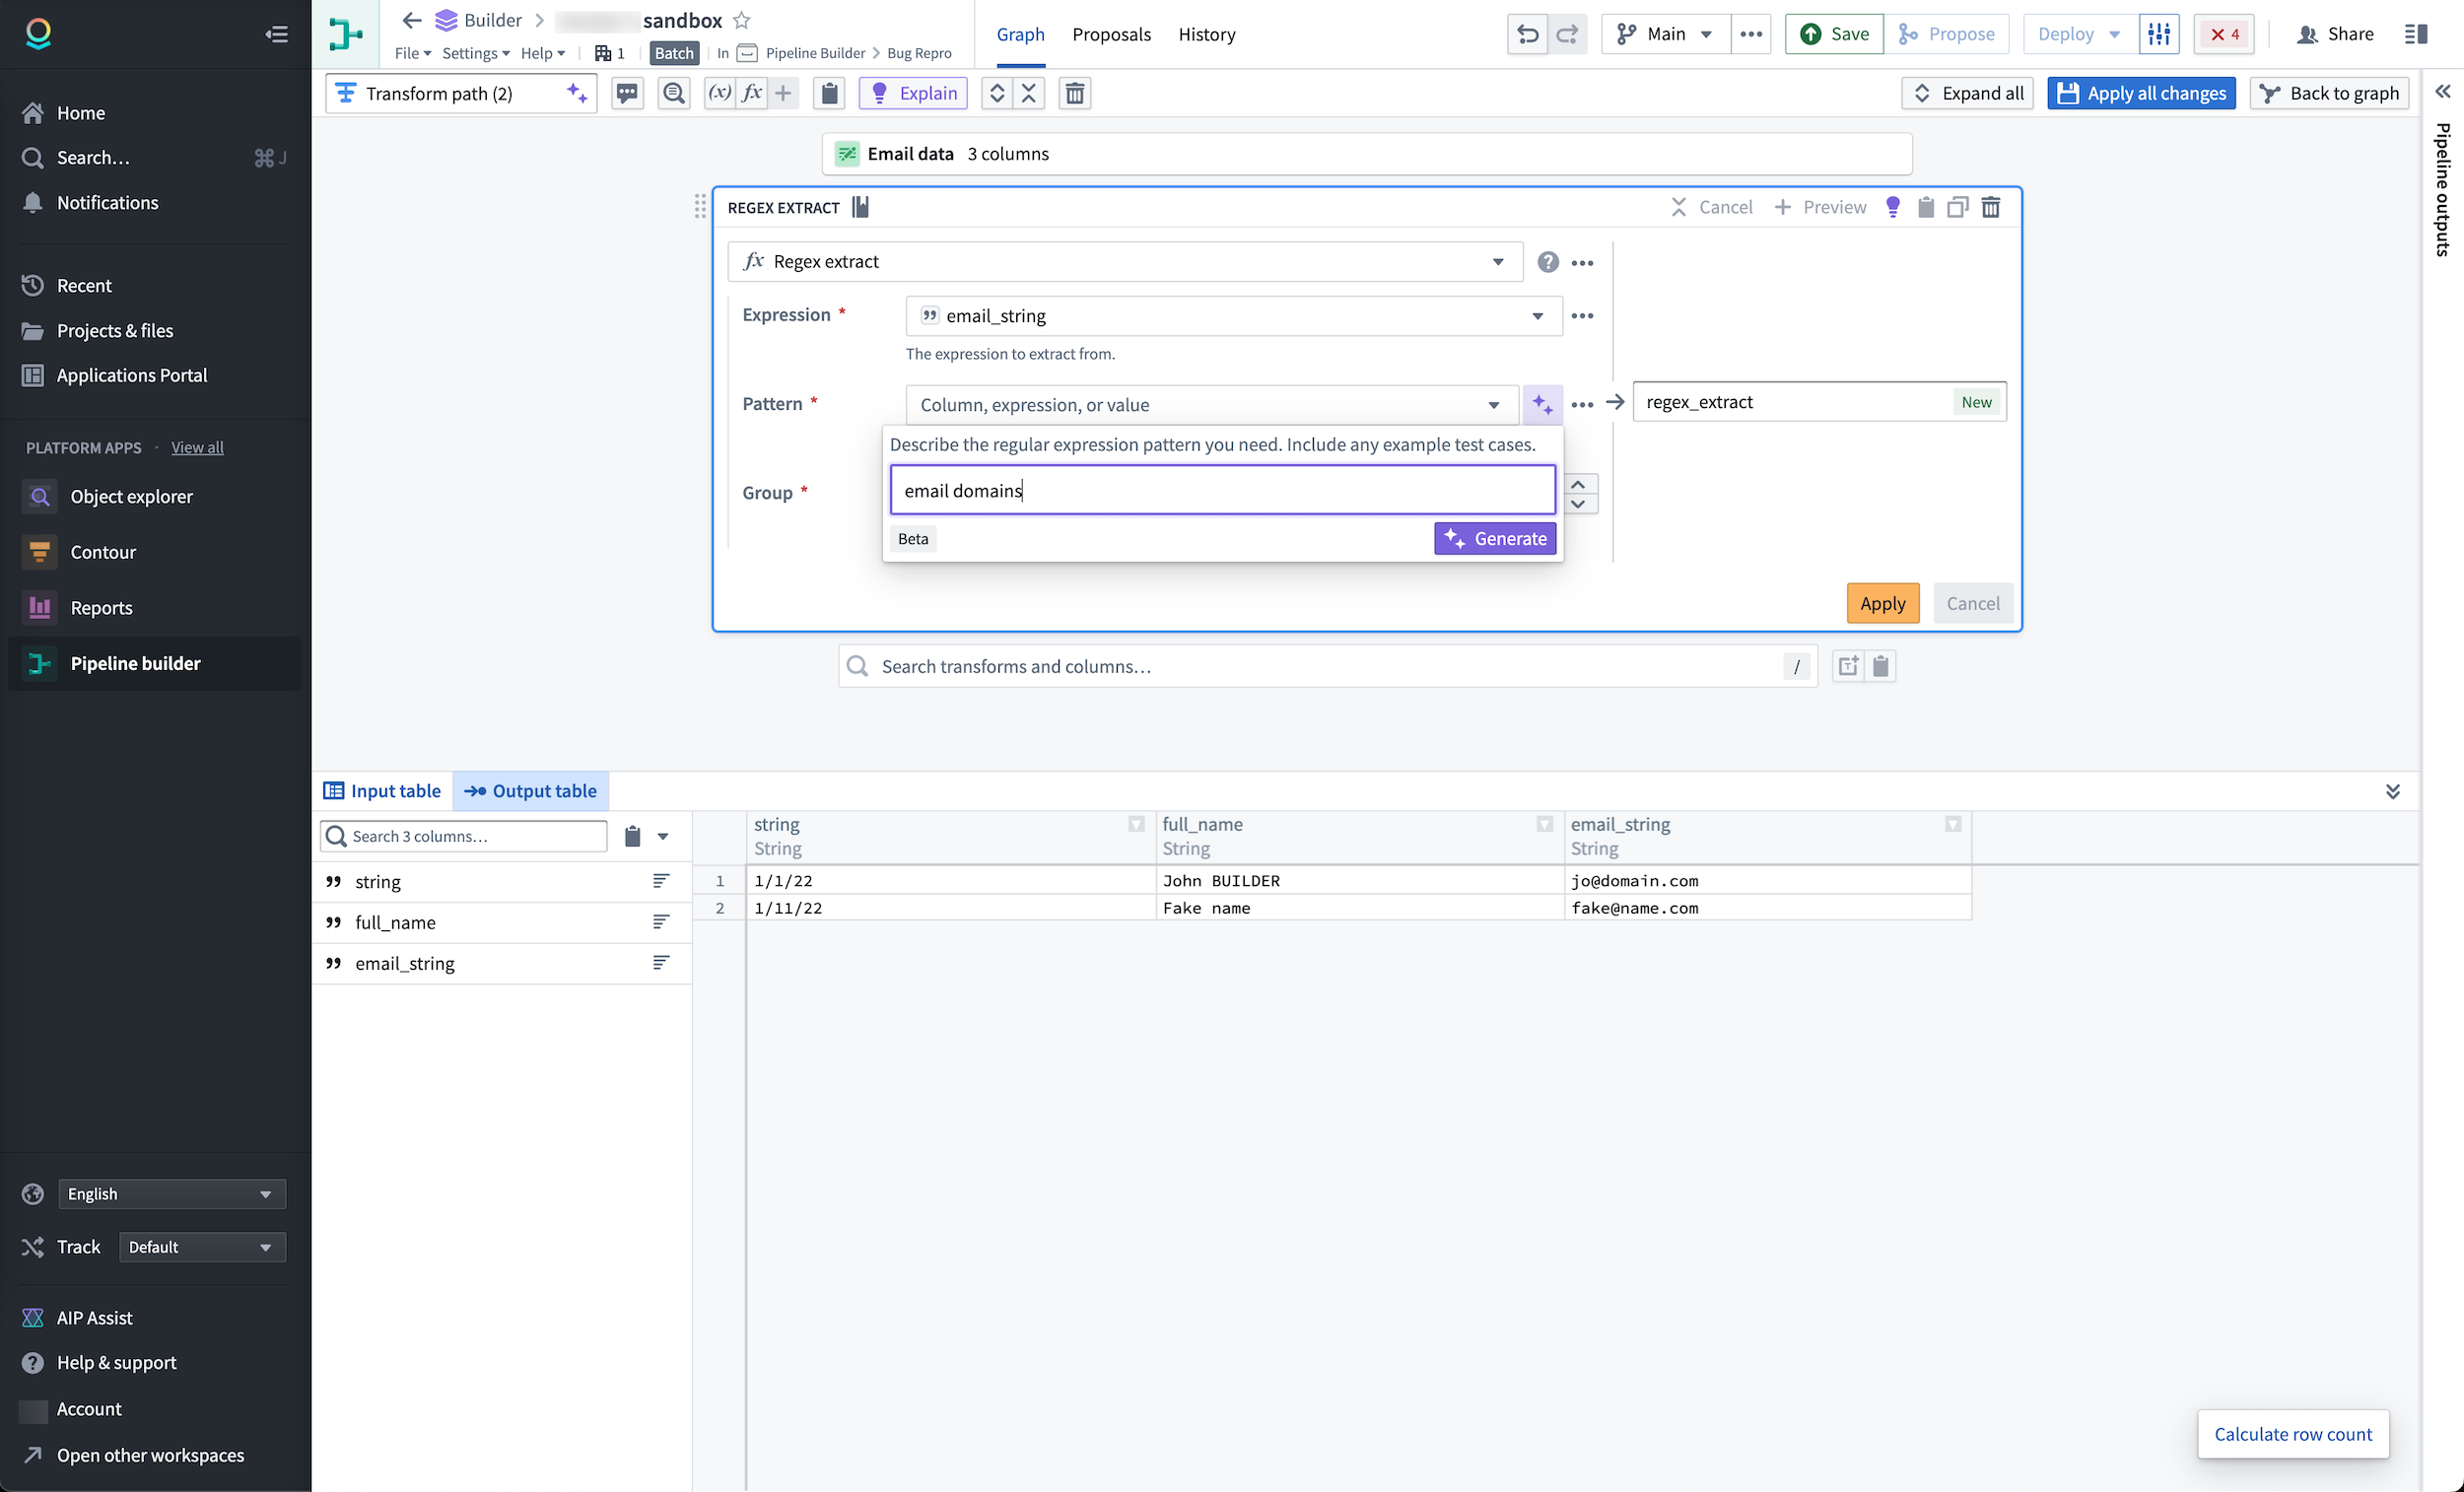
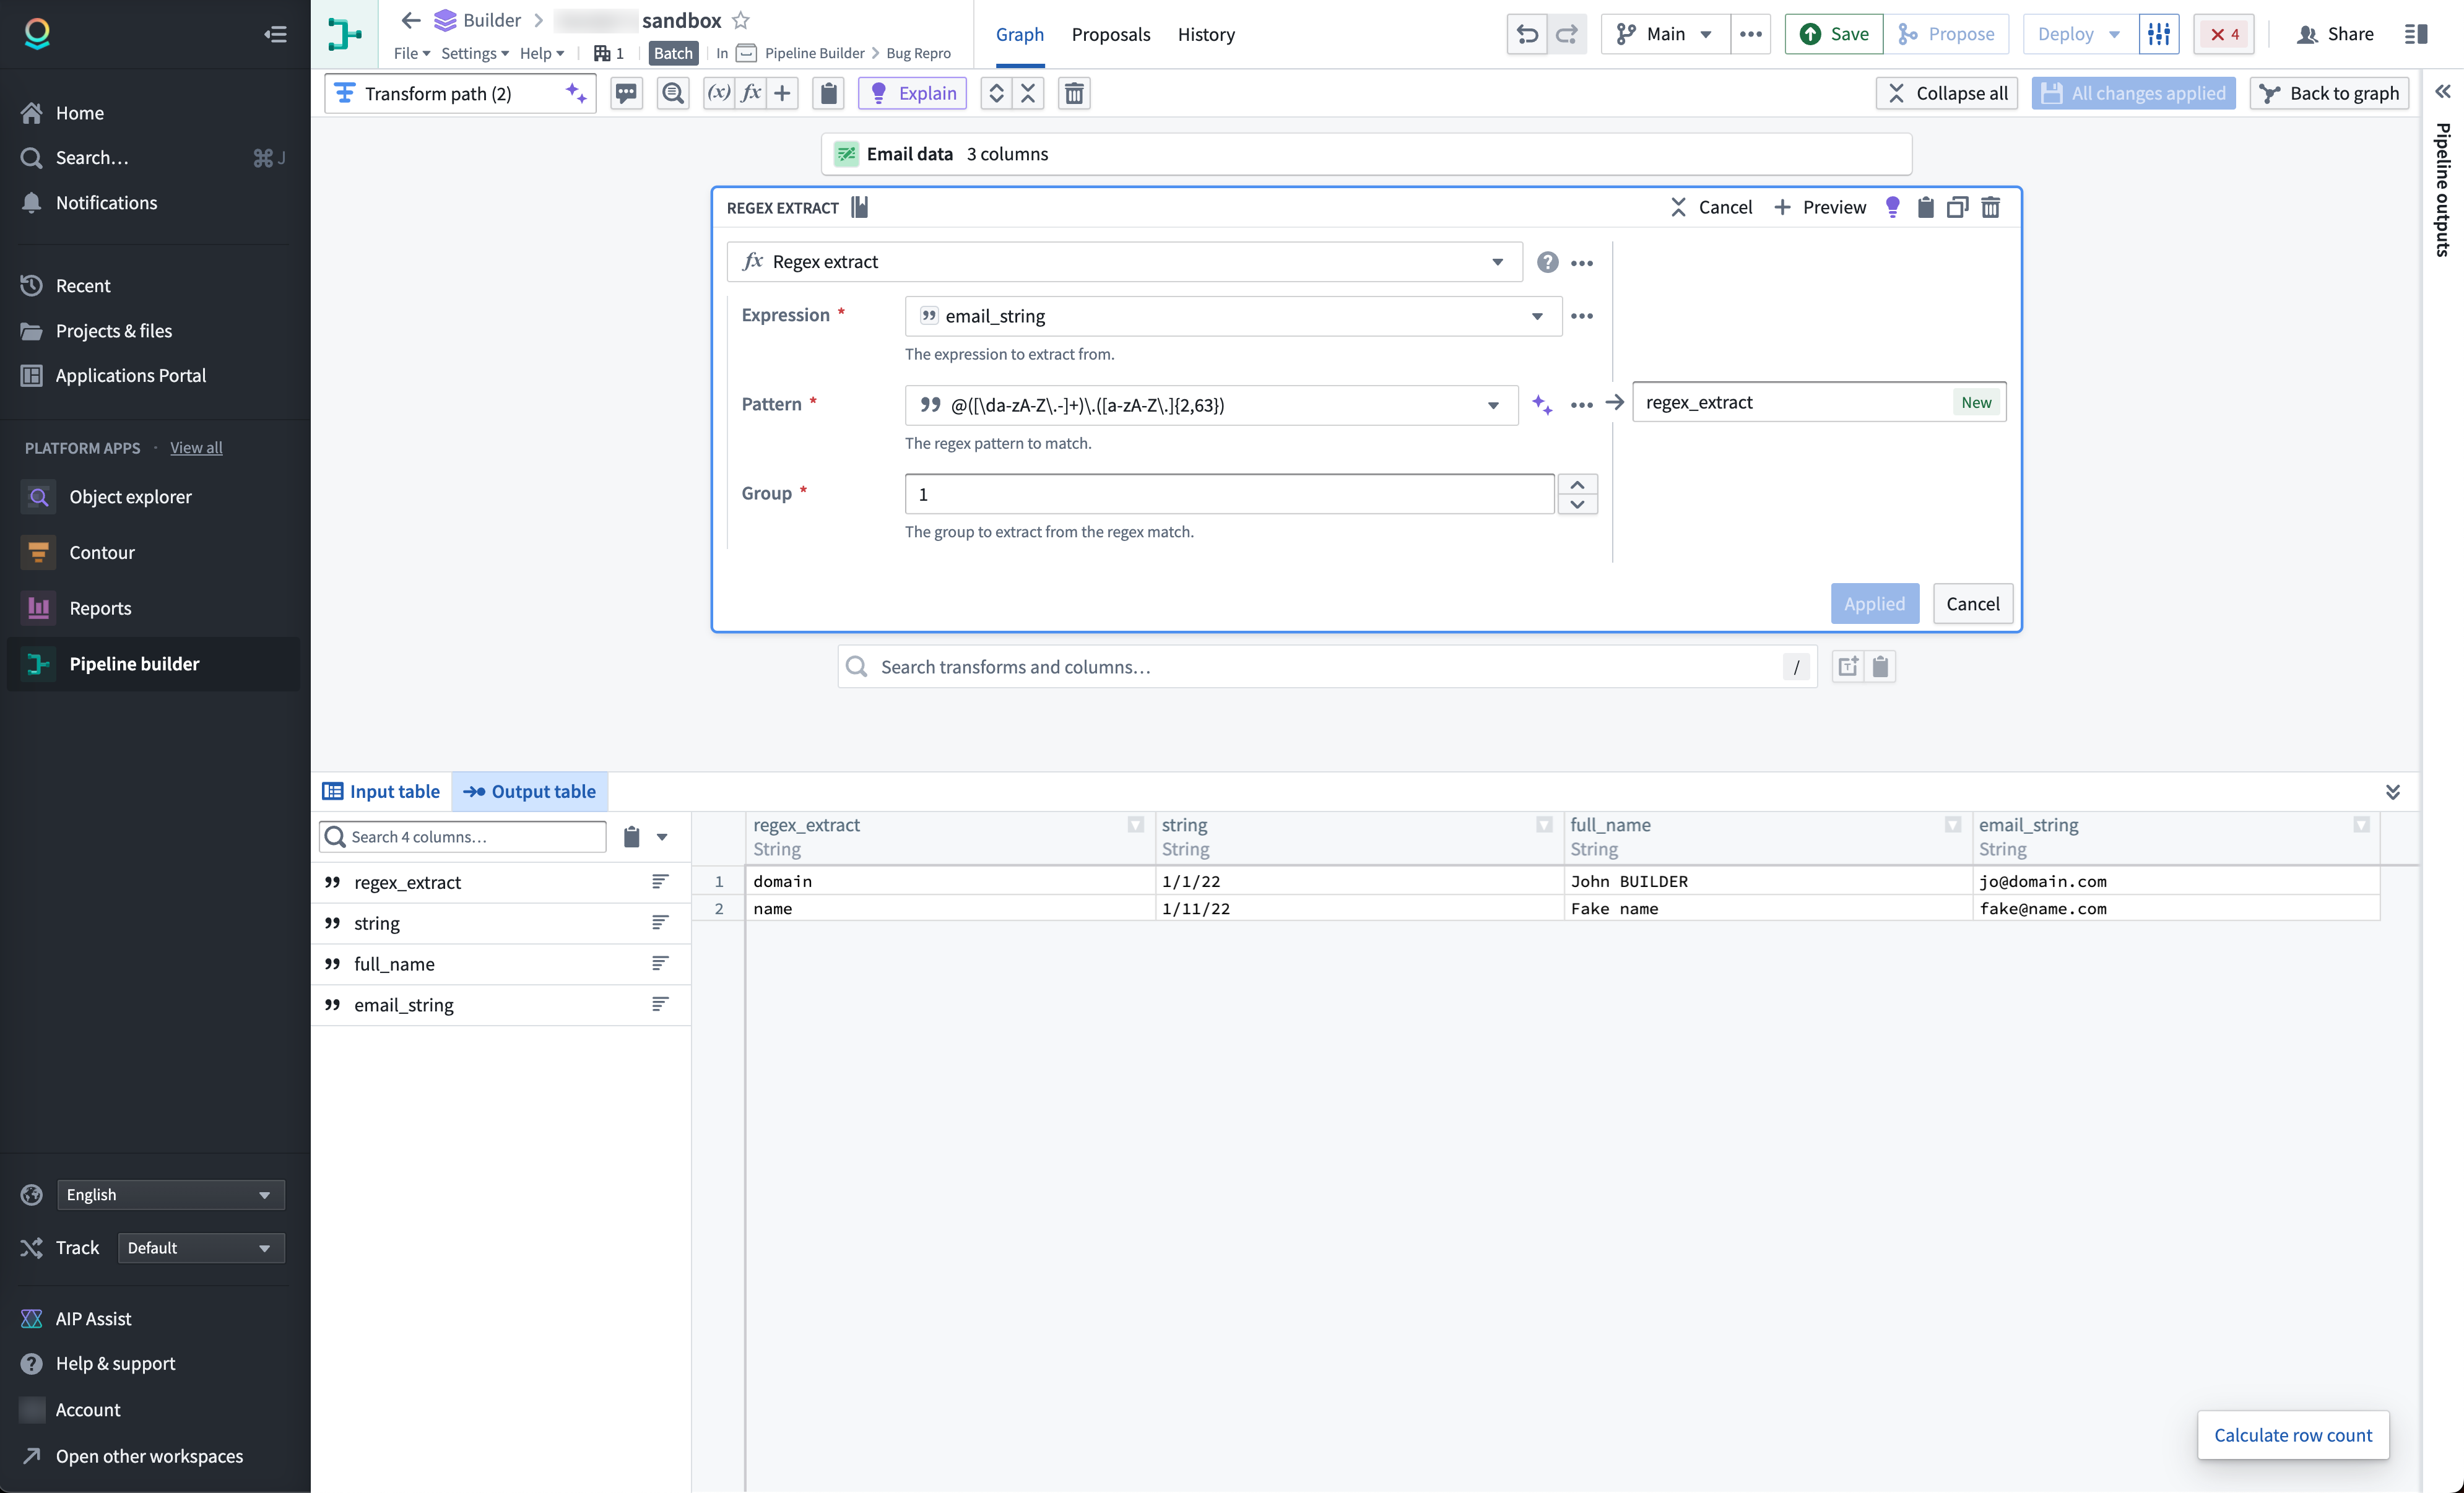
The regex helper simplifies the process of creating data pipelines by providing you with accurate and efficient regex patterns to extract, replace, and find strings within your data. To use the regex helper, first create a new transform board that uses regex parameters: regex extract, regex extract all, regex replace, regex find, or regex match. In the example below, we use the regex extract transform on the expression column email_string.
Select the purple AIP star icon next to the Pattern field, then describe the regular expression you want to create. In this example, we want to search for email domains.
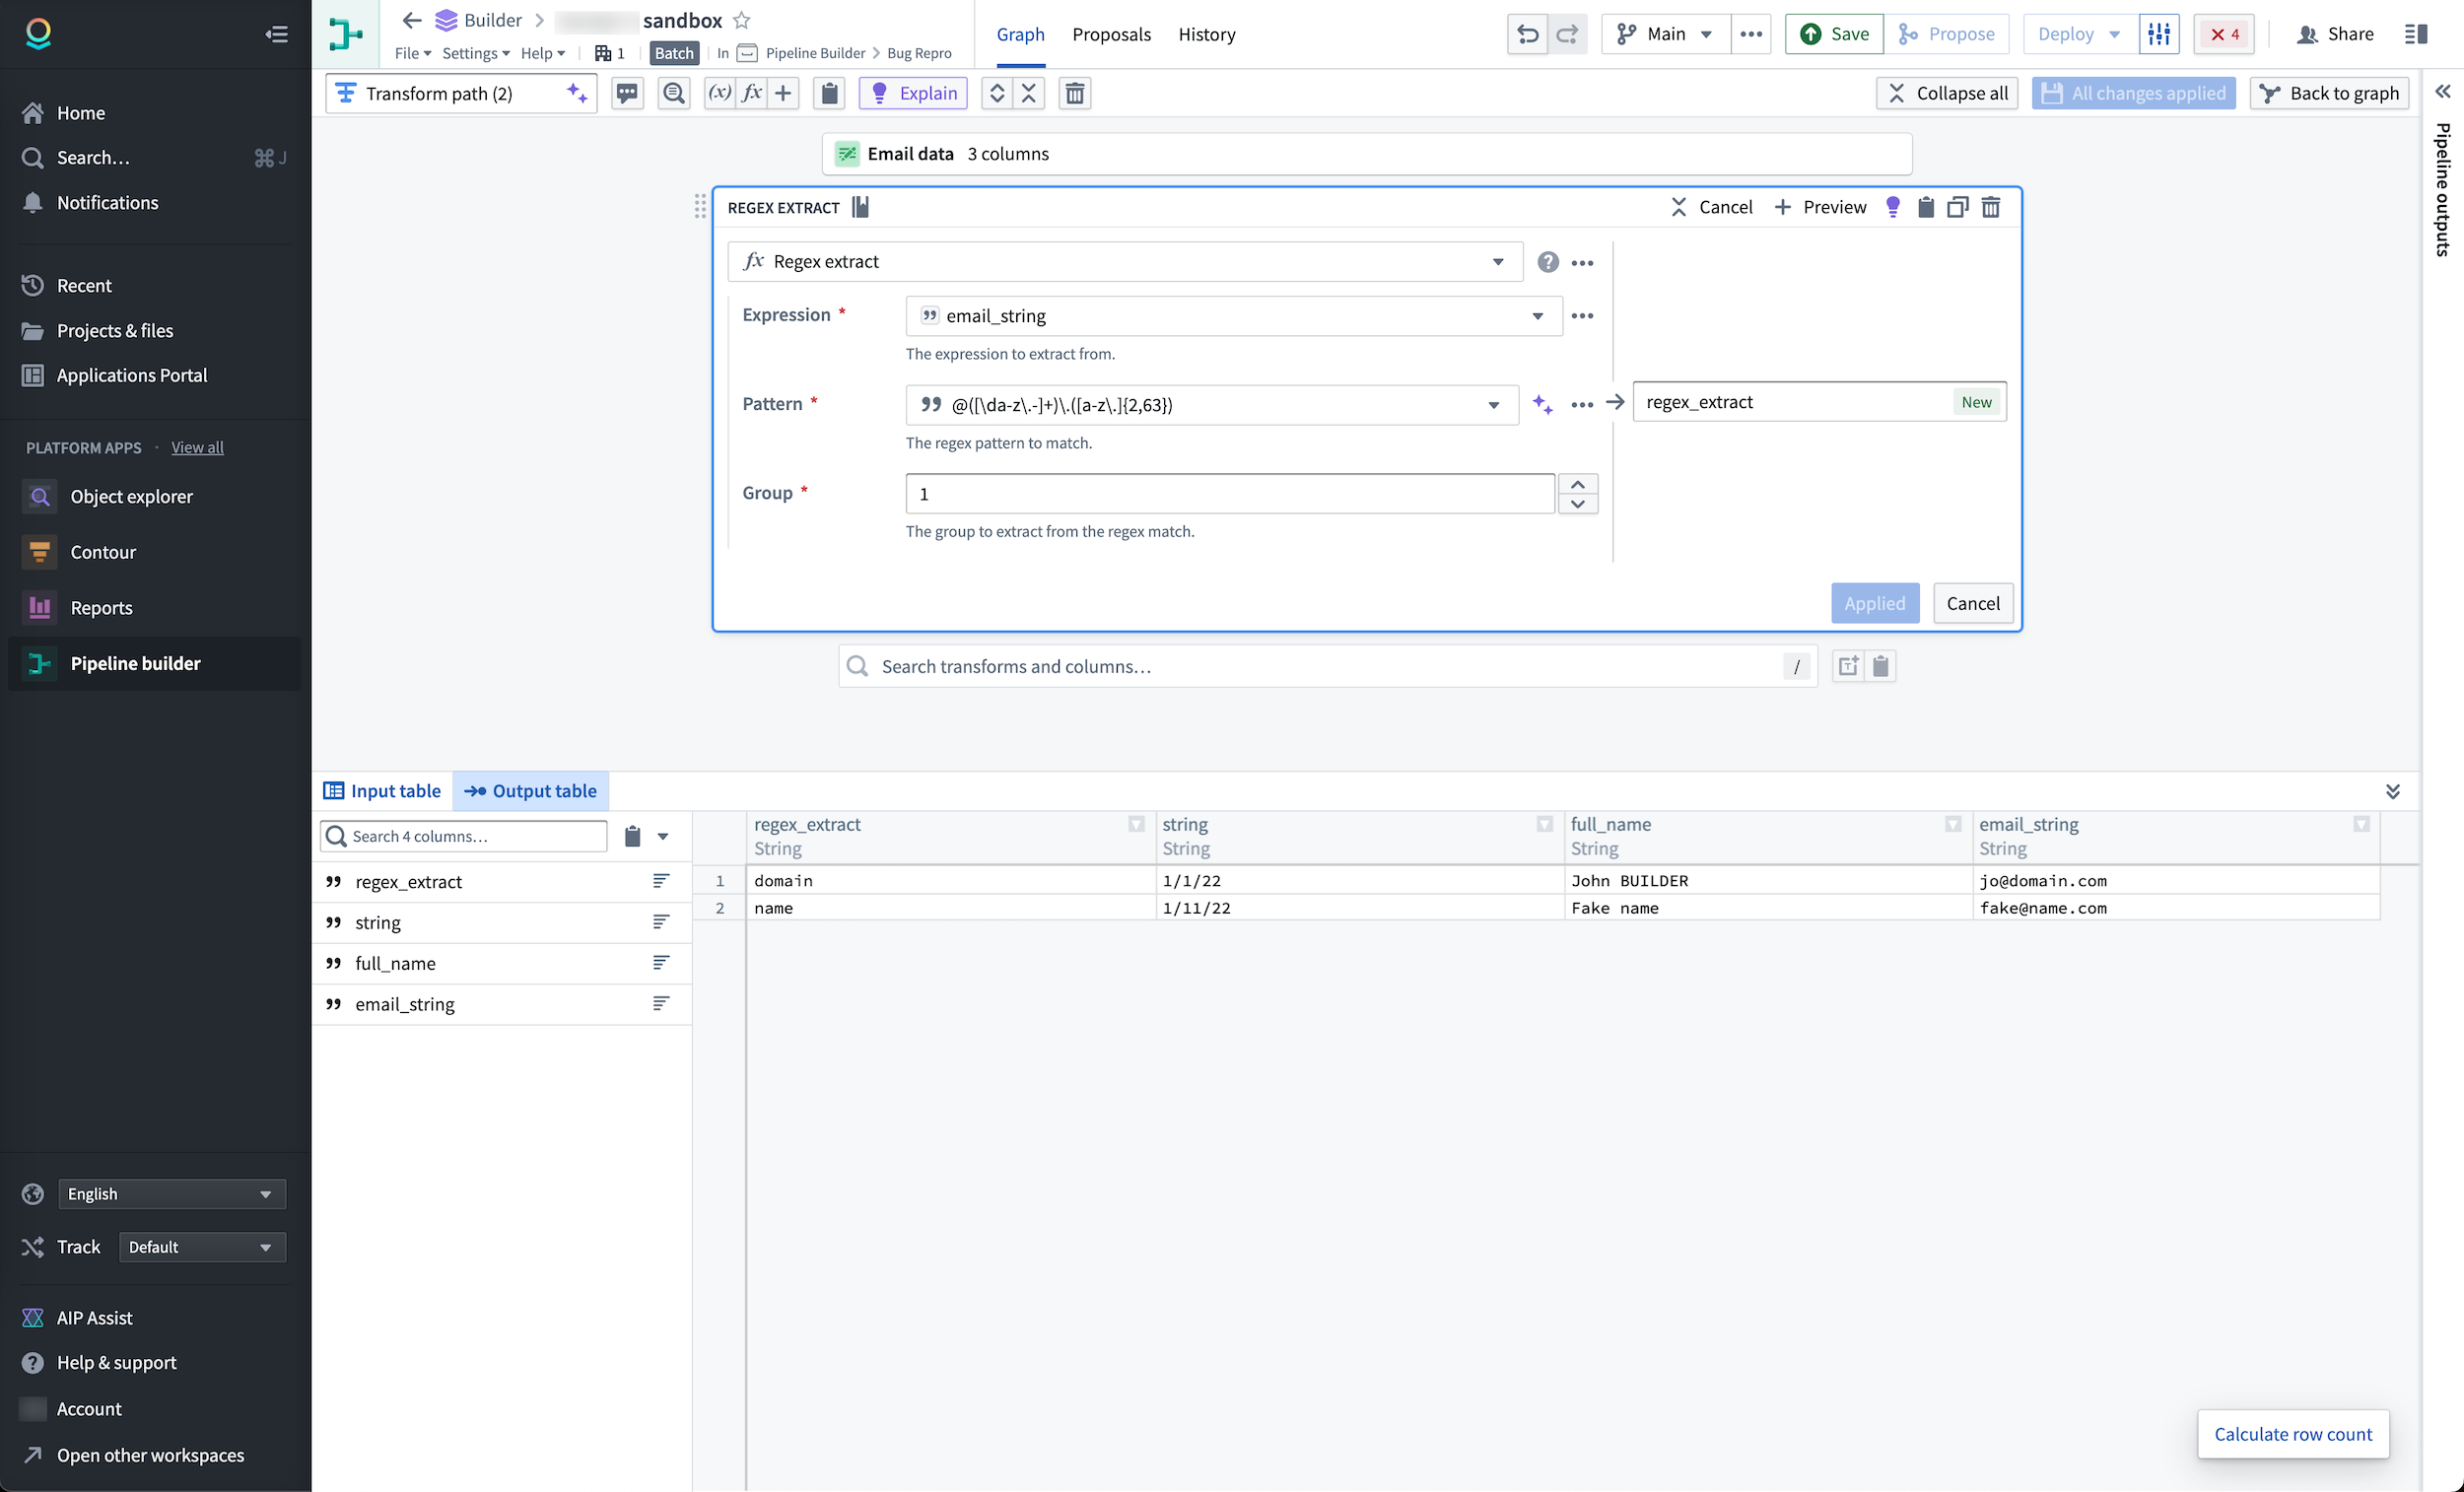
Select the purple Generate button to view the results.
Update existing expressions
You can also use the regex helper to update an existing regular expression.
Select the purple AIP start icon next to the Pattern field. Then, enter the regular expression you want to modify, followed by the modification. In the example below, the regular expression @([\da-z\.-]+\.([a-z\.]{2,63}) should be modified to include uppercase.
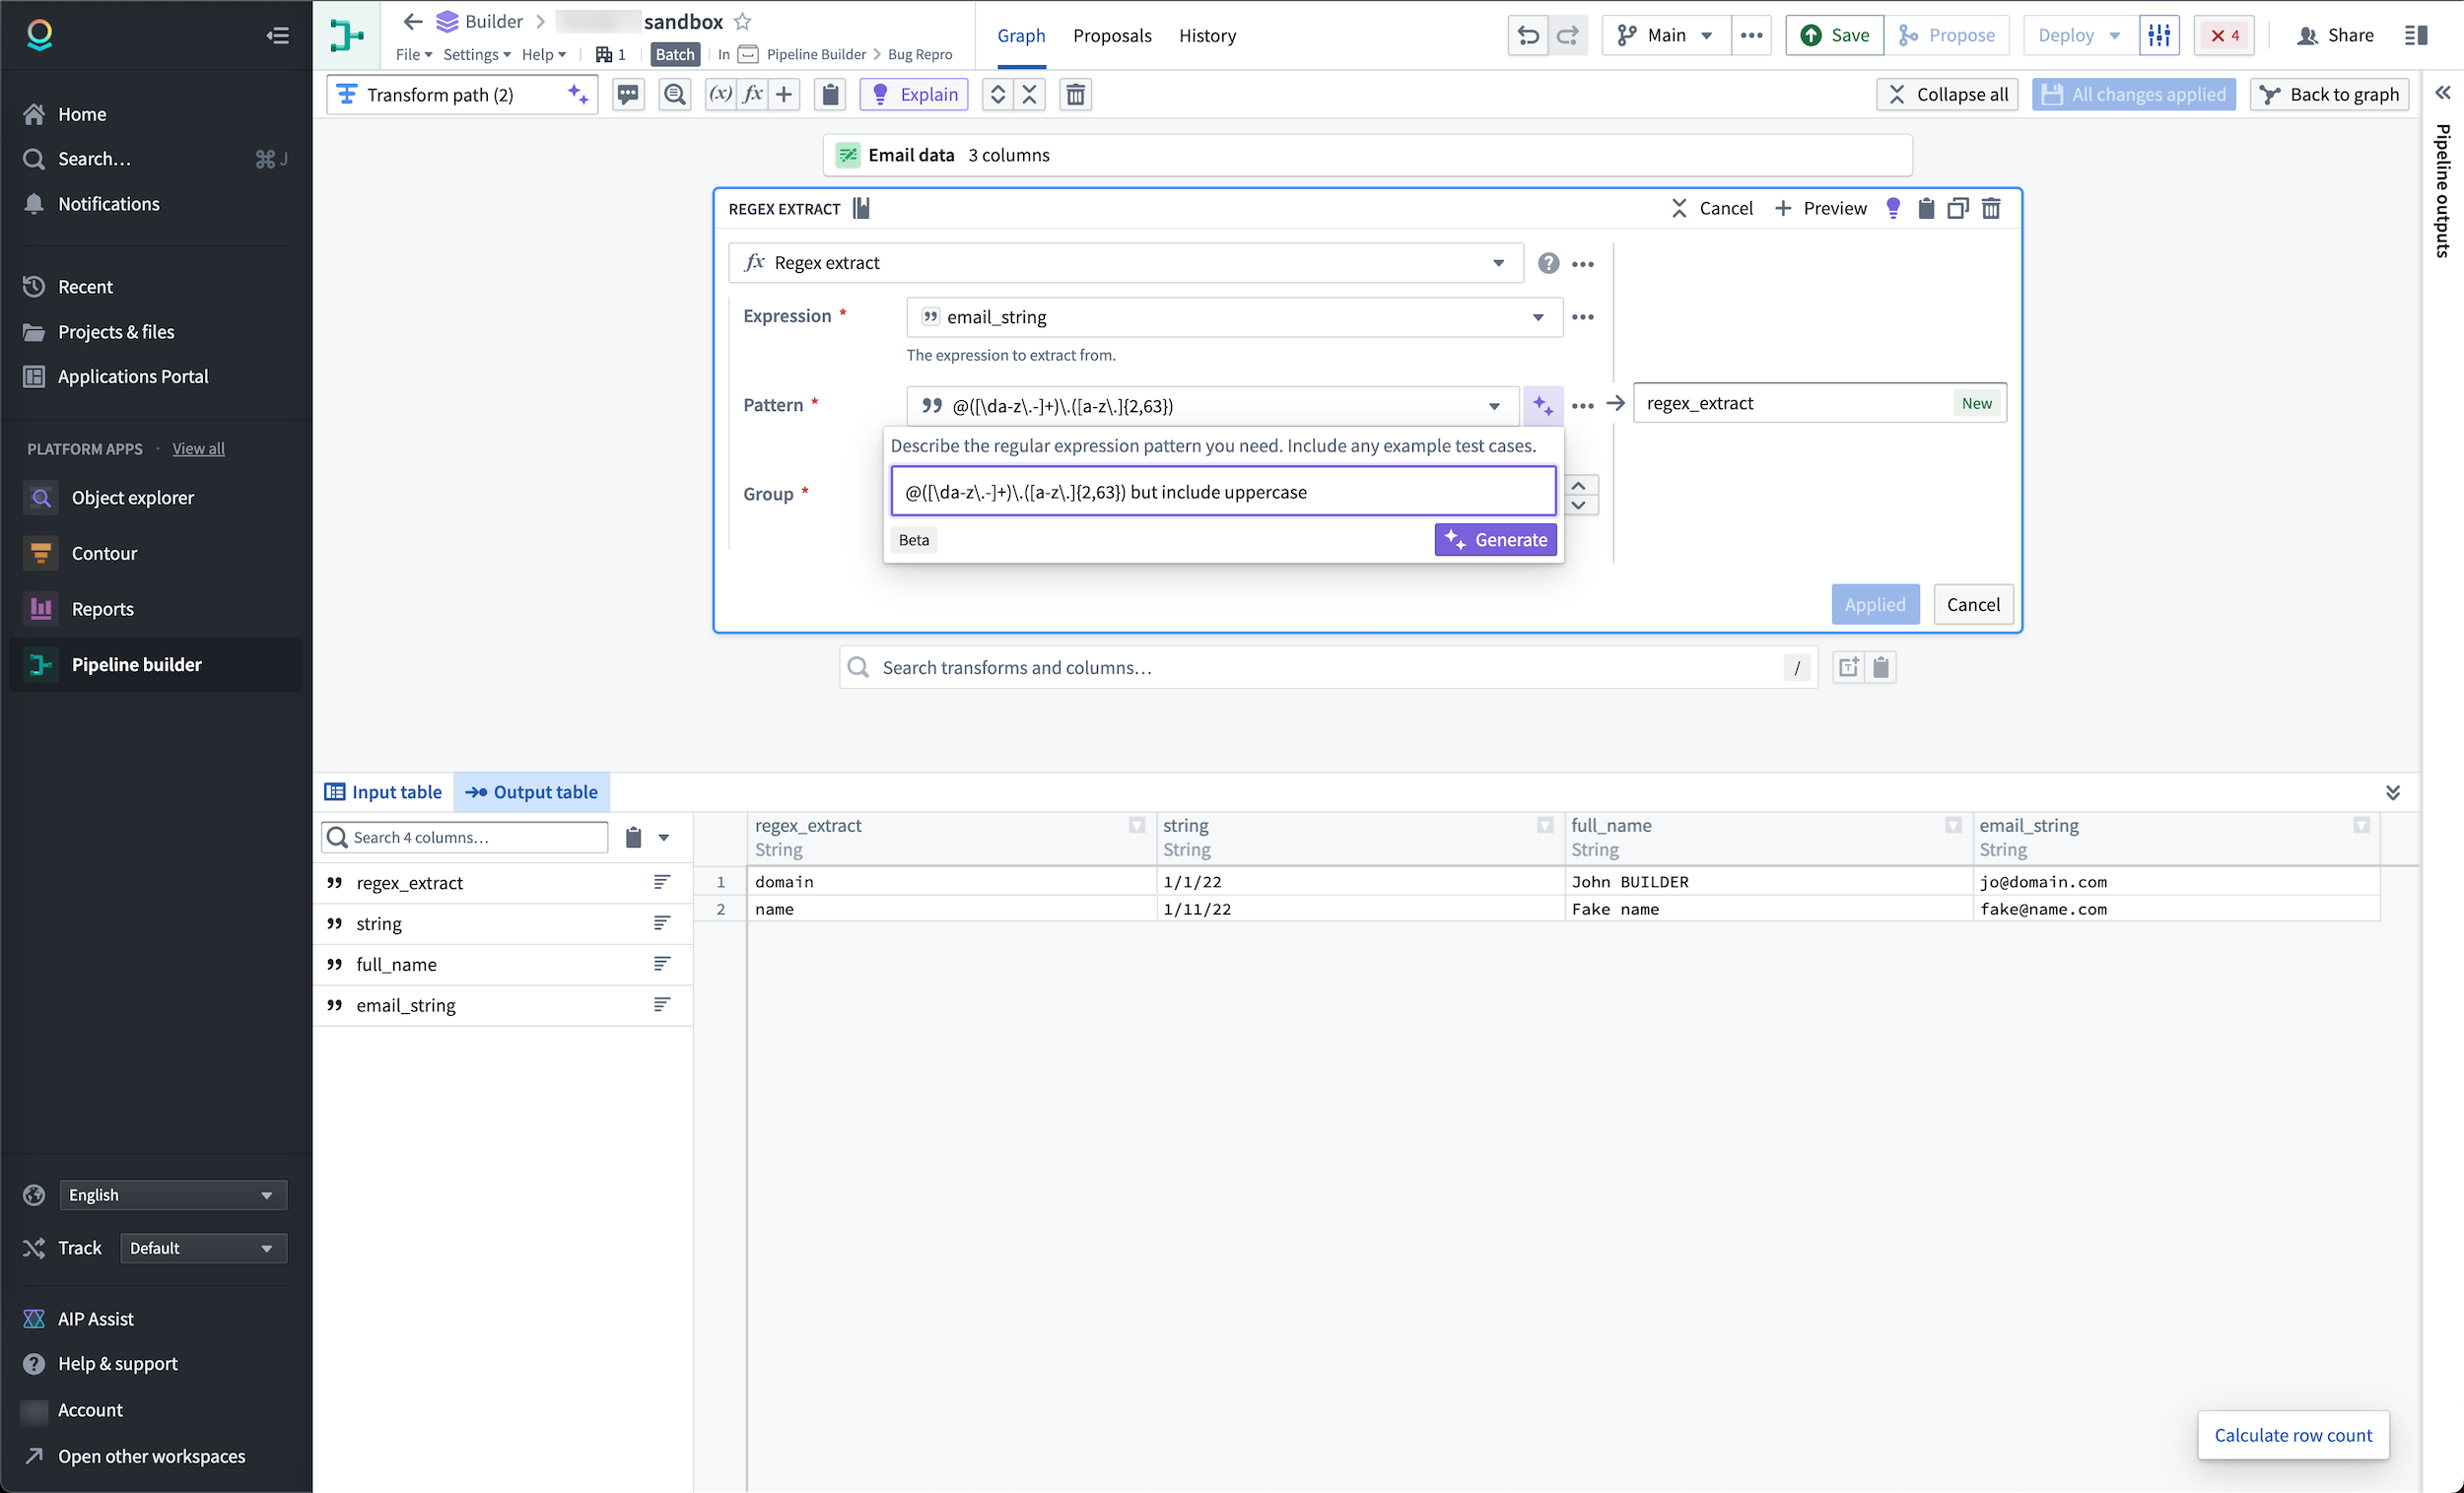
Select the purple Generate button to view the result.
Timestamp formatter
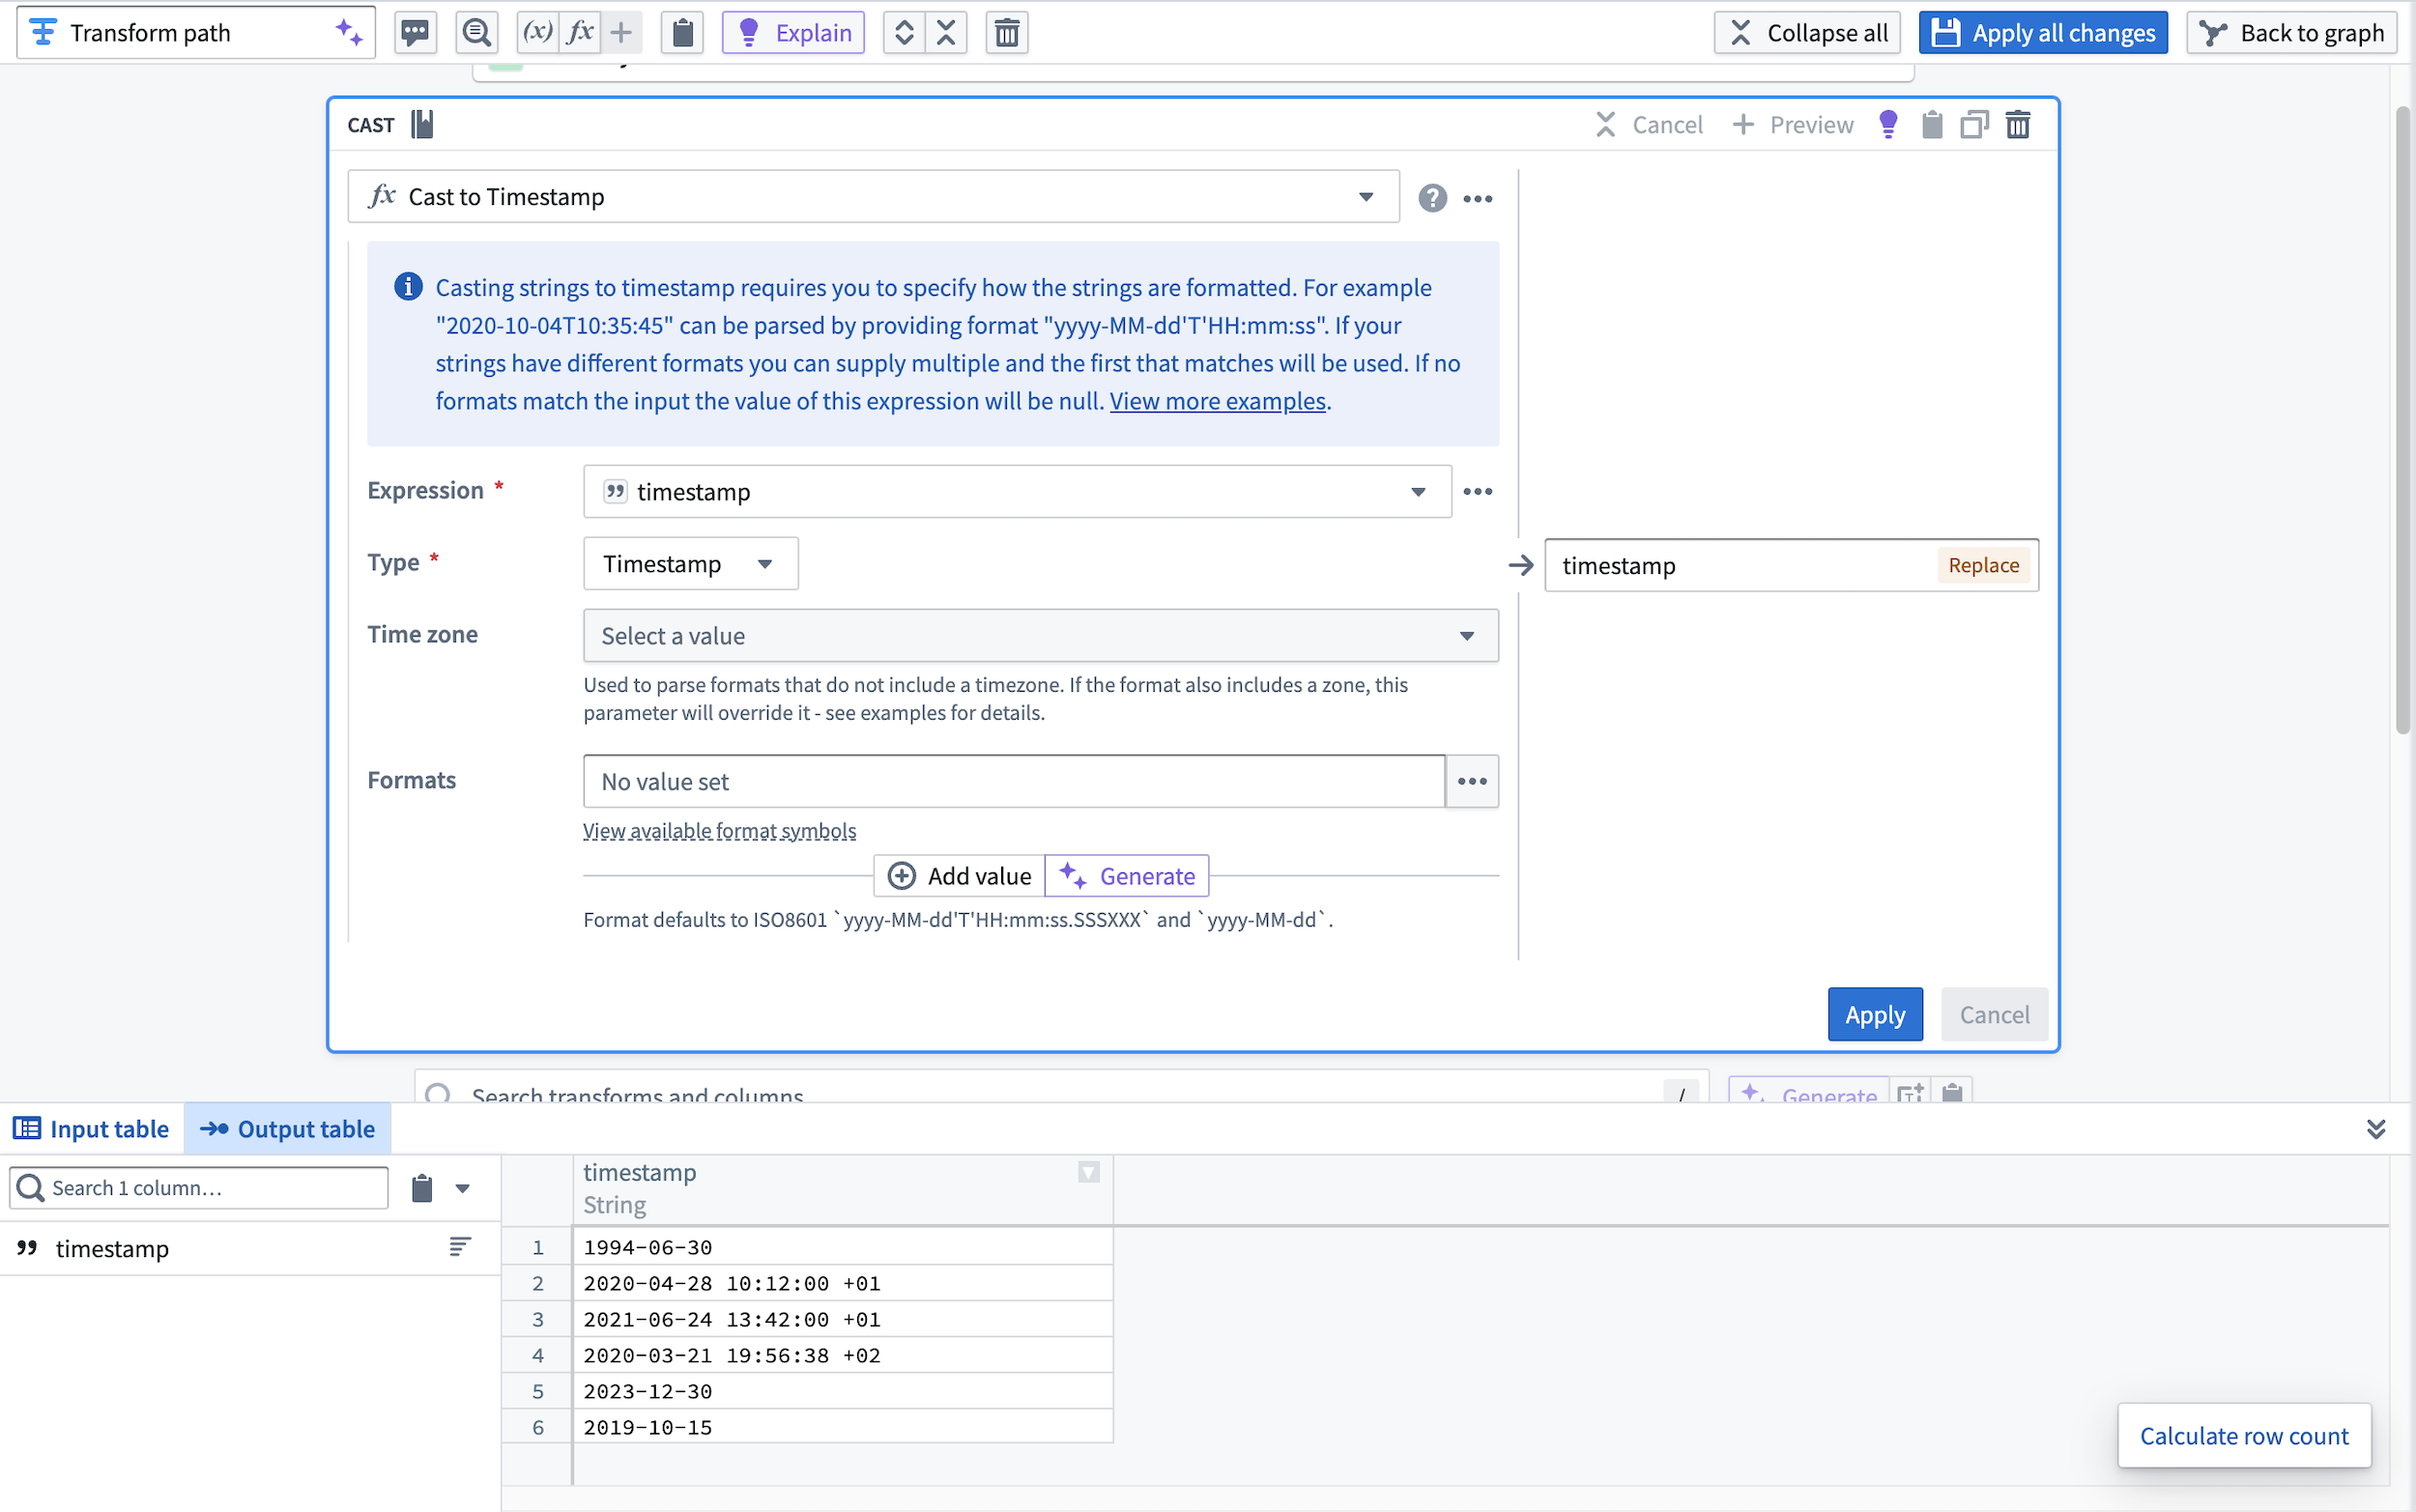
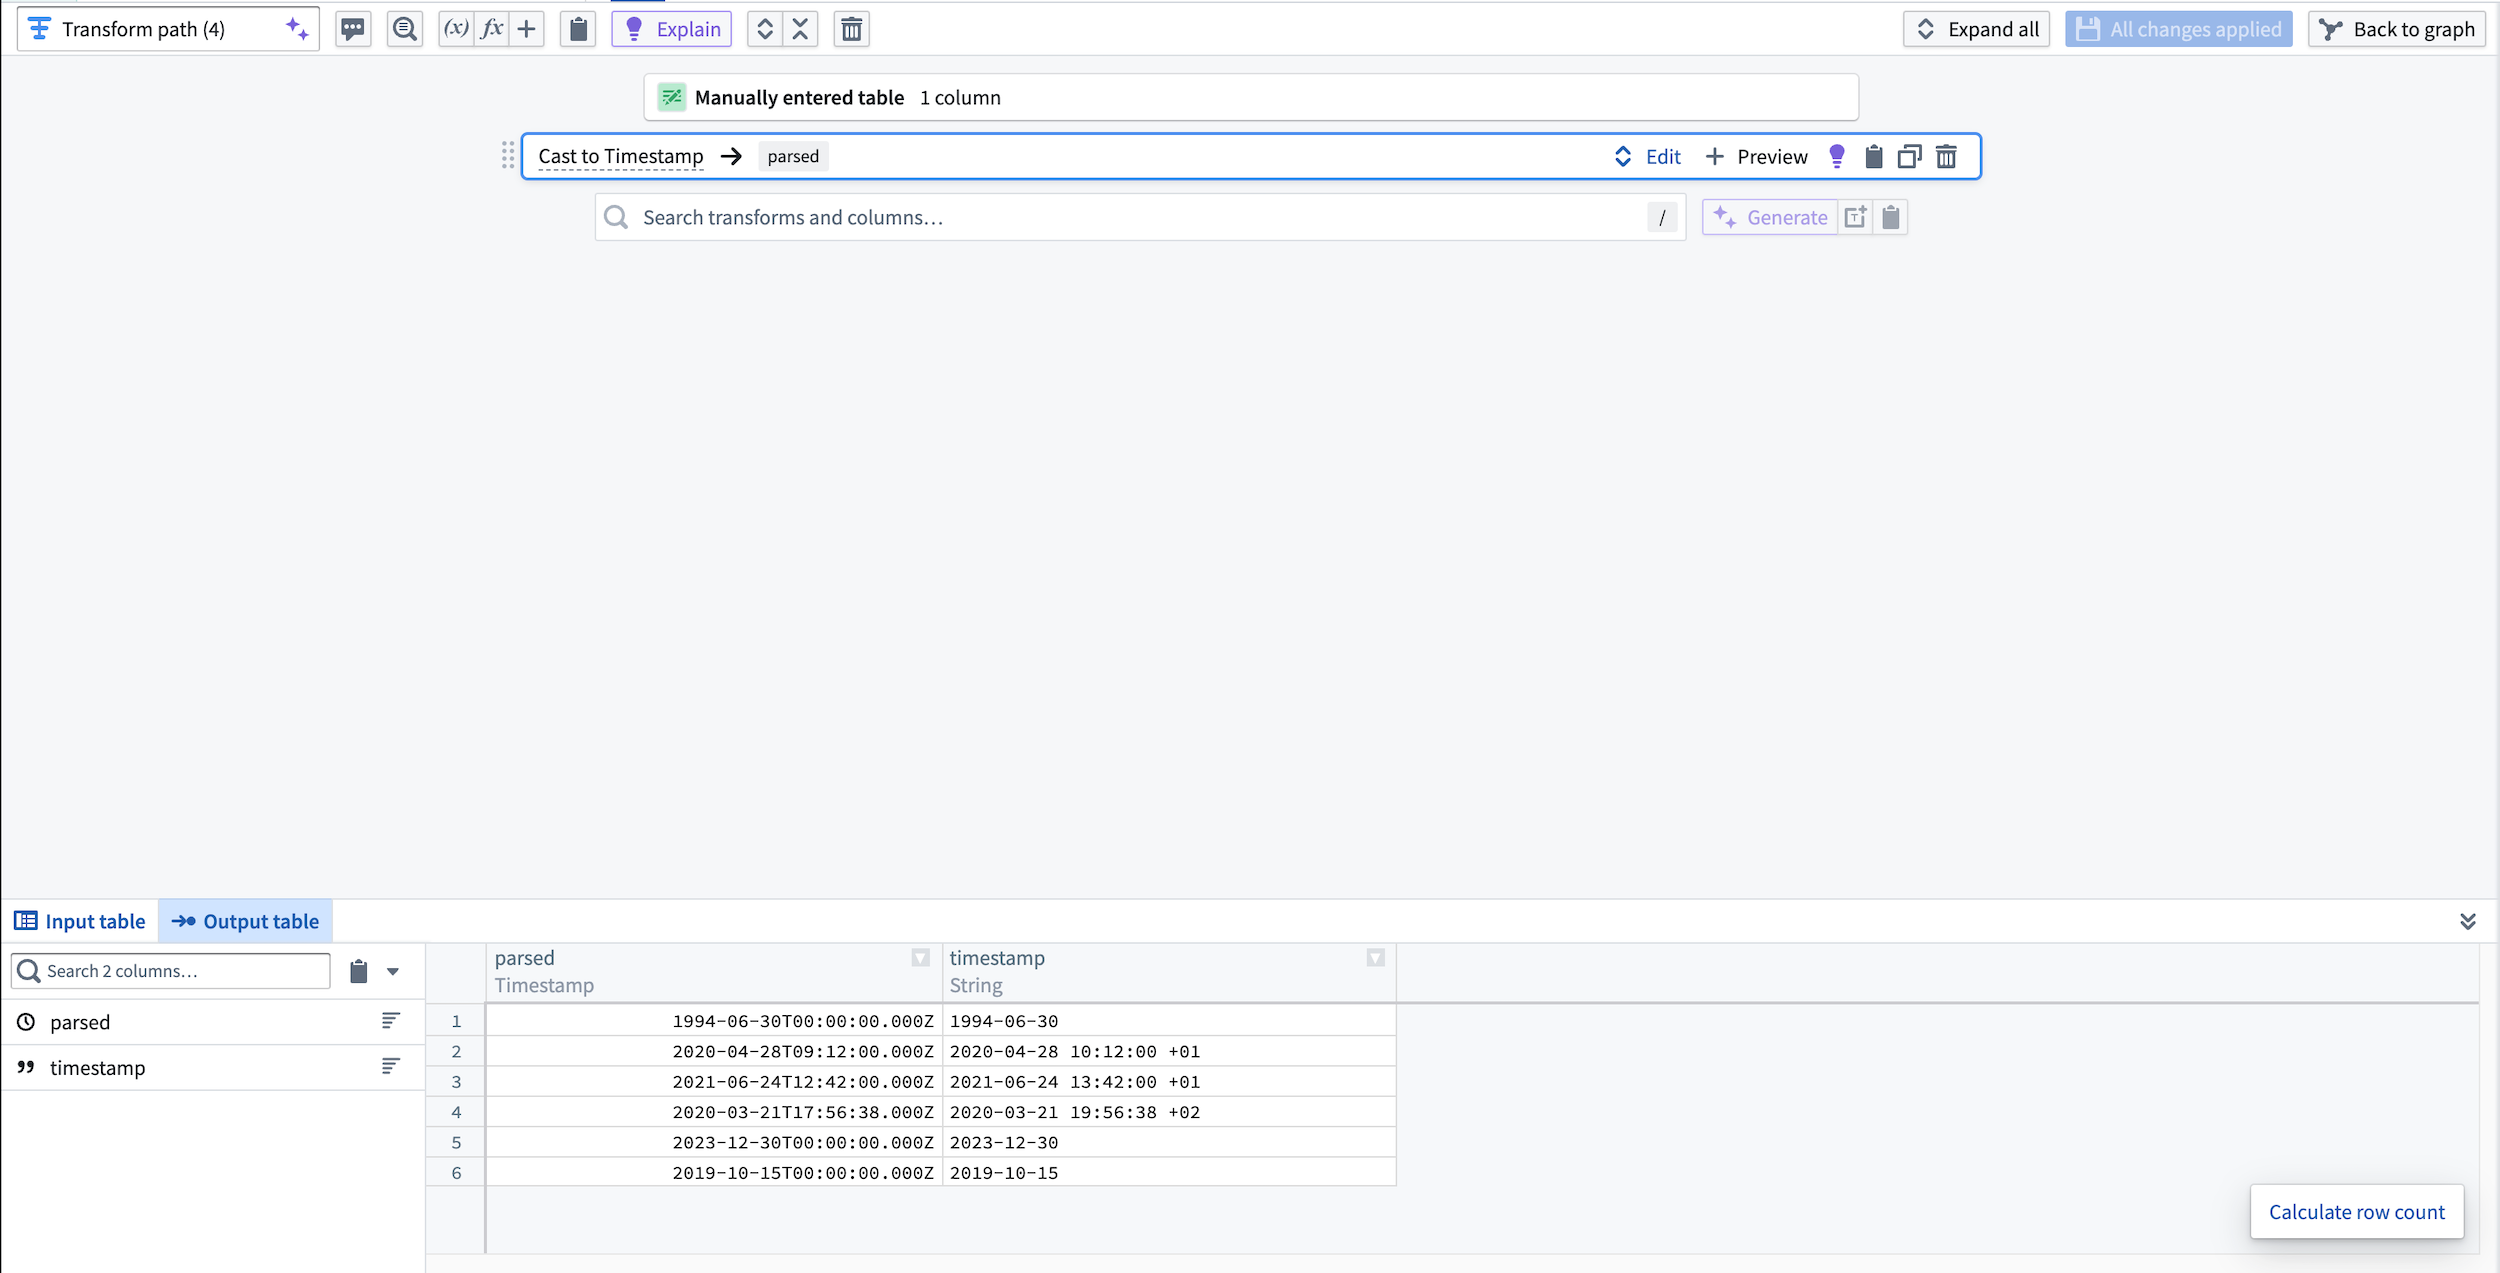
The timestamp formatter offers a time-saving solution for quickly casting strings to timestamps in cast boards. To use the timestamp formatter, first create a new cast board configured to cast from string to timestamp. In the example below, we have timestamps with different formats:
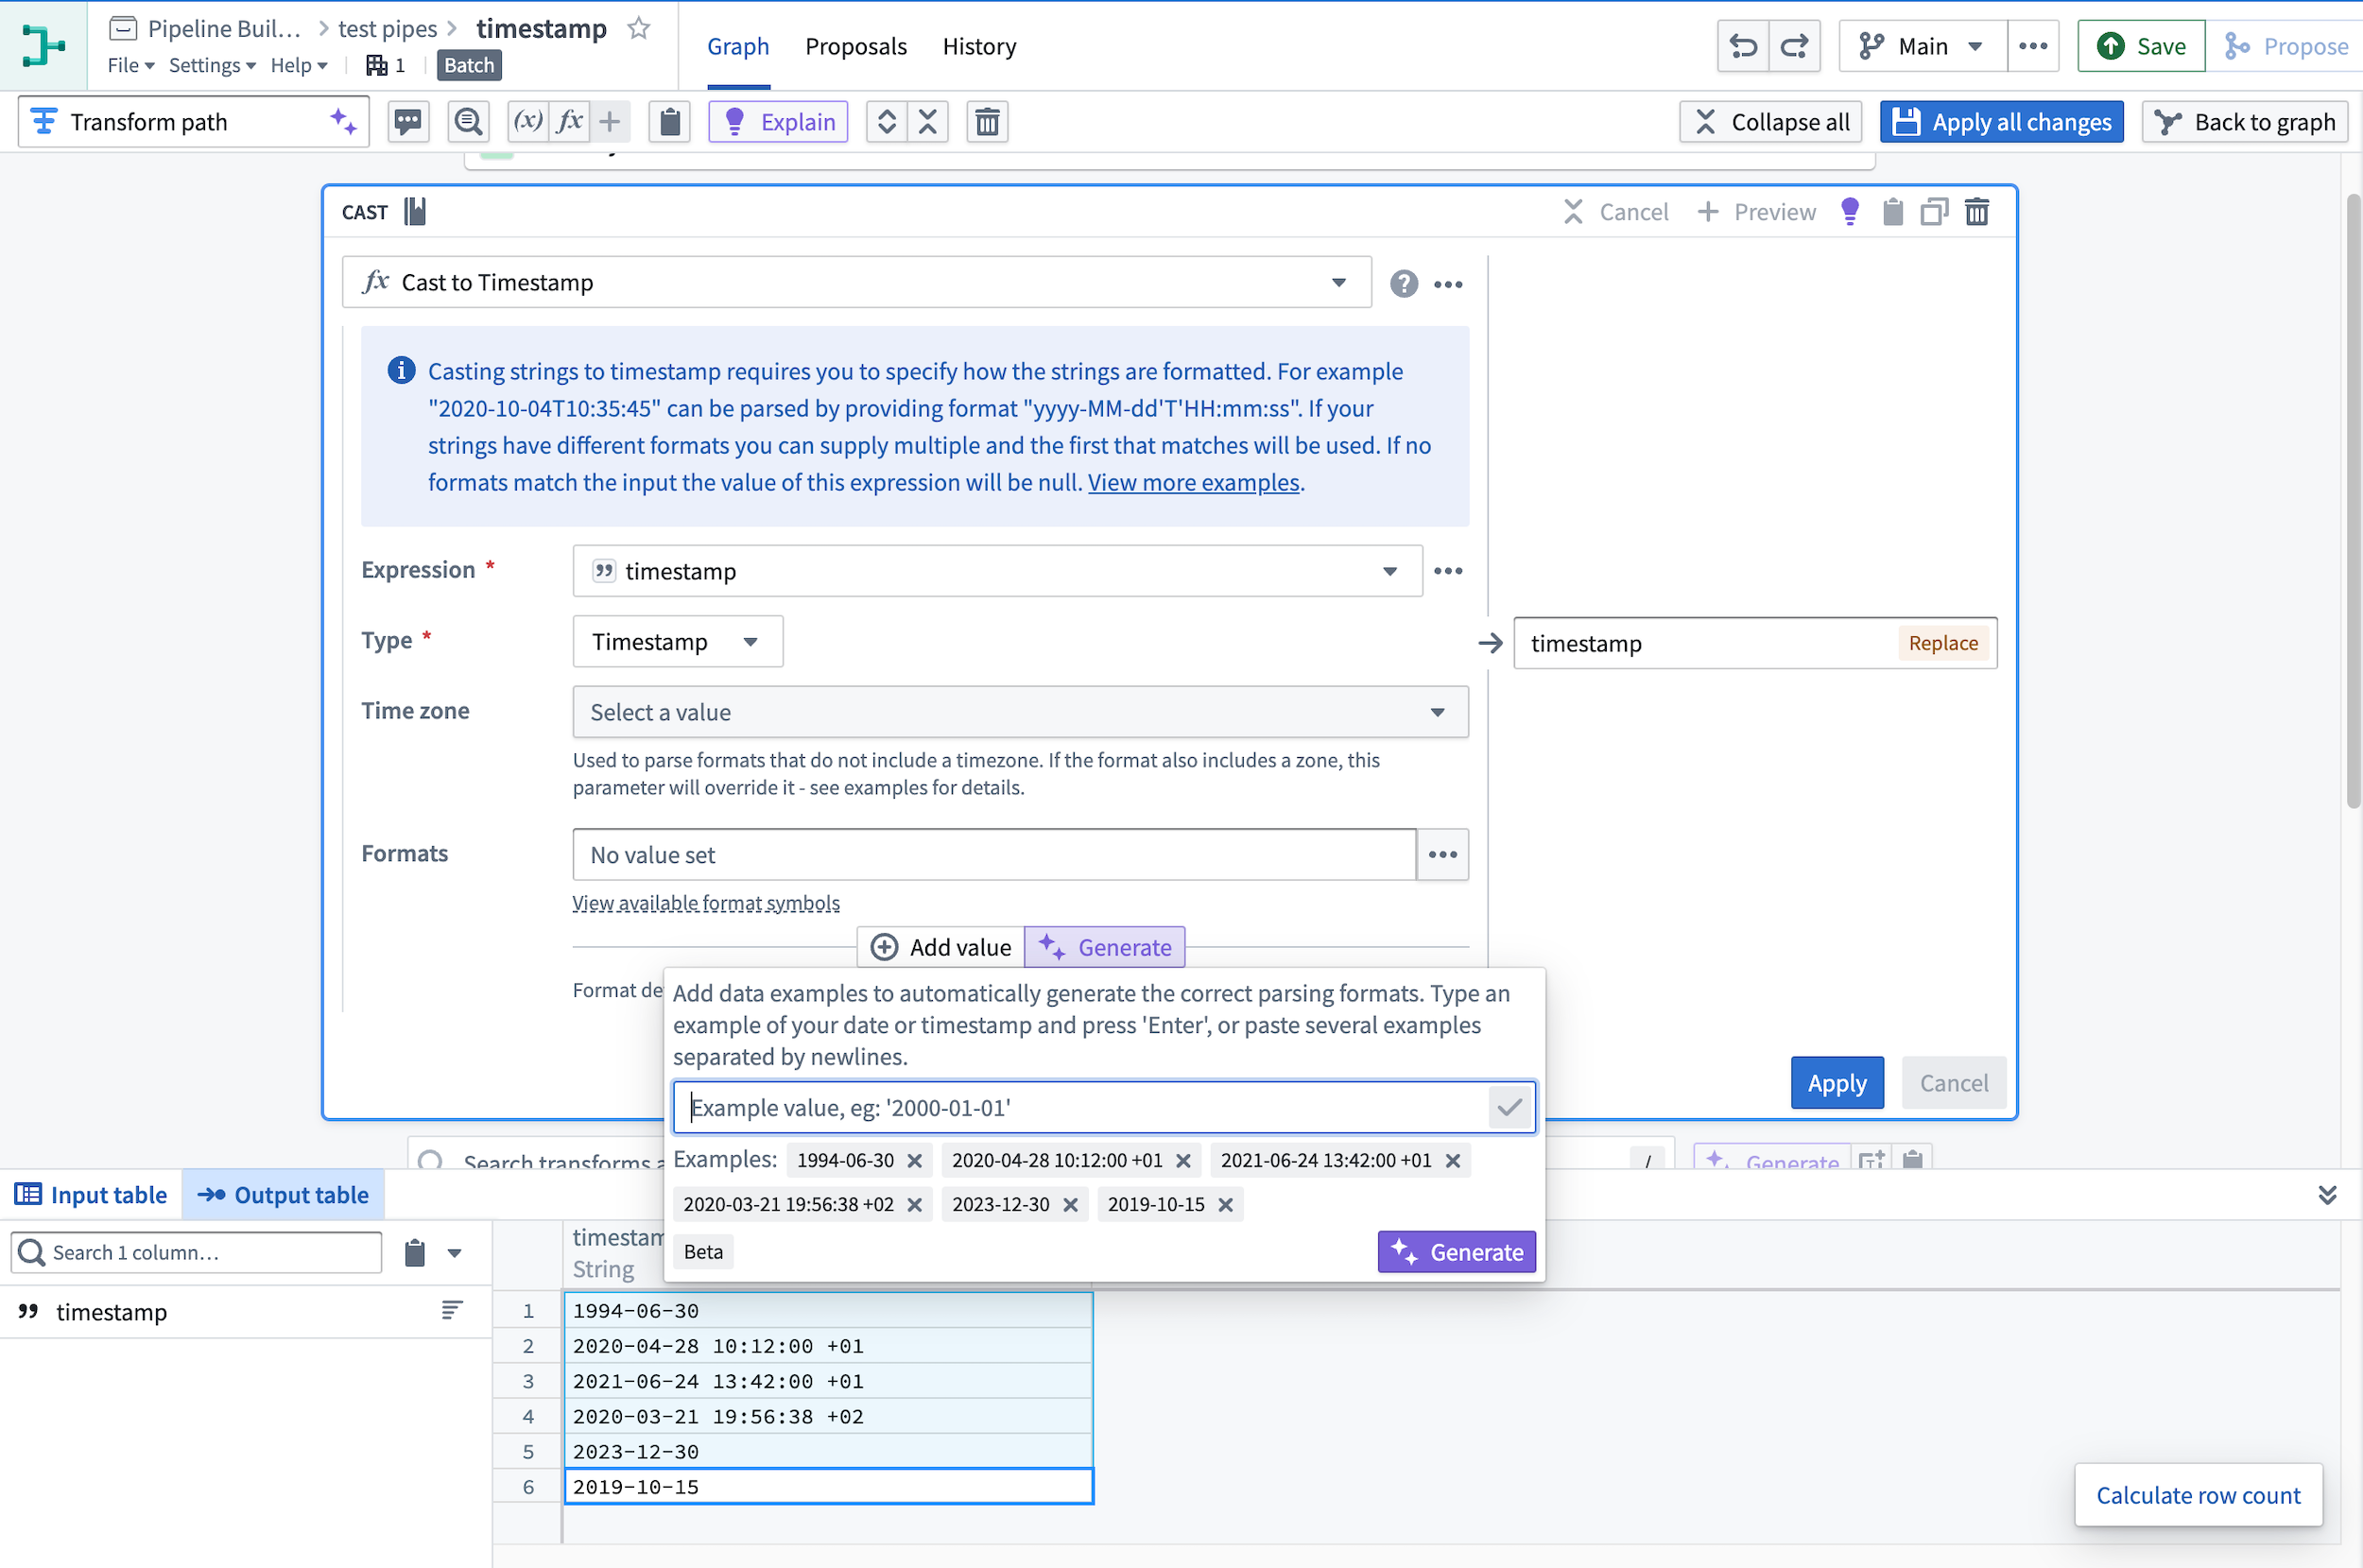
Then, select the purple Generate button to enter an example of the parsing format you want to use in the cast. In our example, we will paste all five timestamps:
AIP will then generate a set of formats matching these timestamps and enter them into the cast board. Select Apply.
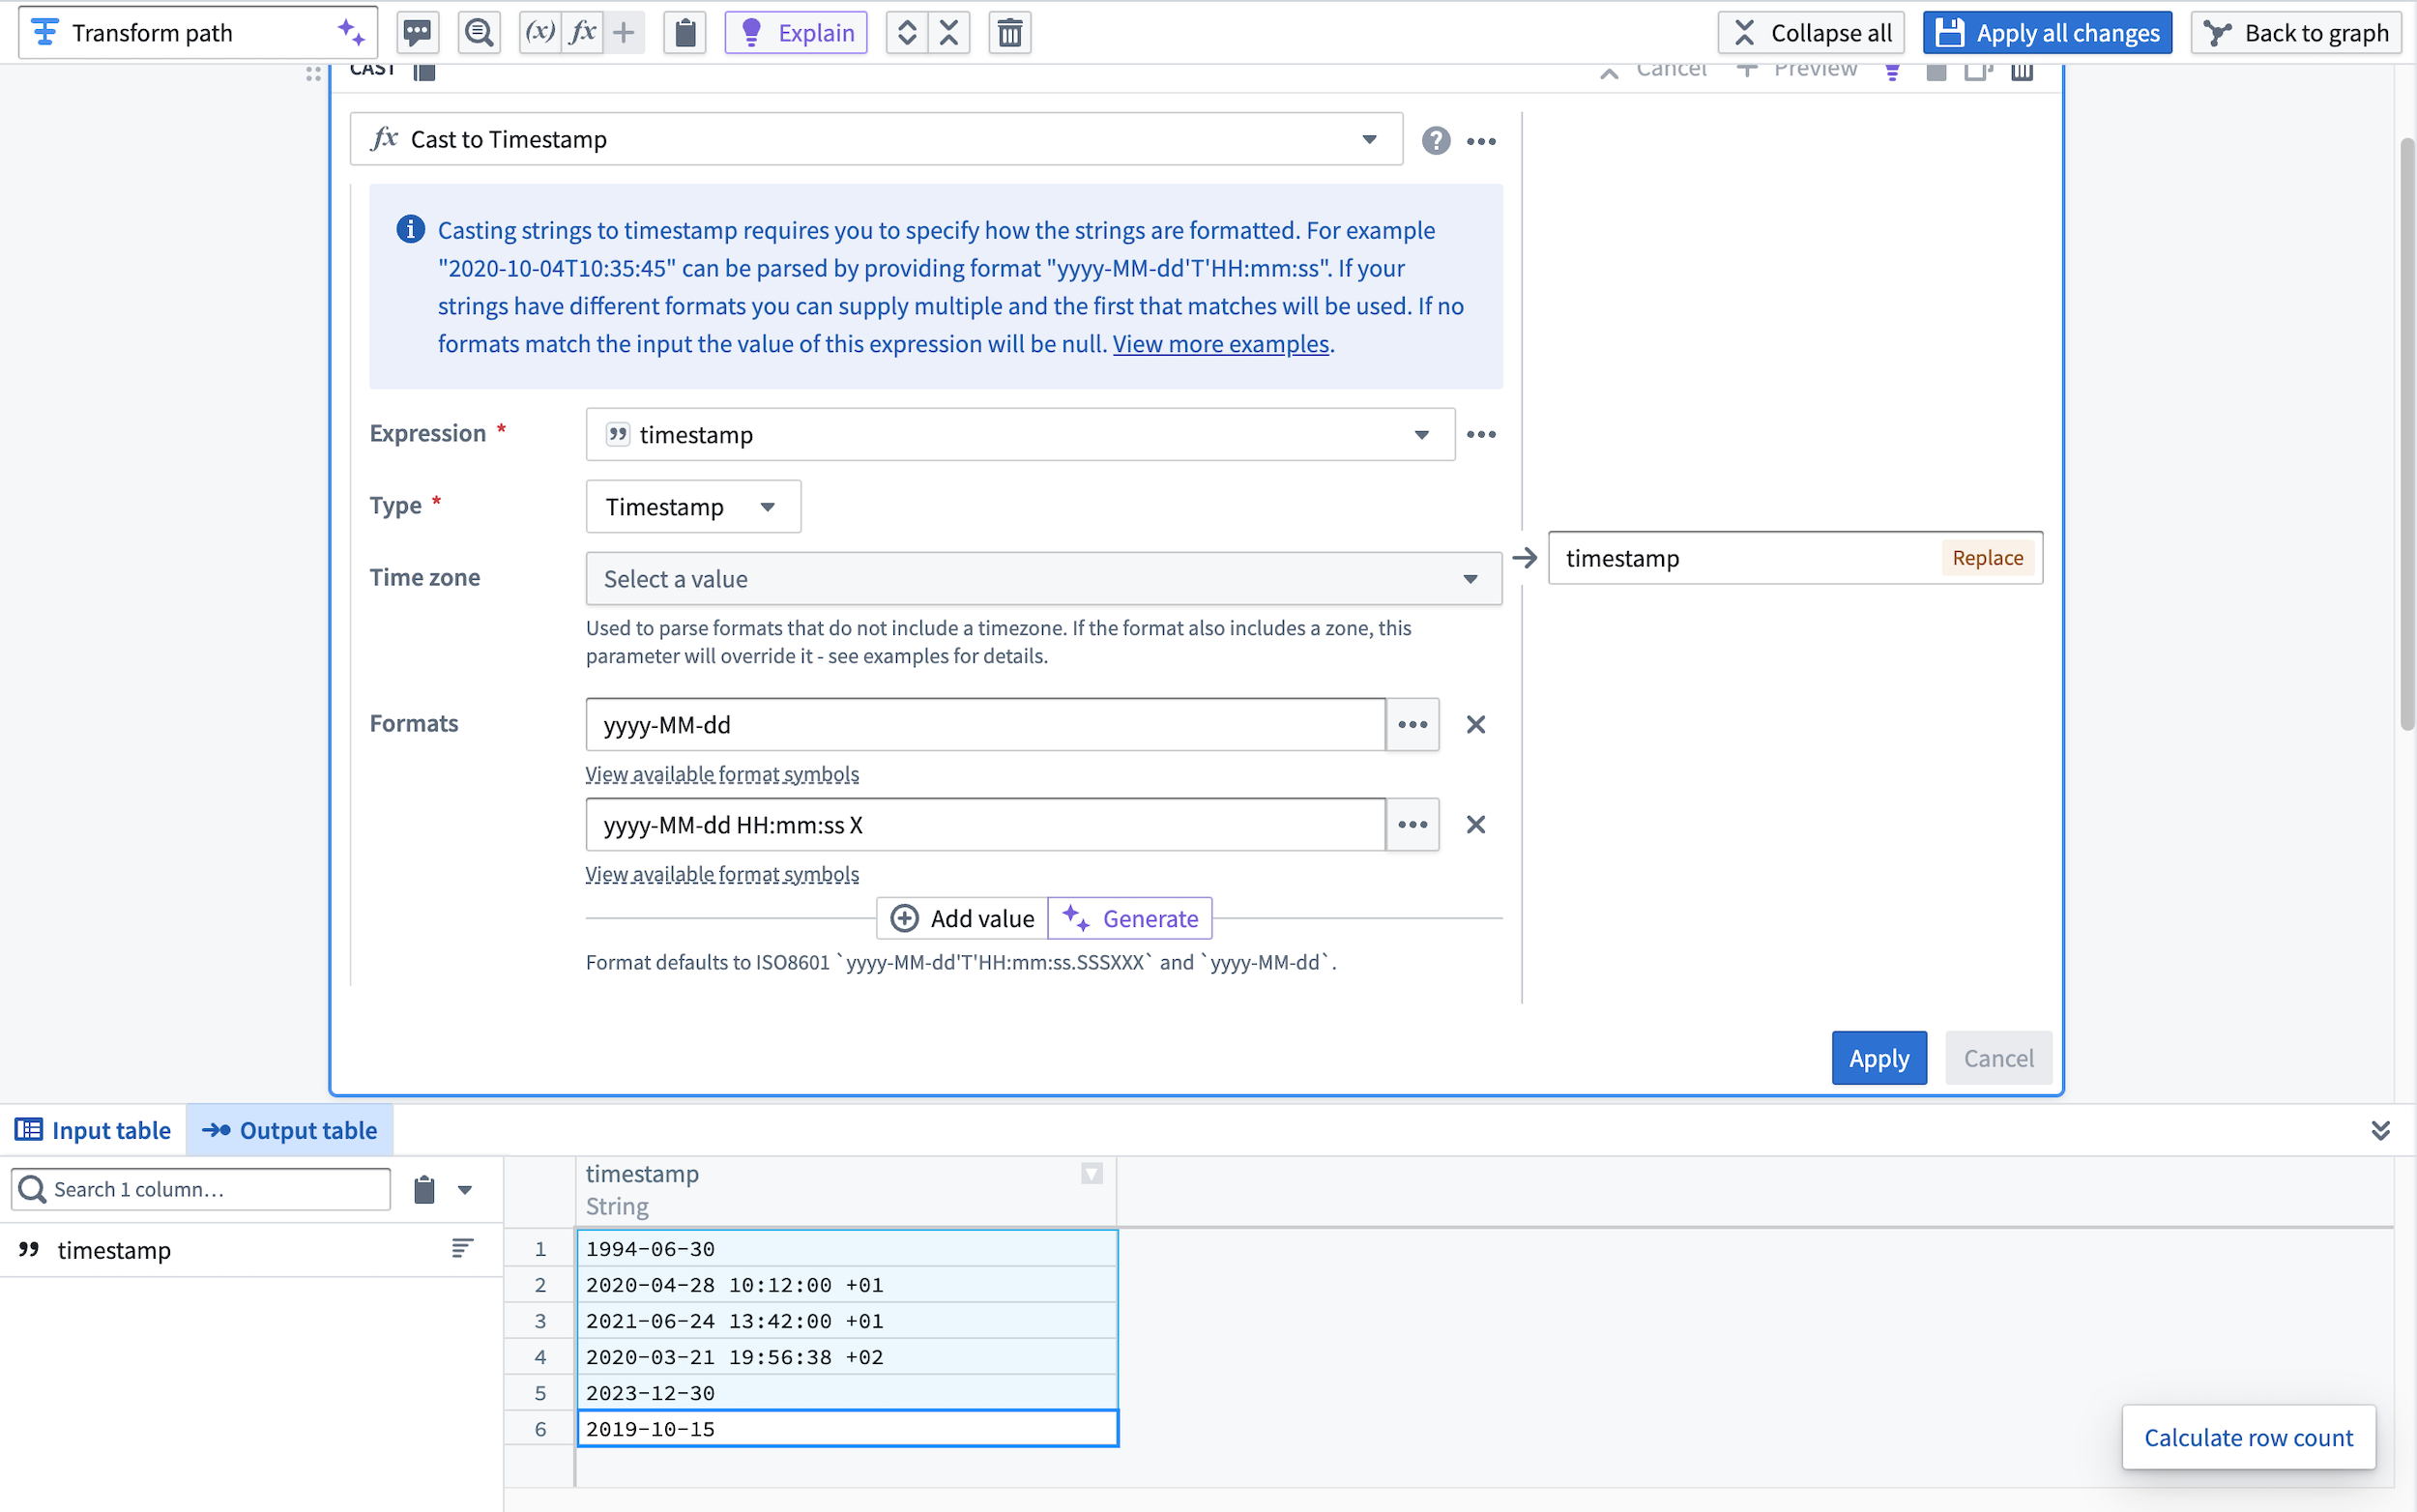
The string column is then parsed into a timestamp column.
Learn more about transforms in Pipeline Builder.
Generate proposal descriptions
You can also use AIP in Pipeline Builder to quickly describe your changes by generating the proposal description when making your proposal.
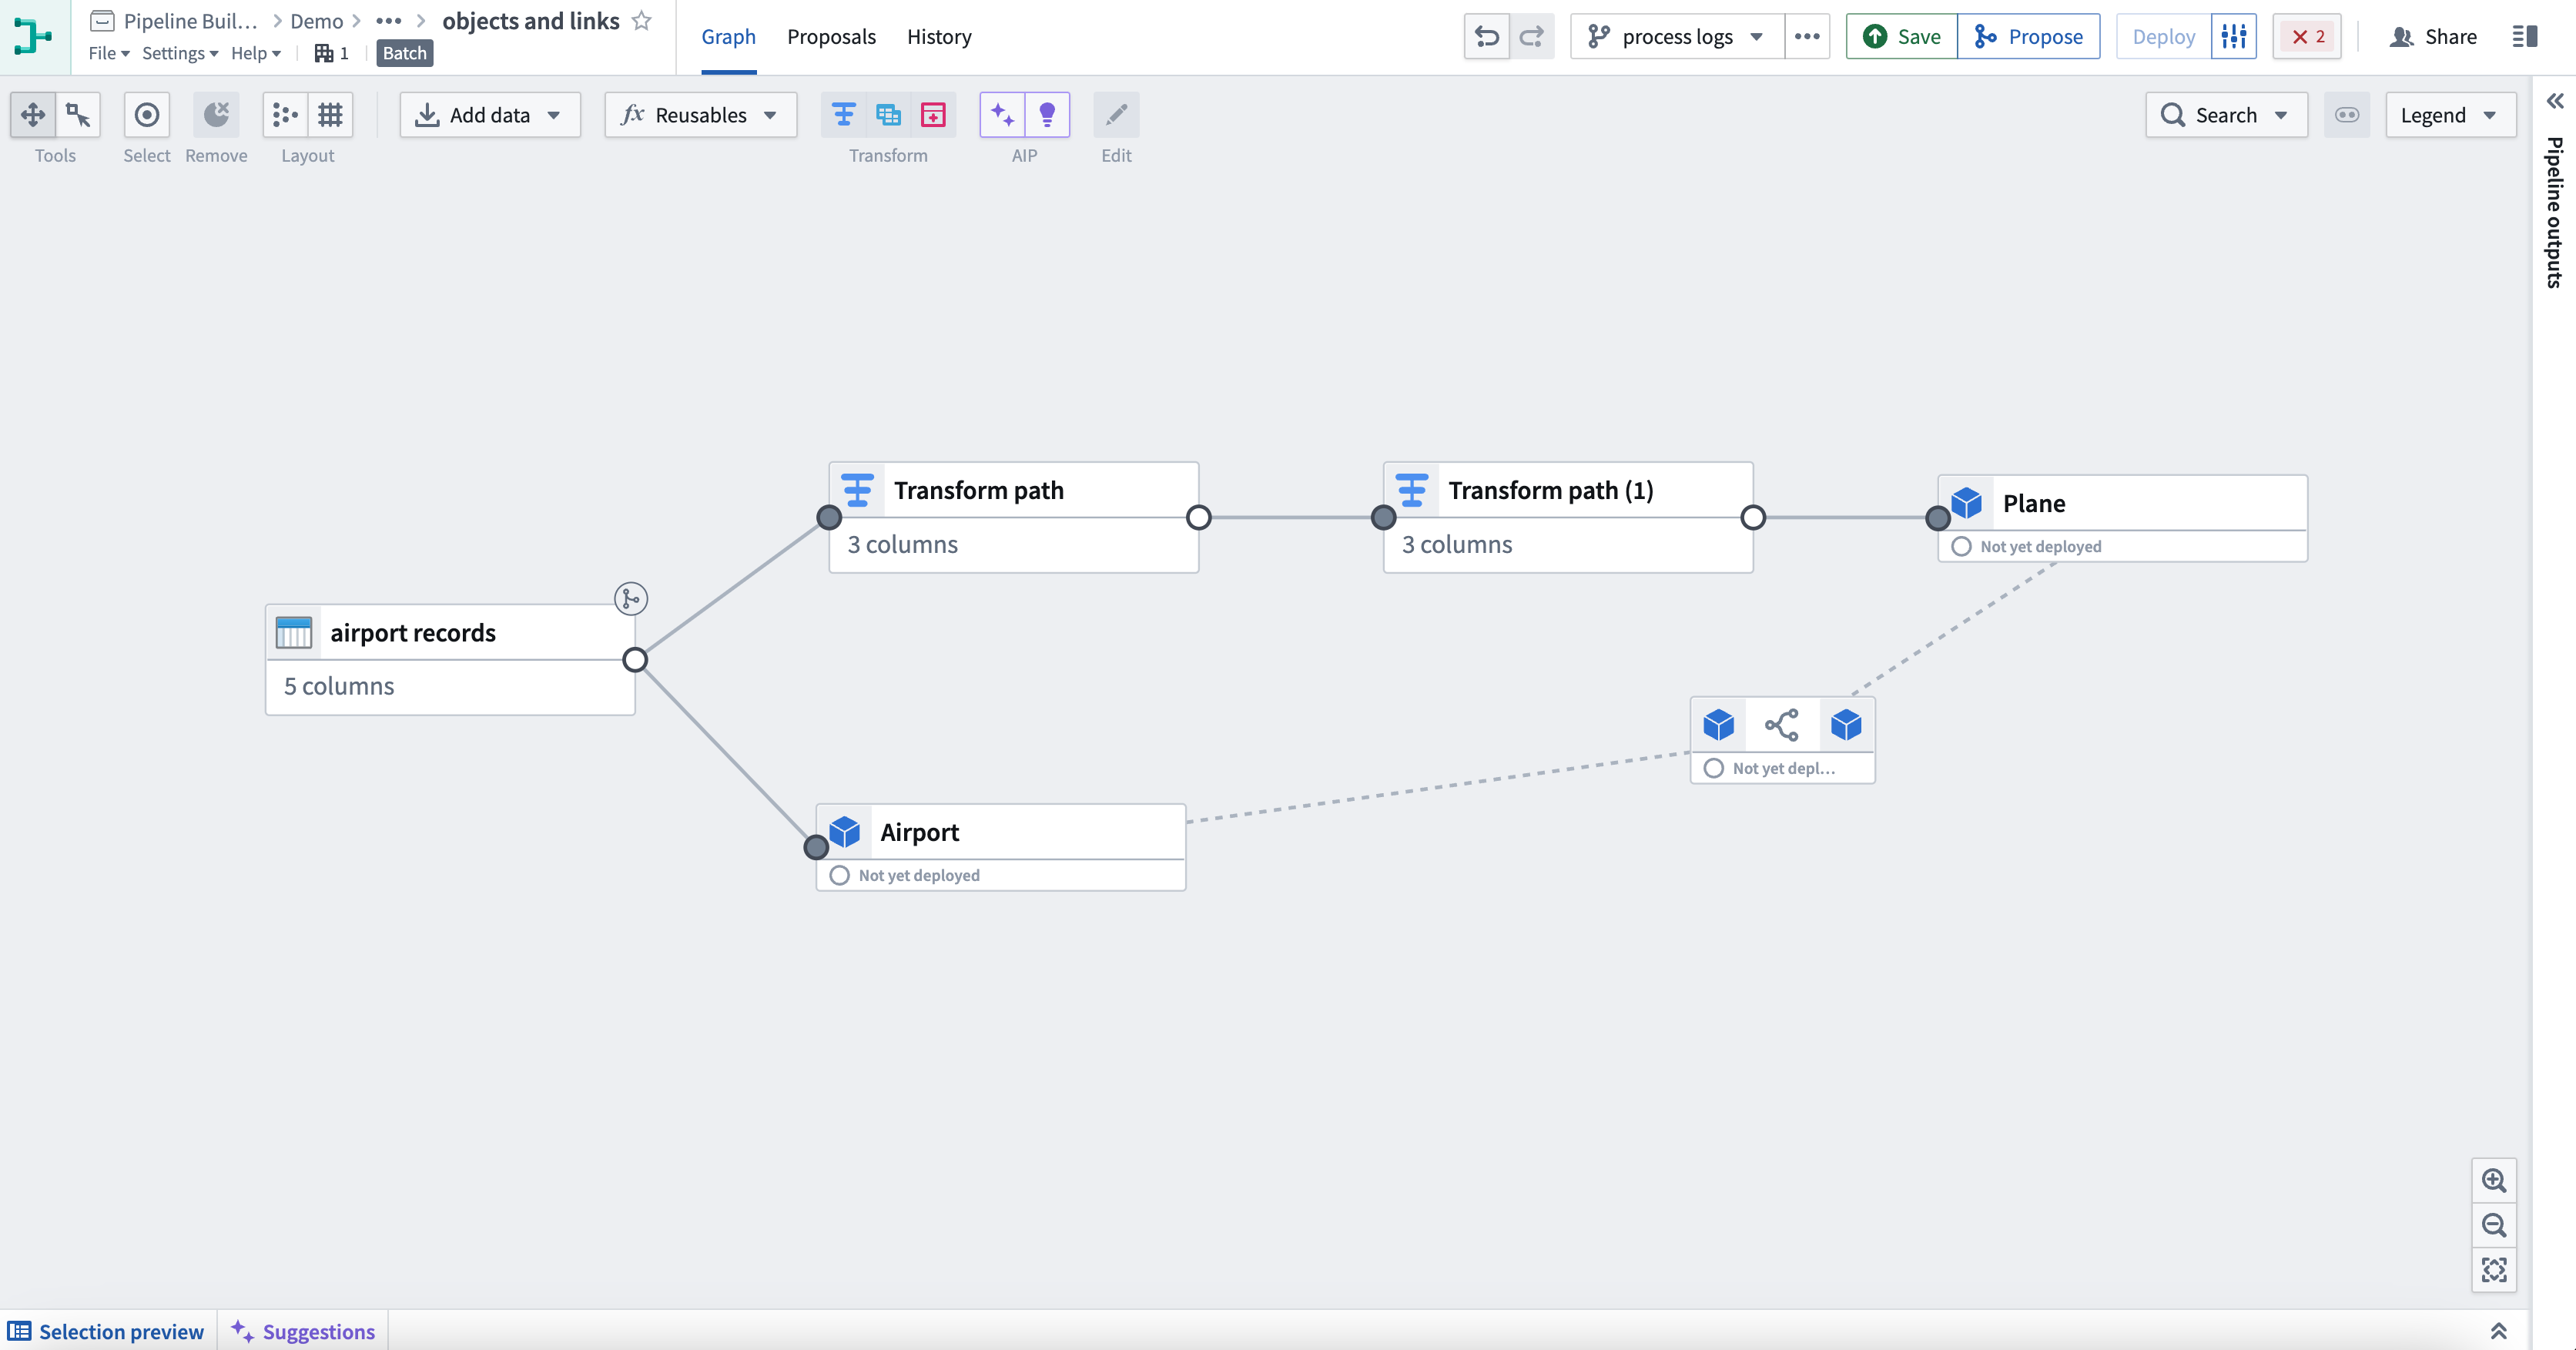
To do this, first select Propose in the top right corner. This will bring you to the proposal creation view.
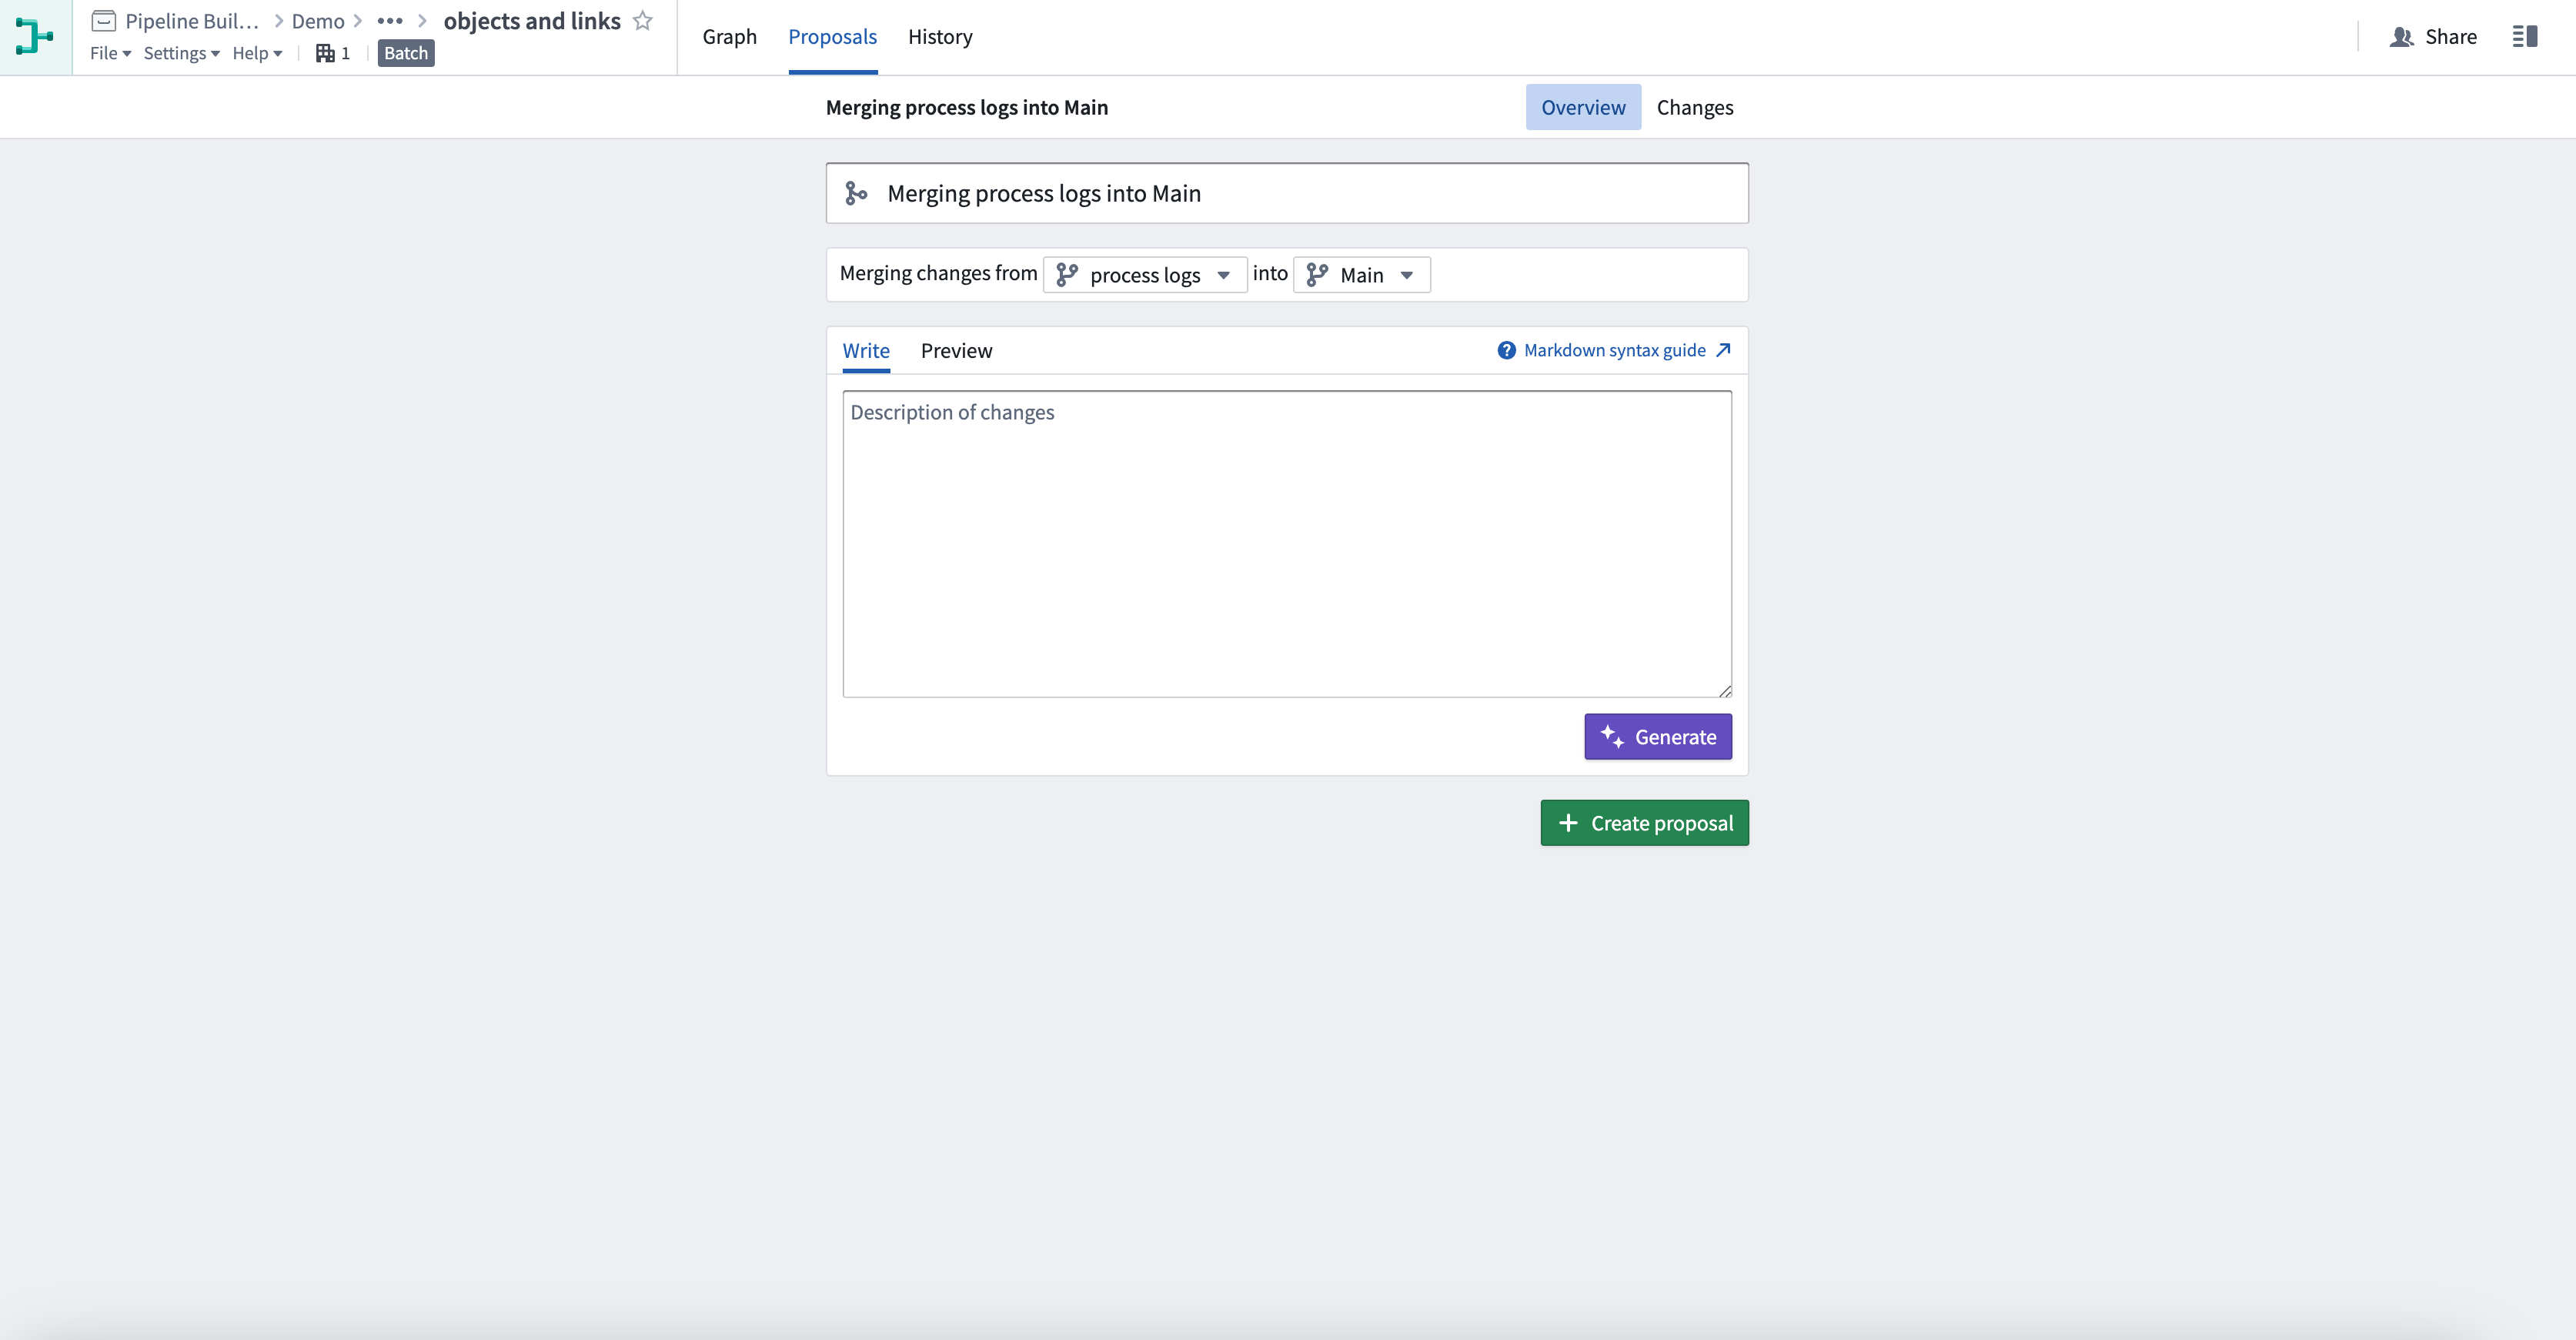
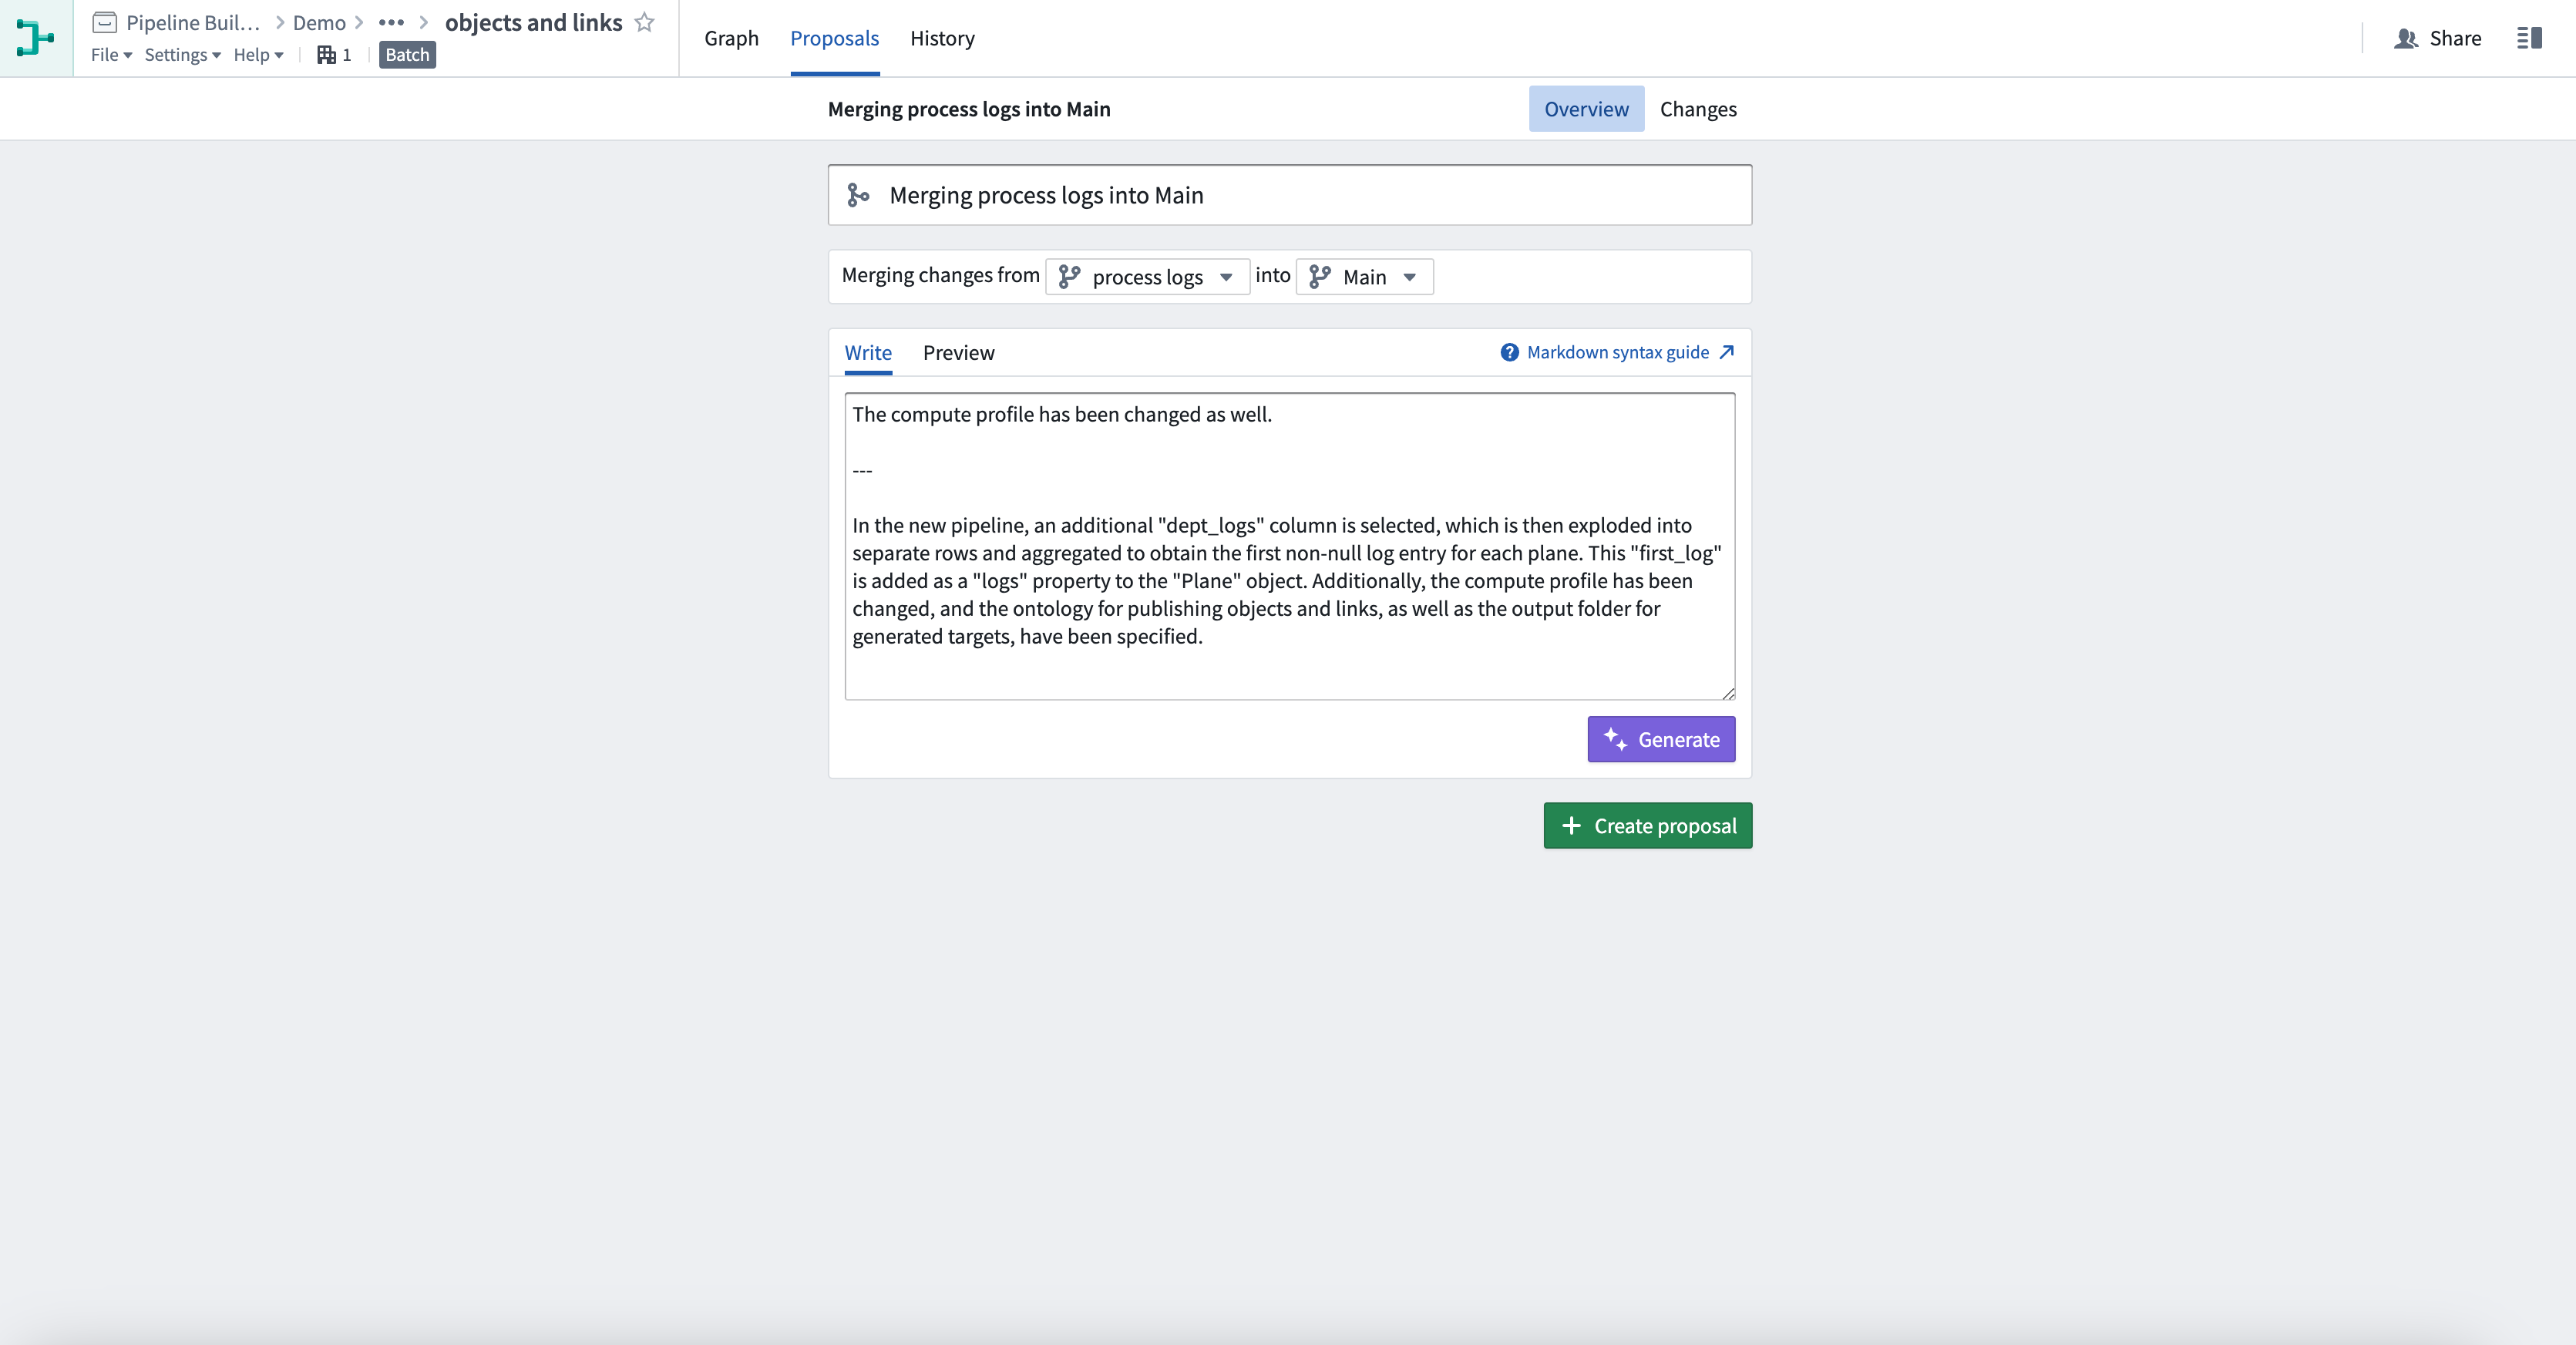
Now select the purple Generate button. AIP will write a proposal description of the changes to the pipeline on your branch.
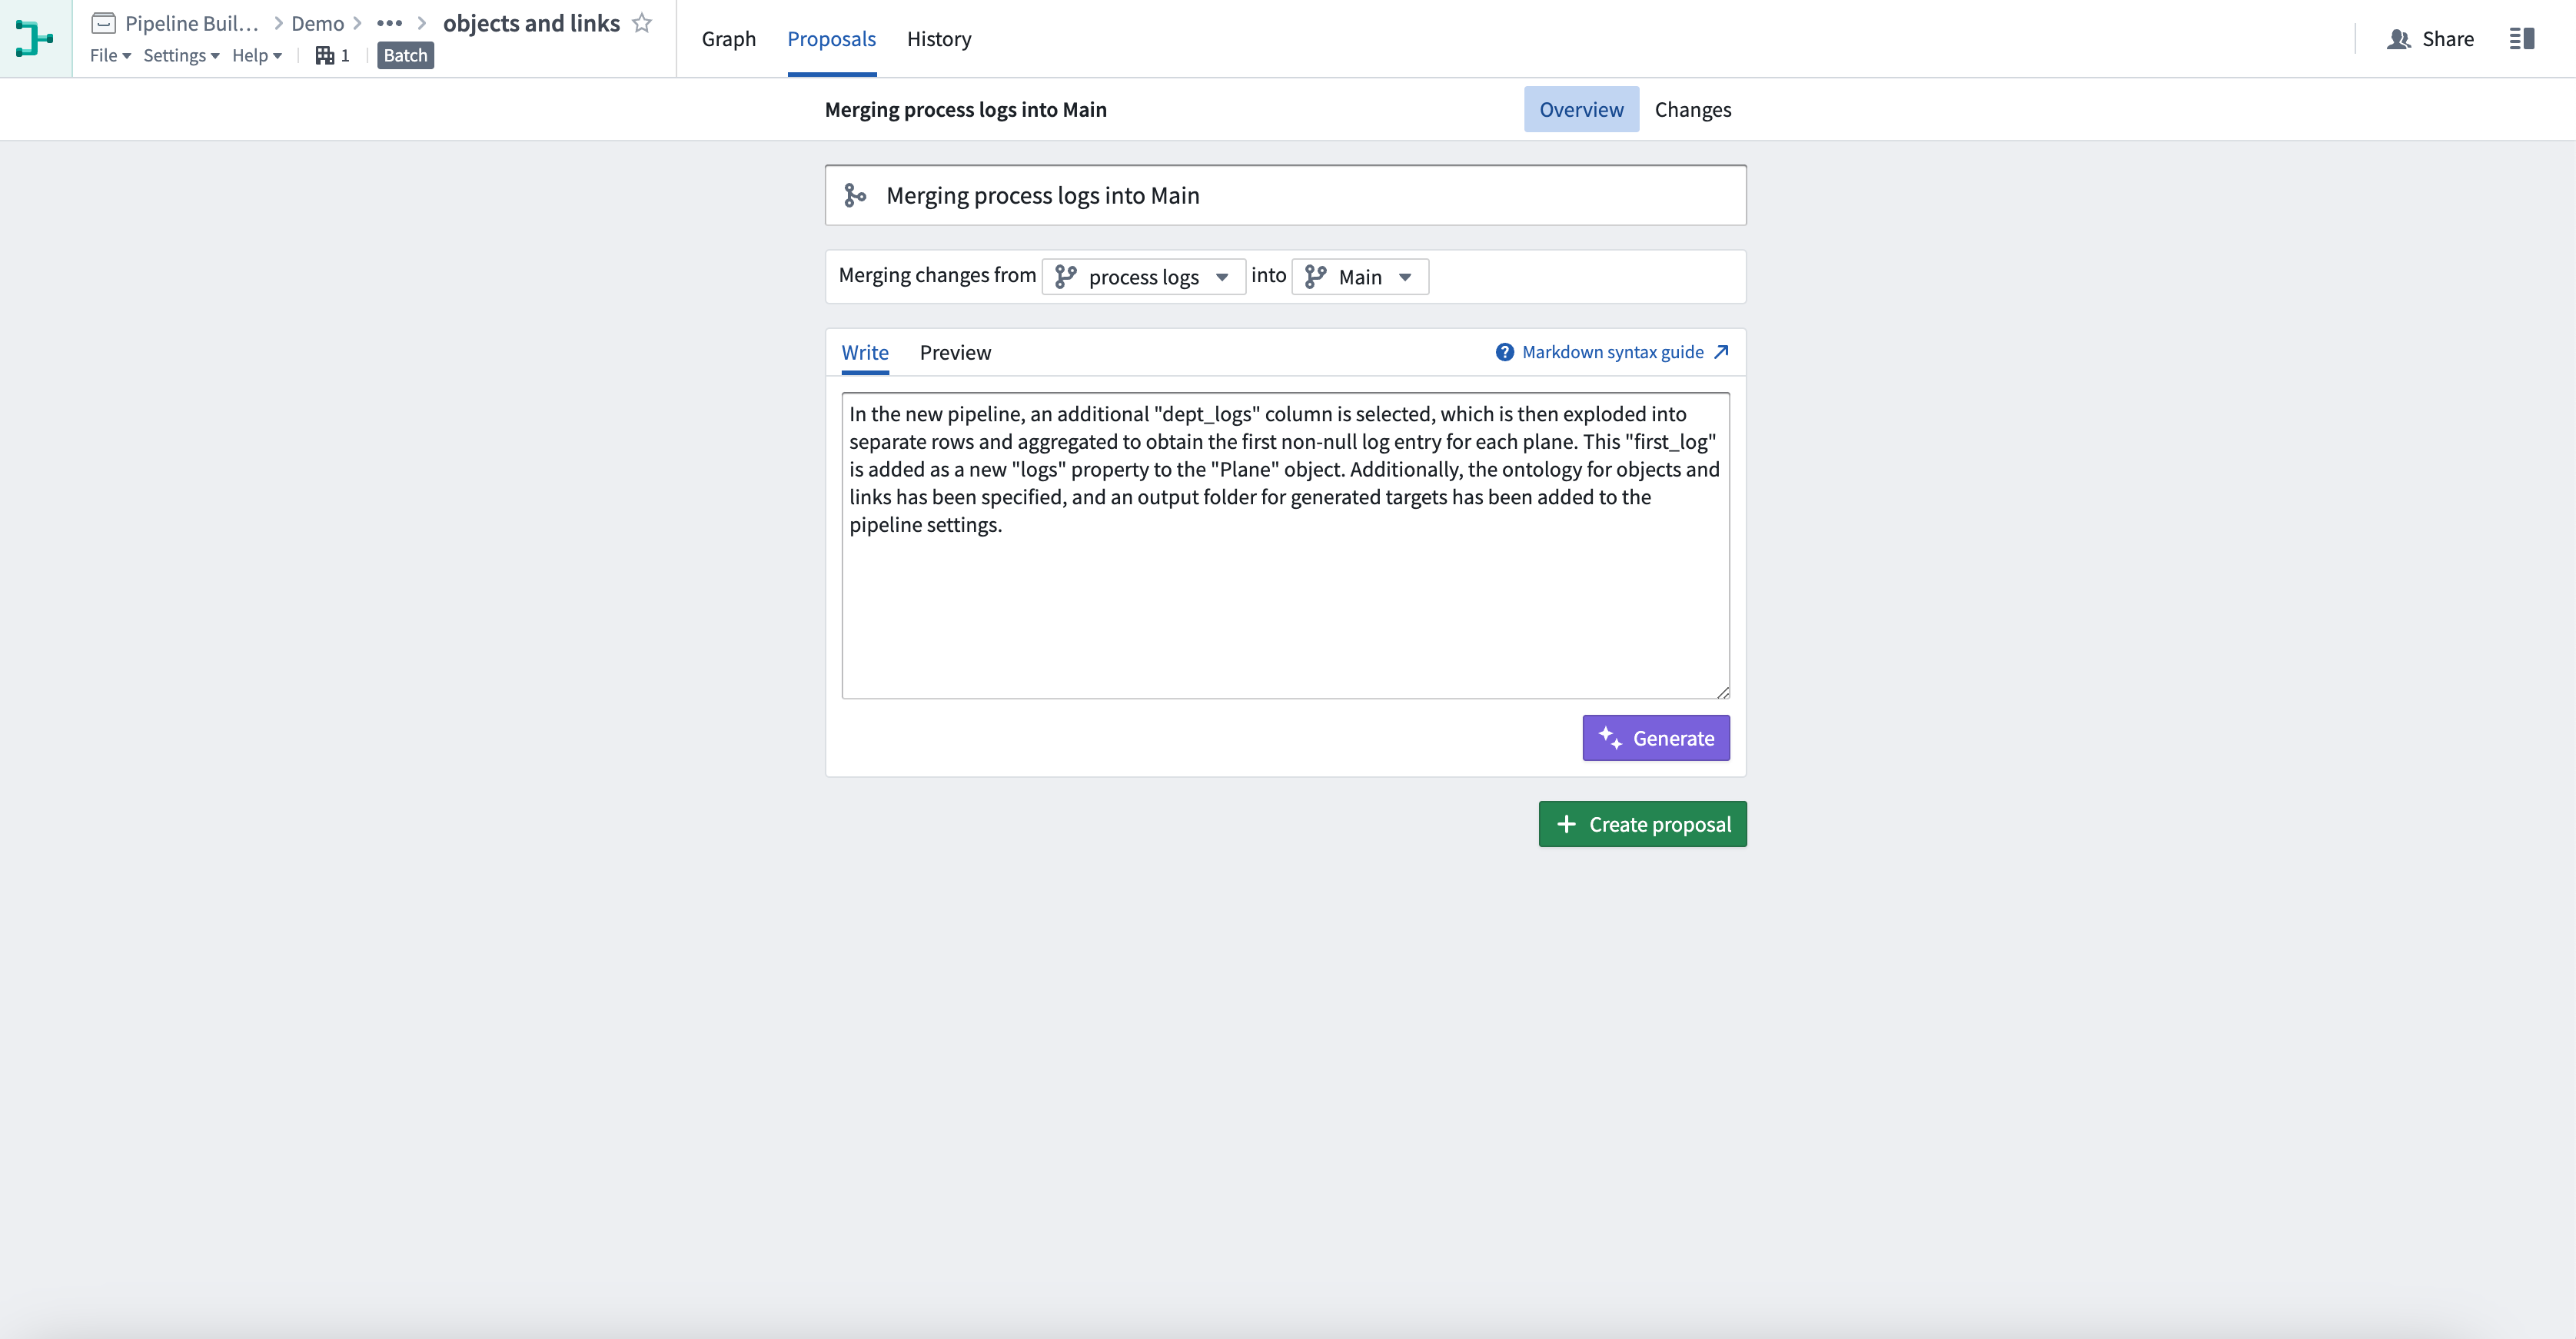
In this example, there were multiple changes, including changes to some pipeline settings. AIP describes all of them for you.
You can also type in additional context, bring attention to particular changes, or even start writing a rough proposal description into the text box before you select Generate. AIP will use this to enhance its proposal description. The generated description will be added below your text, with a clear separation.
To generate again or change the description you have provided, ensure only the relevant text is in the text box before you select Generate. For best results, all other text, including any previously generated description should be deleted.
AIP capabilities for custom workflows
To use the following features, users must be granted permission for AIP capabilities for custom workflows by a platform administrator.
Text to embeddings
You can embed text as vectors with the Text to embeddings expression by providing it with strings to convert to an embedded vector using the Text embedding ada-002 embedding model. These vectors are designed to capture the semantic meaning of words or phrases, enabling advanced text analysis and operations.
Embedding text is computationally expensive and may result in slower previews and builds.

Use LLM node
The Use LLM node feature offers a convenient method for executing Large Language Models (LLMs) on your data at scale so you can seamlessly incorporate LLM processing logic between various data transformations, simplifying the integration of LLMs into your pipeline with no coding required.
Note: AIP feature availability is subject to change and may differ between customers.
中文翻译
Pipeline Builder 中的 AIP 功能
Pipeline Builder 提供了一系列 AIP 辅助功能,可帮助你更好地理解、构建和管理管道(pipeline)。这些功能支持你仅通过一条提示词即可生成全新的数据转换(data transformation)逻辑,解释管道开发过程中的步骤,建议名称与描述,创建和编辑正则表达式(regular expression),以及转换时间戳(timestamp)格式。
Pipeline Builder 助理功能
生成(Generate)
使用生成(Generate)功能,你可以通过输入用户提示词创建新的数据转换逻辑。AIP 可以访问 Pipeline Builder 中所有可用的数据转换能力,为你的特定需求推荐最合适的方案。该功能依托元数据生成逻辑,不会泄露底层数据,同时会完整披露推荐转换逻辑的原因和思路。最终,AIP 生成的转换会和普通数据转换一样保存到你的管道逻辑中,可无缝集成到现有工作流。
要使用生成功能,点击 Pipeline Builder 画布顶部中央的紫色双星AIP图标。按照弹窗中的说明,选择画布上的节点作为输入。按住cmd(MacOS系统)或ctrl(Windows系统)点击节点,即可将其添加到选中集合或从选中集合中移除。
接下来,输入供AIP处理的提示词,然后点击生成即可开始运行。
运行后会返回一个或多个高亮为紫色的转换节点(transform node),同时附带生成的转换逻辑的描述。
如果要继续执行转换,点击返回生成页,选择下一组节点并输入下一条提示词,即可继续构建你的管道。
点击输入框可以查看你最近使用的提示词。你可以选择历史记录中的任意条目重新运行,系统会自动选中当时对应的原始输入节点。
解释(Explain)
使用解释(Explain)功能,你可以在开发流程的每一步动态获取管道的描述信息。你可以借助该功能让协作者同步了解当前状态,为新的审批者提供有价值的上下文,或是以极低的维护成本实现新团队成员之间的知识传递。
要使用解释功能,点击 Pipeline Builder 画布顶部中央的紫色灯泡形状AIP图标。按照弹窗中的说明,选择画布上的表作为输入。长按并点击节点即可将其添加到选中集合或从选中集合中移除。你的选中集合必须至少包含一个转换节点,且为连通的、仅有单个输出的节点集合。
长按并点击节点即可将其添加到选中集合或从选中集合中移除。你的选中集合必须至少包含一个转换节点,且为连通的、仅有单个输出的节点集合。
最后,点击解释xx个节点即可生成转换逻辑的解释。
你也可以选中单个节点,点击右侧弹出菜单中的紫色解释按钮,即可解释单个节点的逻辑。
此外,你还可以选择解释一个节点内的任意转换集合。
了解更多 Pipeline Builder 中的转换。
名称与描述建议
你还可以在 Pipeline Builder 中使用AIP为任意转换节点生成推荐的名称和描述,快速完成工作内容的文档沉淀。
点击转换默认名称旁的紫色AIP星形图标,即可生成推荐名称。
在本示例中,推荐名称Open claims by landlord...比默认的Transform path提供了更多信息:
点击紫色生成按钮即可生成推荐的描述。
在本示例中,生成的描述为按房东ID分组的理赔数据转换提供了更多细节:
生成的建议是转换路径的简短摘要。你保存生成的名称或描述后,相关信息会自动持久化存储在管道中,对所有协作者可见。
如果需要一次为最多10个节点生成建议,打开屏幕底部的建议标签页即可。
选中管道中一个或多个还没有名称和描述的节点,即可为其生成对应内容。
点击每条建议旁的应用即可将更改保存到对应节点。
转换辅助(Transform Assist)
转换辅助功能可帮助你充分利用 Pipeline Builder 提供的各类转换选项。依托AIP的能力,正则表达式助手可以根据你的输入生成正则表达式,也可以更新已有的表达式。此外,借助时间戳格式化工具,你可以快速将看板中的string类型值转换为timestamp类型。
正则表达式助手
正则表达式助手可以提供准确高效的正则表达式模式,用于提取、替换、查找数据中的字符串,简化数据管道的创建流程。要使用正则表达式助手,首先创建一个使用正则参数的新转换看板:包括正则提取、全部正则提取、正则替换、正则查找、正则匹配。在下方示例中,我们对email_string表达式列使用正则提取转换。
点击Pattern字段旁的紫色AIP星形图标,然后描述你想要创建的正则表达式。在本示例中,我们想要搜索邮箱域名。
点击紫色生成按钮查看结果。
更新已有表达式
你也可以使用正则表达式助手更新已有的正则表达式。
点击Pattern字段旁的紫色AIP星形图标,然后输入你想要修改的正则表达式,再说明修改要求。在下方示例中,我们需要修改正则表达式@([\da-z\.-]+\.([a-z\.]{2,63}),使其支持匹配大写字母。
点击紫色生成按钮查看结果。
时间戳格式化工具
时间戳格式化工具可以大幅节省时间,帮助你在类型转换看板中快速将字符串转换为时间戳。要使用时间戳格式化工具,首先创建一个配置为从字符串转换为时间戳的新类型转换看板。在下方示例中,我们有多个不同格式的时间戳:
然后点击紫色生成按钮,输入你想要在类型转换中使用的解析格式示例。在本示例中,我们将粘贴全部5个时间戳:
AIP会生成一组匹配这些时间戳的格式,并自动填入类型转换看板中。点击应用即可。
随后字符串列就会被解析为时间戳列。
了解更多 Pipeline Builder 中的转换。
生成变更提案描述
你还可以在 Pipeline Builder 中提交变更提案时使用AIP生成提案描述,快速说明你做的修改。
要使用该功能,首先点击右上角的Propose,之后你会进入提案创建页面。
现在点击紫色生成按钮,AIP会自动为你当前分支上对管道的修改生成提案描述。
在本示例中,包含了多项修改,包括对部分管道设置的调整,AIP会为你逐一描述所有修改内容。
你也可以输入额外的上下文,提醒审阅者注意特定修改,甚至可以在点击生成前先在文本框中写一份粗略的提案描述。AIP会参考这些内容优化生成的提案描述,生成的内容会添加在你输入的文本下方,并有清晰的分隔。
如果需要重新生成,或是要修改你提供的描述,请在点击生成前确保文本框中仅保留相关文本。为获得最佳效果,请删除所有其他文本,包括之前生成的描述。
面向自定义工作流的AIP能力
要使用以下功能,用户需要先由平台管理员授予自定义工作流AIP能力的相关权限。
文本转向量(Text to embeddings)
你可以使用Text to embeddings表达式将文本嵌入为向量,该表达式依托Text embedding ada-002嵌入模型,将输入的字符串转换为嵌入向量。这些向量可以捕捉单词或短语的语义含义,支持高级文本分析和操作。
文本嵌入的计算成本较高,可能会导致预览和构建速度变慢。
使用大语言模型节点(Use LLM node)
使用LLM节点功能提供了一种便捷的方式,可让你对数据大规模运行大语言模型(Large Language Model, LLM),这样你就可以在不同数据转换之间无缝集成大语言模型处理逻辑,无需编写代码即可轻松将大语言模型能力集成到你的管道中。
注意:AIP功能的可用性可能会发生变化,不同客户的可用功能可能存在差异。