Set up a projection(设置投影(Projection))
The following information will guide you through the process of enabling, configuring, and building a dataset projection.
:::callout{theme="neutral"} Noho is a service that manages dataset projections. :::
Enable projections for your dataset
Projections are enabled in a dataset's schema by configuring noho: true.
You can configure a dataset's schema when writing the dataset from a transform or by manually modifying the schema in the Details tab.
from transforms.api import transform, Input, Output

@transform(
    output_dataset=Output('/examples/example_output')
    input_dataset=Input('/examples/example_input'),

)
def compute(output_dataset, input_dataset):
    input_dataset = input_dataset.dataframe()
    output_dataset.write_dataframe(input_dataset, options={"noho": "true"})

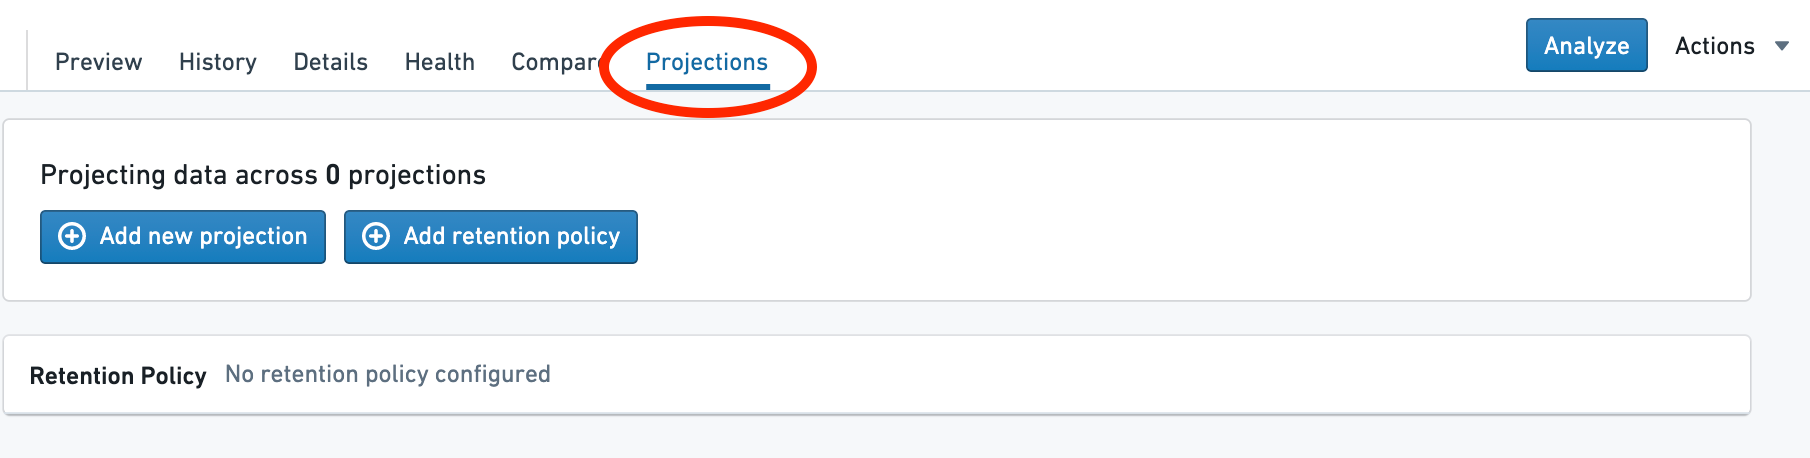
Navigate to the Projections tab
You will see a Projections tab when viewing a dataset if it has noho: true configured in the schema and you have permission to edit the dataset.
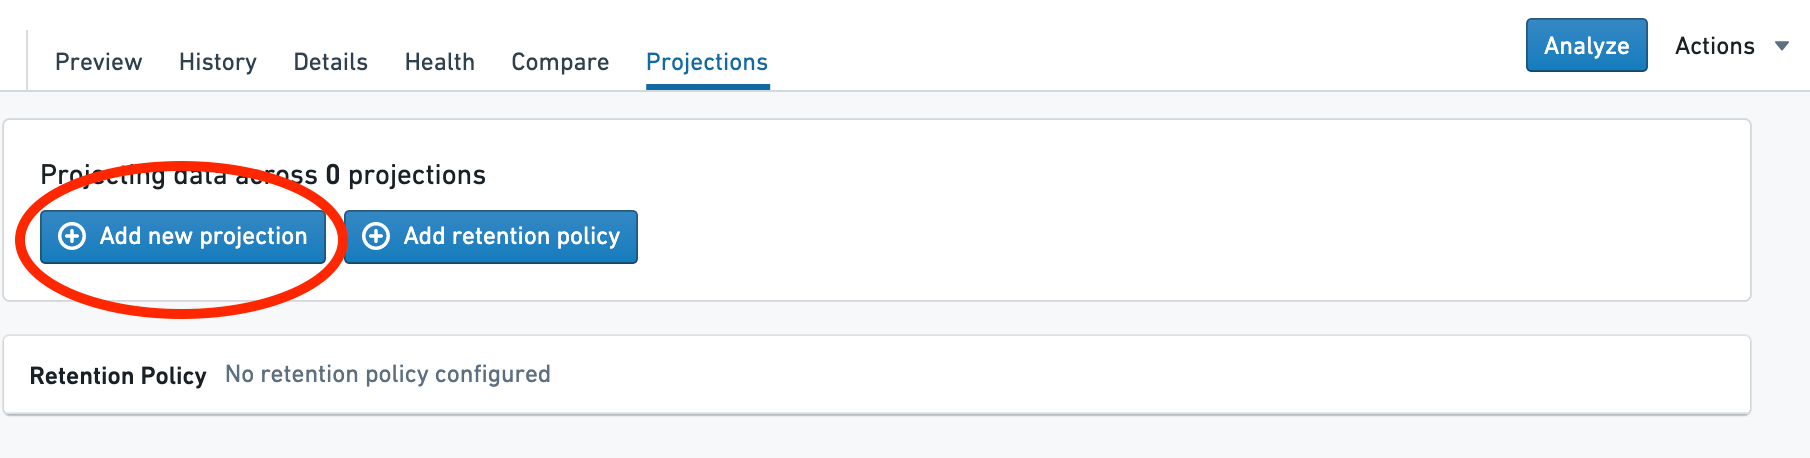
Open the creation dialog
Select Add new projection.
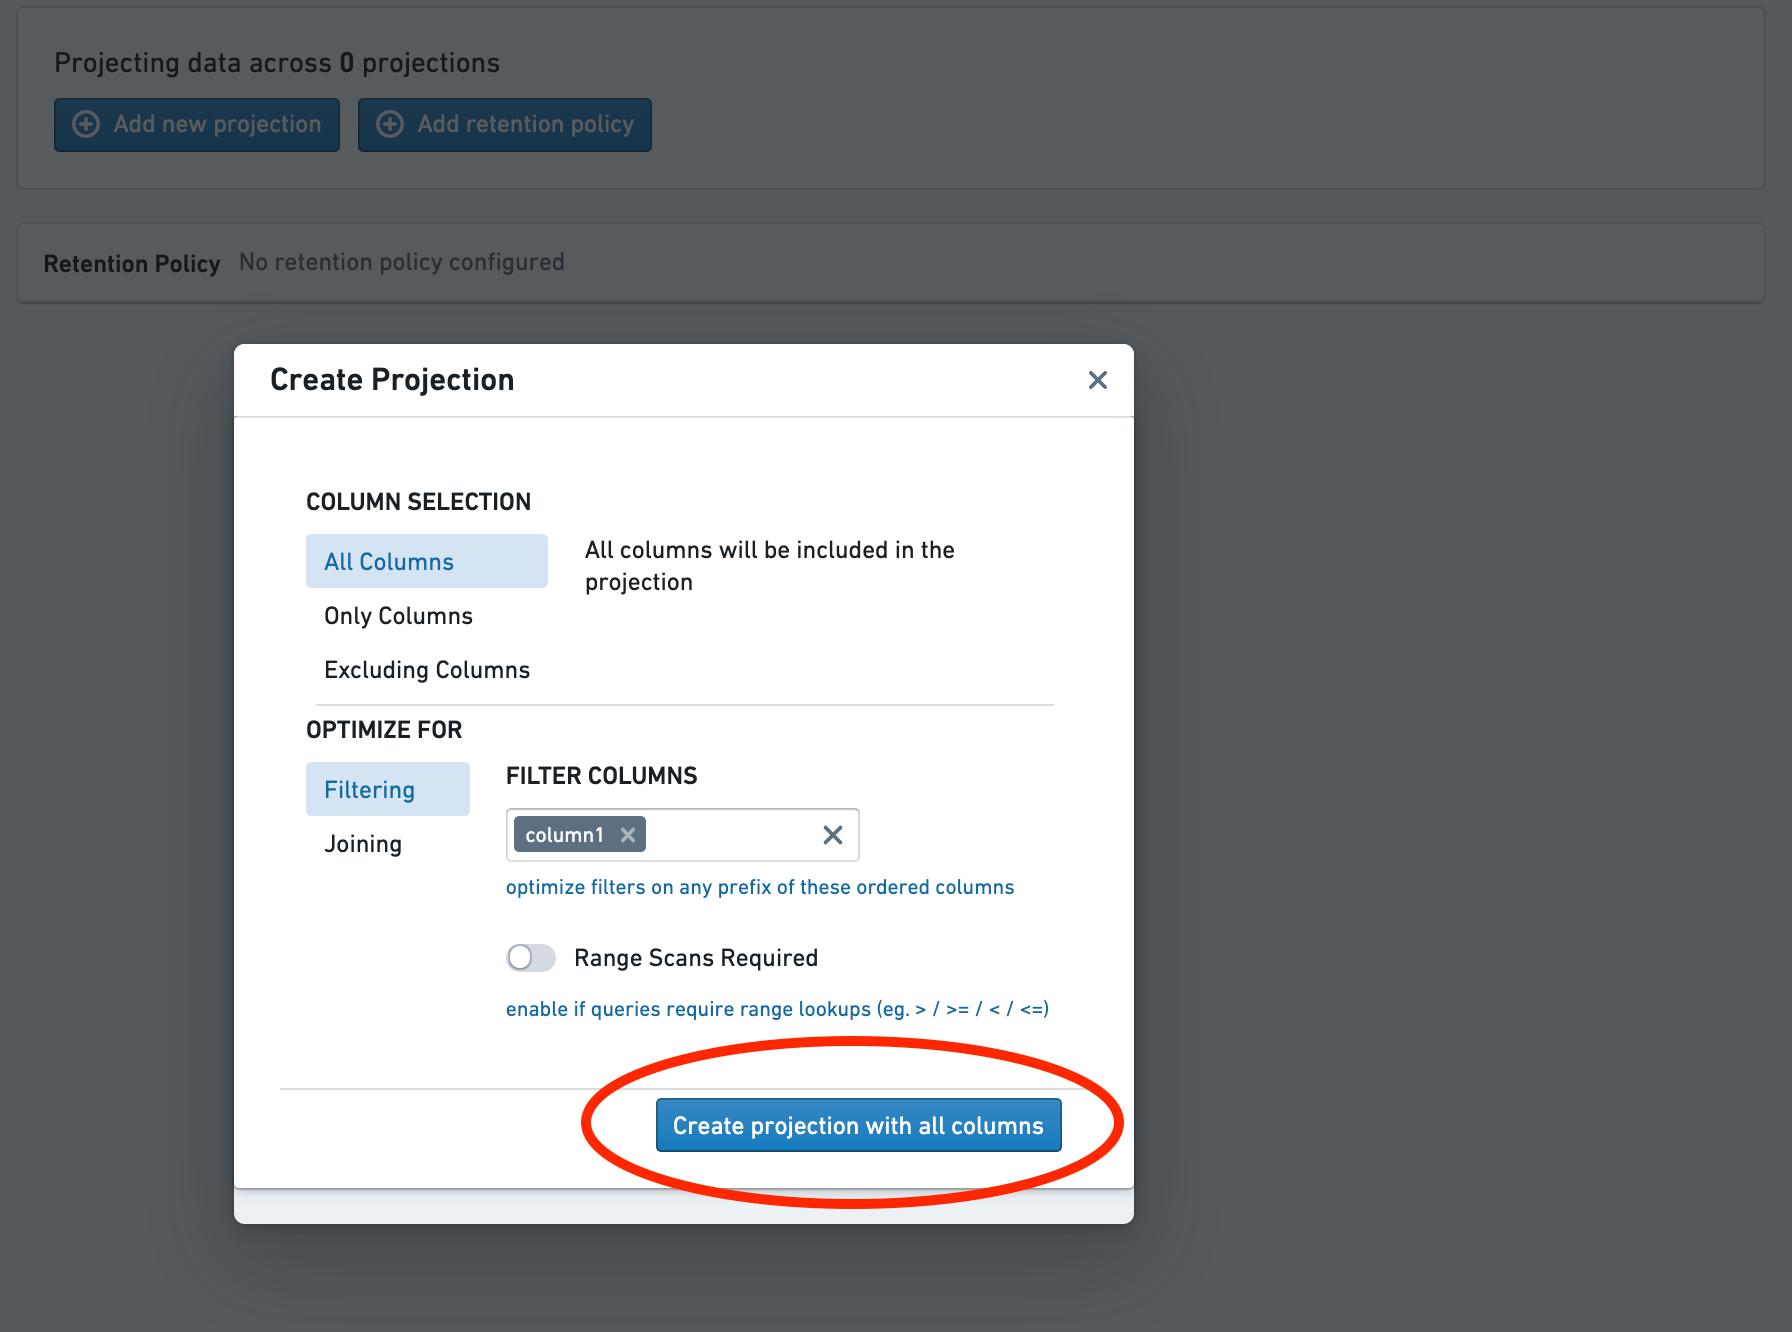
Choose the projection columns
Choose the columns to include in the projection.
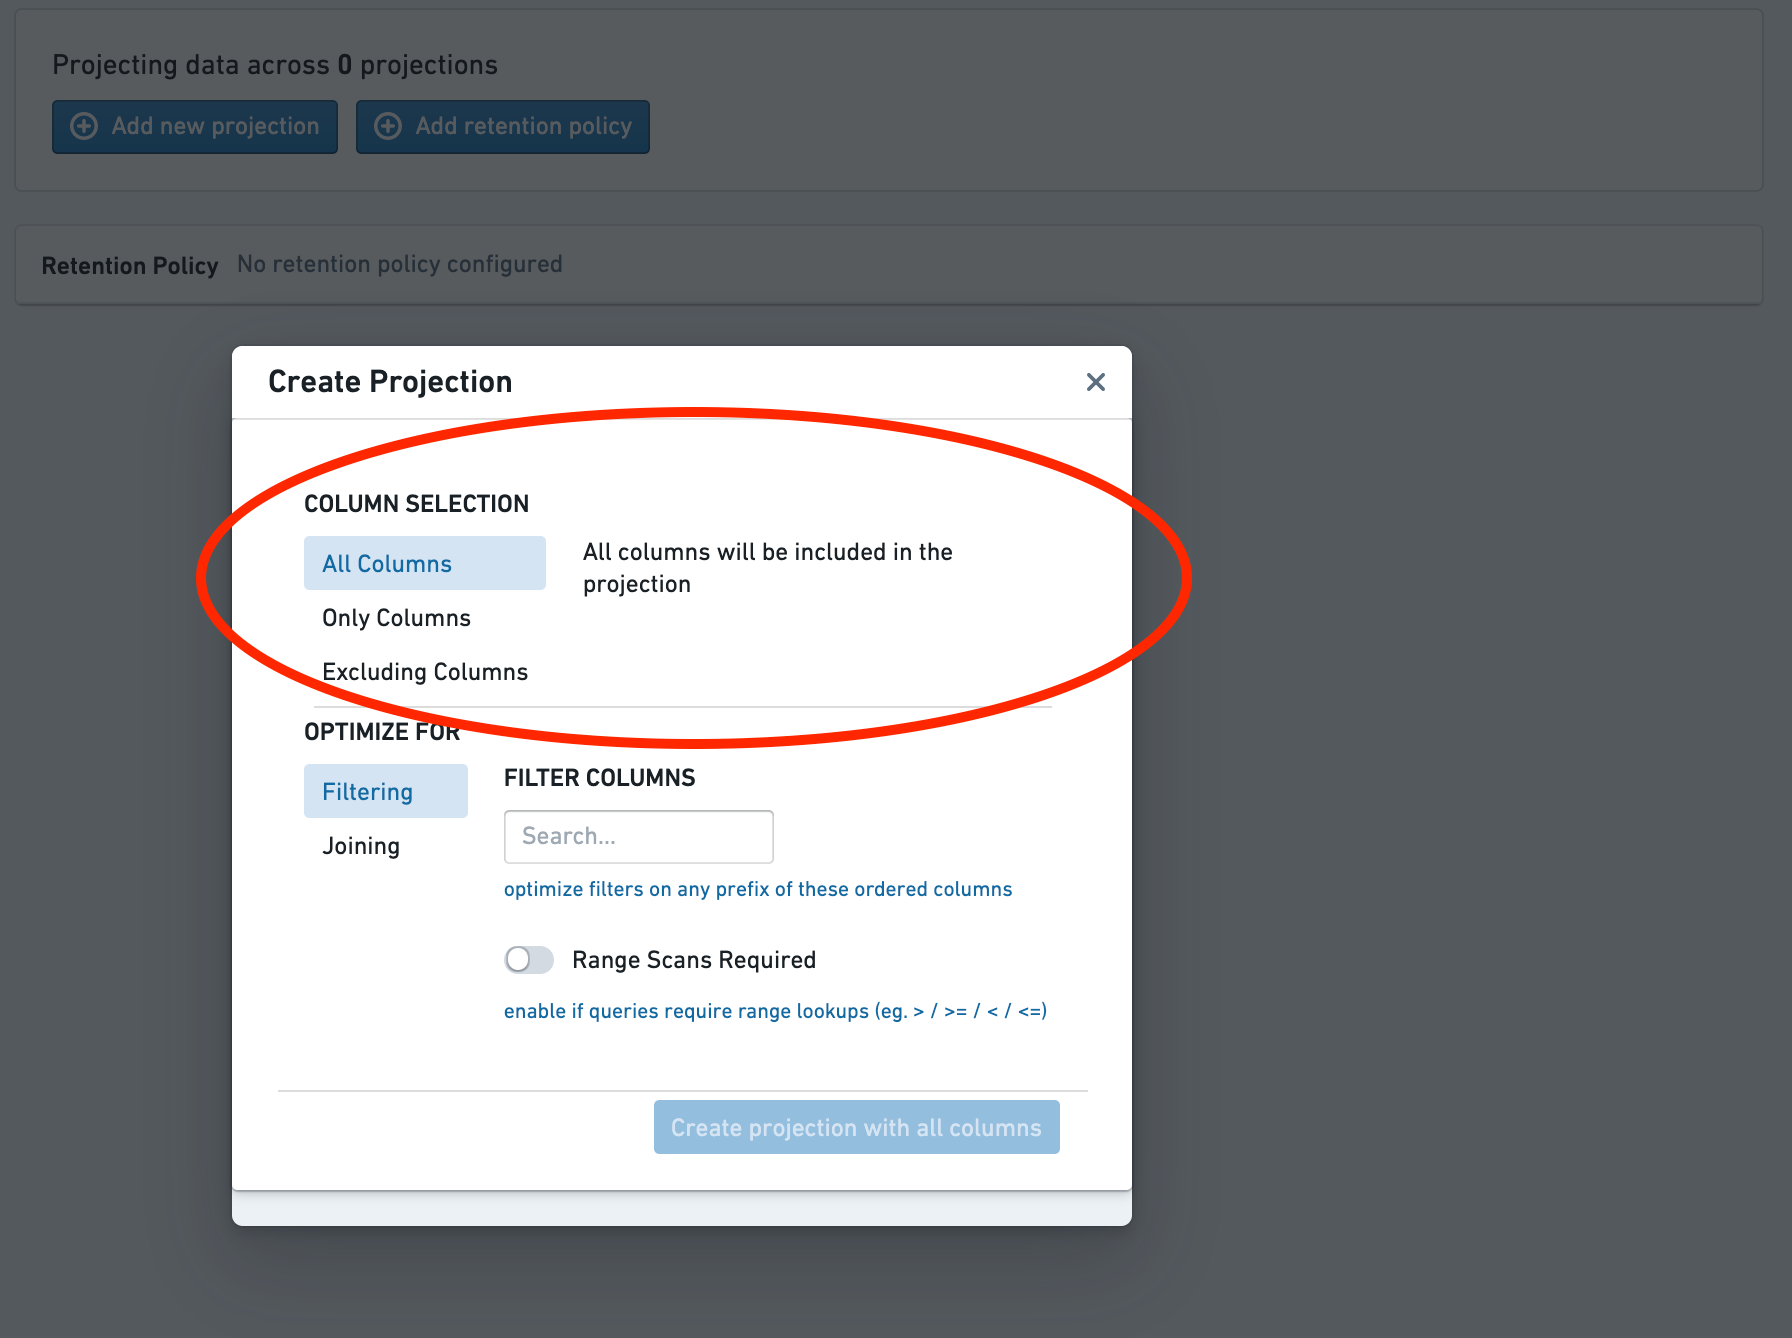
In most cases, All columns is appropriate. However, you can adjust this if you know that a query will only select a subset of the columns.
Choose the projection type
Chose the type of the projection.
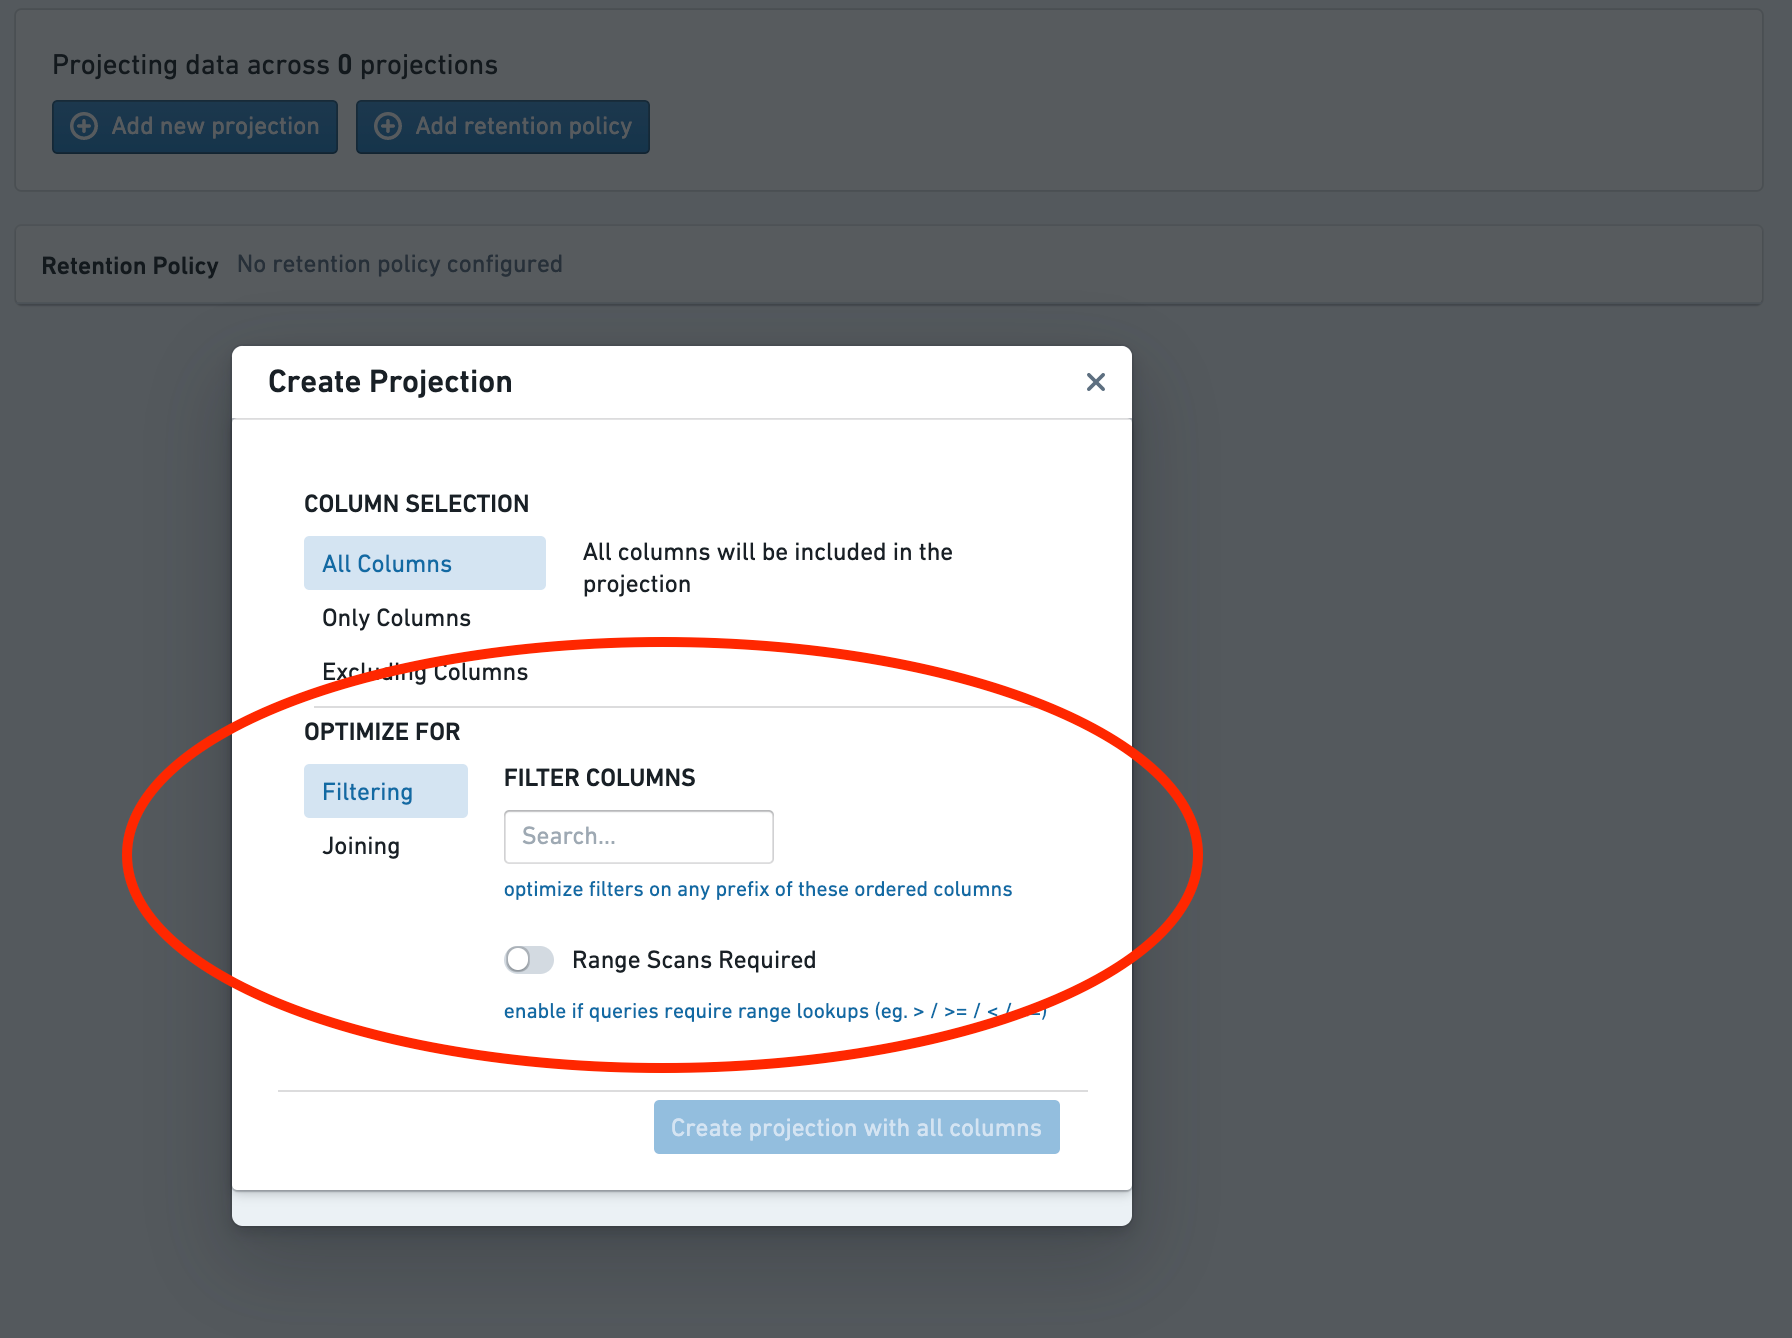
- For filter-optimized projections, select the columns to filter on.
- The order matters, as the projection will only speed up queries on a prefix of this list.
- For join-optimized projections, select the join columns and bucket count.
- Joins will be sped up only on this exact set of columns.
- When joining to an explicitly bucketed dataset or another join-optimized dataset, the bucket counts must be equal.
Create the projection
Select the Create projection button.
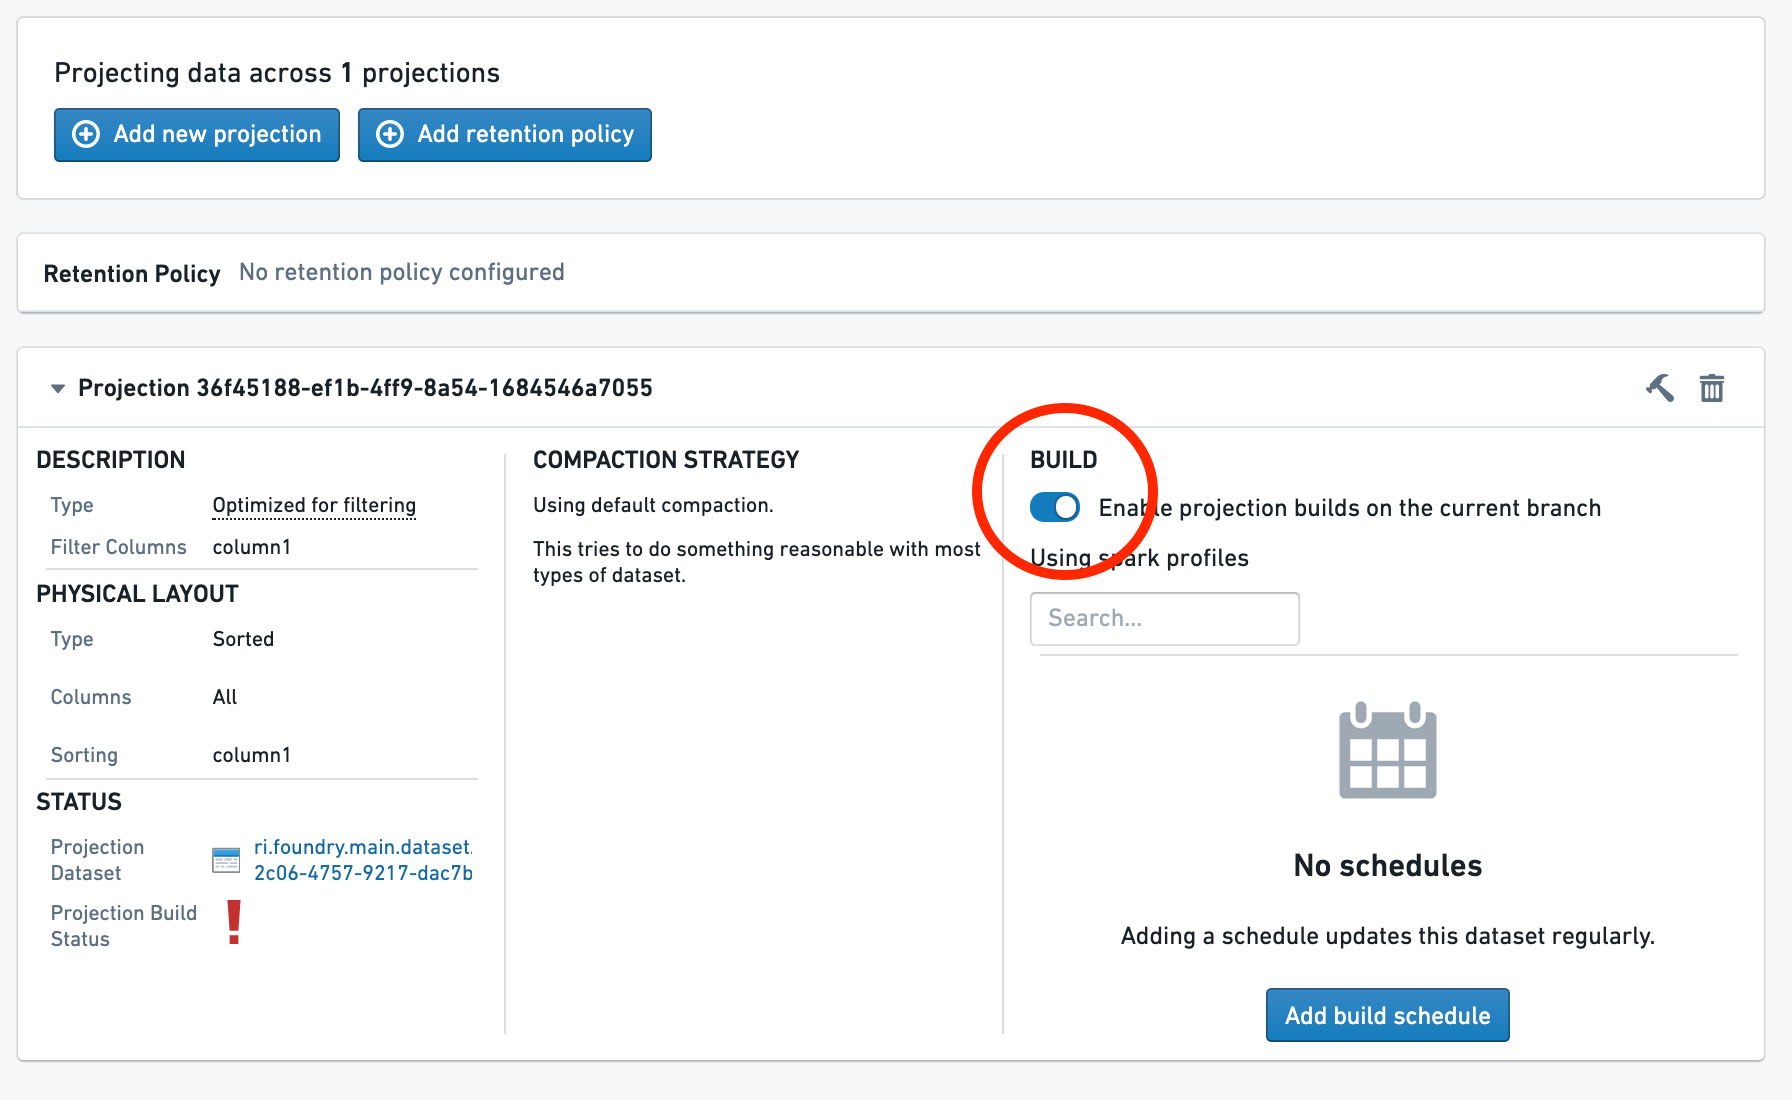
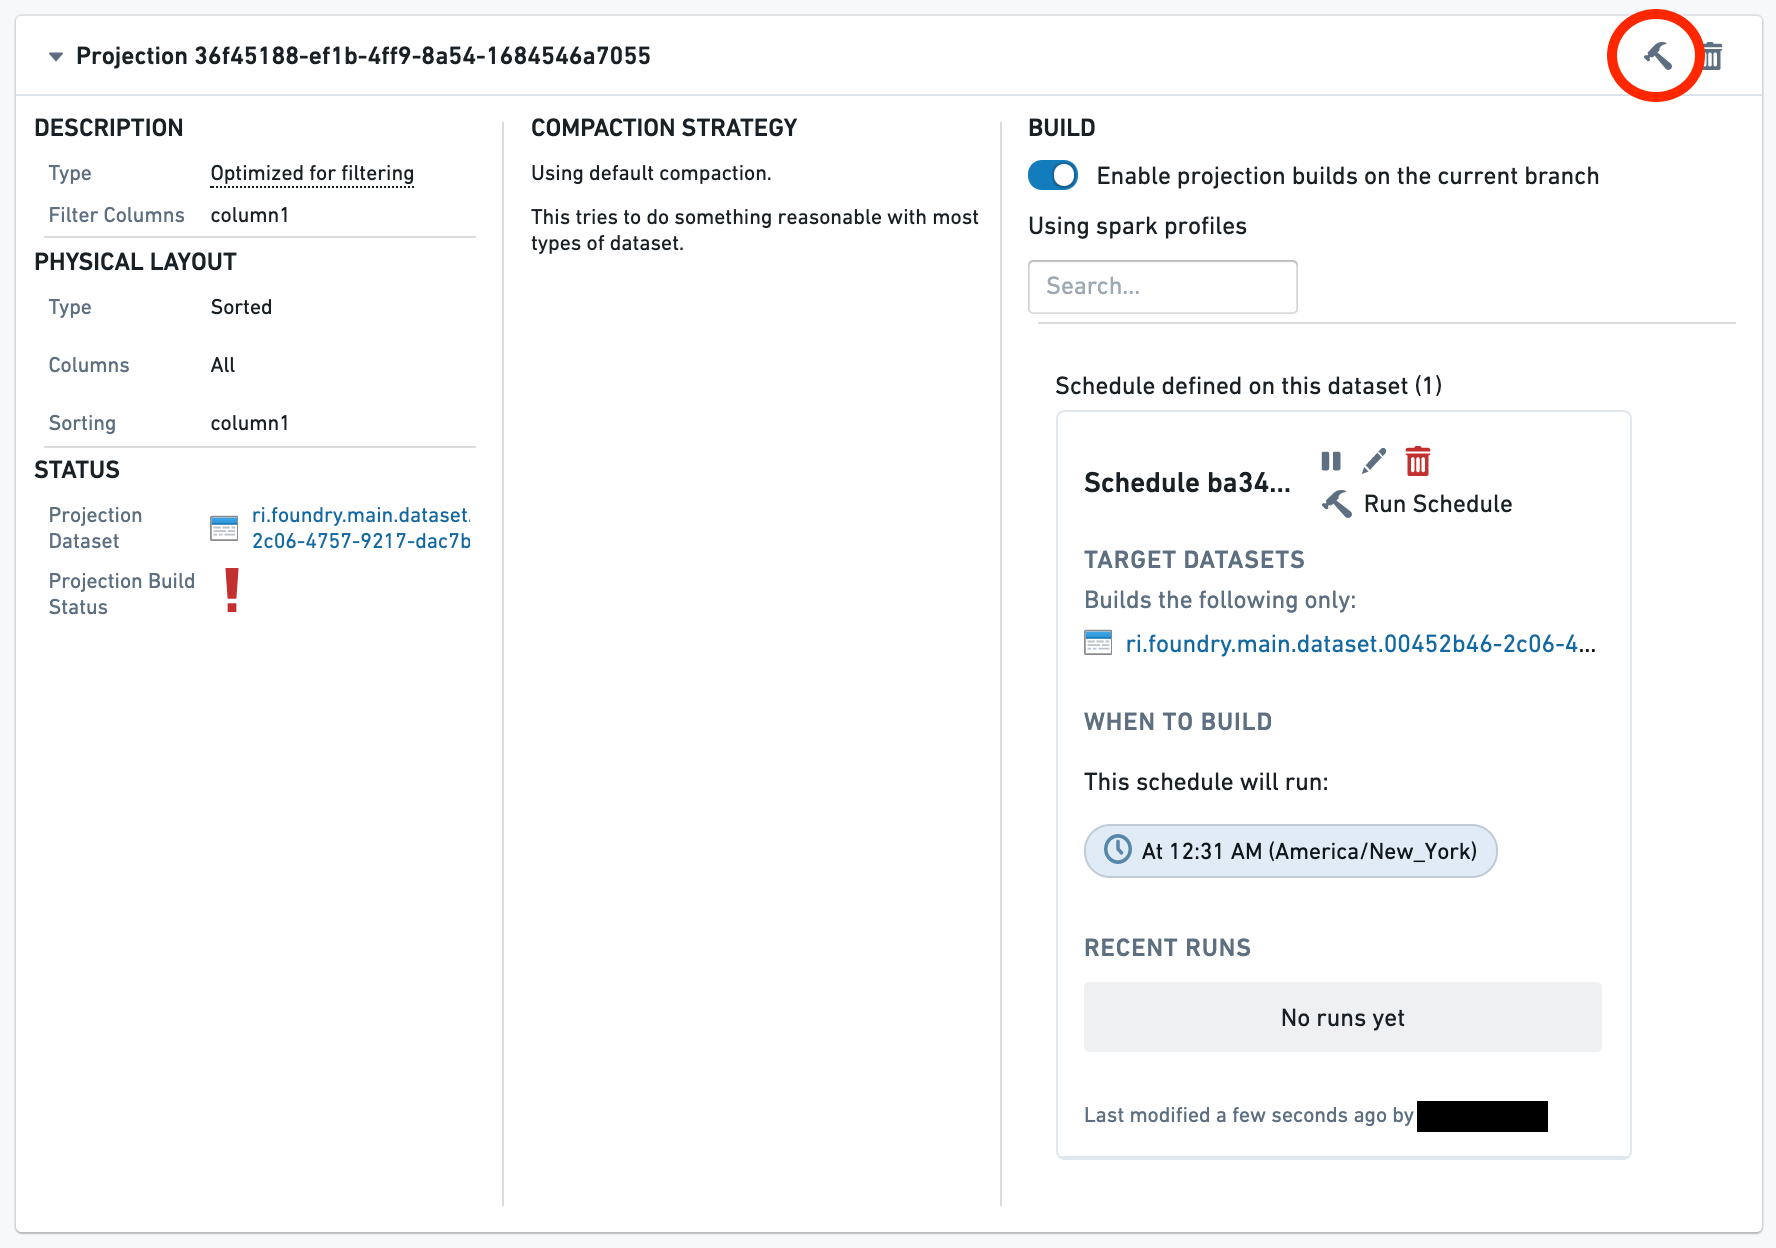
The projection now exists but contains no data. This is denoted by the red warning icon next to the projection. To use the projection in a query, it must first be built by following the next steps.
Set up a build
To give you more control over resource usage, the internal builds that maintain projections are not scheduled automatically; you will need to set one up explicitly.
First, toggle the switch Enable projection builds on the current branch. This allows builds to run on the current branch.
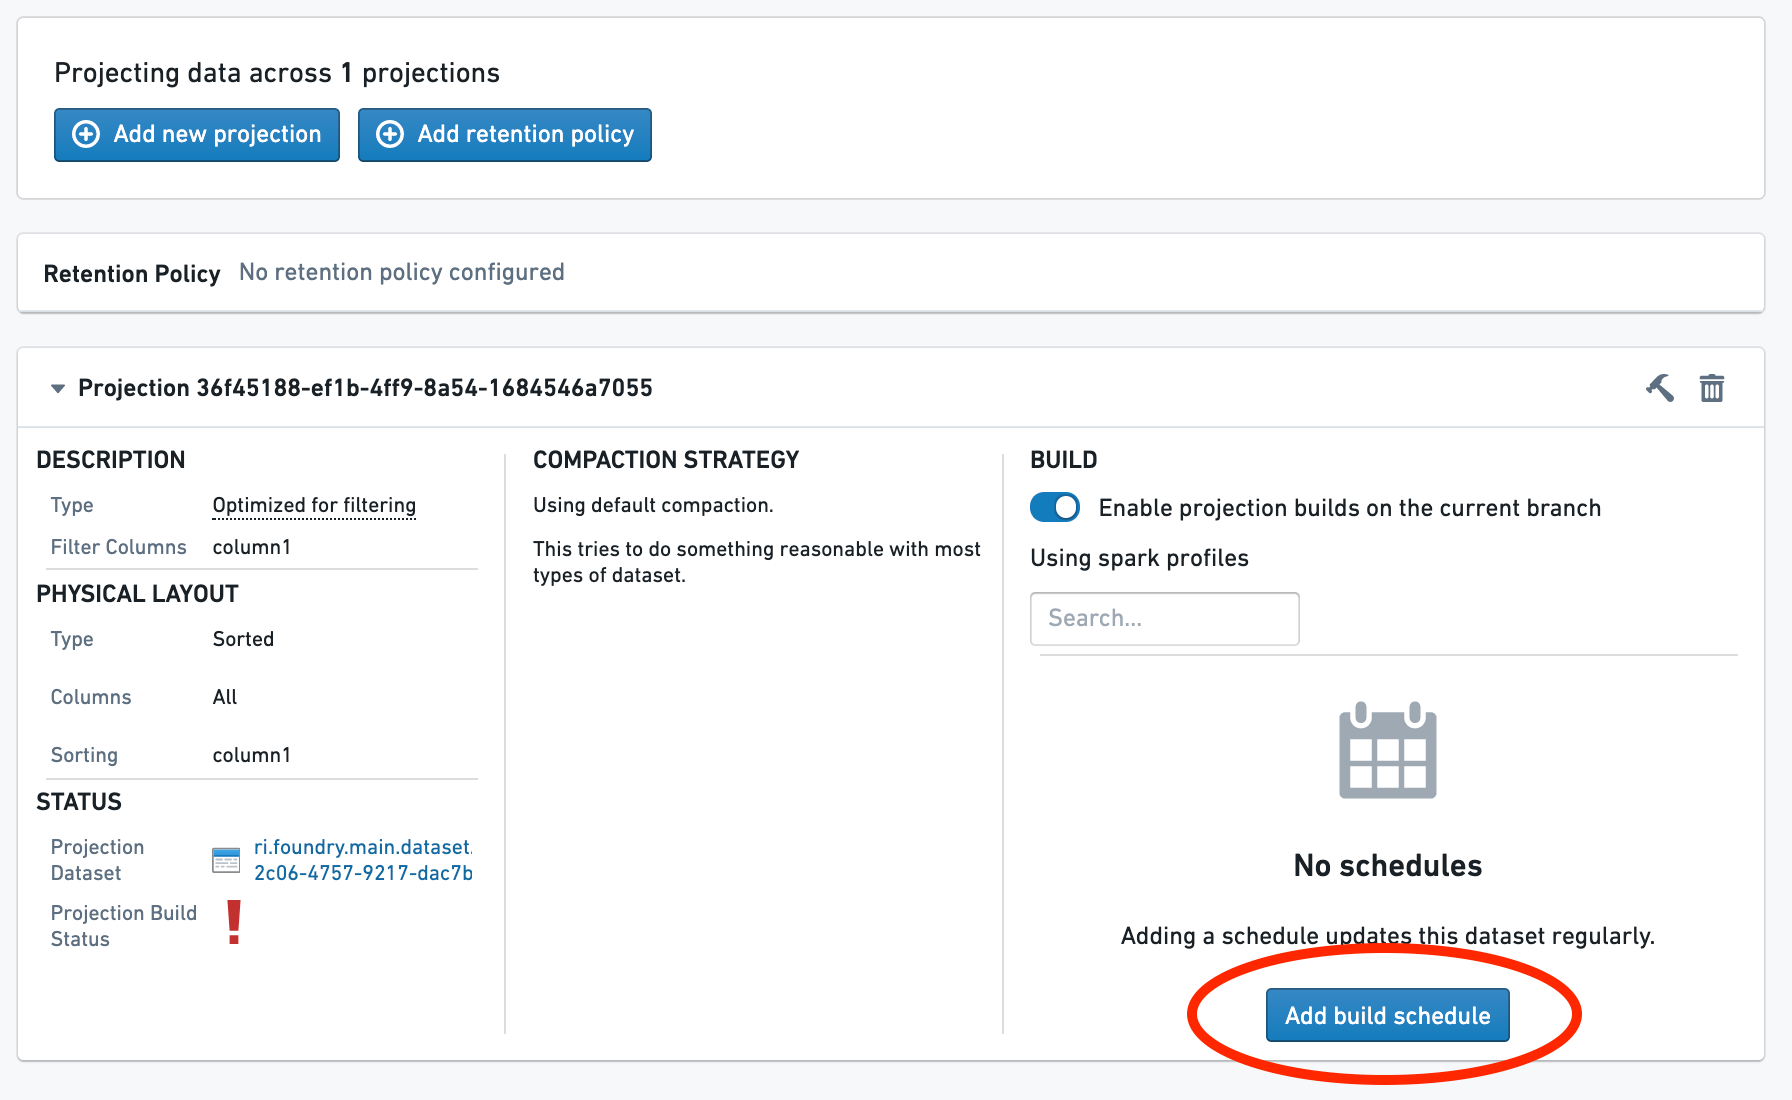
Then, configure a schedule for the build. If you want to schedule a build on a different branch, you will need to navigate to that branch and repeat the process.
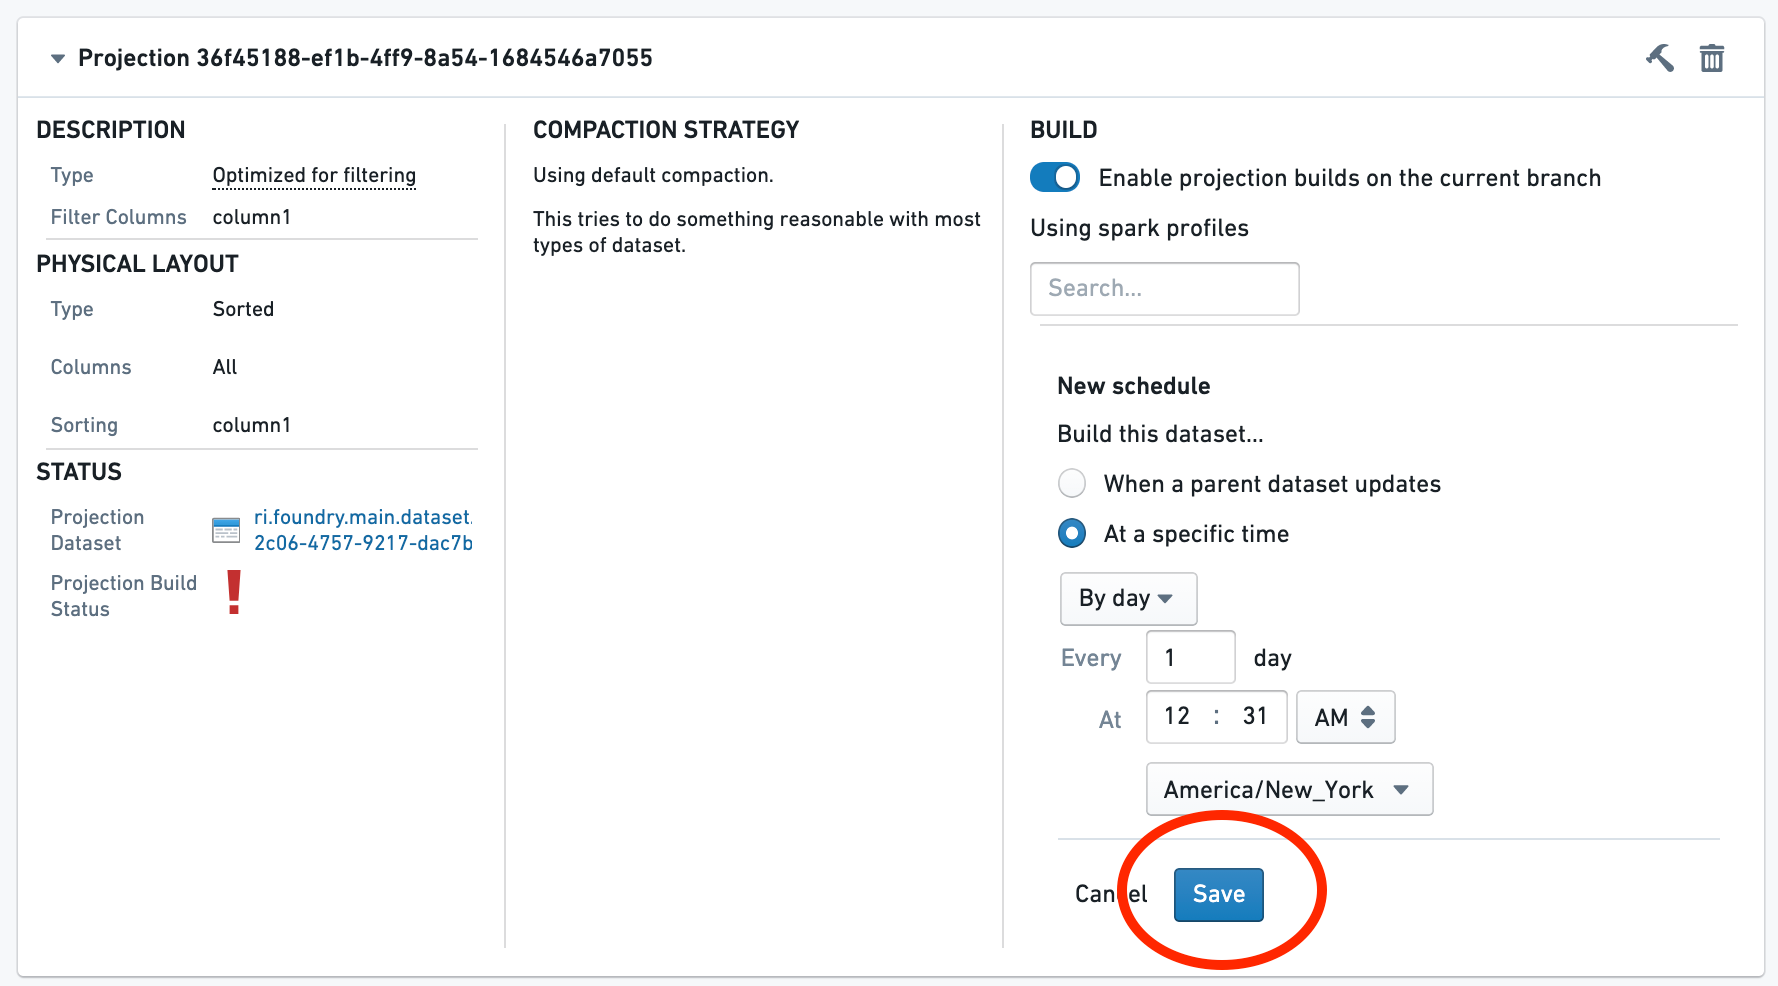
(Optional) Build the projection
If you do not want to wait for the build, explicitly build the projection by selecting the Build button.
Now, wait for the build to complete. Multiple builds may run before the projection is up to date. A green check next to the Projection Build Status line indicates that the projection is now fully up-to-date.
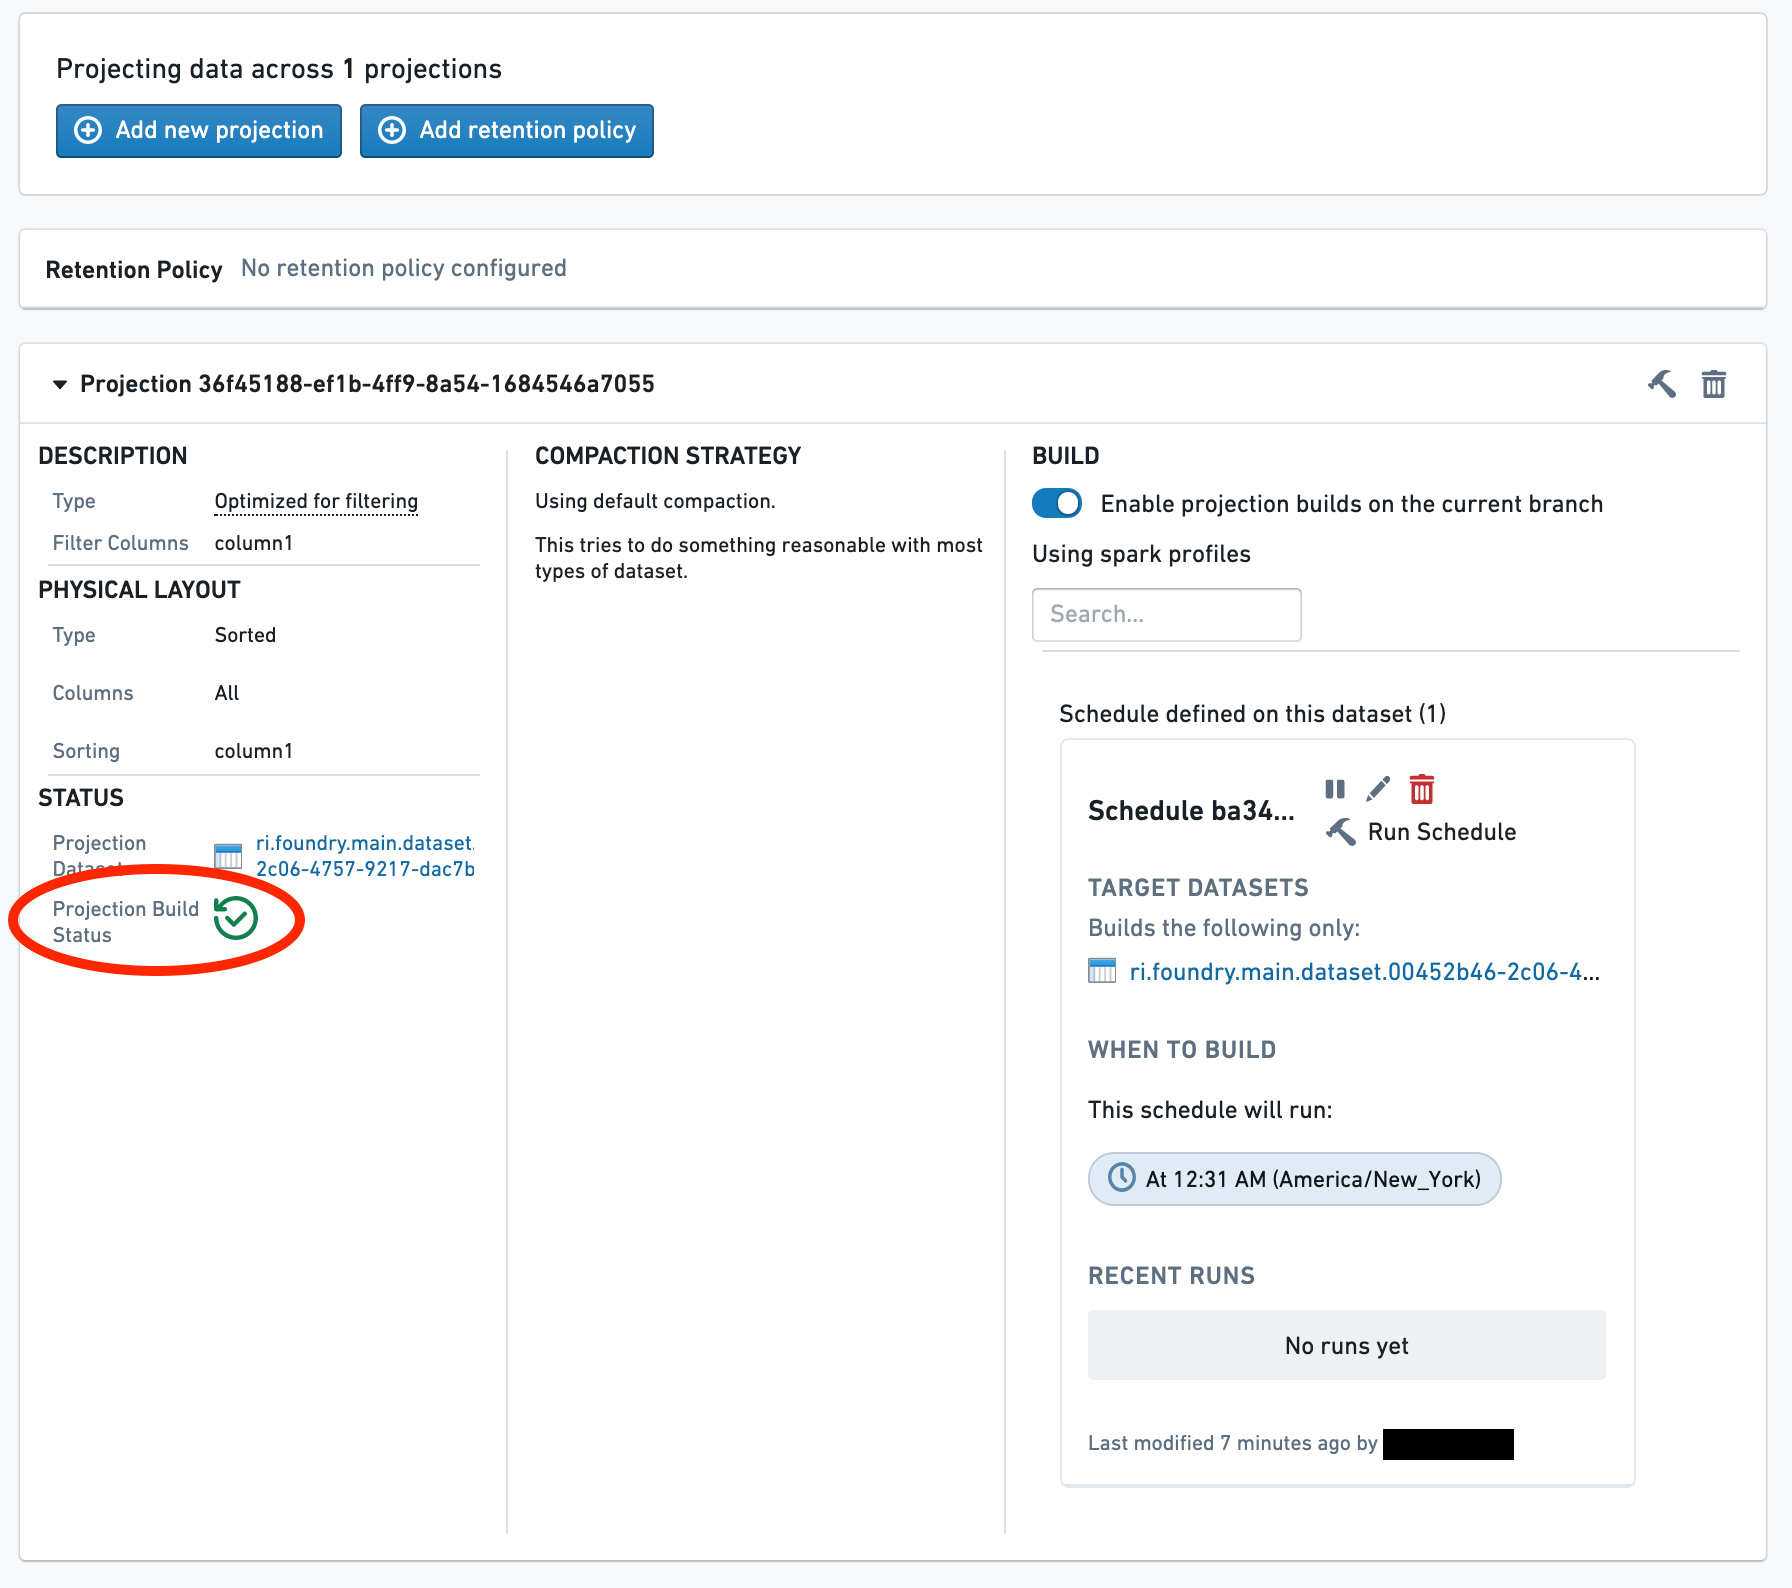
The projection is now up-to-date and will be used for reads on the dataset.
中文翻译
设置投影(Projection)
以下指南将引导您完成启用、配置和构建数据集投影(Projection)的完整流程。
:::callout{theme="neutral"} Noho 是一个管理数据集投影(Projection)的服务。 :::
为数据集启用投影(Projection)
通过在数据集的模式(Schema)中配置 noho: true 来启用投影(Projection)。
您可以在从转换(Transform)写入数据集时配置其模式(Schema),也可以通过手动修改详情(Details)选项卡中的模式(Schema)进行配置。
from transforms.api import transform, Input, Output

@transform(
    output_dataset=Output('/examples/example_output')
    input_dataset=Input('/examples/example_input'),

)
def compute(output_dataset, input_dataset):
    input_dataset = input_dataset.dataframe()
    output_dataset.write_dataframe(input_dataset, options={"noho": "true"})
导航至投影(Projections)选项卡
当查看数据集时,如果其模式(Schema)中配置了 noho: true 且您拥有编辑该数据集的权限,您将看到投影(Projections)选项卡。
打开创建对话框
选择添加新投影(Add new projection)。
选择投影列(Projection Columns)
选择要包含在投影(Projection)中的列。
在大多数情况下,选择所有列(All columns)是合适的。但如果您知道查询只会选择列的子集,则可以调整此设置。
选择投影类型(Projection Type)
选择投影(Projection)的类型。
- 对于过滤优化投影(Filter-optimized projections),选择要过滤的列。
- 列的顺序很重要,因为投影(Projection)只会加速该列表前缀上的查询。
- 对于连接优化投影(Join-optimized projections),选择连接列和桶计数(Bucket count)。
- 仅在此精确列集上加速连接操作。
- 当连接到显式分桶的数据集或另一个连接优化数据集时,桶计数必须相等。
创建投影(Projection)
选择创建投影(Create projection)按钮。
此时投影(Projection)已创建但尚未包含数据。这由投影旁边的红色警告图标表示。要在查询中使用该投影,必须按照后续步骤先进行构建。
设置构建(Build)
为了让您更好地控制资源使用,维护投影(Projection)的内部构建不会自动调度;您需要显式设置一个构建。
首先,切换在当前分支上启用投影构建(Enable projection builds on the current branch)开关。这将允许在当前分支上运行构建。
然后,配置构建的调度计划。如果您想在另一个分支上调度构建,则需要导航到该分支并重复此过程。
(可选)构建投影(Projection)
如果您不想等待调度执行,可以通过选择构建(Build)按钮显式构建投影(Projection)。
现在,等待构建完成。在投影(Projection)更新到最新状态之前,可能会运行多个构建。投影构建状态(Projection Build Status)行旁边的绿色勾选标记表示投影(Projection)现已完全更新到最新状态。
投影(Projection)现已更新到最新状态,并将用于对该数据集的读取操作。