Moving to production(迁移至生产环境)
:::callout{theme="neutral"} We recommend using Code Workbook or Code Workspaces for code-based analyses and pipeline prototypes. We recommend Pipeline Builder and Code Repositories for robust production pipelines and support for workflows that require an additional layer of governance and scrutiny, high data, or optimized performance.
For more information about where to write your pipeline, review our comparison of Code Workbook, Code Workspaces, and Code Repositories. :::
Once you’re satisfied with the outputs you have derived in a Workbook, you should harden your logic and output datasets to make them reliable. Doing this in Code Workbook is straightforward. We’ll run through a few simple steps that can help make your work robust and production-ready:
- Protecting branches
- Using batch builds
- Data health checks
- Organizing outputs
- Organizing the graph
- Exporting to Code Repository
Protecting branches
:::callout{theme="neutral"} To protect a branch in a Workbook, you must have Owner privileges on that Workbook. :::
Branch protection allows branches within a Workbook to be locked down, preventing anyone from editing logic in that branch directly. Instead, logic changes must be created in another branch and then merged into the protected branch. Typically, users protect the master branch in a Workbook, but you can protect any other branches as well.
To protect a branch, click the settings icon (![]() ) in the top right of the branch menu, as shown below.
) in the top right of the branch menu, as shown below.
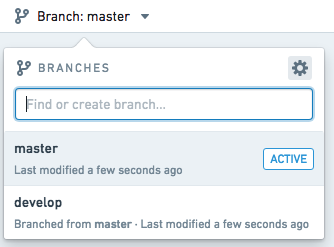
Toggle on Protect this branch to enable branch protection, as shown below. By default, a protected branch does not allow any user to use the Run button on that branch to compute output datasets. This prevents Workbook runs from colliding with scheduled builds, which are described in the next section.
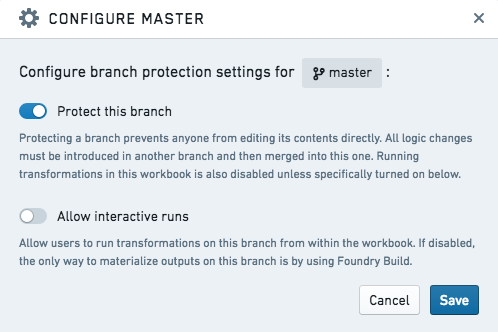
After saving, your branch will be protected and read-only.

Using batch builds
You may want to regularly refresh output datasets created in Code Workbook, either based on the input dataset(s) updating, or on a time-based cadence. You can do this by scheduling a recurring build on these output datasets.
- To schedule a recurring build on one output dataset, open dataset actions and click on Manage Schedules.
- To schedule a recurring build on multiple output datasets, click the cog icon at the top of the workbook and select Explore Data Lineage. You should now see all input datasets and saved output datasets from your workbook.
Both actions will bring you to the Data Lineage app. Click on the calendar icon in the right hand pane to open the Manage Schedules interface. Follow the prompts to set up a recurring schedule. In the image below, a schedule that builds dataset_1 and dataset_2 daily is shown.

Learn more about creating schedules in Data Lineage.
Note that batch builds will not update transforms that are not saved as datasets (e.g. unpersisted transforms). Concretely, consider the case where unpersisted transform A is the parent of persisted transform B. If I use batch build to build transform B, transform B will use the latest logic from transform A, and the latest data from the upstream input dataset. However, the preview shown in the workbook for transform A, as well as any visualization created in transform A, will not be updated by this batch build.
Data health checks
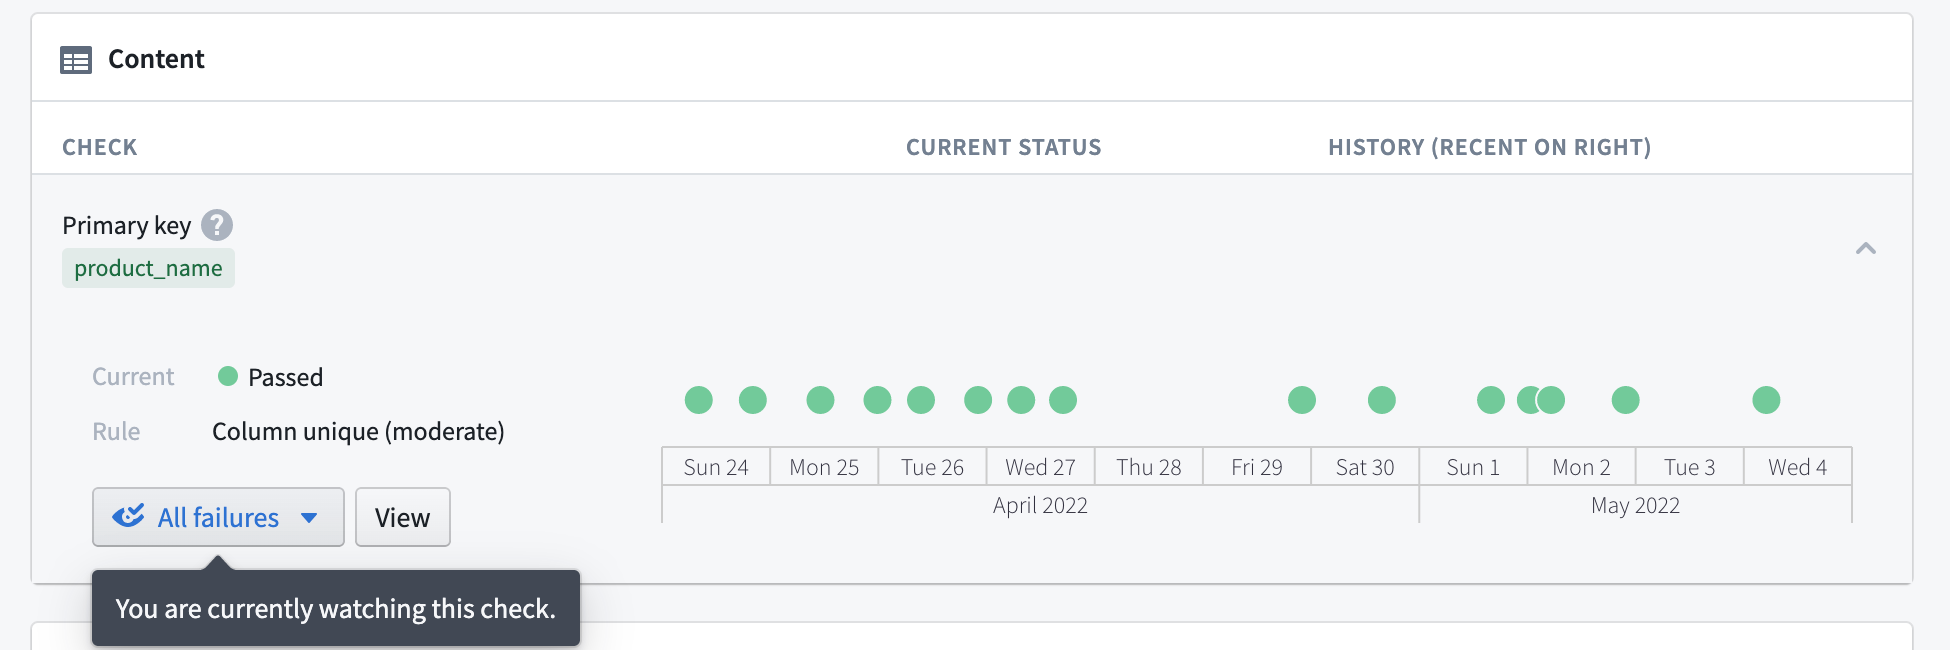
Another best practice for output datasets is adding Data Health checks. Open your output dataset and click the Health tab to access the Data Health page. Setting health checks allows you to receive notifications if a dataset’s build fails, it becomes stale, or fails to conform to some other requirement you specify.
Learn more about Data Health in Foundry.
Organizing outputs
When using Workbooks as part of your project, we recommend creating the following folder structure in the project:
- /data
- /workbooks
- /templates
Once this folder structure is set up, you can share a new Workbook from your home folder easily:
- Move your Workbook to the
/workbooksdirectory. - If you created any templates in your Workbook, move them to the
/templatesdirectory. - To move datasets, click the Output dropdown in the top-left of the Workbook and then click “Change folder…” to choose a folder where new output datasets will be added. Choose the
/datafolder in your project. By default, all the datasets you derived in your Workbook will be moved to the new folder you choose.


Organizing the graph
You may want to curate and organize your graph to allow other users to easily understand the flow of transformation. Two organizational features available in Code Workbook are node coloring and auto-layout.
You can use node coloring to visually group nodes on the graph. Create a new color group by clicking on the Colors button at the top right, and add nodes to the color group by selecting them and using the + button on the color group. In the workbook contents helper, you can also sort the list of datasets by color group.
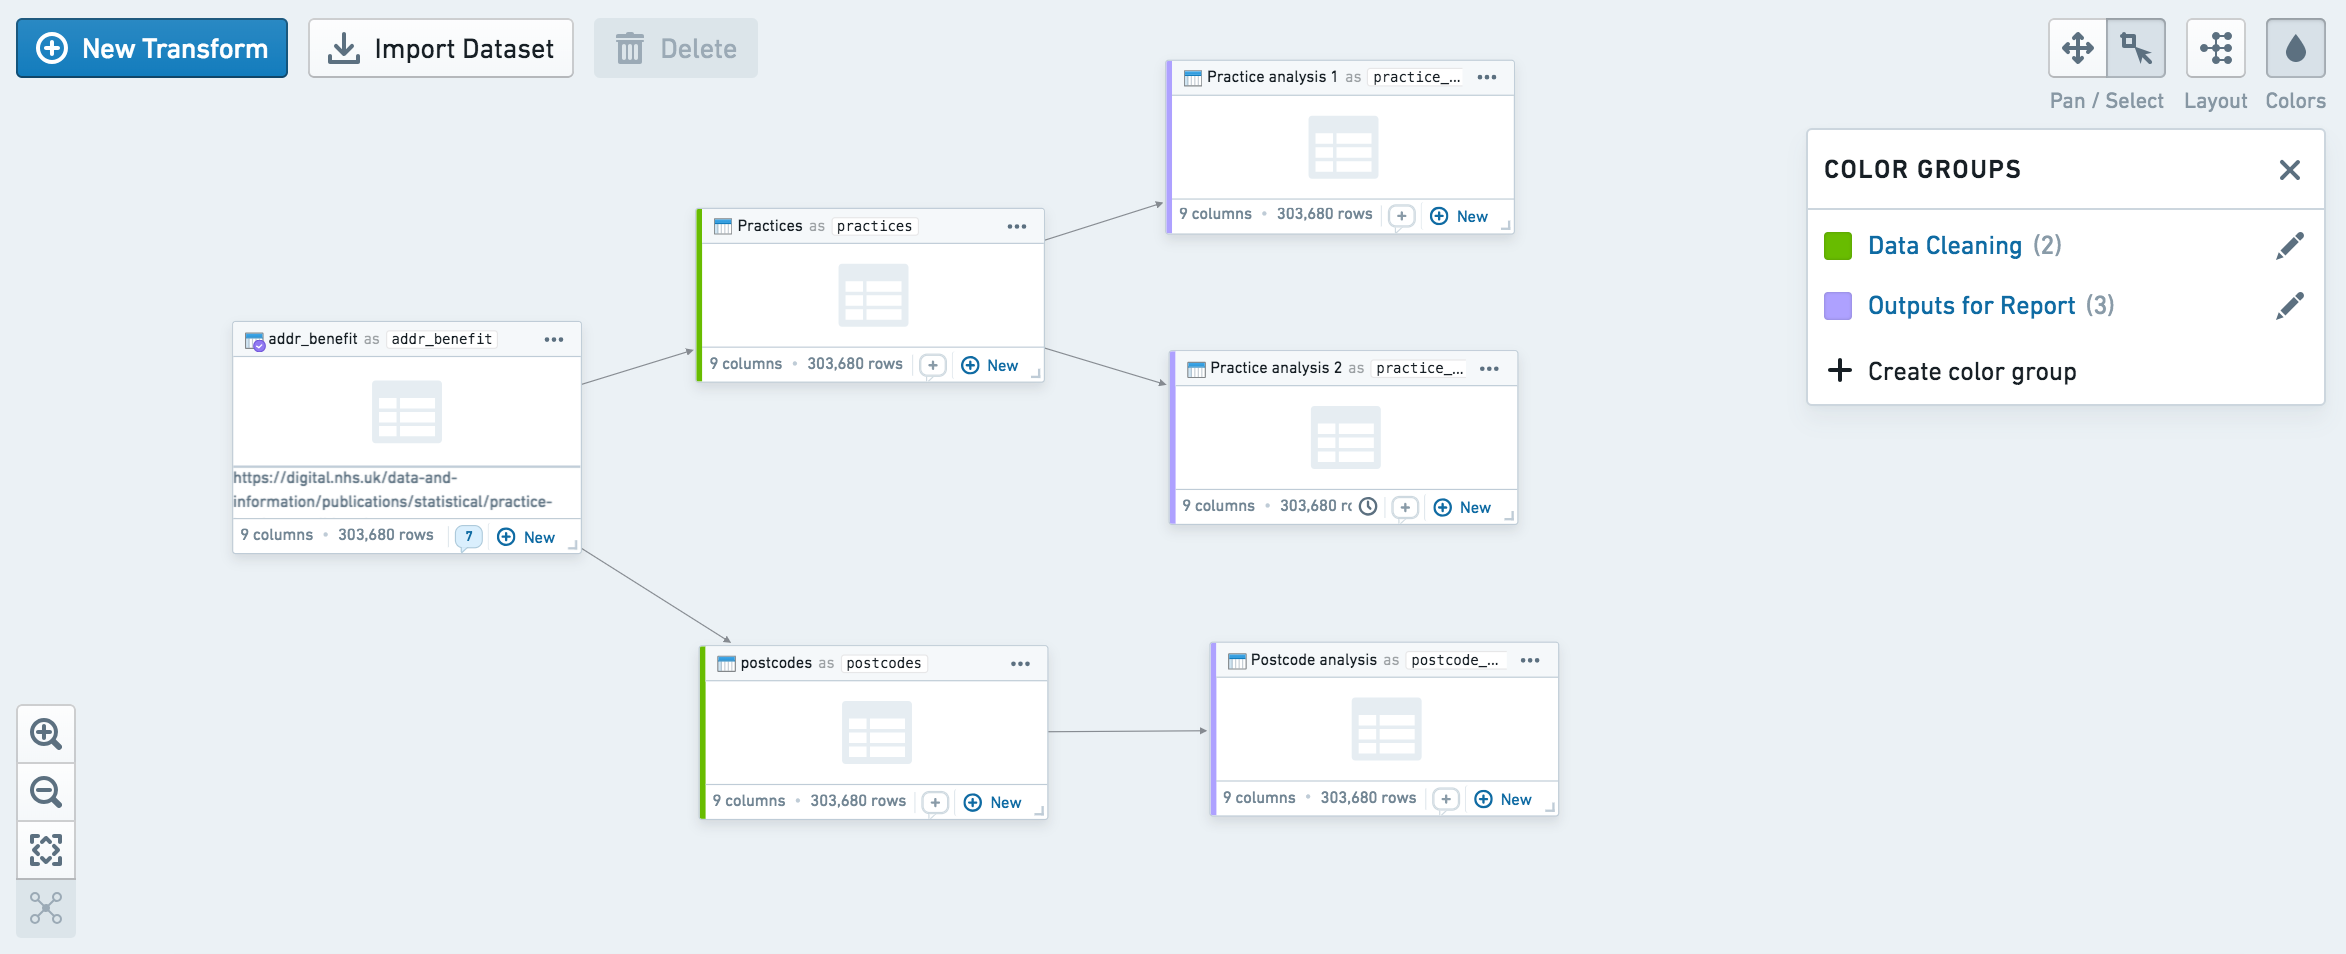
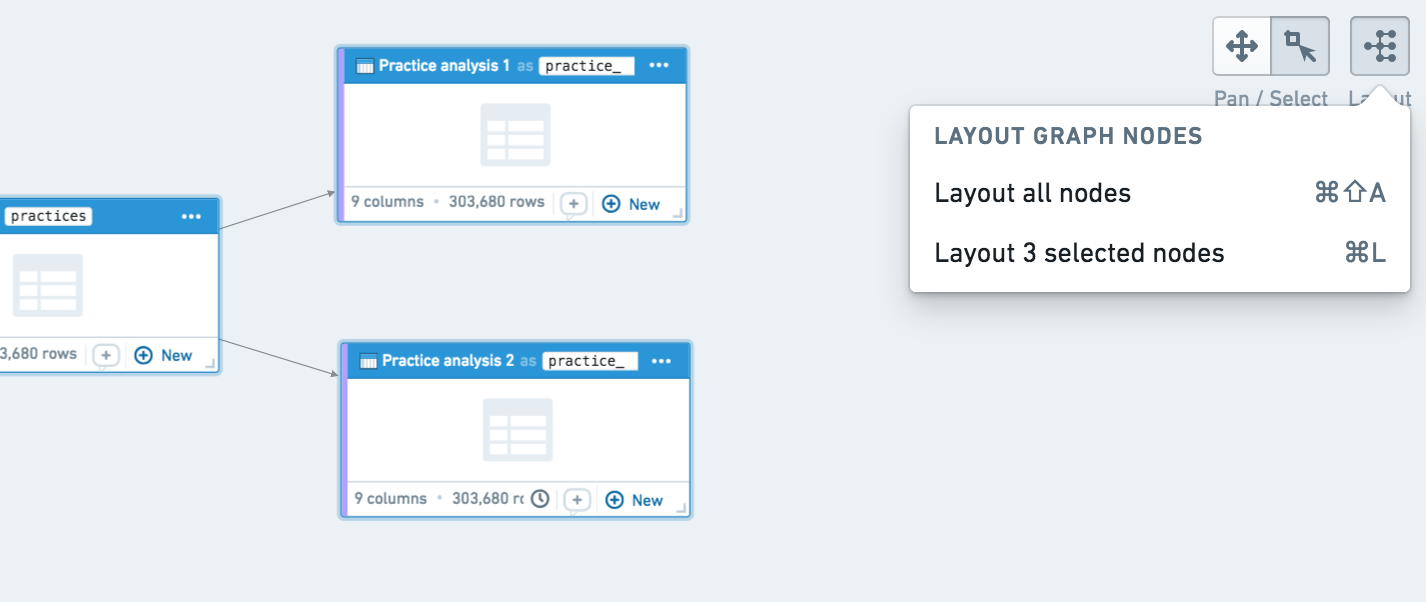
You can also auto-layout sections of your graph by clicking the layout button at the top right. By default, auto-layout arranges the entire graph, but you can also select specific nodes and click auto-layout to arrange only those nodes.
Exporting to Code Repository
If you have finished prototyping a pipeline in Code Workbook and would like to move your code to Code Repositories, you can use the Export to Code Repository helper. Learn more about exporting to Code Repositories.
You may want to move your code to Code Repositories for a variety of reasons:
- Code Repositories provides full Git support, allowing users to view and revert to previous commits.
- Code Repositories supports incremental transforms and multi-output transforms.
- Code Repositories supports unmarking workflows and provides control over when PRs can be merged using branch settings.
中文翻译
迁移至生产环境
:::callout{theme="neutral"} 我们建议使用 Code Workbook 或 Code Workspaces 进行基于代码的分析和流水线原型设计。对于需要更高治理和审查层级、大数据量或优化性能的稳健生产流水线及工作流支持,我们推荐使用 Pipeline Builder 和 Code Repositories。
有关在何处编写流水线的更多信息,请查阅我们的 Code Workbook、Code Workspaces 与 Code Repositories 对比。 :::
当您对在 Workbook 中得出的输出结果感到满意后,应强化您的逻辑和输出数据集,使其更加可靠。在 Code Workbook 中完成此操作非常直接。我们将介绍几个简单步骤,帮助您将工作成果变得稳健并达到生产就绪状态:
保护分支
:::callout{theme="neutral"} 要保护 Workbook 中的分支,您必须对该 Workbook 拥有所有者(Owner)权限。 :::
分支保护(Branch protection) 允许锁定 Workbook 内的分支,防止任何人直接编辑该分支中的逻辑。相反,逻辑变更必须在其他分支中创建,然后合并到受保护的分支中。通常,用户会保护 Workbook 中的 master 分支,但您也可以保护任何其他分支。
要保护分支,请点击分支菜单右上角的设置图标(![]() ),如下图所示。
),如下图所示。
如下所示,开启 保护此分支(Protect this branch) 以启用分支保护。默认情况下,受保护的分支不允许任何用户在该分支上使用 运行(Run) 按钮来计算输出数据集。这可以防止 Workbook 运行与计划构建(将在下一节中介绍)发生冲突。
保存后,您的分支将受到保护并变为只读状态。
使用批量构建
您可能希望定期刷新在 Code Workbook 中创建的输出数据集,无论是基于输入数据集的更新,还是基于时间周期。您可以通过在这些输出数据集上安排定期构建来实现此目的。
- 要为单个输出数据集安排定期构建,请打开数据集操作菜单,点击 管理计划(Manage Schedules)。
- 要为多个输出数据集安排定期构建,请点击 workbook 顶部的齿轮图标,选择 探索数据沿袭(Explore Data Lineage)。此时您将看到 workbook 中的所有输入数据集和已保存的输出数据集。
这两种操作都会将您带到数据沿袭(Data Lineage)应用。点击右侧窗格中的日历图标,打开 管理计划(Manage Schedules) 界面。按照提示设置定期计划。下图显示了一个每日构建 dataset_1 和 dataset_2 的计划。
请注意,批量构建不会更新未保存为数据集的转换(例如未持久化的转换)。具体来说,考虑未持久化转换 A 是持久化转换 B 的父级的情况。如果我使用批量构建来构建转换 B,转换 B 将使用转换 A 的最新逻辑以及上游输入数据集的最新数据。但是,workbook 中为转换 A 显示的预览以及转换 A 中创建的任何可视化内容,都不会通过此批量构建进行更新。
数据健康检查
输出数据集的另一个最佳实践是添加数据健康检查(Data Health checks)。打开您的输出数据集,点击健康(Health)选项卡以访问数据健康页面。设置健康检查后,如果数据集的构建失败、数据过时或未能满足您指定的其他要求,您将收到通知。
组织输出
当在项目中使用 Workbooks 时,我们建议在项目中创建以下文件夹结构:
- /data
- /workbooks
- /templates
设置好此文件夹结构后,您可以轻松地从主文件夹共享新的 Workbook:
- 将您的 Workbook 移动到
/workbooks目录。 - 如果您在 Workbook 中创建了任何模板,请将它们移动到
/templates目录。 - 要移动数据集,请点击 Workbook 左上角的输出(Output)下拉菜单,然后点击"更改文件夹(Change folder)..."以选择将添加新输出数据集的文件夹。选择项目中的
/data文件夹。默认情况下,您在 Workbook 中派生的所有数据集都将移动到您选择的新文件夹。
组织图谱
您可能希望整理和组织您的图谱,以便其他用户能够轻松理解转换流程。Code Workbook 中提供的两个组织功能是节点着色(node coloring)和自动布局(auto-layout)。
您可以使用节点着色在视觉上对图谱上的节点进行分组。点击右上角的 颜色(Colors) 按钮创建新的颜色组,然后选择节点并使用颜色组上的 + 按钮将节点添加到颜色组中。在 workbook 内容辅助工具中,您还可以按颜色组对数据集列表进行排序。
您还可以通过点击右上角的布局按钮来自动布局图谱的某些部分。默认情况下,自动布局会排列整个图谱,但您也可以选择特定节点,然后点击自动布局来仅排列这些节点。
导出至 Code Repository
如果您已完成在 Code Workbook 中的流水线原型设计,并希望将代码移至 Code Repositories,可以使用 导出至 Code Repository(Export to Code Repository) 辅助工具。了解更多关于导出至 Code Repositories 的信息。
您可能出于多种原因希望将代码移至 Code Repositories: