Set up Python local development(设置 Python 本地开发环境)
It is possible to carry out local development of Python transforms repositories, allowing for high-speed iterative development.
Work with your Python transforms repository locally
There are two options for developing locally in your Python transforms repository:
- Option 1: Use the Palantir extension for Visual Studio Code [Recommended]
- Option 2: Clone the repository and use Gradle commands
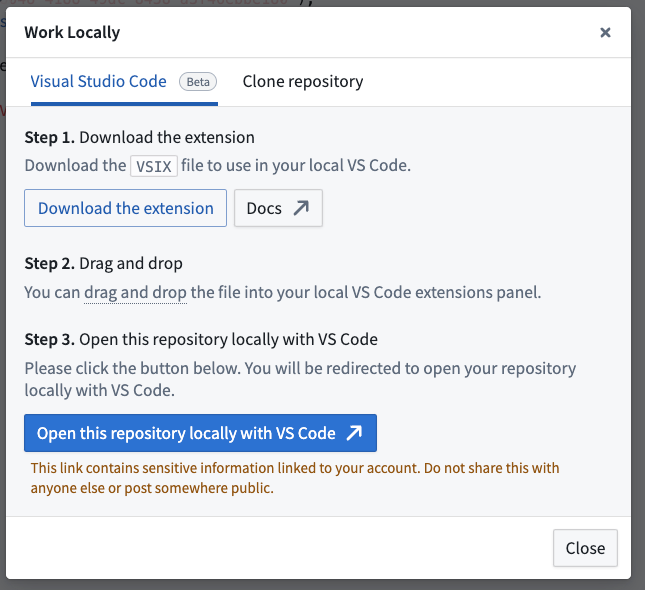
Option 1: Use the Palantir extension for Visual Studio Code [Recommended]
:::callout{theme="neutral"} To enable the extension and local preview capabilities, contact your platform administrator to modify Code Repositories settings in Control Panel. The Palantir extension for Visual Studio Code is enabled by default when using VS Code workspaces. :::
Prerequisites
- Ensure you have Visual Studio Code ↗ installed.
- Download the Palantir extension for Visual Studio Code if it is enabled for your enrollment.
Benefits
- Preview your Python transforms directly from your local Visual Studio Code environment. The Palantir extension for Visual Studio Code supports full datasets (sample-less preview), so you can preview full datasets without losing precision. Note that to run previews locally, you will need your platform administrators to enable local preview through Control Panel.
- Initiate a build directly from your own code editor.
- Debug your code and run tests directly from the editor.
- Leverage the library panel to add libraries.
Troubleshooting
If you experience unexpected language server errors such as broken imports, the Python interpreter's automatic set up may have failed. To fix this, you can manually set up the interpreter by navigating to the Command Palette ↗, then typing Python: Select interpreter and choosing a Python interpreter matching the path ./maestro/bin/python. The .maestro folder should be present if the Palantir extension successfully ran the Palantir: Install Python environment command.
Option 2: Clone the repository and use Gradle commands
Prerequisites
- Ensure your repository is upgraded to the latest template version by following the steps outlined here.
- Ensure that the environment variables
CI,JEMMA, andCAare not set. - If running on an Apple silicon Mac, ensure that Rosetta 2 ↗ is installed. You can install Rosetta 2 by running
/usr/sbin/softwareupdate --install-rosetta --agree-to-licensein the terminal.
Clone the repository locally
- In the menu bar of your repository, select the desktop icon to the right of Data lineage to open the dialog and copy the given repository URL.

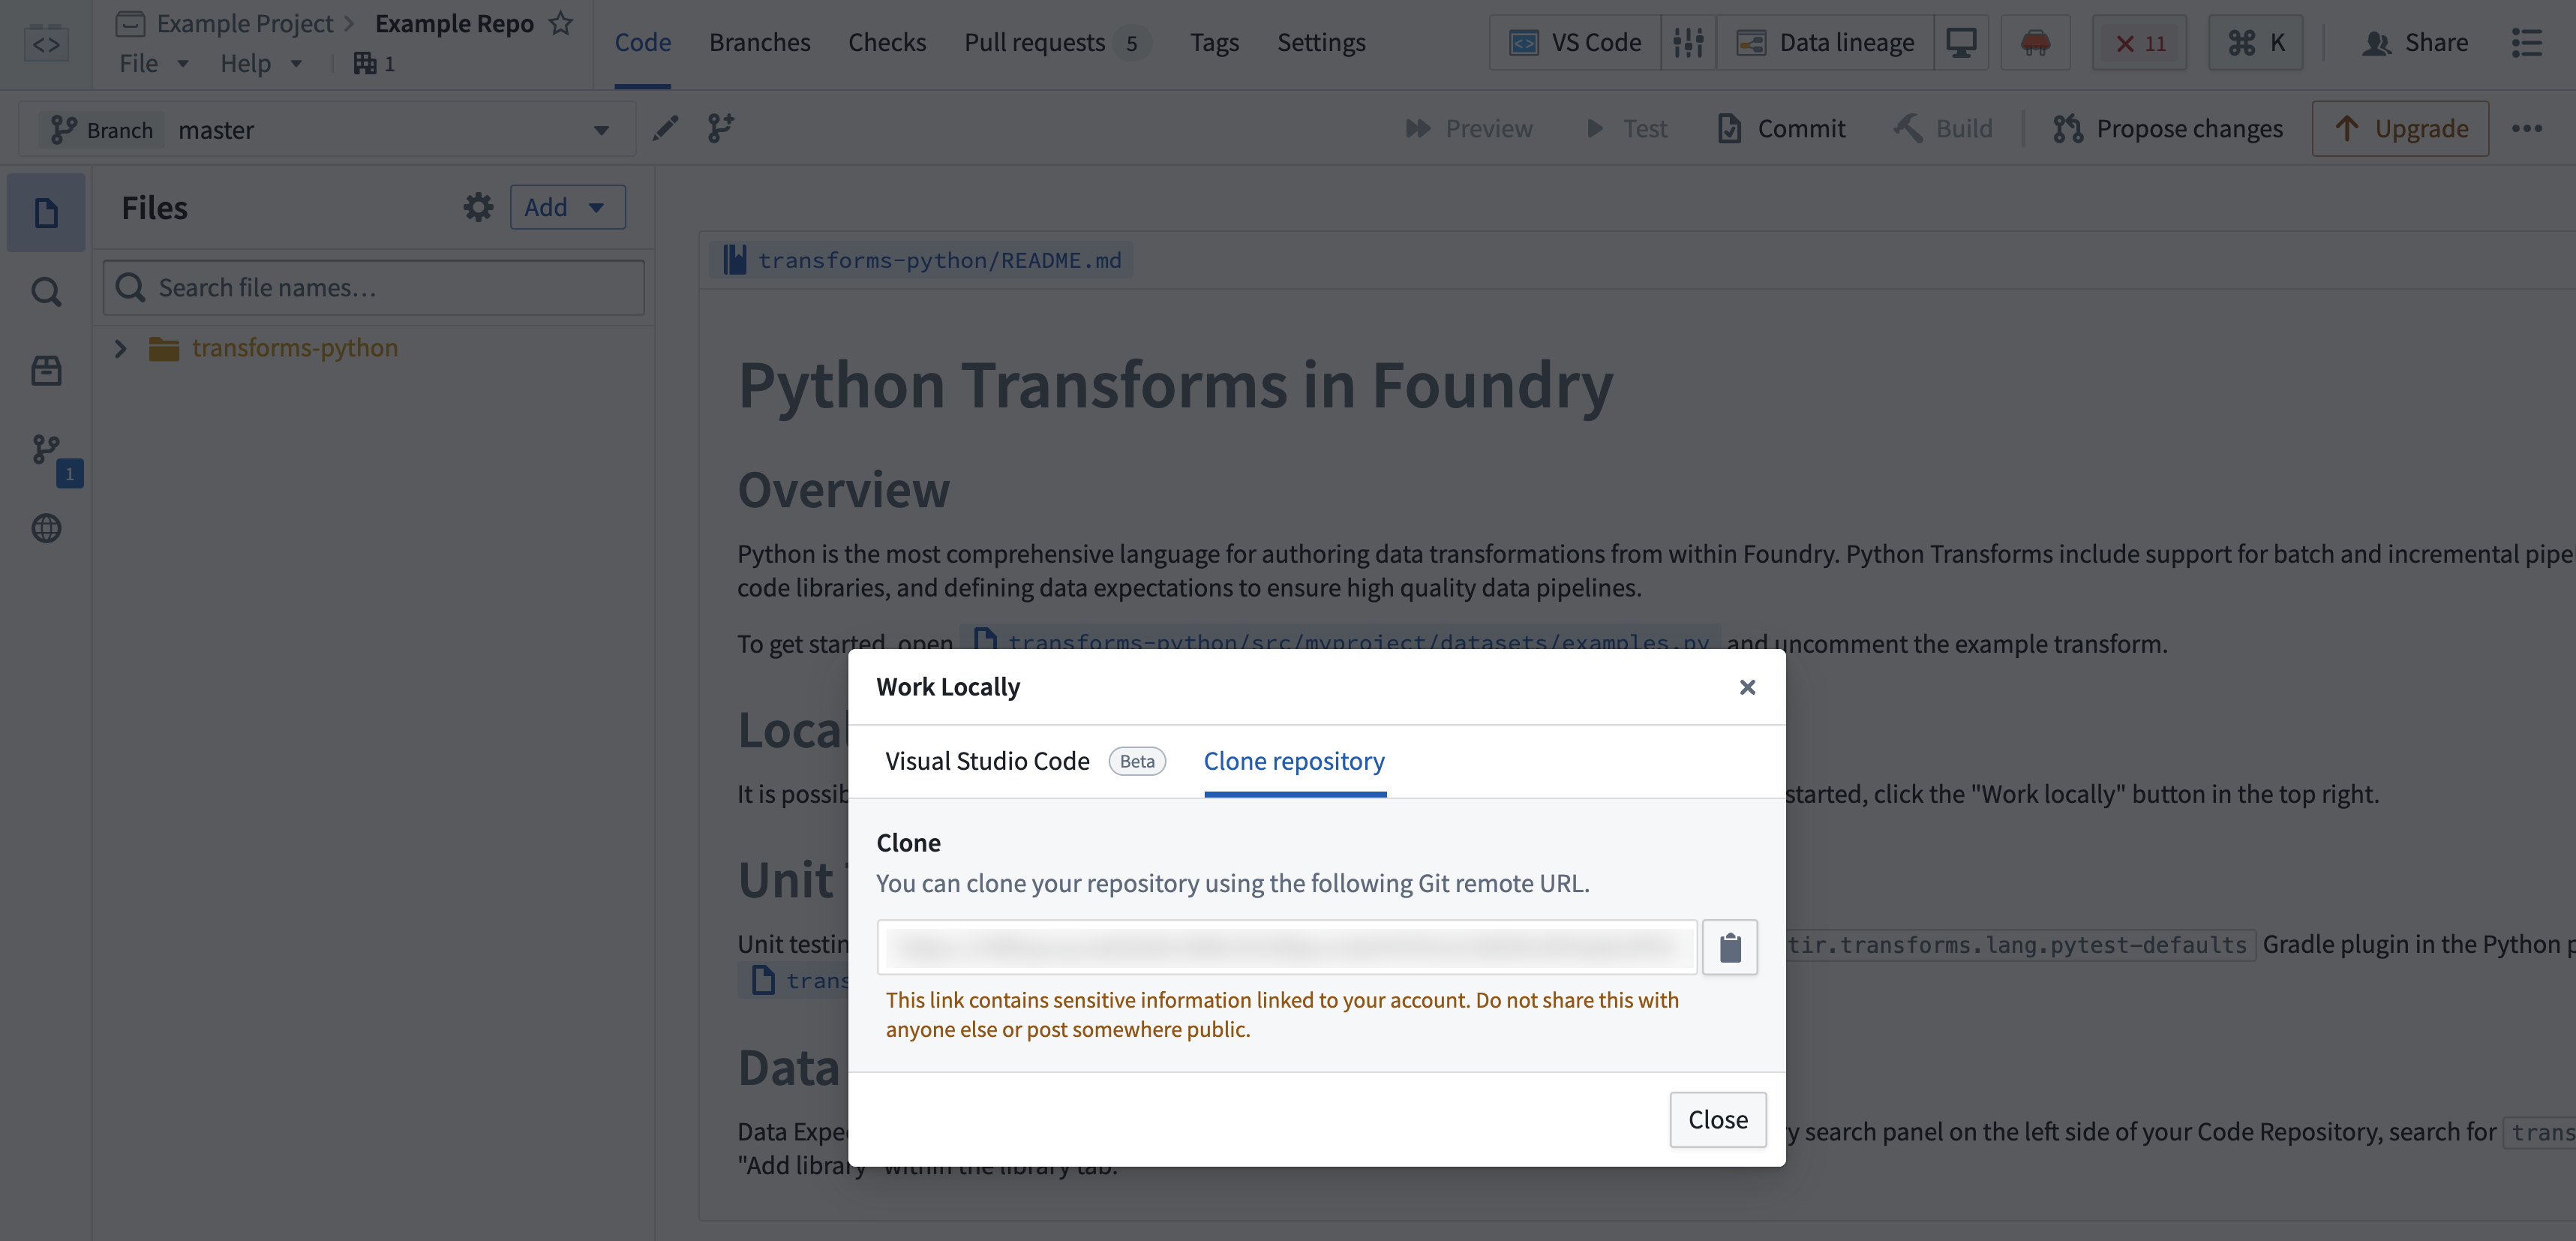
- Using the command line, run
git clone <URL>on your local machine in a directory of your choice. Then, use thecdcommand to navigate to the repository.
Limitations
- The token granted for cloning is short-lived and needs to be refreshed every 7 days.
- You will still need to push your changes to Foundry to publish job specs or artifacts, or if you wish to run checks or builds.
Preview
Dataset previews are supported in local development. Refer to local preview for more details.
中文翻译
设置 Python 本地开发环境
可以对 Python 转换(transforms)仓库进行本地开发,从而实现高速迭代开发。
在本地使用 Python 转换仓库
在 Python 转换仓库中进行本地开发有两种选择:
选项 1:使用适用于 Visual Studio Code 的 Palantir 扩展 [推荐]
:::callout{theme="neutral"} 要启用扩展和本地预览功能,请联系您的平台管理员,在控制面板中修改代码仓库设置。使用 VS Code 工作区时,适用于 Visual Studio Code 的 Palantir 扩展默认启用。 :::
前提条件
- 确保已安装 Visual Studio Code ↗。
- 如果您的注册环境已启用该扩展,请下载适用于 Visual Studio Code 的 Palantir 扩展。
优势
- 直接从本地 Visual Studio Code 环境预览 Python 转换。适用于 Visual Studio Code 的 Palantir 扩展支持完整数据集(无样本预览),因此您可以预览完整数据集而不会损失精度。请注意,要在本地运行预览,您需要让平台管理员通过控制面板启用本地预览。
- 直接从代码编辑器启动构建。
- 调试代码并直接从编辑器运行测试。
- 利用库面板添加库。
故障排除
如果您遇到意外的语言服务器错误(例如导入中断),可能是 Python 解释器的自动设置失败。要解决此问题,您可以手动设置解释器:导航至命令面板 ↗,然后输入 Python: Select interpreter,并选择与路径 ./maestro/bin/python 匹配的 Python 解释器。如果 Palantir 扩展成功运行了 Palantir: Install Python environment 命令,则 .maestro 文件夹应该存在。
选项 2:克隆仓库并使用 Gradle 命令
前提条件
- 按照此处概述的步骤,确保您的仓库已升级到最新模板版本。
- 确保未设置环境变量
CI、JEMMA和CA。 - 如果在 Apple silicon Mac 上运行,请确保已安装 Rosetta 2 ↗。您可以在终端中运行
/usr/sbin/softwareupdate --install-rosetta --agree-to-license来安装 Rosetta 2。
在本地克隆仓库
- 在仓库的菜单栏中,选择数据沿袭(Data lineage)右侧的桌面图标,打开对话框并复制给定的仓库 URL。
- 使用命令行,在本地计算机上选择目录,运行
git clone <URL>。然后,使用cd命令导航到该仓库。
限制
- 用于克隆的令牌有效期较短,每 7 天需要刷新一次。
- 您仍然需要将更改推送到 Foundry 以发布作业规范(job specs)或工件(artifacts),或者如果您希望运行检查或构建。
预览
本地开发支持数据集预览。有关更多详细信息,请参阅本地预览。