Temporary scenarios(临时场景(Temporary scenarios))
Temporary scenarios are created and used only within the current session. Their metadata is not persisted in the platform and will be deleted if the user ends the current session (on Workshop, for example). These scenarios are useful for quick, ad-hoc "what-if" analyses where you do not need to collaborate or share the results. They allow you to experiment with different actions without affecting the state of your Ontology or cluttering your workspace with unnecessary saved scenarios.
Workshop tutorial
In this tutorial, you will walk through building a basic Workshop application supporting temporary scenarios.
Part I: Add the Scenario Manager widget
- From a new, empty Workshop module, navigate to the Settings panel on the left side navigation and ensure the Scenarios setting is enabled in the Advanced Functionalities section.
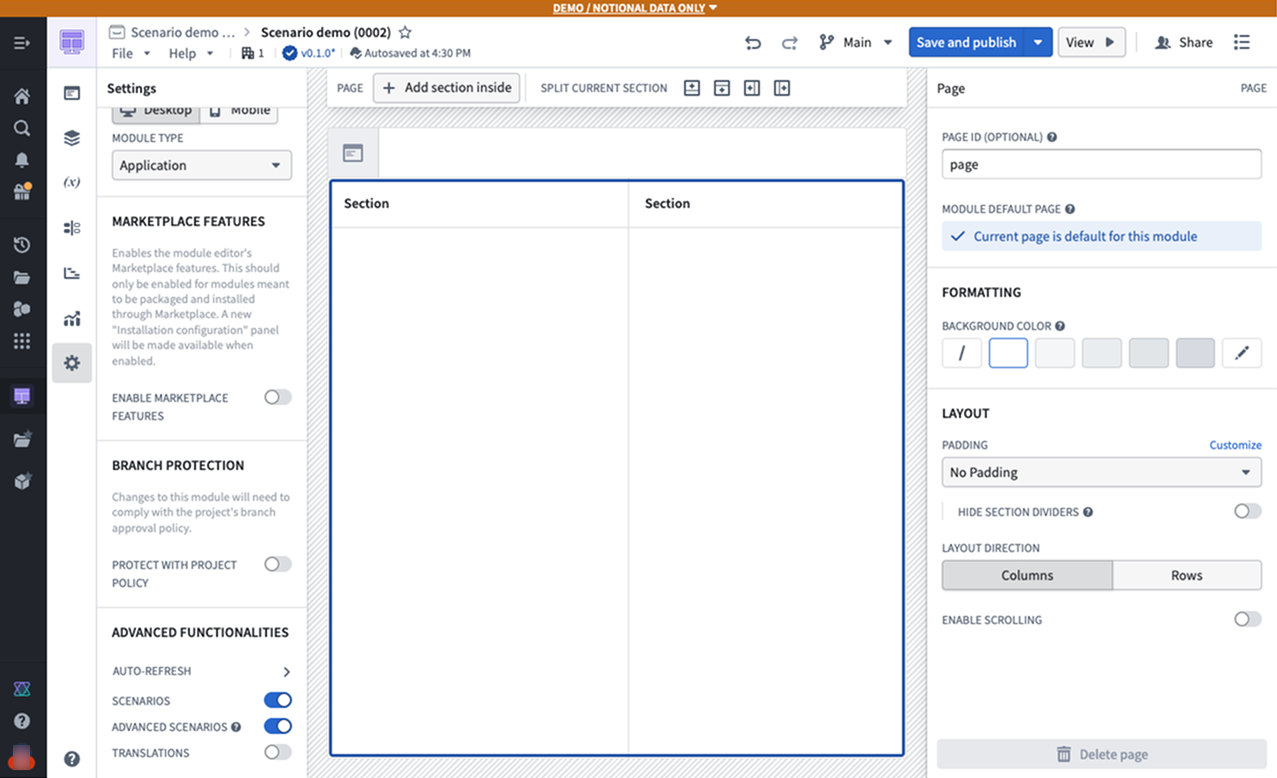
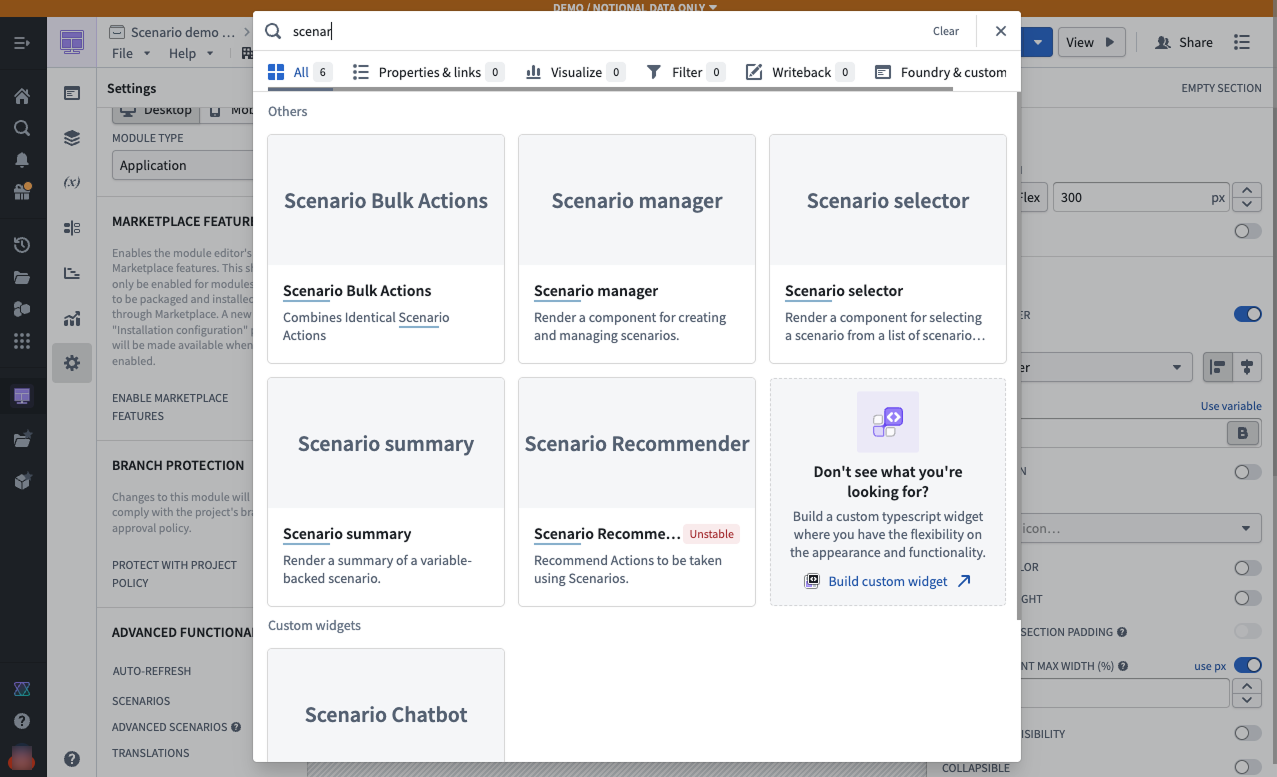
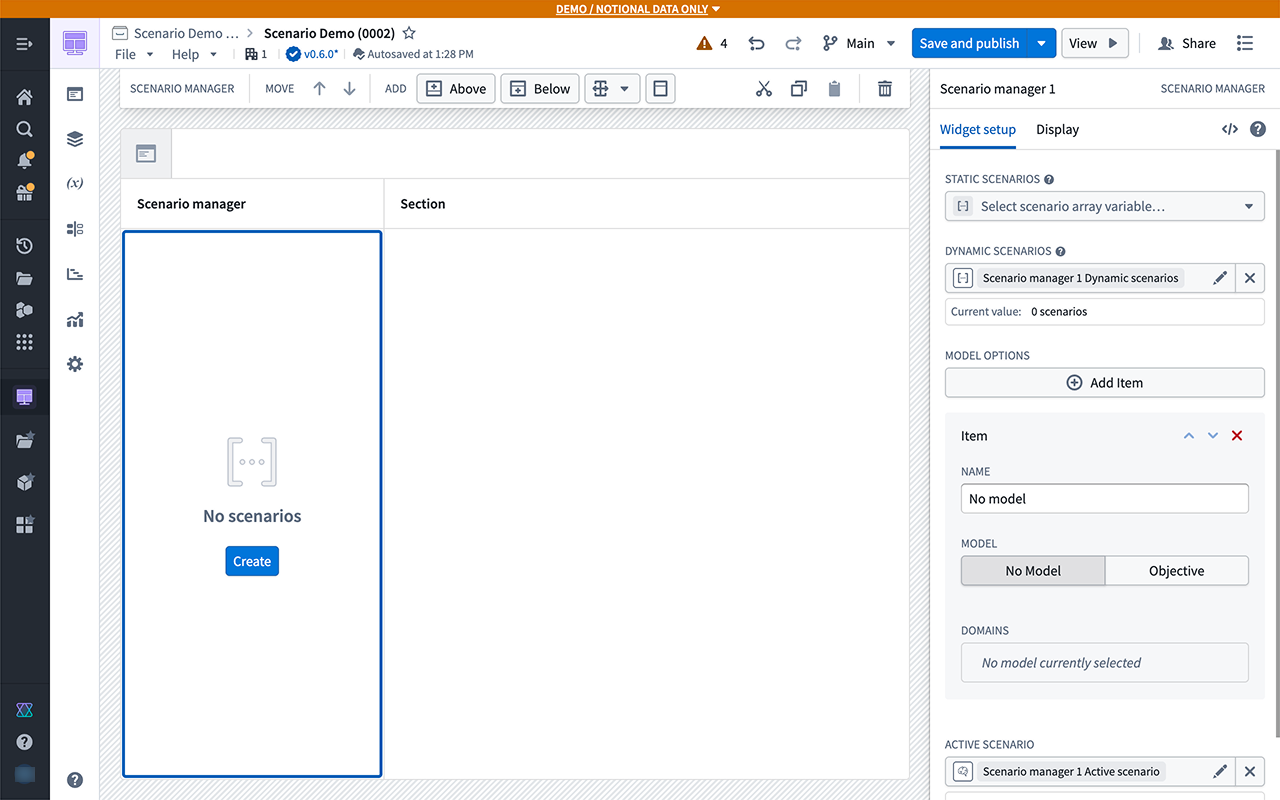
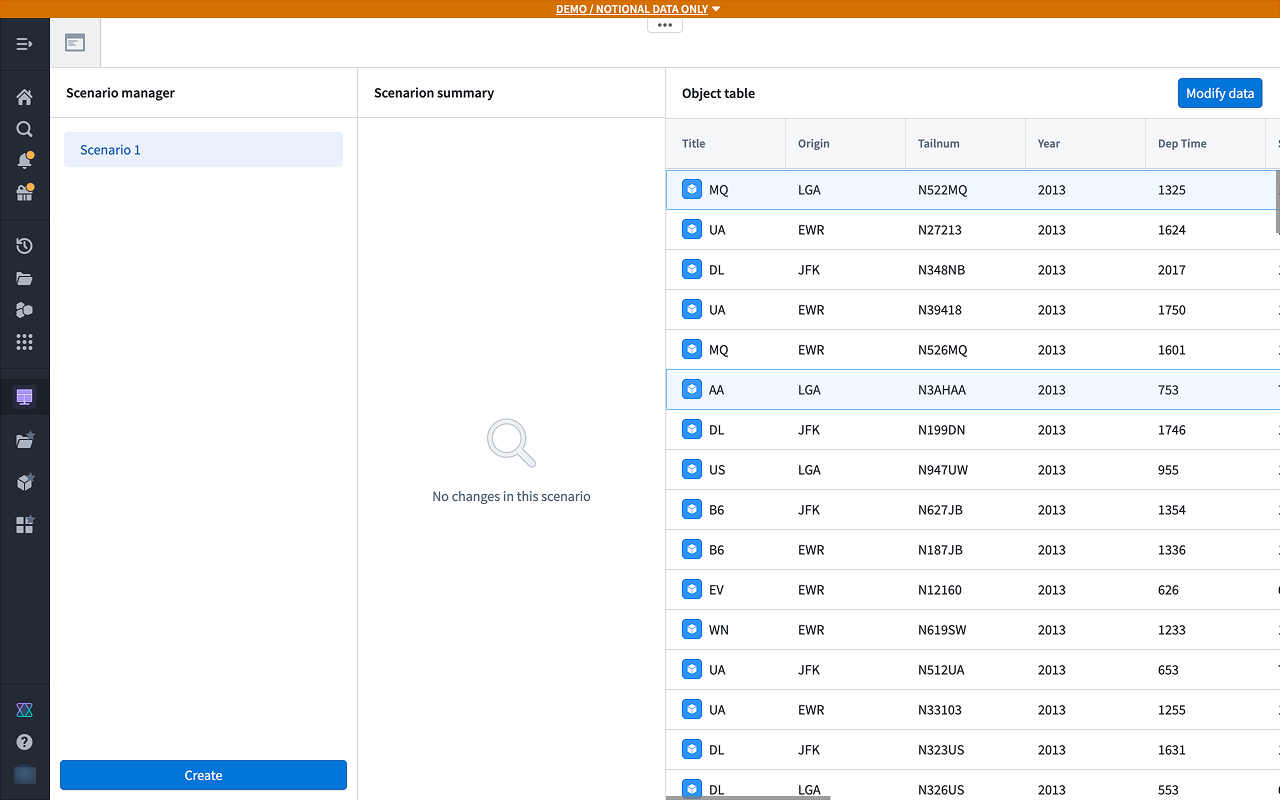
- In the sidebar section, add a Scenario Manager widget. This is one of the scenario-specific widgets in Workshop and is used to create and manage temporary scenarios that will be used throughout the module.
- From the widget setup panel on the right, configure the Dynamic scenarios field to use a new dynamic scenario. The Create button will appear in the center of the widget.
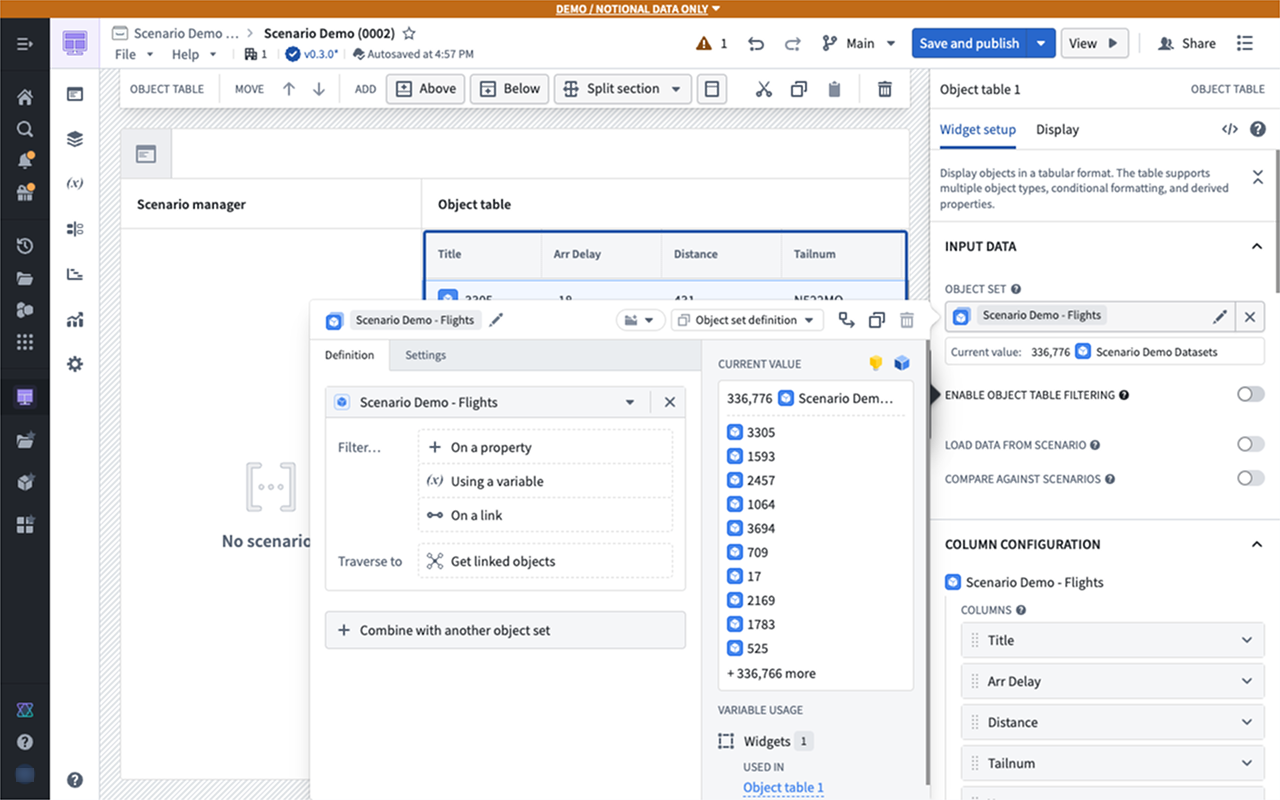
Part II: Add an Object Table widget
-
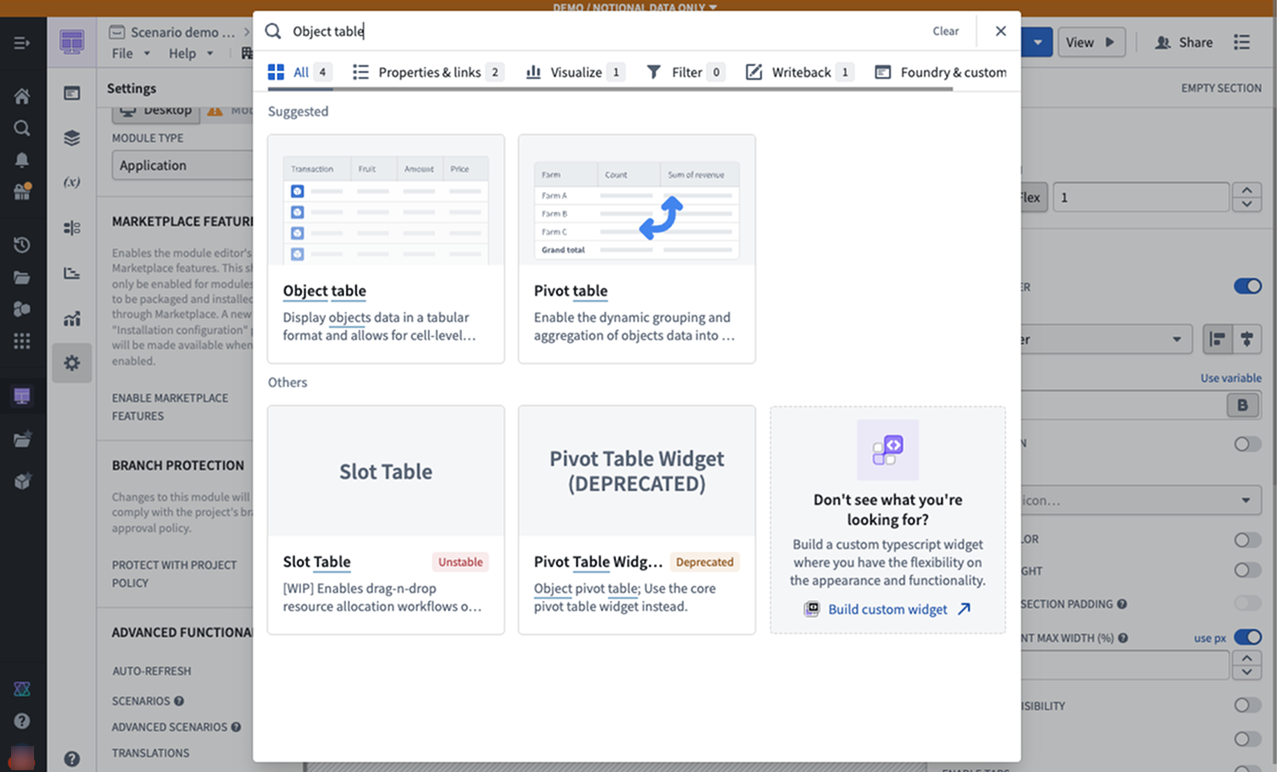
From the body of the module, add an Object Table widget.
-
You can use any object set to populate the table, but we recommend starting with an object type that already has at least one associated action configured.
-
Now, add some properties to display in the table.
-
Below the properties, enable the option to Load Data from Scenario into this widget. This option effectively makes the Object Table widget scenario-aware.
-
Select the scenario array variable produced by the Scenario Manager widget. This will cause the data in the Object Table widget to reflect any modifications to scenarios in the Scenario Manager widget rather than the raw Ontology.

Part III: Add the Scenario Summary widget
-
To preview the changes you will be making on the scenario, add the Scenario Summary widget to your module.
-
In the widget configuration, connect to the active scenario variable generated by the Scenario Manager widget.
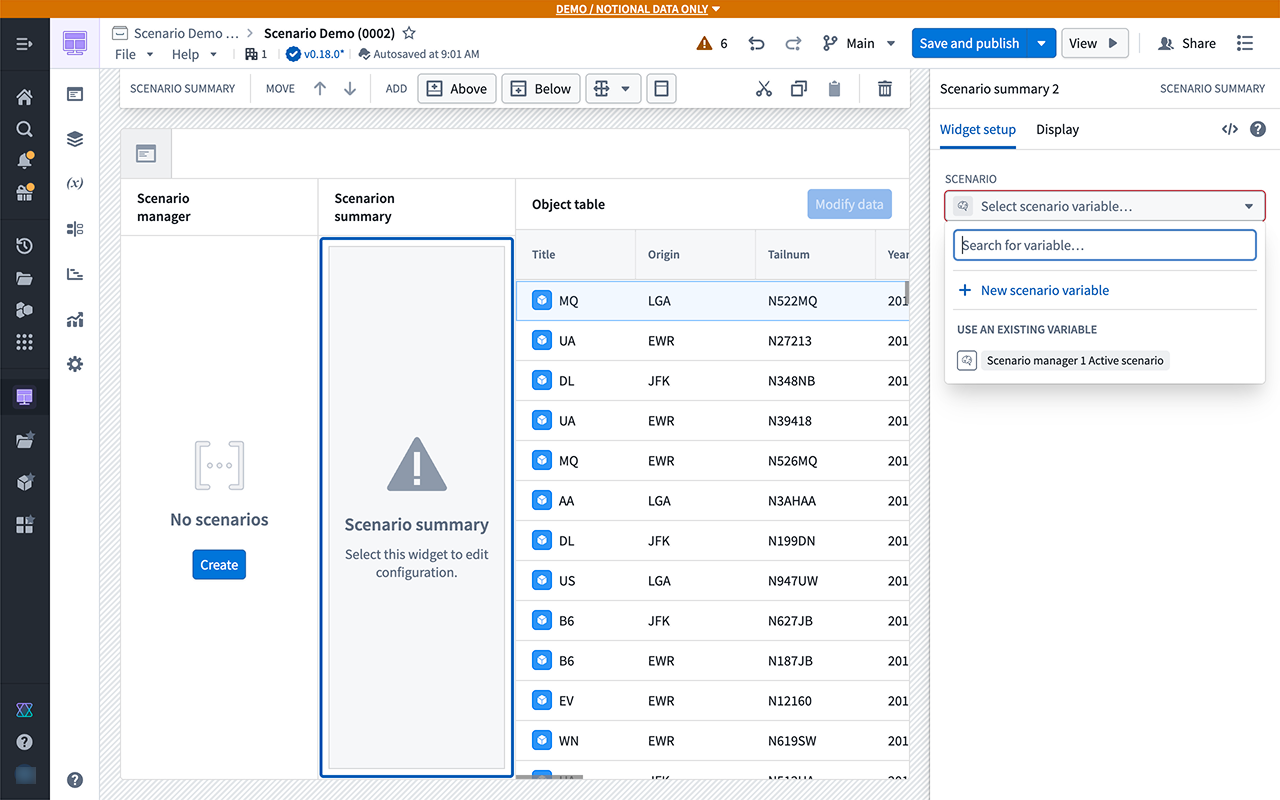
At this point, no modifications have been applied to the scenario; the data should be the same.
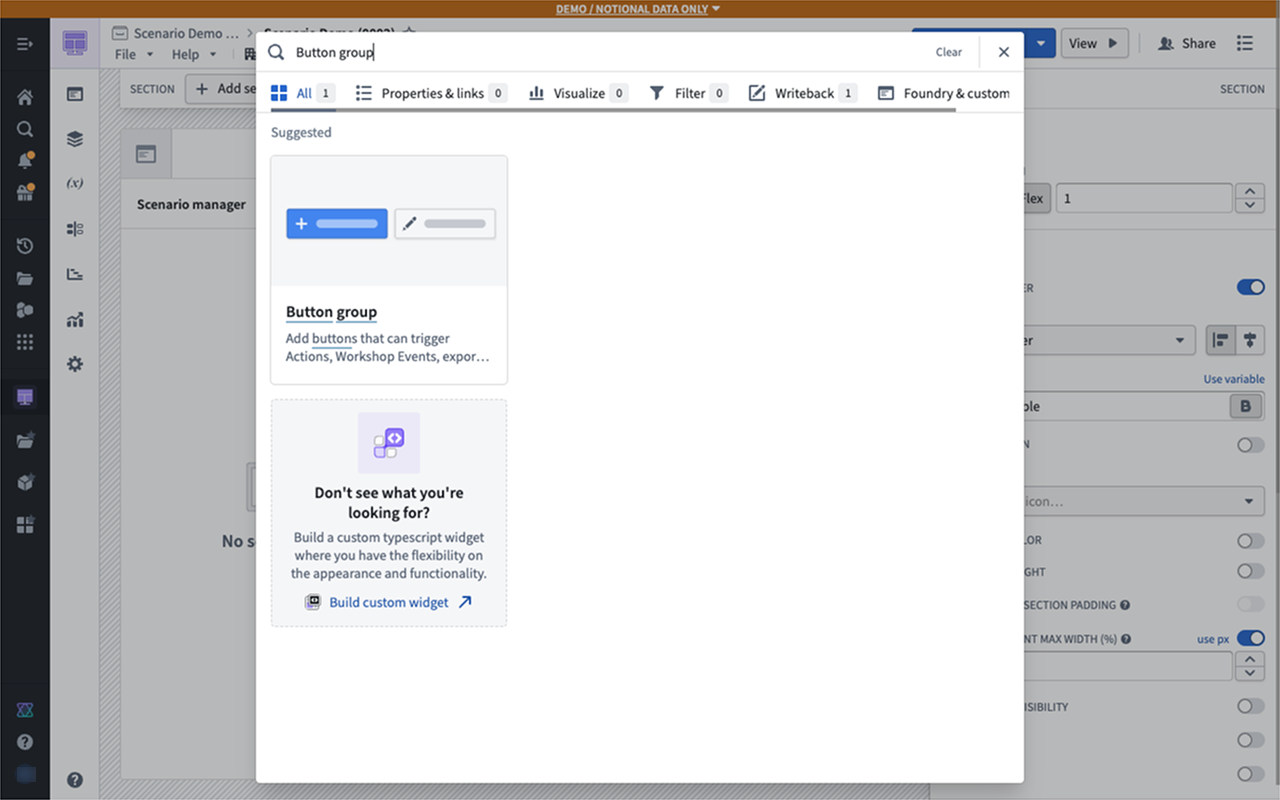
Part IV: Configure an action
-
Add a Button Group widget to configure an action to apply to your scenarios.
-
Select an action that modifies the object types in your table.
-
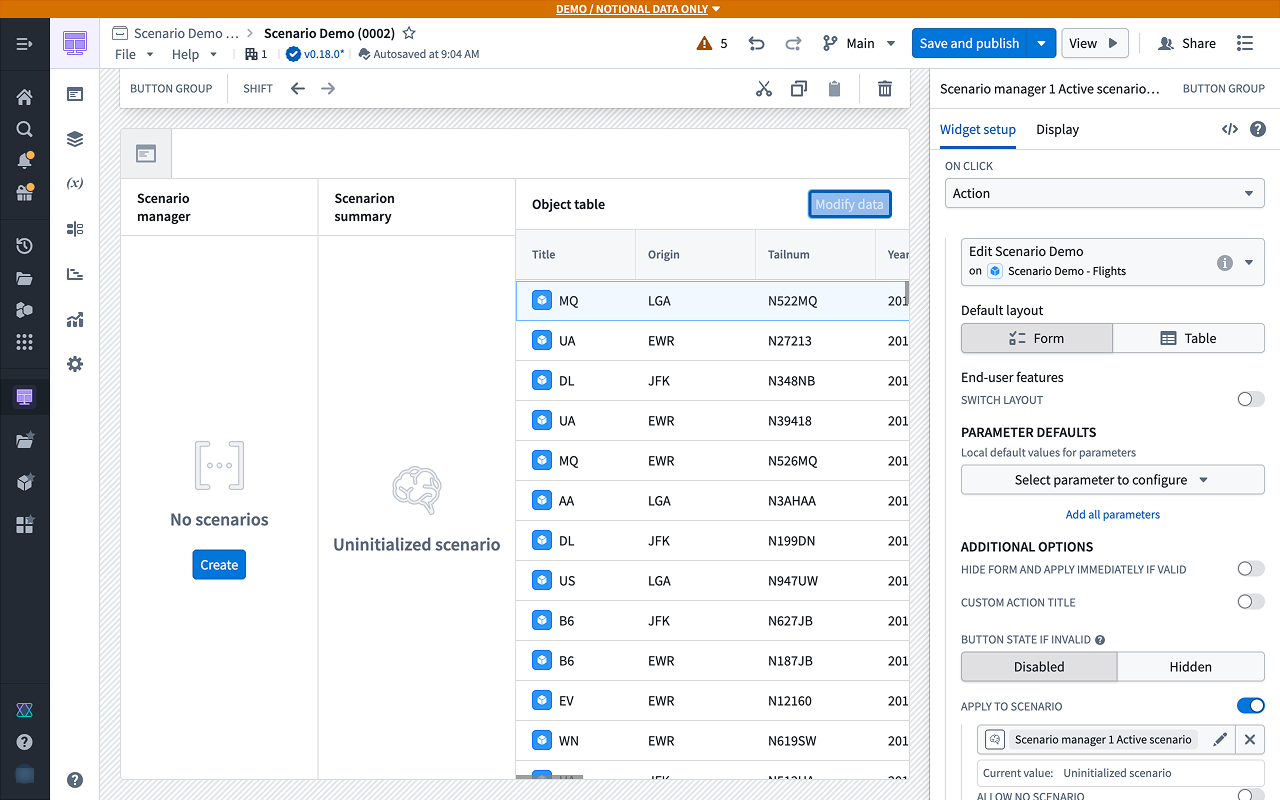
To apply this action to a scenario instead of the Ontology, enable the Apply to Scenario option and select the active scenario variable from the menu.
-
Using the newly configured action, try changing the property of any object in the table to a new value.
-
Before applying the action, create a new scenario in the Scenario Manager widget by selecting Create.
In the example below, the Year for a flight in the table is being updated. You should see the Object Table widget refresh with the new data.
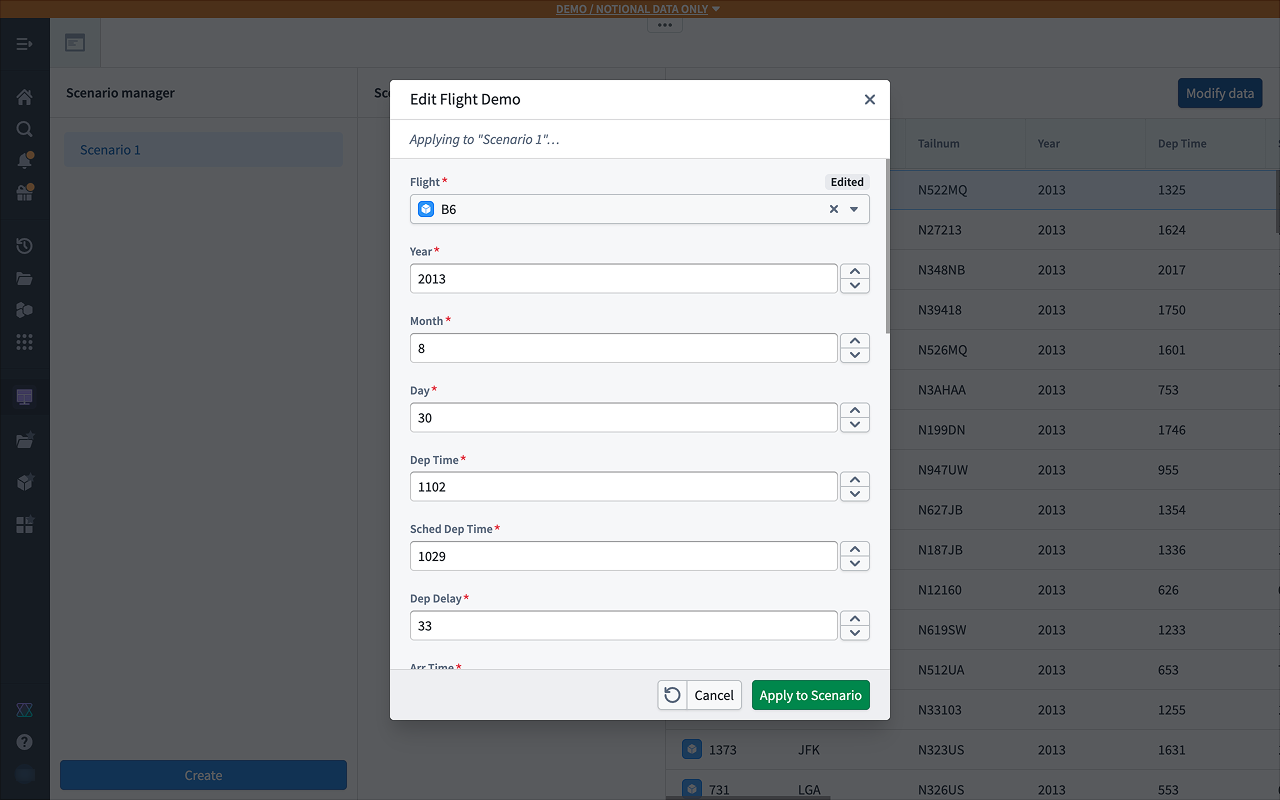
A record will appear in the Scenario Summary widget indicating the change in data. This action has not been applied to the Ontology and exists only within the scenario.
Part V: Add a chart widget
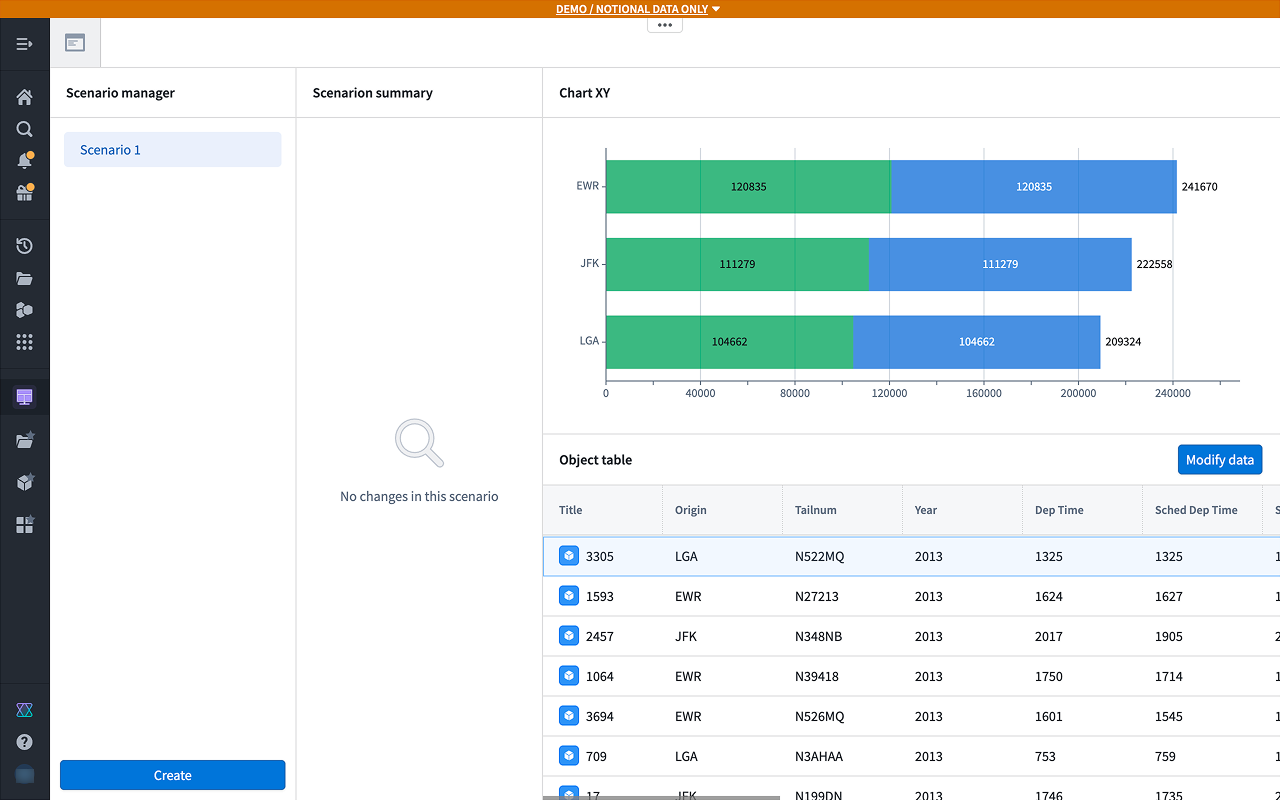
- To better visualize the results, add a section above the table with a Chart: XY widget.
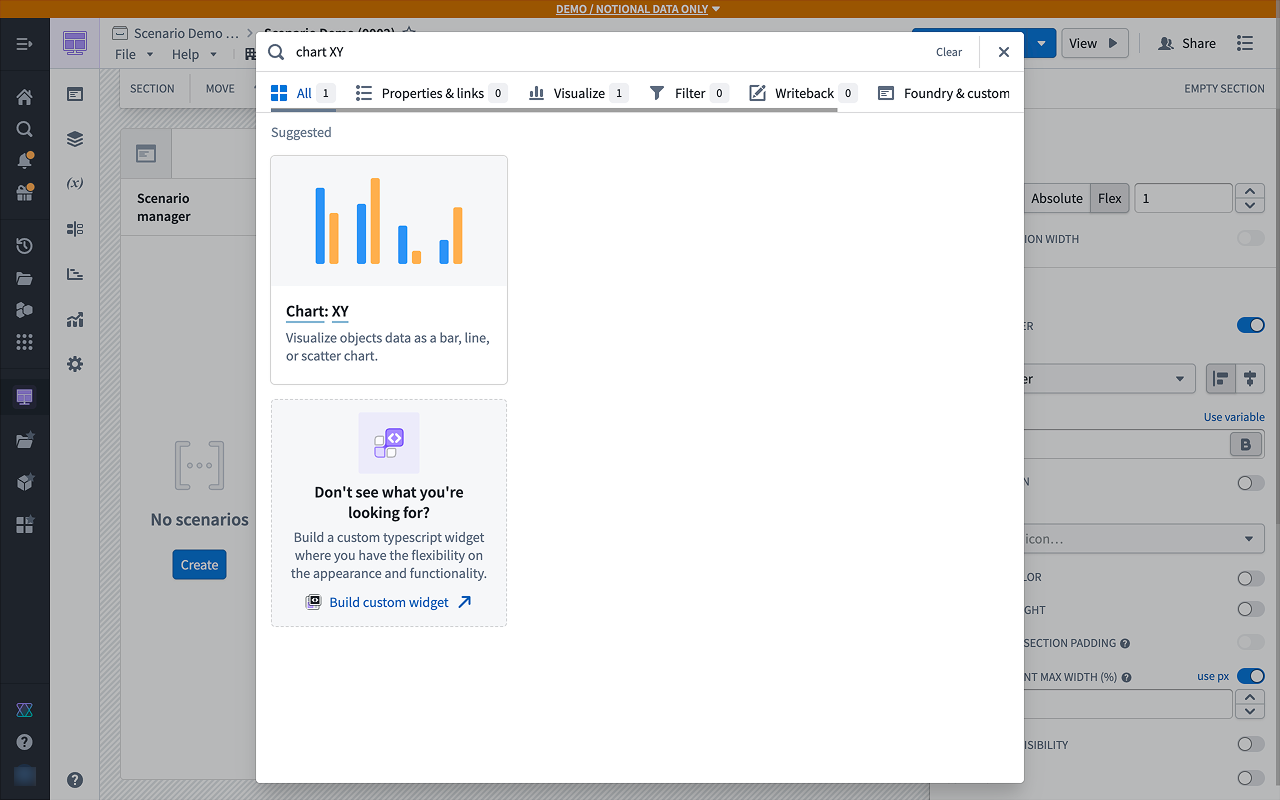
The Chart: XY widget supports an arbitrary number of scenarios, and different scenarios can be configured in different layers.
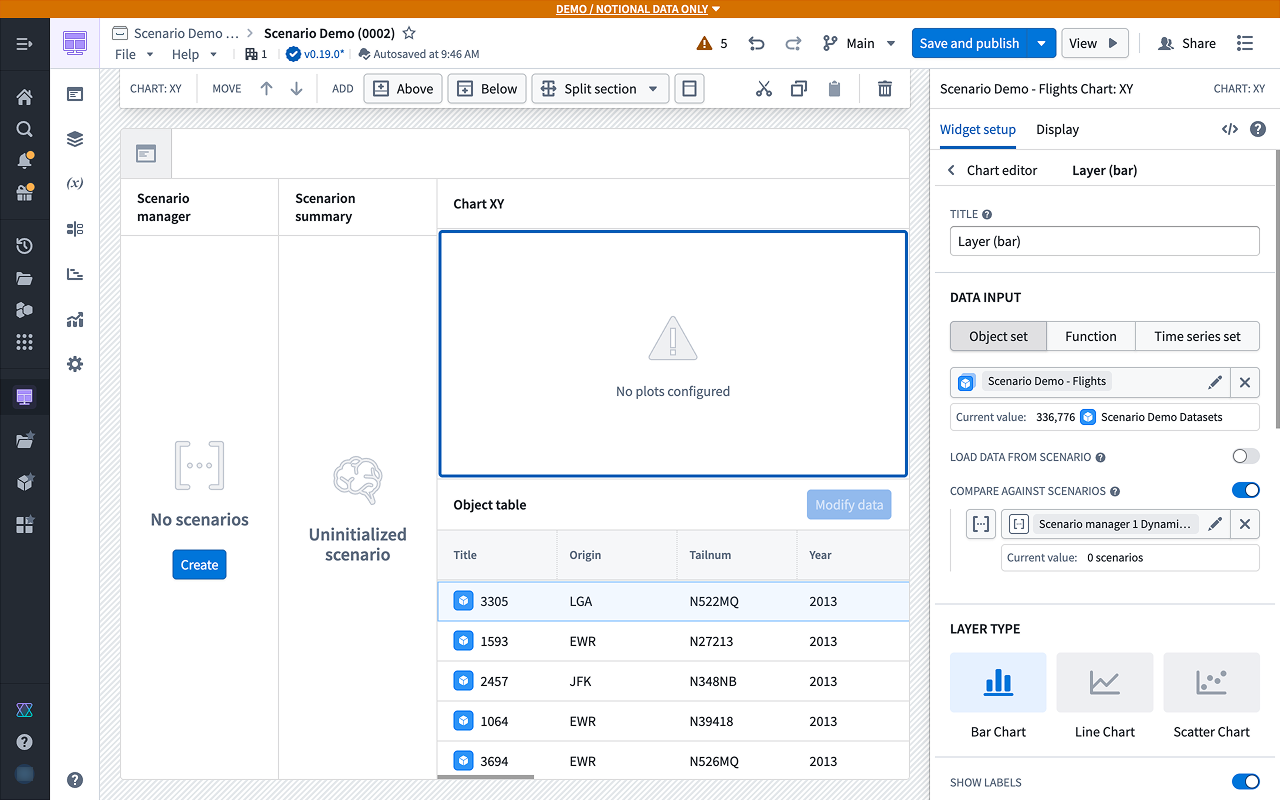
2. Try exploring the various layer types to see how multiple scenarios are visualized in them.
- You can also configure Group By and other aggregates, which will properly respect scenario values.
Part VI: Add a Metric Card widget
- You can also populate values in metric cards from scenarios. Add a new Metric Card widget.
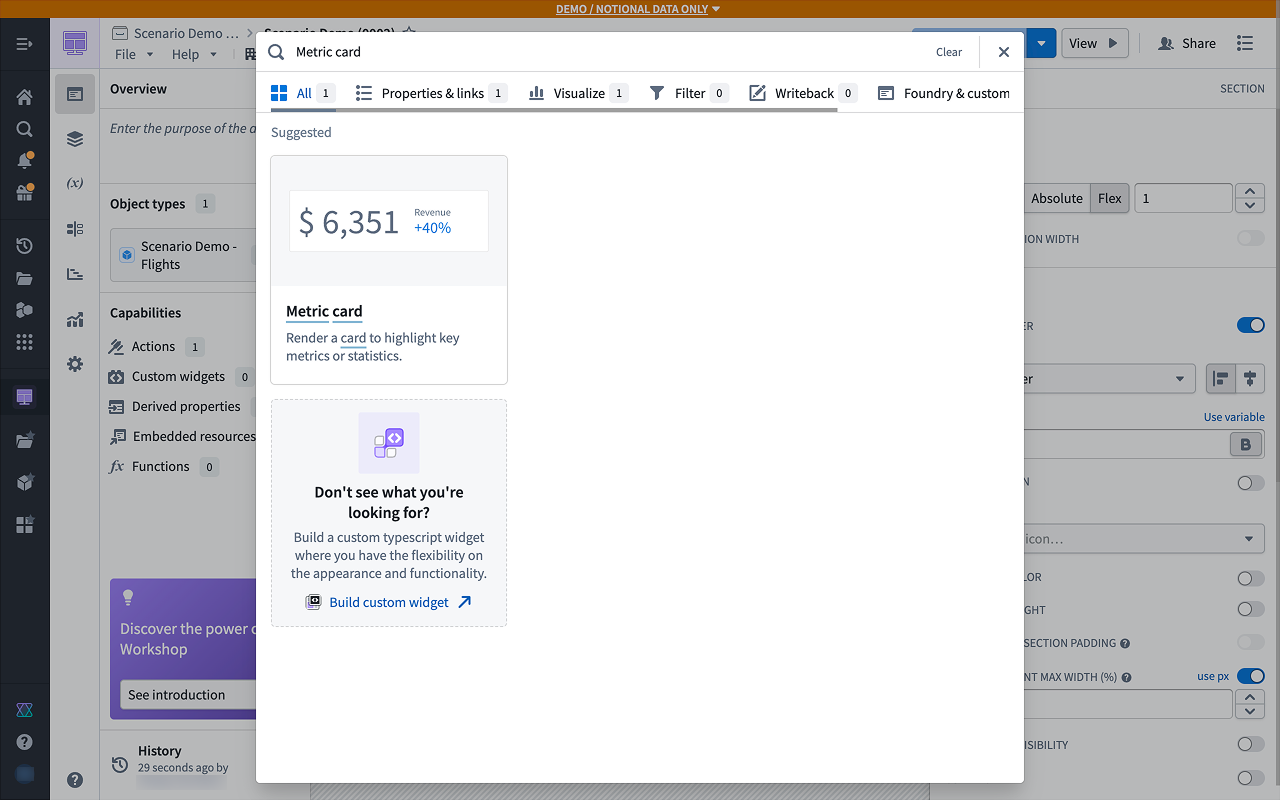
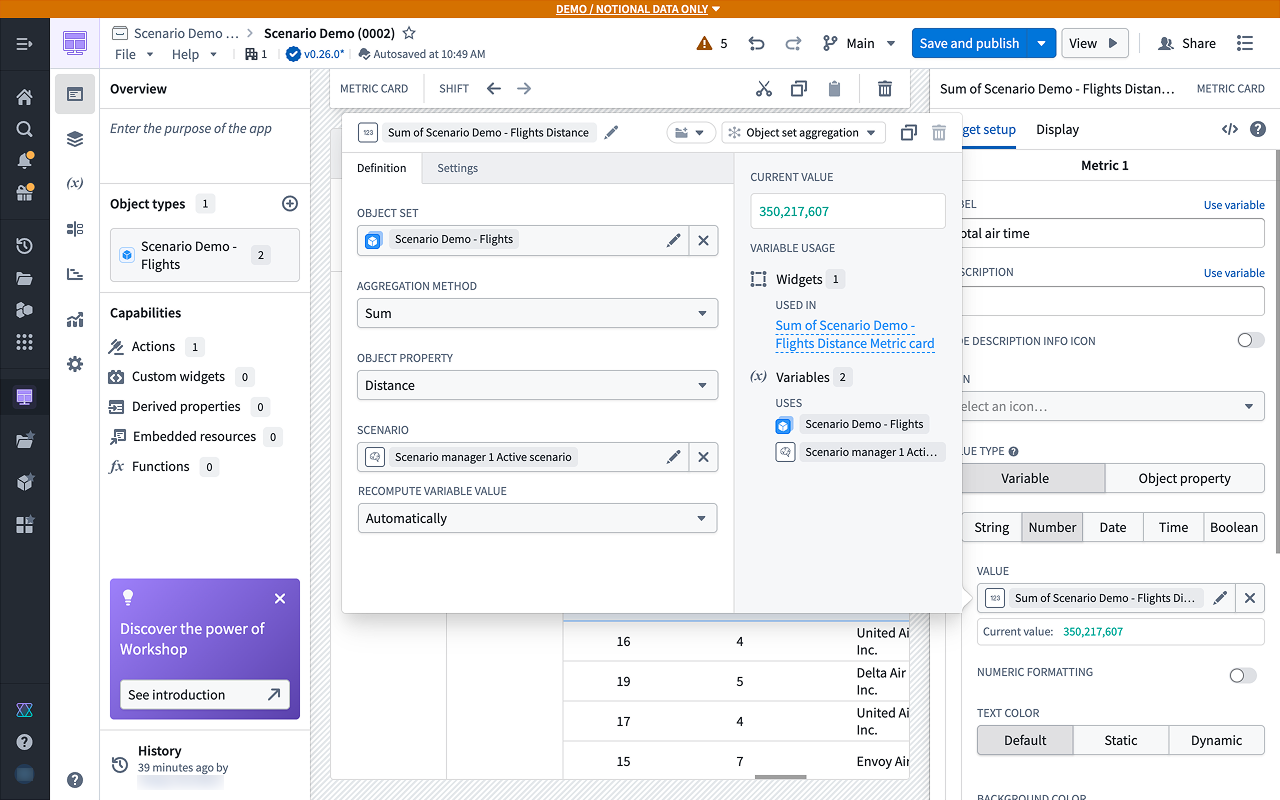
- You can configure variable values from scenarios to use in widgets that are not inherently scenario-aware. The Metric Card widget, for example, does not have an explicit scenario configuration section. Instead, in the Metric Card configuration, create a new numeric metric with a value defined by a new object set aggregation variable.
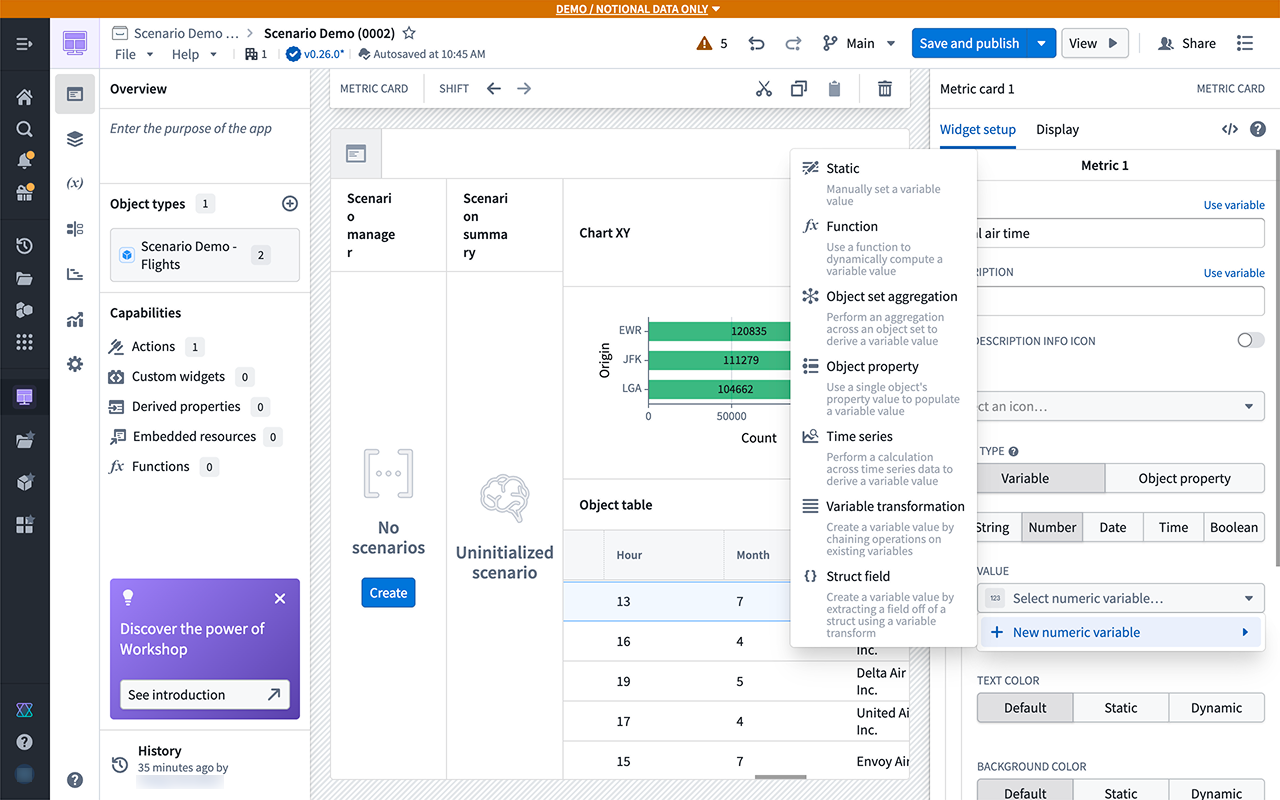
In the variable configuration pane, a Scenario section lets you add a scenario variable. If selected, the aggregation runs with the scenario's modifications applied. Similarly, object property variable configurations also support scenarios.
Next steps
Now that you have created your first scenario, we recommend experimenting with various configurations and layouts of the scenario-specific Workshop widgets used in our tutorial.
Persist temporary scenario metadata
If you determine that you do want to persist this scenario's metadata, follow the guidance in our persisted scenarios documentation.
中文翻译
临时场景(Temporary scenarios)
临时场景仅在当前会话中创建和使用。其元数据不会持久化存储在平台中,如果用户结束当前会话(例如在 Workshop 中),这些数据将被删除。此类场景适用于快速、临时的"假设分析(what-if)"场景,无需协作或共享结果。它们允许您尝试不同的操作,而不会影响本体论(Ontology)的状态,也不会用不必要的已保存场景扰乱工作空间。
Workshop 教程
在本教程中,您将逐步构建一个支持临时场景的基本 Workshop 应用程序。
第一部分:添加场景管理器(Scenario Manager)组件
- 从新的空白 Workshop 模块开始,导航到左侧导航栏的 设置(Settings) 面板,确保在 高级功能(Advanced Functionalities) 部分中启用了 场景(Scenarios) 设置。
- 在侧边栏部分,添加一个 场景管理器(Scenario Manager) 组件。这是 Workshop 中专用于场景的组件之一,用于创建和管理将在整个模块中使用的临时场景。
- 在右侧的组件设置面板中,将 动态场景(Dynamic scenarios) 字段配置为使用新的动态场景。创建(Create) 按钮将出现在组件中央。
第二部分:添加对象表格(Object Table)组件
-
在模块主体中,添加一个 对象表格(Object Table) 组件。
-
您可以使用任何对象集来填充表格,但我们建议从至少已配置一个关联 操作(action) 的对象类型开始。
-
现在,添加一些要在表格中显示的属性。
-
在属性下方,启用 从场景加载数据(Load Data from Scenario) 选项。此选项可使对象表格组件感知场景。
-
选择场景管理器组件生成的场景数组变量。这将使对象表格组件中的数据反映场景管理器组件中对场景的修改,而非原始本体论(Ontology)中的数据。
第三部分:添加场景摘要(Scenario Summary)组件
-
要预览您将在场景中进行的更改,请将 场景摘要(Scenario Summary) 组件添加到模块中。
-
在组件配置中,连接到场景管理器组件生成的活动场景变量。
此时,尚未对场景应用任何修改;数据应保持不变。
第四部分:配置操作(Action)
-
添加一个 按钮组(Button Group) 组件,以配置要应用于场景的操作。
-
选择一个修改表格中对象类型的操作。
-
要将此操作应用于场景而非本体论(Ontology),请启用 应用于场景(Apply to Scenario) 选项,并从菜单中选择活动场景变量。
-
使用新配置的操作,尝试将表格中任意对象的属性更改为新值。
-
在应用操作之前,在场景管理器组件中选择 创建(Create) 来创建一个新场景。
在下面的示例中,表格中某个航班的 年份(Year) 正在被更新。您应该会看到对象表格组件刷新并显示新数据。
场景摘要组件中将出现一条记录,指示数据已更改。此操作未应用于本体论(Ontology),仅存在于场景中。
第五部分:添加图表组件
- 为了更好地可视化结果,在表格上方添加一个 图表:XY(Chart: XY) 组件。
图表:XY 组件支持任意数量的场景,不同场景可以配置在不同的图层中。
2. 尝试探索不同的图层类型,了解多个场景在其中的可视化效果。
- 您还可以配置 分组依据(Group By) 和其他聚合方式,这些设置将正确尊重场景值。
第六部分:添加指标卡片(Metric Card)组件
- 您还可以从场景中填充指标卡片的值。添加一个新的 指标卡片(Metric Card) 组件。
- 您可以配置来自场景的变量值,用于本身不具备场景感知能力的组件。例如,指标卡片组件没有明确的场景配置部分。相反,在指标卡片配置中,创建一个新的数值指标,其值由一个新的对象集聚合变量定义。
在变量配置面板中,场景(Scenario) 部分允许您添加场景变量。如果选择了该变量,聚合将应用场景的修改来运行。同样,对象属性变量配置也支持场景。
后续步骤
现在您已经创建了第一个场景,我们建议您尝试教程中使用的场景专用 Workshop 组件的各种配置和布局。
持久化临时场景元数据
如果您确定要持久化此场景的元数据,请遵循我们的 持久化场景(persisted scenarios) 文档中的指导。