Architecture and configuration(架构与配置)
The following overview for the advanced to-do application will explain the architecture, components, features, and pre-requisites necessary to build the application with the Ontology SDK (OSDK):
- Getting started
- Application architecture
- React routing
- OAuth and OSDK client configuration
- Application configuration
- Environment files
- Meta tag configuration in
index.html - Key configuration variables
- Development vs. production configuration
- Key OSDK functions
- 1. Interfaces and polymorphic task types
- 2. Media content (media sets)
- 3. Runtime-derived properties
- 4. Metadata-driven interface
- 5. Real-time data with subscriptions
- 6. Efficient user data handling
- Learn more
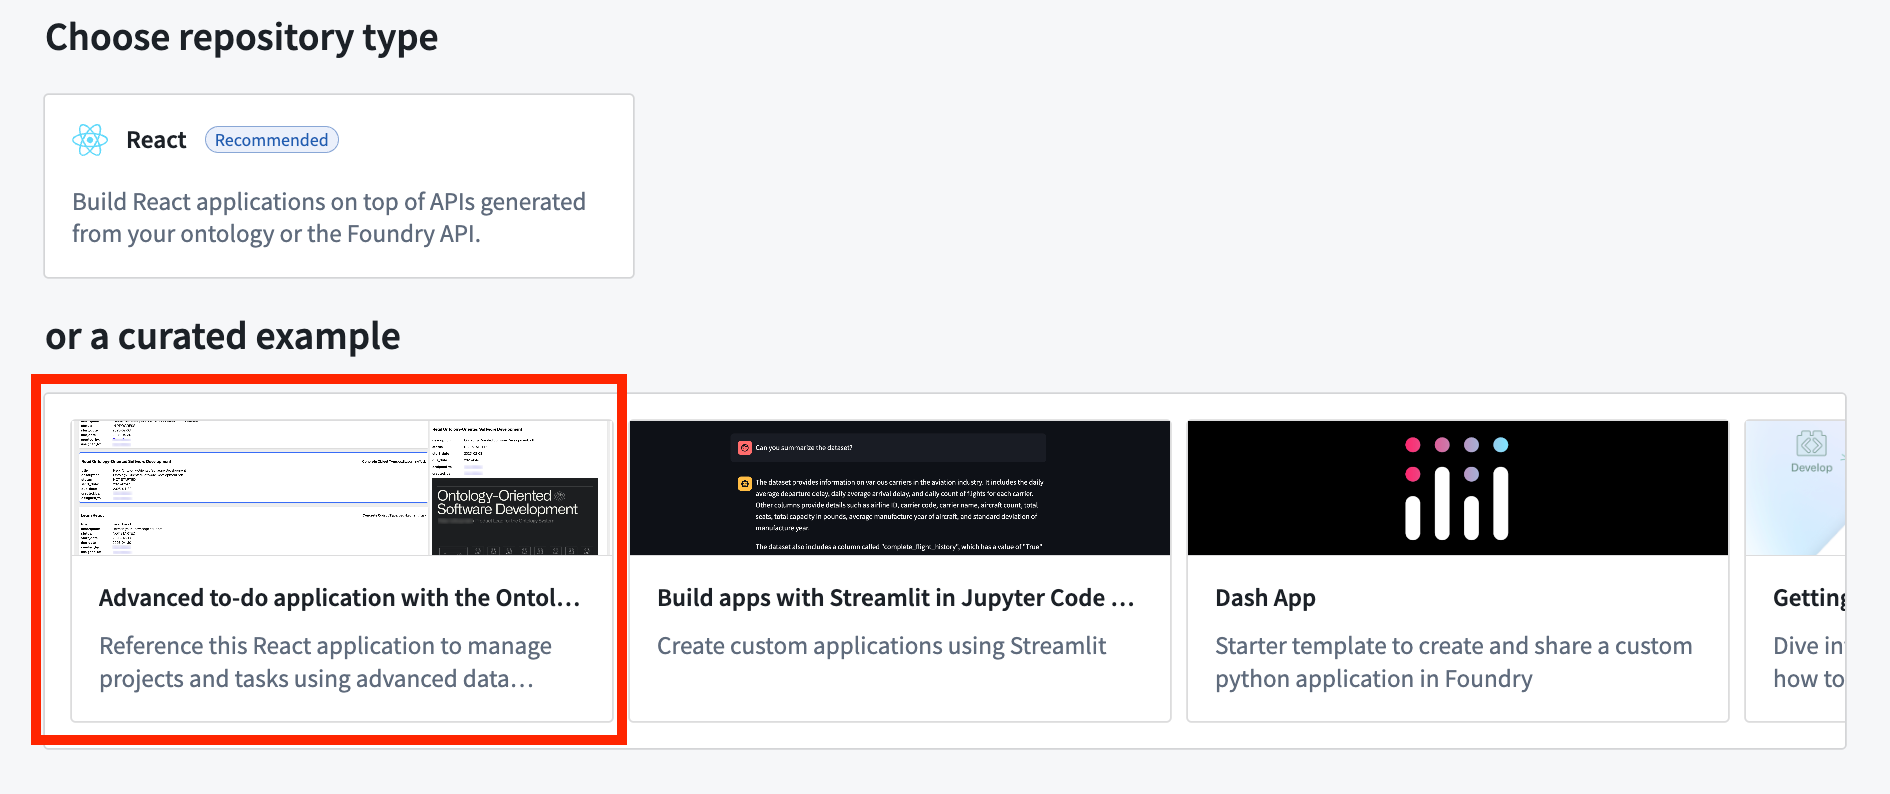
Getting started
To access and install the advanced to-do application example, open the Code Workspaces application and choose to create a + New Workspace. Then, select VS Code > Applications and find the application in the curated examples list.
You can also search for the application in the platform Examples (Build with AIP) or by searching the Ontology SDK reference examples in Developer Console.
Application architecture
The sections below describe the architecture of the advanced to-do application you can create, including routing, client configuration, and usage in components.
The application follows a modern React architecture that includes the following features:
- Data service hooks: Encapsulate OSDK interactions (
useProjects,useTasks, and so on). - UI components: Includes components focused on presentation and user interaction.
- SWR (stale-while-revalidate) strategy for data management: Handles caching, revalidation, and background updates.
- Component-specific logic: Each component has access to exactly the data it needs.
React routing
The advanced to-do application uses React Router ↗ for client-side routing. The routing configuration is set up in the main application entry point.
Routing configuration
The application uses createBrowserRouter from React Router with a simple configuration:
const router = createBrowserRouter(
  [
    {
      path: "/",
      element: <Home />,
    },
    {
      path: "/auth/callback",
      element: <AuthCallback />,
    },
  ],
  { basename: import.meta.env.BASE_URL },
);

ReactDOM.createRoot(document.getElementById("root")!).render(
  <StrictMode>
    <OsdkProvider client={client}>
      <RouterProvider router={router} />,
    </OsdkProvider>
  </StrictMode>
);
The following routes are used:
/: The main application home page./auth/callback: The route that handles OAuth authentication callbacks.
Authentication is managed through the OSDK OAuth client, which automatically redirects unauthenticated users to the login page.
OAuth and OSDK client configuration
The OsdkProvider component
The advanced to-do application uses the OsdkProvider component from the @osdk/react package to provide authentication context and client access throughout the component tree. This strategy follows the React context pattern, making OAuth authentication and OSDK client operations available without prop drilling.
import { OsdkProvider } from "@osdk/react";
import client from "./client";

// In the application's root
ReactDOM.createRoot(document.getElementById("root")!).render(
  <StrictMode>
    <OsdkProvider client={client}>
      <RouterProvider router={router} />
    </OsdkProvider>
  </StrictMode>
);
Authentication configuration
The client is configured in a separate client.ts file that handles the following:
- OAuth authentication setup: Configures the authentication flow using the OSDK OAuth client.
- Client initialization: Sets up the OSDK client with the authenticated user session.
- Configuration parameters: Retrieves the Foundry URL, client ID, redirect URL, and other OAuth parameters from meta tags.
The OAuth client handles the following:
- Authentication redirect flows
- Token acquisition and refreshing
- Session management
- Determining appropriate scopes for API access
Usage in components
Components can access the authenticated OSDK client using the useOsdk hook:
import { useOsdk } from '@osdk/react';

function MyComponent() {
  const { client } = useOsdk();

  const fetchData = useCallback(async () => {
    const tasksPage = await client(OsdkITask).where({
        projectId: { $eq: project.$primaryKey },
    }).fetchPage({
        $orderBy: { "dueDate": "desc", "status": "asc" },
    });
    // Process and return the data
  }, [client, project.$primaryKey]);

  // Rest of the component
}
This usage pattern ensures the following:
- Authentication is handled centrally at the application root.
- Components only access data that the authenticated user is authorized to view.
- OAuth token refresh occurs automatically.
- API requests include the proper authentication headers.
Application configuration
The advanced to-do application uses environment variables for configuration, allowing for different settings between development and production environments. Configuration values are primarily applied through meta tags in the HTML, which are then read by the client.ts file.
Environment files
The application uses the following environment files:
.env: Base environment variables used in all environments..env.development: Development-specific variables (used withnpm run dev)..env.production: Production-specific variables (used withnpm run build).
Meta tag configuration in index.html
The application uses meta tags in index.html to dynamically configure the OSDK client. This approach avoids hardcoding sensitive information directly into JavaScript code:
<meta name="osdk-clientId" content="%VITE_FOUNDRY_CLIENT_ID%" />
<meta name="osdk-redirectUrl" content="%VITE_FOUNDRY_REDIRECT_URL%" />
<meta name="osdk-foundryUrl" content="%VITE_FOUNDRY_API_URL%" />
<meta name="osdk-ontologyRid" content="%VITE_FOUNDRY_ONTOLOGY_RID%" />
Meta tag breakdown
osdk-clientId: The OAuth client ID for authentication.osdk-redirectUrl: The URL for redirect after successful authentication.osdk-foundryUrl: The base URL of the Foundry API.osdk-ontologyRid: The resource identifier for the application's ontology.
Key configuration variables
# Authentication settings
VITE_FOUNDRY_CLIENT_ID=your-client-id
VITE_FOUNDRY_REDIRECT_URL=http://localhost:3000/
VITE_FOUNDRY_API_URL=https://<my-foundry-instance>.palantirfoundry.com
VITE_FOUNDRY_ONTOLOGY_RID=ri.ontology.main.ontology.12345678-abcd-1234-efgh-1234567890ab
Development vs. production configuration
Development environment
The development environment typically uses the following configuration:
- Local development server with Hot Module Replacement ↗.
- Integration with a development or staging Foundry instance.
Example .env.development:
VITE_FOUNDRY_CLIENT_ID=your-dev-client-id
VITE_FOUNDRY_REDIRECT_URL=http://localhost:3000/
VITE_FOUNDRY_API_URL=https://dev-foundry.palantirfoundry.com
VITE_FOUNDRY_ONTOLOGY_RID=ri.ontology.main.ontology.dev-12345
Production environment
The production environment uses the following configuration:
- A Foundry production instance.
- Optimized builds with minimized code.
- Stricter security settings.
Example .env.production:
VITE_FOUNDRY_CLIENT_ID=your-prod-client-id
VITE_FOUNDRY_REDIRECT_URL=https://your-production-domain.com/
VITE_FOUNDRY_API_URL=https://prod-foundry.palantirfoundry.com
VITE_FOUNDRY_ONTOLOGY_RID=ri.ontology.main.ontology.prod-67890
Key OSDK functions
1. Interfaces and polymorphic task types
The advanced to-do application uses OSDK interfaces to implement the following polymorphic task types:
ITask: The base interface for all tasks.osdkCodingTask: The implementation for coding-related tasks.osdkLearningTask: The implementation for learning tasks with media content.
// The task details component decides which concrete implementation to render
if (task.osdkTask.$objectType === "osdkCodingTask") {
    return <TaskDetailsCoding task={task} />;
}
if (task.osdkTask.$objectType === "osdkLearningTask") {
    return <TaskDetailsLearning task={task} />;
}
2. Media content (media sets)
The application demonstrates working with binary content through media sets:
// Fetching and displaying media content from media sets
const response = await learningTask.mediaReference.fetchContents();
const blob: Blob | undefined = await response.blob();
const mediaUrl = blob ? URL.createObjectURL(blob) : "";

// Getting media metadata
const mediaTypeResp = await learningTask.mediaReference.fetchMetadata();
Media rendering is handled dynamically based on the media type:
- PDF documents with embedded viewer.
- Images with responsive display.
- Videos with player controls.
- Links to external resources.
3. Runtime-derived properties
The application uses runtime-derived properties to efficiently calculate aggregate statistics at the server level:
.withProperties({
  "numberOfTasks": (baseObjectSet) =>
    baseObjectSet.pivotTo("osdkTodoTask").aggregate("$count"),
  "numberOfCompletedTasks": (baseObjectSet) =>
    baseObjectSet.pivotTo("osdkTodoTask").where({
      "status": { $eq: "COMPLETED" },
    }).aggregate("$count"),
  // Additional statistics...
})
The example above demonstrates the following:
- Calculating metrics server-side to minimize data transfer.
- Using relationship traversal with
pivotTo. - Applying filtering with
whereconditions. - Performing aggregations with
aggregate.
4. Metadata-driven interface
The application accesses and uses ontology metadata to create dynamic interfaces:
const getObjectTypeMetadata = useCallback(async () => {
  const objectTypeMetadata = await client.fetchMetadata(OsdkITask);
  setMetadata(objectTypeMetadata);
}, []);
This metadata is used for the following:
- Displaying ontology-defined property names.
- Showing object type descriptions.
- Creating context-aware user interfaces.
- Supporting future ontology changes without code changes.
5. Real-time data with subscriptions
The application implements real-time updates using OSDK subscriptions:
const subscription = client(OsdkITask)
  .where({ projectId: { $eq: project.$primaryKey } })
  .subscribe({
    onChange(update) {
      // Handle real-time updates
    },
    onSuccessfulSubscription() { /* ... */ },
    onError(err) { /* ... */ },
    onOutOfDate() { /* ... */ },
  });
This provides the following benefits:
- Live updates when tasks are created, modified, or deleted.
- Efficient updates that only refresh changed data.
- Error handling for subscription issues.
6. Efficient user data handling
The application also demonstrates batch fetching and caching of user data:
const getBatchUserDetails = useCallback(async (userIds: string[]) => {
    const cachedUsers: UserDetails = {};
    const usersToFetch: string[] = [];

    userIds.forEach((userId) => {
      const cachedUser: State<unknown, unknown> | undefined = cache.get(`user-${userId}`);
      if (cachedUser && cachedUser.data) {
        cachedUsers[userId] = cachedUser.data as User;
      } else {
        usersToFetch.push(userId);
      }
    });

    if (usersToFetch.length > 0) {
      const usersRequest = await getBatch(client, usersToFetch.map((userId) => ({ userId })));
      Object.entries(usersRequest.data).forEach(([userId, user]) => {
        cachedUsers[userId] = user;
        mutate(`user-${userId}`, user, { revalidate: false });
      });
    }
    return cachedUsers;
  }, [cache]);
Learn more
For more information about OSDK and the advanced features used in this application, review the documentation below:
中文翻译
架构与配置
以下针对高级待办事项应用的概述将解释使用本体论SDK(OSDK)构建该应用所需的架构、组件、功能及前置条件:
- 入门指南
- 应用架构
- React路由
- OAuth与OSDK客户端配置
- 应用配置
- 环境文件
index.html中的元标签配置- 关键配置变量
- 开发环境与生产环境配置
- 关键OSDK函数
- 1. 接口与多态任务类型
- 2. 媒体内容(媒体集)
- 3. 运行时派生属性
- 4. 元数据驱动接口
- 5. 基于订阅的实时数据
- 6. 高效用户数据处理
- 了解更多
入门指南
要访问并安装高级待办事项应用示例,请打开Code Workspaces应用并选择创建+ 新工作区。然后,选择VS Code > 应用,在精选示例列表中找到该应用。
您也可以在平台示例(使用AIP构建)中搜索该应用,或在Developer Console中搜索OSDK参考示例。
应用架构
以下章节描述了您可以创建的高级待办事项应用的架构,包括路由、客户端配置以及在组件中的使用。
该应用采用现代React架构,包含以下特性:
- 数据服务钩子(Data service hooks): 封装OSDK交互(如
useProjects、useTasks等)。 - UI组件: 包括专注于展示和用户交互的组件。
- SWR(stale-while-revalidate)数据管理策略: 处理缓存、重新验证和后台更新。
- 组件特定逻辑: 每个组件仅访问其所需的数据。
React路由
高级待办事项应用使用React Router ↗进行客户端路由。路由配置在主应用入口点中设置。
路由配置
应用使用React Router的createBrowserRouter进行简单配置:
const router = createBrowserRouter(
  [
    {
      path: "/",
      element: <Home />,
    },
    {
      path: "/auth/callback",
      element: <AuthCallback />,
    },
  ],
  { basename: import.meta.env.BASE_URL },
);

ReactDOM.createRoot(document.getElementById("root")!).render(
  <StrictMode>
    <OsdkProvider client={client}>
      <RouterProvider router={router} />,
    </OsdkProvider>
  </StrictMode>
);
使用以下路由:
/: 主应用首页。/auth/callback: 处理OAuth认证回调的路由。
认证通过OSDK OAuth客户端管理,该客户端会自动将未认证用户重定向到登录页面。
OAuth与OSDK客户端配置
OsdkProvider组件
高级待办事项应用使用@osdk/react包中的OsdkProvider组件,在整个组件树中提供认证上下文和客户端访问。该策略遵循React上下文模式,无需通过属性逐层传递即可使用OAuth认证和OSDK客户端操作。
import { OsdkProvider } from "@osdk/react";
import client from "./client";

// 在应用根节点中
ReactDOM.createRoot(document.getElementById("root")!).render(
  <StrictMode>
    <OsdkProvider client={client}>
      <RouterProvider router={router} />
    </OsdkProvider>
  </StrictMode>
);
认证配置
客户端在单独的client.ts文件中配置,该文件处理以下内容:
- OAuth认证设置: 使用OSDK OAuth客户端配置认证流程。
- 客户端初始化: 使用已认证的用户会话设置OSDK客户端。
- 配置参数: 从元标签中获取Foundry URL、客户端ID、重定向URL及其他OAuth参数。
OAuth客户端处理以下内容:
- 认证重定向流程
- 令牌获取与刷新
- 会话管理
- 确定API访问的适当作用域
在组件中的使用
组件可以使用useOsdk钩子访问已认证的OSDK客户端:
import { useOsdk } from '@osdk/react';

function MyComponent() {
  const { client } = useOsdk();

  const fetchData = useCallback(async () => {
    const tasksPage = await client(OsdkITask).where({
        projectId: { $eq: project.$primaryKey },
    }).fetchPage({
        $orderBy: { "dueDate": "desc", "status": "asc" },
    });
    // 处理并返回数据
  }, [client, project.$primaryKey]);

  // 组件的其余部分
}
这种使用模式确保:
- 认证在应用根节点集中处理。
- 组件仅访问已认证用户有权查看的数据。
- OAuth令牌自动刷新。
- API请求包含正确的认证头。
应用配置
高级待办事项应用使用环境变量进行配置,允许在开发环境和生产环境之间使用不同的设置。配置值主要通过HTML中的元标签应用,然后由client.ts文件读取。
环境文件
应用使用以下环境文件:
.env: 所有环境中使用的基础环境变量。.env.development: 开发环境特定变量(与npm run dev一起使用)。.env.production: 生产环境特定变量(与npm run build一起使用)。
index.html中的元标签配置
应用使用index.html中的元标签动态配置OSDK客户端。这种方法避免了将敏感信息硬编码到JavaScript代码中:
<meta name="osdk-clientId" content="%VITE_FOUNDRY_CLIENT_ID%" />
<meta name="osdk-redirectUrl" content="%VITE_FOUNDRY_REDIRECT_URL%" />
<meta name="osdk-foundryUrl" content="%VITE_FOUNDRY_API_URL%" />
<meta name="osdk-ontologyRid" content="%VITE_FOUNDRY_ONTOLOGY_RID%" />
元标签详解
osdk-clientId: 用于认证的OAuth客户端ID。osdk-redirectUrl: 成功认证后的重定向URL。osdk-foundryUrl: Foundry API的基础URL。osdk-ontologyRid: 应用本体论的资源标识符。
关键配置变量
# 认证设置
VITE_FOUNDRY_CLIENT_ID=your-client-id
VITE_FOUNDRY_REDIRECT_URL=http://localhost:3000/
VITE_FOUNDRY_API_URL=https://<my-foundry-instance>.palantirfoundry.com
VITE_FOUNDRY_ONTOLOGY_RID=ri.ontology.main.ontology.12345678-abcd-1234-efgh-1234567890ab
开发环境与生产环境配置
开发环境
开发环境通常使用以下配置:
- 本地开发服务器,支持热模块替换 ↗。
- 与开发或预发布Foundry实例集成。
.env.development示例:
VITE_FOUNDRY_CLIENT_ID=your-dev-client-id
VITE_FOUNDRY_REDIRECT_URL=http://localhost:3000/
VITE_FOUNDRY_API_URL=https://dev-foundry.palantirfoundry.com
VITE_FOUNDRY_ONTOLOGY_RID=ri.ontology.main.ontology.dev-12345
生产环境
生产环境使用以下配置:
- Foundry生产实例。
- 优化构建,代码最小化。
- 更严格的安全设置。
.env.production示例:
VITE_FOUNDRY_CLIENT_ID=your-prod-client-id
VITE_FOUNDRY_REDIRECT_URL=https://your-production-domain.com/
VITE_FOUNDRY_API_URL=https://prod-foundry.palantirfoundry.com
VITE_FOUNDRY_ONTOLOGY_RID=ri.ontology.main.ontology.prod-67890
关键OSDK函数
1. 接口与多态任务类型
高级待办事项应用使用OSDK接口实现以下多态任务类型:
ITask: 所有任务的基础接口。osdkCodingTask: 编码相关任务的实现。osdkLearningTask: 包含媒体内容的学习任务实现。
// 任务详情组件决定渲染哪个具体实现
if (task.osdkTask.$objectType === "osdkCodingTask") {
    return <TaskDetailsCoding task={task} />;
}
if (task.osdkTask.$objectType === "osdkLearningTask") {
    return <TaskDetailsLearning task={task} />;
}
2. 媒体内容(媒体集)
应用演示了如何通过媒体集处理二进制内容:
// 从媒体集中获取并显示媒体内容
const response = await learningTask.mediaReference.fetchContents();
const blob: Blob | undefined = await response.blob();
const mediaUrl = blob ? URL.createObjectURL(blob) : "";

// 获取媒体元数据
const mediaTypeResp = await learningTask.mediaReference.fetchMetadata();
媒体渲染根据媒体类型动态处理:
- PDF文档,使用嵌入式查看器。
- 图片,响应式显示。
- 视频,带播放器控件。
- 外部资源链接。
3. 运行时派生属性
应用使用运行时派生属性在服务器端高效计算聚合统计信息:
.withProperties({
  "numberOfTasks": (baseObjectSet) =>
    baseObjectSet.pivotTo("osdkTodoTask").aggregate("$count"),
  "numberOfCompletedTasks": (baseObjectSet) =>
    baseObjectSet.pivotTo("osdkTodoTask").where({
      "status": { $eq: "COMPLETED" },
    }).aggregate("$count"),
  // 其他统计信息...
})
上述示例演示了:
- 在服务器端计算指标,以最小化数据传输。
- 使用
pivotTo进行关系遍历。 - 使用
where条件应用过滤。 - 使用
aggregate执行聚合操作。
4. 元数据驱动接口
应用访问并使用本体论元数据创建动态接口:
const getObjectTypeMetadata = useCallback(async () => {
  const objectTypeMetadata = await client.fetchMetadata(OsdkITask);
  setMetadata(objectTypeMetadata);
}, []);
该元数据用于:
- 显示本体论定义的属性名称。
- 显示对象类型描述。
- 创建上下文感知的用户界面。
- 支持未来本体论变更而无需修改代码。
5. 基于订阅的实时数据
应用使用OSDK订阅实现实时更新:
const subscription = client(OsdkITask)
  .where({ projectId: { $eq: project.$primaryKey } })
  .subscribe({
    onChange(update) {
      // 处理实时更新
    },
    onSuccessfulSubscription() { /* ... */ },
    onError(err) { /* ... */ },
    onOutOfDate() { /* ... */ },
  });
这提供了以下优势:
- 任务创建、修改或删除时的实时更新。
- 高效更新,仅刷新已更改的数据。
- 订阅问题的错误处理。
6. 高效用户数据处理
应用还演示了用户数据的批量获取和缓存:
const getBatchUserDetails = useCallback(async (userIds: string[]) => {
    const cachedUsers: UserDetails = {};
    const usersToFetch: string[] = [];

    userIds.forEach((userId) => {
      const cachedUser: State<unknown, unknown> | undefined = cache.get(`user-${userId}`);
      if (cachedUser && cachedUser.data) {
        cachedUsers[userId] = cachedUser.data as User;
      } else {
        usersToFetch.push(userId);
      }
    });

    if (usersToFetch.length > 0) {
      const usersRequest = await getBatch(client, usersToFetch.map((userId) => ({ userId })));
      Object.entries(usersRequest.data).forEach(([userId, user]) => {
        cachedUsers[userId] = user;
        mutate(`user-${userId}`, user, { revalidate: false });
      });
    }
    return cachedUsers;
  }, [cache]);
了解更多
有关OSDK及本应用中使用的更多高级功能的详细信息,请查阅以下文档: