Development environment(开发环境)
This page will walk you through the development workflow when using an in-platform VS Code workspace to build OSDK React applications.
Get started
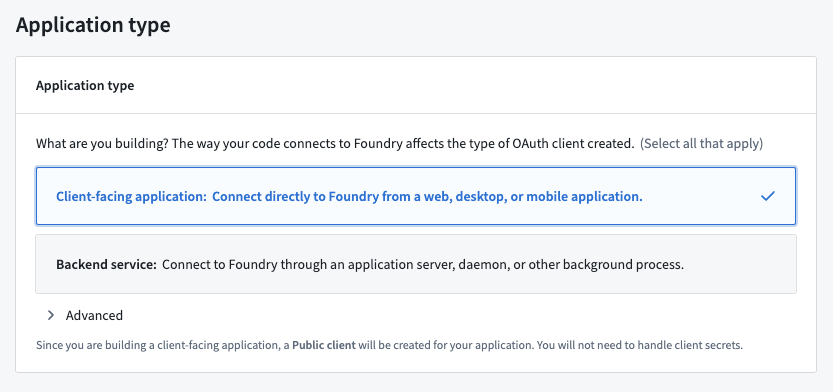
To enable development in your code environment, you will need to set up your Developer Console. During the setup process, you must select Create client-facing application to enable creation of code repositories from Developer Console.
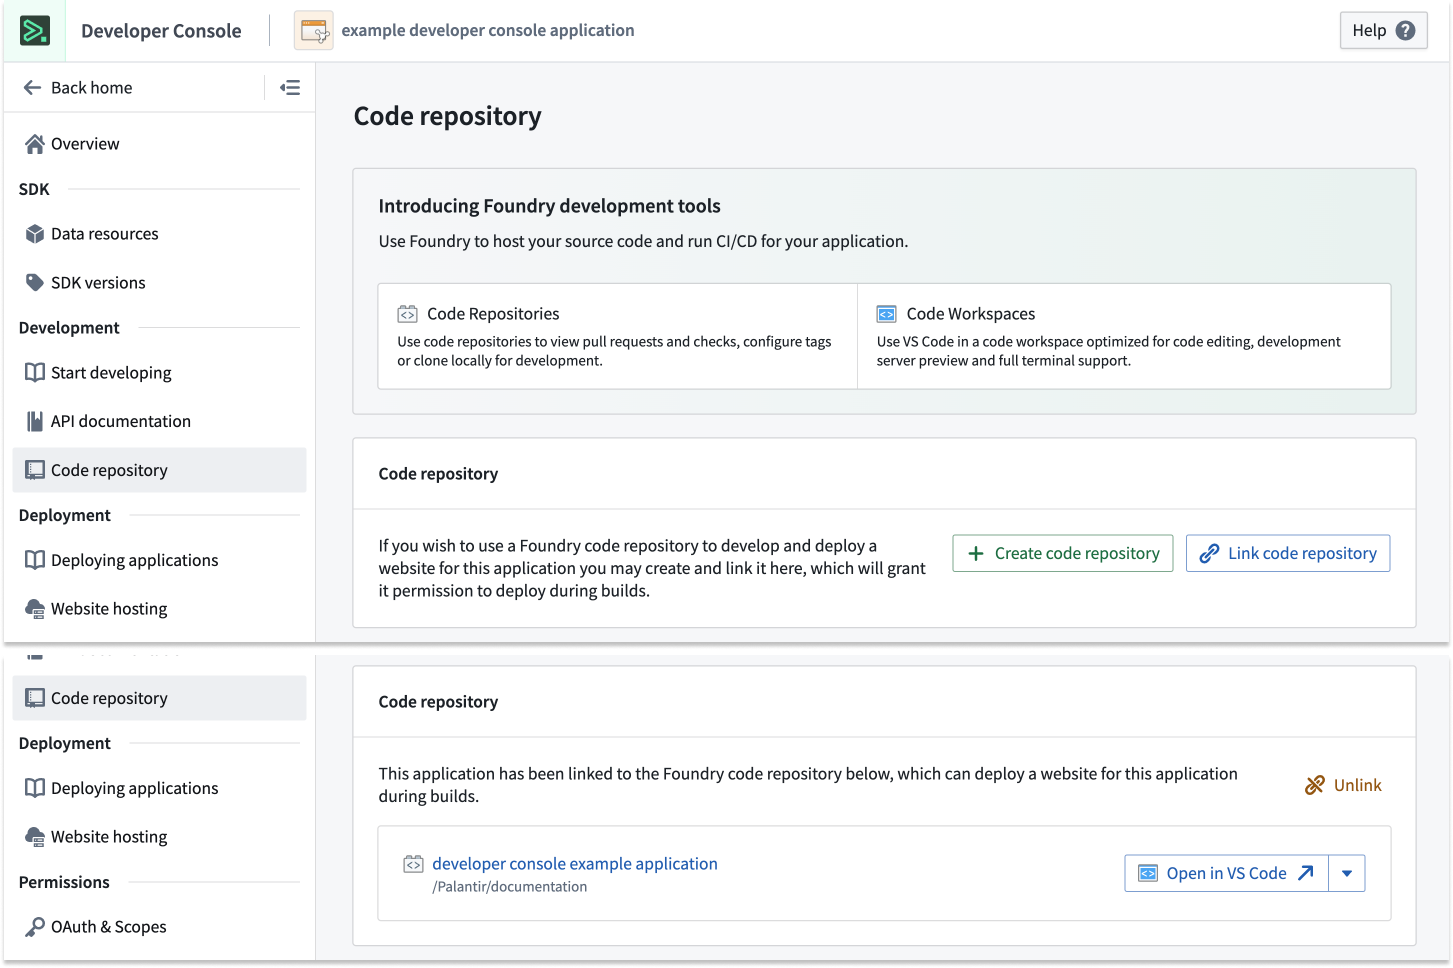
To use a VS Code workspace, open Developer Console and select Create code repository under the Code Repository section in the left side panel. This action will bootstrap your repository with the default React template. You can then select Open in VS Code to launch an in-platform workspace.
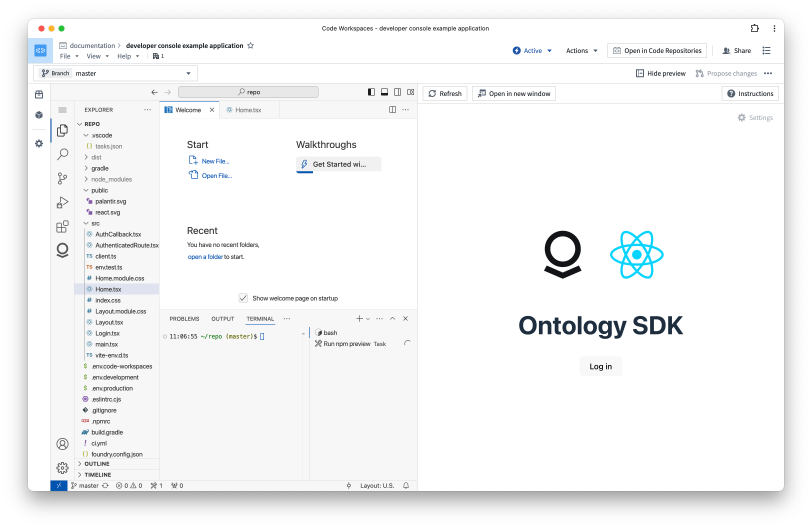
The repository template will include a basic React application integrated with authorization and the Ontology SDK.
Development lifecycle
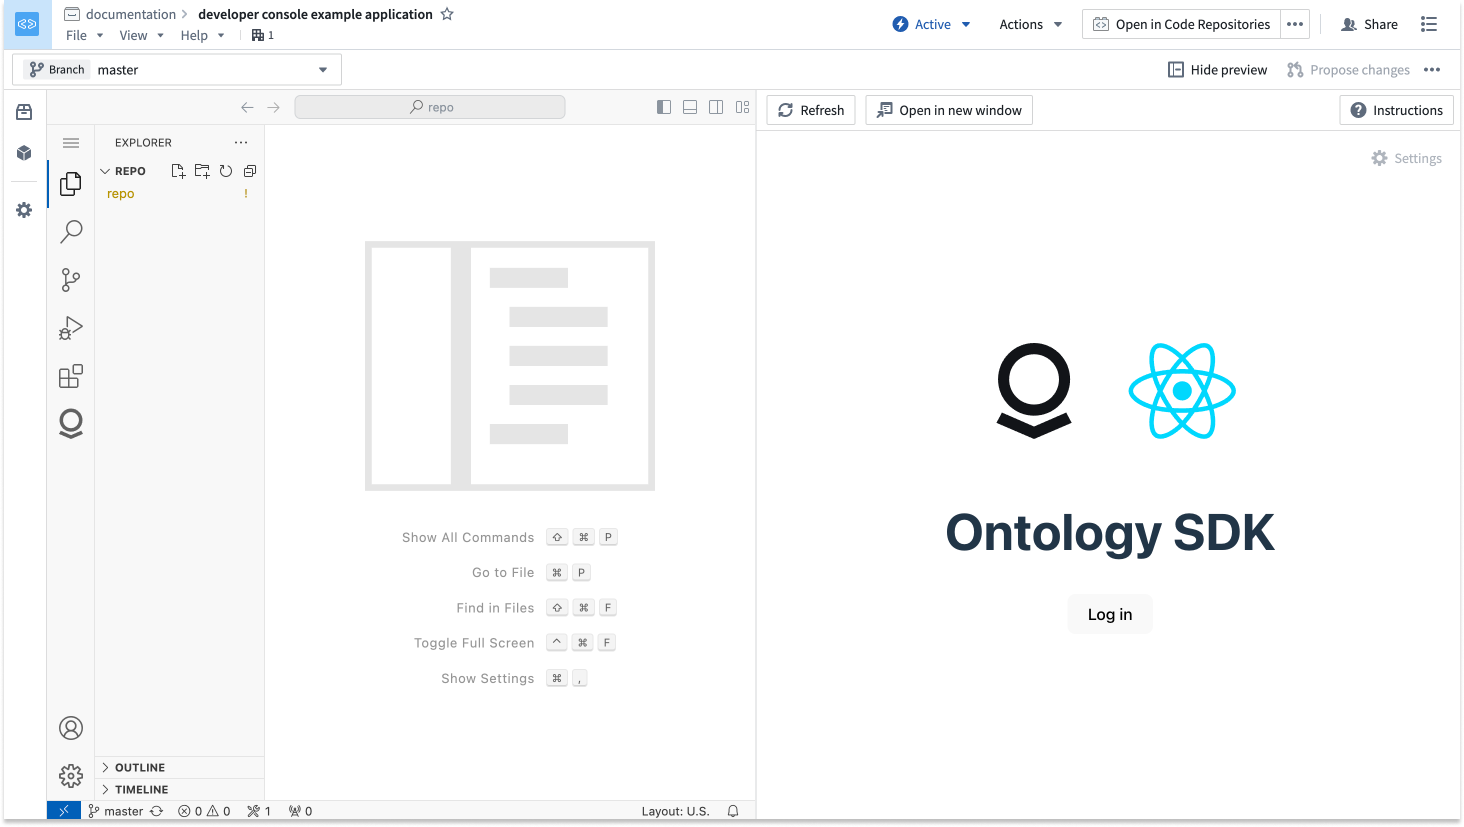
Once the VS Code Workspace is launched, you should see the code editor on the left and a live preview of your application on the right. You can start editing your code as if working in a local environment.
Edit
You can now start building your React application. Be sure to edit and test your code after writing, then use git commands or the VS Code interface to commit and push your changes to make them visible to other developers in your project. In the terminal, run npm run lint, npm run test, and npm run build to ensure that checks will succeed.
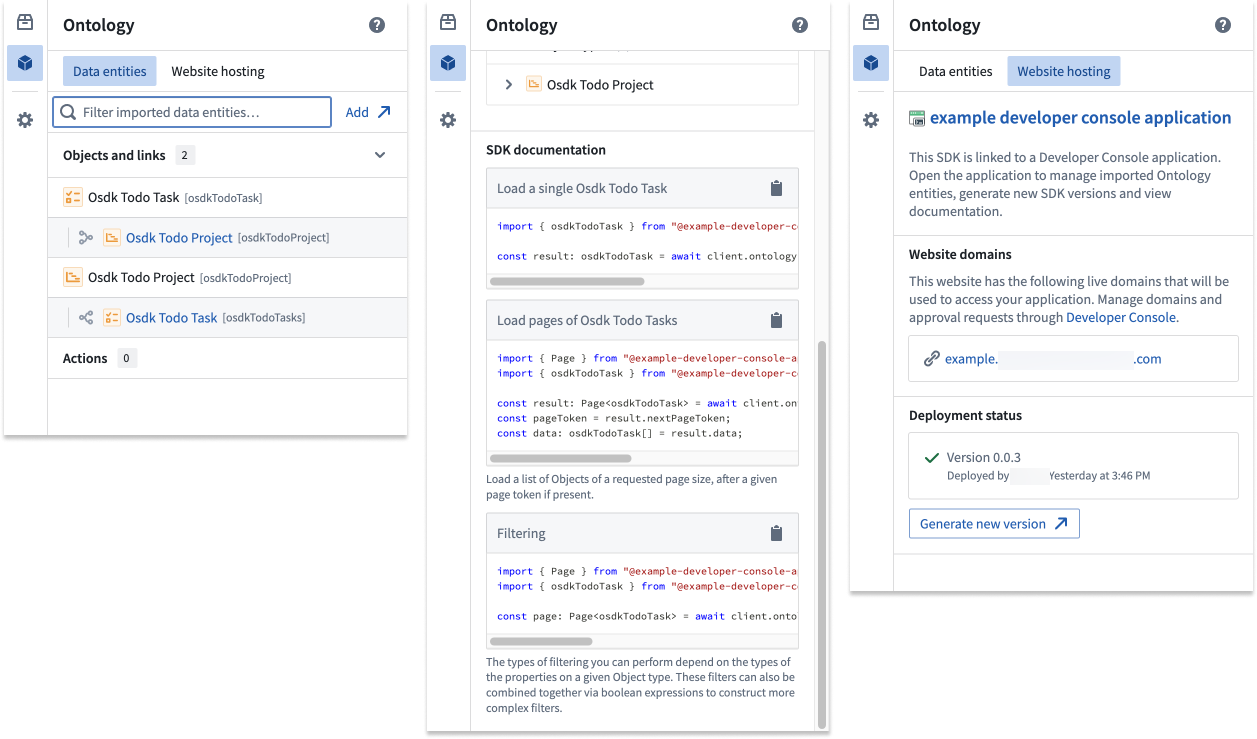
You can also refer to the Ontology tab in the left side panel to view generated documentation and code snippets for your OSDK and return to Developer Console.
Deploy
To deploy a React application, you must first cut a release. This is commonly done with the git tag command, where you can set the version number and then push it to your repository:
git tag <x.y.z>
git push origin tag
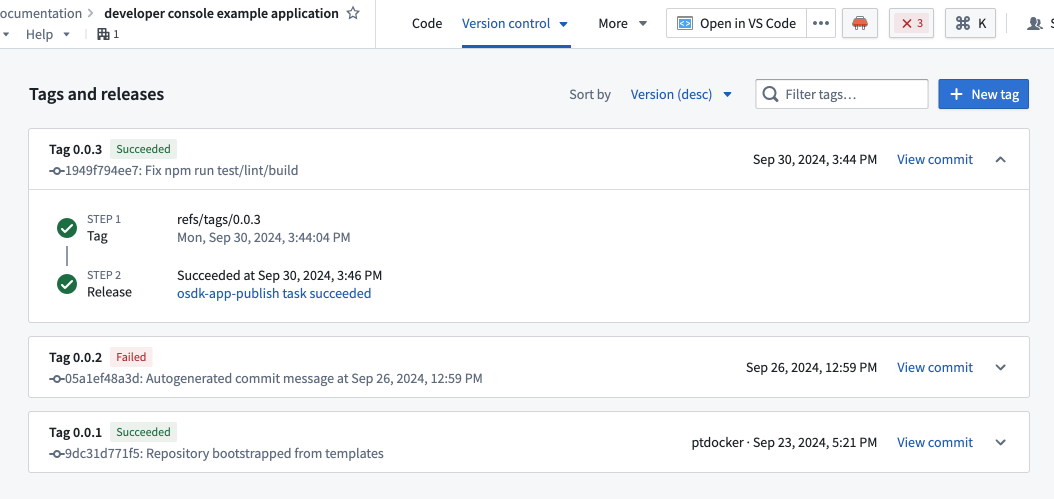
Alternatively, you can cut a release from within the Code Repositories interface by selecting Open in Code Repositories from the top right corner of the screen. Navigate to the Version control tab, the open the Tags and releases section to view previous releases and cut a new release.
Once the release passes checks, you will be able to view your application in Developer Console.

Content Security Policy
By default, we apply a restrictive Content Security Policy (CSP). This means a request to non-Foundry URIs will fail and must be explicitly allowed.
To detect a CSP error, select <F12> and review logs inside the console. If you have CSP failures, you will see errors similar to those shown below:

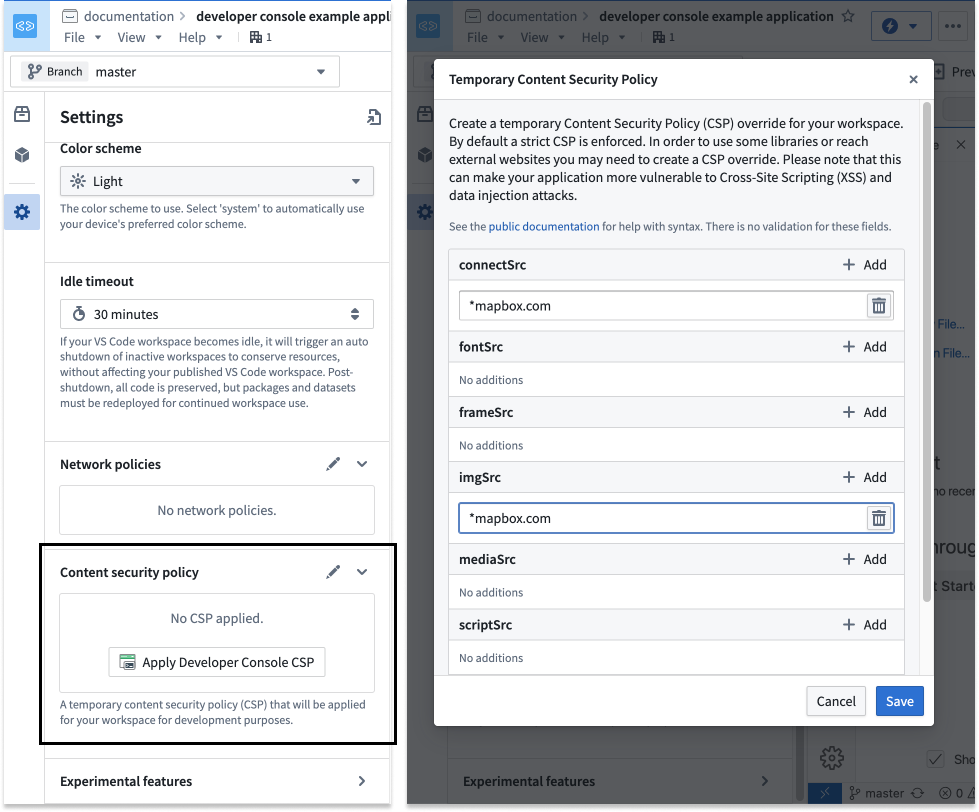
You can apply a temporary CSP to your VS Code workspace. For security reasons, this CSP will not apply to other users of this workspace and will expire when the workspace is paused or restarted.
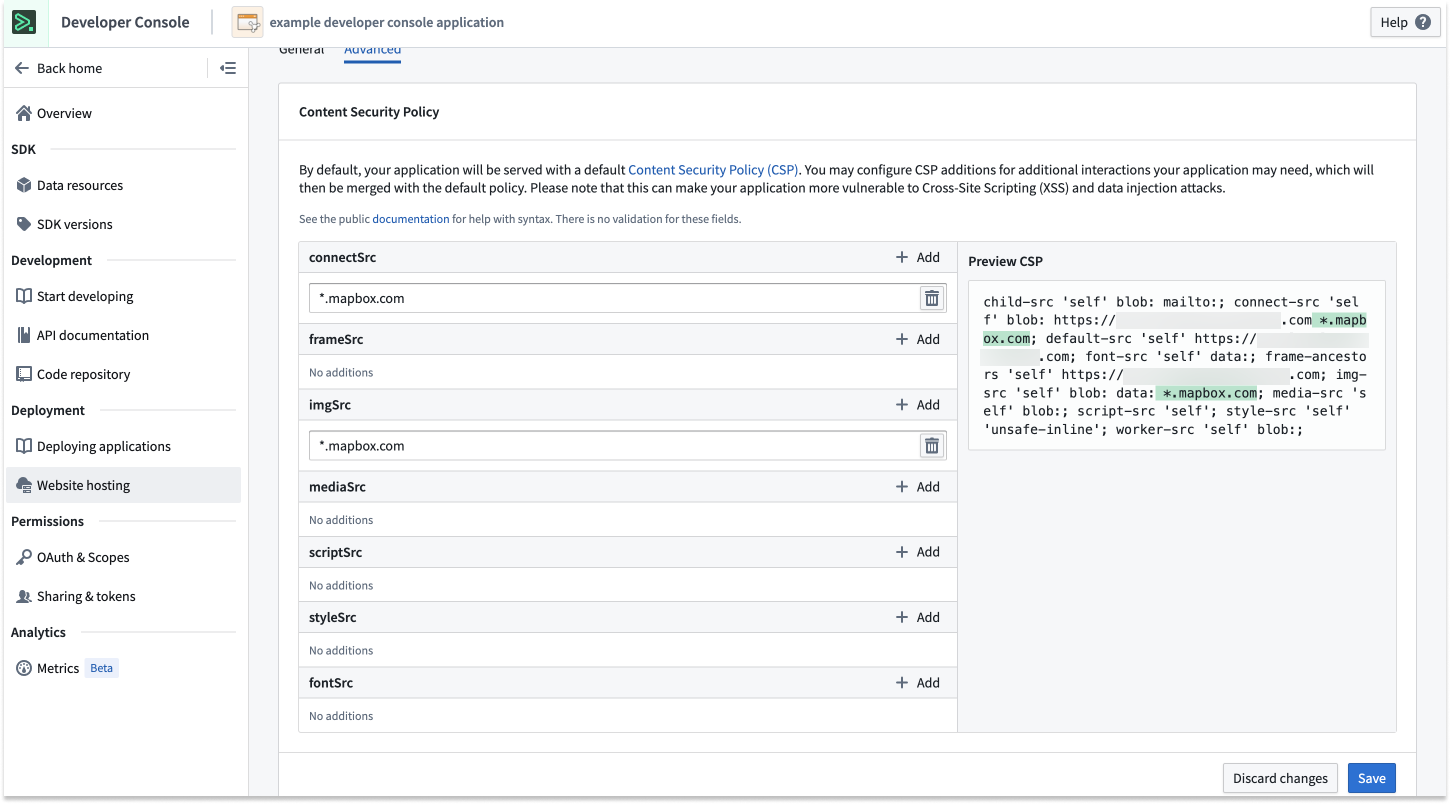
After testing your application inside the VS Code workspace, ensure that the CSP is updated for your Developer Console application.
Development tips
To Do application tutorial
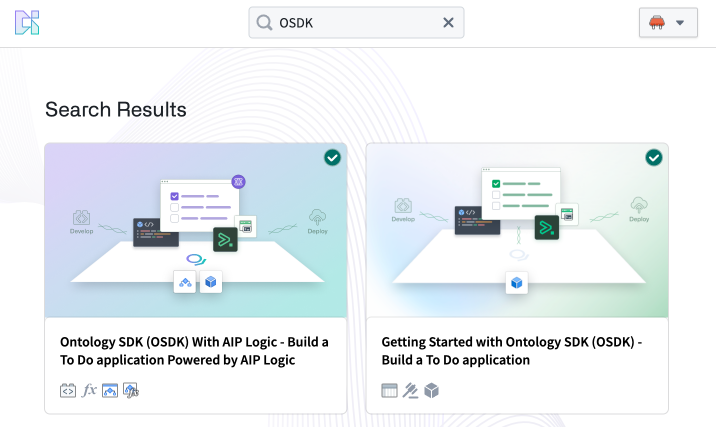
If you are new to Developer Console and OSDK, we recommend following one of our tutorials to get started. Navigate to the Build with AIP application in your enrollment and install one of our example workflows.
Progressive Web Application (PWA)
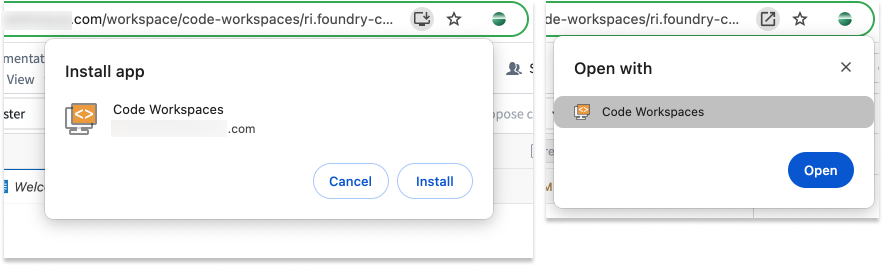
For an optimized editing experience, you can choose to install your workspace as a Progressive Web Application (PWA). A PWA will accept some commonly used shortcuts, such as Cmd+W (macOS) to close a tab.
Zen mode
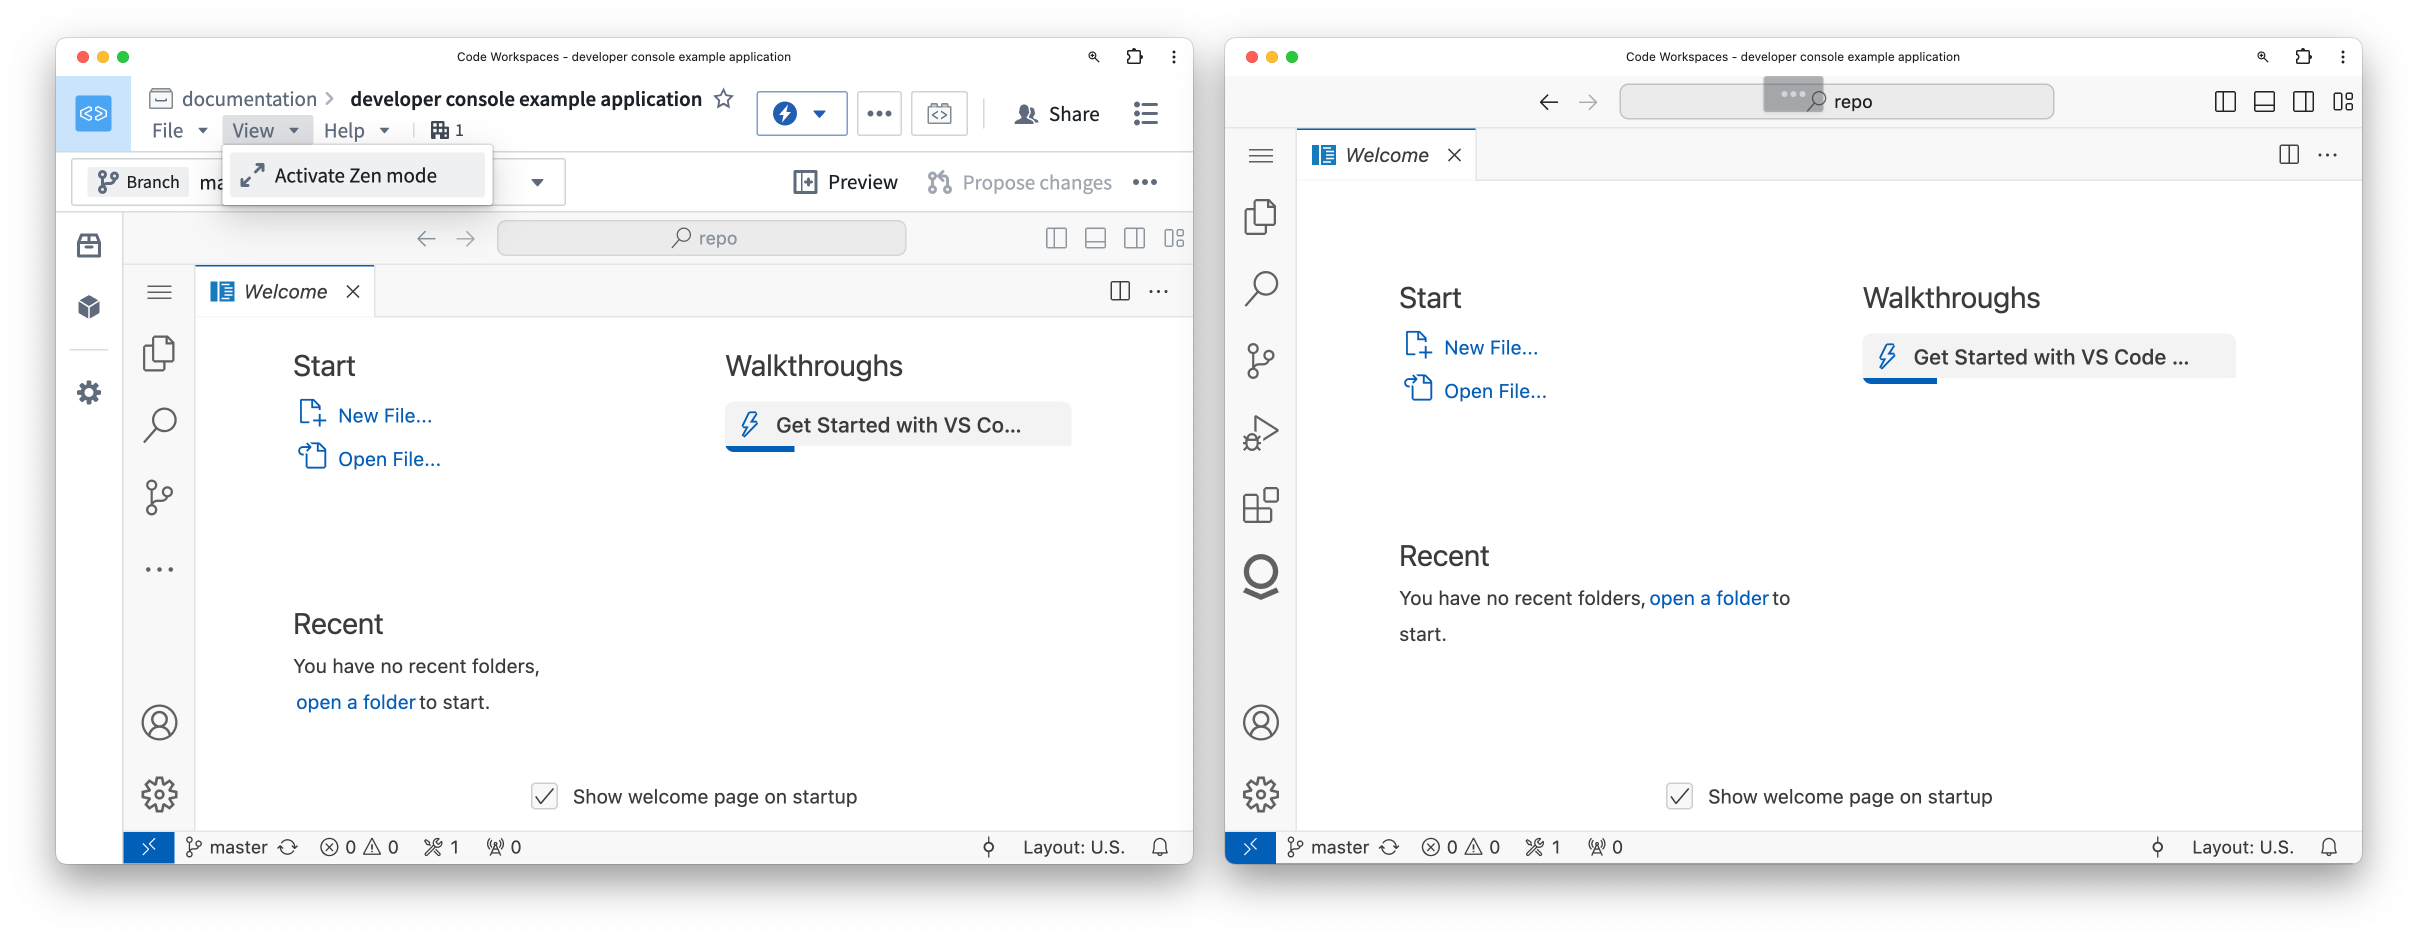
For a nearly native VS Code experience, we recommend using Zen mode. Select View > Activate Zen mode to enable. Zen mode will hide the platform interface and make VS Code take up the entire browser window. To exit Zen mode, hover over the three dots ... in the top center of your screen.
Local development
Instead of working inside the platform, you can work locally on your machine in the following ways:
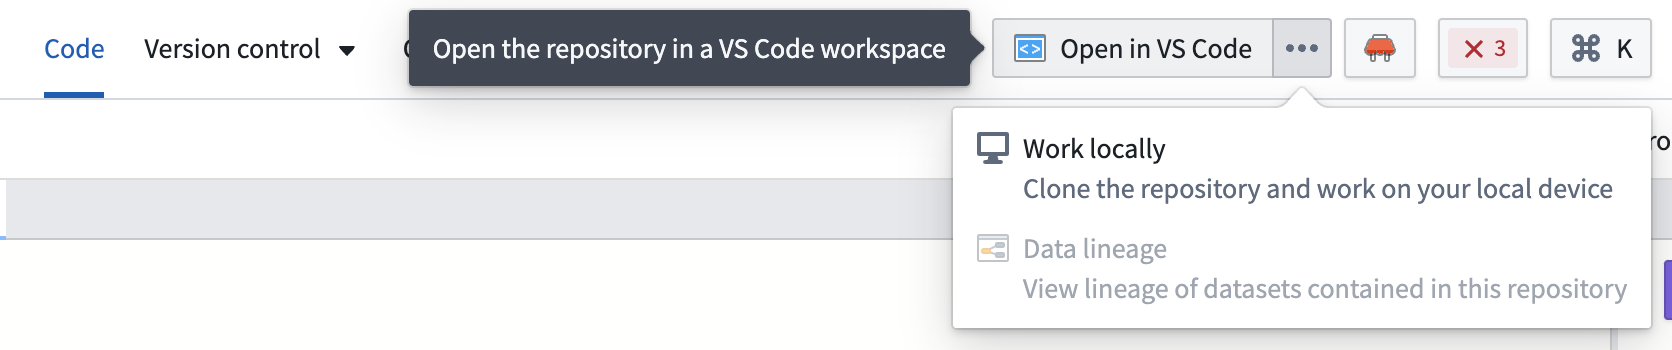
- Navigate to your repository in the Code Repositories application, then select Work locally in the top right corner of your screen to clone your repository and export the
FOUNDRY_TOKENto your local environment.
Refer to the readme.md file in the repository for more information.
:::callout{theme="neutral"} You can store your repository outside the Palantir platform while still using the Developer Console to deploy the application. Learn mode in our documentation on deploying an Ontology SDK application on Foundry. :::
PR preview [Beta]
:::callout{theme="warning"} PR preview for React applications is in the beta phase of development and may not be available on your enrollment. Functionality may change during active development. :::
To add efficiency and easier collaboration to your projects, you can access a PR preview of changes to your React application before pushing updates. A PR (pull request) preview provides a working version of your React application based on the code committed in your pull request. You can preview any proposed changes to your application before it is merged into your main branch and production state, making it easier for you to check for any undesirable outcomes and verify user-facing workflows before changes make their way to production. Previously, builders, designers, and other members of an application team would need to create a development environment to view changes. The PR preview feature removes this requirement, allowing for quicker verification of production changes in design and functionality and a more efficient, collaborative process.
The PR preview feature is available for any OSDK React application that is hosted in a Foundry code repository using the Developer Console web hosting capability.
Follow the steps below to get started with PR previews:
-
First, generate an application in Developer Console.
-
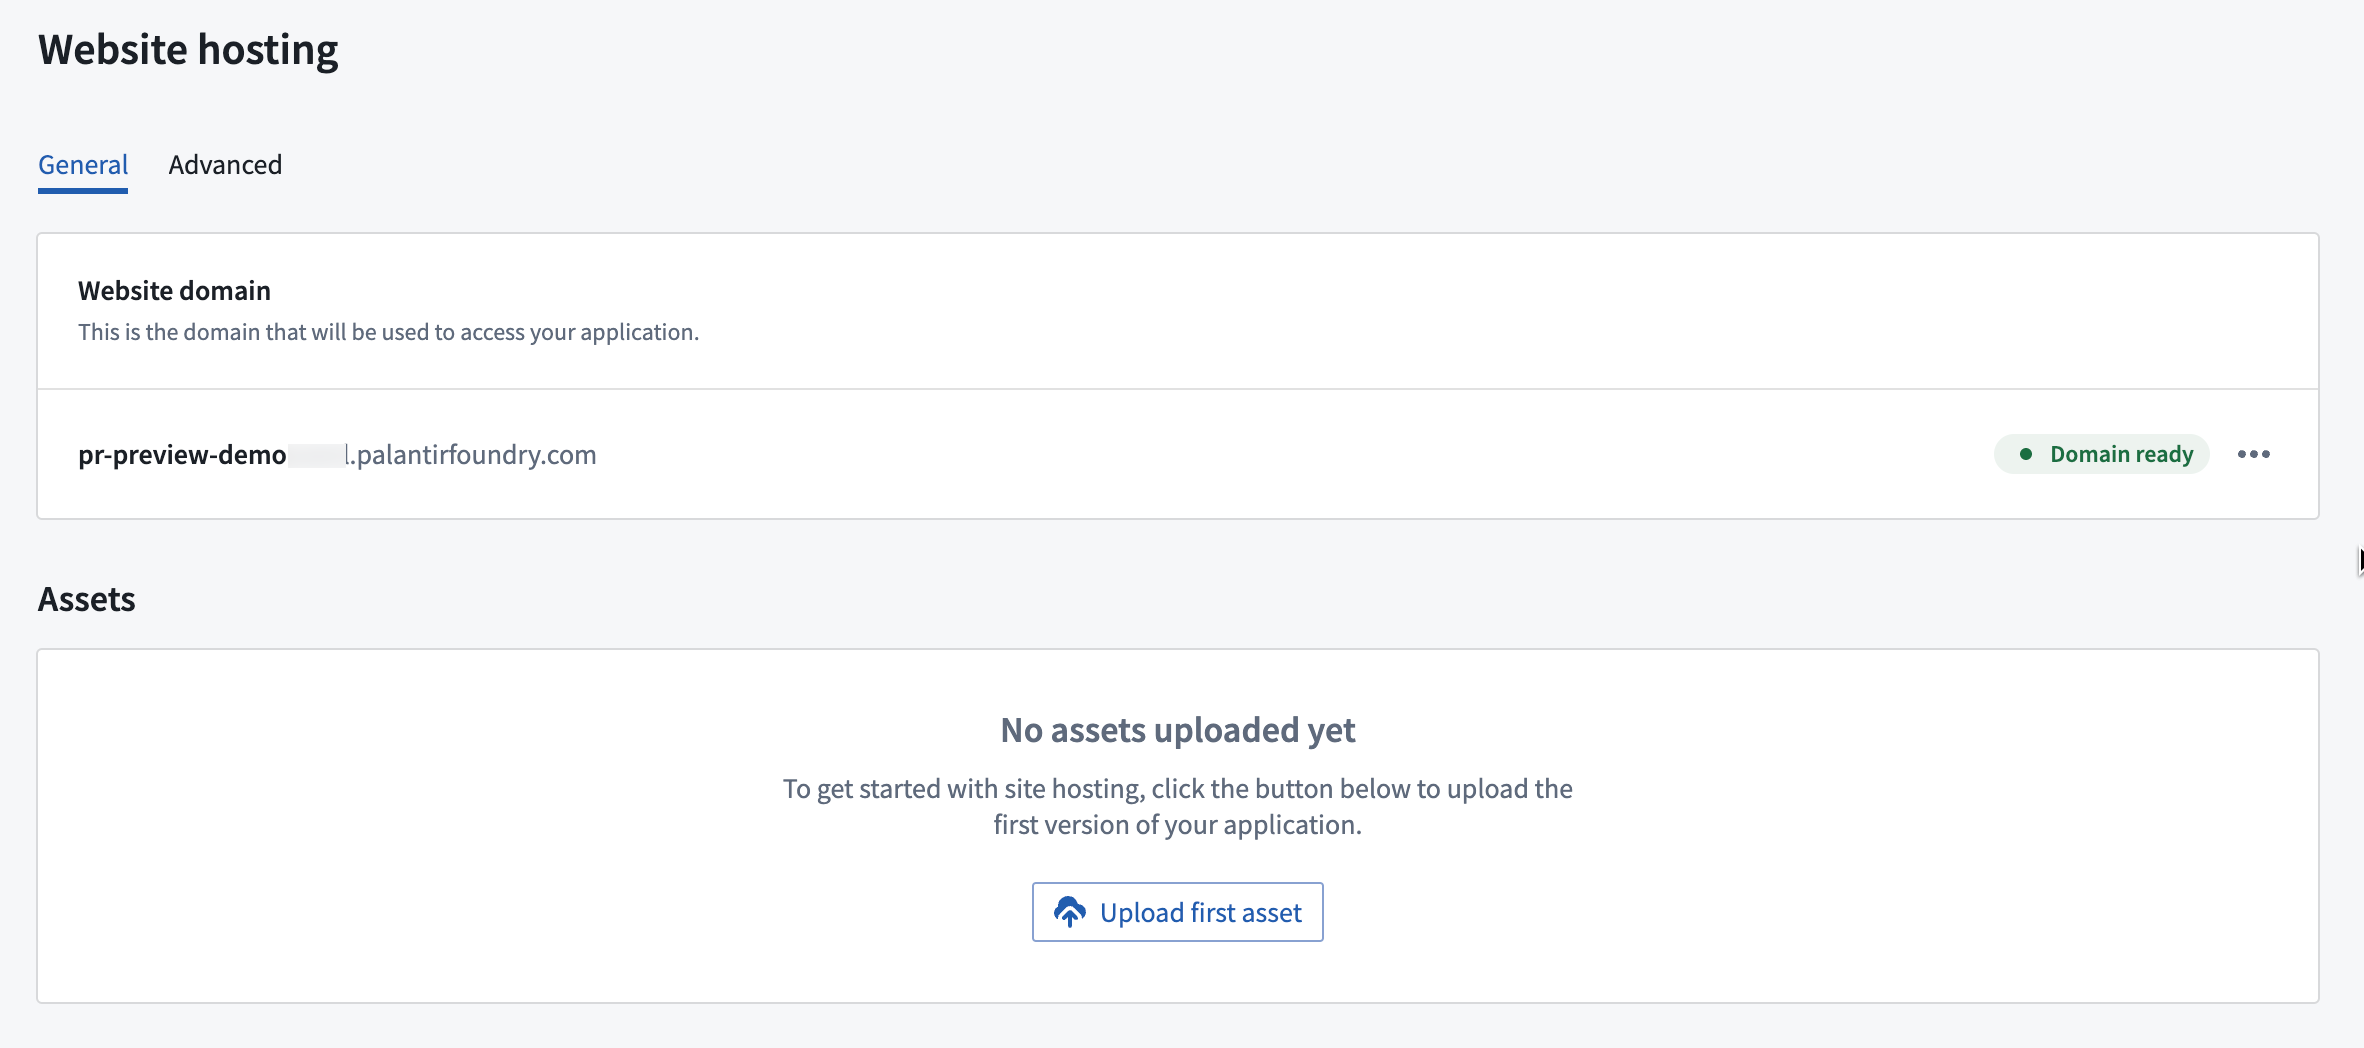
Then, configure website hosting for that application.
-
Choose to use a VS Code workspace to take advantage of the developer features available in the Palantir extension for Visual Studio Code. You can also open your application code in Code Repositories. From either environment, you can create branches in your repository, implement code changes with commits, and push updates. You can use the following terminal commands or your environment interface to make changes:
- Create a new branch:
git checkout -b myFeatureBranch main - Implement your code changes and commit your work:
git commit -am "implement UI change to show PR Preview" -
Push your changes to the code repository:
git push —set-upstream origin myFeatureBranch -
Once you make your desired changes and all checks are complete, return to Code Repositories if you were working in a VS Code workspace.
-
Navigate to the Version control tab at the top of the screen and choose Pull Requests.
-
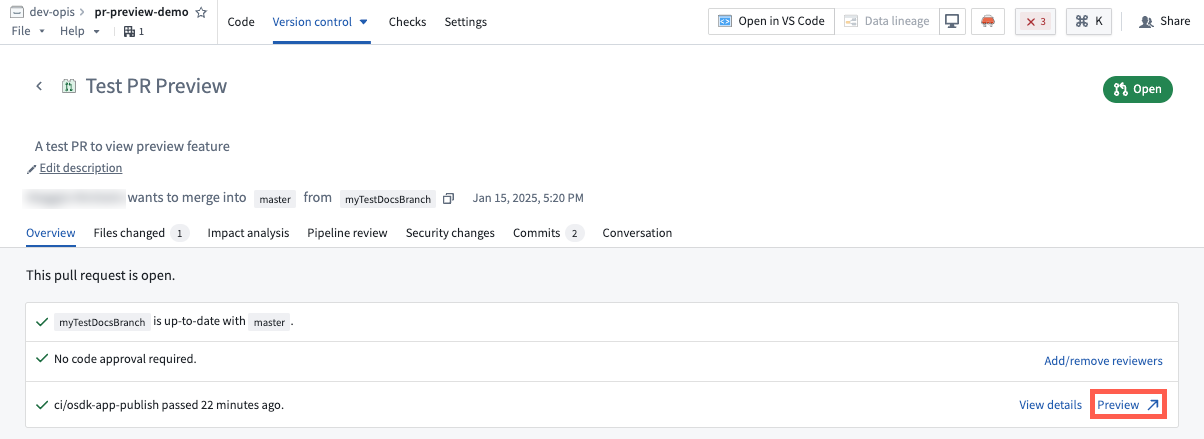
Choose the pull request you would like to preview, then select Preview in the lower right corner to open a preview version of your React application.
You can also find a PR preview link for every commit on your branch by navigating to the Commits tab of the pull request. Note that PR previews are only available within seven days of the creation of the pull request. After seven days, the preview will expire.
Preview permissions
To access the PR preview feature for React applications, users must have proper permissions for the application from Developer Console. To manage these permissions, open your application in Developer Console, then navigate to Sharing in the left sidebar.
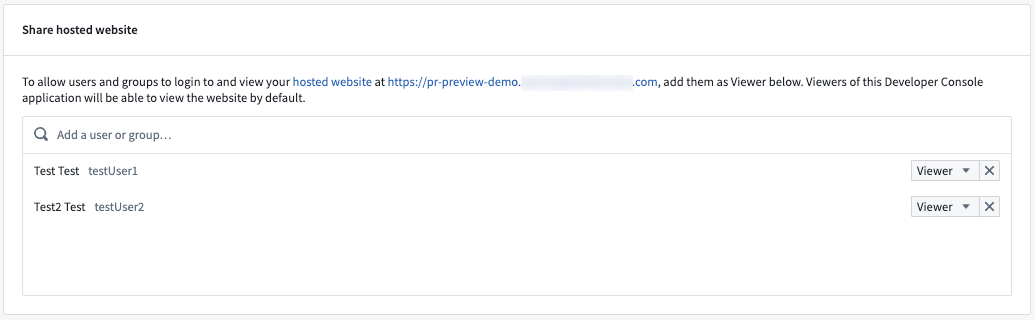
To make changes, create pull requests for the application code, and share PR preview with other users, you must have either Owner or Editor permissions. To share a PR Preview with a user without granting permissions to edit your application code or configurations, add them as a Viewer under Share hosted website.
中文翻译
开发环境
本页将引导您了解在平台内使用 VS Code 工作区(Workspace)构建 OSDK React 应用时的开发工作流程。
开始使用
要在您的代码环境中启用开发功能,您需要设置开发者控制台(Developer Console)。在设置过程中,您必须选择创建面向客户端的应用(Create client-facing application),以便从开发者控制台创建代码仓库。
要使用 VS Code 工作区,请打开开发者控制台,在左侧面板的代码仓库(Code Repository)部分选择创建代码仓库(Create code repository)。此操作将使用默认的 React 模板引导您的仓库。然后您可以选择在 VS Code 中打开(Open in VS Code)来启动一个平台内工作区。
仓库模板将包含一个集成了授权和本体论 SDK(Ontology SDK)的基础 React 应用。
开发生命周期
启动 VS Code 工作区后,您应该会在左侧看到代码编辑器,右侧看到应用的实时预览。您可以像在本地环境中一样开始编辑代码。
编辑
现在您可以开始构建您的 React 应用。请确保在编写代码后进行编辑和测试,然后使用 git 命令或 VS Code 界面提交并推送您的更改,以便项目中的其他开发者可以看到这些更改。在终端中,运行 npm run lint、npm run test 和 npm run build 以确保检查能够通过。
您还可以参考左侧面板中的本体论(Ontology)选项卡,查看为您的 OSDK 生成的文档和代码片段,并返回开发者控制台。
部署
要部署 React 应用,您首先需要创建一个发布版本(Release)。通常使用 git tag 命令来完成,您可以设置版本号,然后将其推送到您的仓库:
git tag <x.y.z>
git push origin tag
或者,您也可以从代码仓库(Code Repositories)界面中创建发布版本:选择屏幕右上角的在代码仓库中打开(Open in Code Repositories),导航到版本控制(Version control)选项卡,然后打开标签和发布(Tags and releases)部分查看之前的发布版本并创建新的发布版本。
一旦发布版本通过检查,您将能够在开发者控制台中查看您的应用。
内容安全策略(Content Security Policy)
默认情况下,我们应用了严格的内容安全策略(CSP)。这意味着对非 Foundry URI 的请求将会失败,并且必须被明确允许。
要检测 CSP 错误,请按 <F12> 键并在控制台中查看日志。如果存在 CSP 失败,您将看到类似于下面所示的错误:
您可以为您的 VS Code 工作区应用一个临时 CSP。出于安全原因,此 CSP 不会应用于该工作区的其他用户,并且会在工作区暂停或重启时过期。
在 VS Code 工作区中测试您的应用后,请确保为您的开发者控制台应用更新 CSP。
开发技巧
待办事项应用教程
如果您是开发者控制台和 OSDK 的新手,我们建议您按照我们的教程之一开始使用。导航到您注册中的使用 AIP 构建(Build with AIP)应用,并安装我们的示例工作流之一。
渐进式 Web 应用(PWA)
为了获得优化的编辑体验,您可以选择将您的工作区安装为渐进式 Web 应用(PWA)。PWA 将接受一些常用的快捷键,例如 Cmd+W(macOS)来关闭标签页。
禅模式(Zen mode)
为了获得接近原生的 VS Code 体验,我们建议使用禅模式。选择视图(View) > 激活禅模式(Activate Zen mode)来启用。禅模式将隐藏平台界面,使 VS Code 占据整个浏览器窗口。要退出禅模式,请将鼠标悬停在屏幕顶部中央的三个点 ... 上。
本地开发
除了在平台内工作,您还可以通过以下方式在本地机器上工作:
- 导航到代码仓库应用中的仓库,然后选择屏幕右上角的在本地工作(Work locally)来克隆您的仓库并将
FOUNDRY_TOKEN导出到您的本地环境。
更多信息请参考仓库中的 readme.md 文件。
:::callout{theme="neutral"} 您可以将仓库存储在 Palantir 平台之外,同时仍然使用开发者控制台来部署应用。在我们的文档中了解更多关于在 Foundry 上部署本体论 SDK 应用的信息。 :::
PR 预览 [Beta]
:::callout{theme="warning"} React 应用的 PR 预览功能处于 beta 开发阶段,可能在您的注册中不可用。功能在活跃开发期间可能会发生变化。 :::
为了为您的项目增加效率和更便捷的协作,您可以在推送更新之前访问 React 应用更改的 PR 预览。PR(拉取请求)预览基于您的拉取请求中提交的代码,提供一个可运行的 React 应用版本。您可以在更改合并到主分支和生产状态之前预览任何提议的更改,从而更容易检查任何不良结果并在更改进入生产之前验证面向用户的工作流程。以前,构建者、设计师和应用团队的其他成员需要创建一个开发环境来查看更改。PR 预览功能消除了这一需求,允许更快地验证设计和功能方面的生产更改,从而实现更高效、更协作的流程。
PR 预览功能适用于任何托管在 Foundry 代码仓库中并使用开发者控制台网站托管功能的 OSDK React 应用。
按照以下步骤开始使用 PR 预览:
-
首先,在开发者控制台中生成一个应用。
-
然后,为该应用配置网站托管。
-
选择使用 VS Code 工作区来利用 Palantir Visual Studio Code 扩展中可用的开发者功能。您也可以在代码仓库中打开您的应用代码。从任一环境中,您都可以在仓库中创建分支,通过提交实现代码更改,并推送更新。您可以使用以下终端命令或您的环境界面进行更改:
- 创建新分支:
git checkout -b myFeatureBranch main - 实现代码更改并提交您的工作:
git commit -am "implement UI change to show PR Preview" -
将更改推送到代码仓库:
git push —set-upstream origin myFeatureBranch -
完成所需的更改并且所有检查通过后,如果您在 VS Code 工作区中工作,请返回代码仓库。
-
导航到屏幕顶部的版本控制(Version control)选项卡,选择拉取请求(Pull Requests)。
-
选择您想要预览的拉取请求,然后选择右下角的预览(Preview)来打开您的 React 应用的预览版本。
您还可以通过导航到拉取请求的提交(Commits)选项卡,找到分支上每个提交的 PR 预览链接。请注意,PR 预览仅在拉取请求创建后的七天内可用。七天后,预览将过期。
预览权限
要访问 React 应用的 PR 预览功能,用户必须从开发者控制台拥有应用的适当权限。要管理这些权限,请在开发者控制台中打开您的应用,然后导航到左侧边栏中的共享(Sharing)。
要进行更改、为应用代码创建拉取请求以及与其他用户共享 PR 预览,您必须拥有 Owner 或 Editor 权限。要向用户共享 PR 预览而不授予编辑应用代码或配置的权限,请在共享托管网站(Share hosted website)下将他们添加为 Viewer。