Design best practices(设计最佳实践)
Designing for interactions on mobile devices requires a different set of considerations than for users on desktop devices. Screen viewports are a different size, users are likely using a touchscreen to interact with components, and users implicitly expect different types of interactions on mobile devices. Additionally, you should be mindful of how your application may be used across a range of operating systems, such as iOS and Android.
Although Workshop attempts to tailor widgets in mobile applications to provide a mobile-friendly user experience, the responsibility for creating a smooth experience for users is ultimately up to you. This page describes a range of best practices for mobile application design, and details how you can achieve a high-quality user experience using the concepts available in Workshop, including by using Layouts and Widgets properly.
We recommend the following best practices for mobile design:
- Avoid collapsible sections, and favor letting users scroll through content
- Use large buttons to ensure mobile-friendly tap targets
- Use drawers for complex data entry
- Navigate to subpages to enable multi-step interactions
- Scale your application using the Navigation Bar, or split it into multiple applications
Favor scrollable content
A common pattern in desktop applications is to use collapsible panels (or sidebars) on the left and right side of your application. These are typically used to show configurable filters or details about an item in a table or list.
Collapsible sections are problematic on mobile devices for a few reasons. It can be difficult to locate and tap on the control to toggle the section, and there usually isn't enough screen real estate available for collapsible sections to provide a natural user experience.
Instead, try using a Flow layout to show a series of widgets that users can scroll through. Vertical scrolling is a natural way to show a large amount of content on a mobile device, and users can easily scroll through a range of widgets to find the information they need.
If you need to keep some summary information or action buttons always available on screen, use either a Toolbar or Rows layout that contains a Flow within it. This enables you to have certain widgets always visible at either the top or bottom of the screen, while keeping the ability for users to scroll through the main body of content, as in the example below.

For a step-by-step guide to setting up a page like this, refer to the tutorial section on creating an object view.
Ensure mobile-friendly tap targets
Users on desktop devices typically use a mouse and keyboard to interact with your application. Using a mouse allows users to click on buttons and other controls with precision. On mobile devices with a touchscreen, however, users may struggle to interact with a button that was originally sized for use on desktop.
When adding a Button Group widget in a mobile application, we recommend selecting the Large style option in most cases to ensure the button is easily selectable on a touchscreen. Where appropriate, we also recommend enabling the Fill available horizontal space option to further increase the size of the control target.

When you need to display multiple button options to an end user, configure your Button Group to have a Menu button type. In a mobile application, this shows a top-level button which will open a bottom drawer to let the user select one of the nested buttons you've configured.

Data entry in drawers
Desktop applications often have plenty of screen real estate available to show multiple input components, using widgets such as the Text input, Numeric input, or Filter list. Sometimes, these components are nested within a collapsible section for cleanliness and organization.
In a mobile application, we recommend using a drawer layout to provide a focused data entry experience. This conforms to the iOS design guideline of using modality ↗ to help users focus on a scoped or complex task.
Mobile Workshop applications automatically show Action forms within a drawer for this reason. When you add a Button Group widget, the widget it will show up in a full-page drawer when selected.
Beyond Action forms, you should consider adding a drawer in Workshop when users need to input multiple pieces of information. A common example is when users need to customize multiple filters that apply to a set of objects that they are looking at. You can create a drawer containing a Filter list widget to let users configure their filters, then add a Button Group widget that opens the drawer.
For a step-by-step guide to setting up a drawer, refer to the tutorial section on adding a filter drawer.
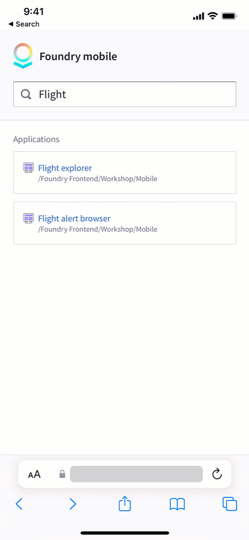
Use subpages for multi-step interactions
Building on the best practices described above, when you need users to examine a specific object to view details or take action, you should create a new page that shows the full details about the object. Workshop applications opened in the mobile app launcher support browser-level Forward and Back interactions to let users navigate into and out of subpages, which provides a natural experience across Android and iOS.
To set up this pattern, create a page in your Workshop application, add widgets to show relevant information, and use an event to navigate to that page. Then, end users will be able to navigate back to your initial page using the web browser, as shown below.
For a step-by-step guide to creating this workflow, refer to the last step of the tutorial section on configuring an object view.
Scale your application using the Navigation Bar
In desktop applications, it's common to use a tabbed layout to include many different pieces of functionality in a single interface. The combination of tabs and collapsible sections can be used to create complex, data-rich interfaces that enable open-ended analysis and show lots of information on the screen.
Mobile applications should usually be more tailored to the specific needs of your target user group than desktop applications. As a result, each top-level page in your mobile application should be fairly simple, typically just allowing users to browse and filter a set of objects, then navigate to another page to view details and take action.
As your application becomes more complex and includes multiple workflows for a user group, you should use the Mobile Navigation Bar to surface multiple pages that users can access. Each navigation item can take users to a different top-level page, typically used to show different types of objects, or to provide multiple ways to search the same set of objects.
For example, in an application used to surface tasks for a technician, one tab called "My tasks" could show all active tasks assigned to the current user, another tab called "Task search" could enable searching for tasks across all technicians, and a final tab called "History" could show a record of tasks the user has previously completed.

For details on how to configure the Navigation Bar, refer to the Navigation Bar Widget page.
The Navigation Bar supports showing up to four tabs at the bottom of the screen, and you can show additional navigation items using submenus. However, if your application has reached a point of having several tabs, you should consider splitting this functionality into multiple applications. Users can navigate across applications using the app launcher, and having a single, targeted purpose for each application can help keep functionality simple and ensure that your application remains performant.
中文翻译
设计最佳实践
为移动设备设计交互体验时,需要考虑与桌面设备用户不同的因素。屏幕视口尺寸不同,用户很可能使用触摸屏与组件交互,并且用户对移动设备上的交互类型有着不同的隐含期望。此外,您还应注意应用程序如何在多种操作系统(如 iOS 和 Android)上使用。
尽管 Workshop 试图调整移动应用程序中的微件(Widget)以提供移动友好的用户体验,但最终为用户创造流畅体验的责任在于您自己。本页面介绍了移动应用设计的一系列最佳实践,并详细说明了如何使用 Workshop 中可用的概念(包括正确使用布局(Layouts)和微件(Widgets))来实现高质量的用户体验。
我们建议遵循以下移动设计最佳实践:
优先使用可滚动内容
桌面应用程序中常见的模式是在应用程序的左右两侧使用可折叠面板(或侧边栏)。这些通常用于显示可配置的筛选器或表格/列表中某个项目的详细信息。
可折叠区域在移动设备上存在一些问题。用户可能难以定位并点击切换该区域的控制按钮,而且通常没有足够的屏幕空间来让可折叠区域提供自然的用户体验。
相反,请尝试使用流式布局(Flow layout)来显示一系列可供用户滚动浏览的微件。垂直滚动是在移动设备上显示大量内容的自然方式,用户可以轻松滚动浏览各种微件以找到所需信息。
如果您需要让某些摘要信息或操作按钮始终显示在屏幕上,请使用包含流式布局(Flow)的工具栏(Toolbar)或行(Rows)布局。这样,您可以让某些微件始终显示在屏幕顶部或底部,同时保持用户能够滚动浏览主要内容主体,如下例所示。
有关设置此类页面的分步指南,请参阅关于创建对象视图的教程部分。
确保移动友好的点击目标
桌面设备用户通常使用鼠标和键盘与应用程序交互。使用鼠标可以让用户精确点击按钮和其他控件。然而,在带有触摸屏的移动设备上,用户可能难以与原本为桌面使用而设计的按钮进行交互。
在移动应用程序中添加按钮组(Button Group)微件时,我们建议在大多数情况下选择大样式(Large style)选项,以确保按钮在触摸屏上易于选择。在适当的情况下,我们还建议启用填充可用水平空间(Fill available horizontal space)选项,以进一步增大控件目标的大小。
当需要向最终用户显示多个按钮选项时,请将按钮组(Button Group)配置为菜单按钮类型。在移动应用程序中,这会显示一个顶层按钮,点击后将打开一个底部抽屉,让用户选择您配置的嵌套按钮之一。
在抽屉中进行数据输入
桌面应用程序通常有充足的屏幕空间来显示多个输入组件,使用文本输入(Text input)、数字输入(Numeric input)或筛选列表(Filter list)等微件。有时,为了整洁和组织,这些组件会嵌套在可折叠区域中。
在移动应用程序中,我们建议使用抽屉(Drawer)布局来提供专注的数据输入体验。这符合 iOS 设计指南中关于使用模态(Modality) ↗来帮助用户专注于特定或复杂任务的要求。
出于这个原因,移动 Workshop 应用程序会自动在抽屉中显示操作表单(Action forms)。当您添加按钮组微件(Button Group widget)时,该微件会在选中时显示在一个全屏抽屉中。
除了操作表单之外,当用户需要输入多条信息时,您应该考虑在 Workshop 中添加抽屉。一个常见的例子是用户需要自定义应用于他们正在查看的对象集的多个筛选器。您可以创建一个包含筛选列表(Filter list)微件的抽屉,让用户配置他们的筛选器,然后添加一个按钮组(Button Group)微件来打开该抽屉。
有关设置抽屉的分步指南,请参阅关于添加筛选器抽屉的教程部分。
使用子页面进行多步骤交互
基于上述最佳实践,当您需要用户检查特定对象以查看详细信息或执行操作时,您应该创建一个新的页面(Page)来显示该对象的完整详细信息。在移动应用启动器(mobile app launcher)中打开的 Workshop 应用程序支持浏览器级别的前进和后退交互,让用户能够导航进入和退出子页面,这在 Android 和 iOS 上提供了自然的体验。
要设置此模式,请在您的 Workshop 应用程序中创建一个页面,添加微件以显示相关信息,并使用事件(Event)导航到该页面。然后,最终用户将能够使用网页浏览器导航回您的初始页面,如下所示。
有关创建此工作流的分步指南,请参阅关于配置对象视图教程部分的最后一步。
使用导航栏扩展应用程序
在桌面应用程序中,通常使用选项卡式布局在单个界面中包含许多不同的功能。选项卡和可折叠区域的组合可用于创建复杂、数据丰富的界面,支持开放式分析并在屏幕上显示大量信息。
移动应用程序通常应比桌面应用程序更针对目标用户群体的特定需求进行定制。因此,移动应用程序中的每个顶层页面都应相当简单,通常只允许用户浏览和筛选一组对象,然后导航到另一个页面查看详细信息并执行操作。
随着您的应用程序变得更加复杂,并为用户群体包含多个工作流,您应该使用移动导航栏(Mobile Navigation Bar)来展示用户可以访问的多个页面。每个导航项可以将用户带到不同的顶层页面,通常用于显示不同类型的对象,或提供多种方式来搜索同一组对象。
例如,在一个用于向技术人员展示任务的应用程序中,一个名为"我的任务(My tasks)"的选项卡可以显示分配给当前用户的所有活动任务,另一个名为"任务搜索(Task search)"的选项卡可以支持在所有技术人员中搜索任务,最后一个名为"历史记录(History)"的选项卡可以显示用户之前完成的任务记录。
有关如何配置导航栏的详细信息,请参阅导航栏微件(Navigation Bar Widget)页面。
导航栏支持在屏幕底部显示最多四个选项卡,您可以使用子菜单显示额外的导航项。但是,如果您的应用程序已经发展到拥有多个选项卡的程度,您应该考虑将此功能拆分为多个应用程序。用户可以使用应用启动器(app launcher)在应用程序之间导航,每个应用程序具有单一、明确的目标有助于保持功能简单,并确保您的应用程序保持高性能。