Getting started(入门指南)
In this tutorial we will walk through building a basic Scenario-powered module.
To begin, let’s create a brand-new Workshop module.
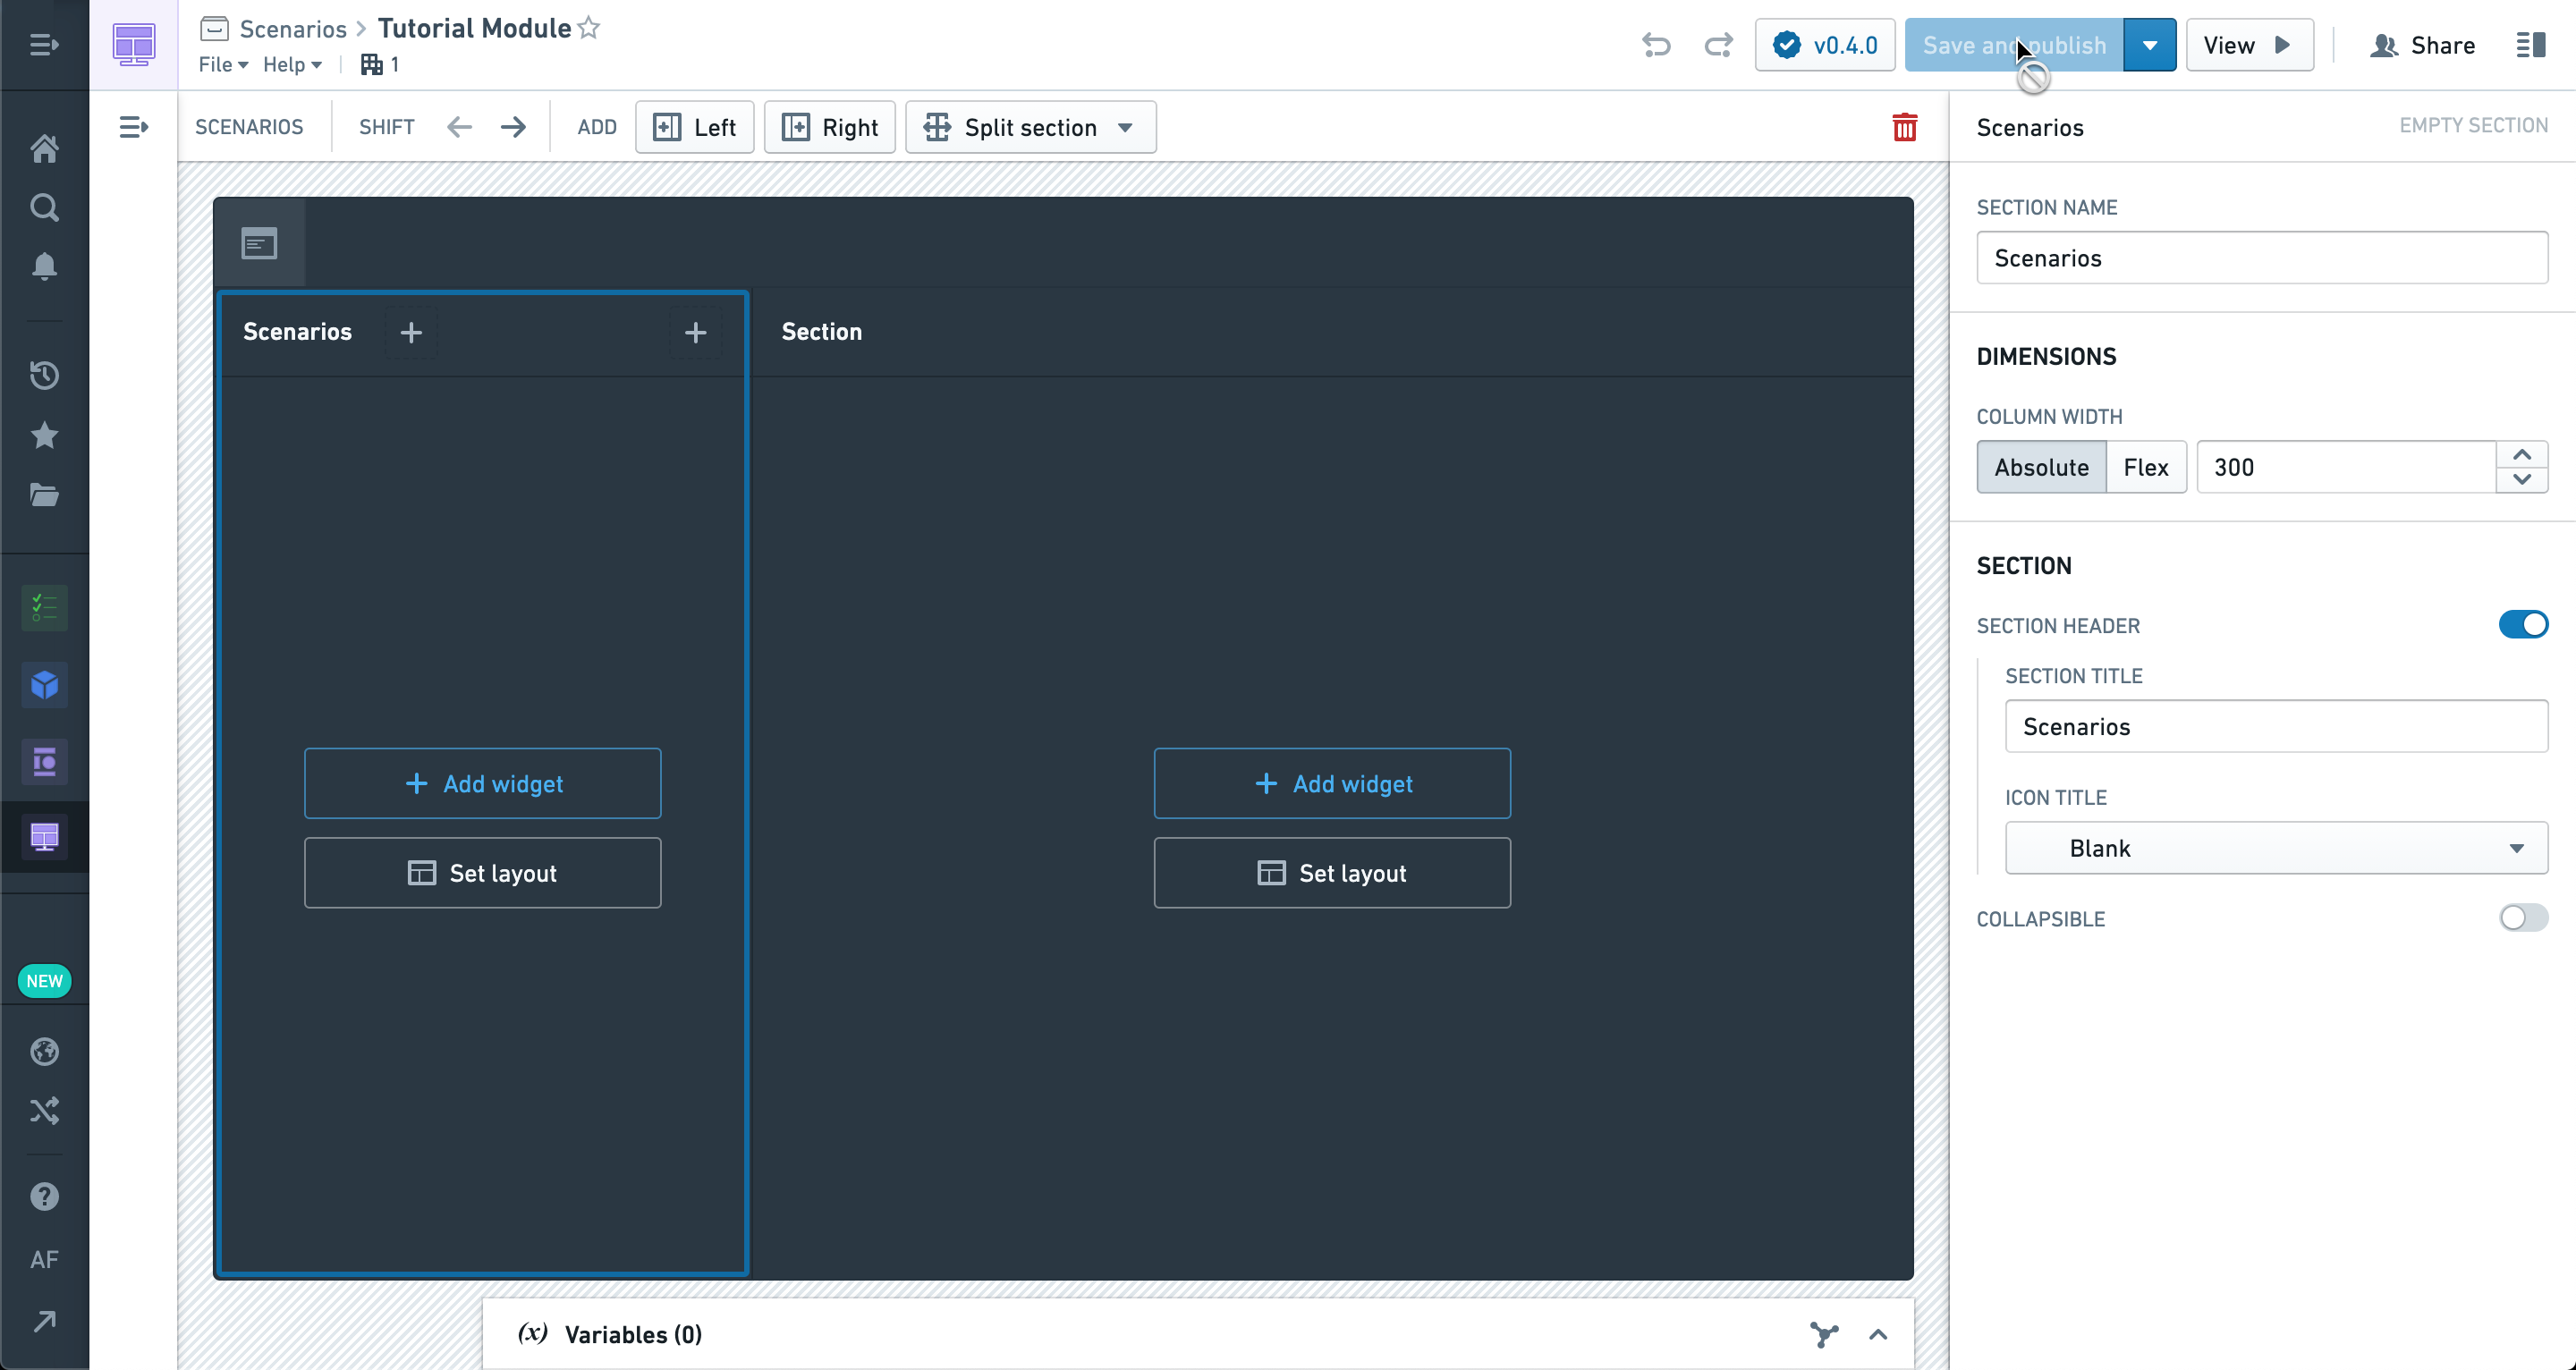
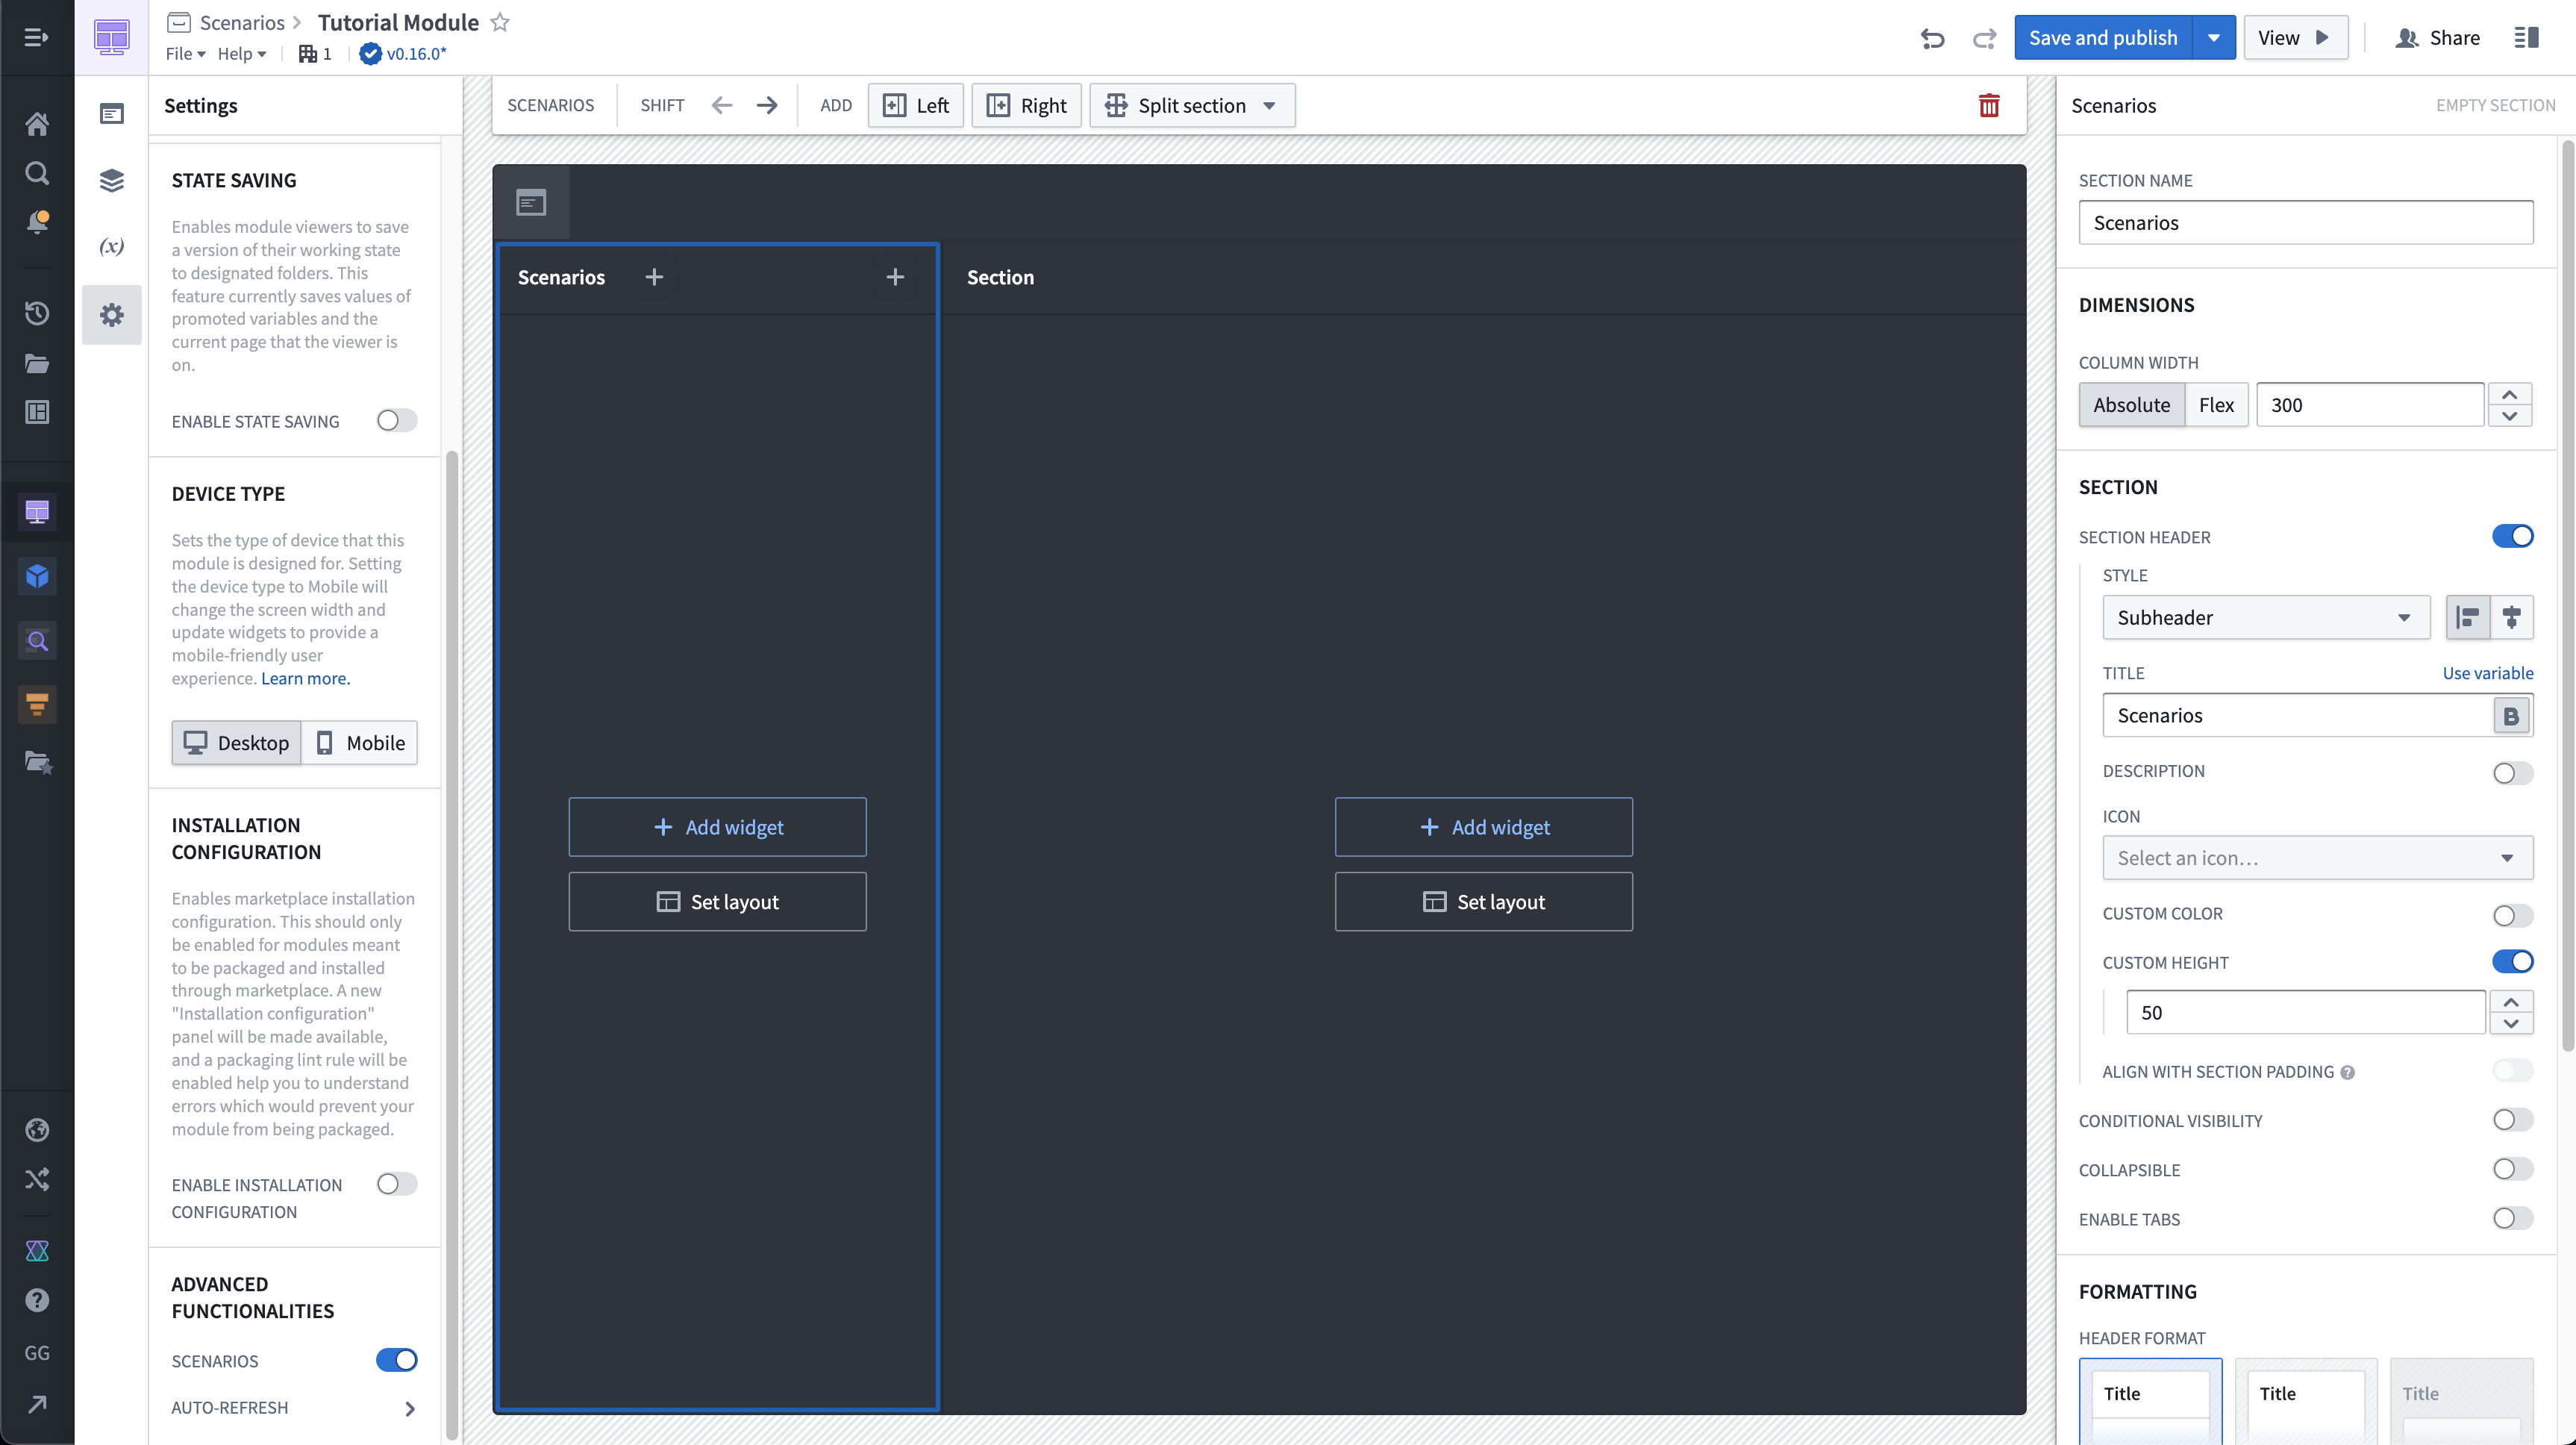
First, navigate to the Settings panel on the left and ensure Scenarios are enabled in Advanced Functionalities.
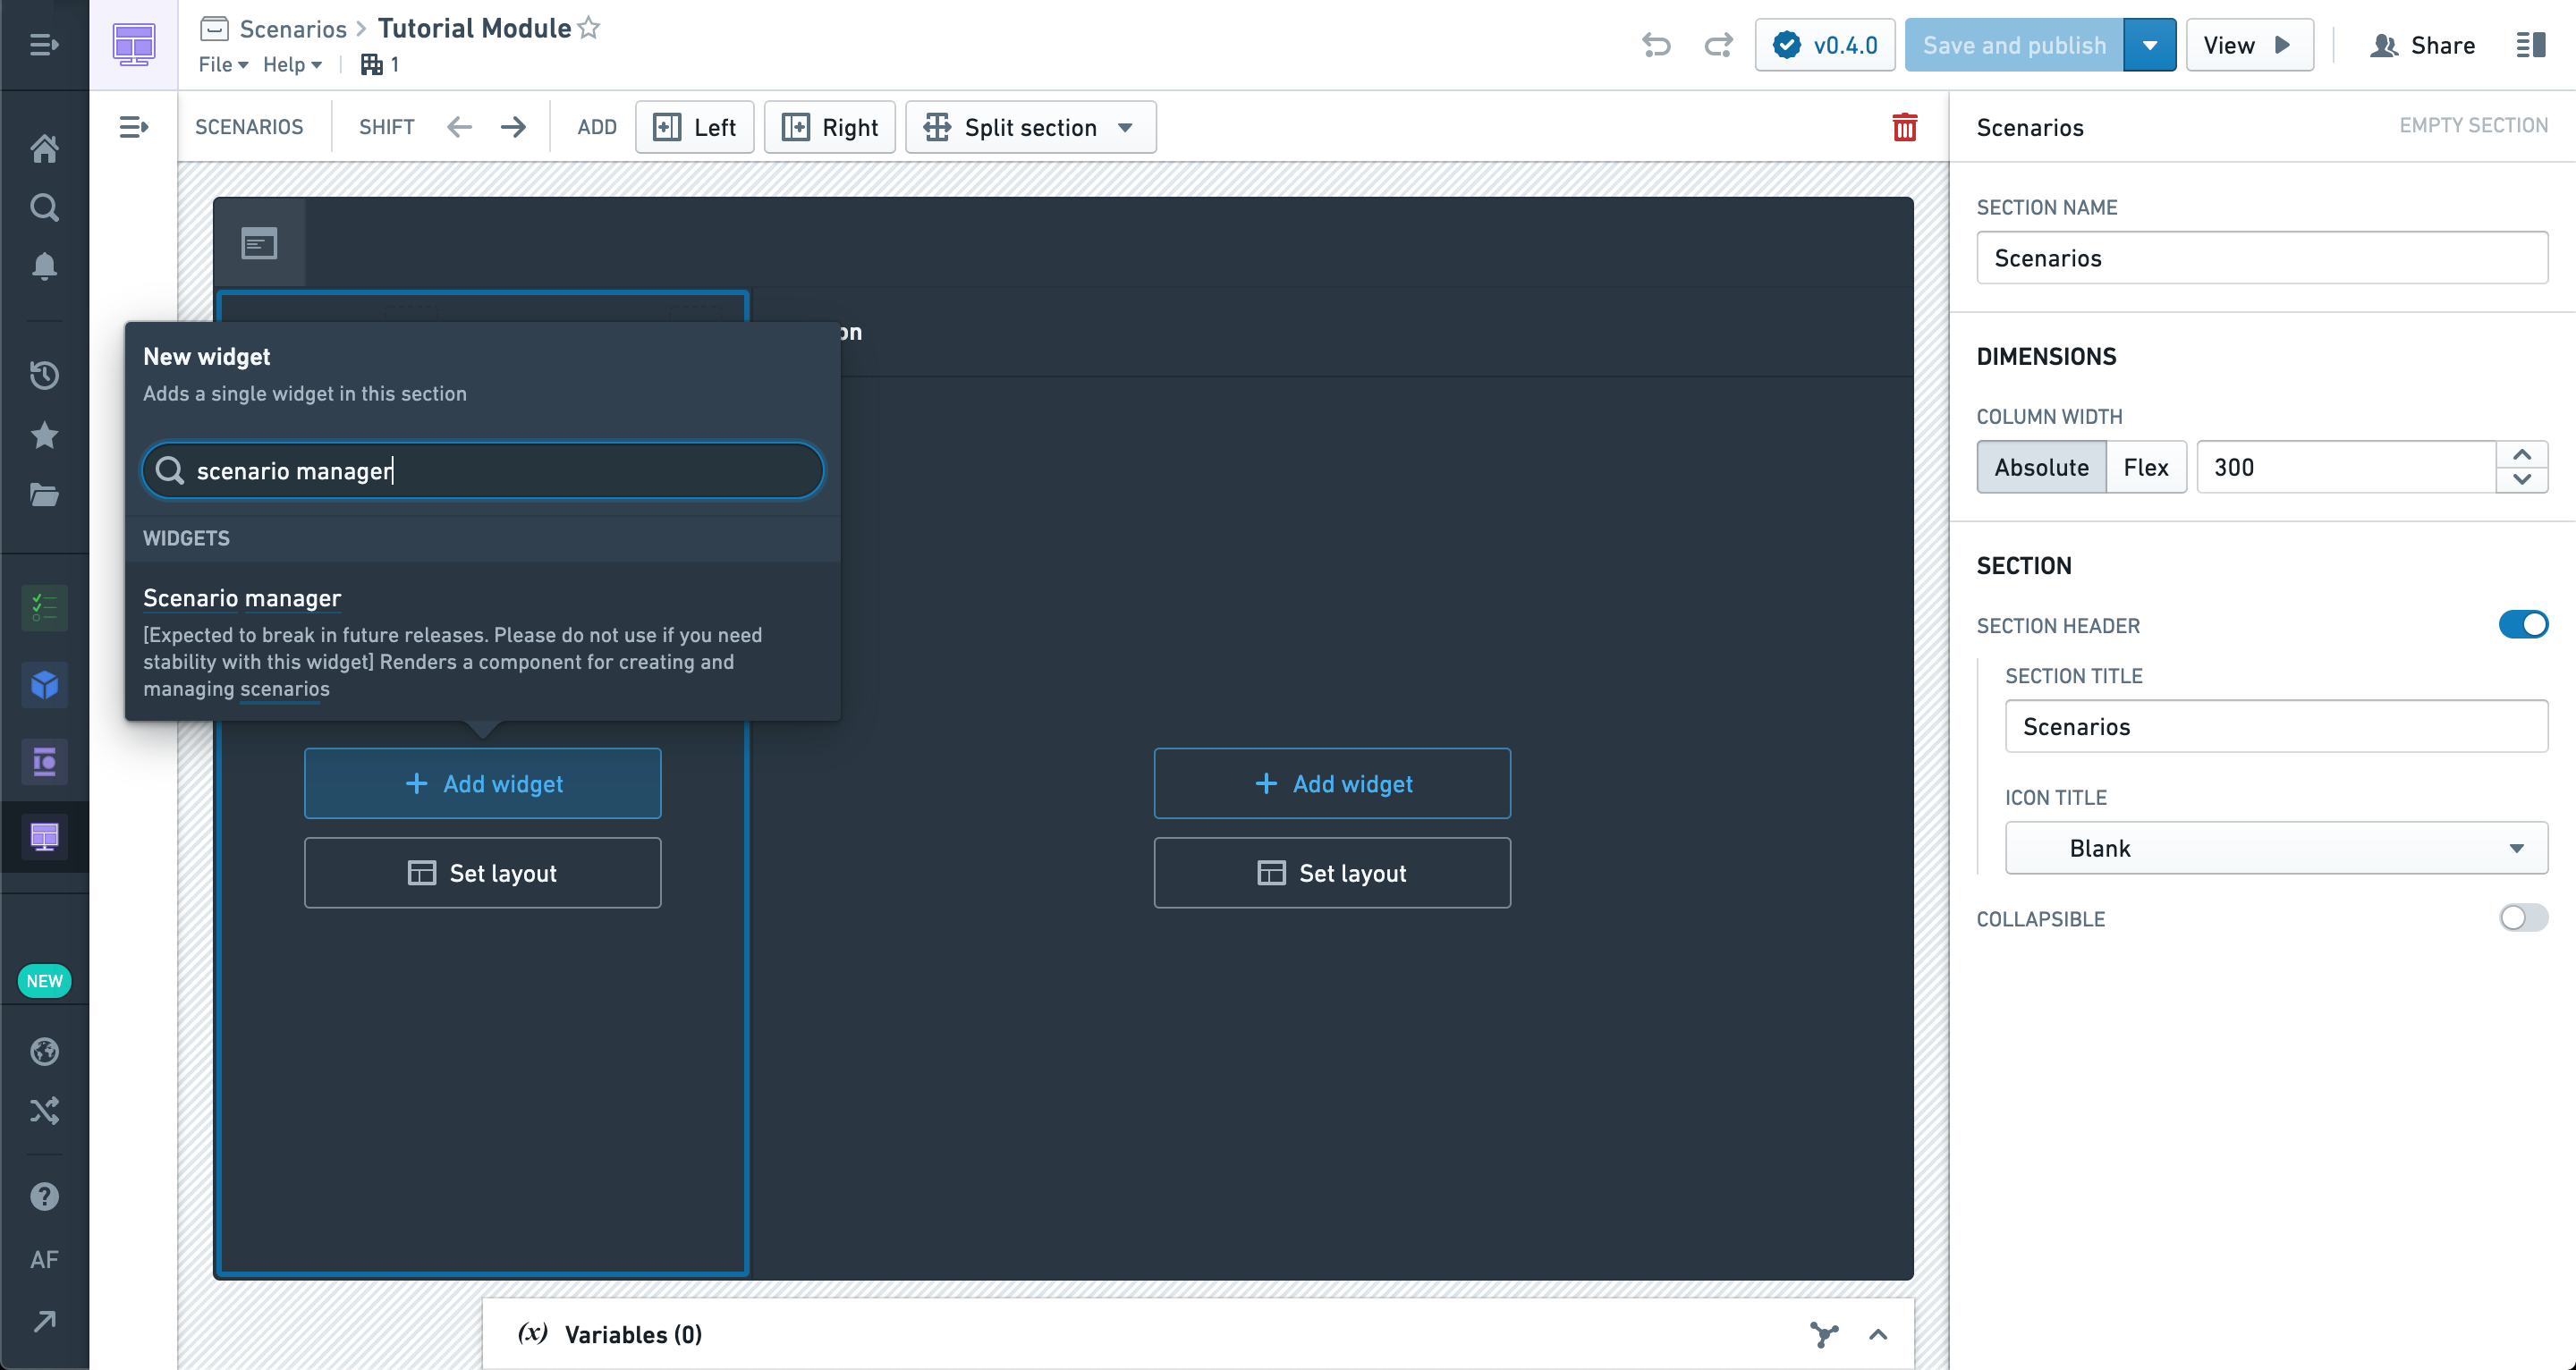
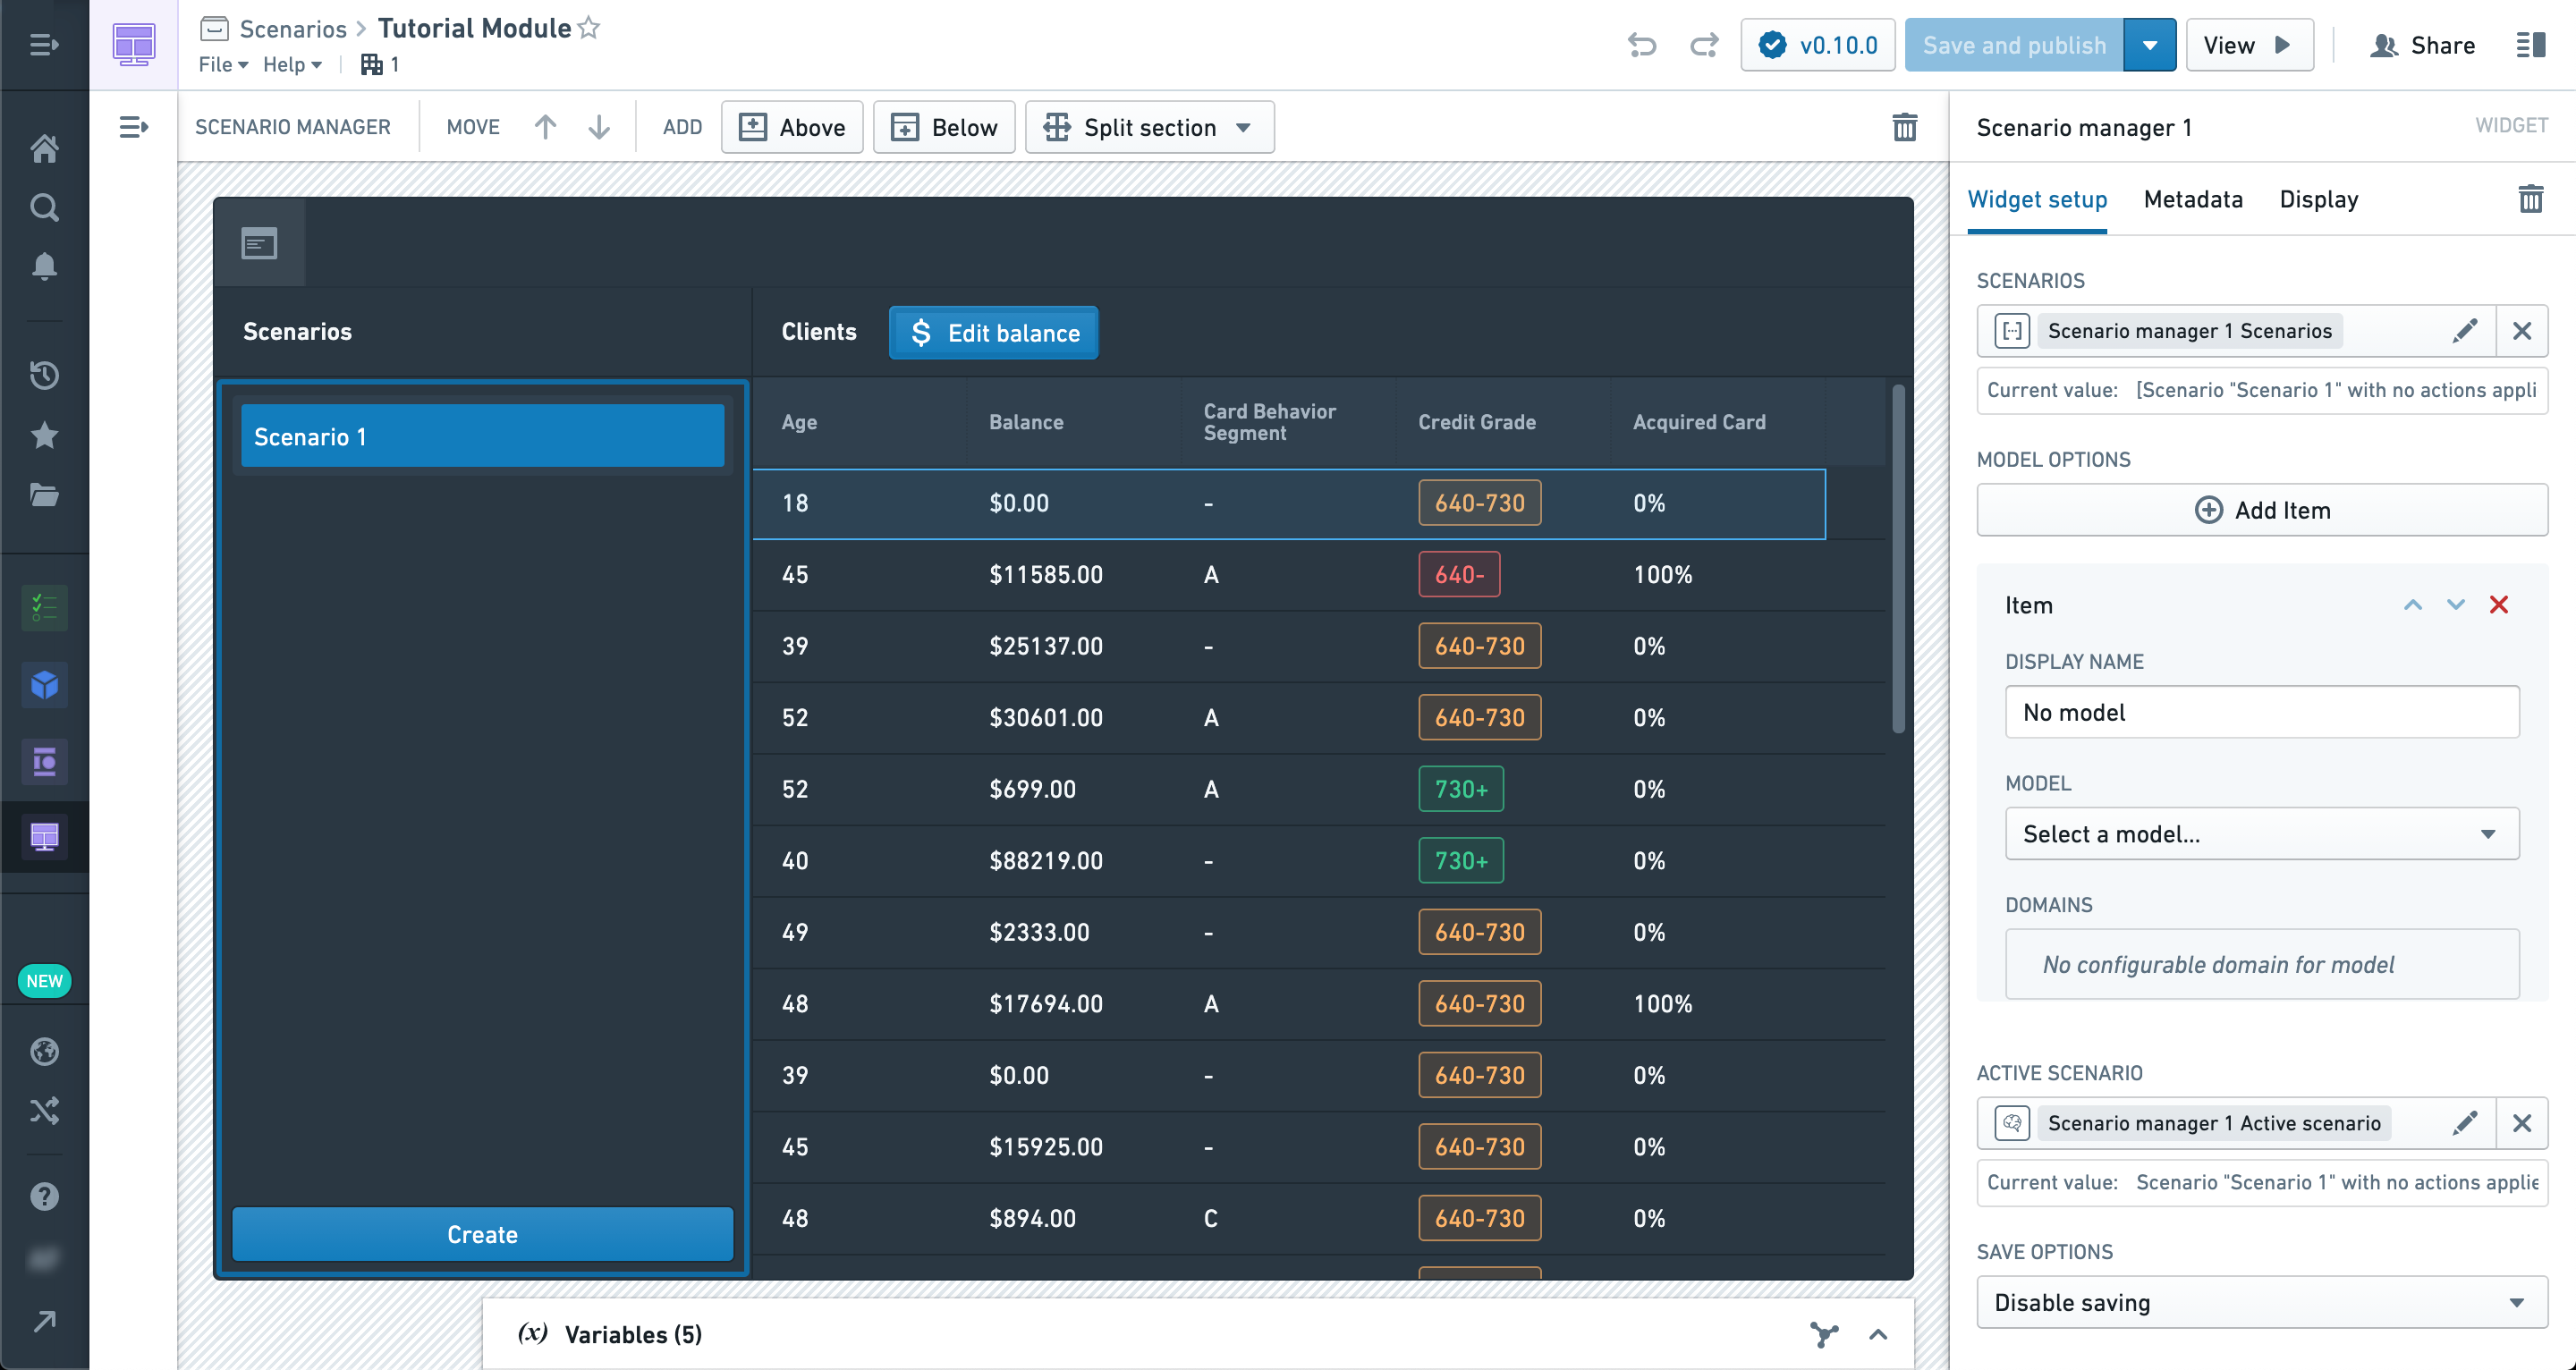
In the sidebar section, let’s add a Scenario Manager widget.
This is one of the Scenario-specific widgets in Workshop and is used to create and manage Scenarios that will be used throughout the module.
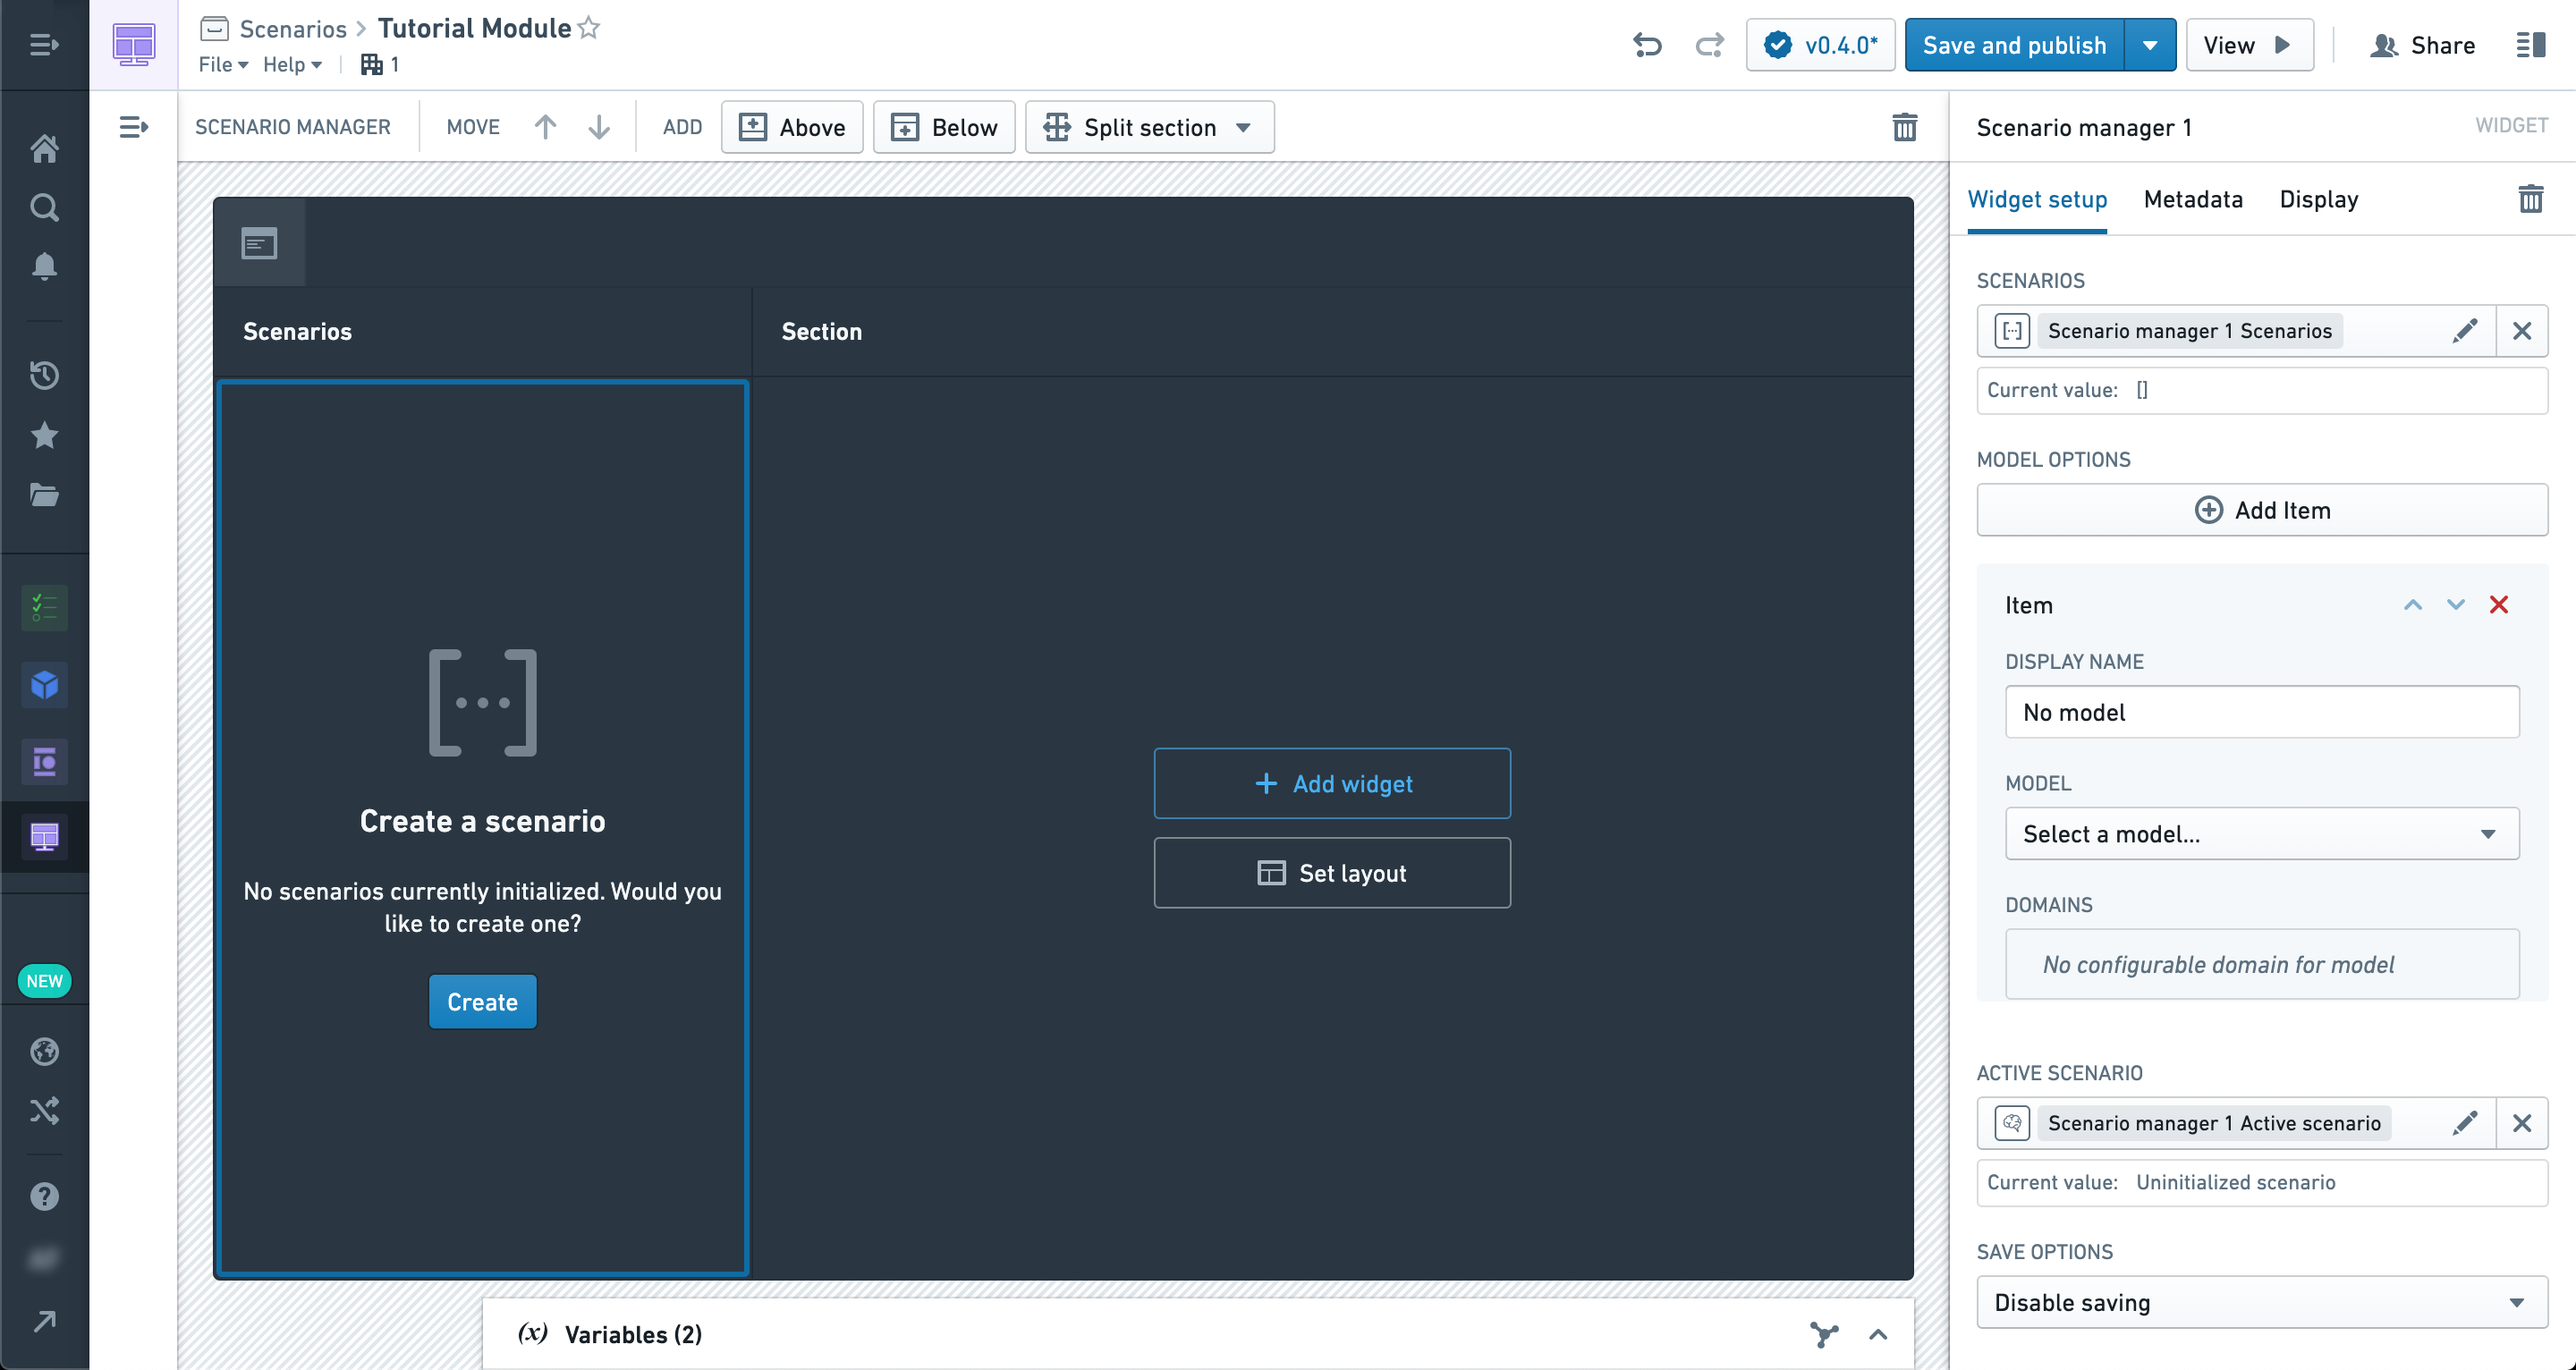
The configuration options can be left alone for now; we will come back to them later.
In the body of the module, let’s add an Object table.
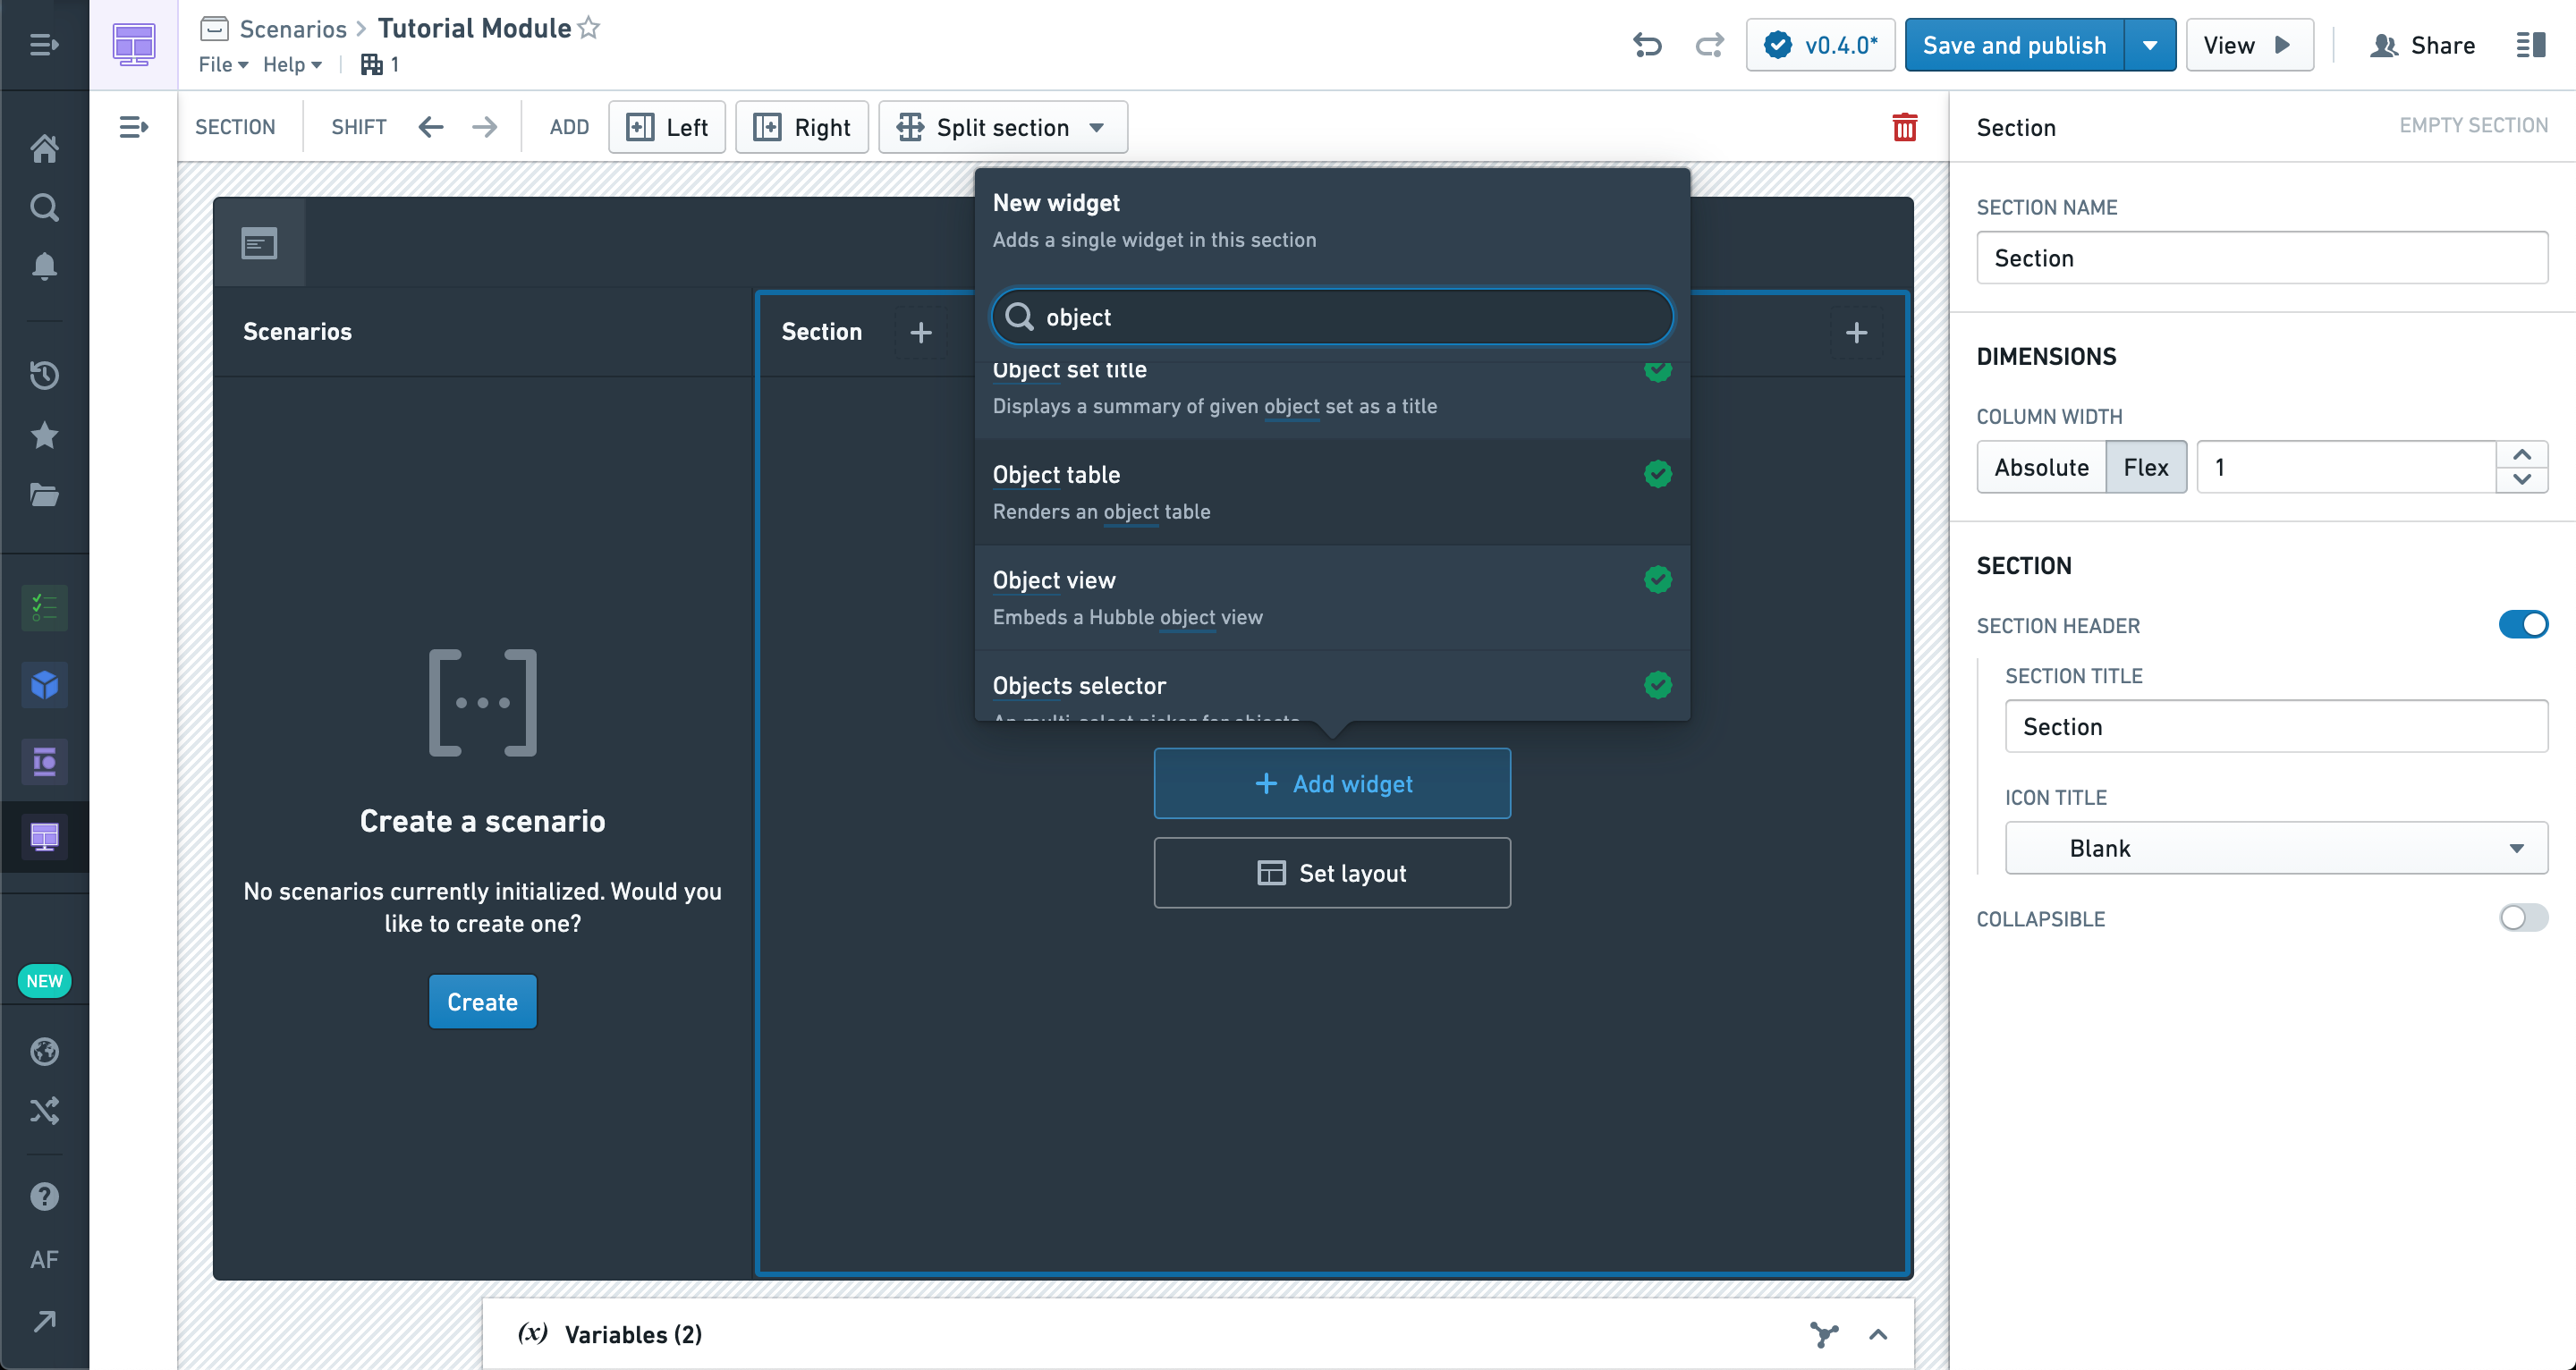
You can use any Object set to populate the table, but we recommend starting with an Object type that already has at least one associated Action configured.
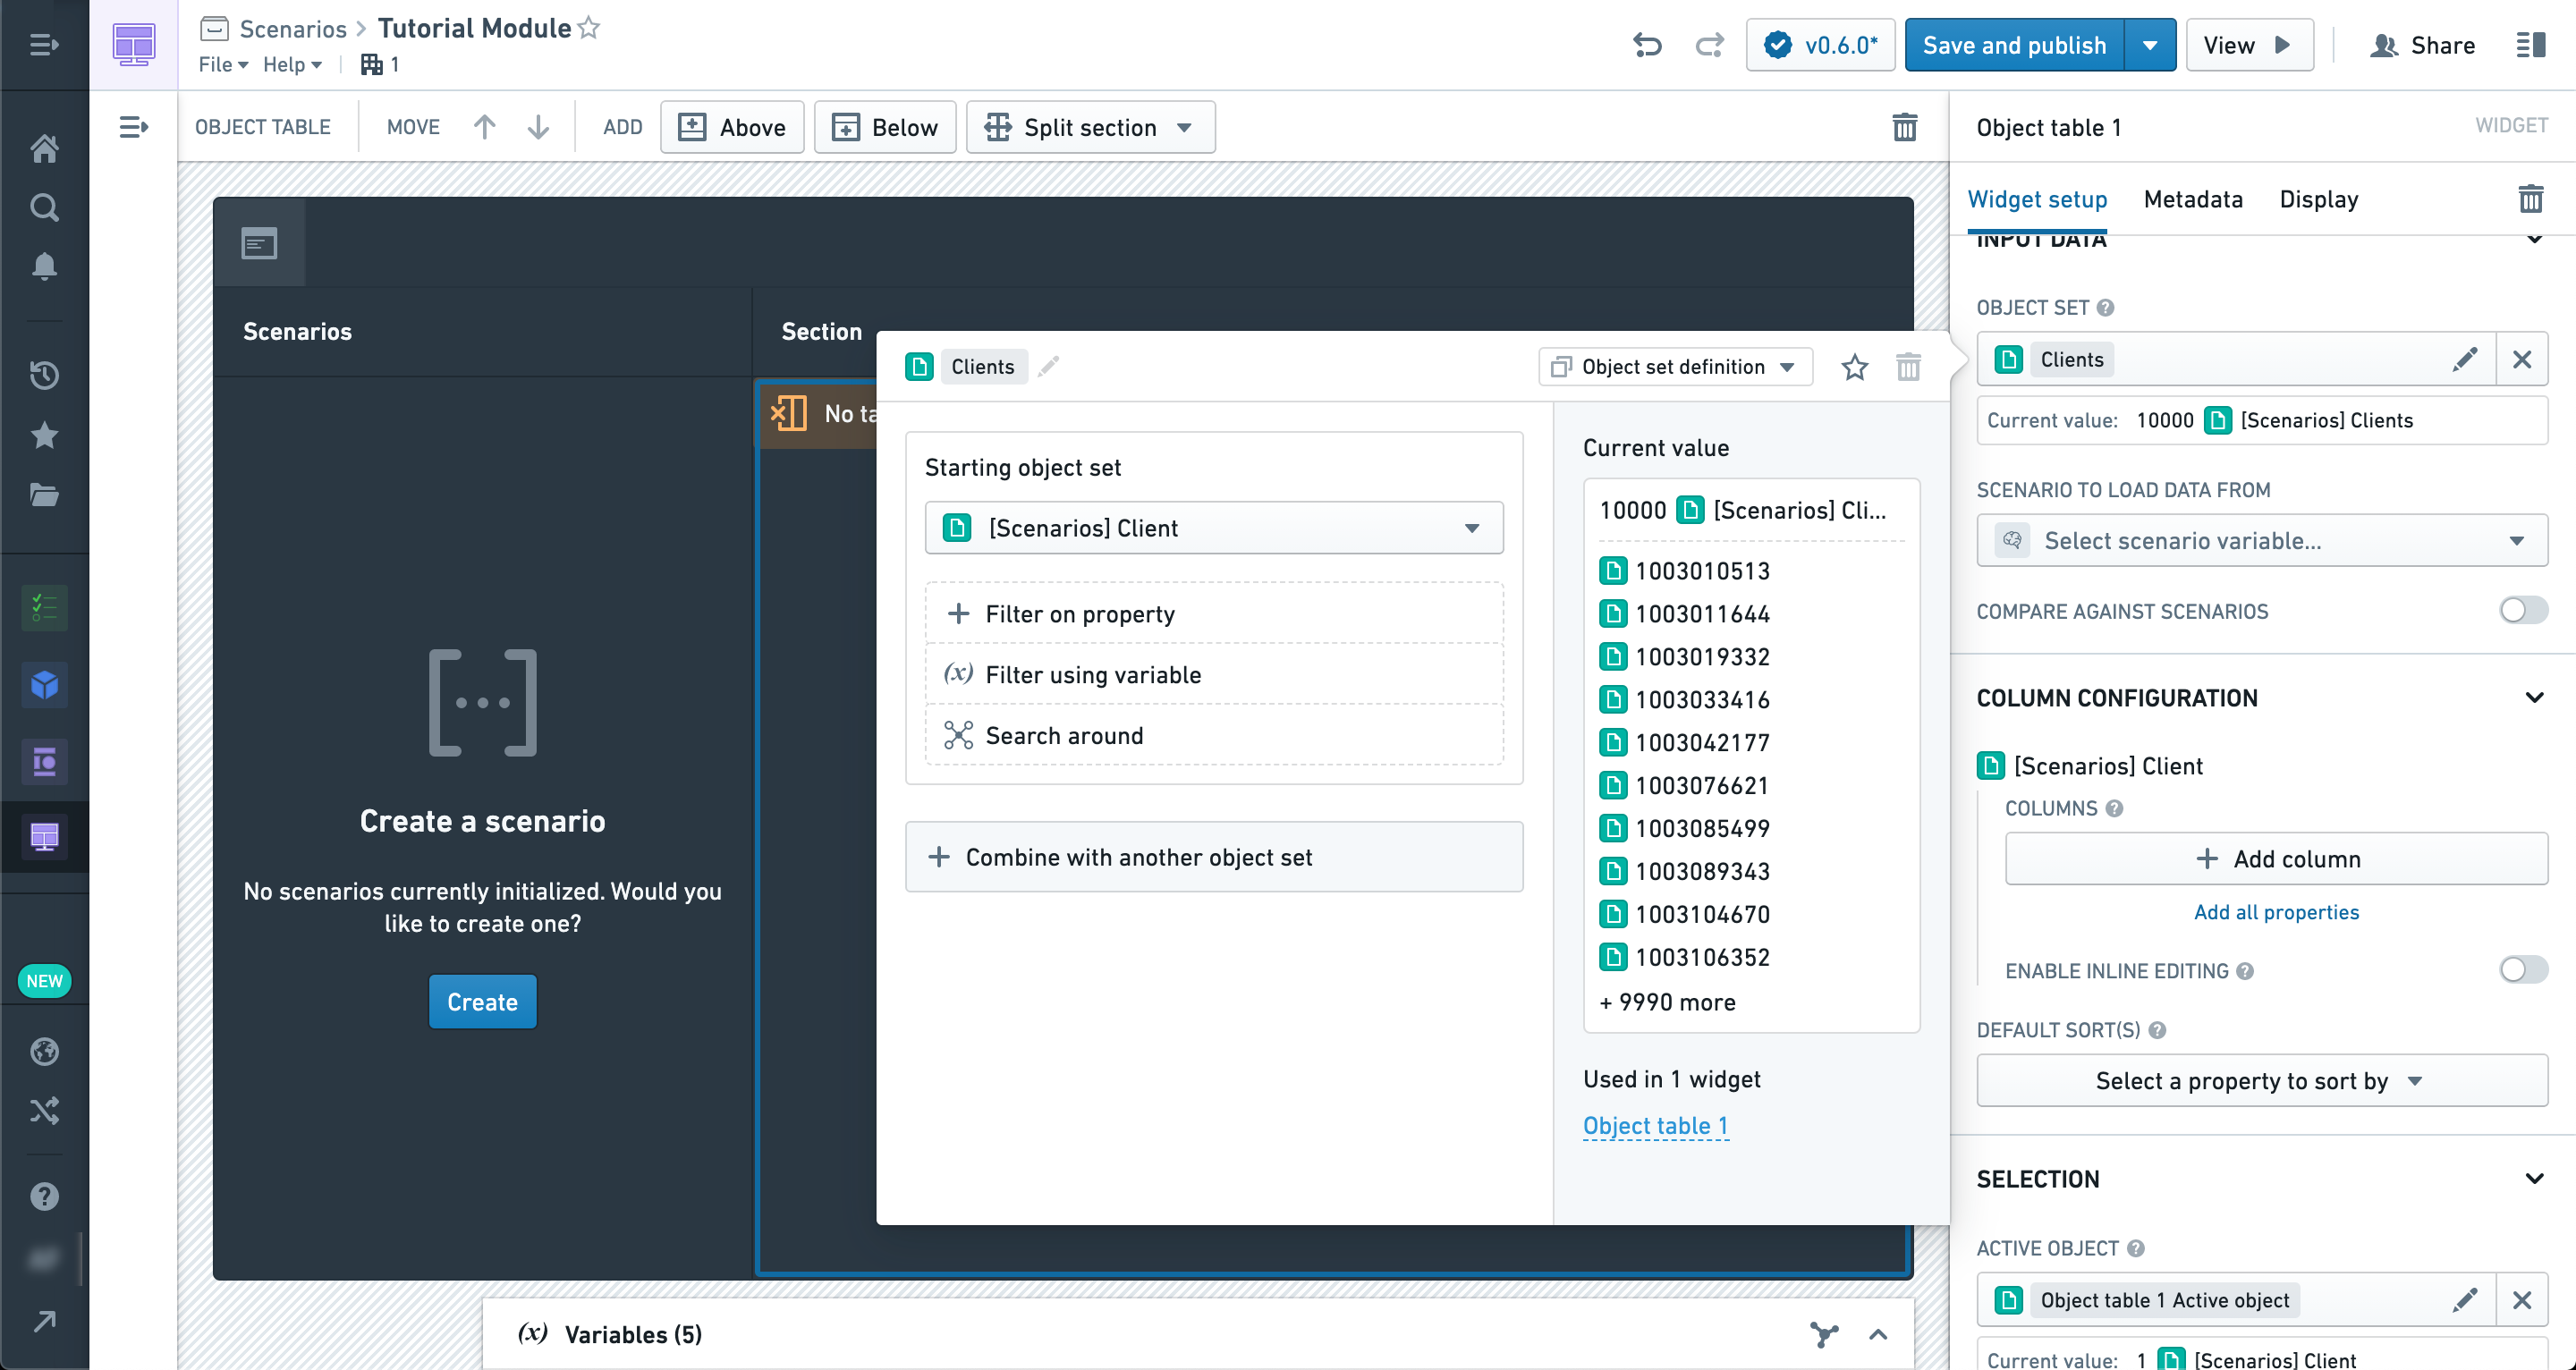
Now, let’s add a few properties to display in the table.
Just below the properties you’ll see the option to enable Scenario comparison in this widget (that is, the Object table is a Scenario-aware widget).
Once enabled, you can select the Scenario array variable produced by the Scenario Manager widget. This will cause the data in the table to reflect any modifications to Scenarios in the Manager rather than the raw Ontology.

However, at this point we haven’t applied any modifications to our Scenario, so the data should be the same.
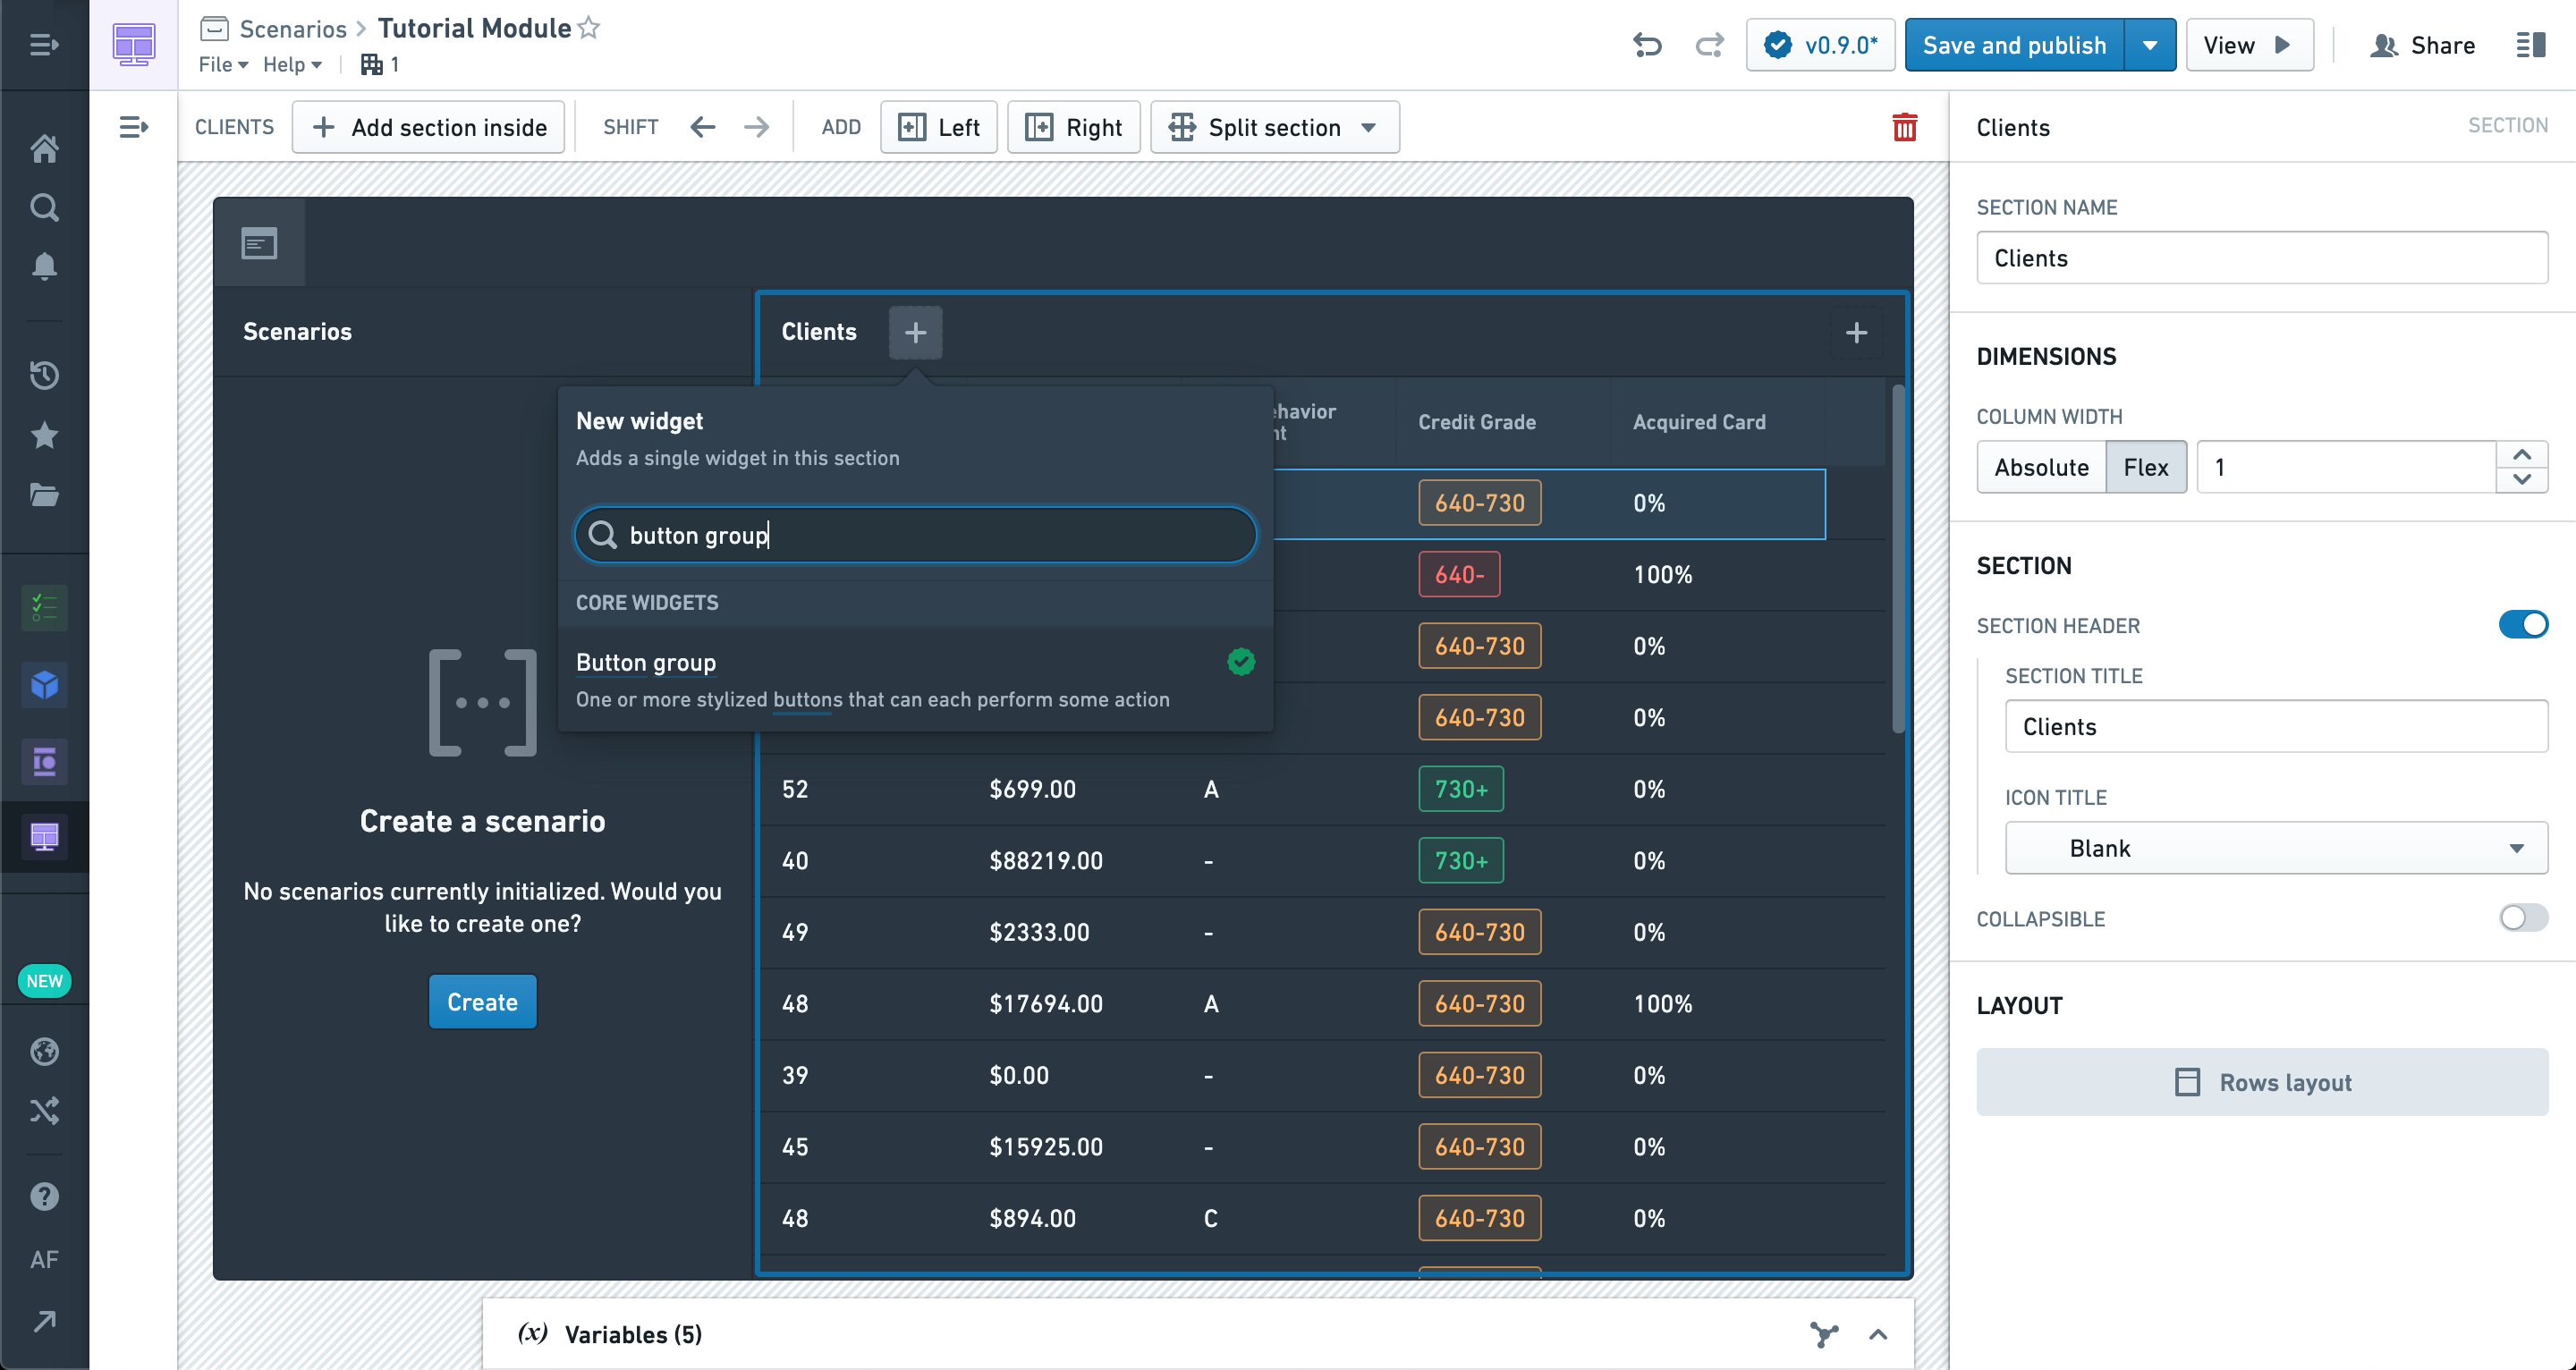
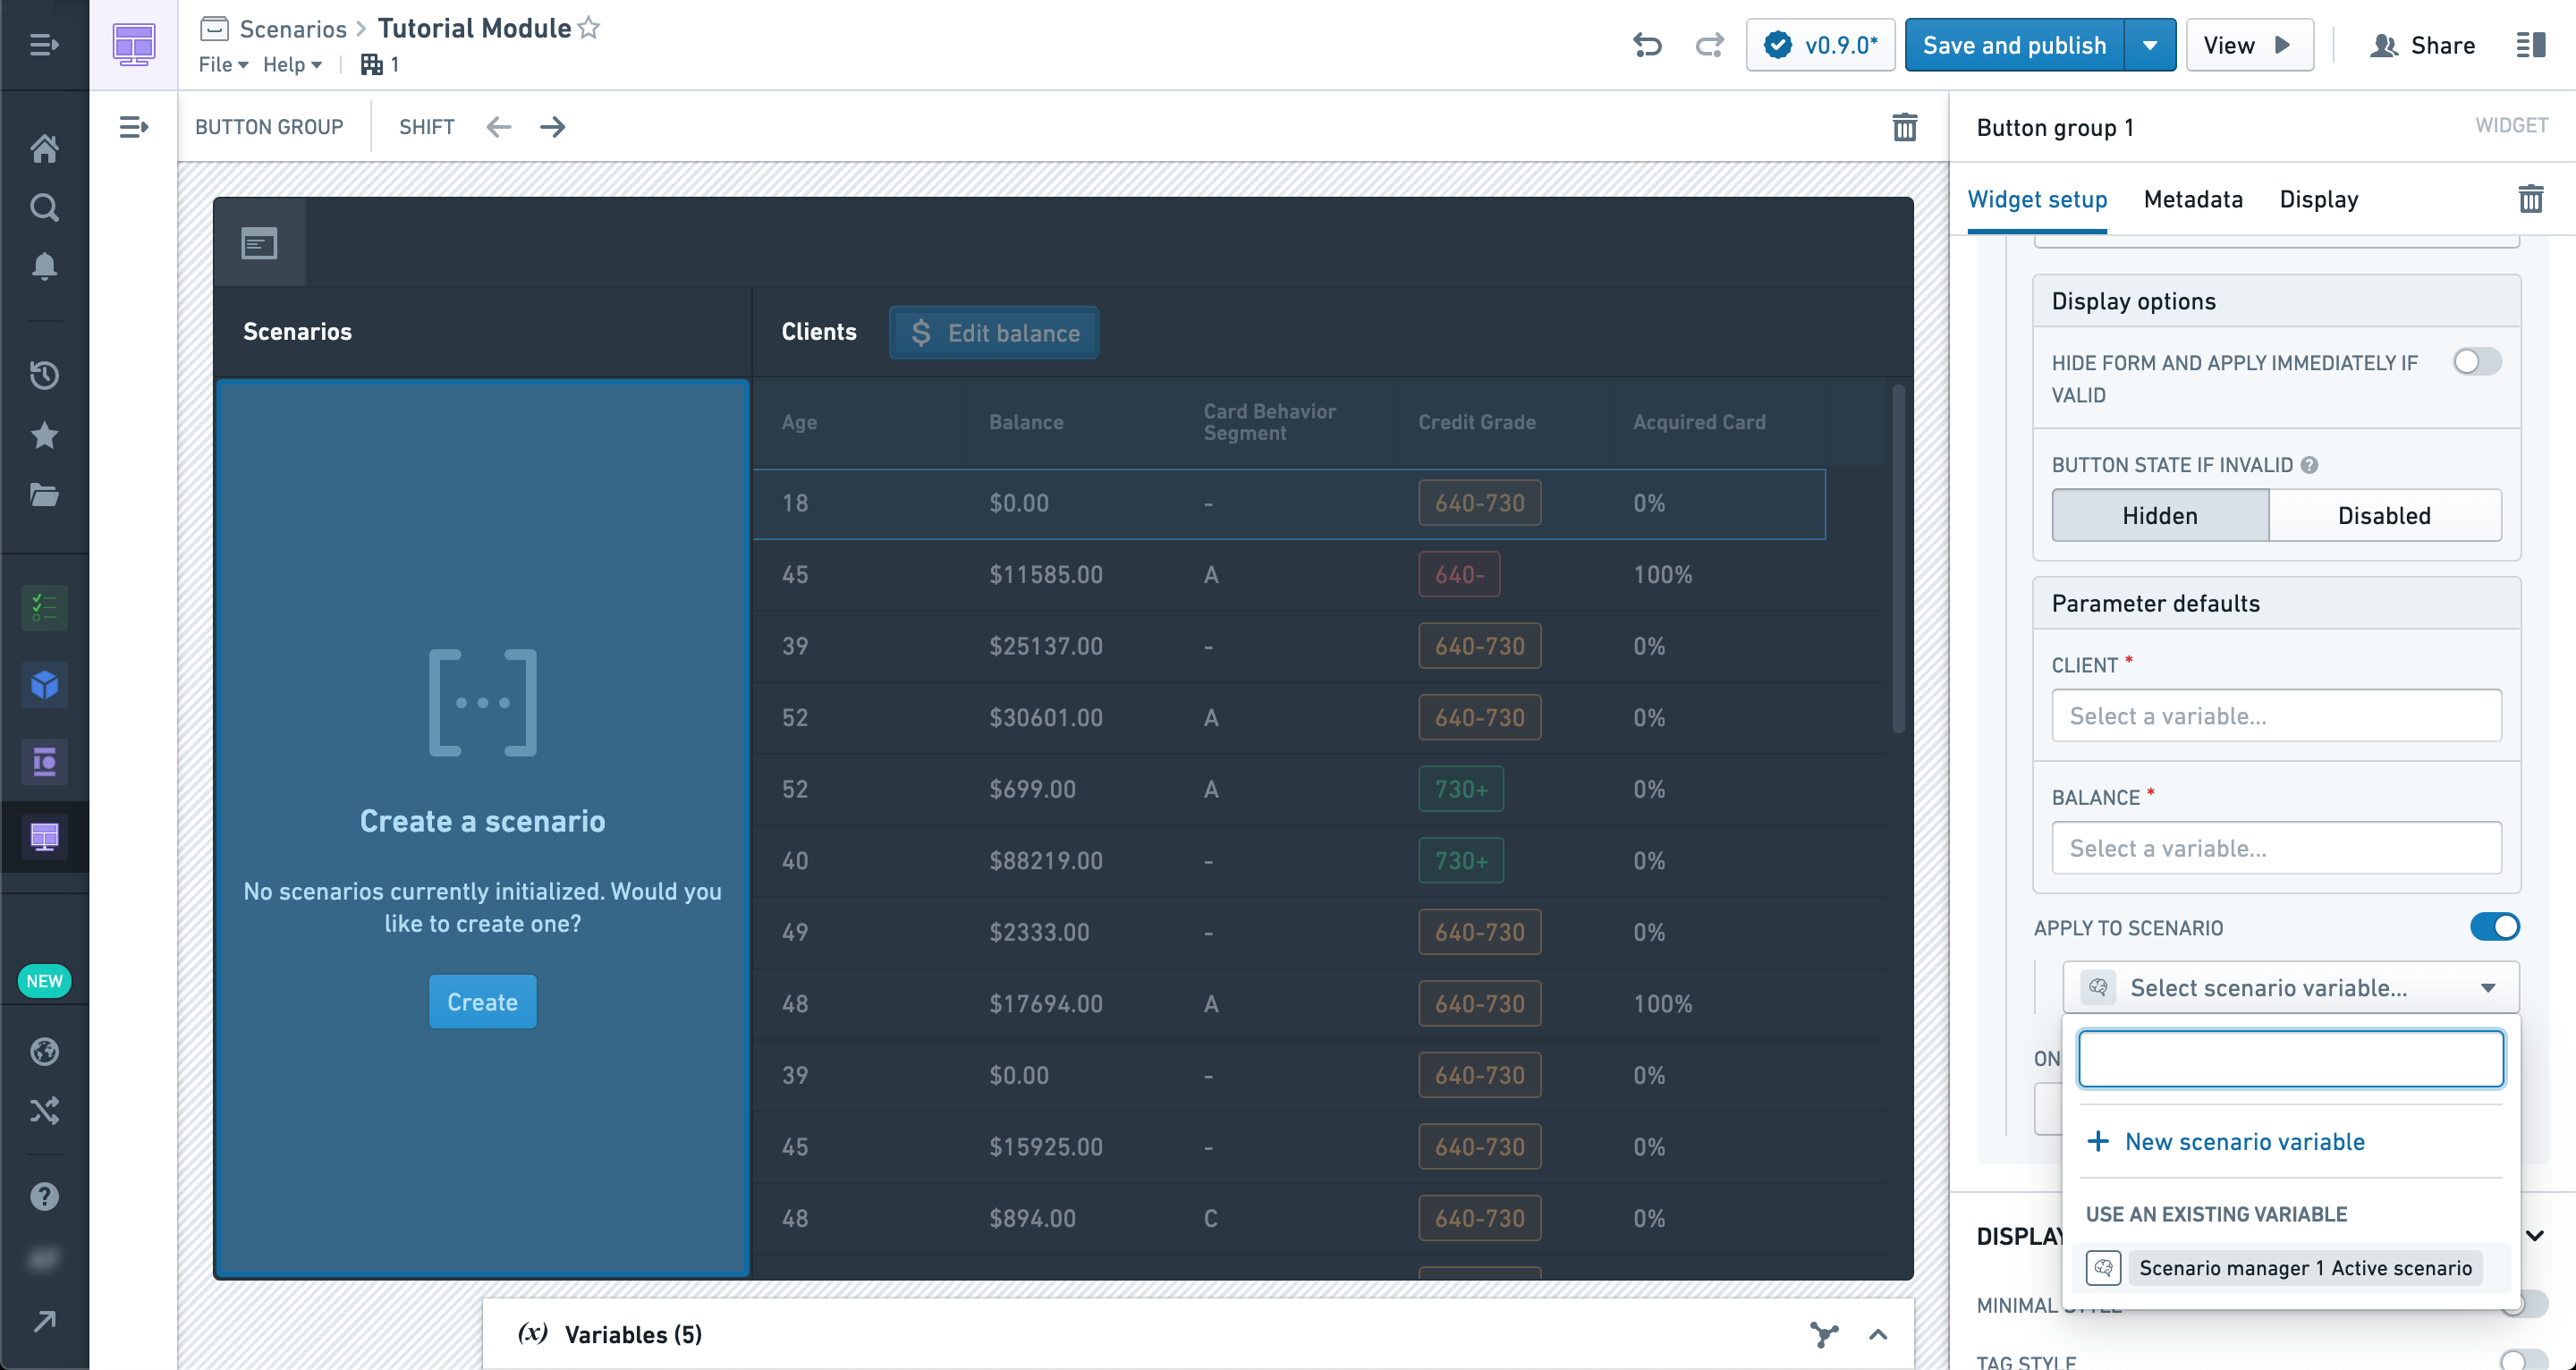
Let’s add a Button Group widget so we can configure an Action to apply to our Scenarios.
We're selecting an Action that modifies Objects of the type in our table.
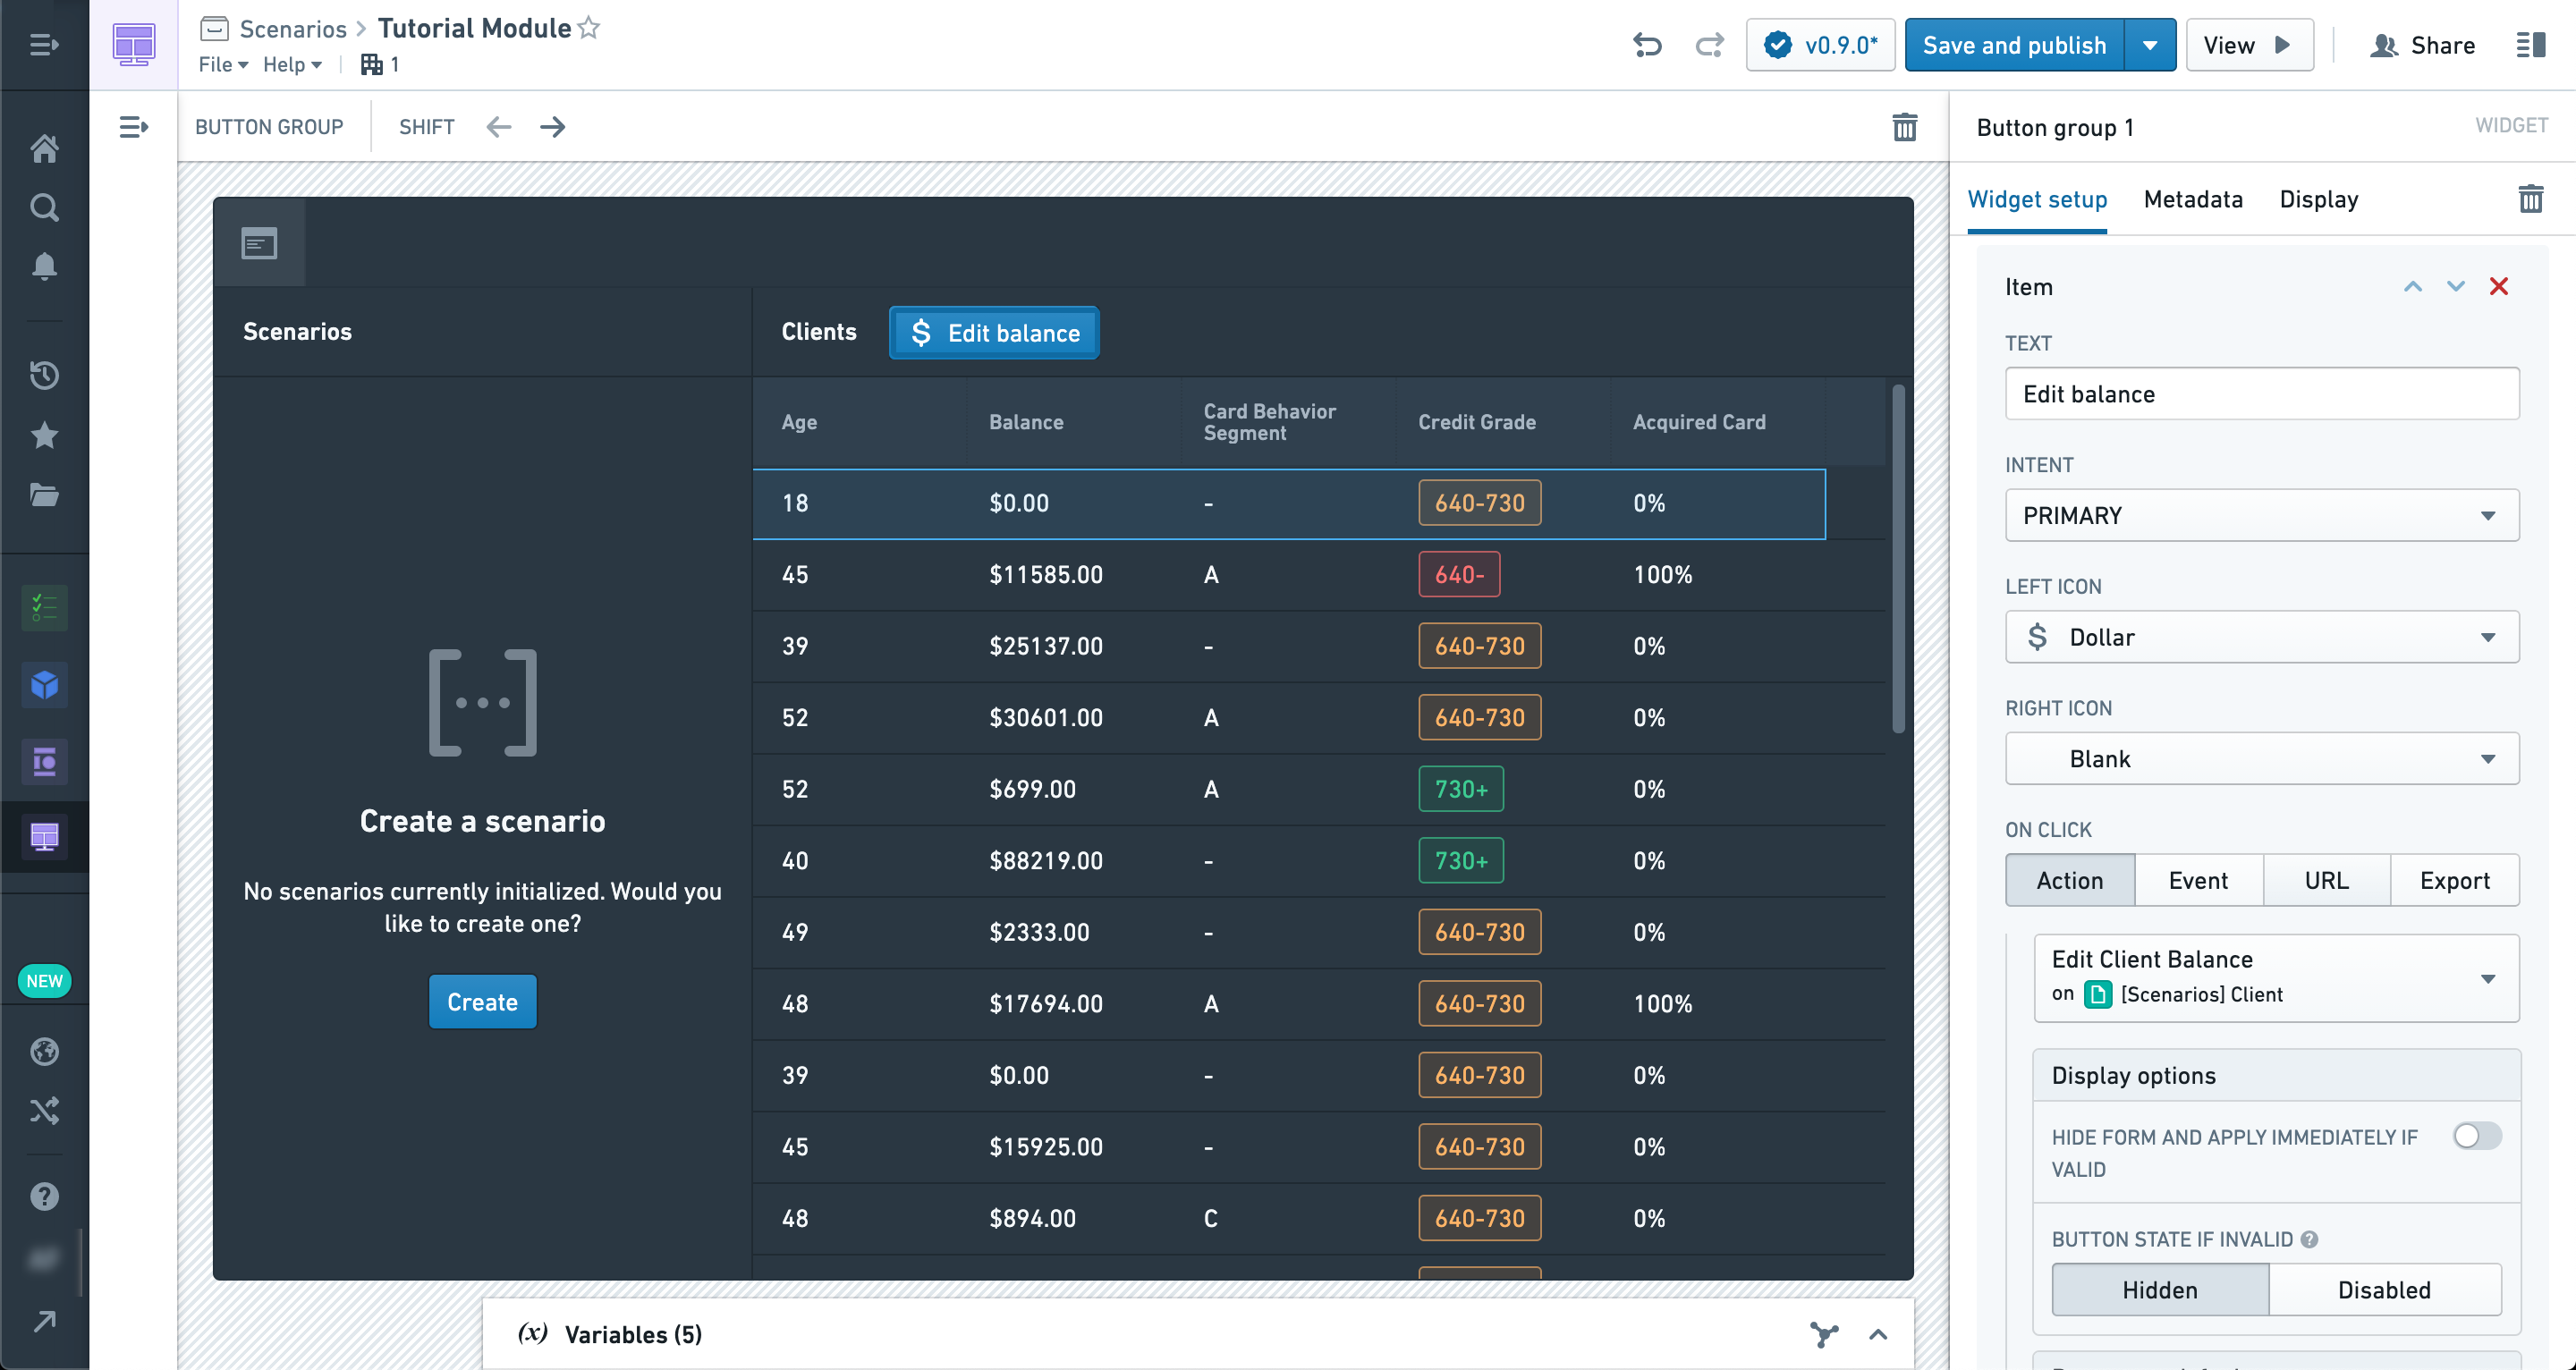
In order to apply this action to a Scenario instead of the real ontology, we're going to enable the "Apply to Scenario" option and select the active Scenario variable from the manager.
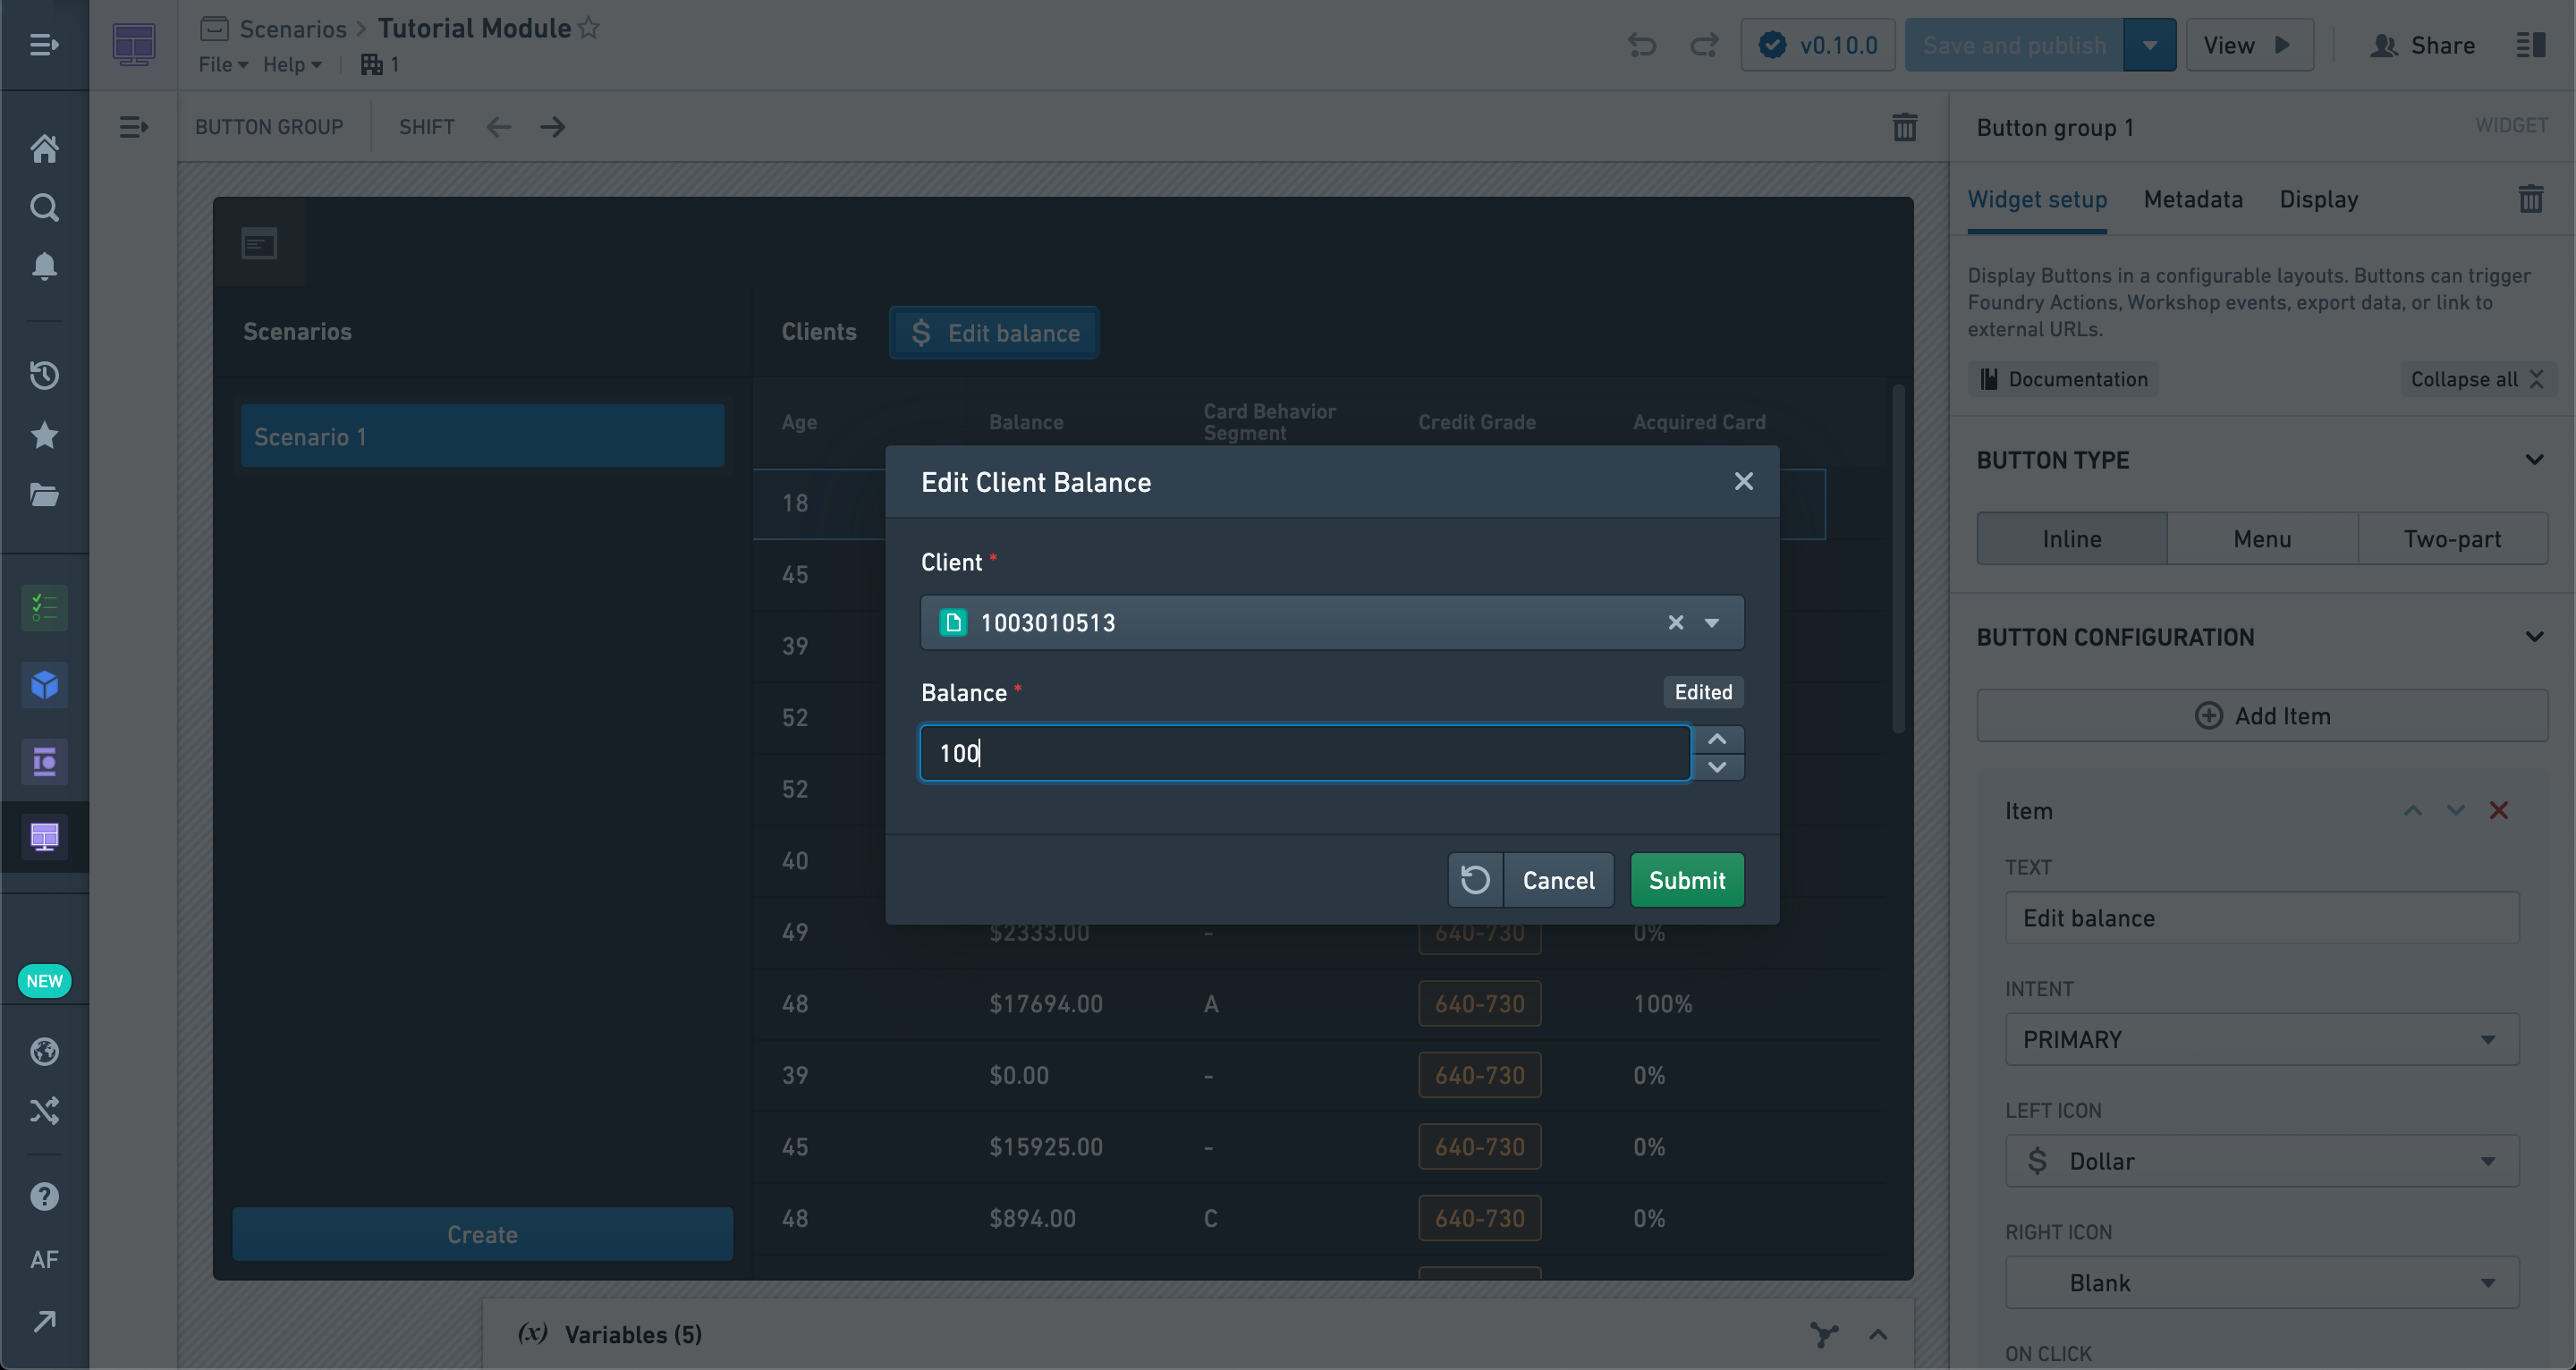
Using the newly configured Action, let's try changing the property of any object in the table to a new value.
However, before we can apply the action we'll need to create a new scenario in the manager widget by clicking the "Create" button.
In this example, we're updating the Balance for a client in the table.
You should see the Object table refresh with the new data, including the modification you just made.
It’s important to note that this Action has not been applied to the Ontology and exists only within the Scenario.
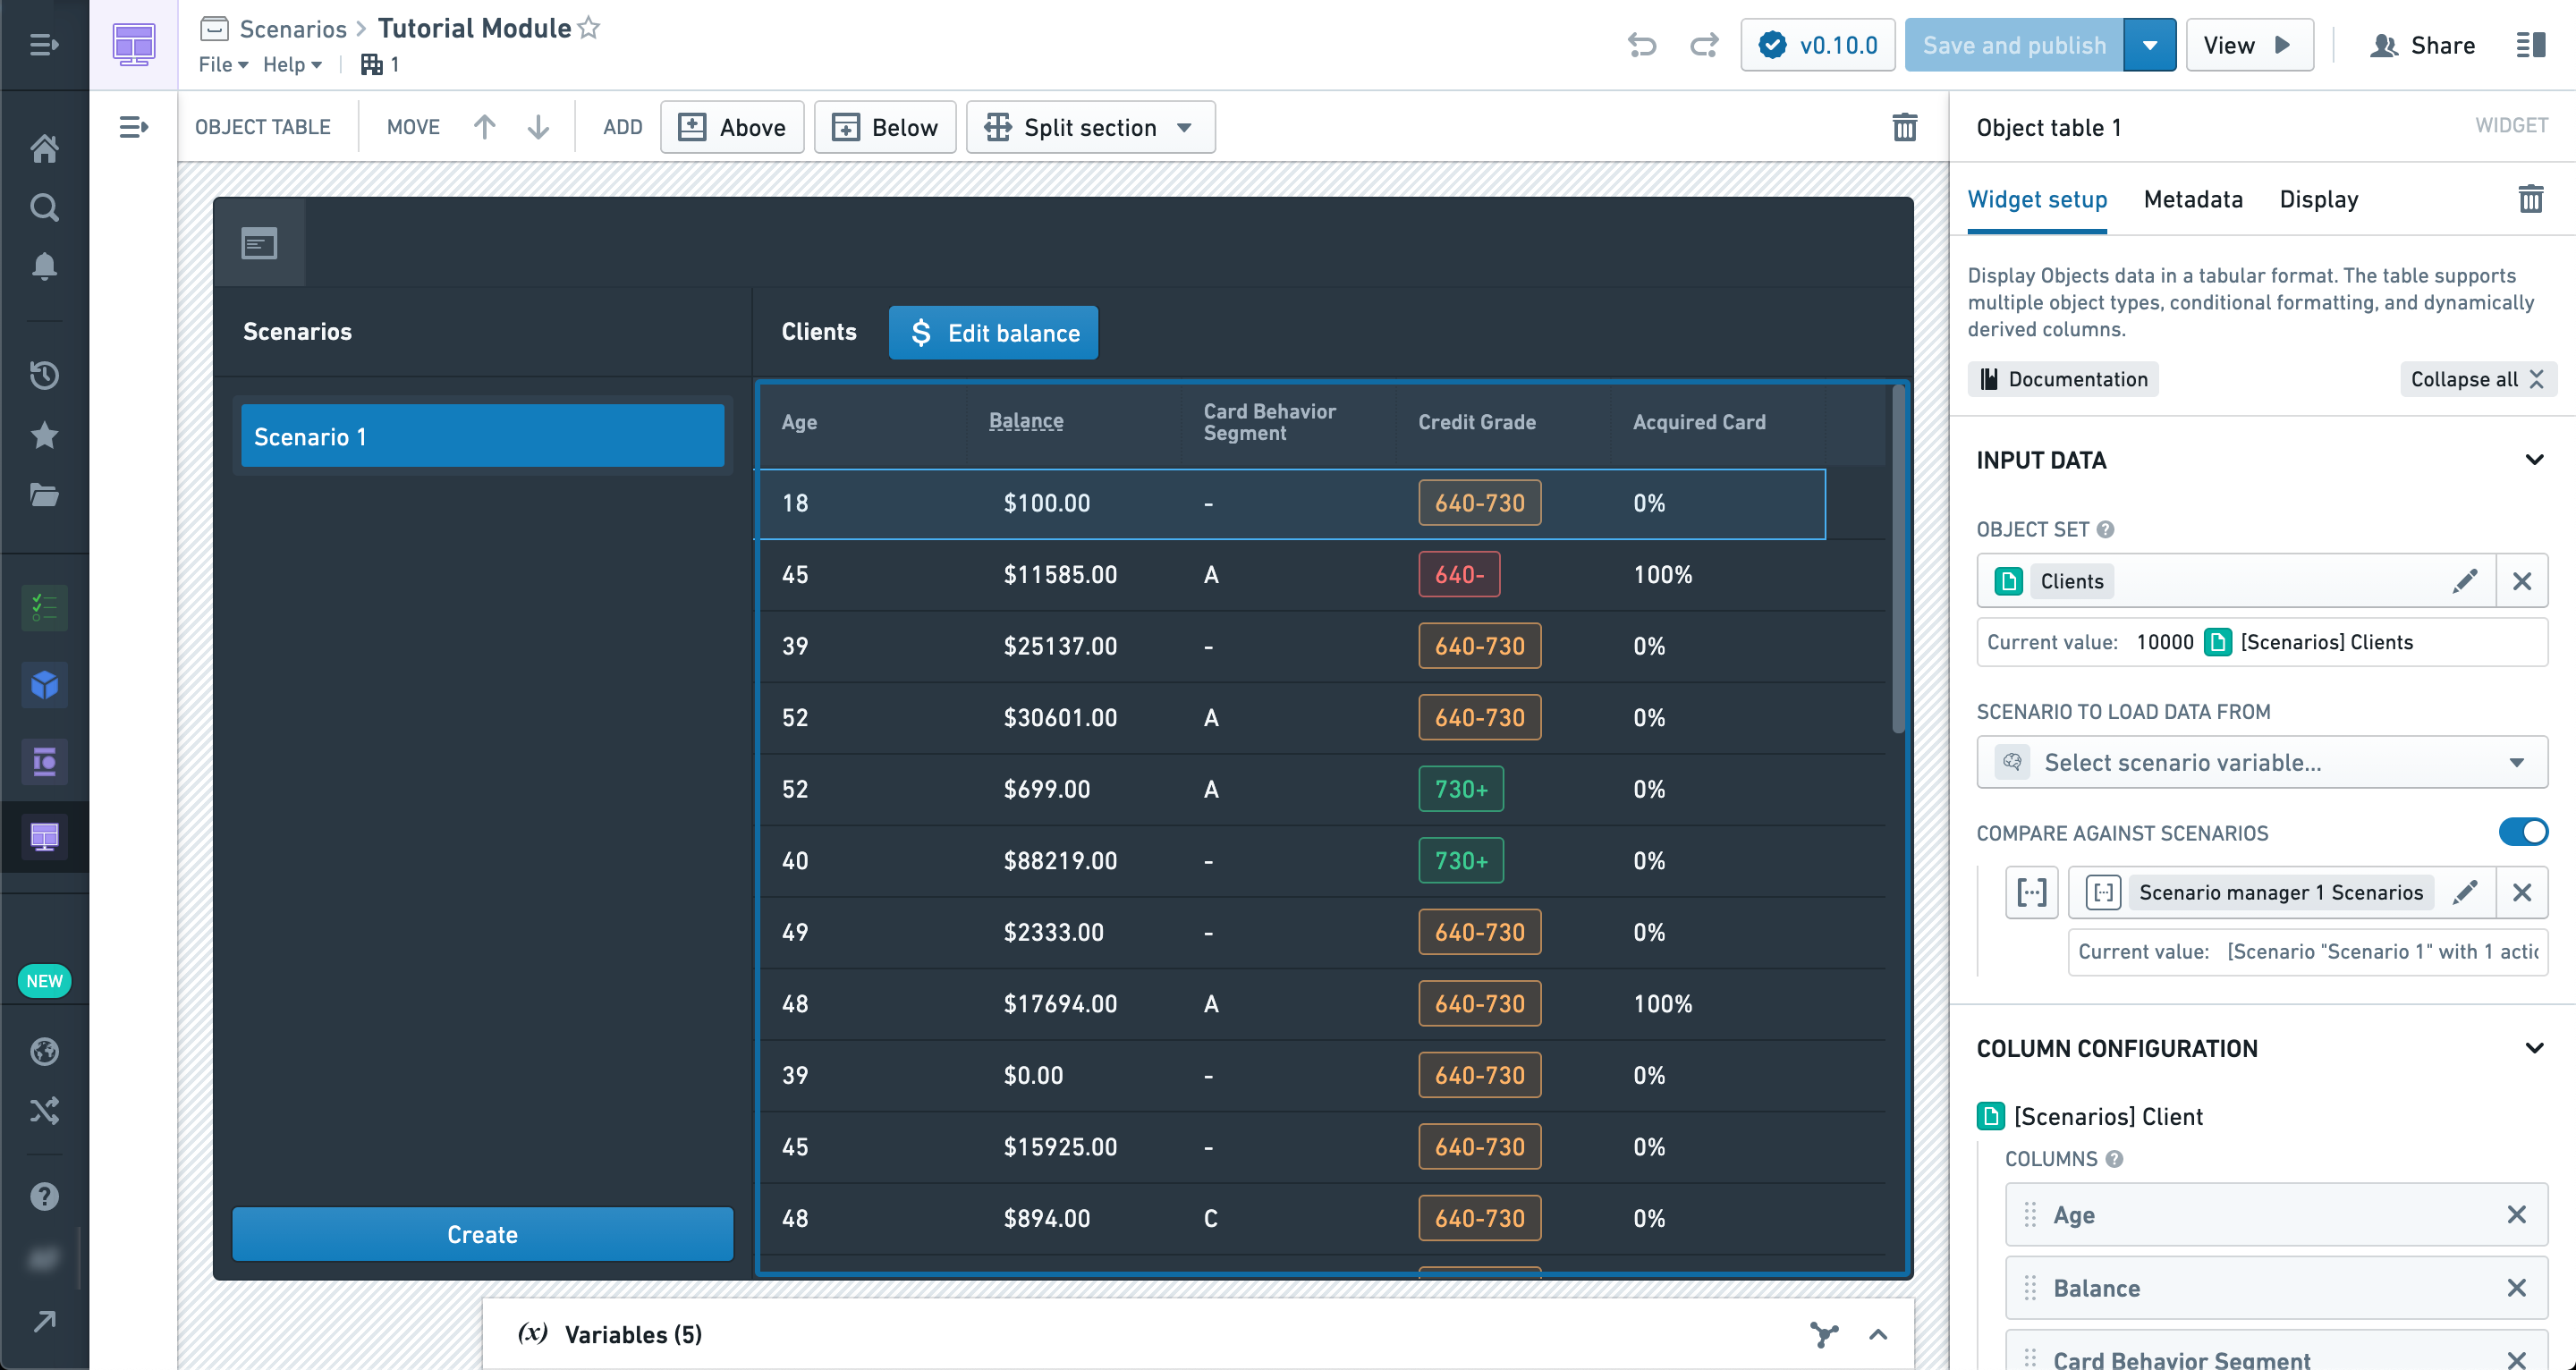
We can also create another Scenario for comparison by selecting the Create button in the manager again. Once created, you’ll see the values from the second Scenario side-by-side with the first in the Object table, but only in columns that differ. Since the second Scenario has not been modified yet, it should show the values from the Ontology.
Some widgets, like the table, can take an arbitrary number of Scenarios and display the results.

Now let’s add a section above the table with a Chart: XY widget.
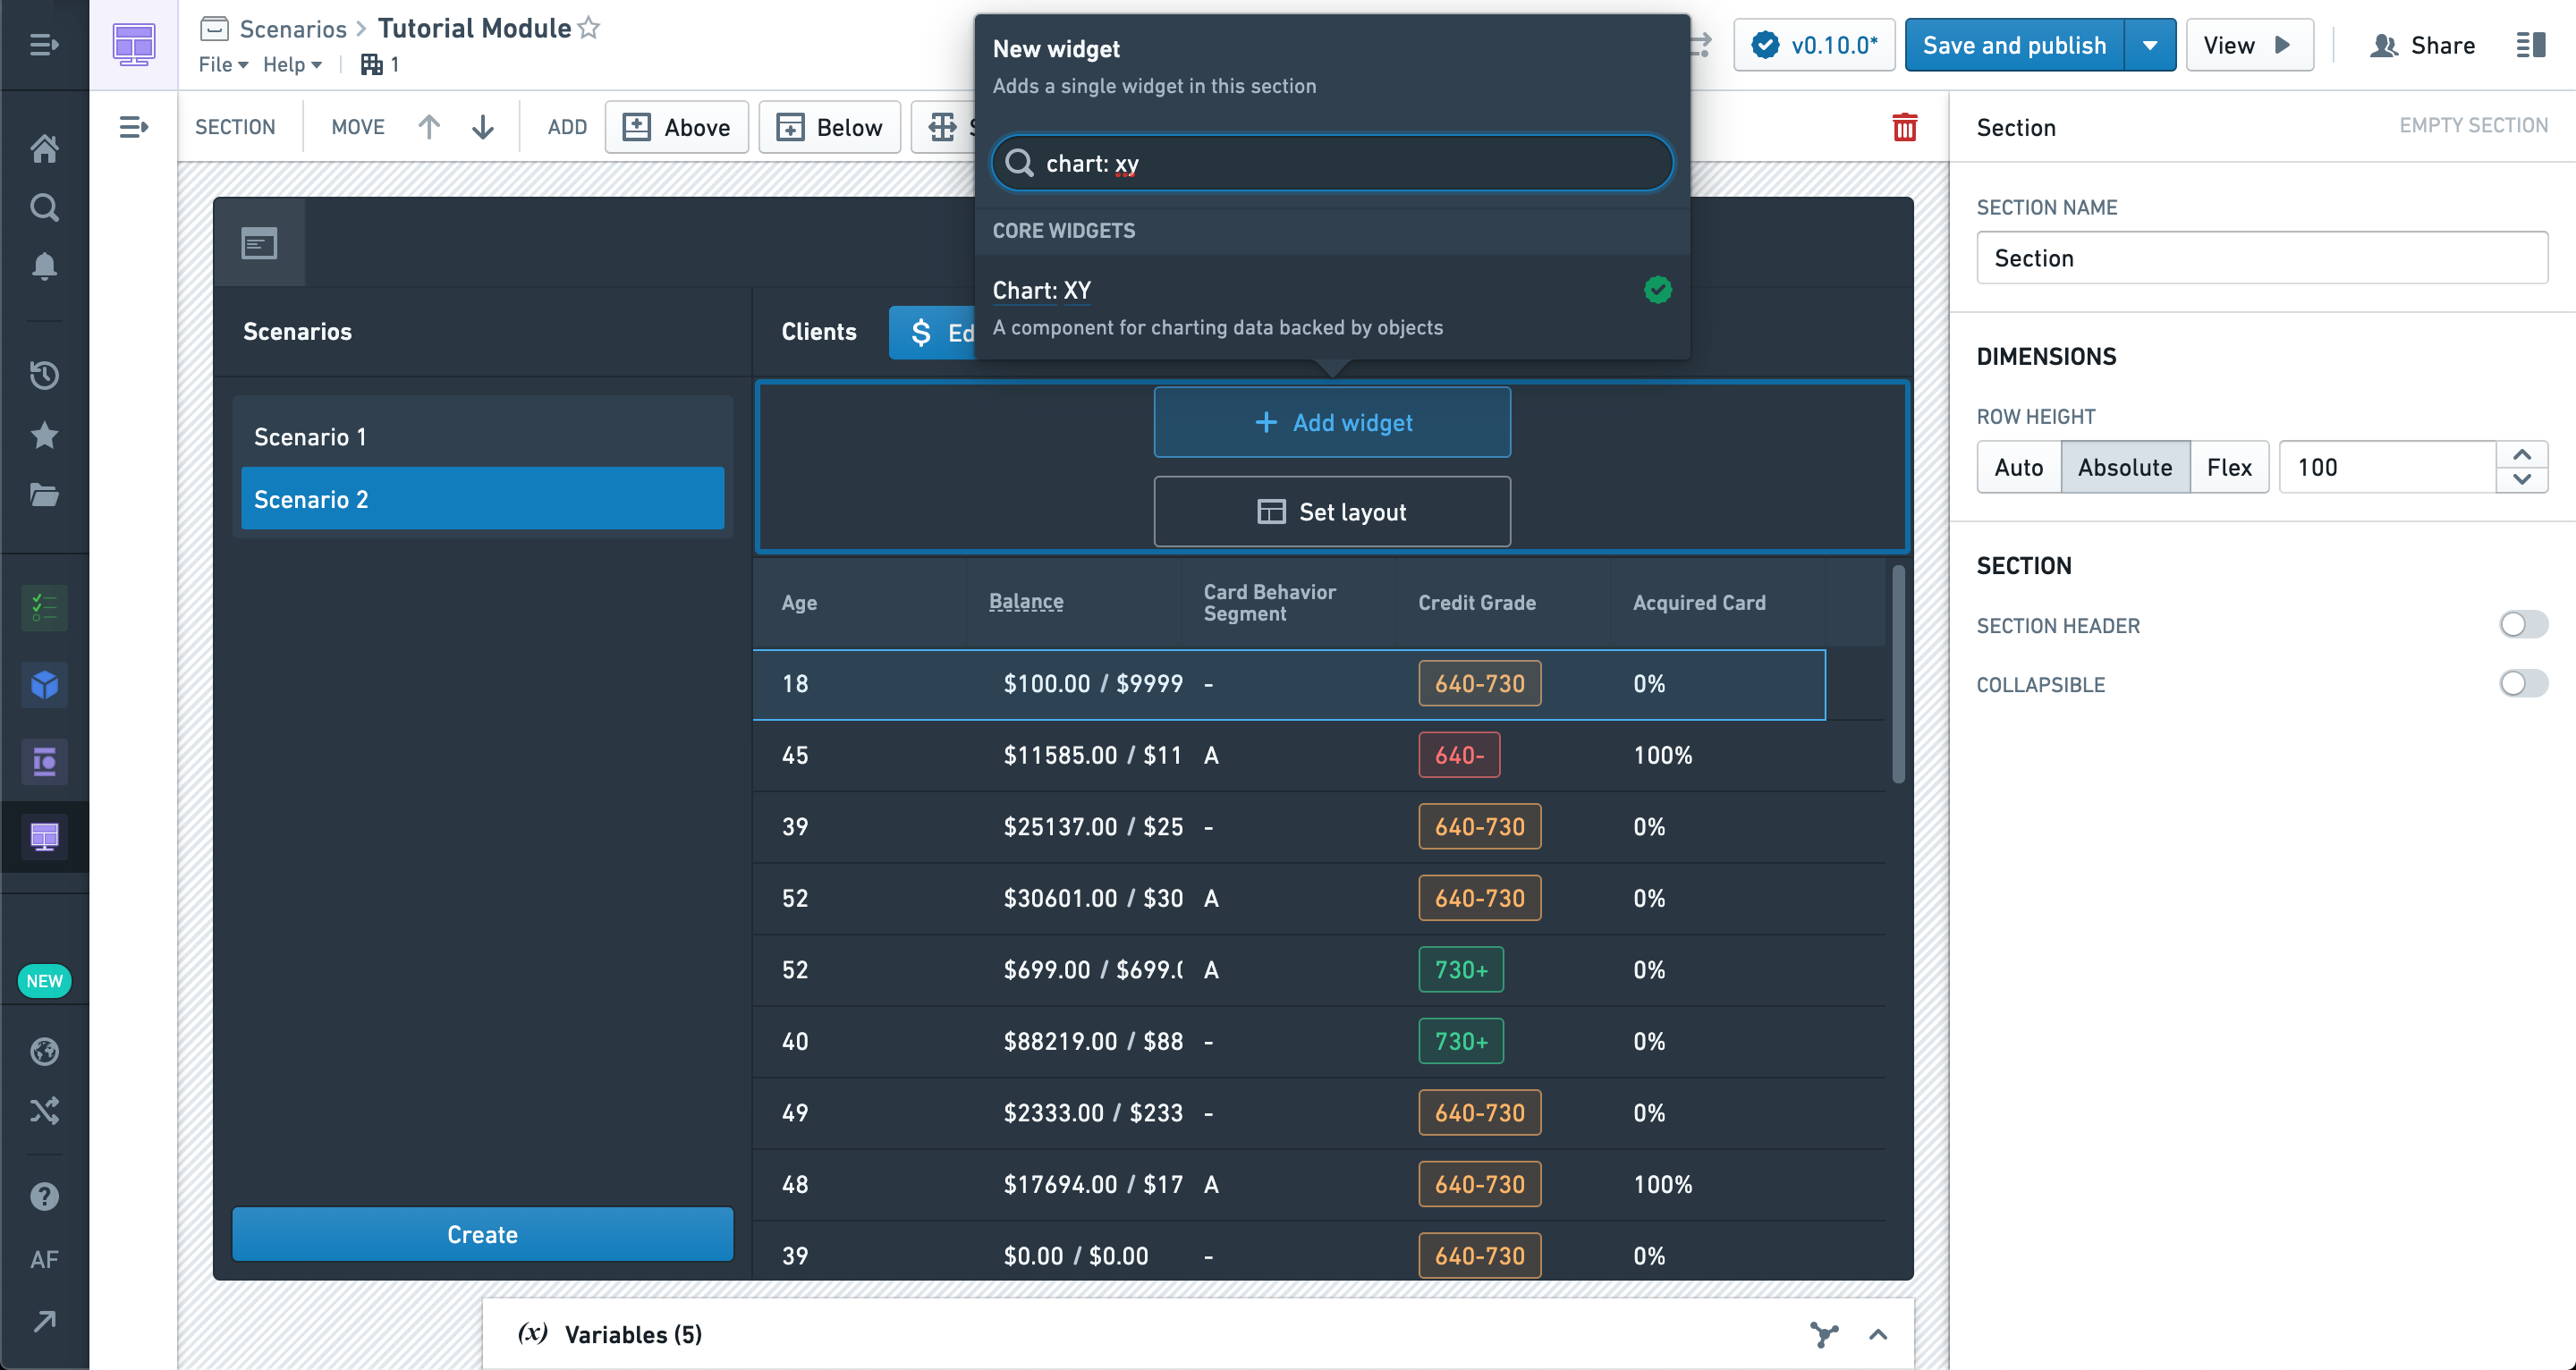
The Chart: XY widget supports an arbitrary number of Scenarios like the table, and different Scenarios can be configured in different layers.
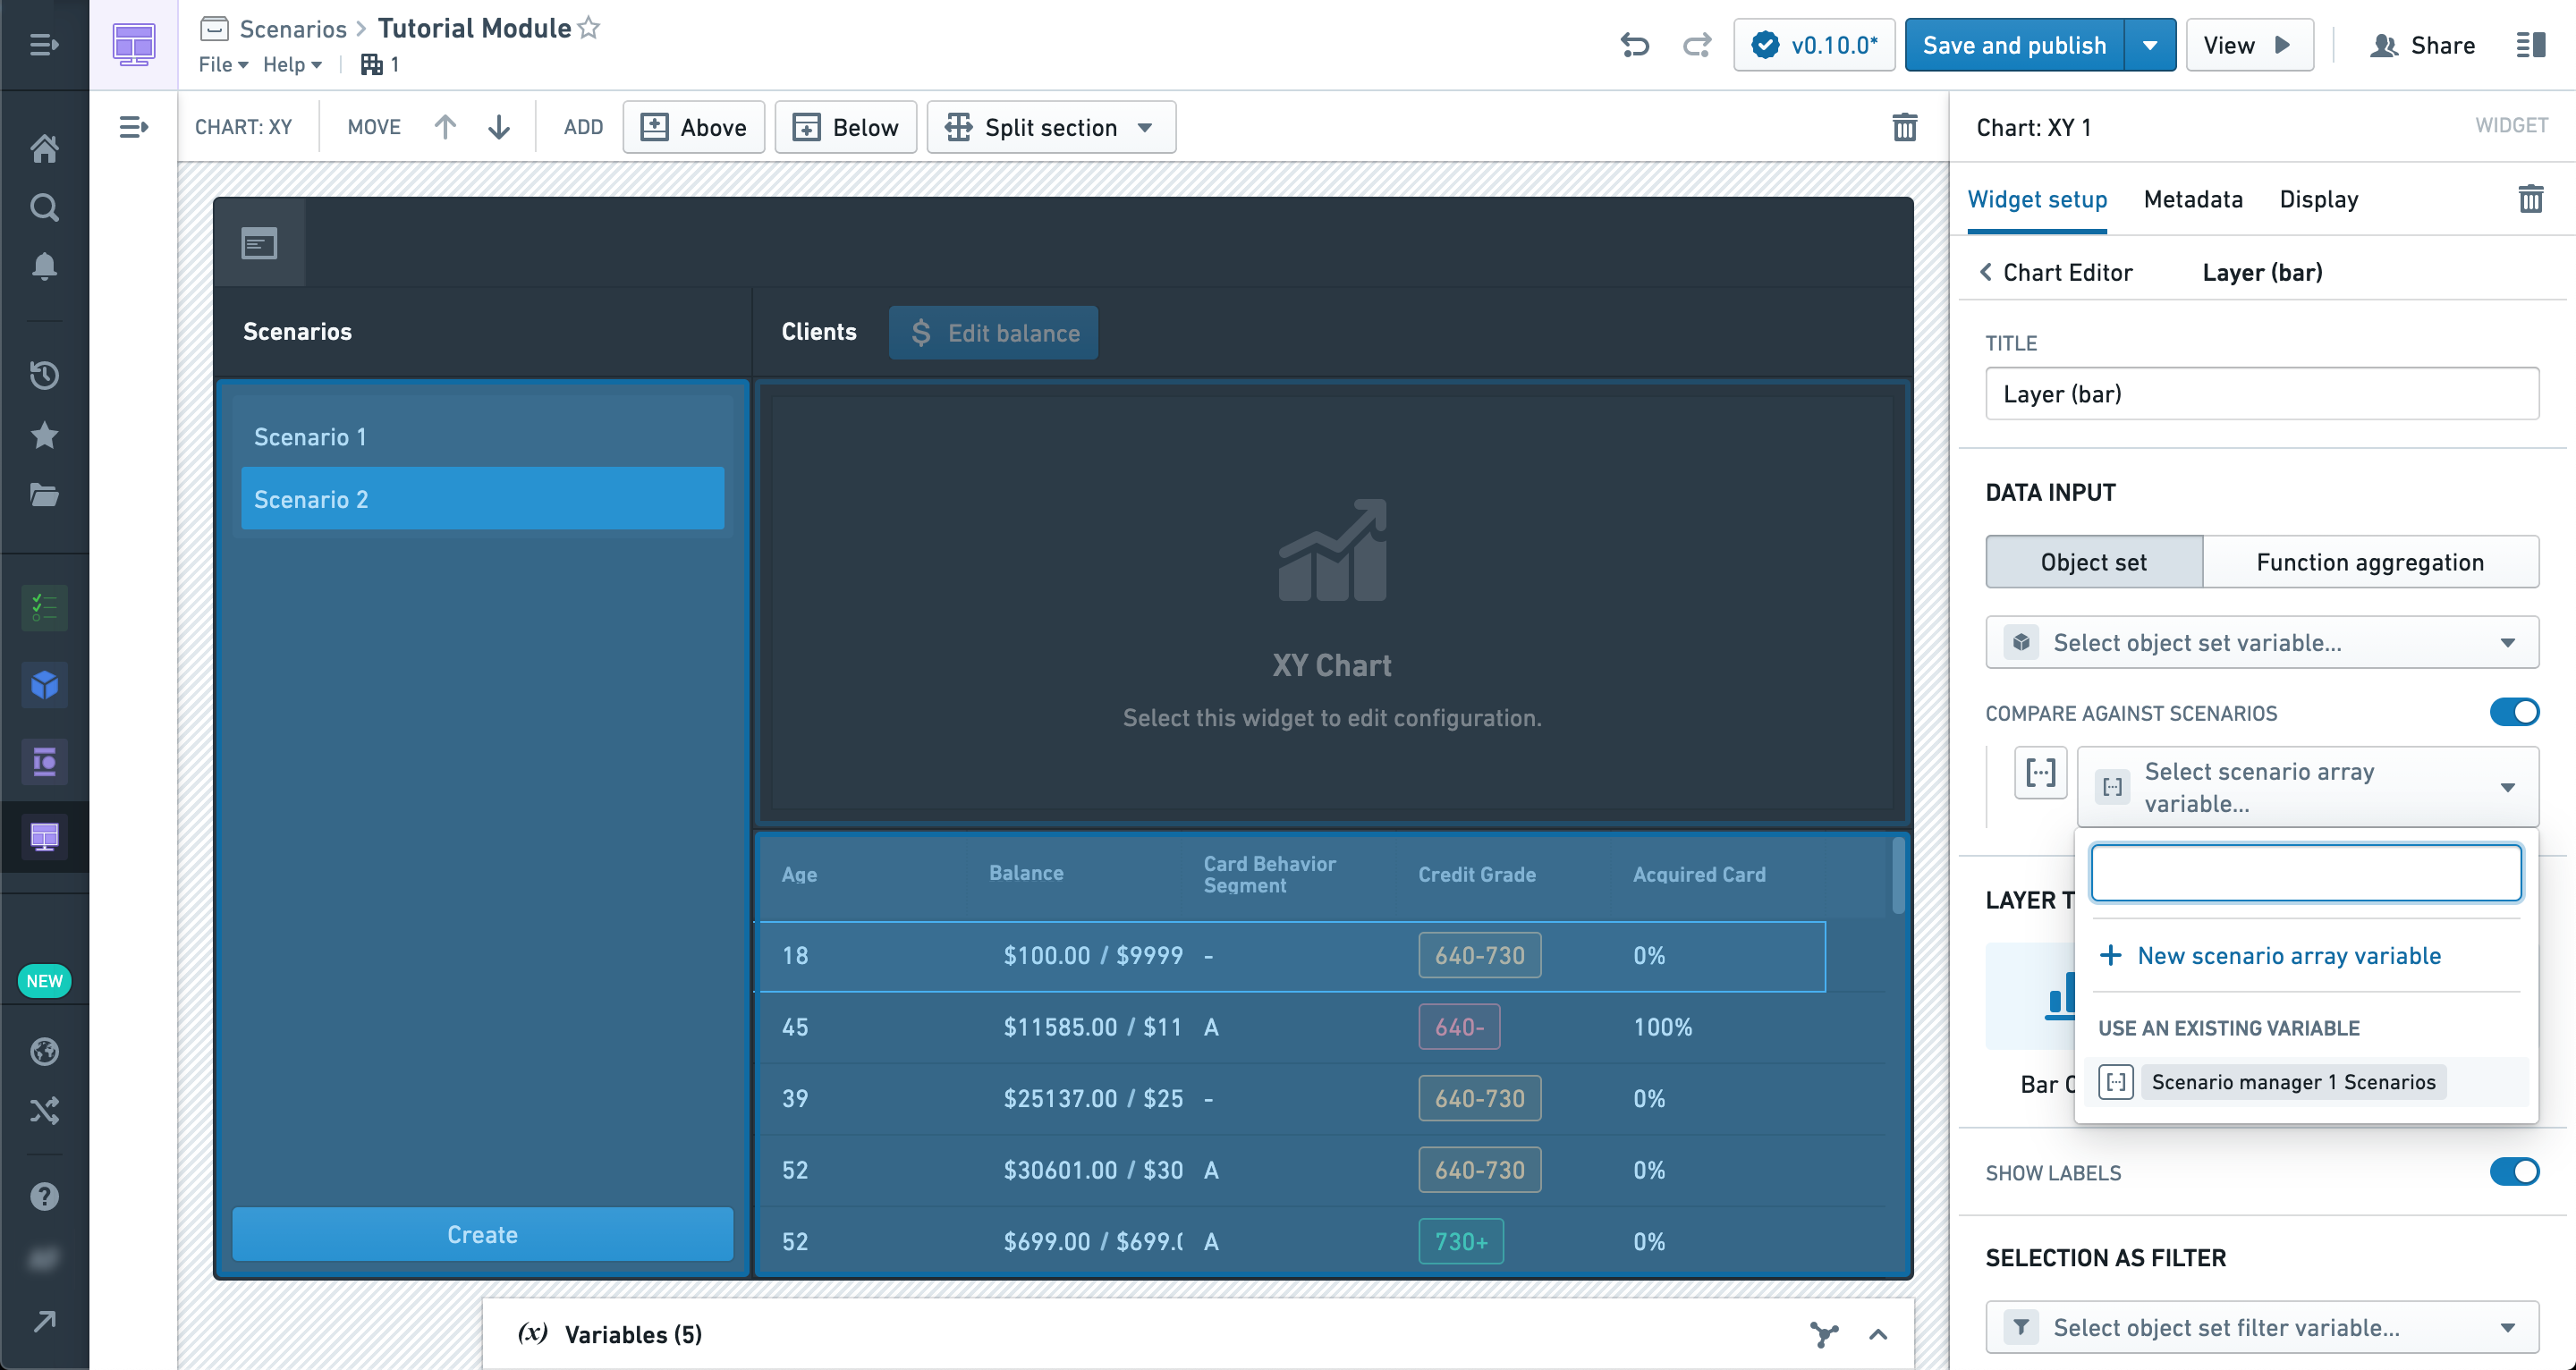
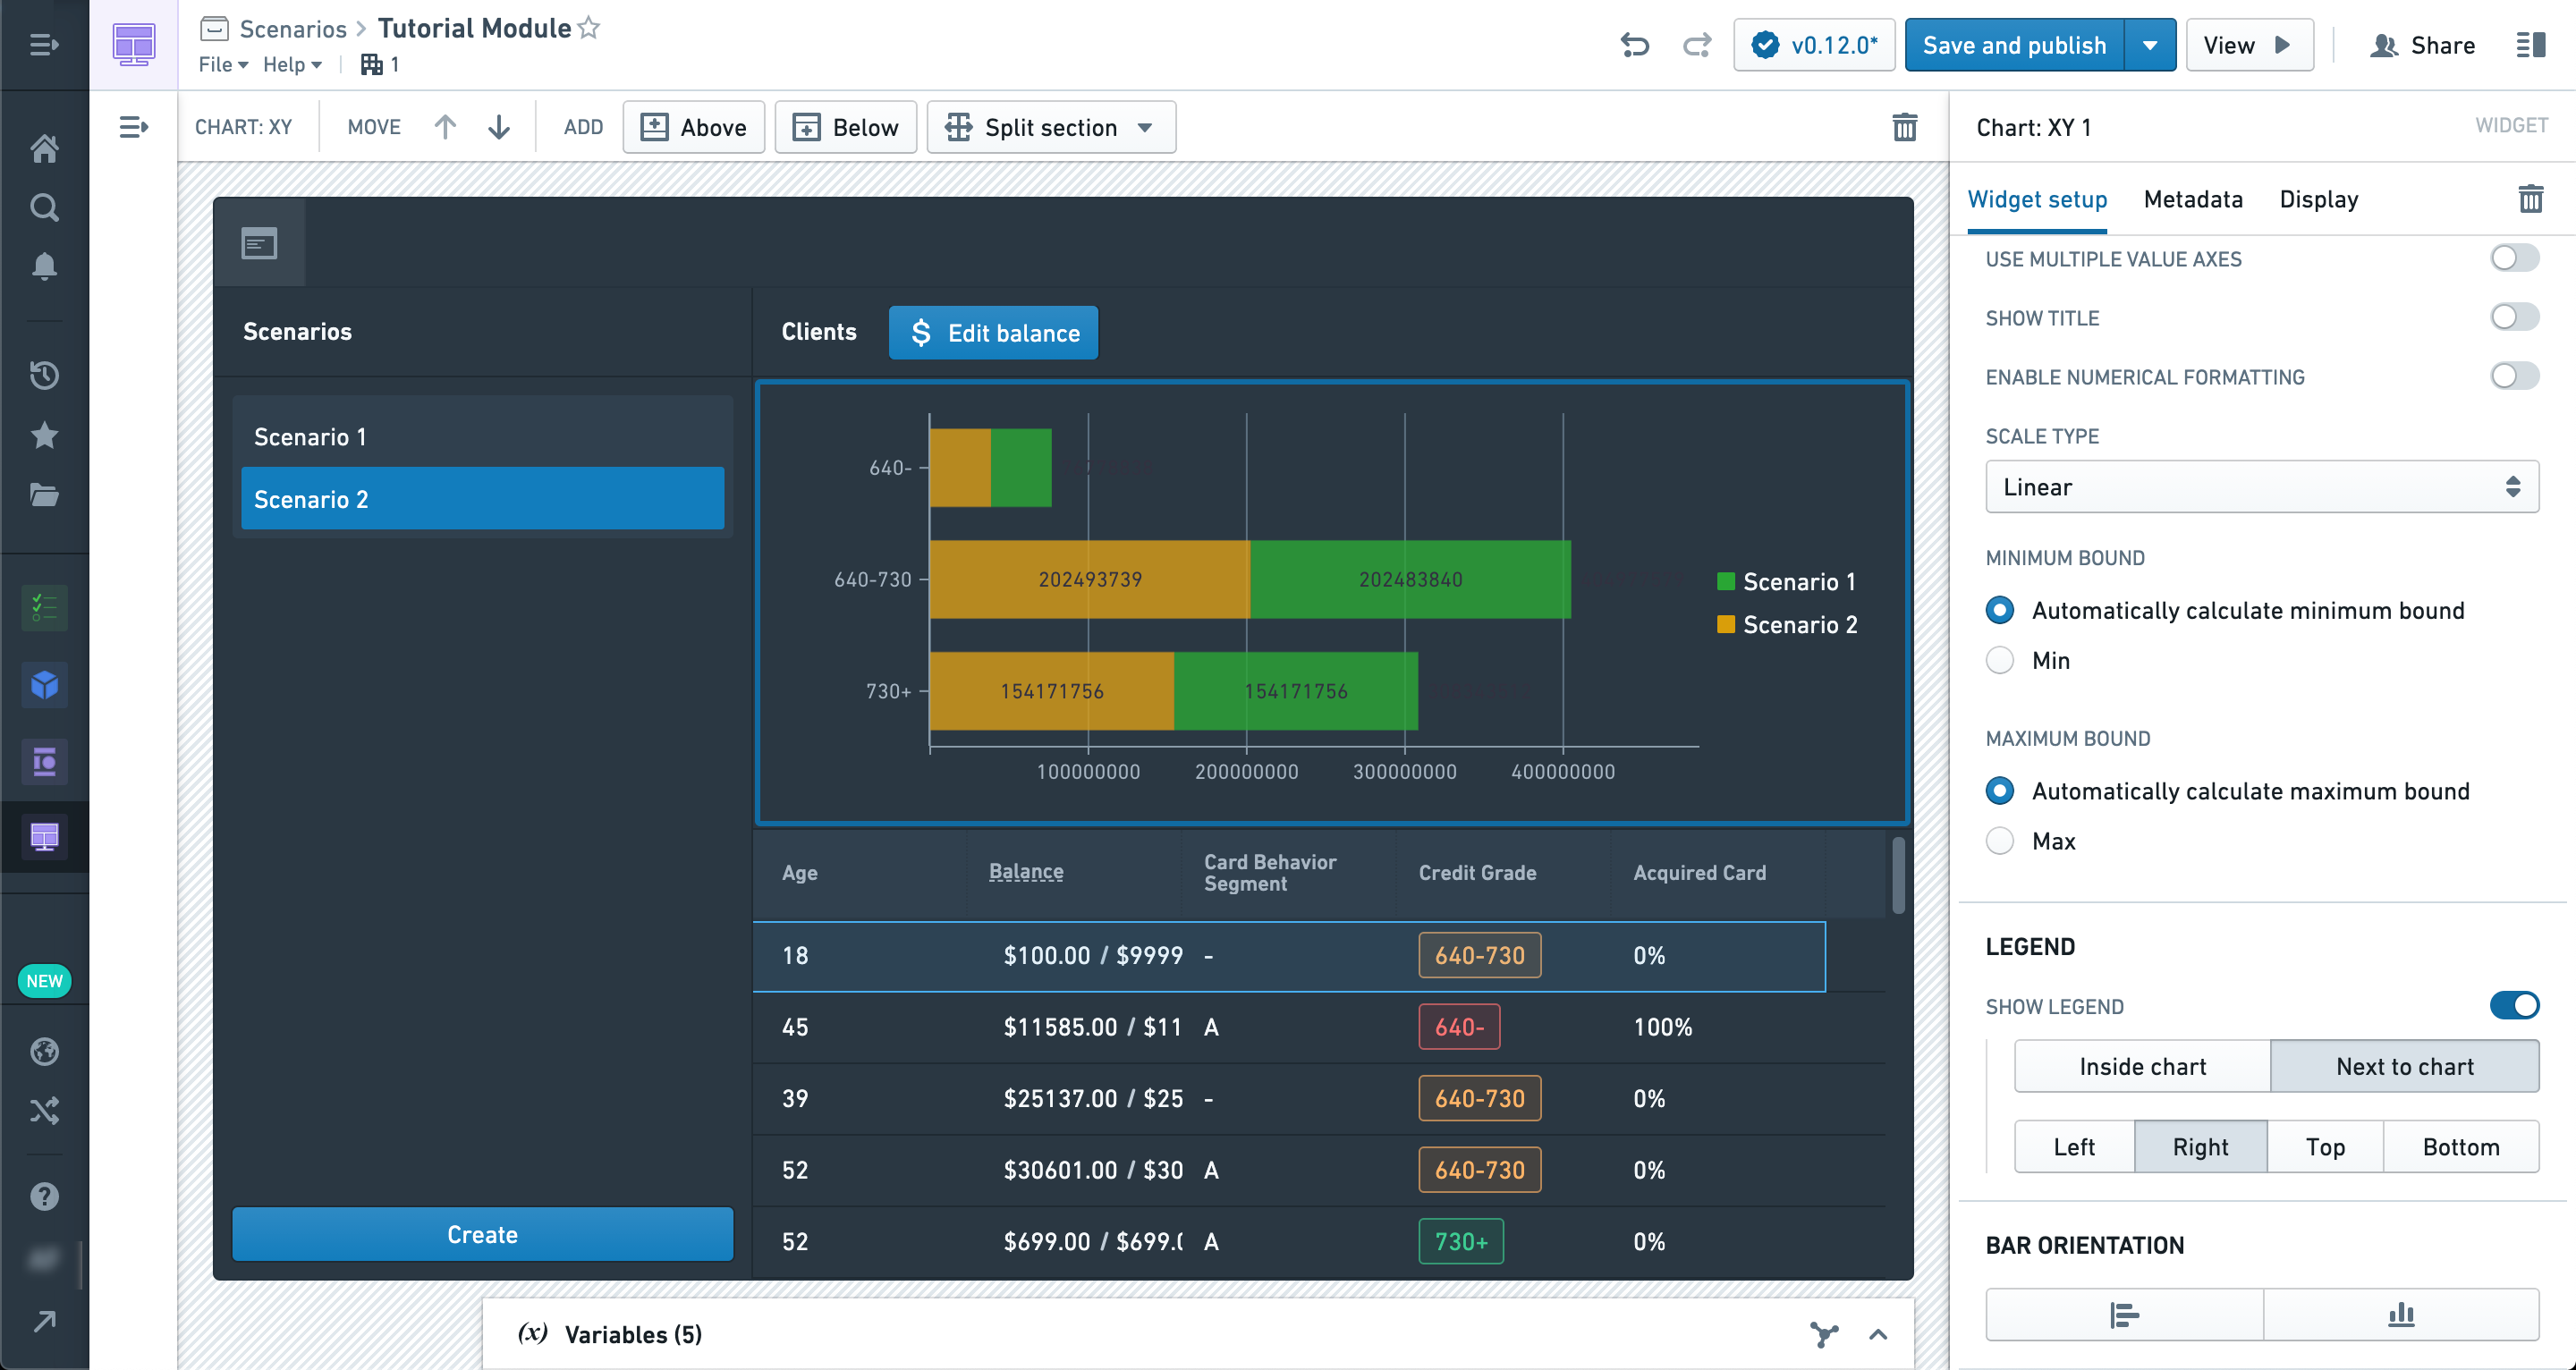
Try exploring the various layer types to see how multiple Scenarios are visualized in them.
You can also configure Group Bys and Aggregates which will properly respect Scenario values.
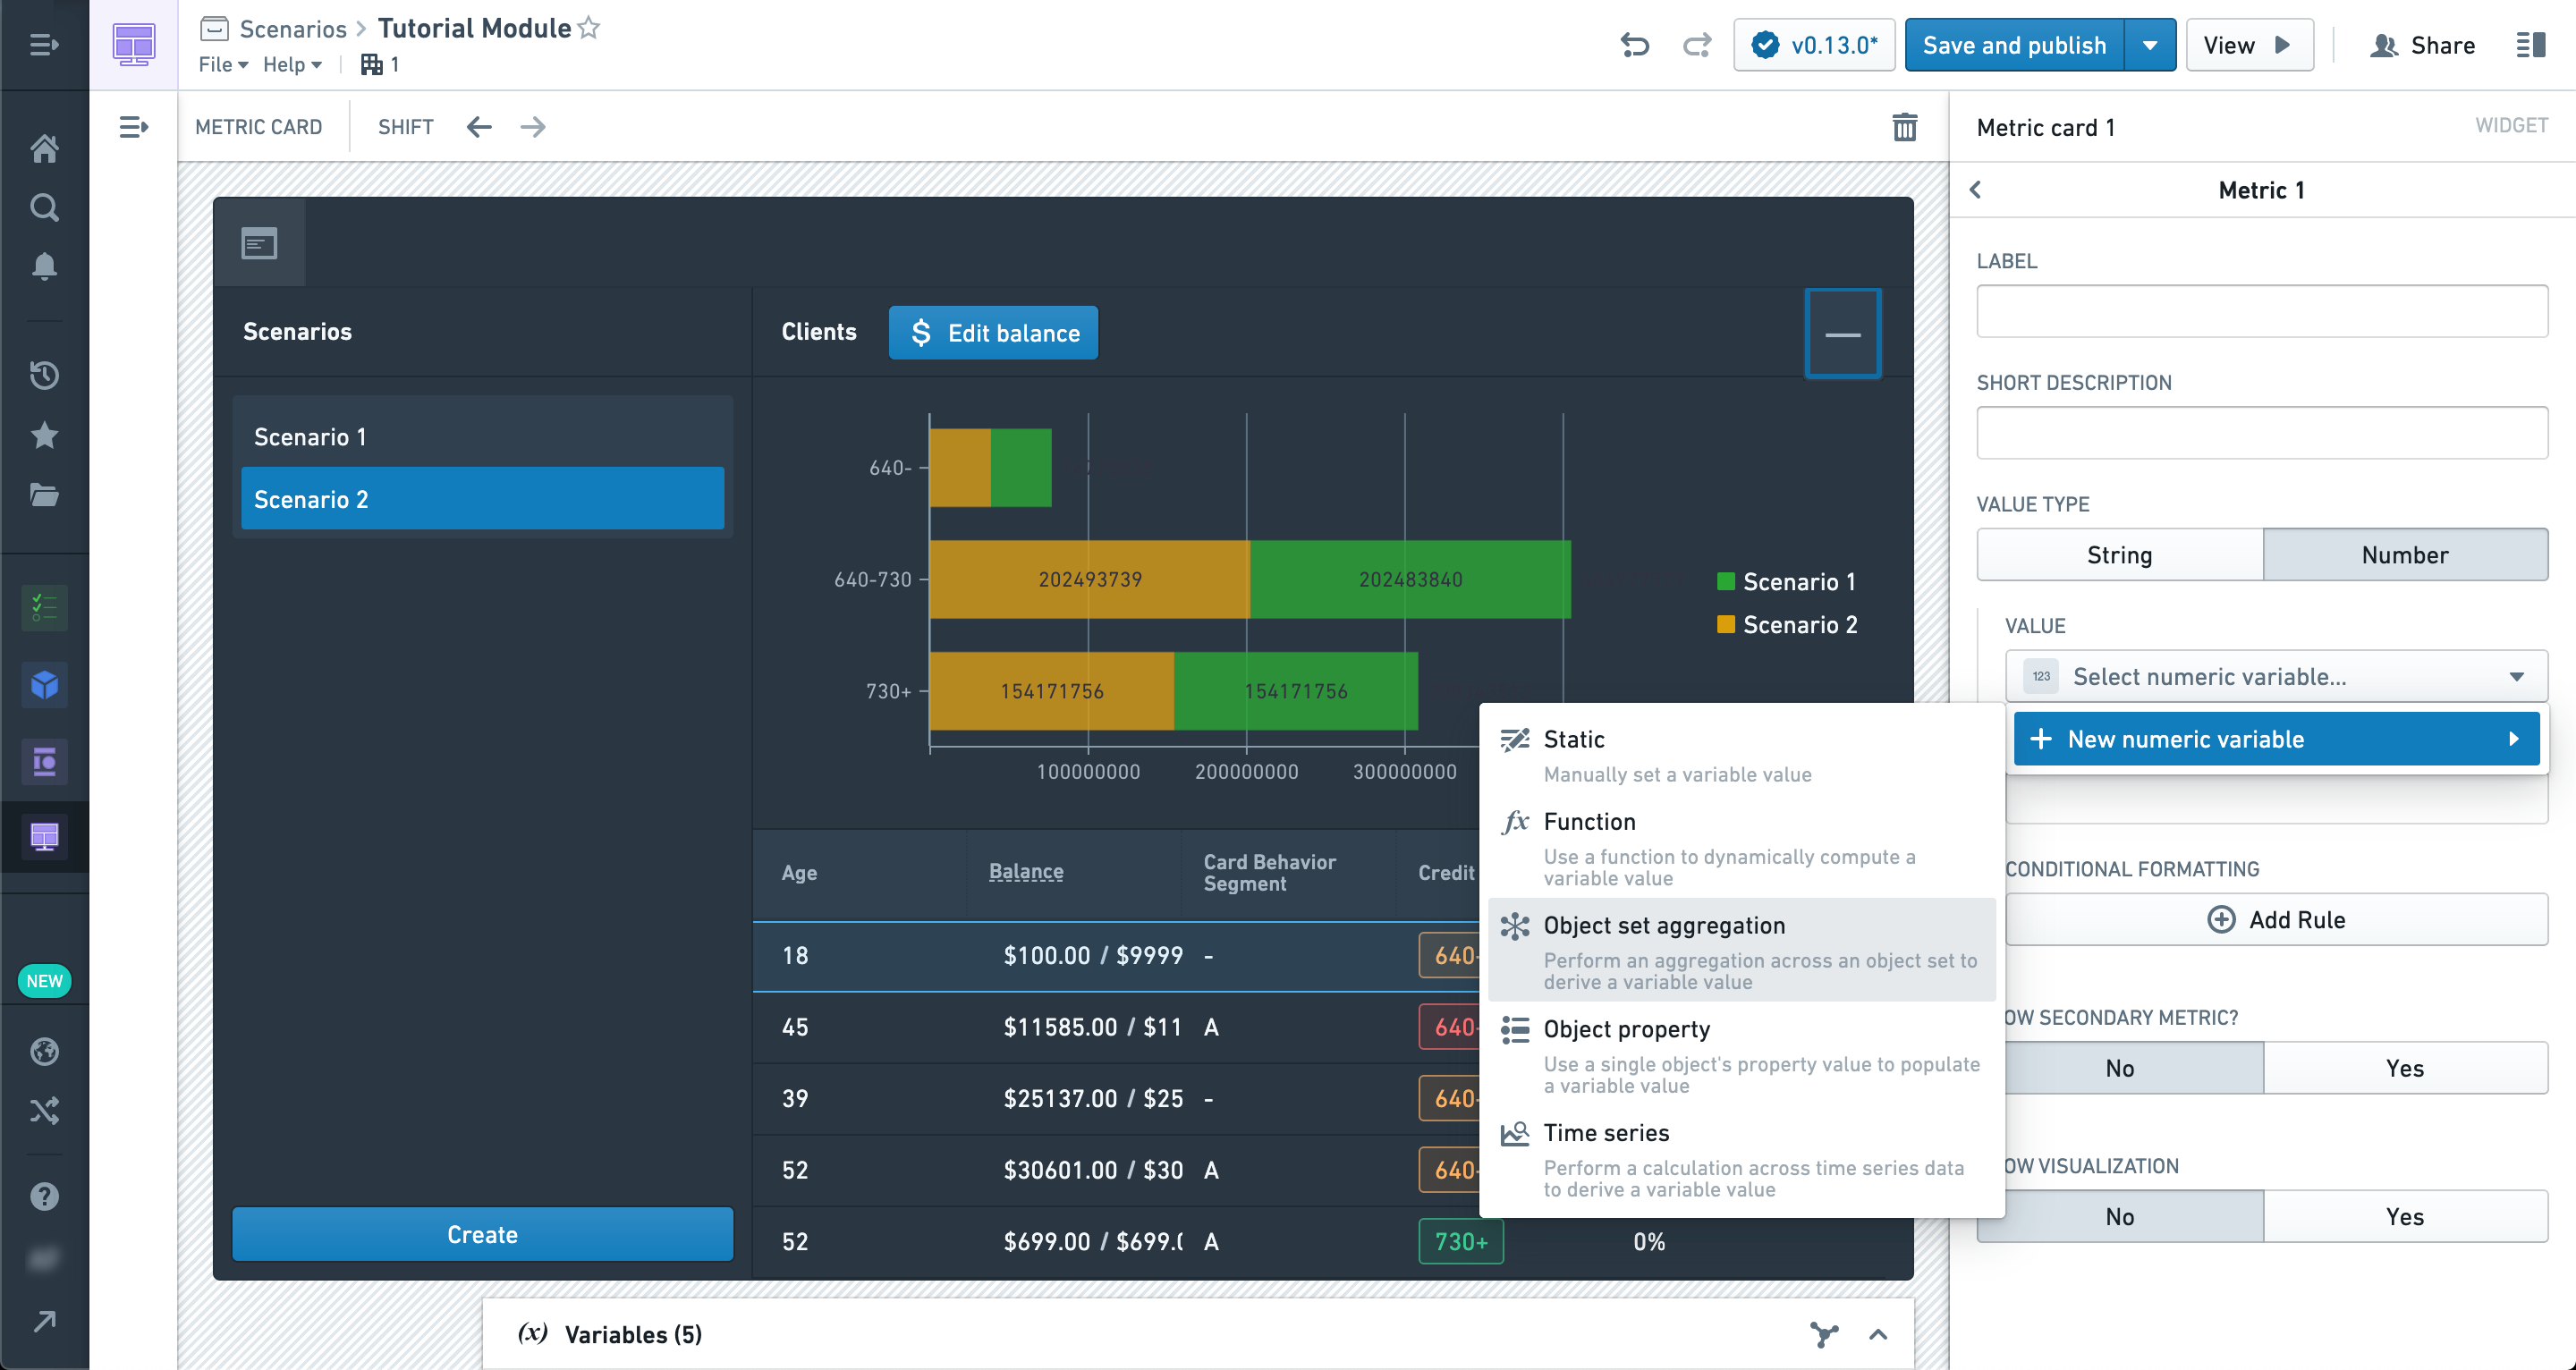
We can also populate values in Metric cards from Scenarios. Let’s add a new Metric card widget now.
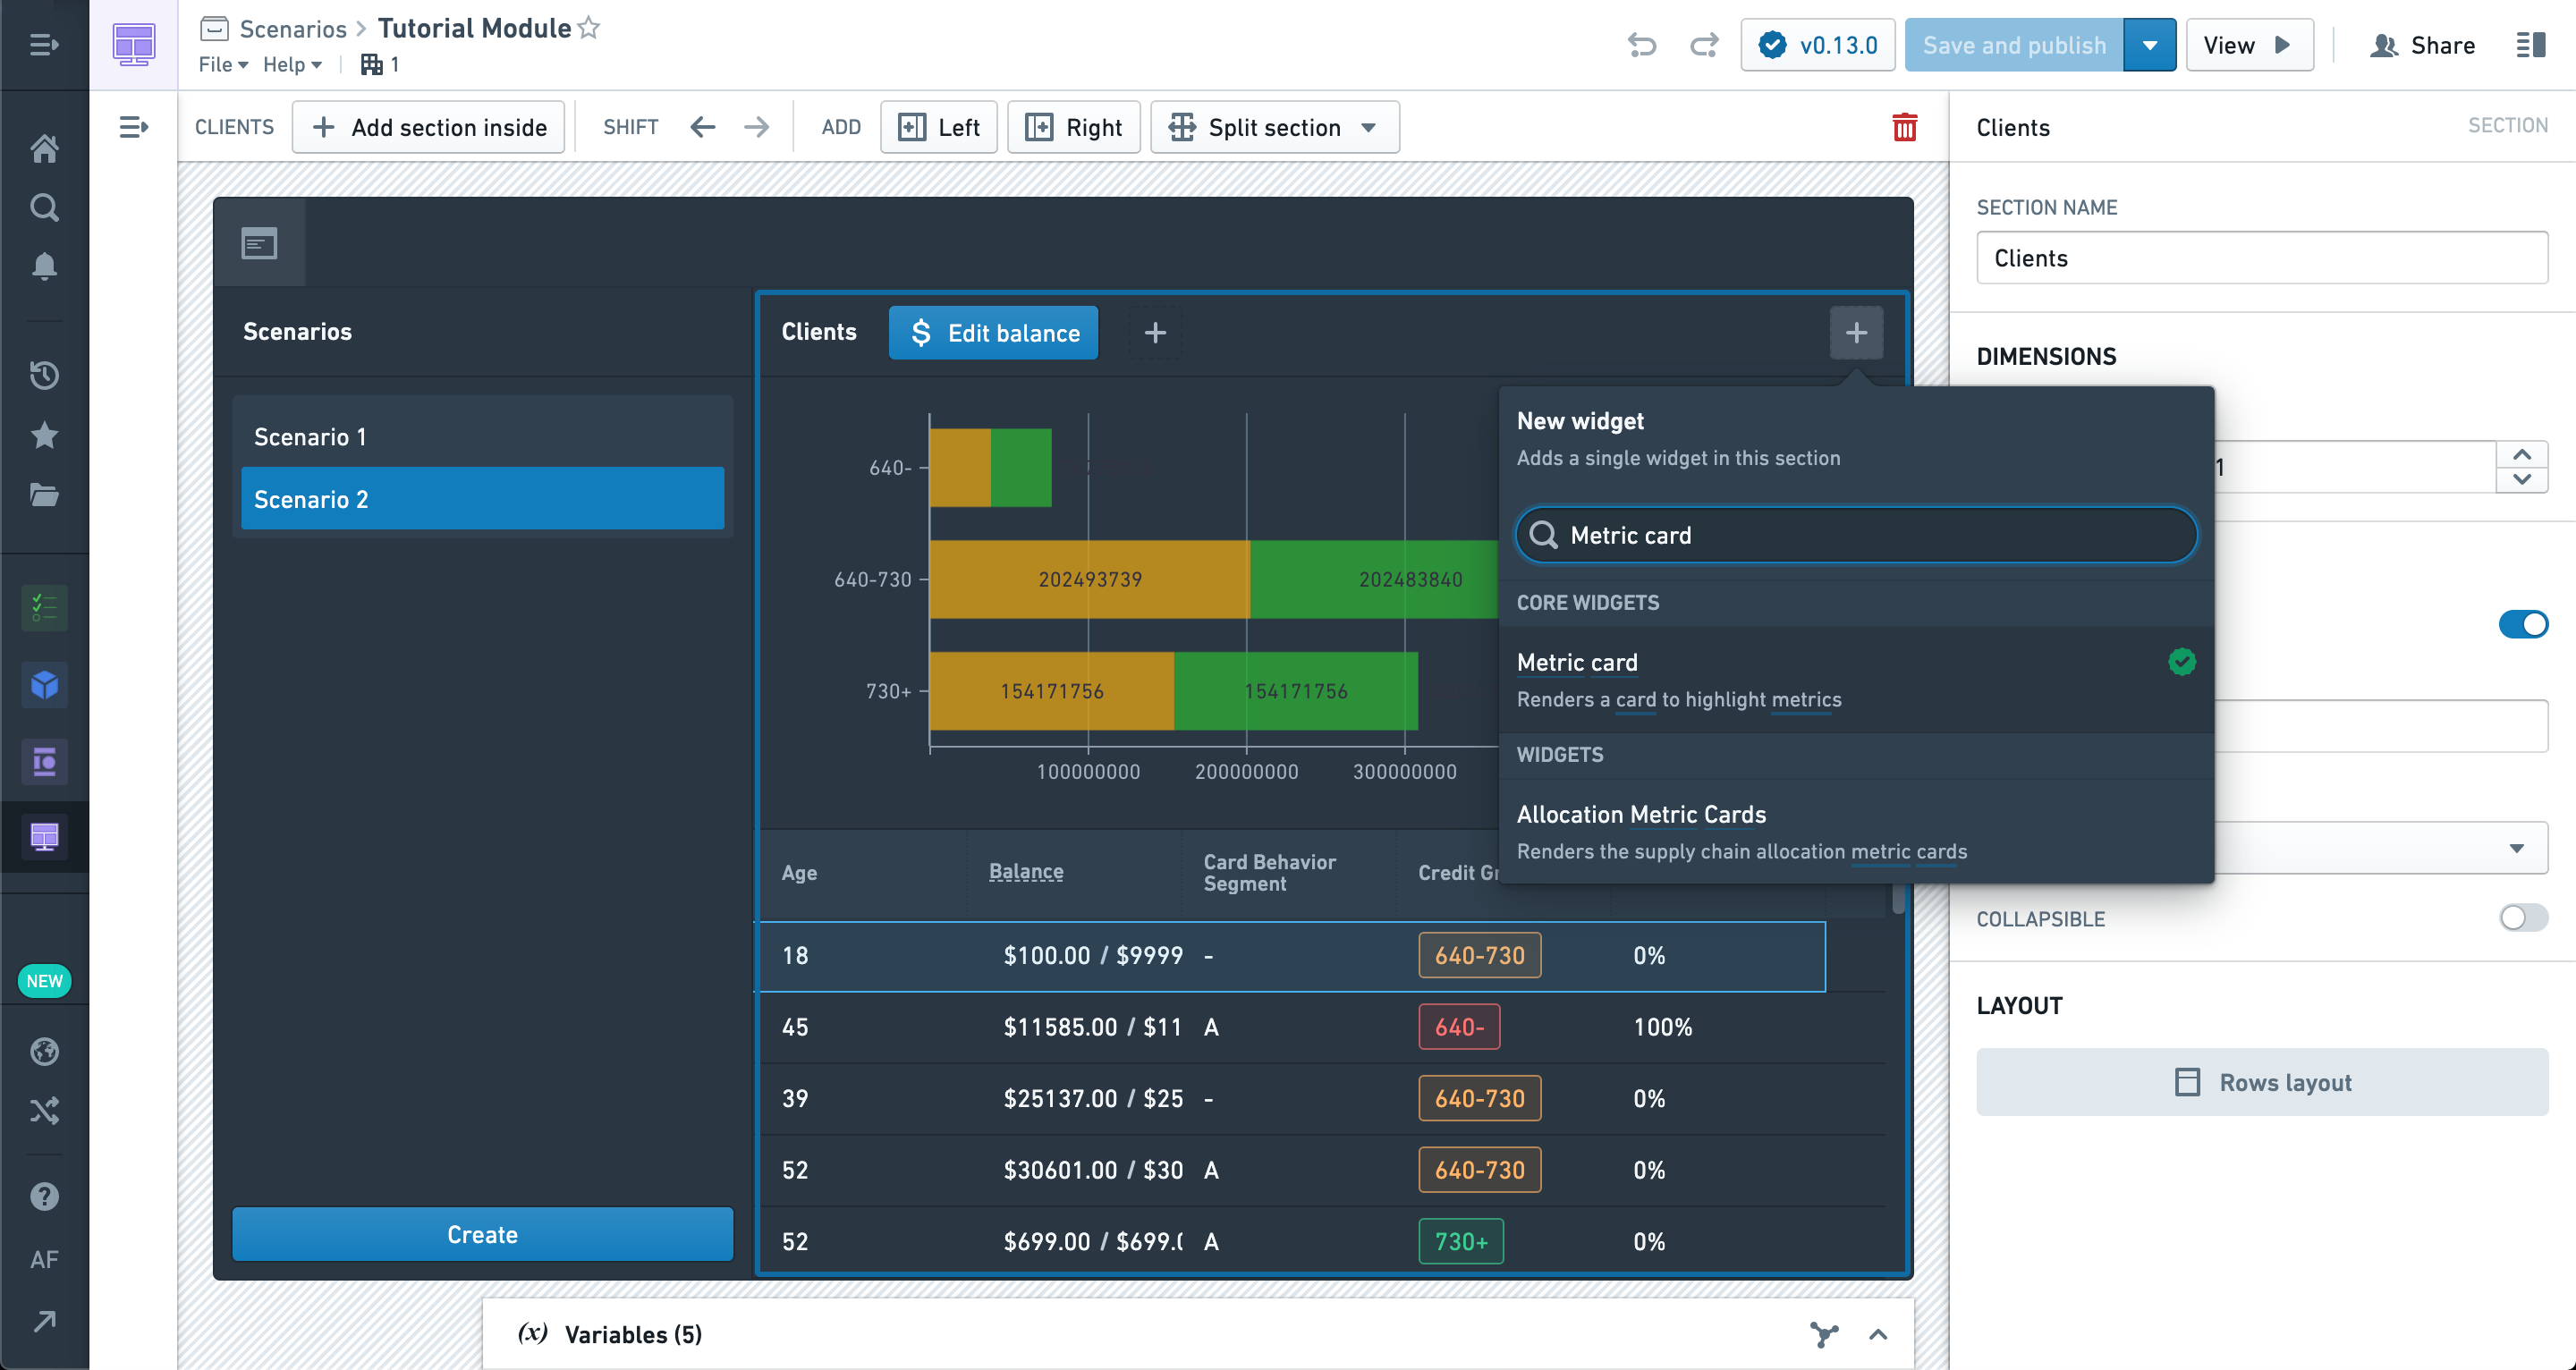
In the Metric card configuration, we’re creating a new numeric metric with a value defined by a new Object set aggregation variable.
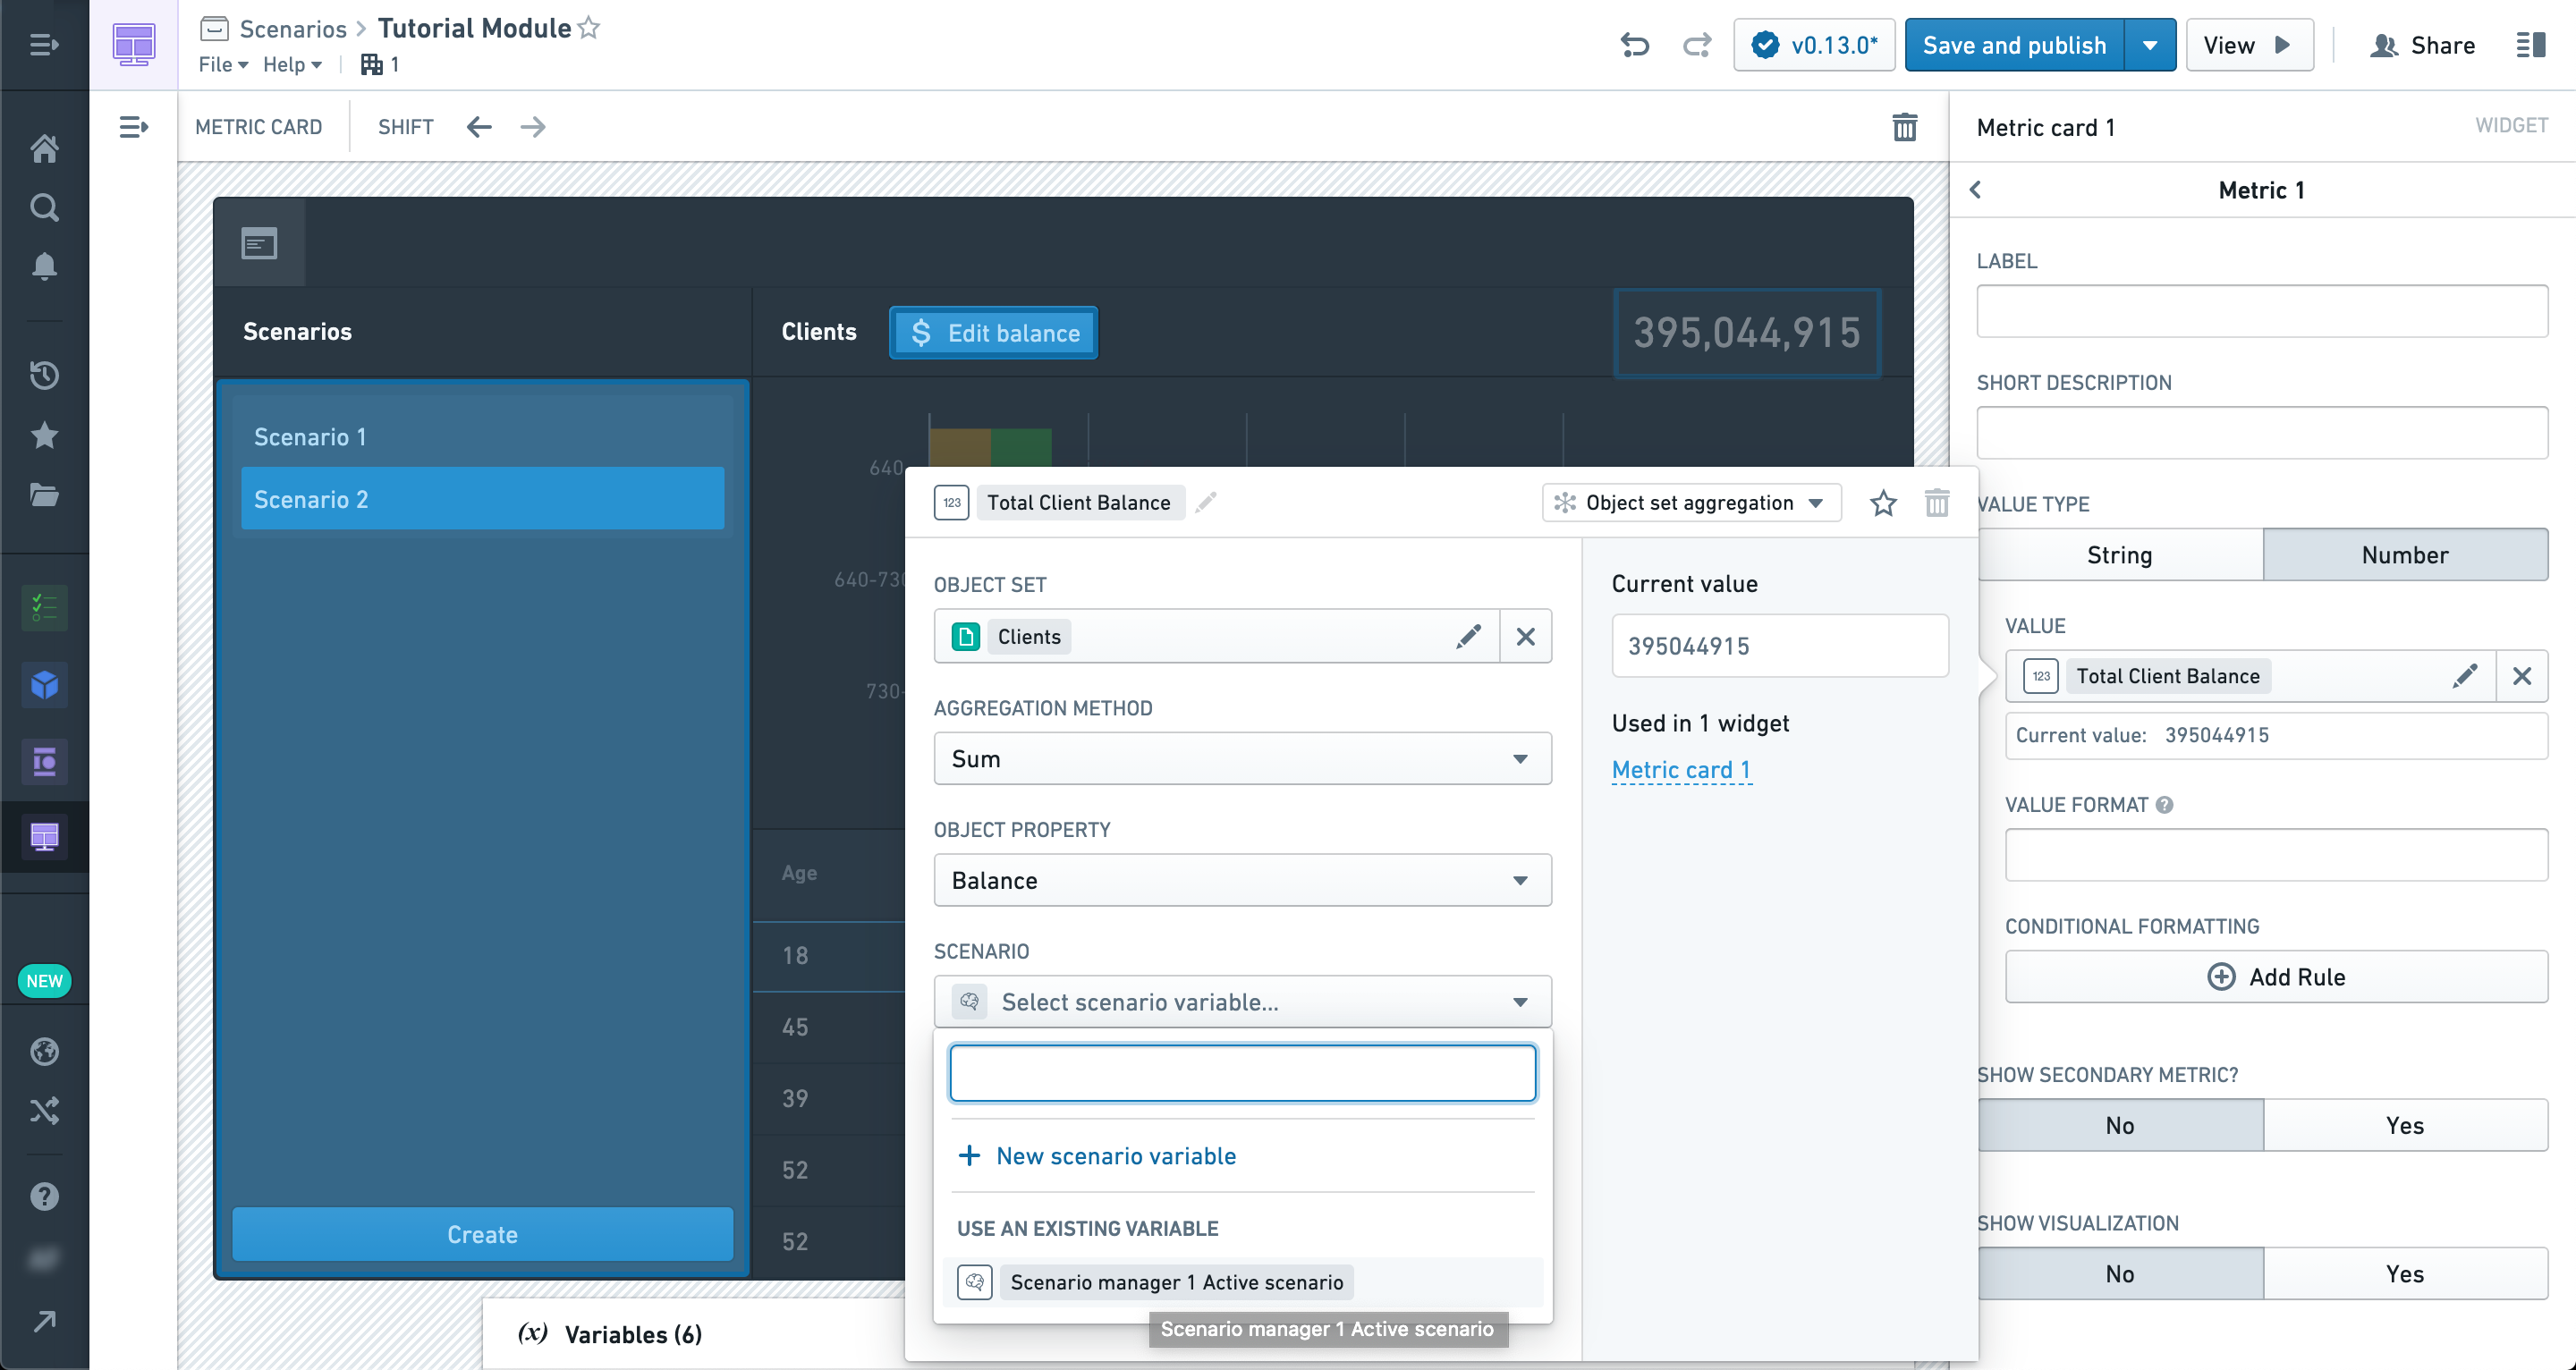
In the Object set aggregation variable configuration pane, there is a Scenario config section which will accept a Scenario variable. If selected, the object set aggregation will be performed with modifications from the Scenario applied.
Similarly, Object property variables also have a Scenario configuration section. In this way, you can configure variable values from Scenarios to be used in widgets that are not inherently Scenario-aware (like the metric card, which does not have an explicit Scenario configuration section).
We’ve chosen the Scenario Selector output variable here, so we can see the aggregate change based on the selection.
Congratulations, you’ve reached the end of your first Scenario tutorial! We recommend experimenting with various configurations and layouts of all the widgets we’ve covered here.
While the layout shown in this tutorial is a common approach to a straightforward Scenario-powered application, it is not the only one.
Many powerful interactions are possible given the tools at your disposal, especially when combined with Actions; experimentation and practice will lead to better results.

中文翻译
入门指南
在本教程中,我们将逐步构建一个基于场景(Scenario)功能的基础模块。
首先,让我们创建一个全新的 Workshop 模块。
第一步,导航至左侧的设置(Settings)面板,确保在高级功能(Advanced Functionalities)中已启用场景(Scenarios)功能。
在侧边栏区域,让我们添加一个场景管理器(Scenario Manager)小组件。
这是 Workshop 中场景(Scenario)专用的小组件之一,用于创建和管理将在整个模块中使用的场景(Scenarios)。
其配置选项暂时保持默认即可,我们稍后会回来进行设置。
在模块的主体部分,让我们添加一个对象表格(Object table)。
您可以使用任何对象集(Object set)来填充表格,但我们建议从已配置至少一个关联操作(Action)的对象类型(Object type)开始。
现在,让我们添加一些要在表格中显示的属性(properties)。
在属性下方,您会看到启用此小组件中场景比较(Scenario comparison)的选项(也就是说,对象表格(Object table)是一个支持场景(Scenario)的小组件)。
启用后,您可以选择由场景管理器(Scenario Manager)小组件生成的场景数组变量(Scenario array variable)。这将使表格中的数据反映管理器中对场景(Scenarios)所做的任何修改,而非原始本体论(Ontology)中的数据。
不过,此时我们尚未对场景(Scenario)应用任何修改,因此数据应该保持一致。
让我们添加一个按钮组(Button Group)小组件,以便配置一个可应用于场景(Scenarios)的操作(Action)。
我们选择的是一个能够修改表格中对象类型的操作(Action)。
为了将此操作(Action)应用于场景(Scenario)而非真实的本体论(Ontology),我们将启用"应用于场景(Apply to Scenario)"选项,并从管理器中选择活动场景变量(active Scenario variable)。
使用新配置的操作(Action),让我们尝试将表格中任意对象的属性(property)更改为一个新值。
不过,在应用操作(Action)之前,我们需要通过点击管理器小组件中的"创建(Create)"按钮来创建一个新场景(Scenario)。
在此示例中,我们正在更新表格中某位客户的余额(Balance)。
您应该会看到对象表格(Object table)刷新并显示新数据,其中包含您刚刚所做的修改。
需要注意的是,此操作(Action)并未应用于本体论(Ontology),仅存在于场景(Scenario)之中。
我们还可以再次点击管理器中的创建(Create)按钮来创建另一个用于比较的场景(Scenario)。创建完成后,您将在对象表格(Object table)中看到第二个场景(Scenario)的值与第一个并排显示,但仅显示存在差异的列。由于第二个场景(Scenario)尚未被修改,它应显示本体论(Ontology)中的原始值。
某些小组件(如表格)可以接受任意数量的场景(Scenarios)并显示结果。
现在,让我们在表格上方添加一个包含XY图表(Chart: XY)小组件的区域。
XY图表(Chart: XY)小组件与表格一样支持任意数量的场景(Scenarios),并且不同的场景(Scenarios)可以在不同的图层(layers)中进行配置。
尝试探索各种图层类型(layer types),看看多个场景(Scenarios)在其中是如何可视化的。
您还可以配置分组依据(Group Bys)和聚合(Aggregates),这些设置将正确识别场景(Scenario)中的值。
我们还可以从场景(Scenarios)中填充指标卡片(Metric cards)的值。 现在让我们添加一个新的指标卡片(Metric card)小组件。
在指标卡片(Metric card)配置中,我们正在创建一个新的数值型指标(numeric metric),其值由一个新的对象集聚合变量(Object set aggregation variable)定义。
在对象集聚合变量(Object set aggregation variable)配置面板中,有一个场景配置(Scenario config)部分,可以接受一个场景变量(Scenario variable)。 如果选择了该变量,对象集聚合(Object set aggregation)将应用场景(Scenario)中的修改来执行。
同样地,对象属性变量(Object property variables)也包含一个场景配置(Scenario configuration)部分。 通过这种方式,您可以将来自场景(Scenarios)的变量值配置到那些本身不支持场景(Scenario)的小组件中使用(例如指标卡片(Metric card),它没有显式的场景配置(Scenario configuration)部分)。
我们在这里选择了场景选择器输出变量(Scenario Selector output variable),这样我们就可以根据选择看到聚合值的变化。
恭喜您,您已经完成了第一个场景(Scenario)教程的学习! 我们建议您尝试我们在此介绍的所有小组件的各种配置和布局。
虽然本教程中展示的布局是构建基于场景(Scenario)应用程序的常见方法,但并非唯一方法。
利用您手中的工具,尤其是与操作(Actions)结合使用时,可以实现许多强大的交互功能;通过实验和实践,您将获得更好的成果。