Save scenarios(保存场景)
Saving and loading scenarios enables the reuse of long-lived scenarios across sessions and allows users to share and collaborate on scenarios.
It is often useful to store workflow specific metadata alongside the stored scenario to make organizing and finding relevant stored scenarios easier.
To accomplish this, we leverage the Ontology to create objects that represent the stored scenarios.
Users can then customize the name, additional properties, and even relationships between the scenario object and other objects.
Object scenario capabilities
Before we can start saving scenarios, we will need to create an object that implements the scenario trait.
At minimum, this requires a property to hold the scenario ID and another for the scenario name.
We strongly encourage using the primary key and title properties of the object, respectively, for this purpose.
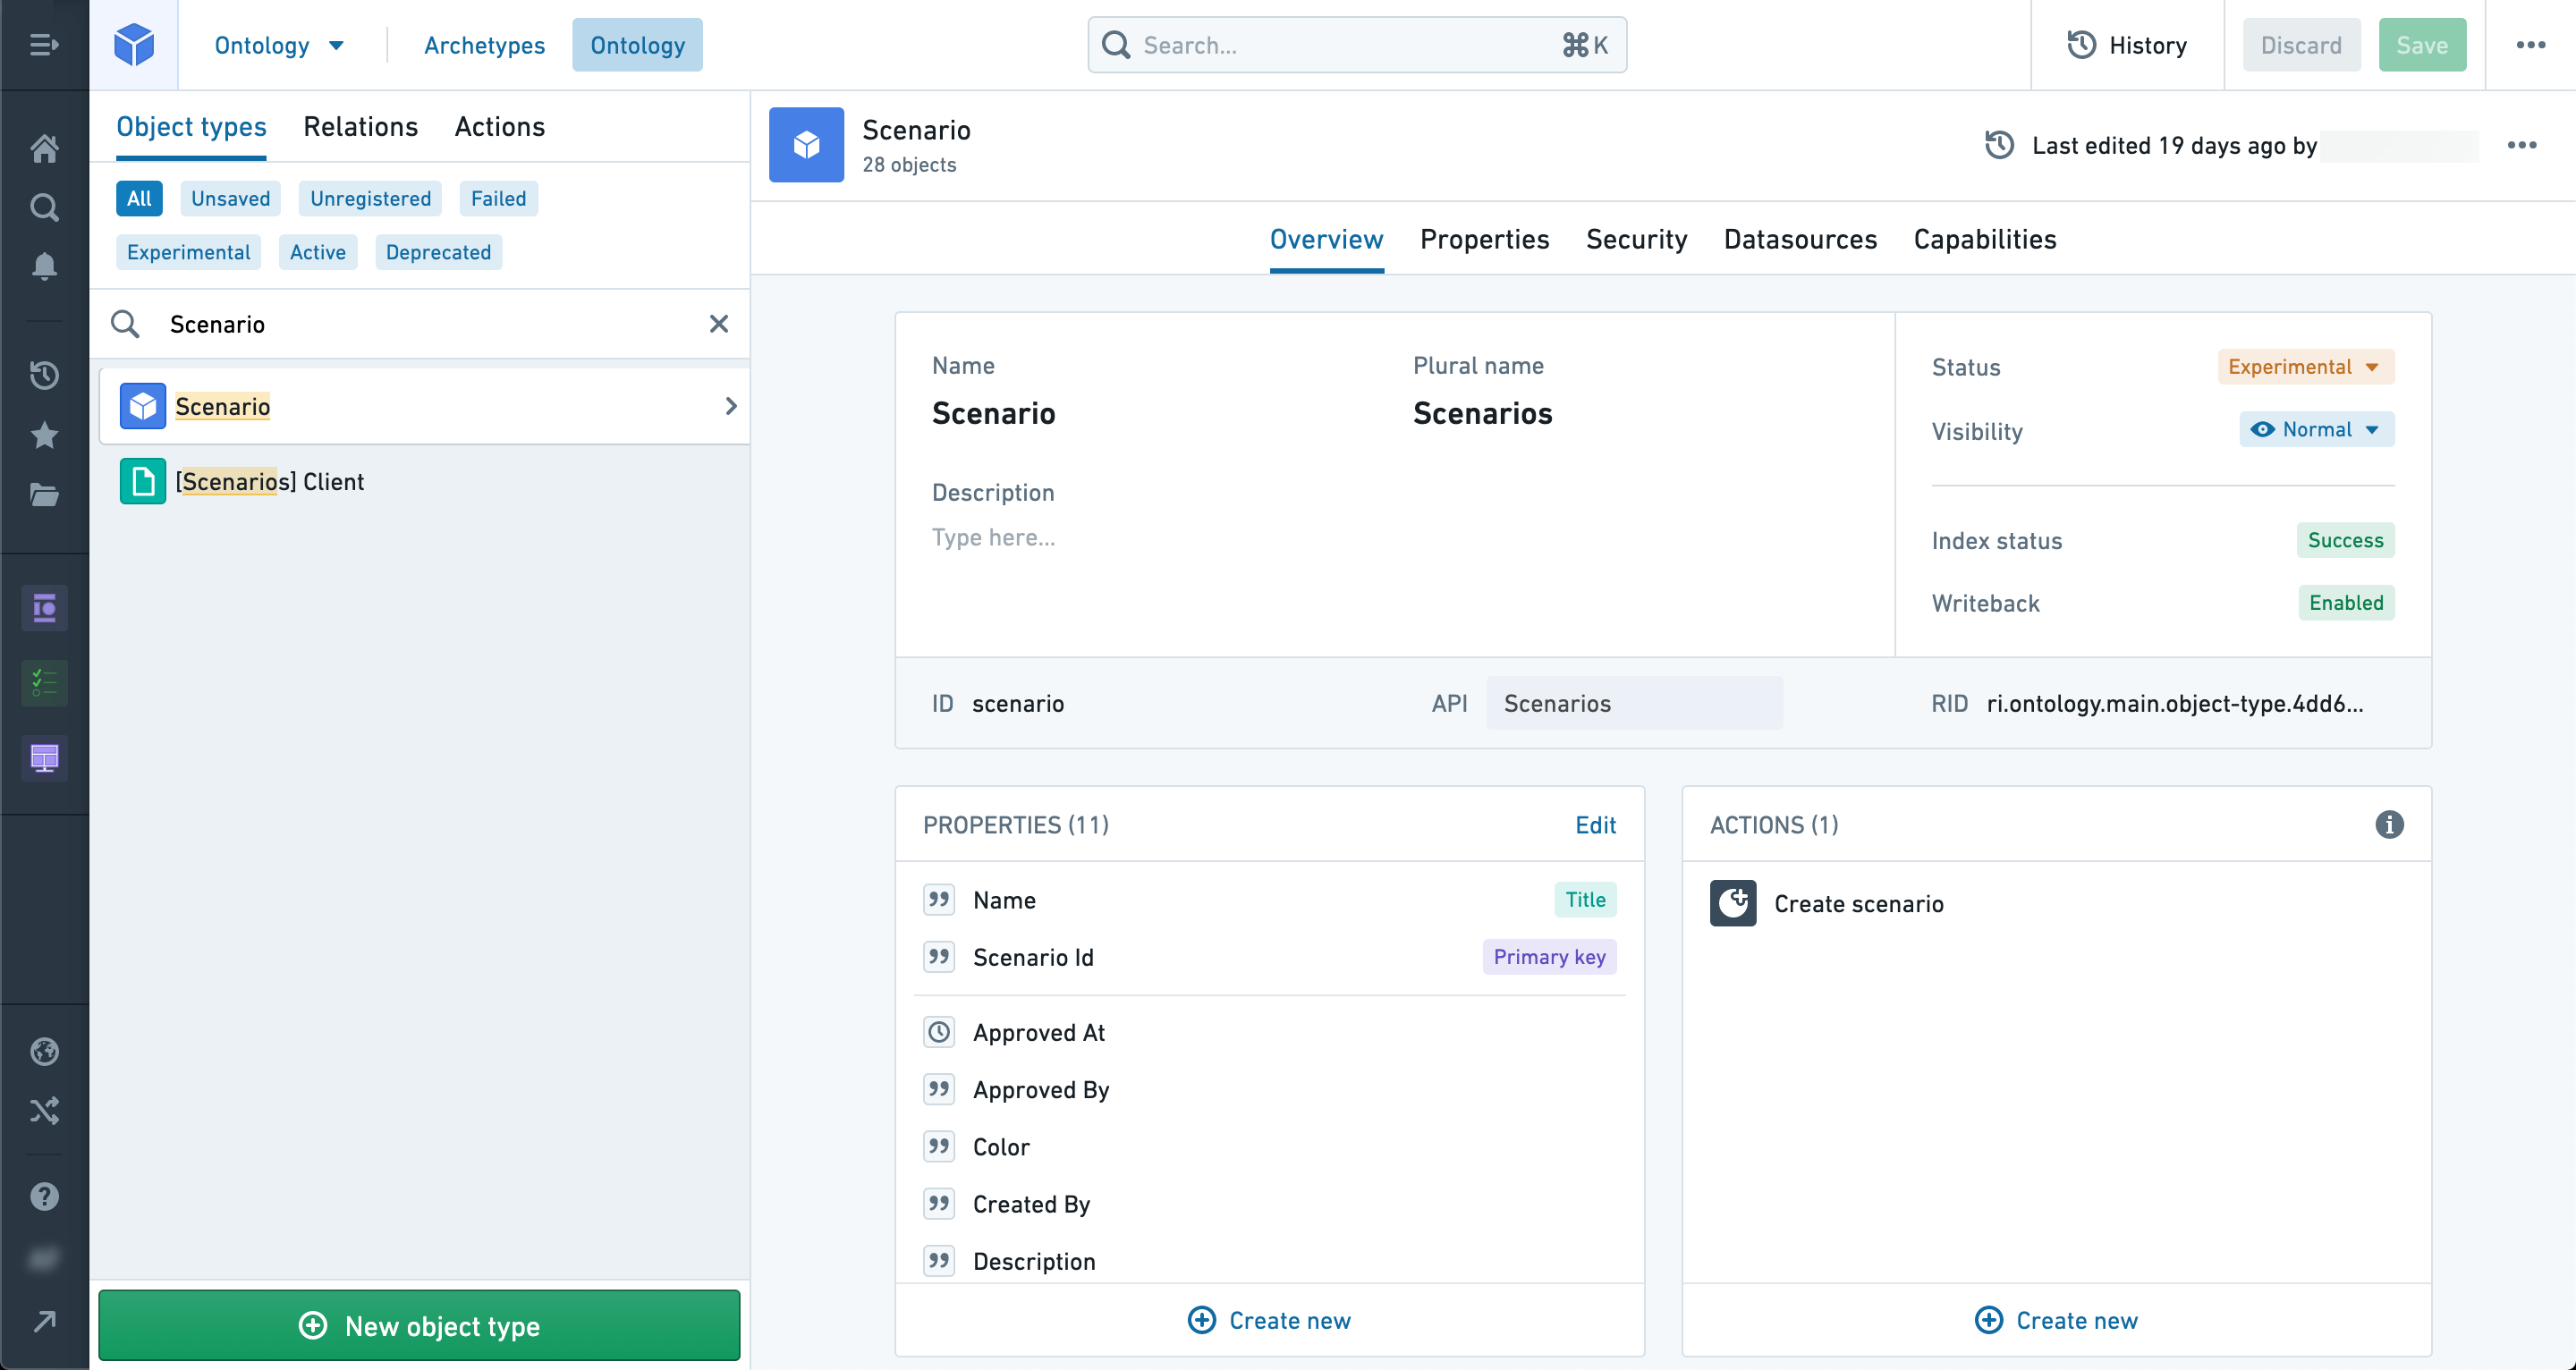
You can also add other properties to hold additional information about the scenario such as Created By or Description.
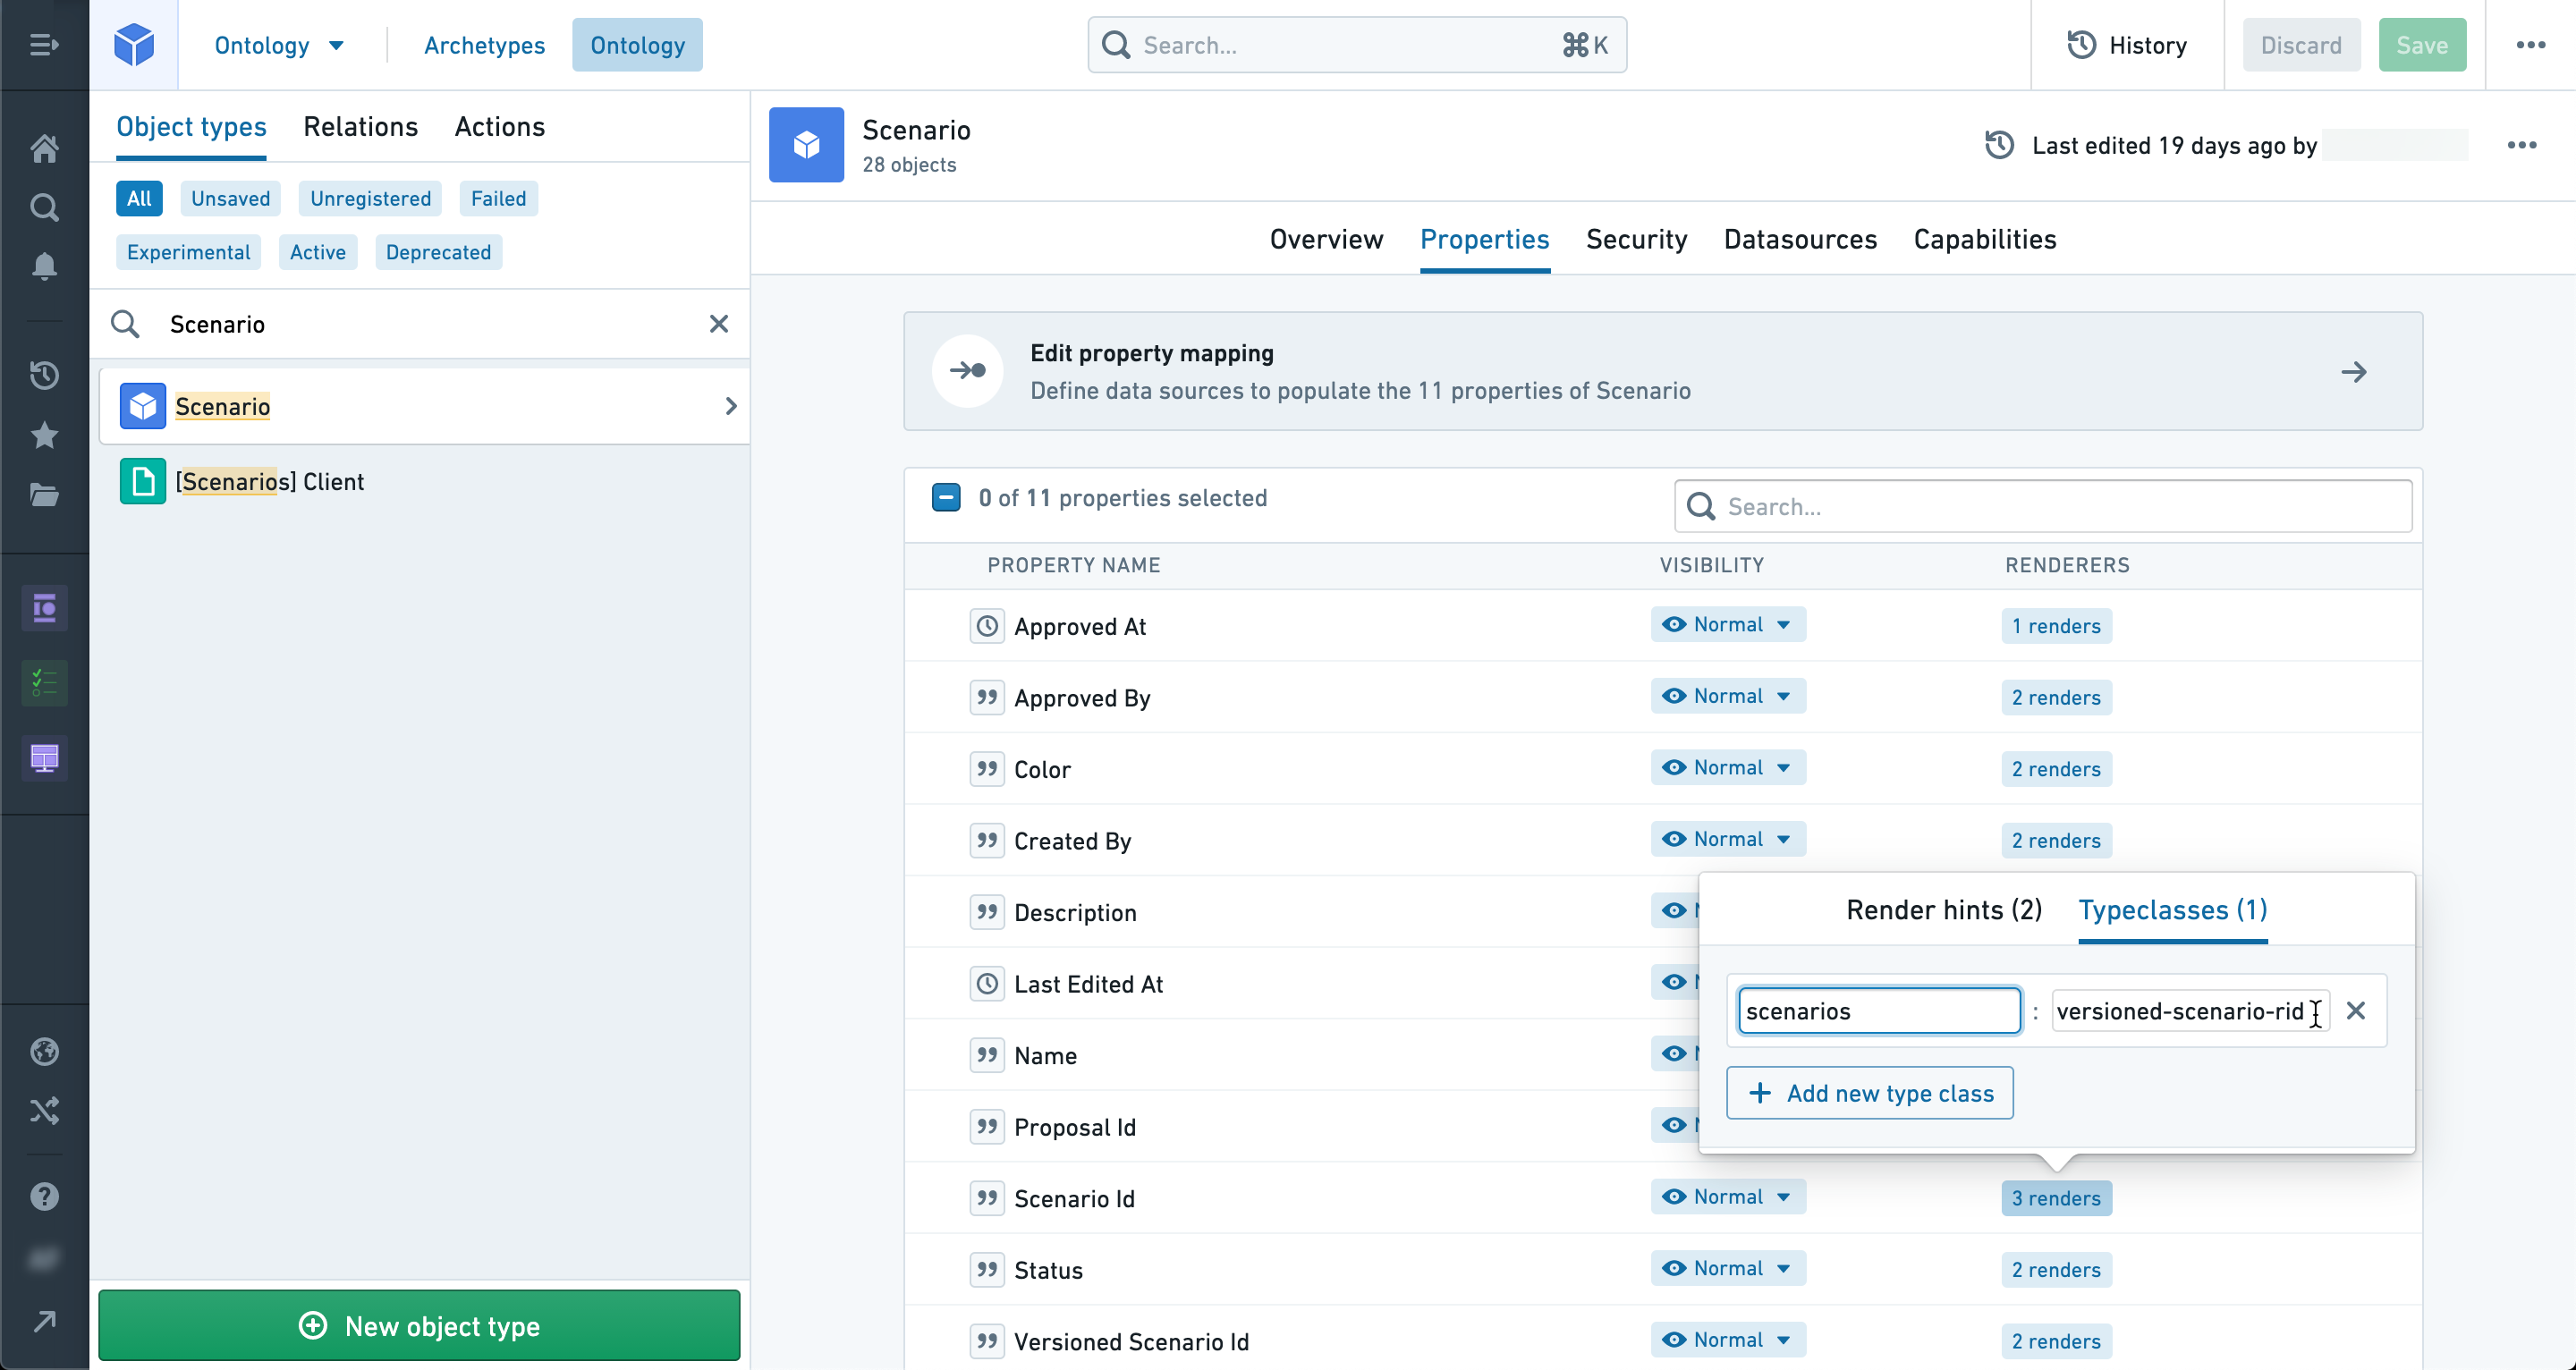
In the properties tab of your scenario object, select your ID property and add the type class scenarios:versioned-scenario-rid as shown below.
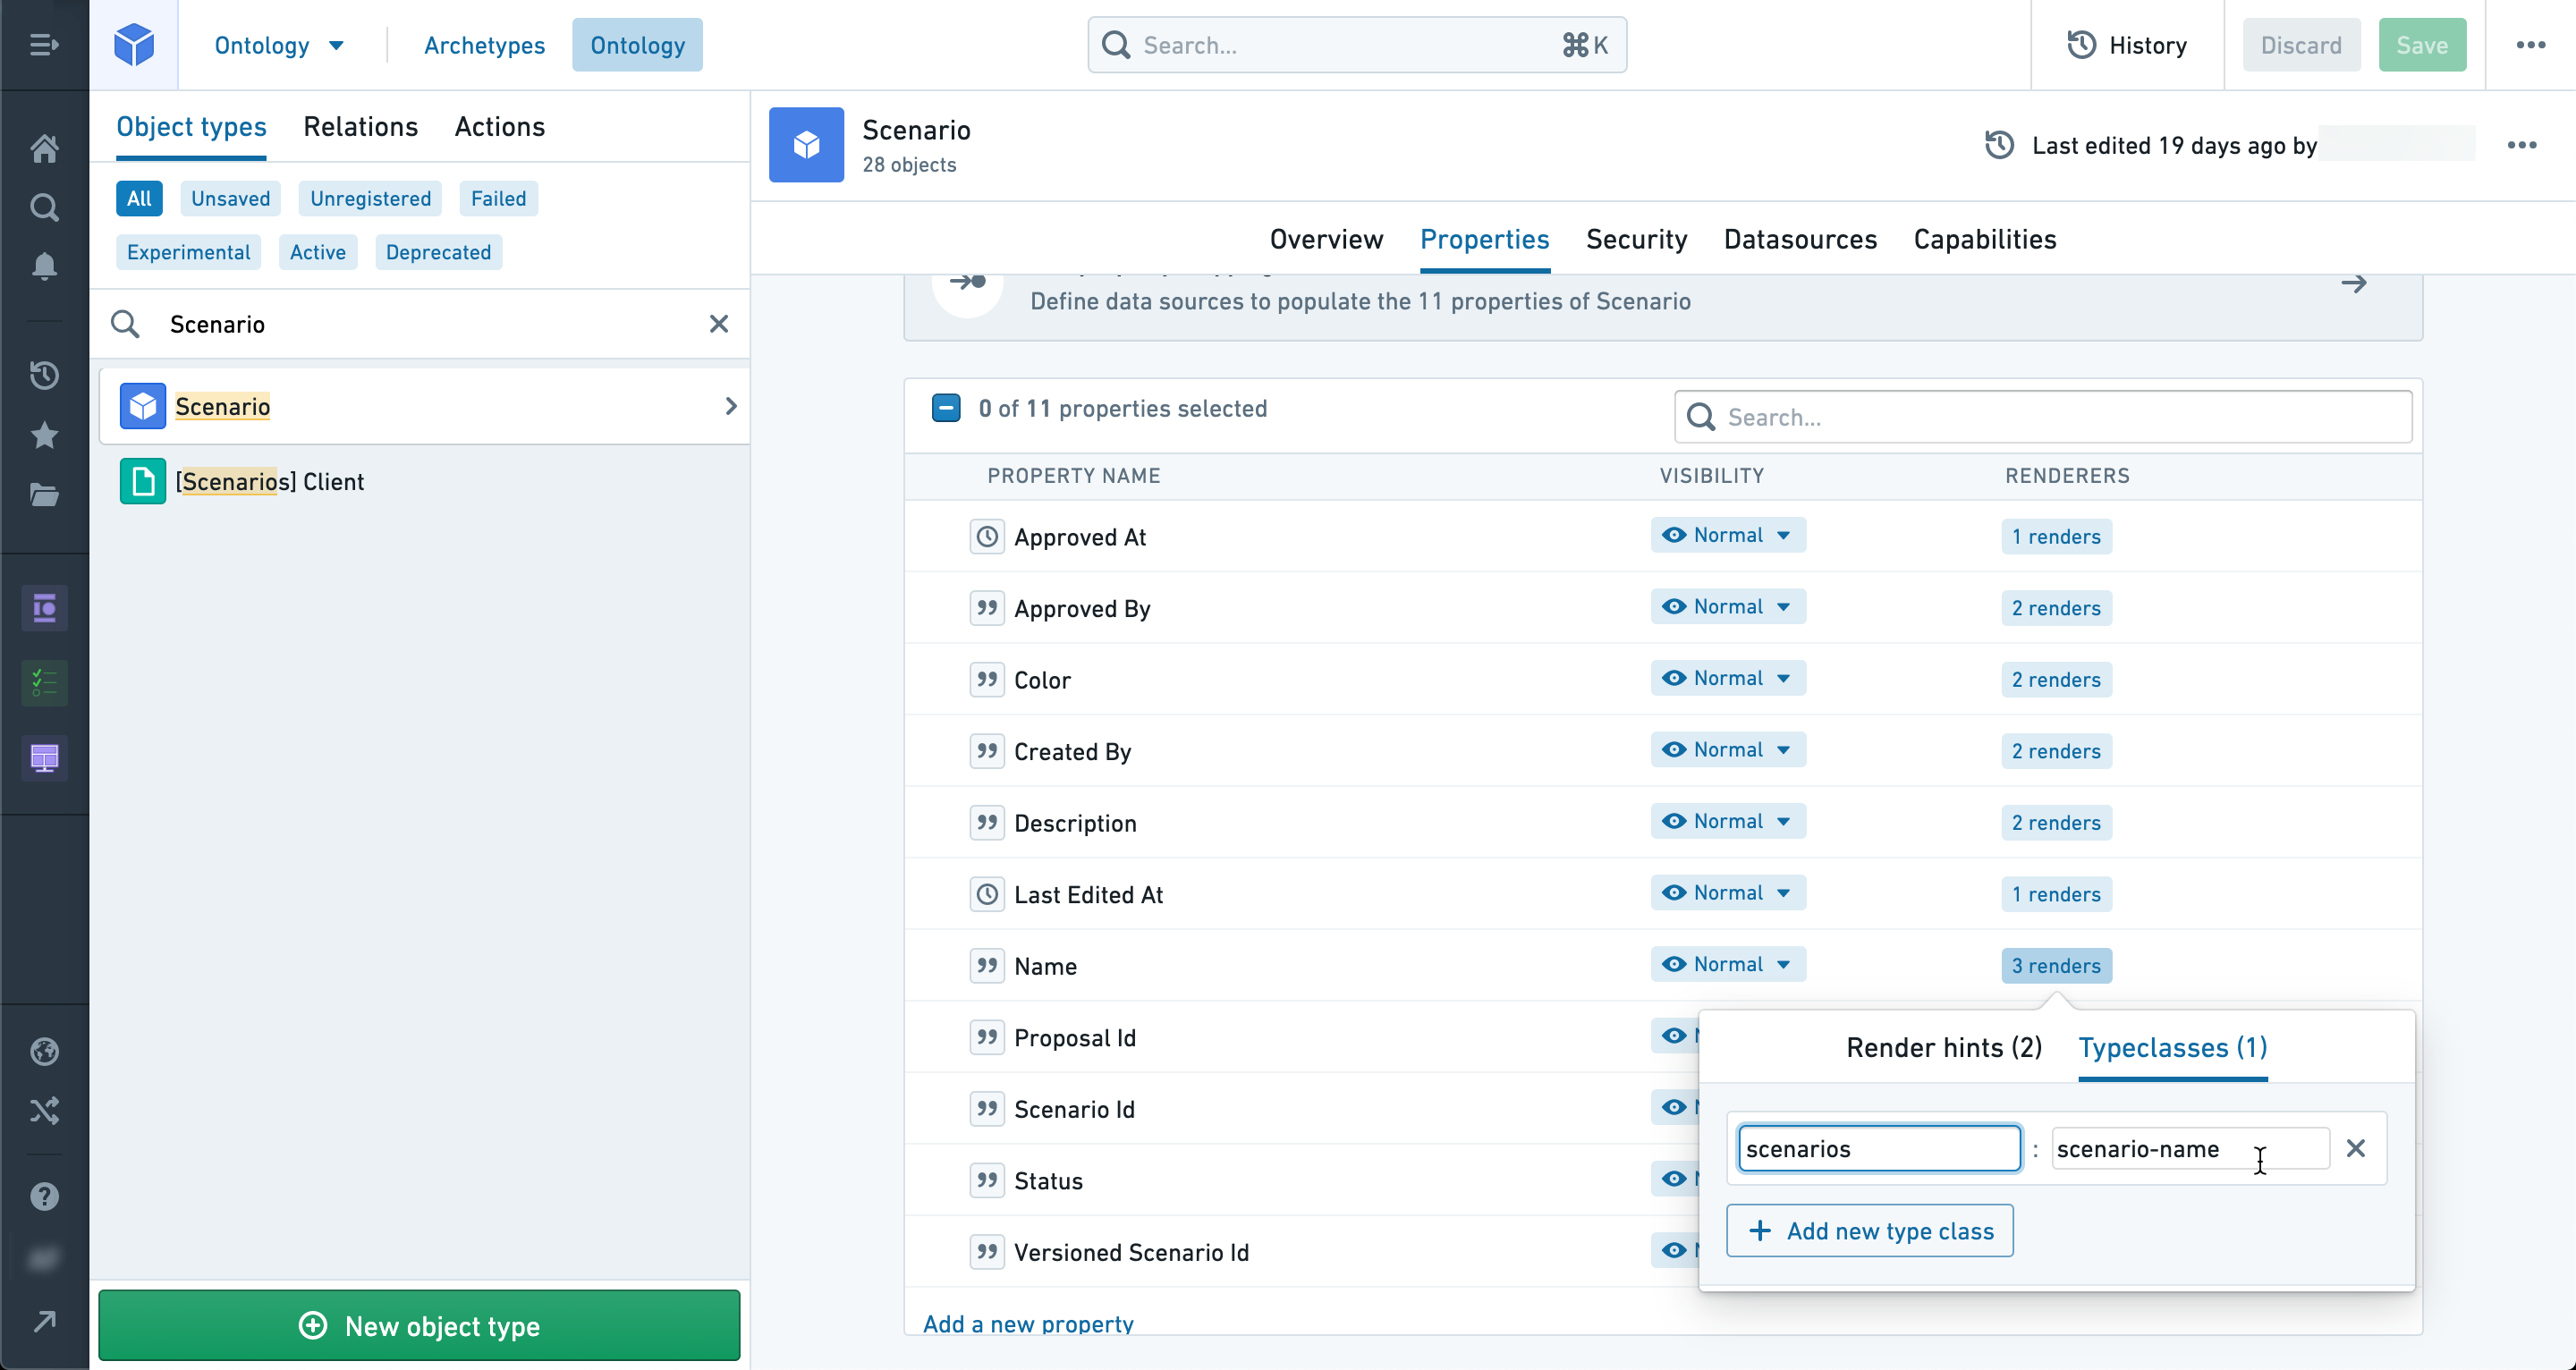
Then select your name or title property and add the type class scenarios:scenario-name.
Your scenario object is now ready to store saved scenarios, but before you’ll be able to save scenarios to this object in Workshop, you will need to set up an Action that creates objects of this type.
Scenario Actions
In addition to a scenario object, we need to have Actions that create and update scenario objects to use in Workshop when saving scenarios.
Create scenario Action
We start by creating an Action that produces an object that implements the scenario trait.
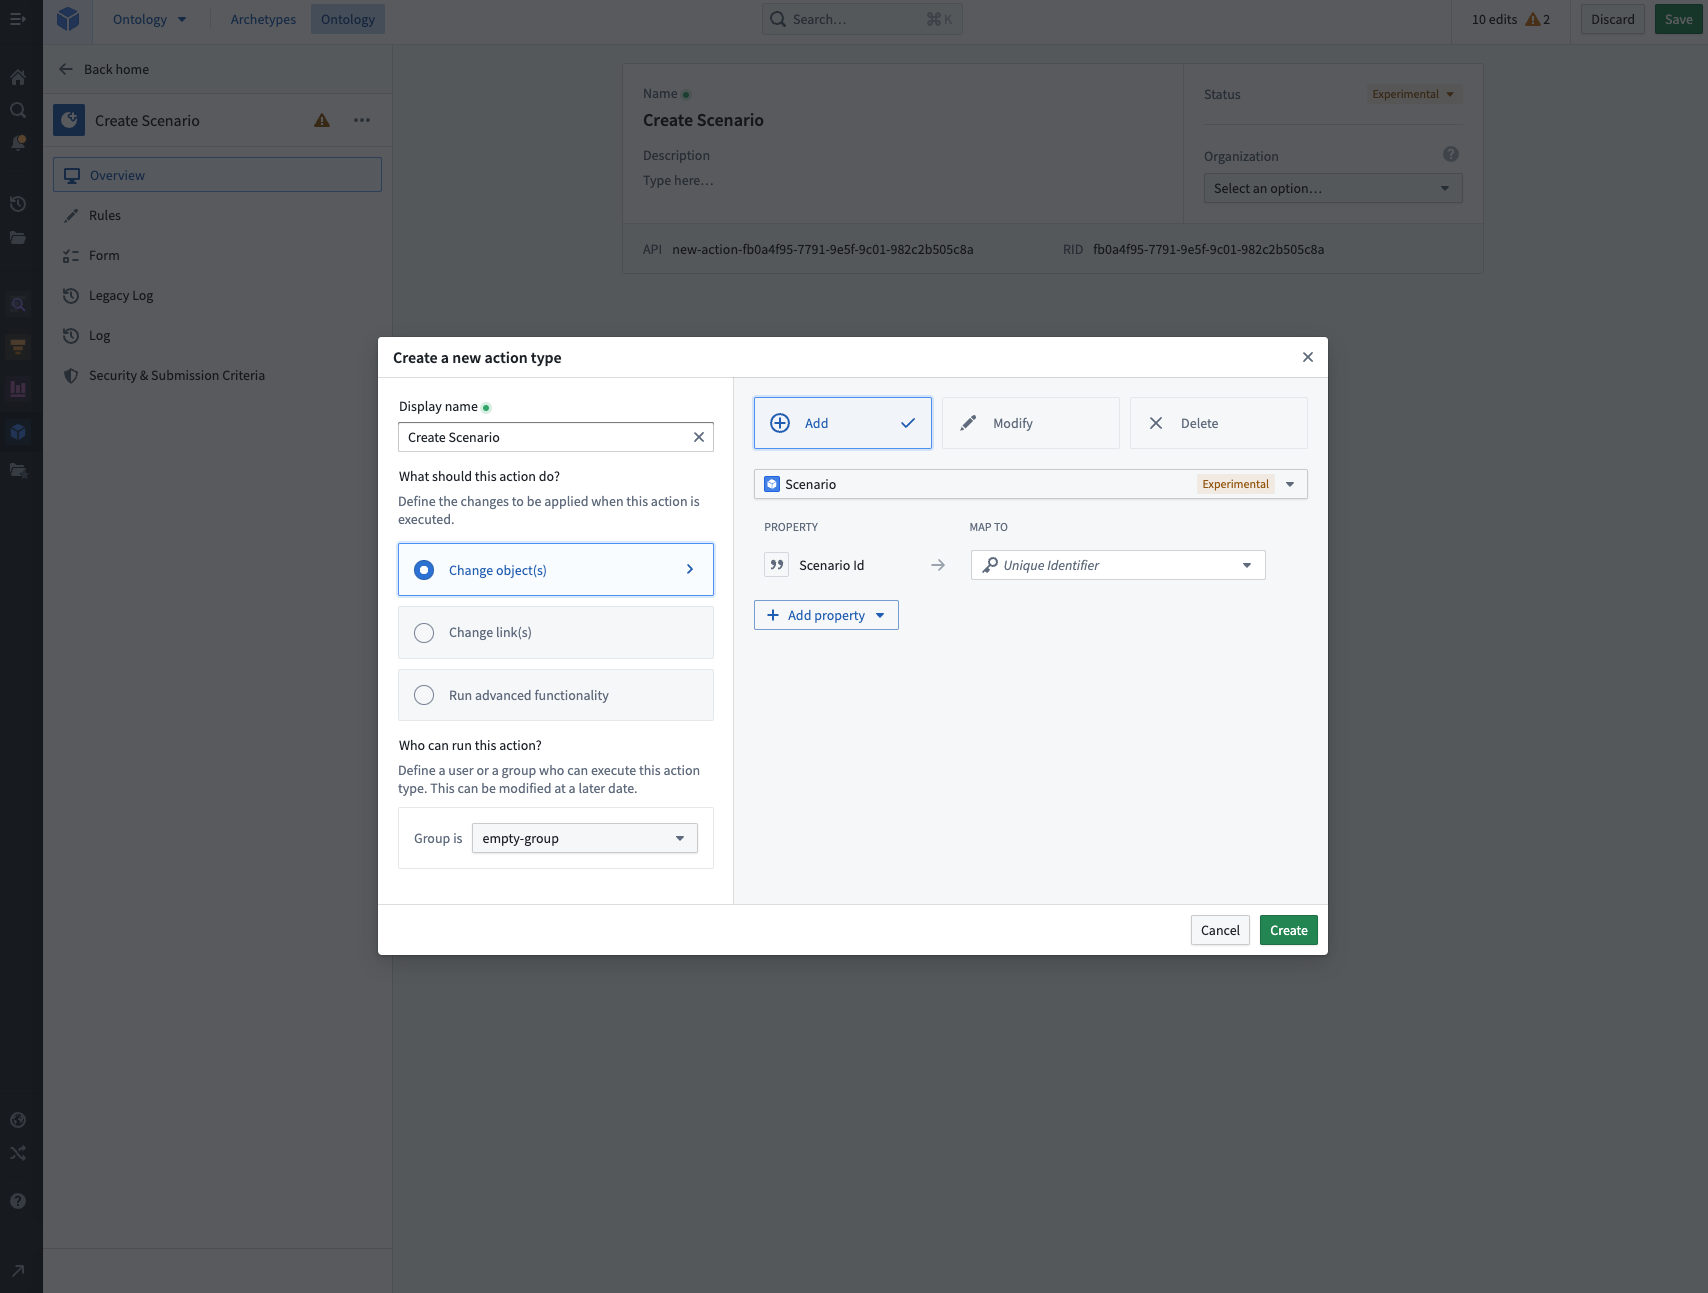
In the Rules tab, add properties that need to be provided during the creation of a scenario.
At a minimum, the scenario's Scenario Id and Name properties must be added.

Now we need to ensure that the Scenario ID and Name properties have the correct type class.
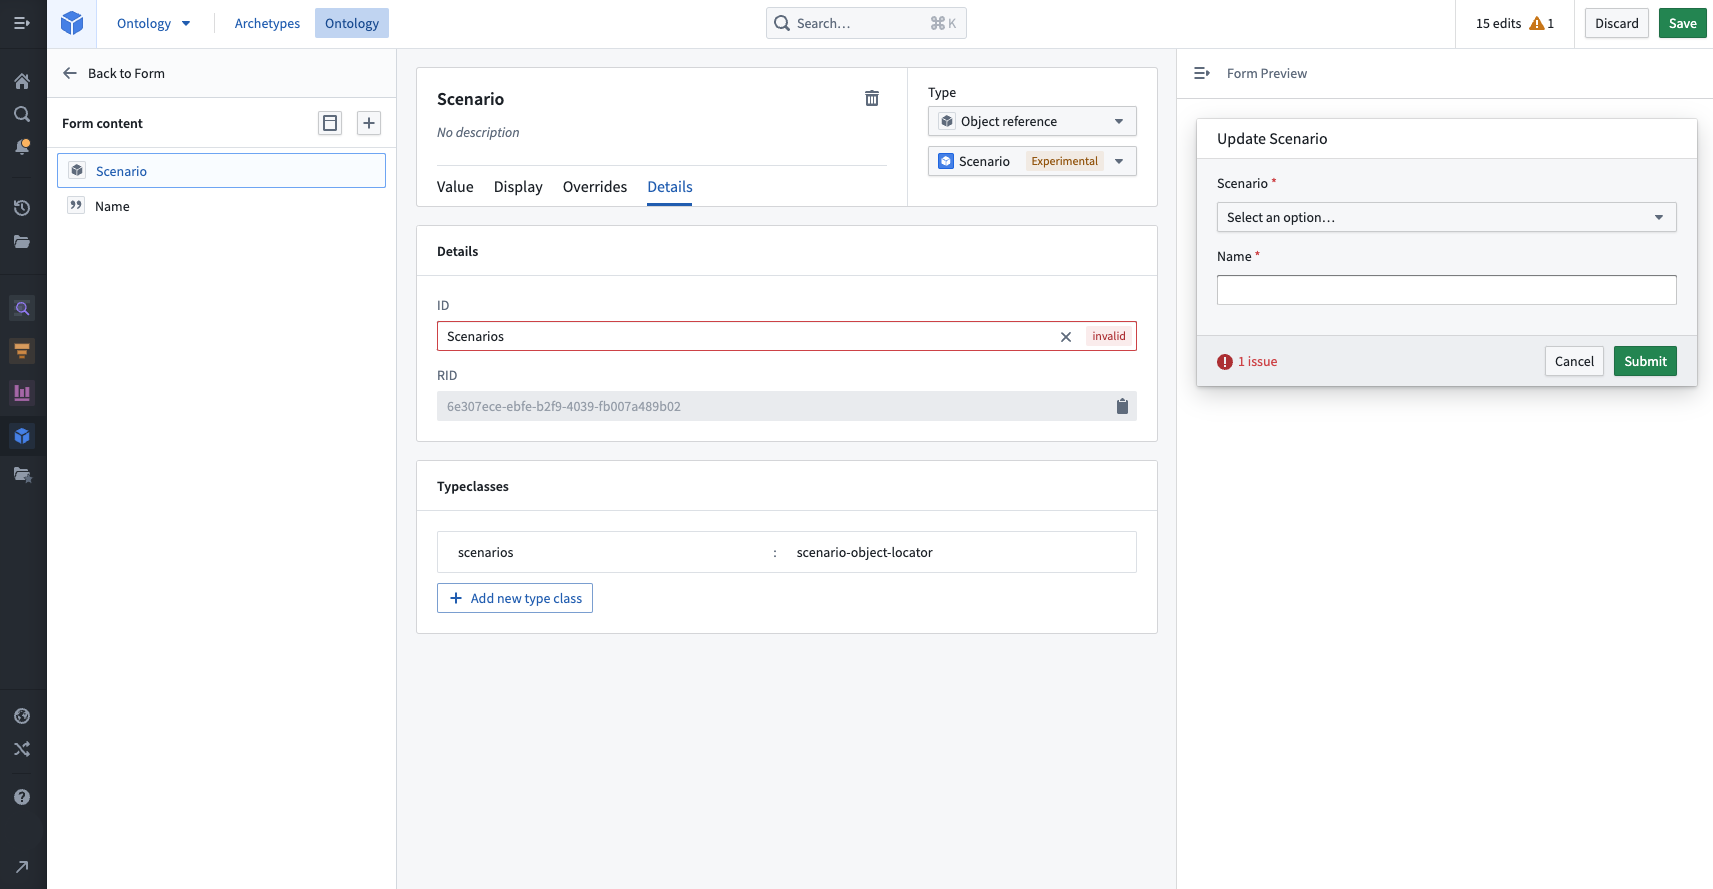
In the Forms tab, we can remove the scenario object from the list of properties since the action we are making creates a new scenario.
Create a new string property named Scenario Id.
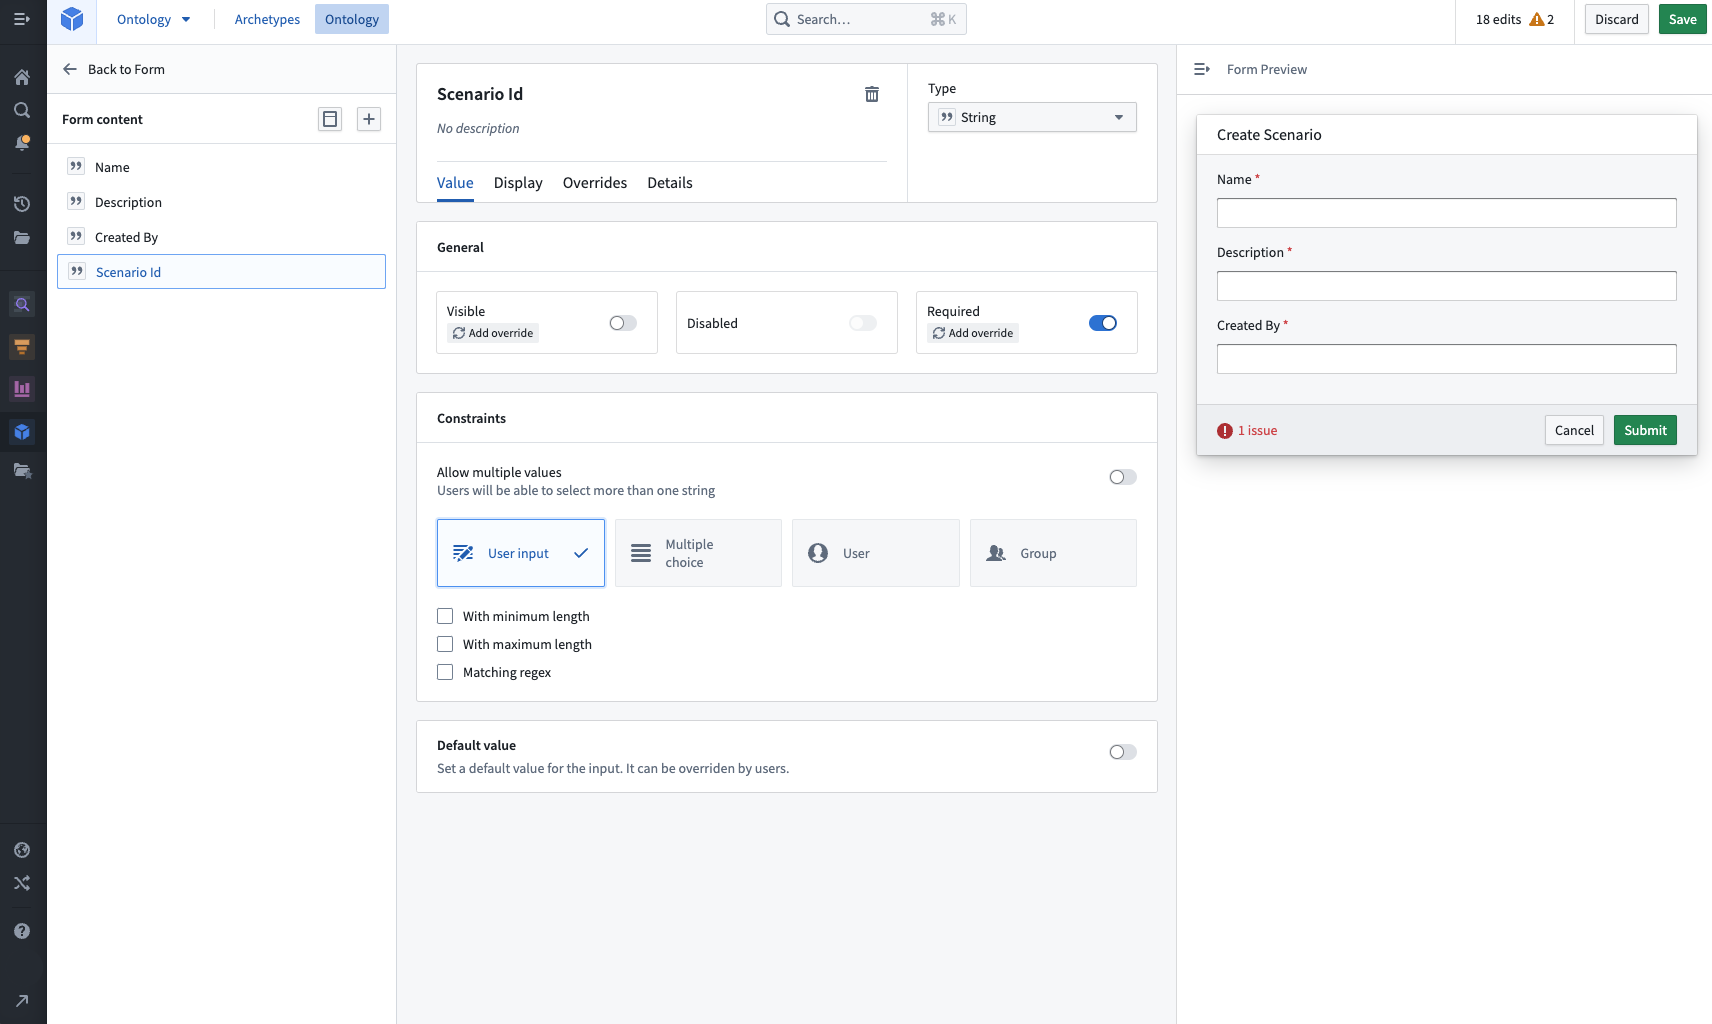
In the Details tab, add the type class scenarios:versioned-scenario-rid.
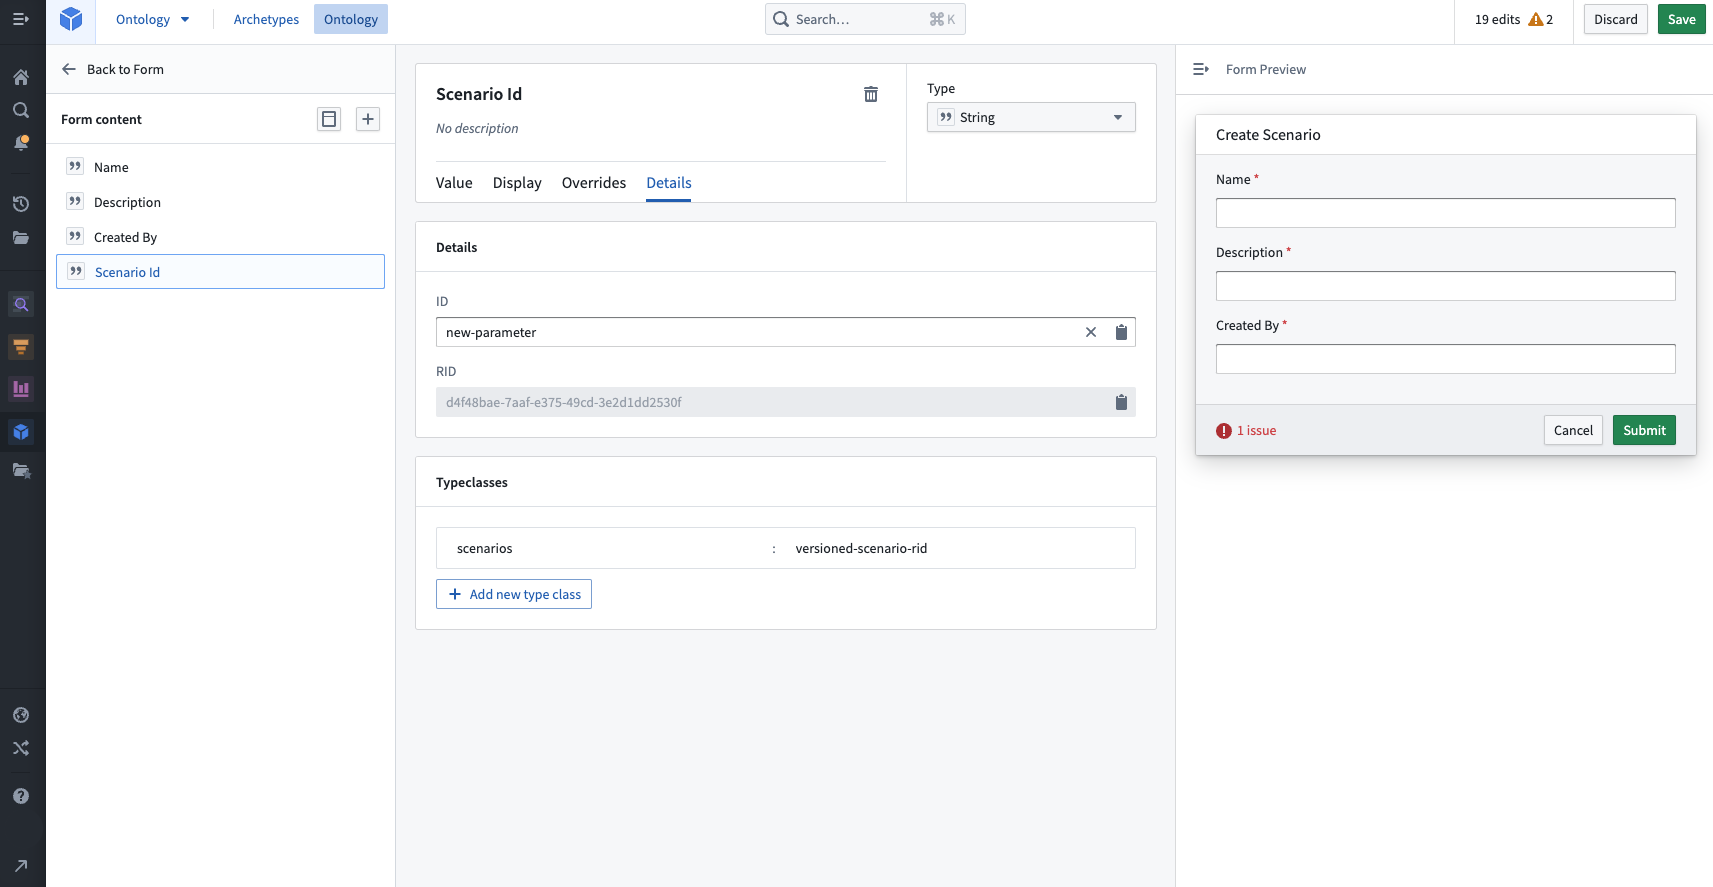
For the Action property that sets the scenario name, add the type class scenarios:scenario-name if it is not already set.
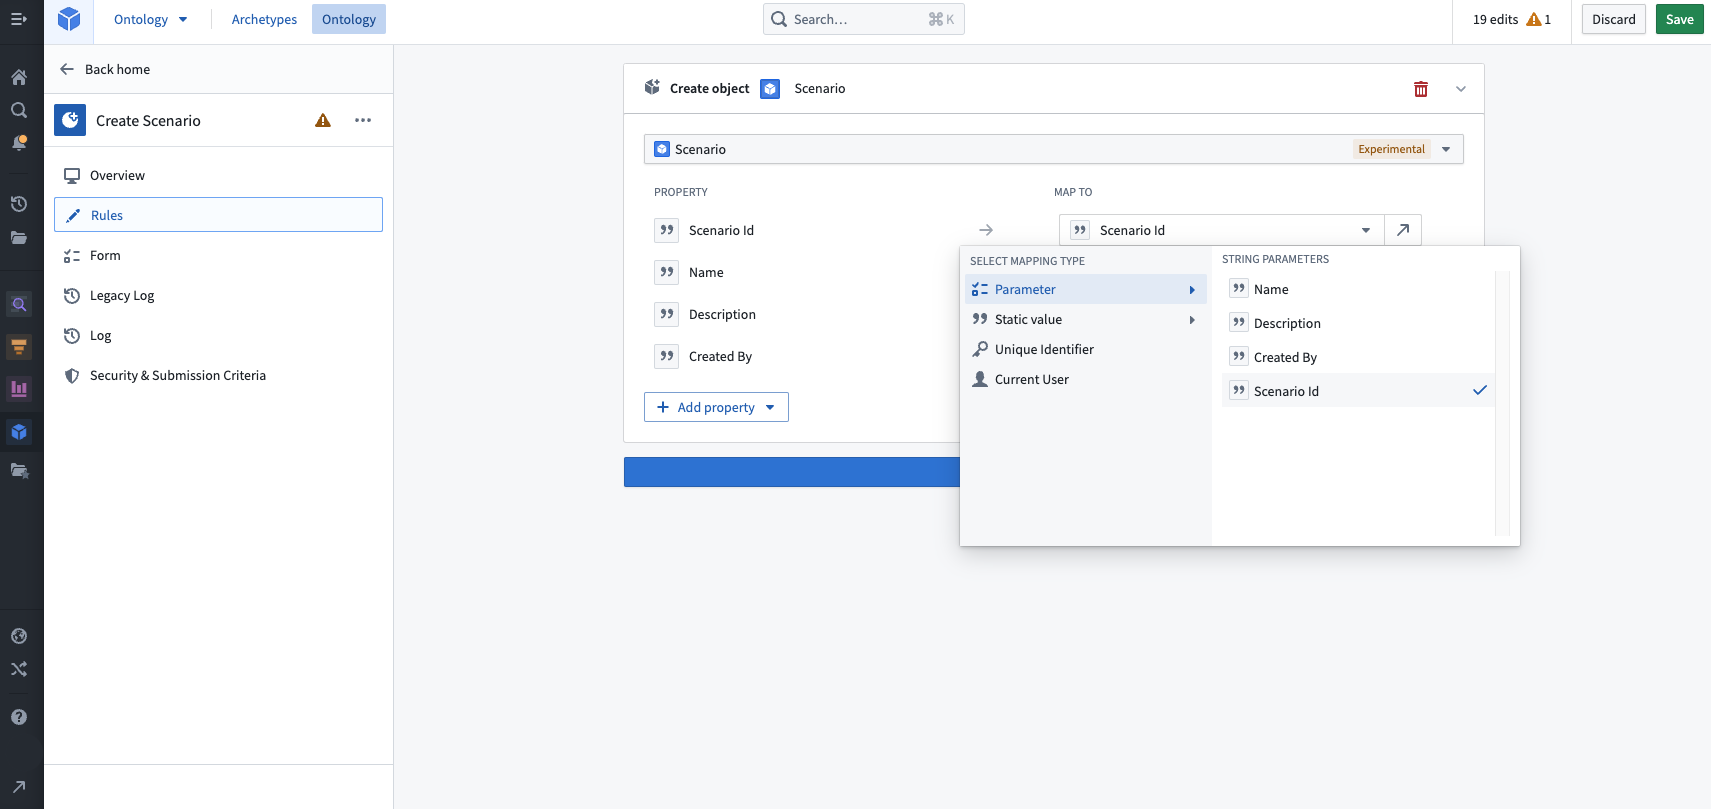
In the Rules tab, the Scenario ID can now be set to the recently created string value.
Update scenario Action
Next, we will create an Action that updates an object that implements the scenario trait.
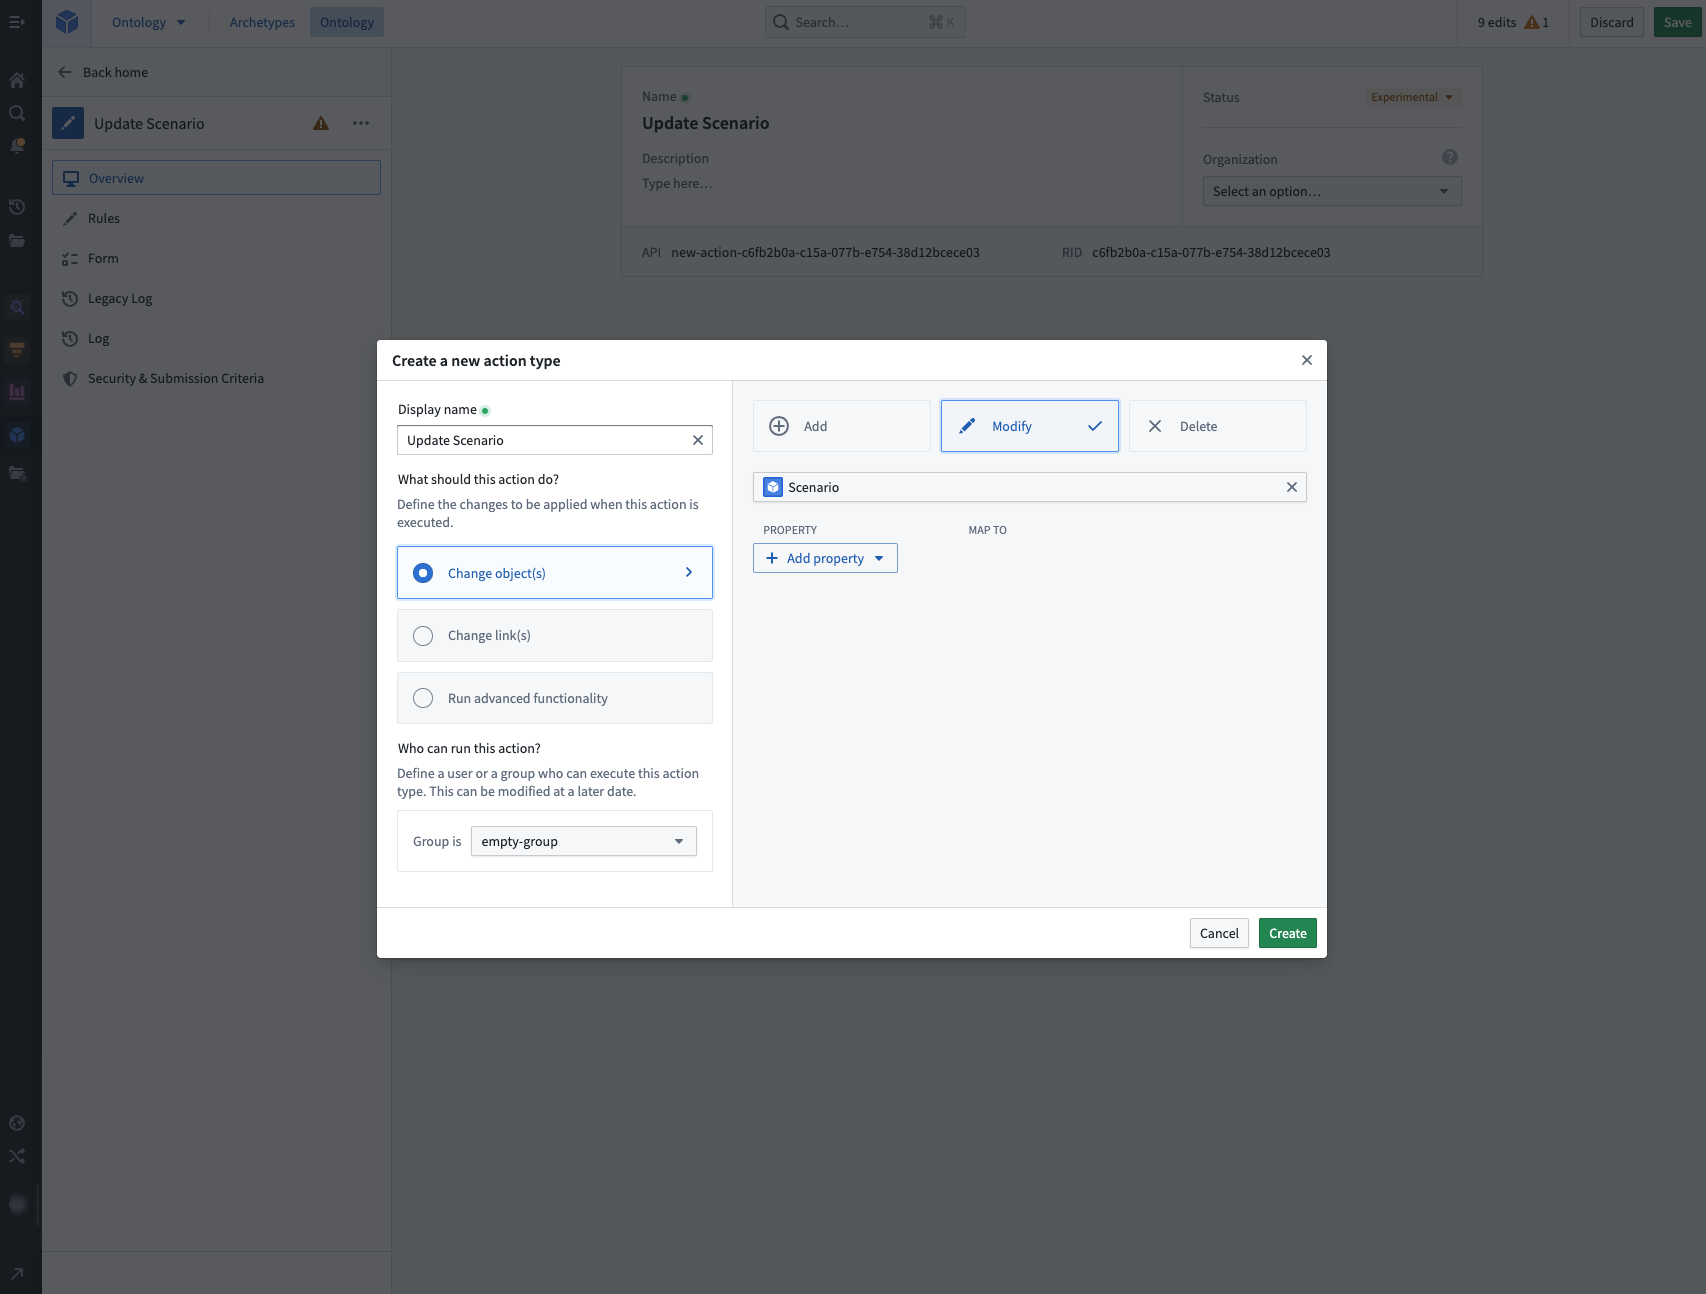
In the Rules tab, add a Name property.
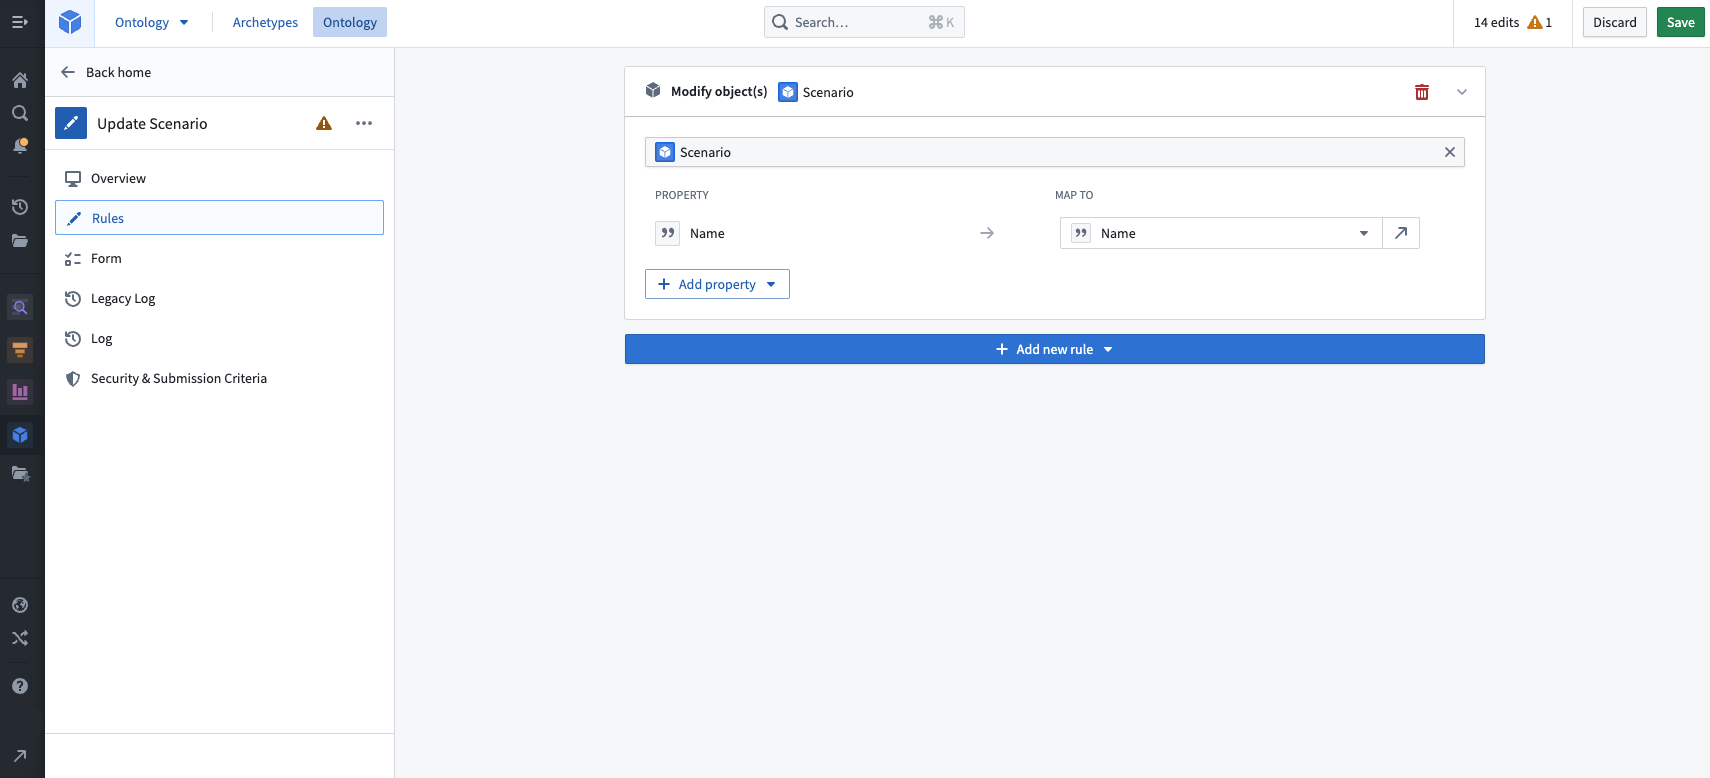
In the Forms tab, add the type class scenarios:scenario-object-locator to the Action property that determines the scenario object to be modified.
For the Action property that updates the scenario name, add the type class scenarios:scenario-name if it is not already set.
The scenario object and Actions are now ready to be used in Workshop to save and update stored scenarios.
Configure a Save Scenario button
We will enable saving scenarios from a button in the core button group widget.
To start, we have added a new button to our button group and selected the "Save Scenario" event on click.
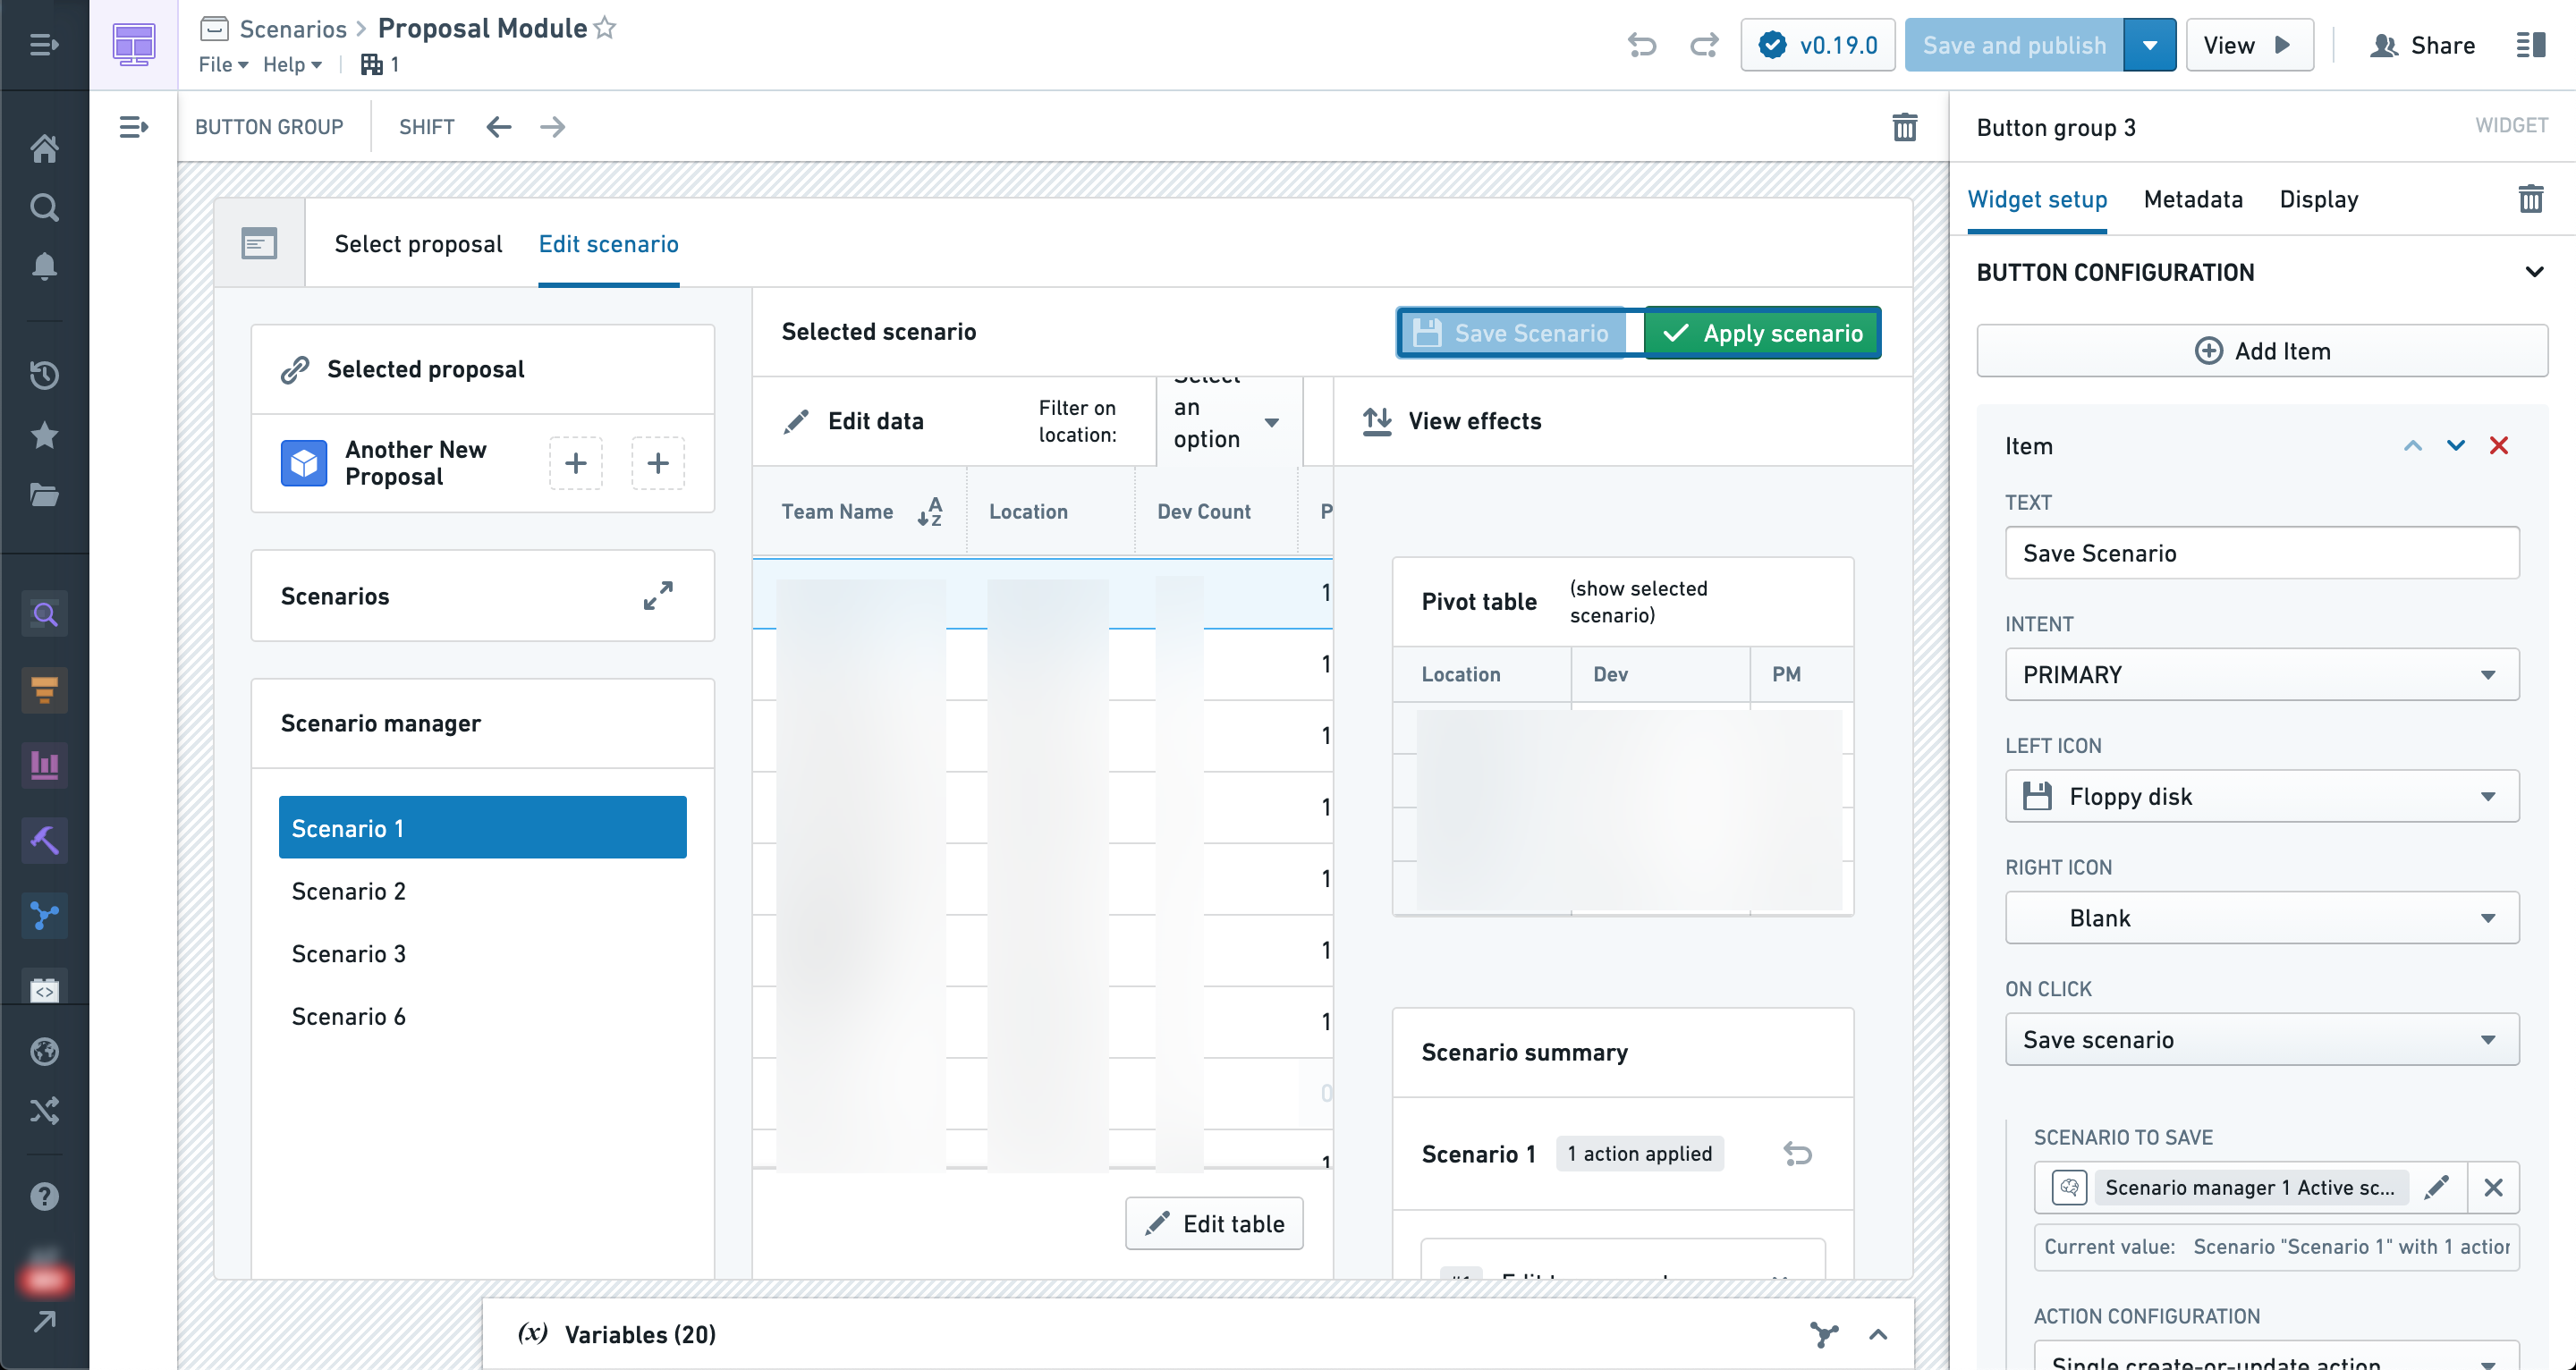
In order to save to an object, we must select an object type that implements the scenario trait.
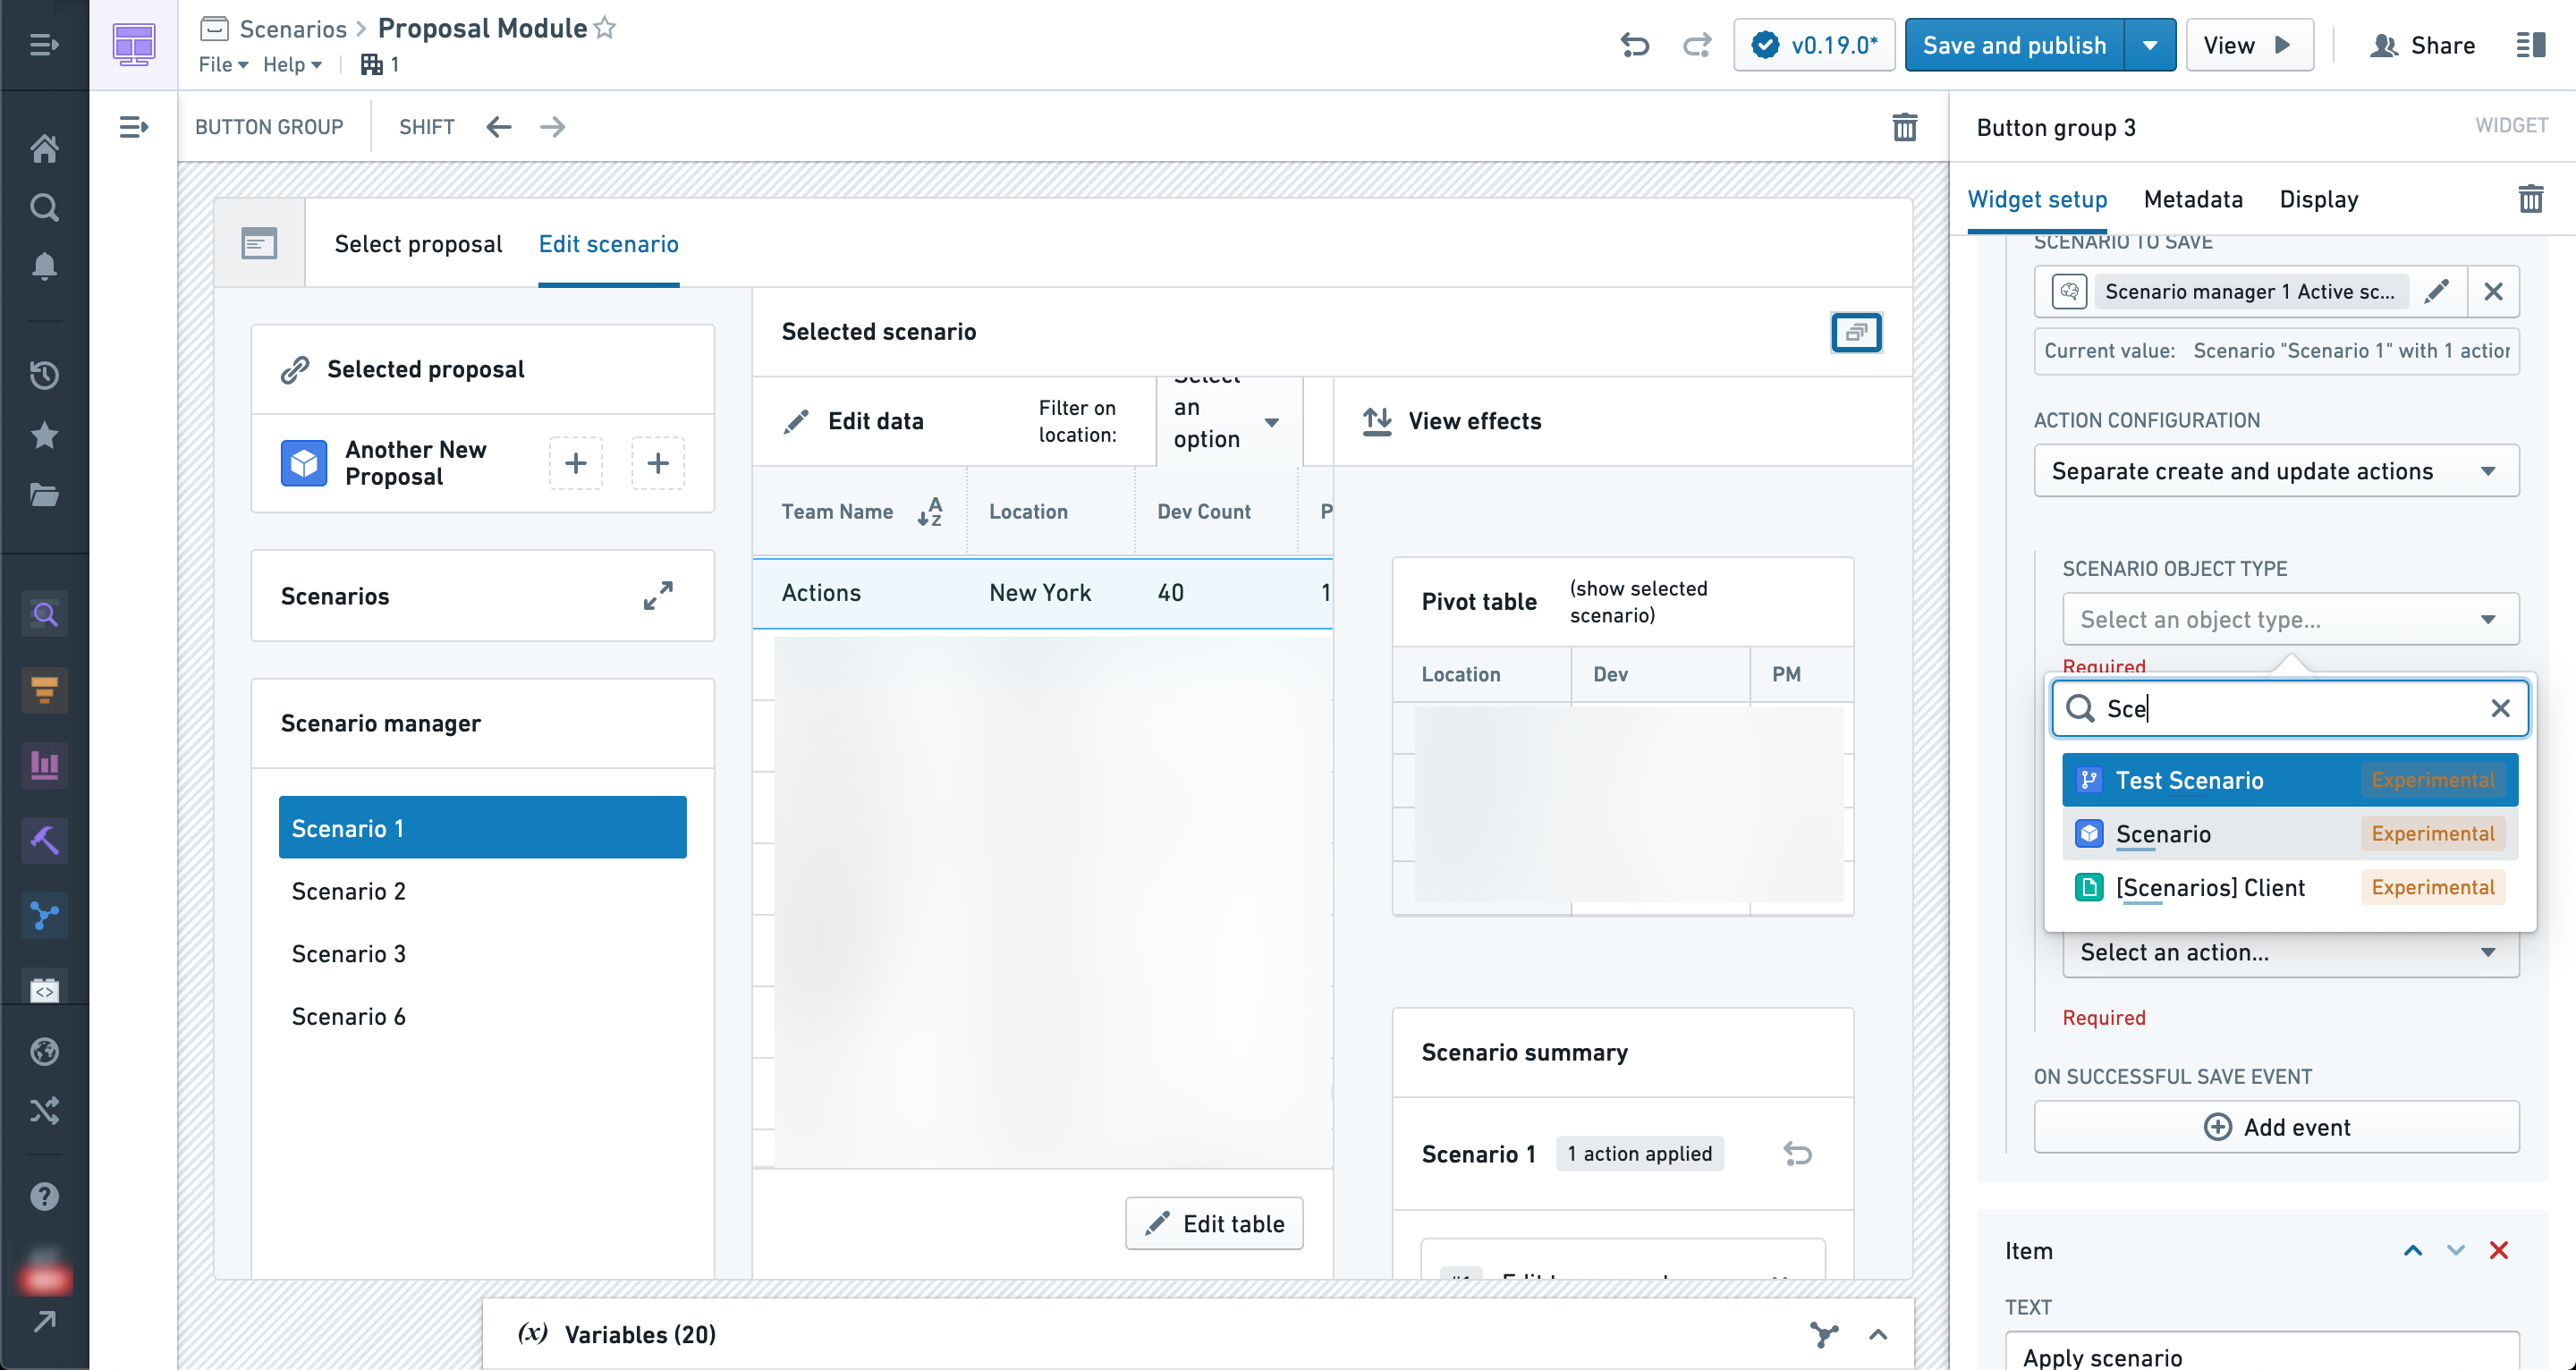
After selecting an object type, we must select an Action that creates scenario objects of that type.
If the type classes for the Action parameters are configured properly, then the Scenario ID and name parameters should be automatically filled in (as shown below).
Other Action parameters can be configured the same way as other Actions in Workshop, so you can set default values or leave them blank for the user to fill in.
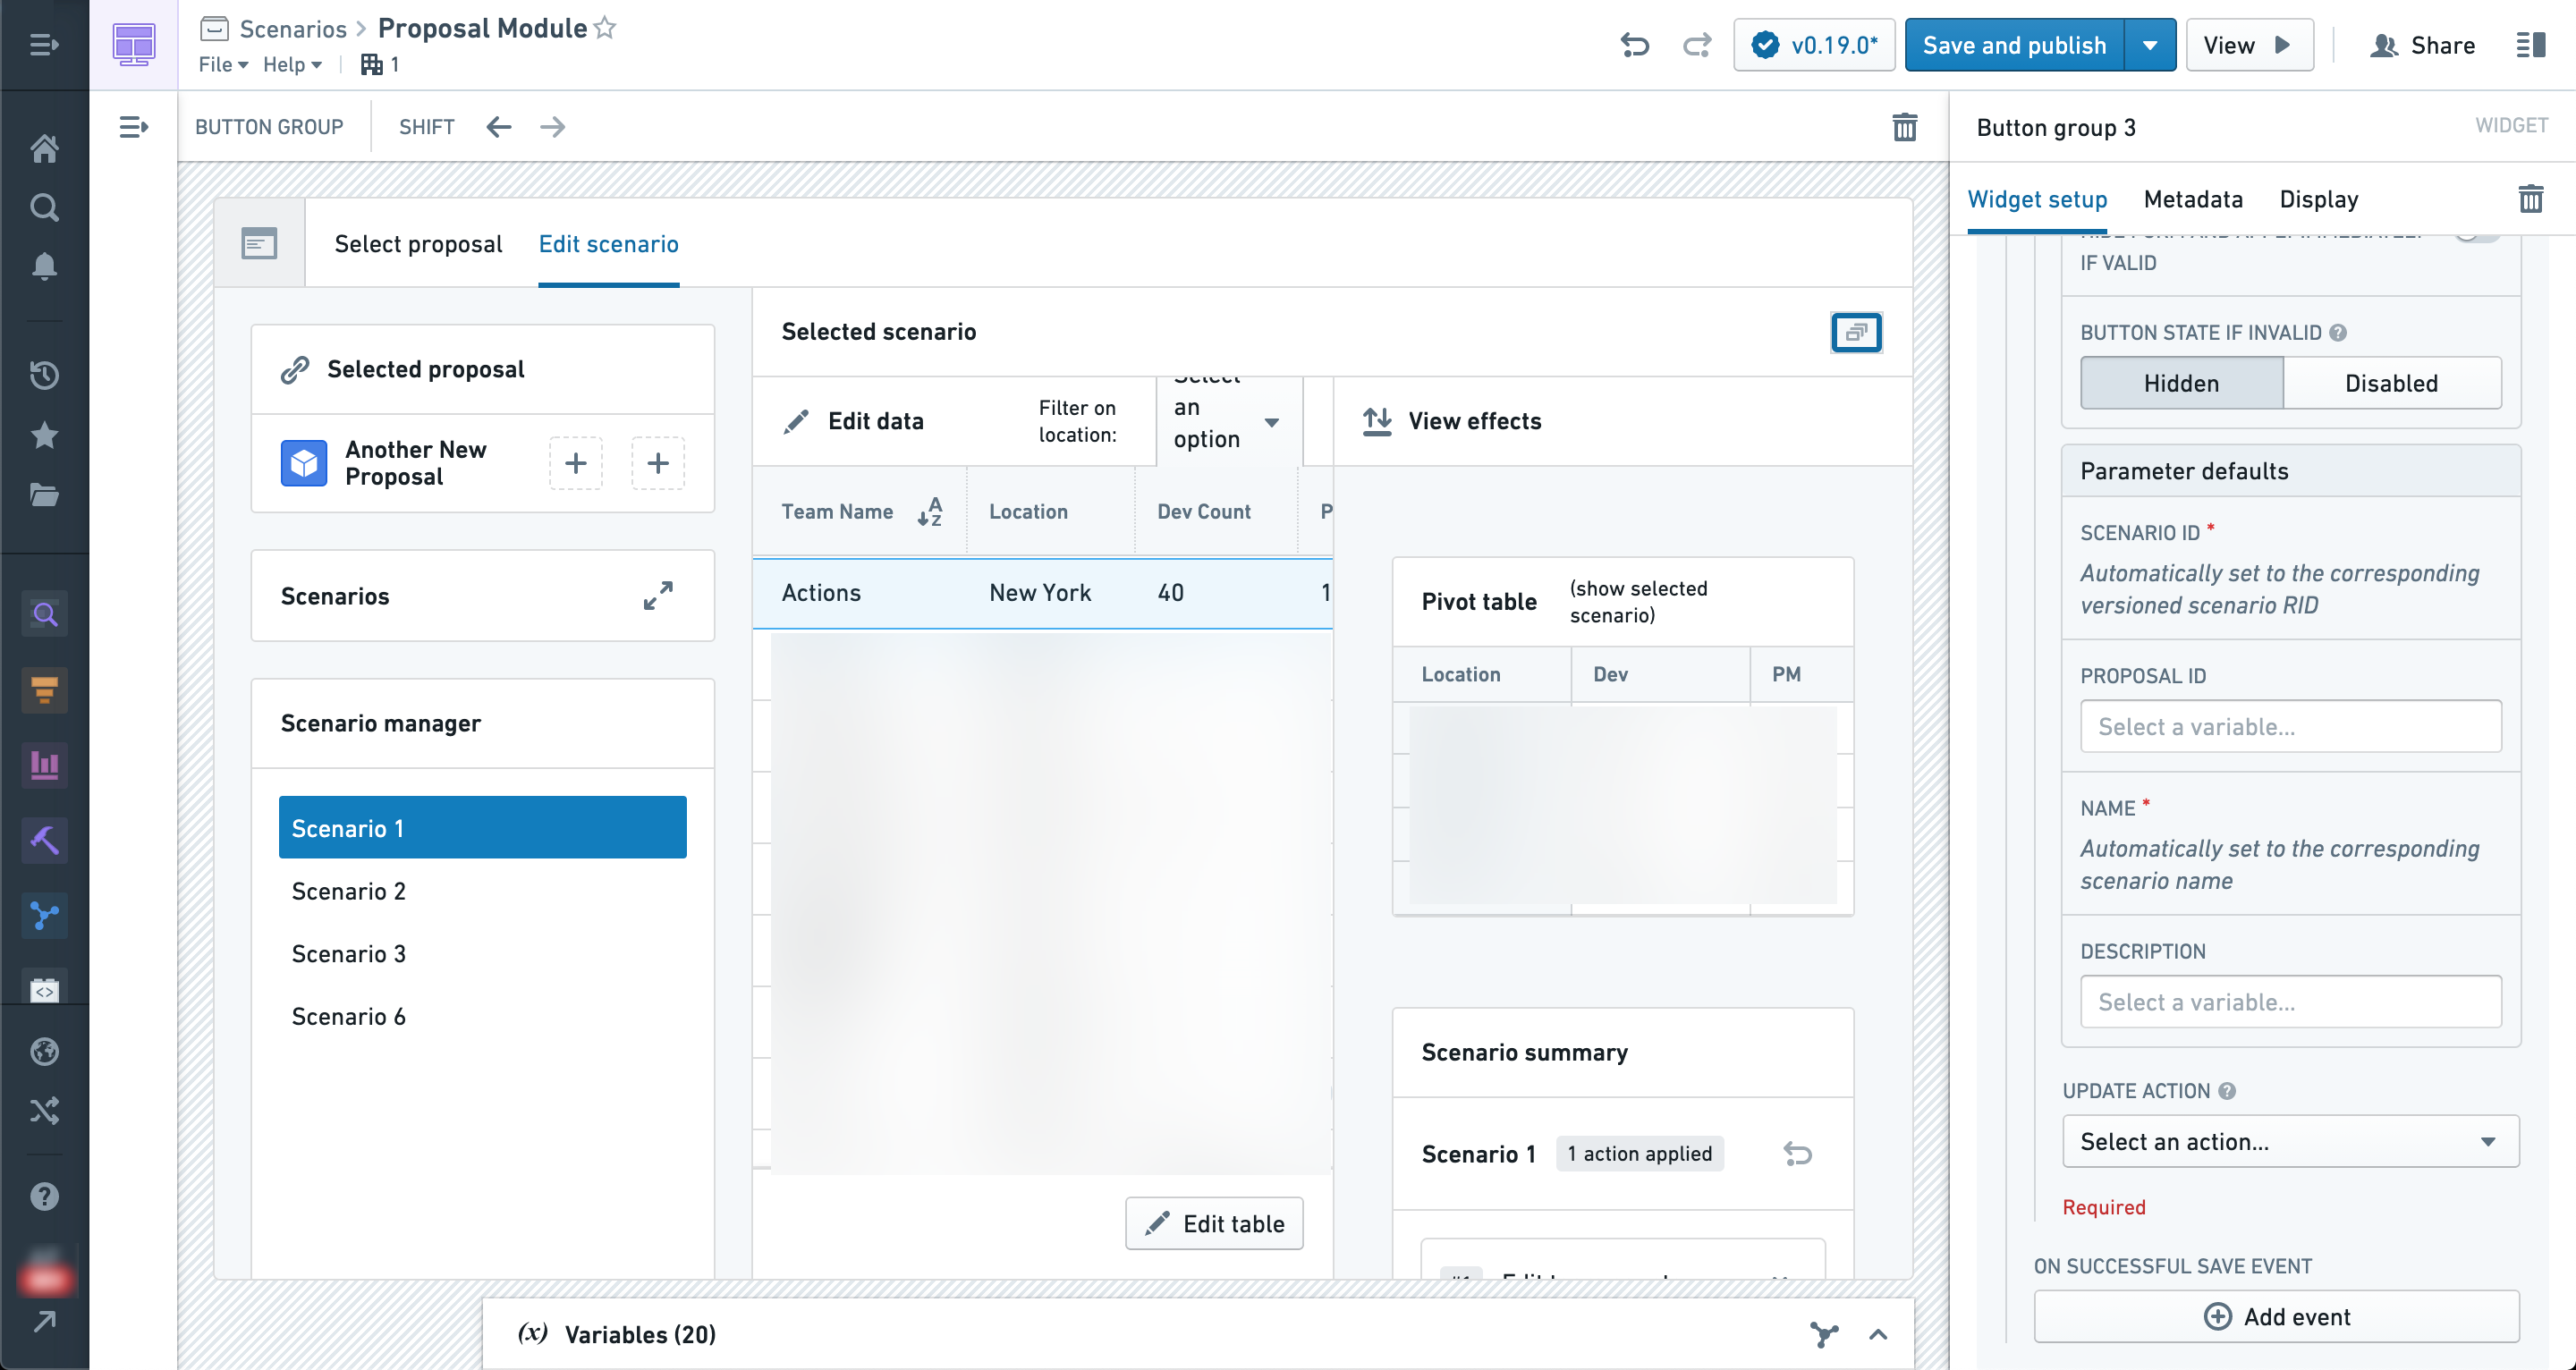
For example, you can use the Current user special variable to populate a created by parameter.
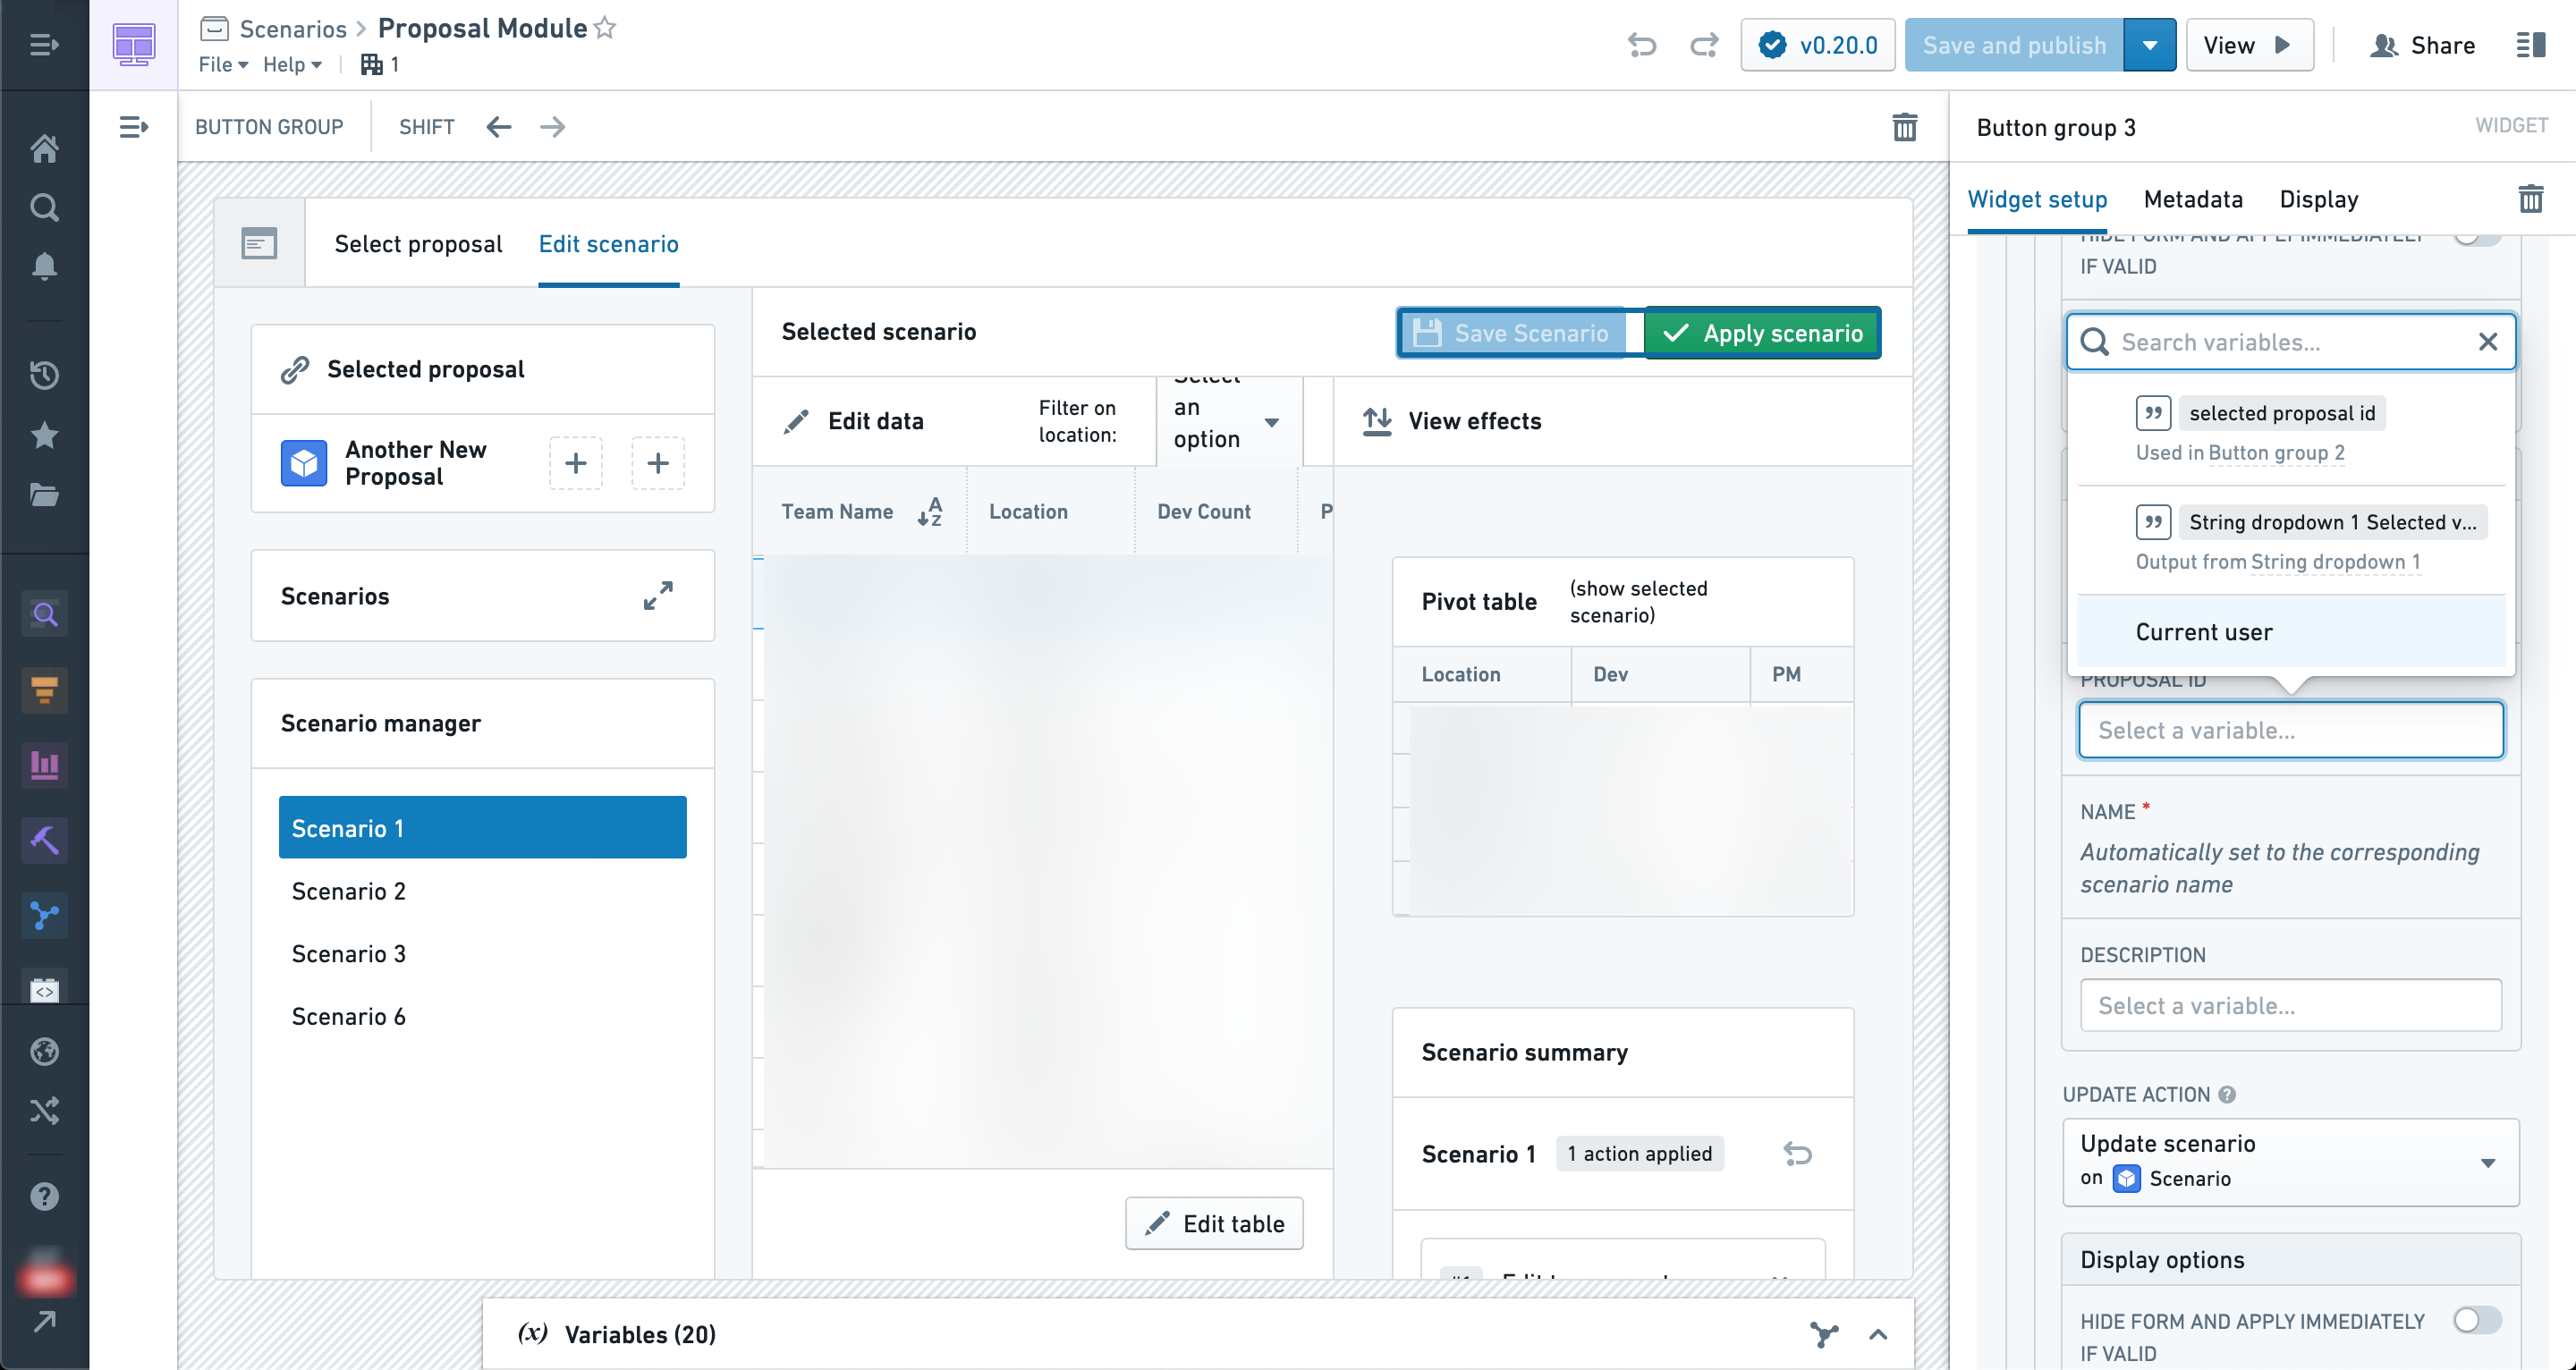
With the Create and Update Actions configured, the widget now allows users of the module to save scenarios.
Saving scenarios as a user
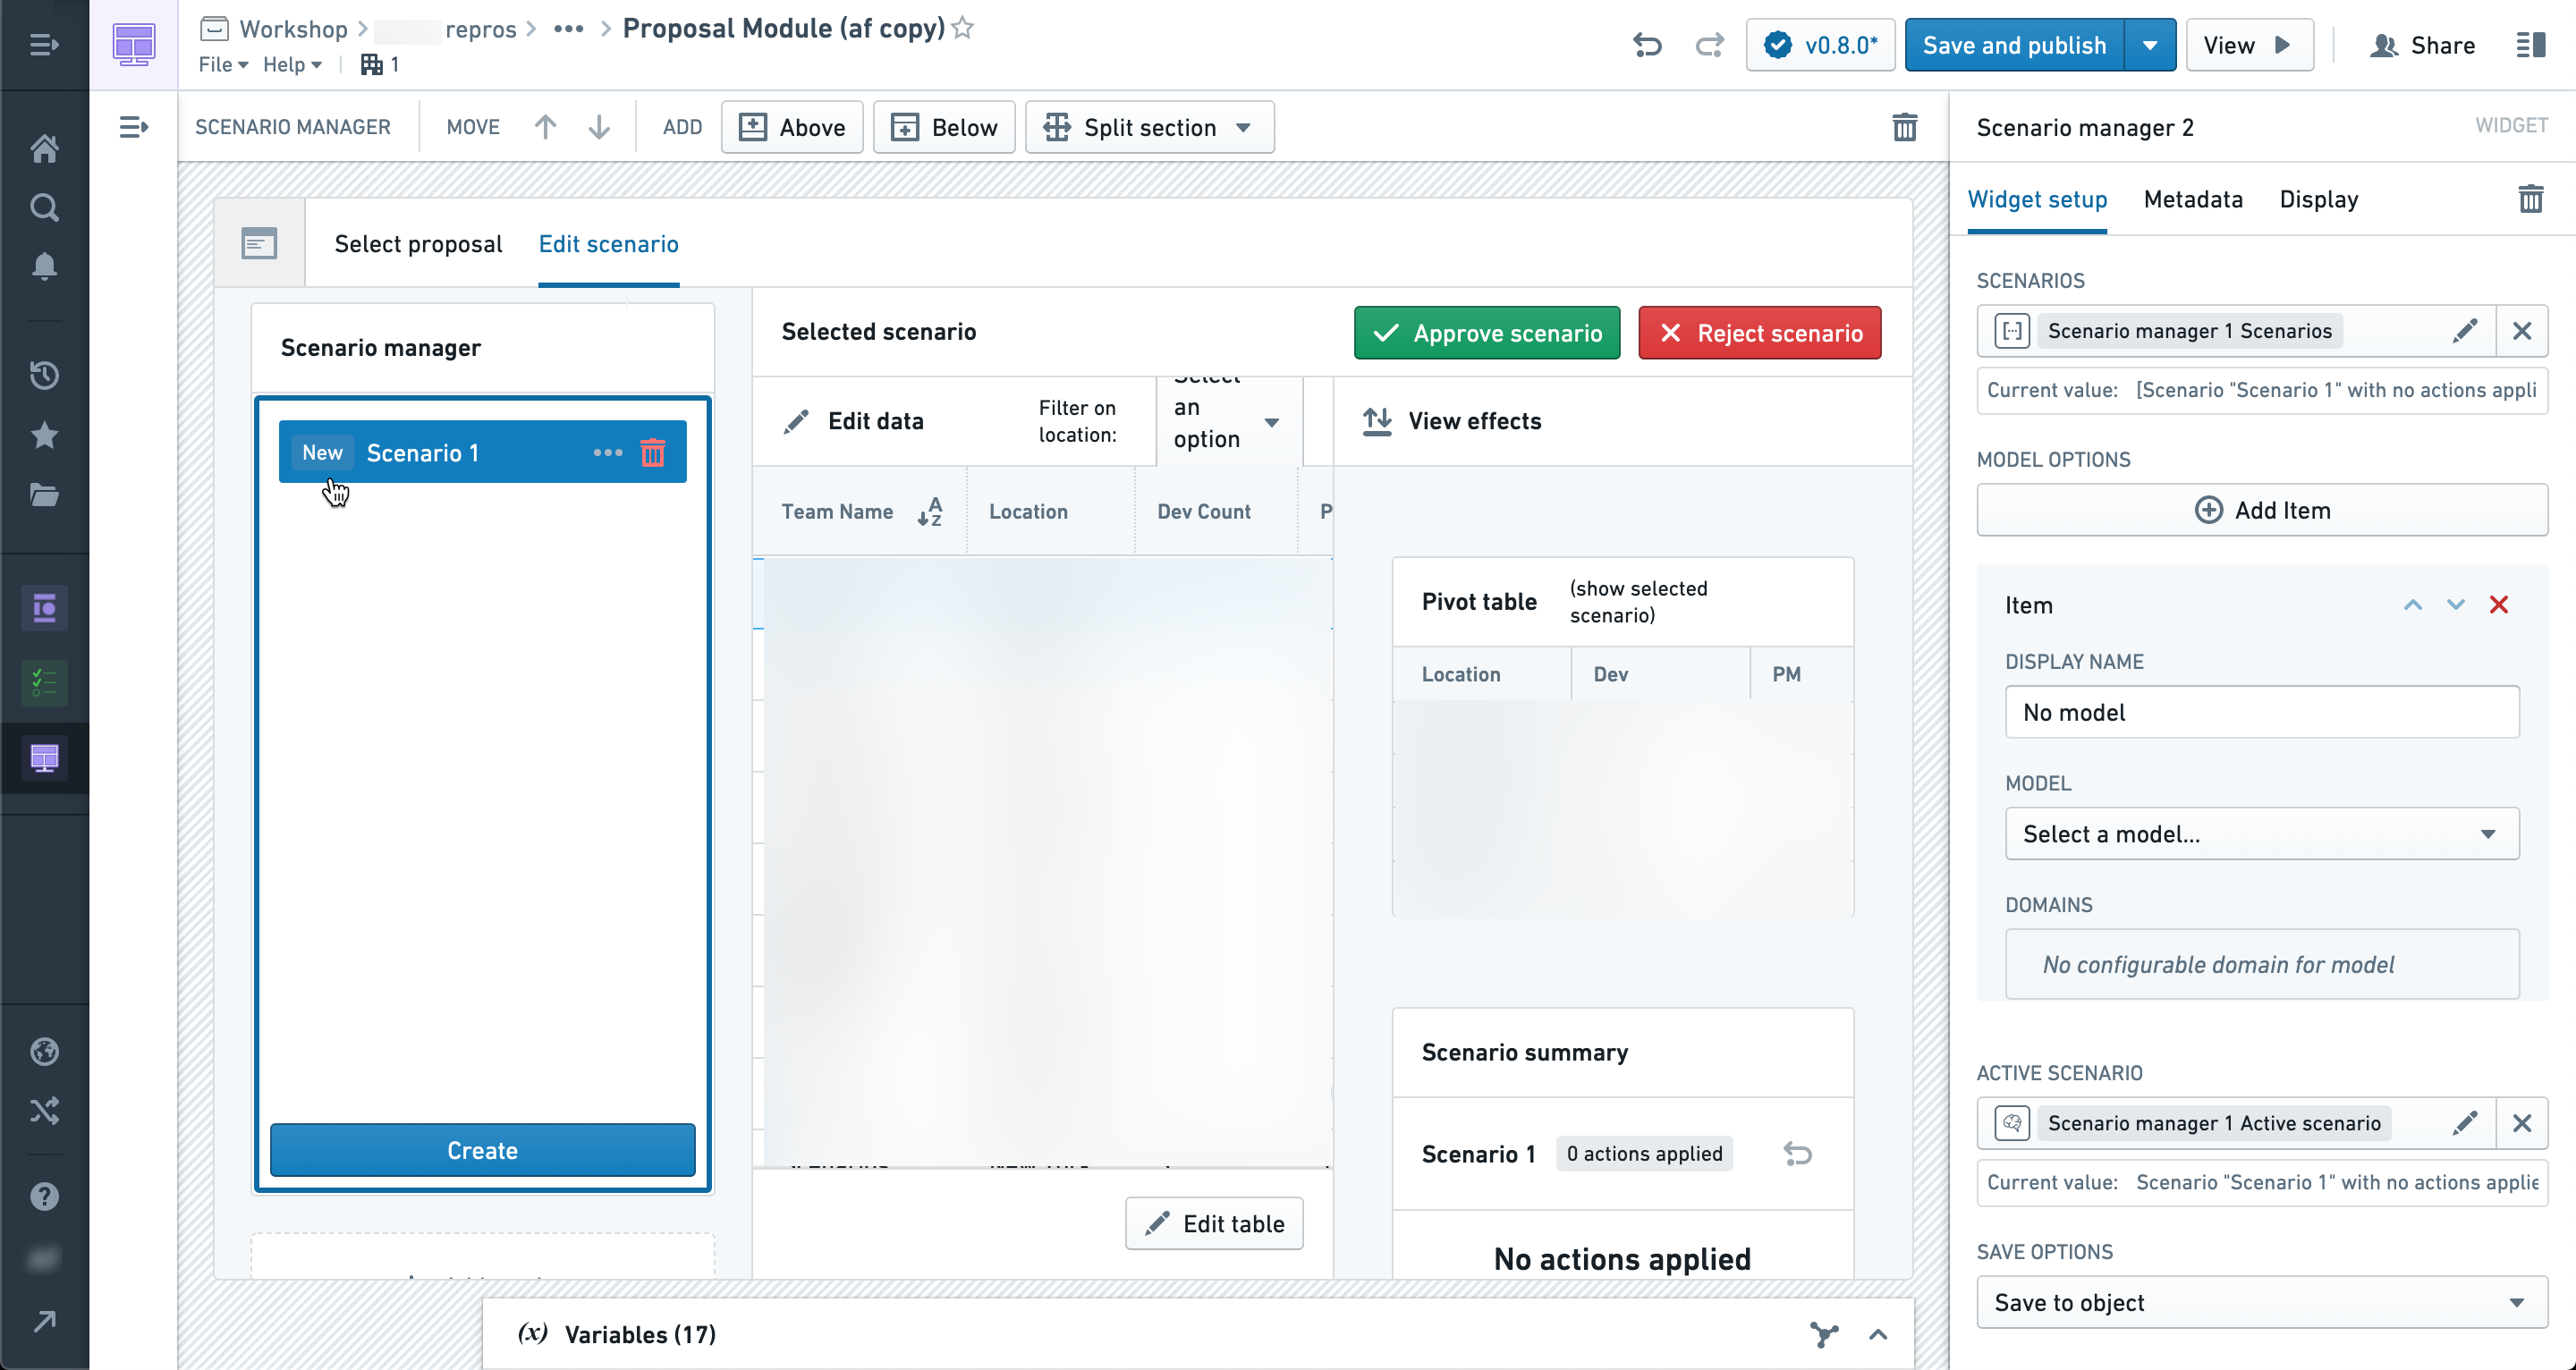
Users can save newly created scenarios as well as update existing scenarios using the configured save button.
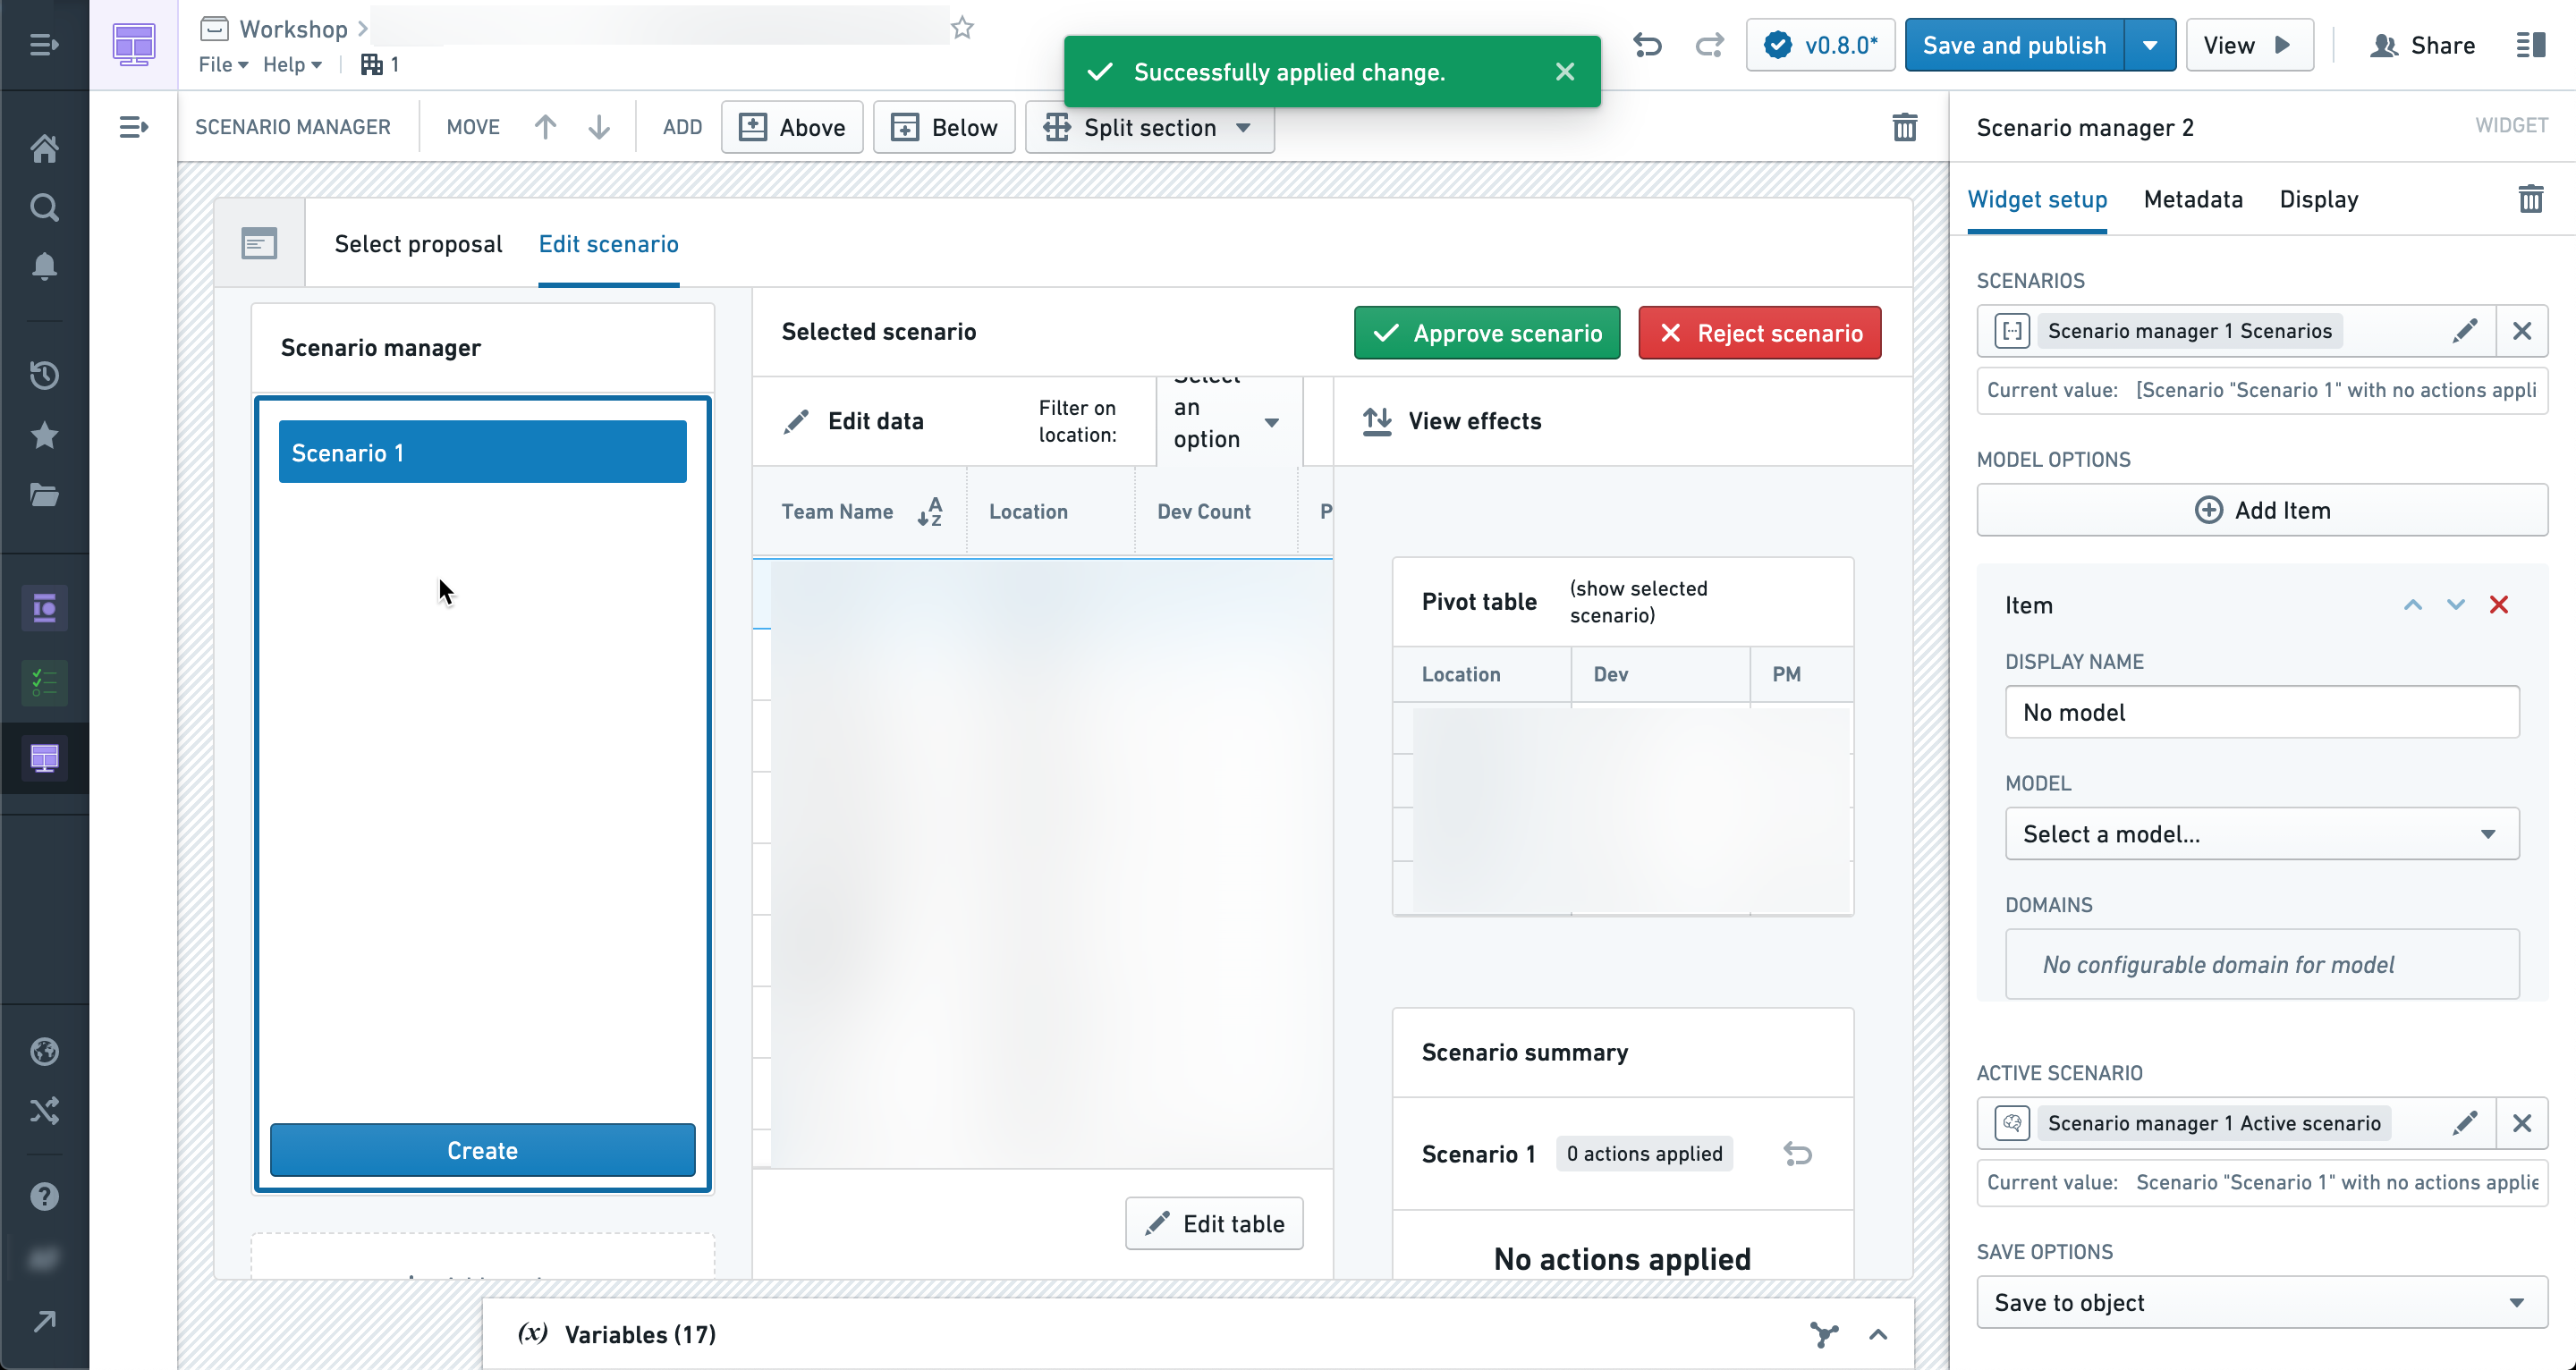
Additionally, in the Scenario manager when a scenario has been created but not yet saved the scenario will show the “New” tag until it has been saved, or "Updated" if the scenario has previously been saved and modified.
When saving a new scenario, this will open the Create scenario action dialog.
The name and scenario ID will be automatically filled in, and the user will have the opportunity to enter or change values for any additional action parameters.
In this case, we’ve added a description field that the user may populate to save along with the scenario.
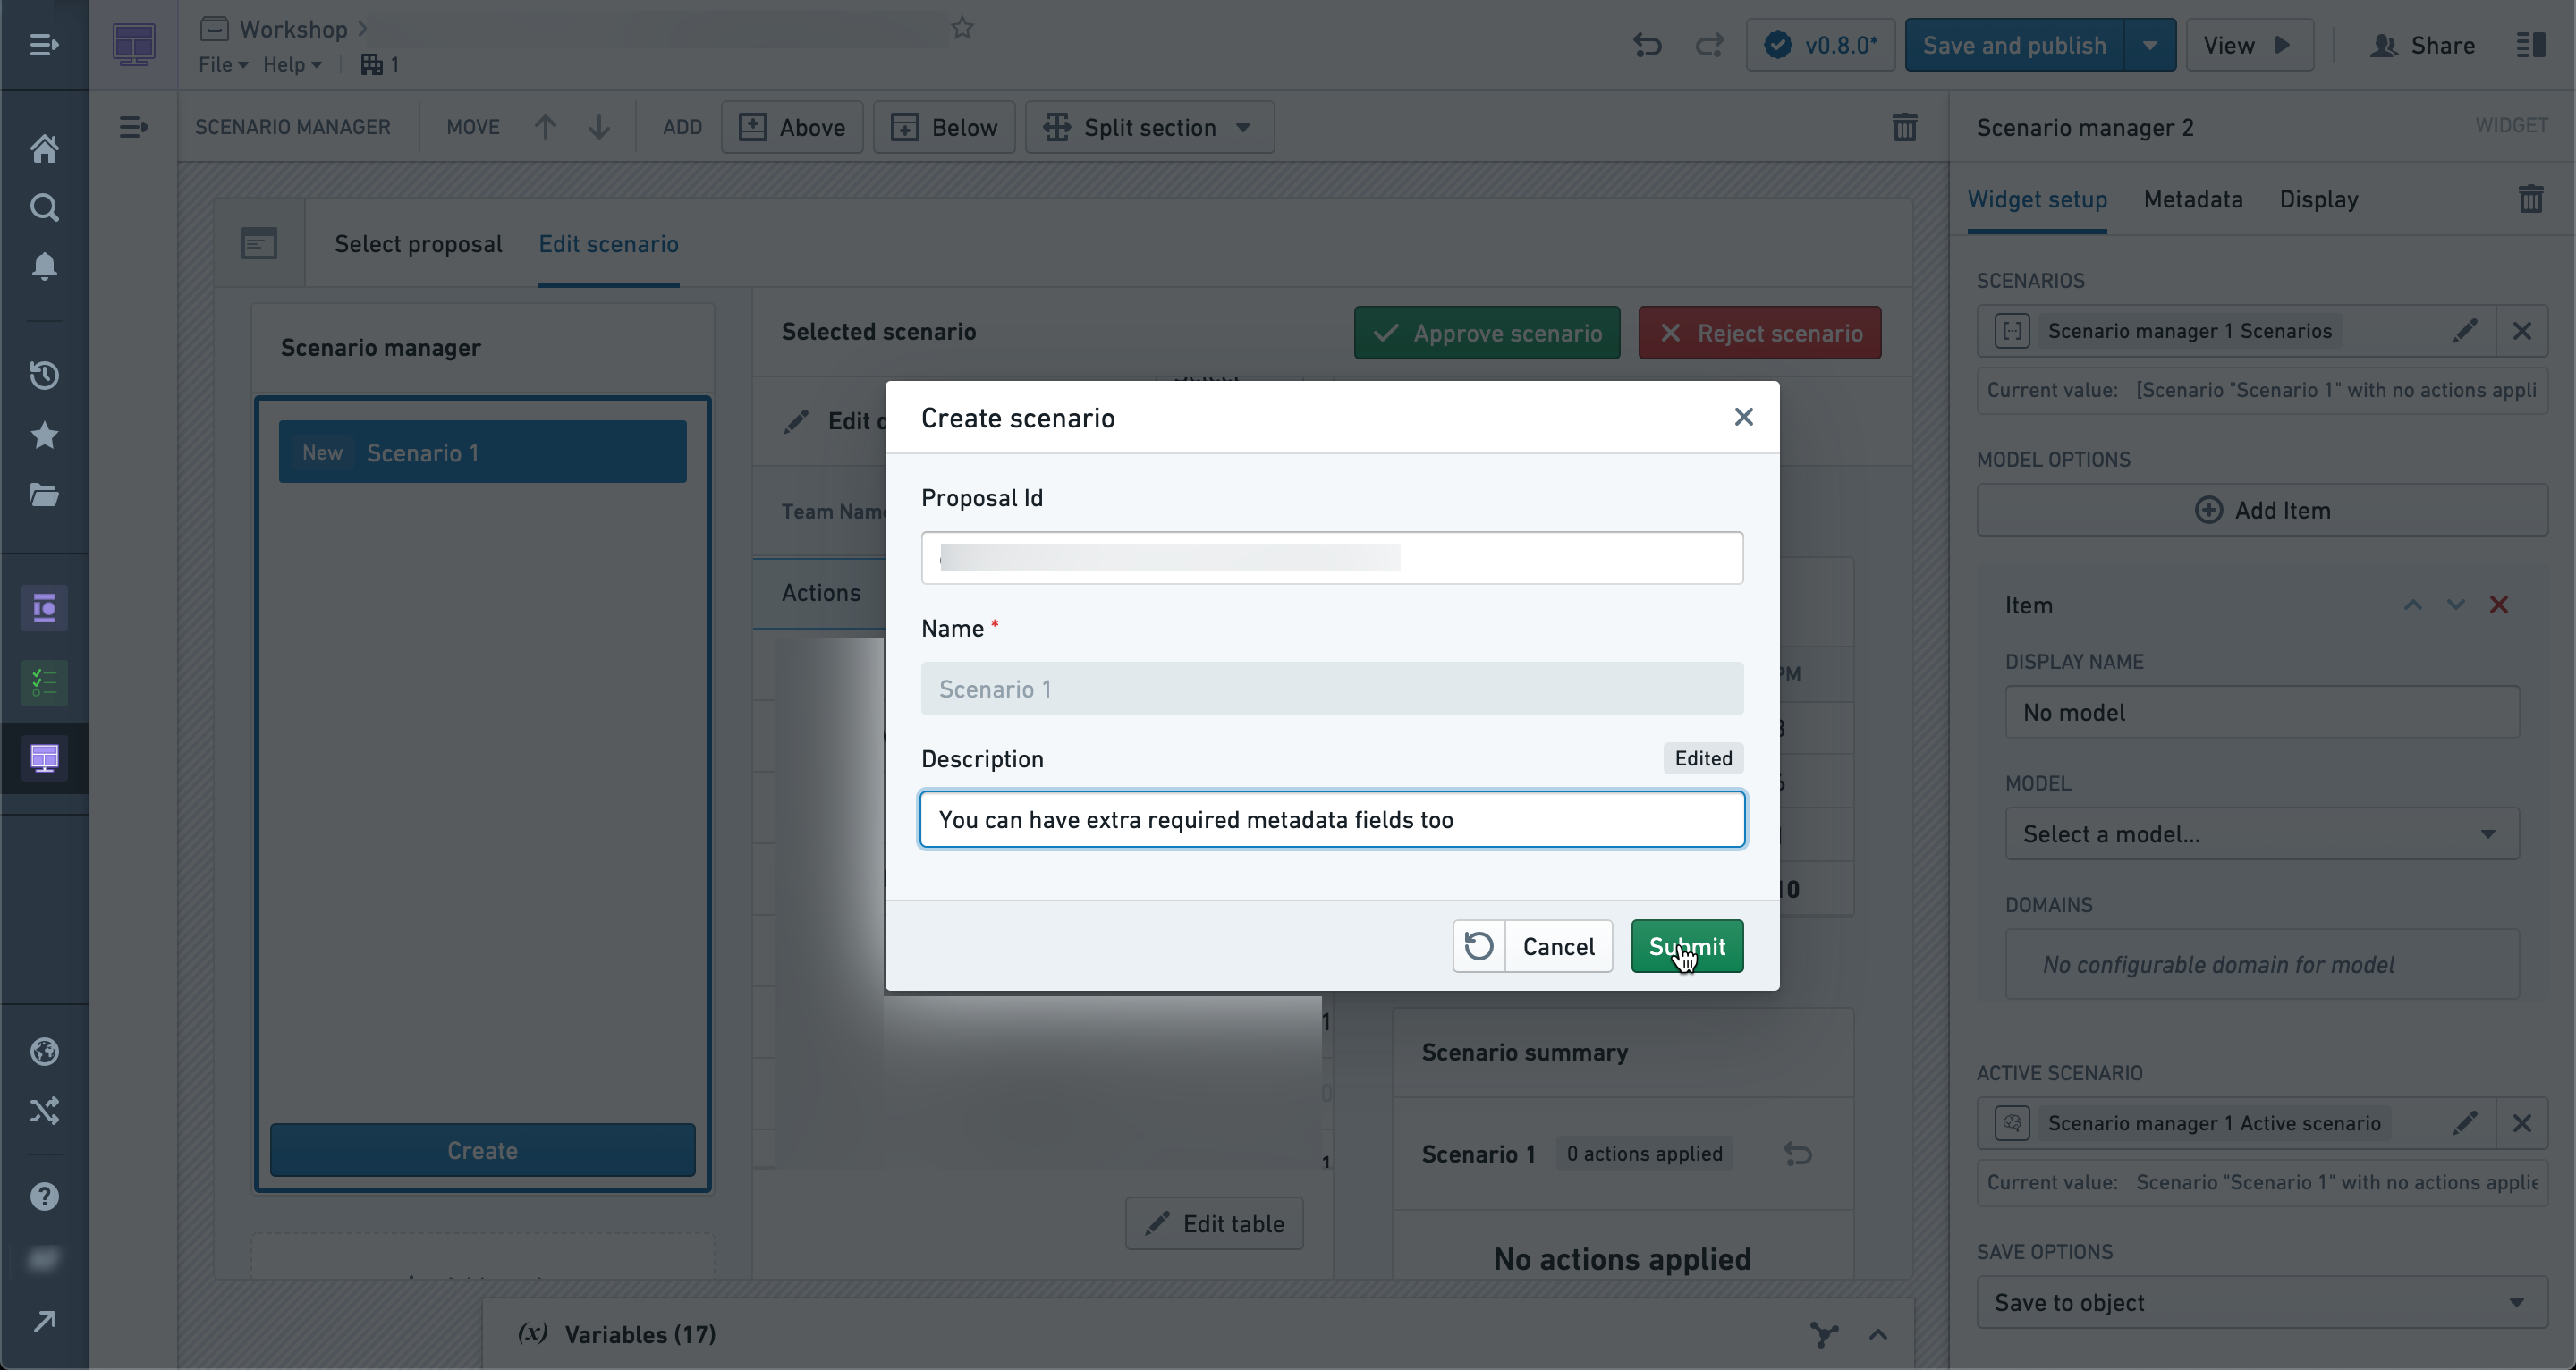
After clicking Submit, the Scenario will be saved and will no longer show a "New" indicator.
At this point, the scenario has been saved, but it will not be loaded by default when visiting this application unless configured to do so.
See the Loading scenarios tutorial to learn how to configure this behavior.
Save scenarios without the editor role
If you are facing issues saving your scenarios within your Workshop Module, this may be because your Foundry permissions are missing the Editor role. This is an issue specifically if you want to enable saving scenarios in a Workshop module without having to grant edit permissions on the module. This should not be an issue if you do not plan to save your scenario.
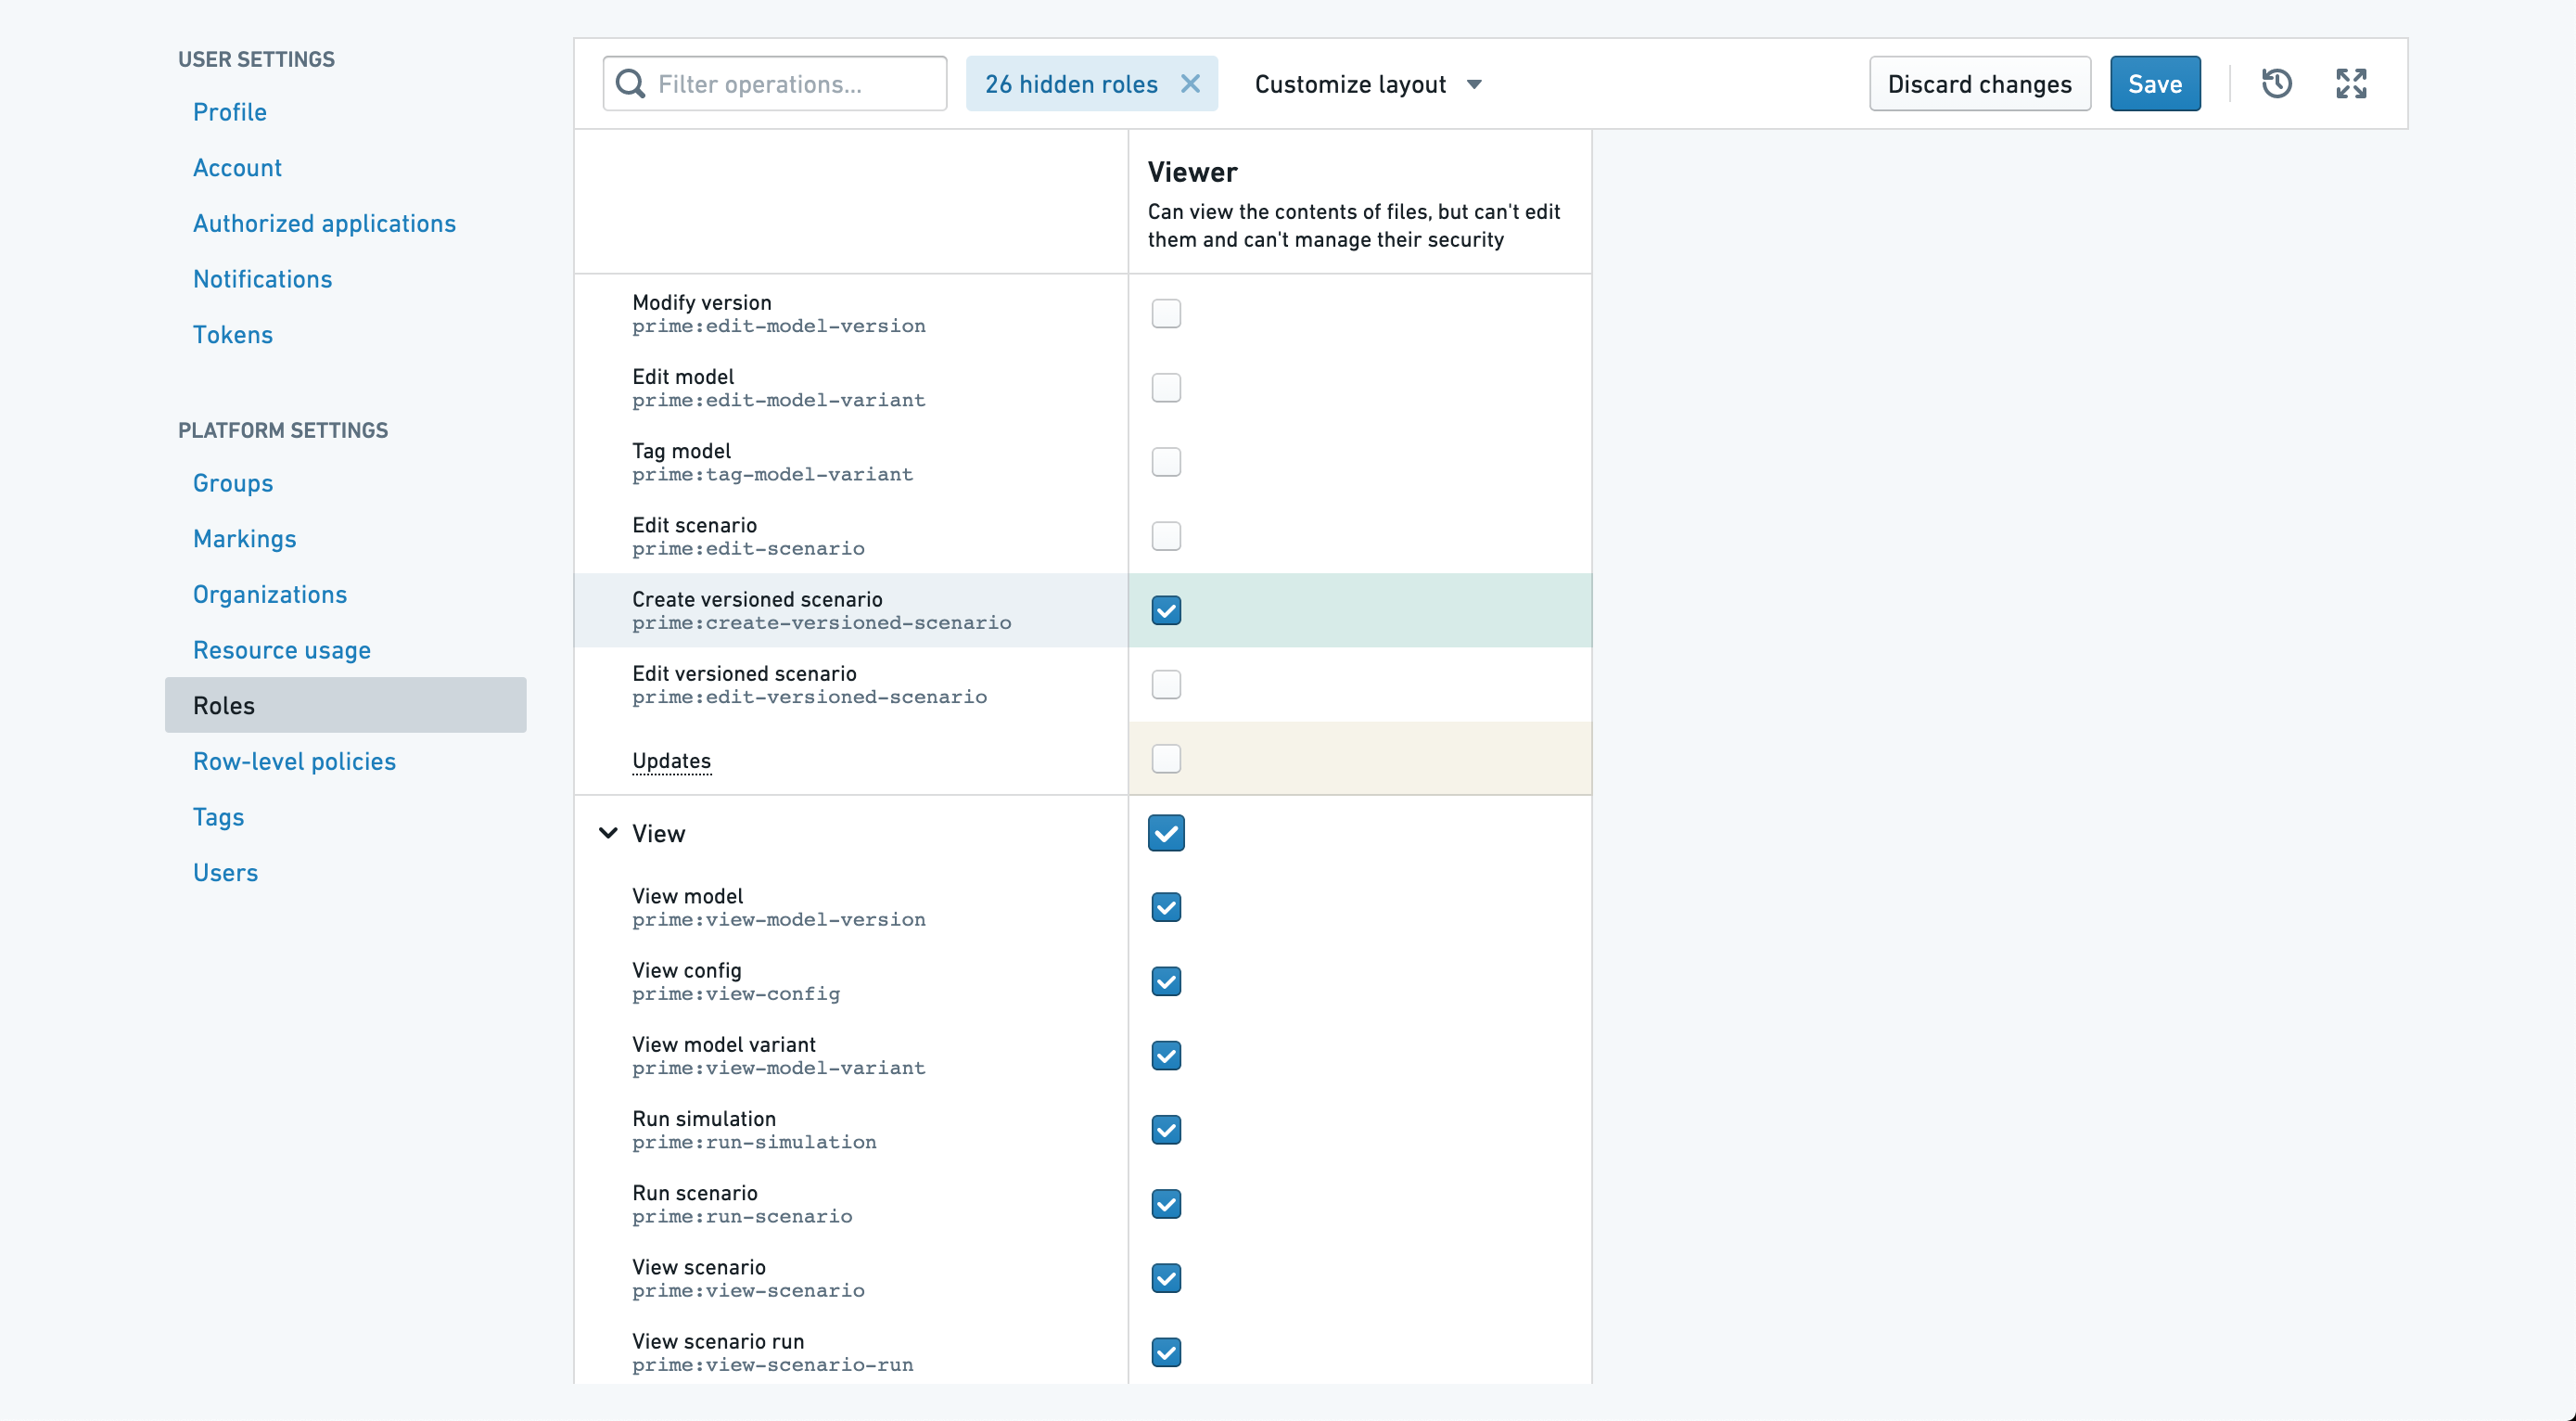
For this issue, contact your Palantir representative to (1) create a “Viewer with Create Scenarios” role and (2) update the Viewer items checked in the second image below.

中文翻译
保存场景
保存和加载场景(scenario)功能支持跨会话复用长期存续的场景,还可让用户针对场景开展共享与协作。
通常来说,将工作流专属的元数据和存储的场景一并保存是非常实用的,可让组织和查找相关已存储场景的过程更简便。
要实现这一能力,我们利用本体(Ontology)创建代表已存储场景的对象。
用户可自定义名称、额外属性,甚至可以设置场景对象和其他对象之间的关联关系。
场景对象能力
在开始保存场景之前,我们需要先创建一个实现了场景特征(scenario trait)的对象。
该对象至少需要包含两个属性:一个用于存储场景ID,另一个用于存储场景名称。
我们强烈建议分别使用该对象的主键和标题属性来承载这两个字段。
你还可以添加其他属性来存储场景的额外信息,比如Created By、Description等。
在场景对象的属性标签页中,选中你的ID属性,为其添加类型类(type class)scenarios:versioned-scenario-rid,如下图所示。
接着选中你的名称或标题属性,为其添加类型类scenarios:scenario-name。
现在你的场景对象已经可以用来存储已保存的场景了,但要在Workshop中向该对象保存场景,你还需要先设置一个用于创建该类型对象的操作(Action)。
场景操作
除了场景对象之外,我们还需要创建用于创建和更新场景对象的操作,供Workshop中保存场景时调用。
创建场景操作
我们首先创建一个用于生成实现了场景特征的对象的操作。
在规则标签页中,添加创建场景时需要提供的属性。
至少必须添加场景的Scenario Id和Name属性。
现在我们需要确保Scenario ID和Name属性配置了正确的类型类。
在表单标签页中,我们可以把场景对象从属性列表中移除,因为我们创建的这个操作是用来生成新场景的。
创建一个名为Scenario Id的新字符串属性。
在详情标签页中,为该属性添加类型类scenarios:versioned-scenario-rid。
针对设置场景名称的操作属性,如果还没有配置类型类scenarios:scenario-name,请添加该配置。
回到规则标签页,现在可以将Scenario ID设置为刚创建的字符串值。
更新场景操作
接下来,我们将创建一个用于更新实现了场景特征的对象的操作。
在规则标签页中,添加Name属性。
在表单标签页中,为用于指定待修改场景对象的操作属性添加类型类scenarios:scenario-object-locator。
针对更新场景名称的操作属性,如果还没有配置类型类scenarios:scenario-name,请添加该配置。
现在场景对象和相关操作已经配置完成,可以在Workshop中用于保存和更新已存储的场景了。
配置保存场景按钮
我们可以通过核心按钮组组件中的按钮来实现场景保存功能。
首先,向按钮组中添加一个新按钮,并将其点击事件设置为Save Scenario。
要保存到对象,我们必须选择一个实现了场景特征的对象类型。
选中对象类型后,我们需要选择一个用于创建该类型场景对象的操作。
如果操作参数的类型类配置正确,场景ID和名称参数会自动填充(如下图所示)。
其他操作参数可以和Workshop中的其他操作一样配置,你可以设置默认值,也可以留空让用户自行填写。
比如,你可以使用Current user特殊变量来填充created by参数。
完成创建操作和更新操作的配置后,该组件就可以支持模块用户保存场景了。
用户侧场景保存流程
用户可以通过配置好的保存按钮保存新创建的场景,也可以更新已有场景。
此外,在场景管理器中,新创建但尚未保存的场景会显示New标签,直至完成保存;如果是之前已保存过、之后又被修改的场景,则会显示Updated标签。
保存新场景时,会弹出创建场景操作的对话框。
名称和场景ID会自动填充,用户可以输入或修改其他操作参数的值。
在本示例中,我们添加了描述字段,用户可以填写内容和场景一并保存。
点击提交后,场景就会保存成功,不再显示New标识。
此时场景已保存成功,但除非另行配置,否则用户访问该应用时不会默认加载该场景。
请参阅加载场景教程了解如何配置该行为。
无编辑者权限时保存场景
如果你在Workshop模块中保存场景时遇到问题,可能是因为你的Foundry权限缺少编辑者(Editor)角色。如果你希望无需授予模块编辑权限就能在Workshop模块中保存场景,就会遇到这个问题。如果你没有保存场景的需求,就不会受此影响。
要解决该问题,请联系你的Palantir对接人,要求(1)创建Viewer with Create Scenarios(具备场景创建权限的查看者)角色,以及(2)更新下图第二张图中勾选的查看者配置项。