Select a model(选择模型)
:::callout{theme="neutral"} The functionality described below is deprecated and its use is no longer recommended. To use a model as part of a Scenario, wrap the model in a Function and use it in a Function-backed Action instead. :::
This page explains how to select an objective-backed model to power your Scenario.
Before you begin, you must ensure that your model is correctly being managed by a modeling objective. See below for specific requirements for powering your Scenario with a model from an objective:
- Ensure you have created an objective and successfully submitted your model to the objective. There are many ways a model can be authored or imported into the platform. Learn more about what a Model is in the platform and how to author one by visiting the Model concept page.
- Ensure your objective has an objective API configured and properly mapped to the Ontology.
- Ensure you have successfully deployed your model to a Live deployment configured to deploy the
PRODUCTIONrelease tag. For more information on tags and deployment environments, see the Deployment Environment concept page.
:::callout{theme="neutral"} Only objectives that are bound to the Ontology and that have a healthy Live production deployment will appear in the model selector for a Scenario. :::
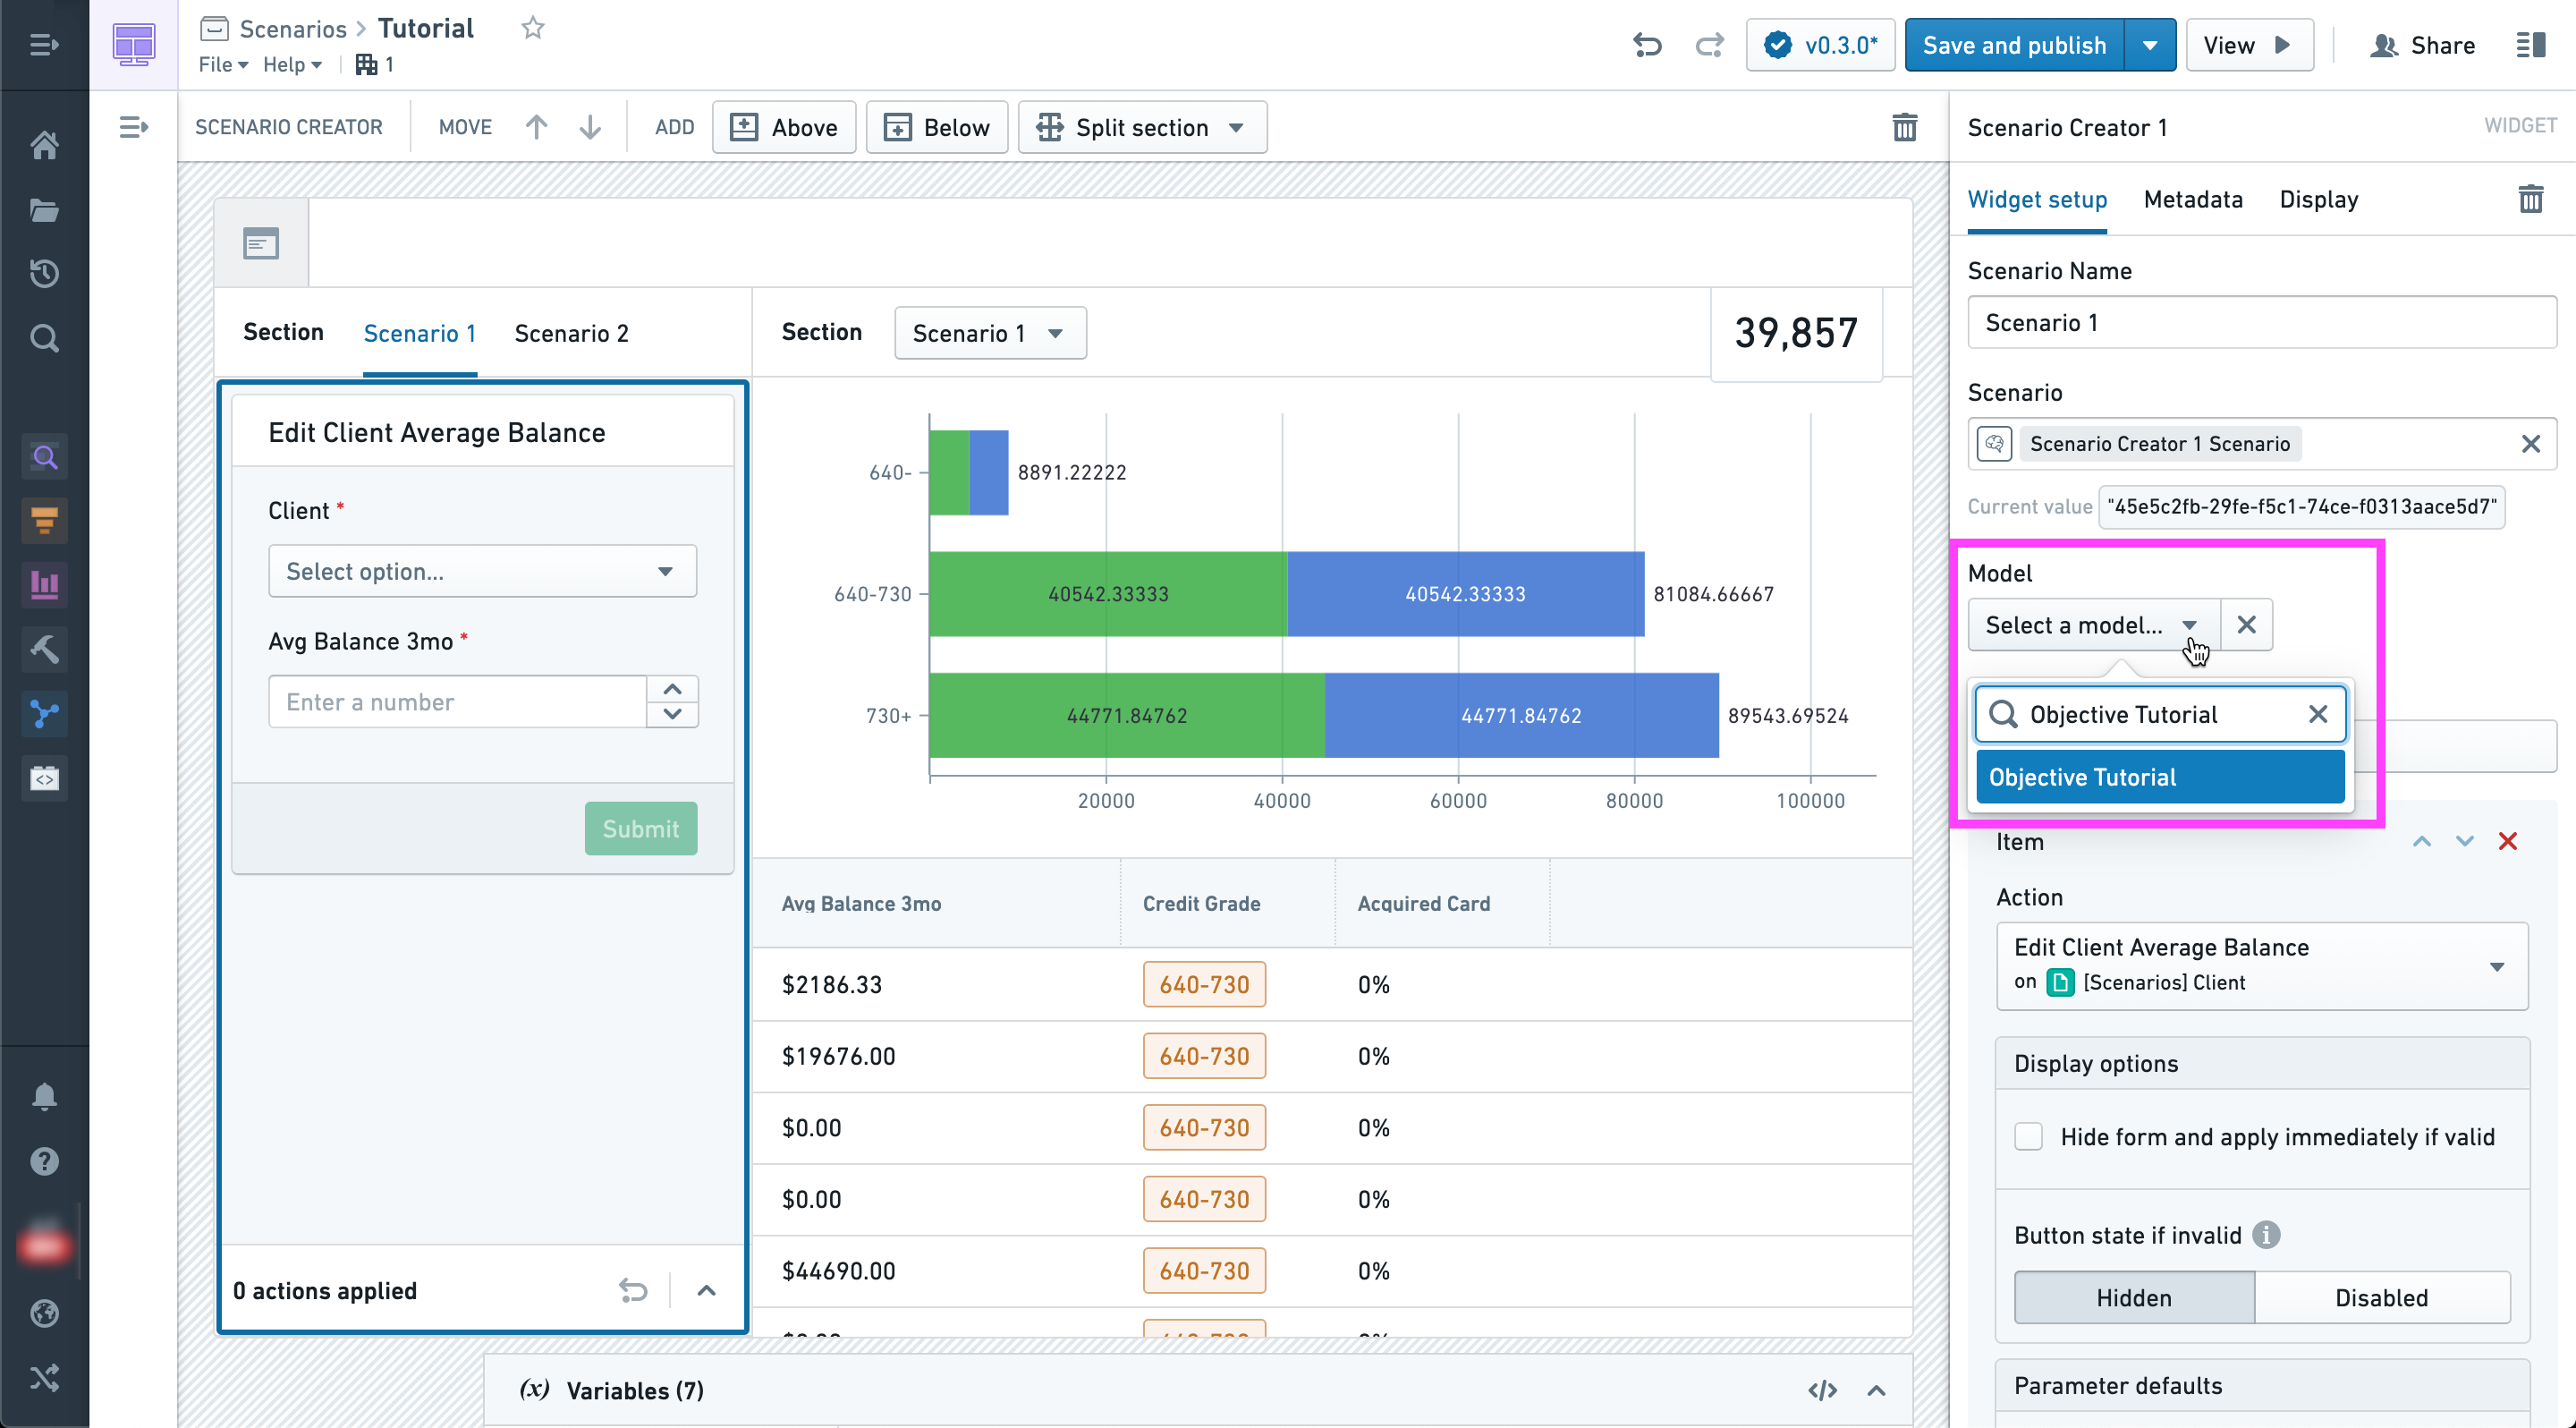
In the configuration for the Scenario Creator widget, click Select a model and choose the modeling objective you just configured.
Notice that you are not selecting a specific version but rather the objective. This means that as new models and versions are released to production deployments, they will automatically be picked up by applications like this module.
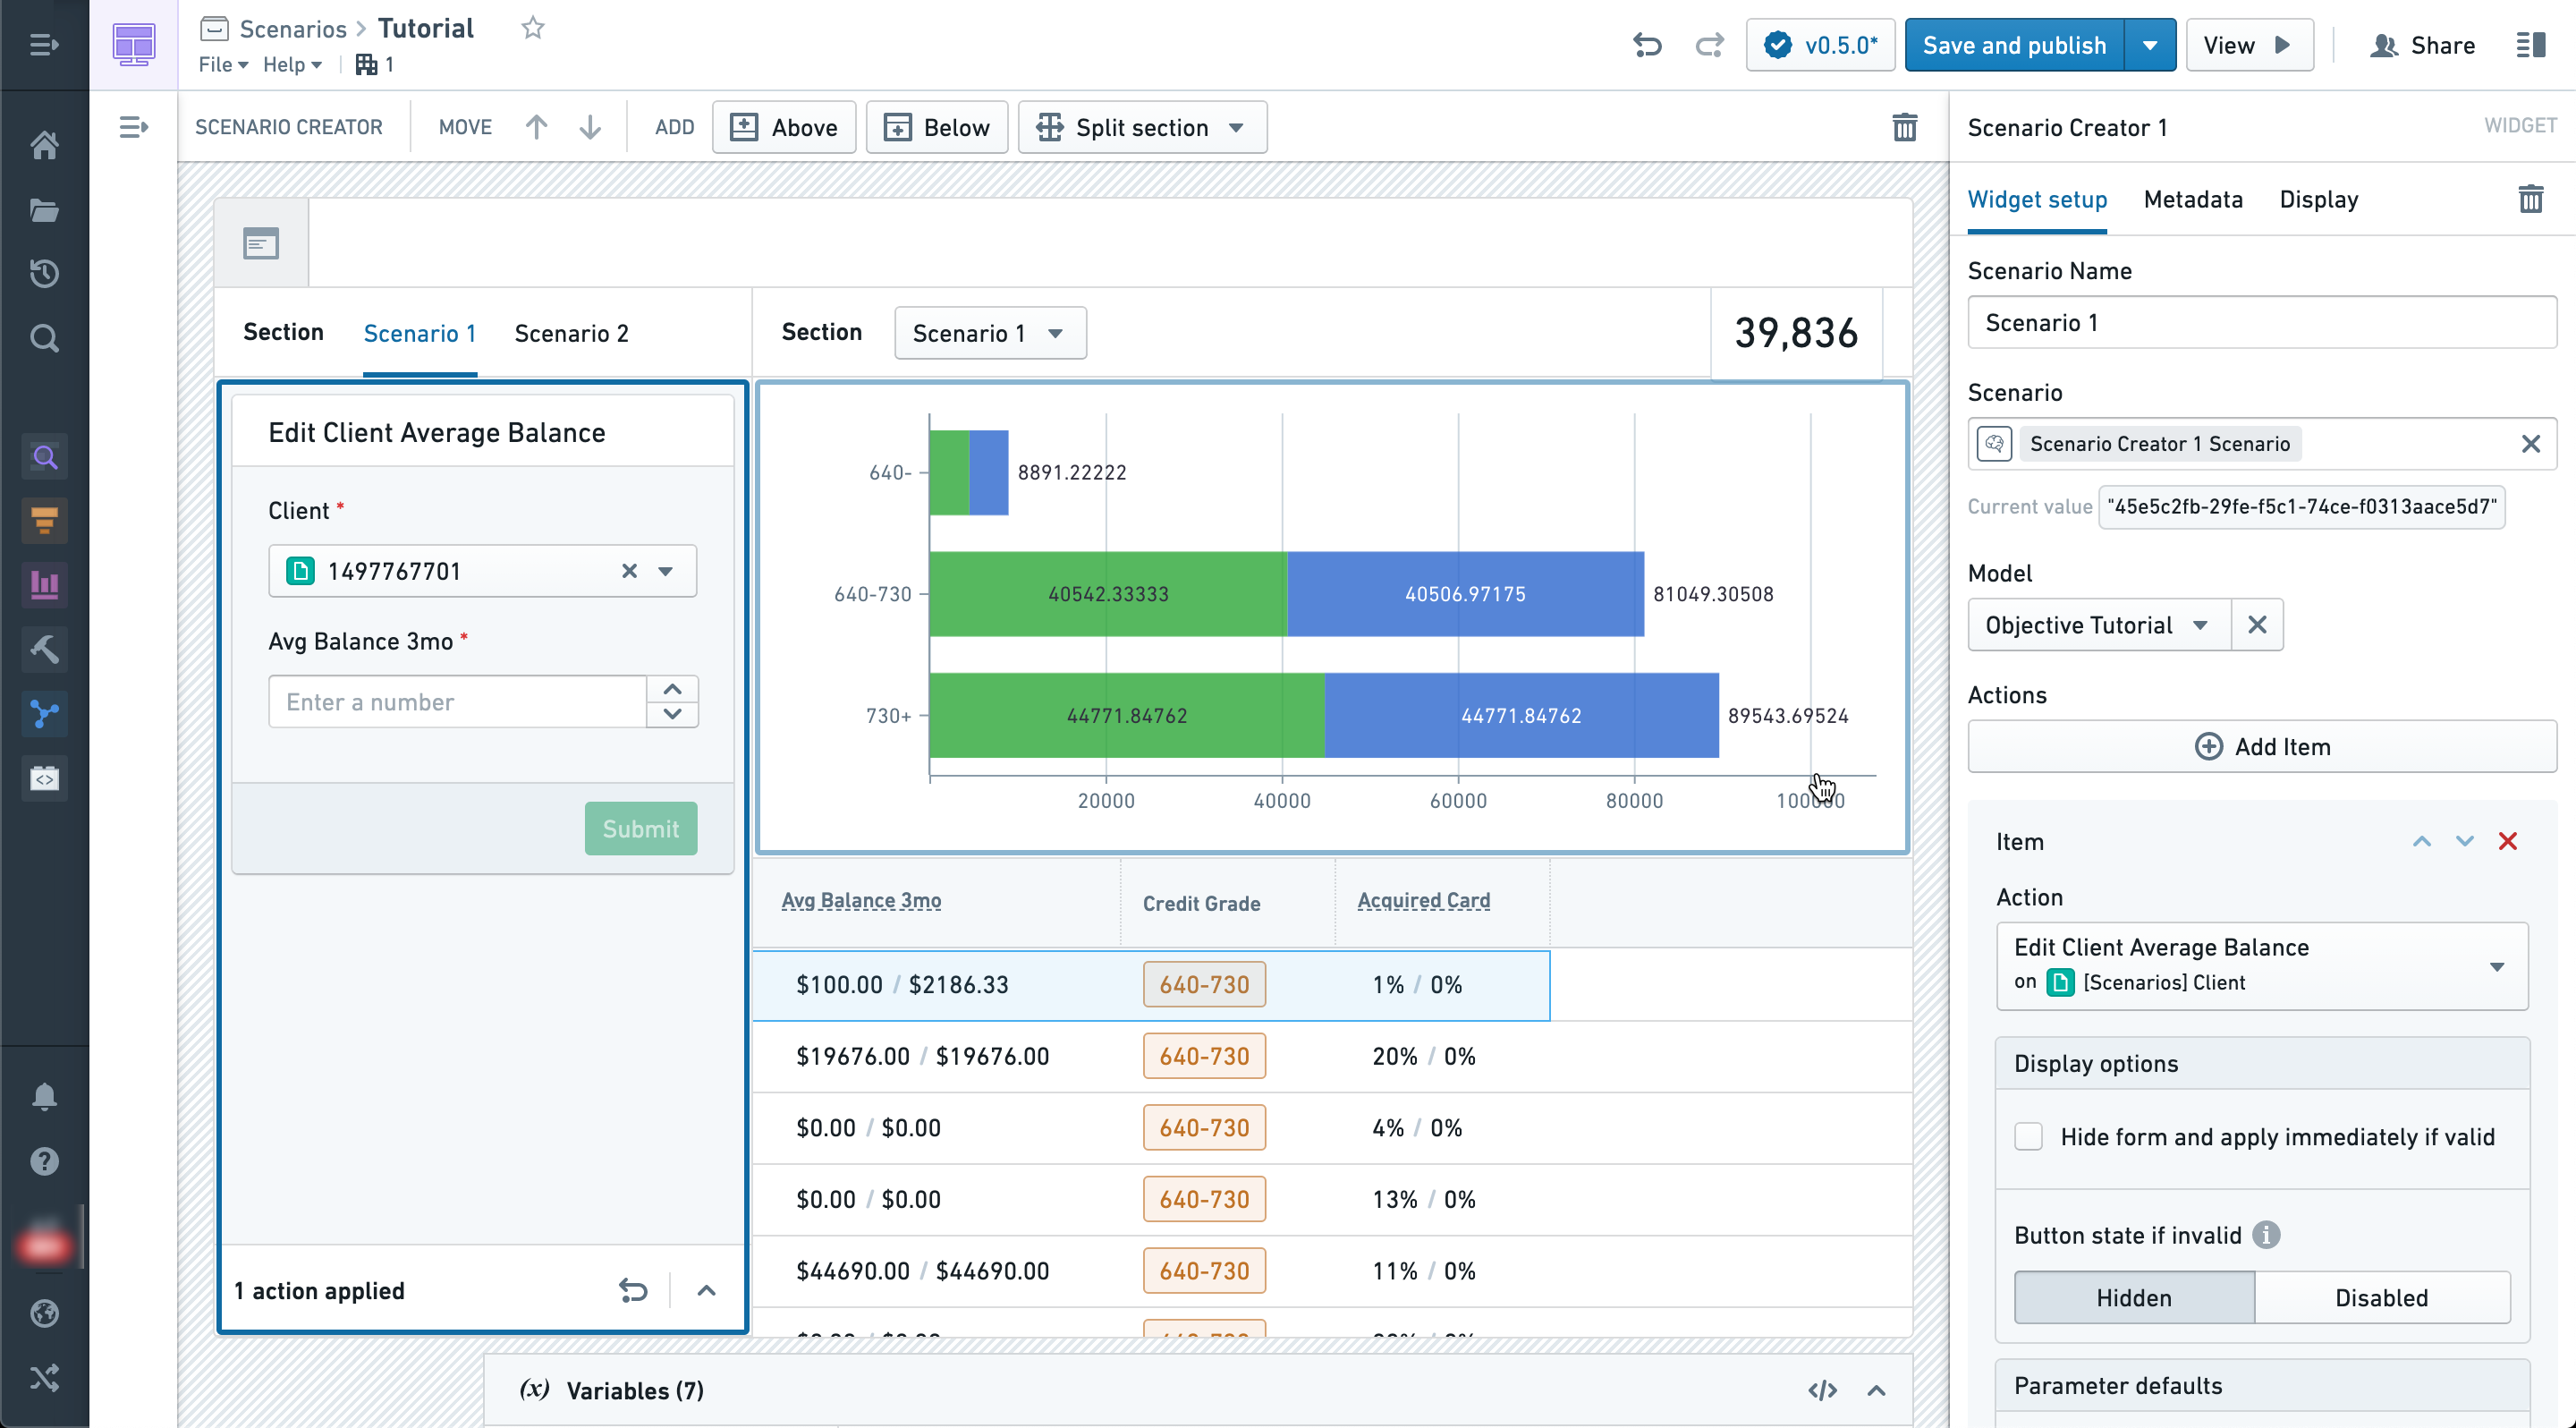
At this point, model configuration has been completed.
The model will now be run in the context of the Scenario after all Actions have been applied. Any widget configured to display values from the Scenario will reflect model results via the bound output properties.
Below you can see the newly calculated probability of acquiring the offer calculated for every client in the table.
中文翻译
选择模型
:::callout{theme="neutral"} 下文描述的功能已弃用,不再建议使用。若要在场景(Scenario)中使用模型,请将模型封装到函数(Function)中,改为在函数支撑的操作(Function-backed Action)中使用。 :::
本页面将介绍如何选择由建模目标支撑的模型,为您的场景提供运行支持。
开始操作前,请务必确认您的模型已由建模目标(modeling objective)正确管理。使用建模目标中的模型为场景提供支持的具体要求如下:
1. 确认您已创建建模目标,并成功将模型提交到该目标。模型的编写、导入平台的方式有多种,如需了解平台中模型(Model)的定义以及编写方法,请访问模型(Model)概念页面。
2. 确认您的建模目标已配置目标API(objective API),且已正确映射到本体论(Ontology)。
3. 确认您已成功将模型部署到实时部署(Live deployment),且该部署配置为发布PRODUCTION发布标签(release tag)。如需了解更多关于标签和部署环境的信息,请访问部署环境(Deployment Environment)概念页面。
:::callout{theme="neutral"} 只有绑定了本体论(Ontology)、且生产环境实时部署状态正常的建模目标,才会显示在场景的模型选择器中。 :::
在场景创建器(Scenario Creator)组件(Widget)的配置界面中,点击选择模型,选择您刚刚配置完成的建模目标。
请注意您选择的不是某个特定版本,而是建模目标本身。这意味着当有新的模型和版本发布到生产部署环境时,当前模块这类应用会自动适配新版本。
至此,模型配置已全部完成。
所有操作执行完成后,模型将在场景的上下文环境中运行。所有配置为展示场景数值的组件,都会通过绑定的输出属性展示模型的运行结果。
您可以在下方表格中看到为每位客户计算得出的最新报价获取概率。