Multiplicity(多重录入 (Multiplicity))
Foundry Forms is designed to make the intake of information from a variety of sources as easy as possible. In most cases, this involves configuring a form where a respondent will fill it out once and create a single new row (or object) based on the values entered. This can be more or less complex, but the basic expectation is that the respondent must interact with a single instance of the form.
This expectation does not work for use cases where the same form must be filled out repeatedly by the same user.
Consider the data collection needs for a scientist who needs to record observations on a long-running experiment.
We can design a simple form to capture the necessary information about each observation:
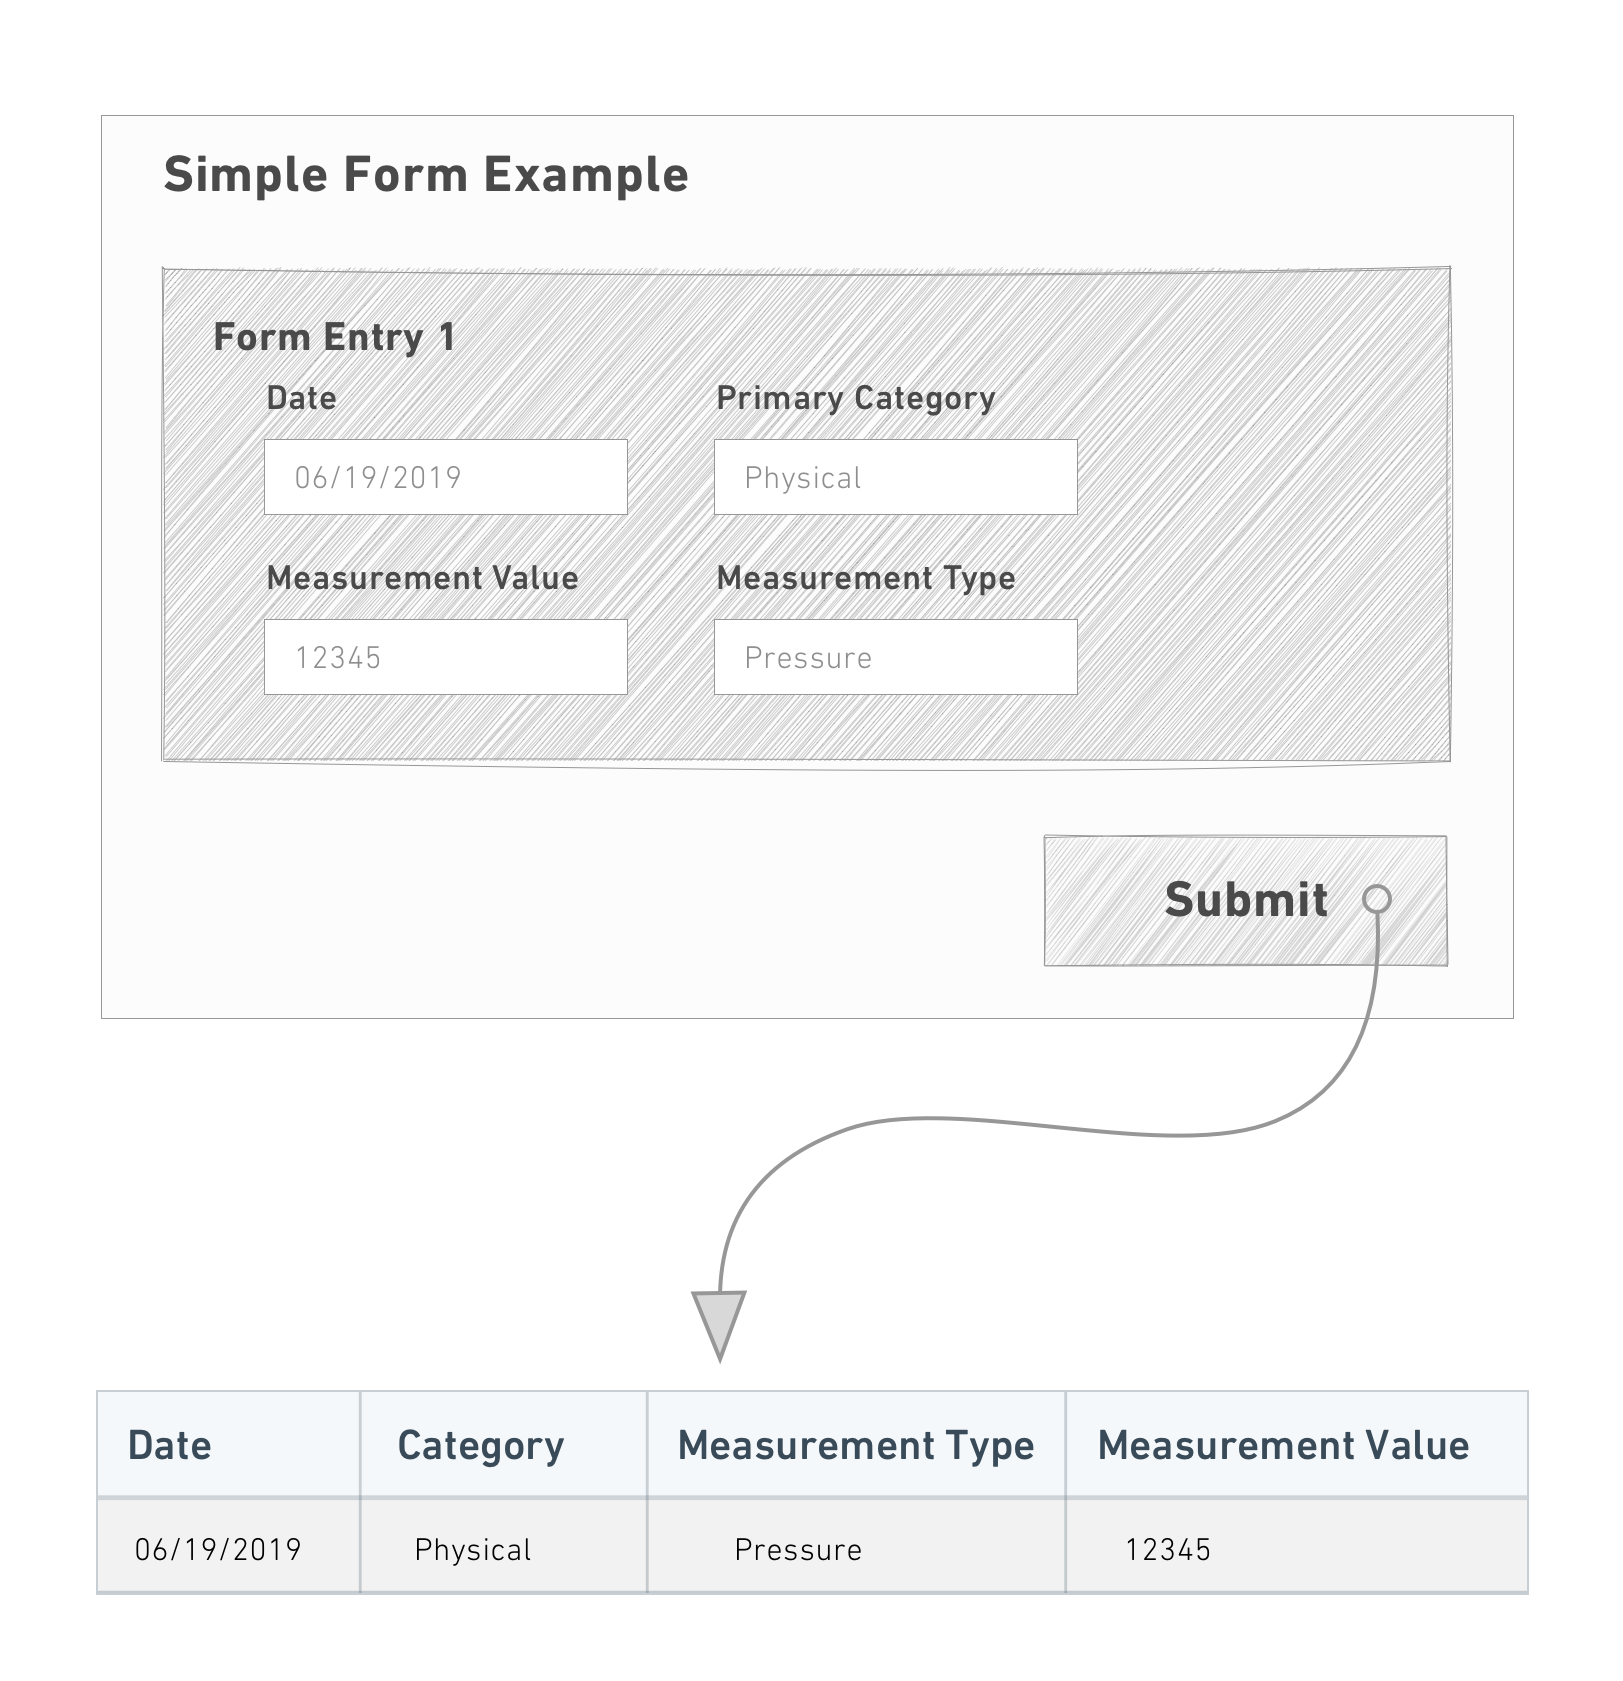
This behavior becomes tedious and repetitive, however, if there are many observations to record. Time is wasted making the same selections (in this case,Date and Primary Category) for each instance of the form and submitting responses.
These use cases are best resolved with Multiple Entries. Rather than filling out one form at a time, the user specifies which fields are "shared" and which are "unique" for each instance of the form:
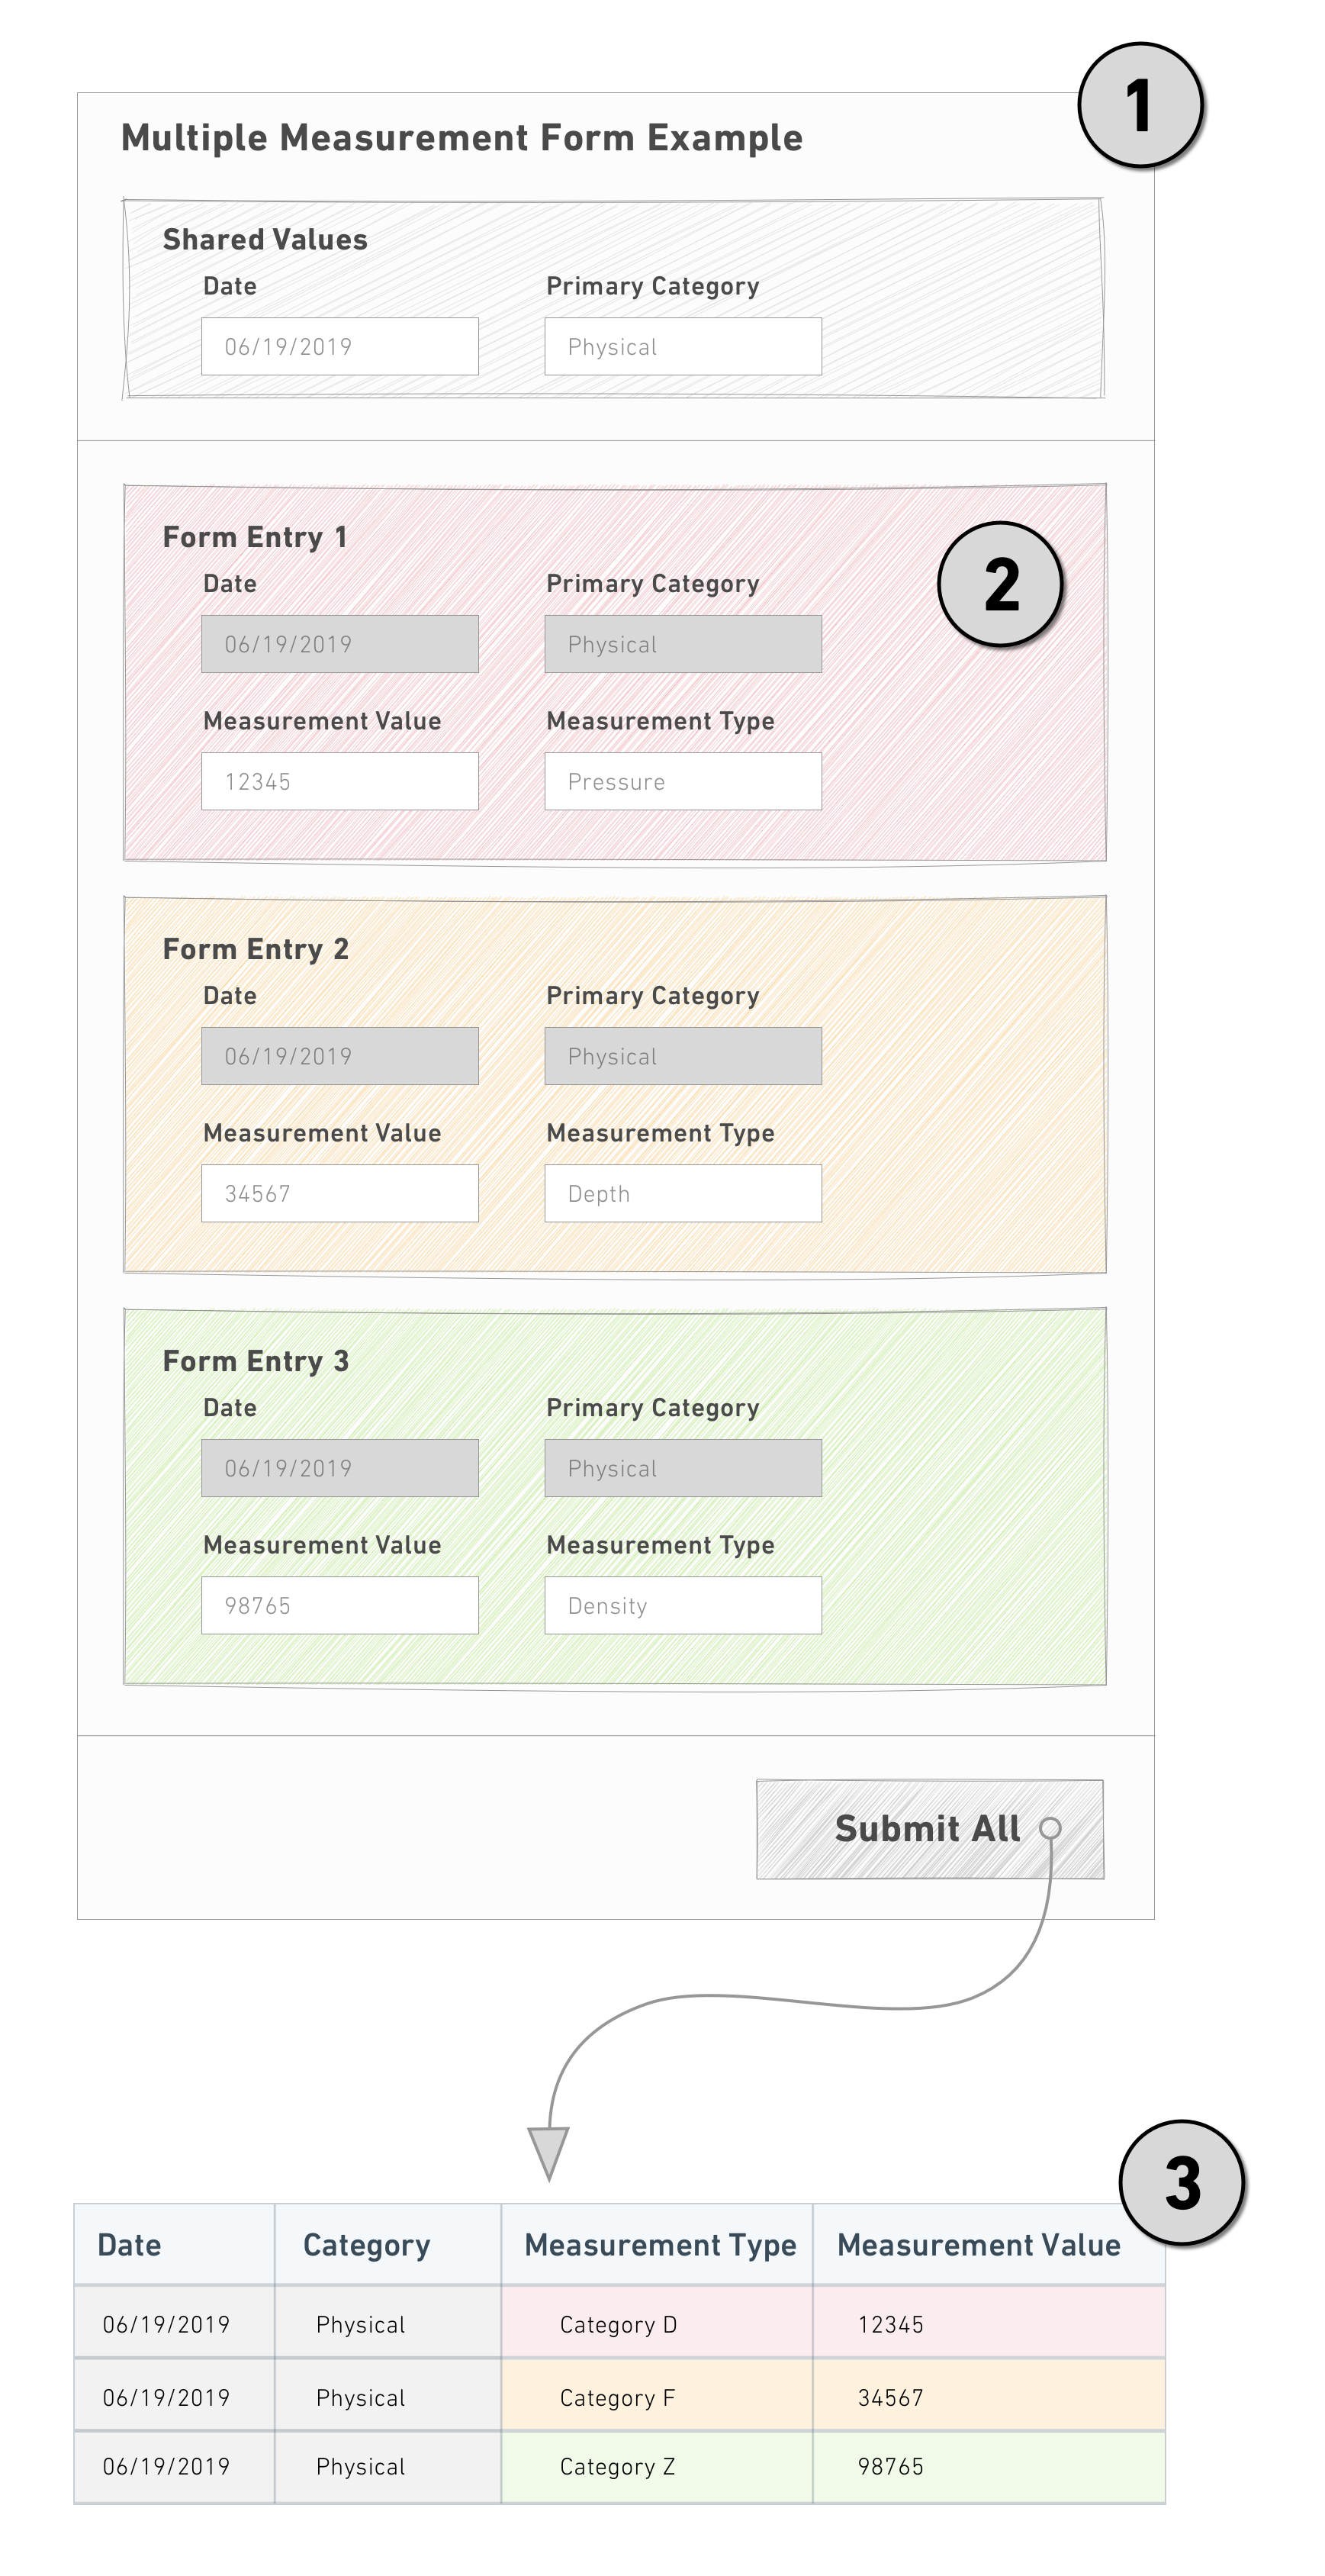
Notice the following:
- The shared fields are factored out and entered once in the header.
- Each form instance then only displays the fields that are unique.
- Once all the forms are complete, a single submit creates the rows (or objects) using both the shared and unique values.
Multiple entry forms do not support Default Value or UrlParams configuration.
Configure a free multiple entry form
Follow the steps below to create a form that takes multiple entries in a free-form context:
- Select + above or below an existing field to continue adding more shared fields.
- Select + below the last field and select Insert new sheet.
- Double-click the new sheet header to open the Visual Editor.
- Toggle Multiplicity config on (button will display blue).
- Select Free multiplicity from the dropdown and adjust the settings as needed.
- Select the green Save button.
- Select + immediately below the new sheet header to add unique fields.
In the example above, each instance of Measurement and Measurement Type generates a new entry in the backing spreadsheet because they are in separate sheets. Date and Primary Category, which exist outside of the sheets, have been captured as a common value for each of the three entries created from this submission.
Configure a parameterized multiple entry form
In addition to sharing common values across all form instances, parameterized multiple entry forms use a shared field to determine how many form instances to display and set a unique value in each one.
Consider the experiment observations example from above. If measurements need to be collected for Pressure, Depth, and Density every day, we can enforce that these are always the values used for Measurement Type.
Unlike free multiple entry forms, parameterized multiple entry forms need additional configuration to connect the shared field with the fields that will capture its unique values:
Follow the steps below to create a form that takes multiple entries in a parameterized context:
- Select + above or below an existing field to continue adding more shared fields.
- Select + below the last field and select Insert new sheet.
- Select + immediately below the new sheet header to add the field (for example,
Text) that will hold the value. - Double-click the new sheet header to open the Visual Editor.
- Toggle Multiplicity config on (button will display blue).
- Select Parameterized multiplicity from the dropdown.
- In the Parameterized uri field, enter the URI of the field in the sheet.
- Change the next dropdown from Constant to Tag.
- Select No field with current tag(). Available fields will highlight in purple.
- Select the shared field that will populate the value.
- Select the green Save button.
:::callout{theme="neutral"} To make the prefilled values uneditable, open the Visual Editor for the receiving field and toggle on Make this field read only. :::
Advanced: Configure with objects
To receive one form per instance of an object, you can use the Objects Provider field following the steps below:
- Select + above or below an existing field and add an
Objects Providerfield. - Select + below the last field and select Insert new sheet.
- Select + immediately below the new sheet header and add a
Textfield. - Double-click the new sheet header to open the Visual Editor.
- Toggle Multiplicity config on (button will display blue).
- Select Parameterized multiplicity from the dropdown.
- In the Parameterized uri field, enter the URI of the
Textfield. - Change the next dropdown from Constant to Tag.
- Select No field with current tag(). Available fields will highlight in purple.
- Select the
Objects Providerfield. - Select the green Save button.
:::callout{theme="neutral"}
The Objects Provider field could be filtered based on the value of another field.
:::
中文翻译
多重录入 (Multiplicity)
Foundry Forms 旨在尽可能简化从多种来源收集信息的过程。在大多数情况下,这涉及配置一个表单,受访者只需填写一次,系统便会根据输入的值创建单条新行(或对象)。这个过程可能简单也可能复杂,但基本预期是受访者只需与单个表单实例进行交互。
然而,当同一用户需要重复填写同一表单时,这种预期便不再适用。
以一位需要记录长期实验观察结果的科学家为例,其数据收集需求如下:
我们可以设计一个简单的表单来捕获每次观察所需的信息:
但如果需要记录大量观察数据,这种操作方式会变得繁琐且重复。每次填写表单时,都需要重复选择相同的选项(本例中为日期 (Date)和主要类别 (Primary Category)),然后提交,这无疑会浪费时间。
此类用例的最佳解决方案是使用多重录入 (Multiple Entries)。用户无需一次只填写一个表单,而是可以指定哪些字段是"共享的 (shared)",哪些字段在每个表单实例中是"唯一的 (unique)":
请注意以下几点:
- 共享字段被提取出来,在表头中一次性输入。
- 每个表单实例随后仅显示其唯一的字段。
- 所有表单填写完毕后,一次提交即可使用共享值和唯一值创建行(或对象)。
多重录入表单不支持默认值 (Default Value)或UrlParams配置。
配置自由形式的多重录入表单
按照以下步骤创建一个在自由形式上下文中支持多重录入的表单:
- 在现有字段的上方或下方选择 +,继续添加更多共享字段。
- 在最后一个字段下方选择 +,然后选择插入新工作表 (Insert new sheet)。
- 双击新工作表的表头以打开可视化编辑器 (Visual Editor)。
- 将多重录入配置 (Multiplicity config)开关打开(按钮将显示为蓝色)。
- 从下拉菜单中选择自由多重录入 (Free multiplicity),并根据需要调整设置。
- 选择绿色的保存 (Save)按钮。
- 在新工作表表头的正下方选择 +,以添加唯一字段。
在上面的示例中,测量值 (Measurement)和测量类型 (Measurement Type)的每个实例都会在后台电子表格中生成一条新记录,因为它们位于不同的工作表中。而位于工作表之外的日期 (Date)和主要类别 (Primary Category)则被捕获为本次提交所创建的三个条目的公共值。
配置参数化的多重录入表单
除了在所有表单实例间共享公共值之外,参数化的多重录入表单还使用一个共享字段来决定显示多少个表单实例,并为每个实例设置一个唯一值。
回顾上面实验观察的示例。如果每天都需要收集压力 (Pressure)、深度 (Depth)和密度 (Density)的测量值,我们可以强制要求这些值始终作为测量类型 (Measurement Type)的值。
与自由形式的多重录入表单不同,参数化的多重录入表单需要额外配置,以将共享字段与将捕获其唯一值的字段连接起来:
按照以下步骤创建一个在参数化上下文中支持多重录入的表单:
- 在现有字段的上方或下方选择 +,继续添加更多共享字段。
- 在最后一个字段下方选择 +,然后选择插入新工作表 (Insert new sheet)。
- 在新工作表表头的正下方选择 +,添加将保存值的字段(例如,
文本 (Text))。 - 双击新工作表的表头以打开可视化编辑器 (Visual Editor)。
- 将多重录入配置 (Multiplicity config)开关打开(按钮将显示为蓝色)。
- 从下拉菜单中选择参数化多重录入 (Parameterized multiplicity)。
- 在参数化 URI (Parameterized uri)字段中,输入工作表中该字段的 URI。
- 将下一个下拉菜单从常量 (Constant)更改为标签 (Tag)。
- 选择当前无标签()字段 (No field with current tag())。可用字段将高亮显示为紫色。
- 选择将填充值的共享字段。
- 选择绿色的保存 (Save)按钮。
:::callout{theme="neutral"} 要使预填值不可编辑,请打开接收字段的可视化编辑器,并开启将此字段设为只读 (Make this field read only)。 :::
高级:使用对象进行配置
要为每个对象实例接收一个表单,您可以按照以下步骤使用对象提供者 (Objects Provider)字段:
- 在现有字段的上方或下方选择 +,添加一个
对象提供者 (Objects Provider)字段。 - 在最后一个字段下方选择 +,然后选择插入新工作表 (Insert new sheet)。
- 在新工作表表头的正下方选择 +,添加一个
文本 (Text)字段。 - 双击新工作表的表头以打开可视化编辑器 (Visual Editor)。
- 将多重录入配置 (Multiplicity config)开关打开(按钮将显示为蓝色)。
- 从下拉菜单中选择参数化多重录入 (Parameterized multiplicity)。
- 在参数化 URI (Parameterized uri)字段中,输入
文本 (Text)字段的 URI。 - 将下一个下拉菜单从常量 (Constant)更改为标签 (Tag)。
- 选择当前无标签()字段 (No field with current tag())。可用字段将高亮显示为紫色。
- 选择
对象提供者 (Objects Provider)字段。 - 选择绿色的保存 (Save)按钮。
:::callout{theme="neutral"}
对象提供者 (Objects Provider)字段可以根据另一个字段的值进行过滤。
:::