Use Ontology SDK (OSDK) in a widget set(在微件集中使用本体论SDK (OSDK))
You can use OSDK in a widget set by following the steps outlined in each section below.
Configure an OSDK for your widget set
To configure an Ontology SDK (OSDK) for your widget set, navigate to the overview page of your widget set and then select Configure SDK in the top bar on the page.
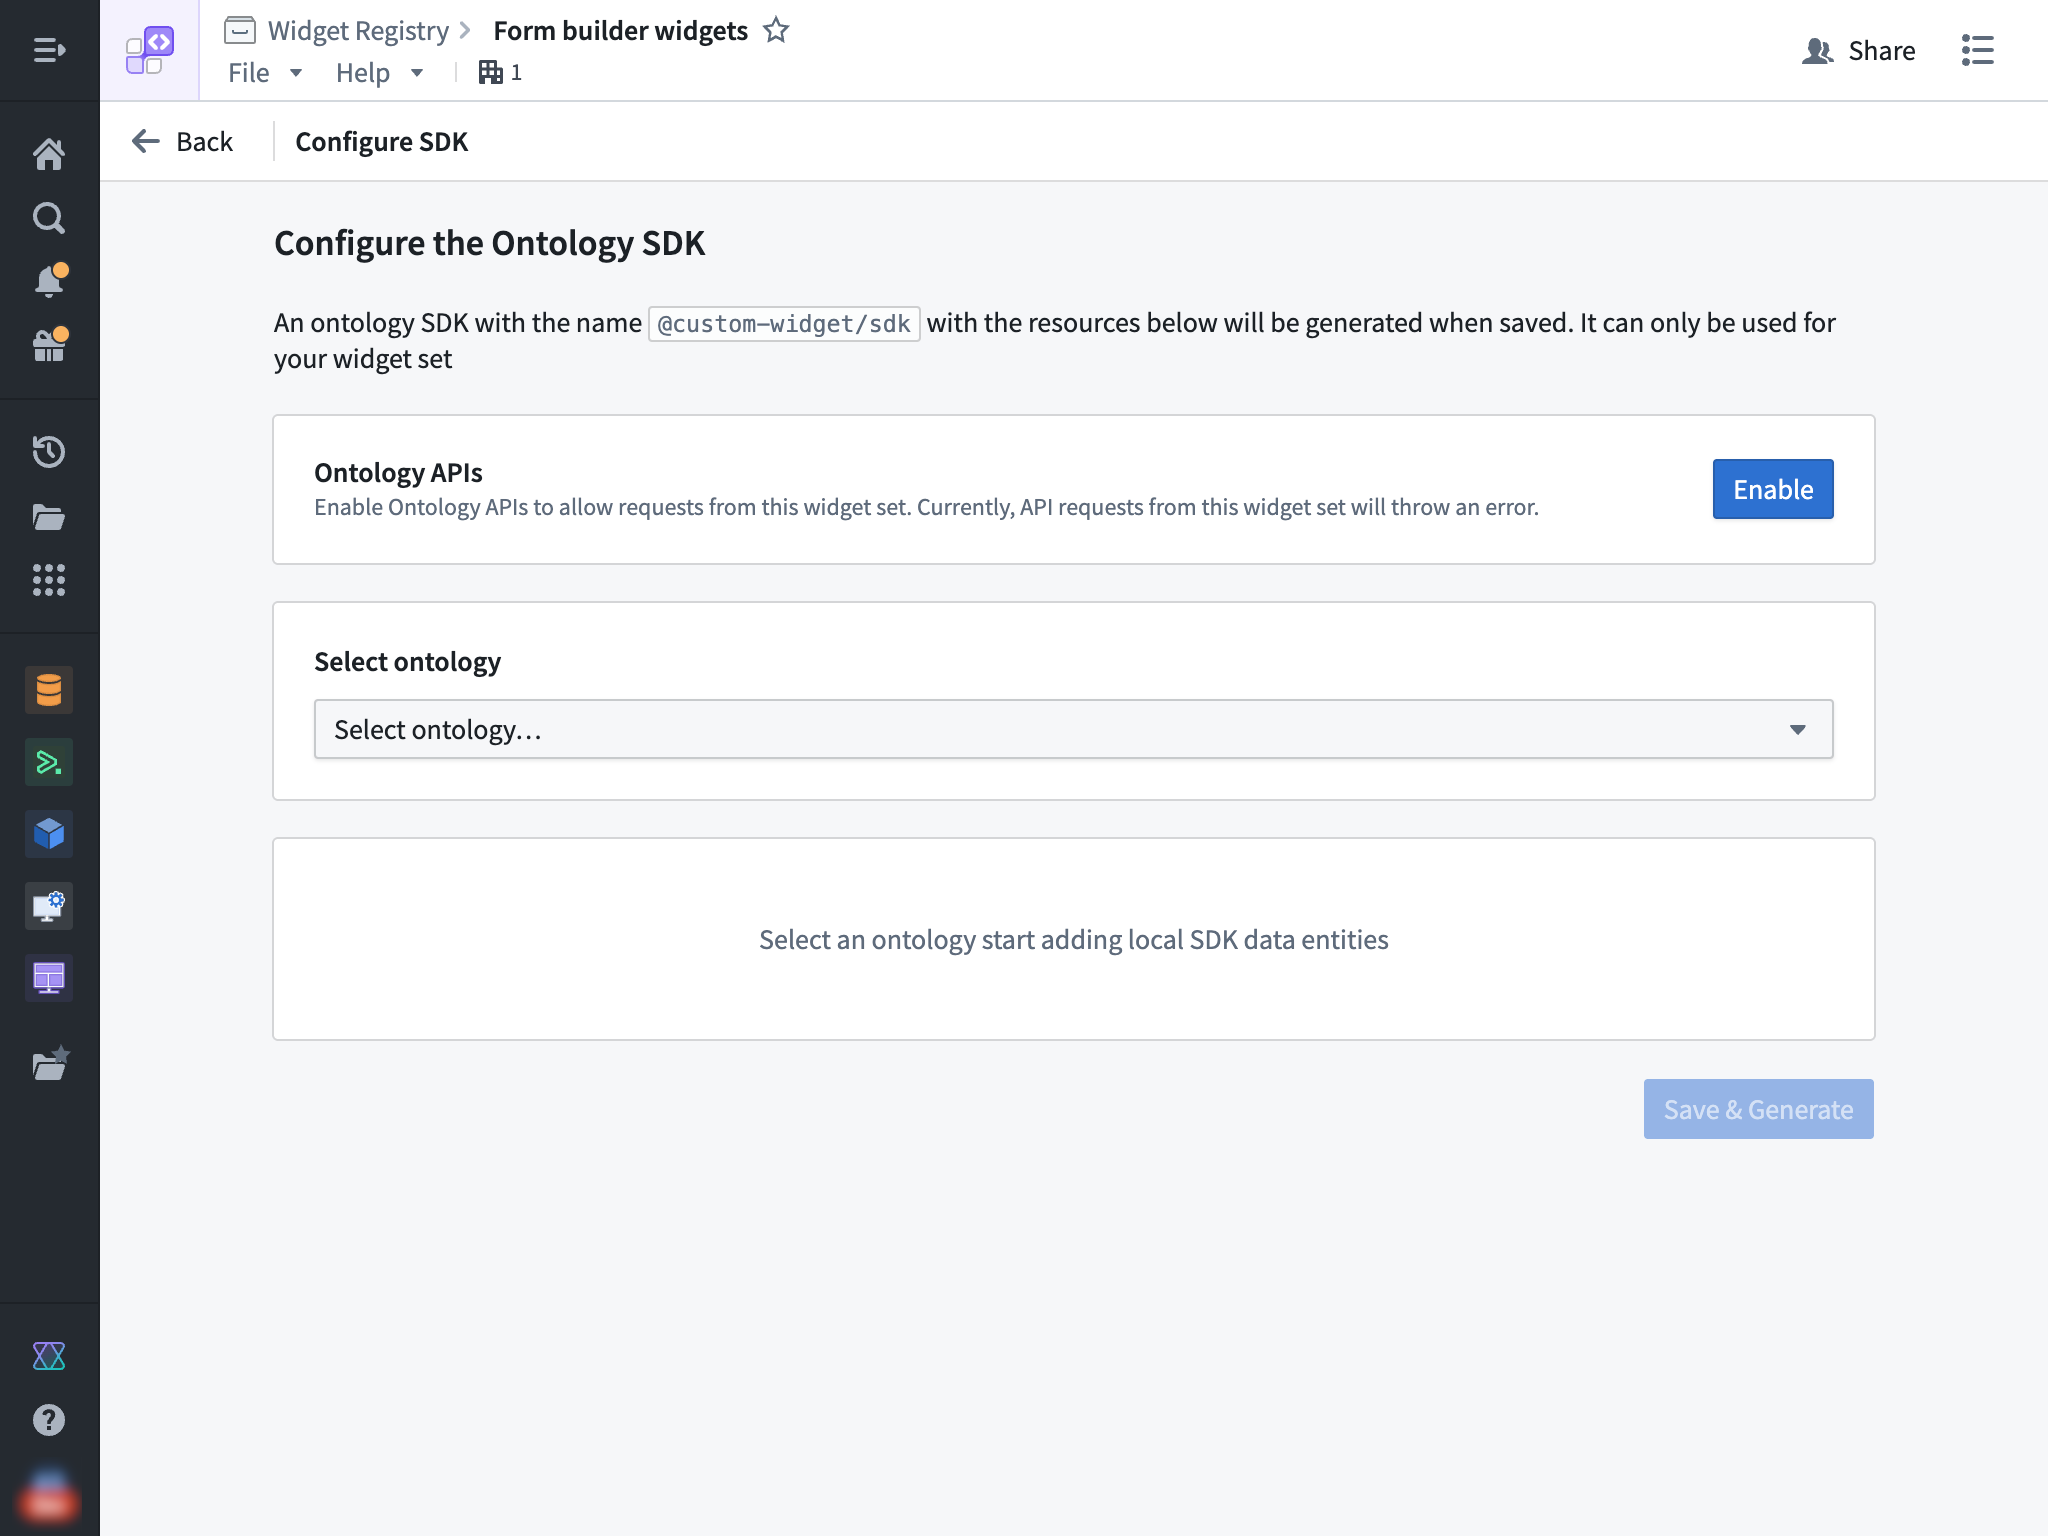
Then, select an ontology and the specific resources that you would like to access from your widget.
Enable Ontology APIs
You also need to enable the Ontology APIs for your widget set so that API calls made from the OSDK can succeed. This action can be performed by a user with the Information Security Officer default enrollment role. Alternatively, a user with a custom enrollment role that grants the Enable widget set unscoped API access workflow can also perform this action.
Install the OSDK in your widget
After the above steps have been completed, you can start using your OSDK in your widget set. To do so, ensure that @custom-widget/sdk is listed in your package.json and properly installed using the following JSON:
```json tab="JSON" { // ... "dependencies": { // ... "@custom-widget/sdk": "latest" } }
If you selected the **In Foundry** option during creation, then you are using a Foundry code repository. Your project `.npmrc` file should already be set up to resolve NPM dependencies including your OSDK package from Foundry and this file **should not be modified**.

If you selected the **Outside of Foundry** option and did not generate an OSDK package during creation, you must manually configure NPM to be able to resolve your OSDK package from Foundry. This can be done by setting up a `.npmrc` file in your project root with the following contents:
The above snippet tells NPM to resolve the `@custom-widget` scope from Foundry and auth with the `FOUNDRY_TOKEN` environment variable. You should replace the `<EXAMPLE>` and `<ri.widgetregistry..widget-set.LOCATOR>` placeholders with the specific values for your Foundry instance and widget set RID.

## Configure the OSDK in your widget

Ensure that your client is configured with the `baseUrl` set to `window.location.origin`. You can use the `createFoundryWidgetTokenProvider()` helper to provide a placeholder value for the auth token, as any access to the ontology would use the user's token and adhere to the user's permissions at runtime. Review the following code snippet:

```TypeScript tab="TypeScript"
import { createClient } from "@osdk/client";
import { $ontologyRid } from "@custom-widget/sdk";
import { createFoundryWidgetTokenProvider } from "@osdk/widget.client";

const client = createClient(
    window.location.origin,
    $ontologyRid,
    createFoundryWidgetTokenProvider(),
);
Use the OSDK
Refer to your OSDK's documentation to learn more about usage by selecting the SDK docs option on the top bar of your widget set.

Refresh host data on action
When a widget applies an Ontology action using OSDK that modifies data backing an object set parameter, the host application's data can become stale.
To address this, you can enable the refreshHostDataOnAction option, which causes the host application (such as Workshop) to automatically refresh any object set parameters passed to the widget after it applies an Ontology action. No additional configuration is required from the application builder in Workshop.
Newly-created widget sets have this option enabled at the plugin level by default. For existing widget sets, you can enable it manually as described below.
To set this as the default for all widgets in a widget set, configure the defaults option in the Vite plugin:
```TypeScript tab="vite.config.ts" import FoundryWidgetPlugin from "@osdk/widget.vite-plugin"; import { defineConfig } from "vite";
export default defineConfig({ plugins: [ FoundryWidgetPlugin({ defaults: { refreshHostDataOnAction: true, }, }), ], });
To override the plugin-level default for an individual widget, set `refreshHostDataOnAction` in the widget configuration file:

```TypeScript tab="myWidget.config.ts"
import { defineConfig } from "@osdk/widget.client";

export default defineConfig({
    id: "myWidget",
    name: "My Widget",
    description: "An example widget",
    type: "workshop",
    refreshHostDataOnAction: false, // overrides the plugin-level default
    parameters: {},
    events: {},
});
Limitations
Currently, widgets do not support the following Foundry API features:
- Object set subscriptions
- Non-Ontology APIs
中文翻译
在微件集中使用本体论SDK (OSDK)
您可以通过以下各节概述的步骤,在微件集中使用本体论SDK (OSDK)。
为微件集配置OSDK
要为微件集配置本体论SDK (OSDK),请导航至微件集的概览页面,然后选择页面顶部栏中的 Configure SDK。
然后,选择一个本体论(Ontology)以及您希望从微件中访问的特定资源。
启用本体论API (Ontology APIs)
您还需要为微件集启用本体论API (Ontology APIs),以便从OSDK发出的API调用能够成功。此操作可由具有信息安全官(Information Security Officer)默认注册角色的用户执行。或者,拥有授予启用微件集无范围API访问(Enable widget set unscoped API access)工作流的自定义注册角色的用户也可以执行此操作。
在微件中安装OSDK
完成上述步骤后,您就可以开始在微件集中使用OSDK了。为此,请确保@custom-widget/sdk已列在您的package.json中,并使用以下JSON正确安装:
```json tab="JSON" { // ... "dependencies": { // ... "@custom-widget/sdk": "latest" } }
如果您在创建时选择了**在Foundry内部(In Foundry)**选项,那么您正在使用Foundry代码仓库。您的项目`.npmrc`文件应已设置好,以便从Foundry解析NPM依赖项(包括您的OSDK包),并且**不应修改此文件**。

如果您选择了**在Foundry外部(Outside of Foundry)**选项,并且在创建时未生成OSDK包,则必须手动配置NPM以使其能够从Foundry解析您的OSDK包。这可以通过在项目根目录中设置一个包含以下内容的`.npmrc`文件来完成:
上述代码片段告诉NPM从Foundry解析`@custom-widget`范围,并使用`FOUNDRY_TOKEN`环境变量进行身份验证。您应将`<EXAMPLE>`和`<ri.widgetregistry..widget-set.LOCATOR>`占位符替换为您的Foundry实例和微件集RID的具体值。

## 在微件中配置OSDK

确保您的客户端已将`baseUrl`设置为`window.location.origin`。您可以使用`createFoundryWidgetTokenProvider()`辅助函数为身份验证令牌提供一个占位值,因为对本体论(Ontology)的任何访问都将使用用户的令牌,并在运行时遵守用户的权限。请查看以下代码片段:

```TypeScript tab="TypeScript"
import { createClient } from "@osdk/client";
import { $ontologyRid } from "@custom-widget/sdk";
import { createFoundryWidgetTokenProvider } from "@osdk/widget.client";

const client = createClient(
    window.location.origin,
    $ontologyRid,
    createFoundryWidgetTokenProvider(),
);
使用OSDK
请参阅您的OSDK文档以了解更多用法,方法是选择微件集顶部栏上的 SDK docs 选项。
在操作时刷新宿主数据
当微件使用OSDK应用一个修改对象集参数支持数据的本体论(Ontology)操作时,宿主应用程序的数据可能会变得过时。
为了解决这个问题,您可以启用refreshHostDataOnAction选项,该选项会使宿主应用程序(例如Workshop)在微件应用本体论(Ontology)操作后自动刷新传递给微件的任何对象集参数。Workshop中的应用程序构建者无需进行额外配置。
新创建的微件集默认在插件级别启用了此选项。对于现有的微件集,您可以按照以下描述手动启用它。
要将其设置为微件集中所有微件的默认值,请在Vite插件中配置defaults选项:
```TypeScript tab="vite.config.ts" import FoundryWidgetPlugin from "@osdk/widget.vite-plugin"; import { defineConfig } from "vite";
export default defineConfig({ plugins: [ FoundryWidgetPlugin({ defaults: { refreshHostDataOnAction: true, }, }), ], });
要为单个微件覆盖插件级别的默认值,请在微件配置文件中设置`refreshHostDataOnAction`:

```TypeScript tab="myWidget.config.ts"
import { defineConfig } from "@osdk/widget.client";

export default defineConfig({
    id: "myWidget",
    name: "My Widget",
    description: "An example widget",
    type: "workshop",
    refreshHostDataOnAction: false, // 覆盖插件级别的默认值
    parameters: {},
    events: {},
});
限制
目前,微件不支持以下Foundry API功能:
- 对象集订阅(Object set subscriptions)
- 非本体论API (Non-Ontology APIs)