Upload data for public applications(为公共应用上传数据)
:::callout{theme="neutral" title="Enabling data uploads"} The ability to upload data via public applications requires two secure upload data sources to be available via queries:
- A data source used for generating secure channels and tokens. It is one of:
- A SERVICE API data source called
secure-upload - A HTTP JSON data source called
secure-upload-raw-oauth - A data source used for uploading JSON blobs using a generated secure token. It is most commonly named as
secure-upload-raw.
You can check their availability by creating a public application and creating a new query. If secure upload sources are not available, contact Palantir Support. :::
Public applications can be configured to enable users to upload data to Foundry. Users uploading data do not require access to Foundry. However, only Foundry users with appropriate resource permissions can access uploaded data.
To set up data upload in your public application, follow the instructions below:
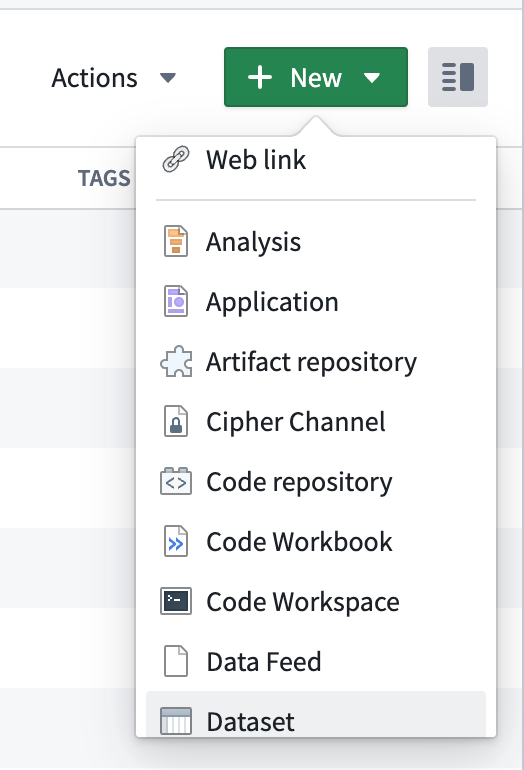
1. Create an empty dataset
Create a new dataset resource in a Project or folder of your choice.
2. Create a channel
In your public Slate application, create a new query based on either the secure-upload or secure-upload-raw-oauth source. Set the query to only run manually by ticking the checkbox in the dropdown located next to Test.
Choose a unique ID for your channel, for example, slate-app-name-data-upload. The channelId must not contain spaces. The request body requires the RID of the empty dataset you previously created. You can obtain the dataset RID from the URL of the dataset, for example, ri.foundry.main.dataset.abcd1234-1234-5678-9000-1234abcd1234.
Create a channel using secure-upload
From Available services, select the Channel Service, then Put channel from the Endpoints dropdown.
In the channelId field, enter the unique ID for your channel.
Enter the following JSON in the body of the request:
{
  "configuration": {
    "dataset": "<your_dataset_rid_here>",
    "maxBlobSize": <optional size limit for individual blob size (in bytes)>,
    "options": {
      "type": "json",
      "json": {}
    }
  }
}
Create a channel using secure-upload-raw-oauth
Enter the following JSON in the query editor:
{
    "path": "channels/{channelId}",
    "method": "PUT",
    "extractors": {
        "result": "$"
    },
    "pathParams": {
        "channelId": "<your_channel_name_here>"
    },
    "queryParams": {},
    "bodyJson": {
        "configuration": {
            "dataset": "<your_dataset_rid_here>",
            "maxBlobSize": <optional size limit for individual blob size (in bytes)>,
            "options": {
                "type": "json",
                "json": {}
            }
        }
    }
}
After creating the query based on the secure-upload or secure-upload-raw-oauth source, select Test. The response will return a channelId matching the one you entered in the field. Store the channelId as it will be needed in the following step.
This query will not be needed again for users to upload data, unless you want to create more channels. The query can be safely deleted.
3. Create a token
After creating the channel, you need to create a token. This token is required to submit a secure upload query and upload data into the dataset. You will need to specify an expiry date. The maximum expiration date depends on your enrollment's secure upload configuration. Create a new query based on the secure-upload or secure-upload-raw-oauth source. Set the query to only run manually.
Create a token using secure-upload
From the available services, select the Token Service, then select Create Token from the Endpoints dropdown.
The body in the request is in the following format:
{
  "type": "blobUploadToDataset",
  "blobUploadToDataset": {
    "channel": "<channelId defined in step 2>",
    "expiry":"<expiration date in ISO-8601: e.g. 2021-06-30T00:00:00Z>",
    "count": 1
  }
}
Create a token using secure-upload-raw-oauth
Enter the following JSON in the query editor:
{
    "path": "tokens",
    "method": "POST",
    "extractors": {
        "result": "$"
    },
    "pathParams": {},
    "queryParams": {},
    "bodyJson": {
        "type": "blobUploadToDataset",
        "blobUploadToDataset": {
            "channel": "<channelId defined in step 2>",
            "expiry":"<expiration date in ISO-8601: e.g. 2021-06-30T00:00:00Z>",
            "count": 1
        }
    }
}
After creating the query based on the secure-upload or secure-upload-raw-oauth source, select Test to submit the query. The response includes a token that you need to save as it will only be shown once. Rerun the query to get another token if necessary. This query will not be needed again for users to upload data, unless you want to create more tokens. The query can be safely deleted.
4. Create query for data upload
To allow users to submit queries, you need to create one more query:
- Select secure-upload-raw as a source.
- Open the dropdown near Test and select when you want the data to be submitted (on button click or another criteria, just as a regular query). The body of the request defines the fields which are captured and uploaded into the previously-created dataset. You can edit the fields even after initial submissions. Entries made prior to the modification will show no value under the newly-added fields.
Every field needs to map to a value. The values need to be strings. You can either use the jsonStringify handlebar helper or cast the values into strings using a function.
An example of the request body follows:
{
    "path": "blobs",
    "method": "POST",
    "extractors": {
        "result": "$"
    },
    "headers": {
        "authorization": "Bearer <token_from_step_3>"
    },
    "bodyJson": {
        "content": {
            // whatever json-shaped content you want here
            // for example:
            "field1": "value1",
            "field2": {{jsonStringify w_input1.text}},
            "field3": [
                "item1",
                {{jsonStringify w_input2.text}},
                {{jsonStringify f_function1}}
            ]
        }
    }
}
When this query is run, the data will land in a dataset with the suffix _buffer_v2 appended, and be located alongside the original dataset. The data will be shaped exactly as defined in this step. For example, a query with the body from the examples above will result in the following data entry in the "content" column (the dataset will contain additional metadata in other columns):
{
  content: {
    "field1": "value1",
    "field2": "<<value of jsonStringify w_input1.text>>",
    "field3": ["item1", "<<value of jsonStringify w_input2.text>>", "<<value of jsonStringify f_function1>>"]
  }
}
Stop data uploads
To stop new entries from being uploaded to the dataset, you will need to both unpublish the application and delete the token being used as the authentication header in the last query.
:::callout{theme="neutral"} Though unpublishing hides the application from unauthenticated users, unauthenticated users could still call the public secure-upload data source. Deleting the token is important to maintain application security. :::
:::callout{theme="neutral"} Remember to store your generated tokens in a safe location as there is no recovery option. :::
To delete a token, follow these steps:
- From Slate, create a query with secure-upload or secure-upload-raw-oauth as source.
- Open the dropdown near Test and tick the manually checkbox to run this query manually.
- Configure and run the query:
- If using secure-upload:
- Select Token Service from Available Services.
- Select Delete Token from Endpoints.
- Enter the token you want to delete as a string, for example,
1abcdefgha2bcdef3ghabcdefg.
- If using secure-upload-raw-oauth:
- Use the token you want to delete, for example,
1abcdefgha2bcdef3ghabcdefg, and enter the following JSON in the query editor:{ "path": "tokens/{token}", "method": "DELETE", "extractors": { "result": "$" }, "headers": {}, "pathParams": { "token": "1abcdefgha2bcdef3ghabcdefg" }, "queryParams": {} }
- Use the token you want to delete, for example,
- To verify that the token was deleted, check by submitting data. You should get the following
InvalidTokenresponse:
{
  "errorCode":"PERMISSION_DENIED",
  "errorName":"TokenSecurity:InvalidToken",
  "errorInstanceId":"13abec1b-3c0f-467d-ad14-6ae702b52b33",
  "parameters":{}
 }
中文翻译
为公共应用上传数据
:::callout{theme="neutral" title="启用数据上传"} 通过公共应用上传数据的功能需要两个安全上传数据源(secure upload data sources)可通过查询(query)使用:
- 用于生成安全通道(channel)和令牌(token)的数据源,可以是以下之一:
- 名为
secure-upload的 SERVICE API 数据源 - 名为
secure-upload-raw-oauth的 HTTP JSON 数据源 - 用于使用生成的安全令牌上传 JSON 数据块(blob)的数据源,通常命名为
secure-upload-raw。
您可以通过创建公共应用并新建查询来检查这些数据源是否可用。如果安全上传数据源不可用,请联系 Palantir 支持团队。 :::
公共应用可配置为允许用户向 Foundry 上传数据。上传数据的用户无需拥有 Foundry 的访问权限。但只有具备相应资源权限的 Foundry 用户才能访问已上传的数据。
请按照以下说明在您的公共应用中设置数据上传功能:
1. 创建空数据集
在您选择的项目或文件夹中创建一个新的数据集资源。
2. 创建通道
在您的公共 Slate 应用中,基于 secure-upload 或 secure-upload-raw-oauth 数据源创建一个新查询。勾选 测试 旁下拉菜单中的复选框,将查询设置为仅手动运行。
为您的通道选择一个唯一 ID,例如 slate-app-name-data-upload。channelId 不能包含空格。请求体(request body)需要包含您之前创建的空数据集的 RID。您可以从数据集的 URL 中获取数据集 RID,例如 ri.foundry.main.dataset.abcd1234-1234-5678-9000-1234abcd1234。
使用 secure-upload 创建通道
从 可用服务 中选择 通道服务,然后从 端点 下拉菜单中选择 Put channel。
在 channelId 字段中输入通道的唯一 ID。
在请求体中输入以下 JSON:
{
  "configuration": {
    "dataset": "<your_dataset_rid_here>",
    "maxBlobSize": <单个数据块大小的可选限制(以字节为单位)>,
    "options": {
      "type": "json",
      "json": {}
    }
  }
}
使用 secure-upload-raw-oauth 创建通道
在查询编辑器中输入以下 JSON:
{
    "path": "channels/{channelId}",
    "method": "PUT",
    "extractors": {
        "result": "$"
    },
    "pathParams": {
        "channelId": "<your_channel_name_here>"
    },
    "queryParams": {},
    "bodyJson": {
        "configuration": {
            "dataset": "<your_dataset_rid_here>",
            "maxBlobSize": <单个数据块大小的可选限制(以字节为单位)>,
            "options": {
                "type": "json",
                "json": {}
            }
        }
    }
}
创建基于 secure-upload 或 secure-upload-raw-oauth 数据源的查询后,选择 测试。响应将返回一个与您输入字段匹配的 channelId。请保存 channelId,因为下一步会用到。
除非您想创建更多通道,否则用户上传数据时不再需要此查询。可以安全地删除该查询。
3. 创建令牌
创建通道后,您需要创建一个令牌。此令牌用于提交安全上传查询并将数据上传到数据集中。您需要指定一个过期日期。最大过期日期取决于您注册环境的安全上传配置。基于 secure-upload 或 secure-upload-raw-oauth 数据源创建一个新查询。将查询设置为仅手动运行。
使用 secure-upload 创建令牌
从可用服务中选择 令牌服务,然后从 端点 下拉菜单中选择 Create Token。
请求体格式如下:
{
  "type": "blobUploadToDataset",
  "blobUploadToDataset": {
    "channel": "<步骤2中定义的channelId>",
    "expiry":"<ISO-8601格式的过期日期:例如 2021-06-30T00:00:00Z>",
    "count": 1
  }
}
使用 secure-upload-raw-oauth 创建令牌
在查询编辑器中输入以下 JSON:
{
    "path": "tokens",
    "method": "POST",
    "extractors": {
        "result": "$"
    },
    "pathParams": {},
    "queryParams": {},
    "bodyJson": {
        "type": "blobUploadToDataset",
        "blobUploadToDataset": {
            "channel": "<步骤2中定义的channelId>",
            "expiry":"<ISO-8601格式的过期日期:例如 2021-06-30T00:00:00Z>",
            "count": 1
        }
    }
}
创建基于 secure-upload 或 secure-upload-raw-oauth 数据源的查询后,选择 测试 提交查询。响应中包含一个令牌,您需要保存它,因为它只会显示一次。如有必要,可重新运行查询以获取另一个令牌。除非您想创建更多令牌,否则用户上传数据时不再需要此查询。可以安全地删除该查询。
4. 创建数据上传查询
要允许用户提交查询,您需要再创建一个查询:
- 选择 secure-upload-raw 作为数据源。
- 打开 测试 旁的下拉菜单,选择数据提交的时机(例如按钮点击或其他条件,与常规查询相同)。请求体定义了将被捕获并上传到之前创建的数据集中的字段。即使在首次提交后,您也可以编辑这些字段。修改之前输入的条目在新添加的字段下将不显示任何值。
每个字段都需要映射到一个值。这些值必须是字符串。您可以使用 jsonStringify 句柄助手(handlebar helper)或通过函数将值转换为字符串。
以下是一个请求体示例:
{
    "path": "blobs",
    "method": "POST",
    "extractors": {
        "result": "$"
    },
    "headers": {
        "authorization": "Bearer <步骤3中的token>"
    },
    "bodyJson": {
        "content": {
            // 此处可放置任意 JSON 格式的内容
            // 例如:
            "field1": "value1",
            "field2": {{jsonStringify w_input1.text}},
            "field3": [
                "item1",
                {{jsonStringify w_input2.text}},
                {{jsonStringify f_function1}}
            ]
        }
    }
}
当此查询运行时,数据将落入一个带有 _buffer_v2 后缀的数据集中,并与原始数据集并列存放。数据的结构将完全按照此步骤中的定义。例如,使用上述示例请求体的查询将在 "content" 列中产生以下数据条目(数据集中其他列将包含额外的元数据):
{
  content: {
    "field1": "value1",
    "field2": "<<jsonStringify w_input1.text 的值>>",
    "field3": ["item1", "<<jsonStringify w_input2.text 的值>>", "<<jsonStringify f_function1 的值>>"]
  }
}
停止数据上传
要阻止新条目上传到数据集中,您需要同时取消发布应用并删除最后一个查询中用作身份验证标头的令牌。
:::callout{theme="neutral"} 虽然取消发布会使应用对未认证用户隐藏,但未认证用户仍可能调用公共的安全上传数据源。删除令牌对于维护应用安全性至关重要。 :::
:::callout{theme="neutral"} 请务必将生成的令牌保存在安全位置,因为无法恢复。 :::
要删除令牌,请按照以下步骤操作:
- 在 Slate 中,创建一个以 secure-upload 或 secure-upload-raw-oauth 为数据源的查询。
- 打开 测试 旁的下拉菜单,勾选 手动 复选框以手动运行此查询。
- 配置并运行查询:
- 如果使用 secure-upload:
- 从 可用服务 中选择 令牌服务。
- 从 端点 中选择 Delete Token。
- 输入要删除的令牌字符串,例如
1abcdefgha2bcdef3ghabcdefg。
- 如果使用 secure-upload-raw-oauth:
- 使用要删除的令牌,例如
1abcdefgha2bcdef3ghabcdefg,在查询编辑器中输入以下 JSON:{ "path": "tokens/{token}", "method": "DELETE", "extractors": { "result": "$" }, "headers": {}, "pathParams": { "token": "1abcdefgha2bcdef3ghabcdefg" }, "queryParams": {} }
- 使用要删除的令牌,例如
- 要验证令牌是否已删除,请尝试提交数据。您应收到以下
InvalidToken响应:
{
  "errorCode":"PERMISSION_DENIED",
  "errorName":"TokenSecurity:InvalidToken",
  "errorInstanceId":"13abec1b-3c0f-467d-ad14-6ae702b52b33",
  "parameters":{}
 }