Commands(命令(Commands))
Commands are a pro-code language that enable a Palantir application to declare client-side operations executable by the application itself, other Palantir applications, workspace components, or AIP Chatbots. Developed from the principle that builders should be able to configure commands for use across Palantir applications which safely automate manual application tasks and actions, commands provide both users and LLMs with a shared language for client-side interactions.
By adding one or multiple commands to a Workshop module, you can configure and execute operations in other Palantir platform applications you embed as a widget. Additionally, you can use commands:
- As tools in AIP Chatbot Studio to create AIP Chatbots that read from and write to any application that interoperates with commands.
- Inline as part of a Notepad document.
You can trigger commands in Workshop through three existing widgets:
- Button Group, by configuring a button that triggers a command On click.
- Metric card, by configuring an interactive metric that triggers a command.
- App Pairing, by adding a command trigger based on a variable updating in your application.

Follow the instructions below to configure a command using Button Group, Metric Card, or App Pairing widgets.
Use the Button Group widget to configure a command
Navigate to your Workshop module and add the Button Group widget to launch the Widget setup panel on the right side of your screen. Follow the instructions below to configure buttons that trigger a command:
- Select Button 1 from the Button configuration section of the Widget setup panel.
- Enter a display name for your button in the Text input box.
- Optionally configure your button's Color, Left icon, and Right icon.
:::callout{theme="neutral"} If a command has an associated icon, then Workshop automatically populates the Color and icon options with that association by default. :::
- Write a description that will render as a tooltip when a user hovers over your button in Workshop.
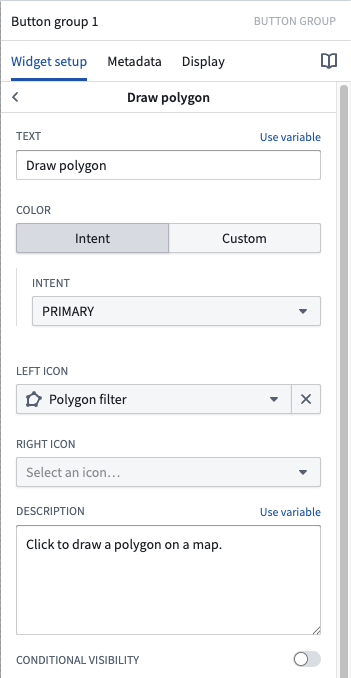
:::callout{theme="neutral"} You can toggle on Conditional visibility and configure a Boolean variable which, when satisfied, will disable the command or hide it from a user's view. :::
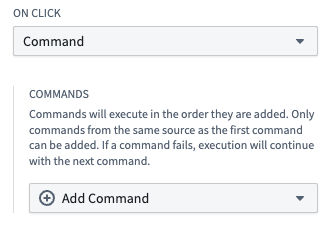
- Choose command within the On click dropdown menu.
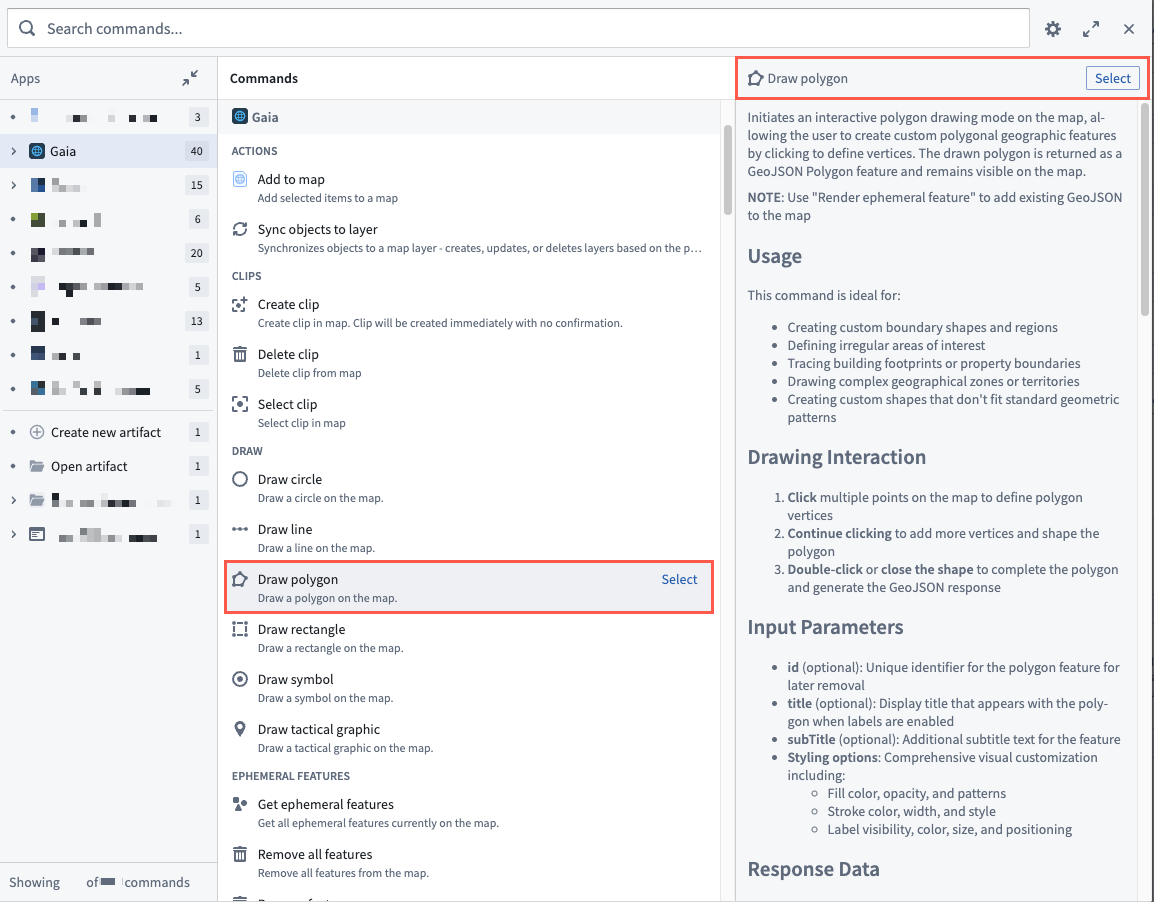
- Select Add command > Browse all commands... to launch the Select a command... pop-up window.

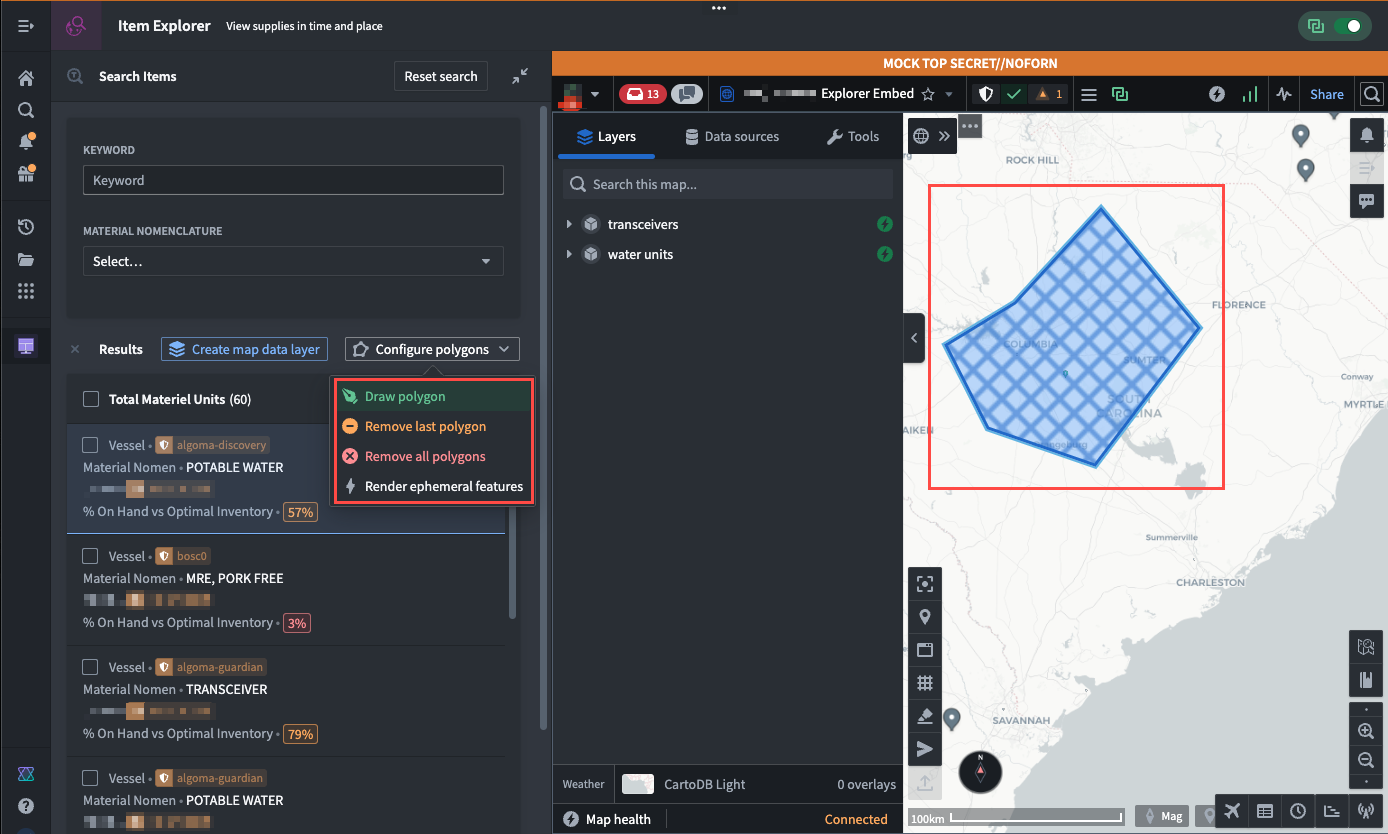
- Search for and Select a command to configure, such as Draw polygon. Once selected, you can view the command's usage documentation in the right panel.
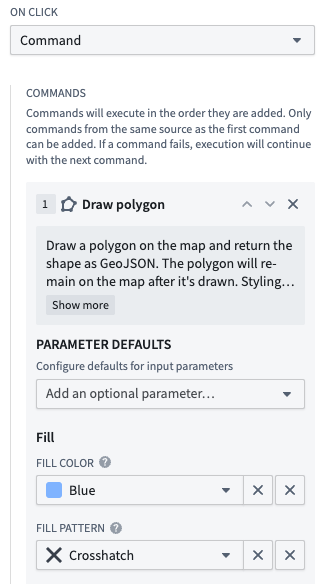
- Add optional shape styling parameters from the Parameters defaults section, such as Fill color and Fill pattern.
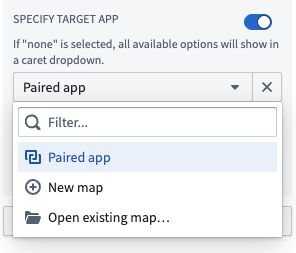
- Optionally, change the default state in the Specify target app section from Paired app; select New map if you want the command to execute on a new Gaia map or Open existing map... to add the shape to an existing map. You can use the default if you paired your Workshop with another application using the App Pairing widget.
:::callout{theme="neutral"} By default, a command targets the Paired app. If your Workshop contains more than one paired application, then it will prompt you to select an application when you execute the command. :::
- Optionally, map the command's output to a new or existing variable in your Workshop module.
Create a command chain
You can chain multiple commands together by selecting Add command beneath Output variables. Chained commands execute in the order you add them to your Workshop module, enabling you to pass the output from one command as the input to another.
:::callout{theme="neutral"} To create a valid command chain, all commands must derive from the same source application, such as Gaia or Graph. If a command fails, then chain execution continues with the next command in order. :::
Use the Prompt command input dialog section of the Widget setup panel to configure user prompts to review or enter command inputs based on the following conditions:
- Always prompt: Always show the commands form pop-up window, enabling users to verify and edit its input values whenever they execute the command.
- Never prompt, skip if missing required inputs: Never show the commands form pop-up window, even if user inputs are invalid. If inputs are invalid, then Workshop skips the command and moves to the next in the chain. This is the default behavior for command chains you configure using the App Pairing widget.
- Prompt missing any inputs: Show the commands form pop-up window when any inputs are missing, required or optional.
- Only prompt when missing required inputs: Show the commands form pop-up window when any required inputs are missing. This is the default behavior for command chains you configure using the Button Group widget.
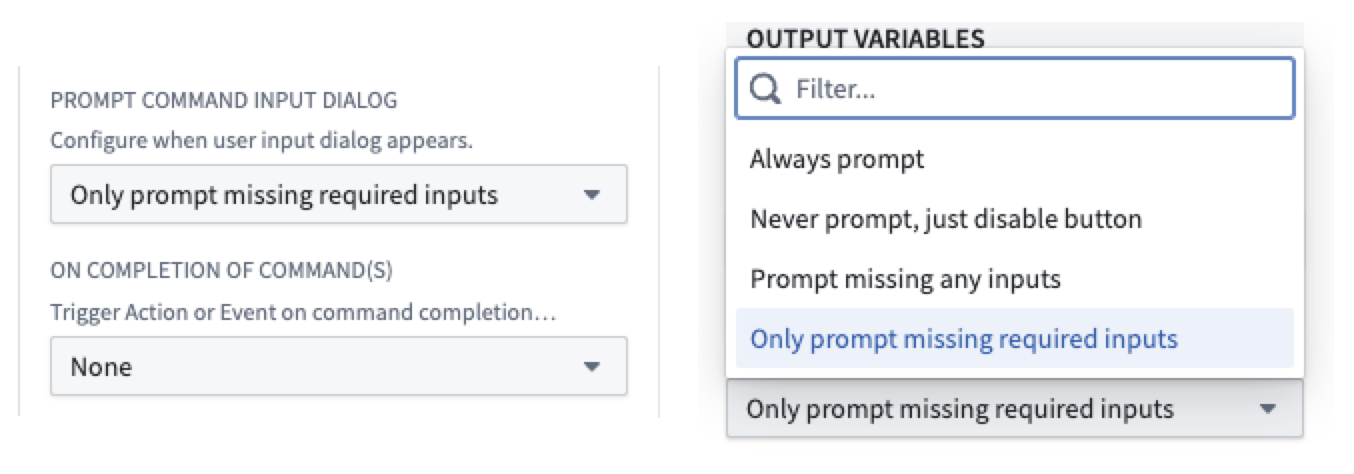
Whether you configure one command or create a command chain, you can use the On completion of command(s) section to trigger an action or event when a command completes. Commands trigger immediately after the triggering variable changes. To avoid sending stale data, configure a Listener for the derived variable directly. When you finish, select Save and publish from the top of your screen to save your changes to Workshop.
Use the Metric Card widget to configure a command
Navigate to your Workshop module and add the Metric Card widget to open the Widget setup panel on the right side of your screen. Follow the instructions below to configure an interactive metric card that triggers a command when selected:
- Select Metric 1 from the Metric configuration section of the Widget setup panel.
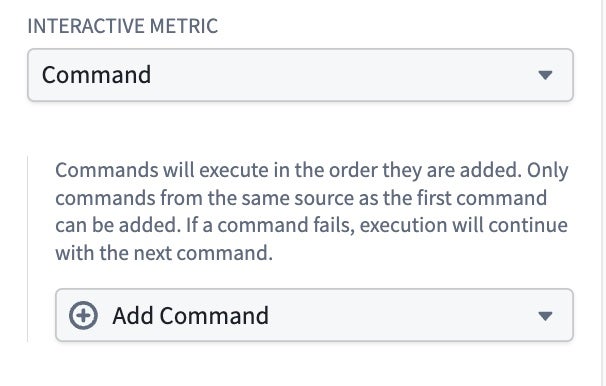
- Choose Command within the Interactive metric dropdown menu.
- Follow steps 6-10 from the Button Group widget instructions to select and configure your command.
The command triggers when a user selects the interactive metric. You can also create command chains and configure completion actions following the same process described in the Button Group widget section.
Use the App Pairing widget to configure a command
You can configure the App Pairing widget to trigger one or multiple commands when a variable in your Workshop module updates. When editing your Workshop module, select your existing App Pairing widget to launch the Widget setup panel on the right side of your screen. Follow the instructions below to configure the trigger which executes a command or instantiates a chain of commands:
- Select Add command trigger from the Trigger commands on variable update section of the Widget setup panel.
- Set a Listener to identify the variable that, when changed, triggers your command.
- Optionally add a Conditional trigger based on a new or existing Boolean variable. Workshop will skip command execution if the variable's value is
false.

With your command trigger identified, select Add command and follow the same instructions for the Budget Group widget to create one or multiple commands in the App Pairing widget.
中文翻译
命令(Commands)
命令是一种专业代码语言,使 Palantir 应用能够声明可由应用本身、其他 Palantir 应用、工作区组件或 AIP 聊天机器人(AIP Chatbots)执行的客户端操作。基于"构建者应能配置命令以在 Palantir 应用间安全自动化手动应用任务和操作"这一原则,命令为用户和 LLM 提供了客户端交互的共享语言。
通过向 Workshop 模块(Workshop module)添加一个或多个命令,您可以配置并执行在 作为小部件嵌入(embed as a widget)的其他 Palantir 平台应用中的操作。此外,您还可以使用命令:
- 作为 AIP 聊天机器人工作室(AIP Chatbot Studio)中的工具(tools),创建能够读写任何与命令互操作的应用的 AIP 聊天机器人(AIP Chatbots)。
- 内联嵌入到 Notepad 文档(Notepad document)中。
您可以通过以下三个现有小部件在 Workshop 中触发命令:
- 按钮组(Button Group),通过配置一个在 点击时(On click) 触发命令的按钮。
- 指标卡片(Metric Card),通过配置触发命令的交互式指标。
- 应用配对(App Pairing),通过基于应用中变量更新添加命令触发器。
按照以下说明,使用按钮组(Button Group)、指标卡片(Metric Card)或应用配对(App Pairing)小部件配置命令。
使用按钮组小部件配置命令
导航至您的 Workshop 模块并添加按钮组小部件,以打开屏幕右侧的小部件设置(Widget setup)面板。按照以下说明配置触发命令的按钮:
- 从小部件设置面板的按钮配置部分选择按钮 1。
- 在文本输入框中为按钮输入显示名称。
- 可选配置按钮的颜色、左侧图标和右侧图标。
:::callout{theme="neutral"} 如果命令有关联图标,Workshop 会默认自动填充颜色和图标选项。 :::
- 编写描述,当用户在 Workshop 中悬停按钮时将显示为工具提示。
:::callout{theme="neutral"} 您可以开启条件可见性(Conditional visibility)并配置一个布尔变量(Boolean variable),当条件满足时,将禁用命令或对用户隐藏。 :::
- 在点击时下拉菜单中选择命令。
- 选择添加命令 > 浏览所有命令... 以启动选择命令... 弹出窗口。
- 搜索并选择要配置的命令,例如绘制多边形(Draw polygon)。选择后,您可以在右侧面板查看命令的使用文档。
- 从参数默认值(Parameters defaults)部分添加可选的形状样式参数,例如填充颜色(Fill color)和填充图案(Fill pattern)。
- 可选地,在指定目标应用(Specify target app)部分更改默认状态(从配对应用(Paired app));如果希望命令在新 Gaia 地图上执行,选择新地图(New map);如果要向现有地图添加形状,选择打开现有地图...(Open existing map...)。如果您已使用应用配对小部件(App Pairing widget)将 Workshop 与其他应用配对,则可以使用默认设置。
:::callout{theme="neutral"} 默认情况下,命令以配对应用为目标。如果您的 Workshop 包含多个配对应用,执行命令时会提示您选择应用。 :::
- 可选地将命令的输出映射到 Workshop 模块中新的或现有的变量(variable)。
创建命令链(Command Chain)
您可以通过选择输出变量下方的添加命令将多个命令链接在一起。链式命令按您添加到 Workshop 模块的顺序执行,使您能够将一个命令的输出作为另一个命令的输入。
:::callout{theme="neutral"} 要创建有效的命令链,所有命令必须源自同一源应用(如 Gaia 或 Graph)。如果某个命令失败,链式执行将继续按顺序执行下一个命令。 :::
使用小部件设置面板的提示命令输入对话框(Prompt command input dialog)部分,根据以下条件配置用户提示以查看或输入命令:
- 始终提示(Always prompt): 始终显示命令表单弹出窗口,使用户在执行命令时能够验证和编辑其输入值。
- 从不提示,缺少必需输入时跳过(Never prompt, skip if missing required inputs): 从不显示命令表单弹出窗口,即使输入无效。如果输入无效,Workshop 将跳过该命令并移至链中的下一个。这是使用应用配对小部件配置命令链时的默认行为。
- 缺少任何输入时提示(Prompt missing any inputs): 当缺少任何输入(必需或可选)时显示命令表单弹出窗口。
- 仅缺少必需输入时提示(Only prompt when missing required inputs): 当缺少任何必需输入时显示命令表单弹出窗口。这是使用按钮组小部件配置命令链时的默认行为。
无论您配置单个命令还是创建命令链,都可以使用命令完成后(On completion of command(s))部分在命令完成时触发操作(action)或事件(event)。命令在触发变量更改后立即触发。为避免发送过时数据,请直接为派生变量配置监听器(Listener)。完成后,选择屏幕顶部的保存并发布(Save and publish)以保存对 Workshop 的更改。
使用指标卡片小部件配置命令
导航至您的 Workshop 模块并添加指标卡片小部件,以打开屏幕右侧的小部件设置面板。按照以下说明配置在选择时触发命令的交互式指标卡片:
- 从小部件设置面板的指标配置部分选择指标 1。
- 在交互式指标下拉菜单中选择命令。
- 按照按钮组小部件说明中的步骤 6-10 选择和配置您的命令。
当用户选择交互式指标时触发命令。您还可以按照按钮组小部件部分中描述的相同过程创建命令链并配置完成操作。
使用应用配对小部件配置命令
您可以配置应用配对小部件,在 Workshop 模块中的变量更新时触发一个或多个命令。编辑 Workshop 模块时,选择现有的应用配对小部件以打开屏幕右侧的小部件设置面板。按照以下说明配置执行命令或实例化命令链的触发器:
- 从小部件设置面板的变量更新时触发命令(Trigger commands on variable update)部分选择添加命令触发器。
- 设置监听器以识别在更改时触发命令的变量。
- 可选地基于新的或现有的布尔变量添加条件触发器(Conditional trigger)。如果变量值为
false,Workshop 将跳过命令执行。
确定命令触发器后,选择添加命令并按照与预算组小部件相同的说明在应用配对小部件中创建一个或多个命令。