Create drag-and-drop integration points(创建拖放集成点)
:::callout{theme="neutral"} The following tutorial only covers dragging and dropping between drag and drop zones that transfer or accept the same media type. For example, if your drag zone adds the Foundry object RID media type data to the DataTransfer, you can only drag it onto drop zones that accept the Foundry object RID media type. If you want to support dropping Foundry object RID data on drop zones that accept the Gotham object media type for example, you will need to enable type mapping for your objects and follow the enrichment tutorial after this tutorial. :::
Drag and drop allows users to dynamically move data within and between applications. The following tutorial will teach you how to drag data between your application and the Palantir platform, including both Gotham and Foundry. Adding just one drag-and-drop integration point to your application will allow users to seamlessly perform workflows across your application and the Palantir platform.
Implementing drag and drop zones consists of two main components:
:::callout{theme="neutral"} We recommend installing the latest version of our platform for increased drag-and-drop interoperability between your application and the Palantir platform. :::
Create a drag zone
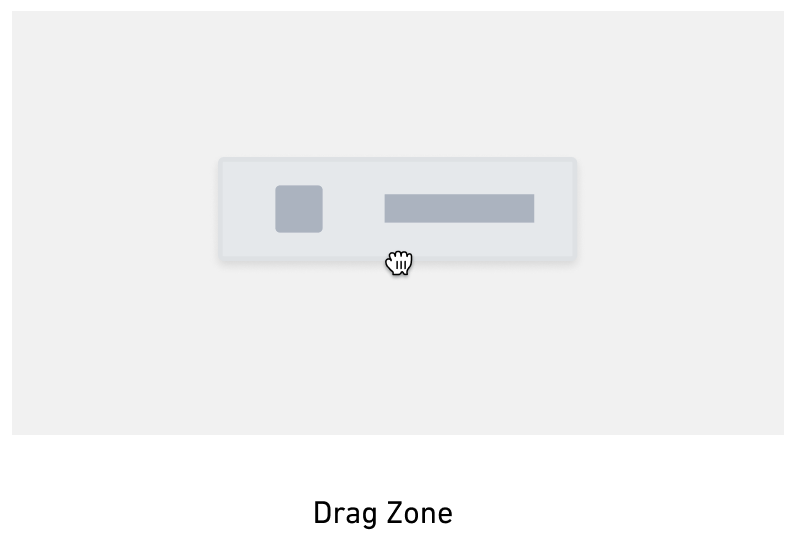
A drag zone is an interactive DOM element that allows users to "grab" data and transfer it elsewhere by "dropping" it on a drop zone. Drag zones write data to the DataTransfer object, allowing it to be transferred when the user drags a draggable element. The steps below detail how to make an element draggable, add data to the DataTransfer object, and handle drag events. Refer to drag zones and the DataTransfer object for details on these concepts.
Make the HTML element draggable
Make an HTML element a drag zone by setting the draggable attribute to true. To attach data to the drag event, add an ondragstart handler, which will set data on the DataTransfer.
<p id="p1" draggable="true" ondragstart="handleDragStart    (event)">
    Draggable Element
</p>
Add data to the DataTransfer
To add data to the drag event, call the dataTransfer.setData method for the attached DataTransfer. This method adds data to the DataTransfer in the given media type format. Refer to the MDN DataTransfer documentation ↗ for more information.
function handleDragStart(event) {
    event.dataTransfer.setData(
        <media type>,
        <data>
    );

   event.dataTransfer.effectAllowed = "move";
}
Replace <media type> above with the dragged data's media type, for example application/x-vnd.palantir.rid.phonograph2-objects.object for Foundry object RIDs. Replace <data> with a serialized version of the data by using JSON.stringify to convert the data to a string. Refer to the Palantir media types documentation to determine the correct media type for your use case.
:::callout{theme="warning"} Keep security concerns in mind when adding data to your DataTransfer. Any drop zone will be able to access this data. :::
Below is an example of a drag start handler for Foundry object RIDs:
function handleDragStart(event) {
    const foundryObjectRids = ["ri.phonograph2-objects.main.object.XXXXXXX", "ri.phonograph2-objects.main.object.YYYYYYY"]
    event.dataTransfer.setData(
        "application/x-vnd.palantir.rid.phonograph2-objects.object",
        JSON.stringify(foundryObjectRids)
    );

    event.dataTransfer.effectAllowed = "move";
}
This handler adds the Foundry object RID media type to the DataTransfer. Any drop zone that accepts Foundry object RID data will be able to receive the data in foundryObjectRids when the dragged DataTransfer is dropped.
:::callout{theme="success"} At this point, you should be able to drag from your drag zone onto drop zones that accept the media type in the DataTransfer. Refer to Palantir media types to find drop zones that accept your drag payload depending on the media type. :::
Create a drop zone
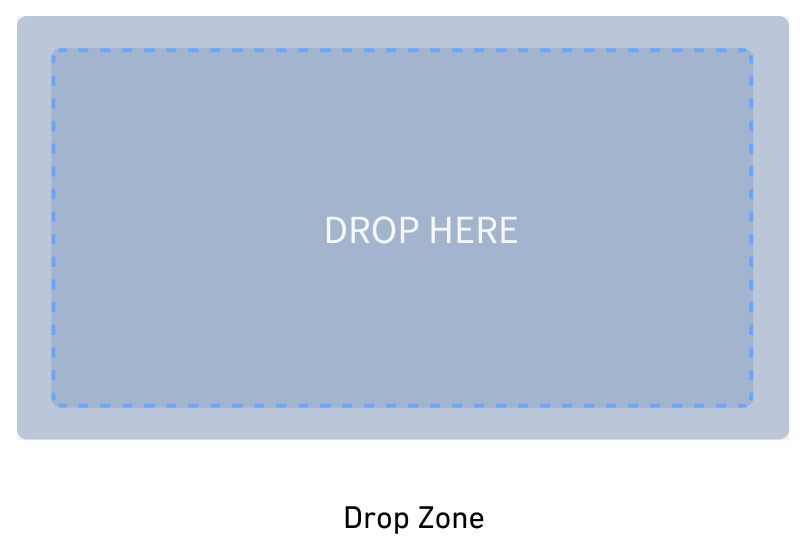
Drop zones are interactive elements on the DOM that receive "dropped" data from a drag zone. Drop zones work by listening to the ondrop event and accessing information from the event's DataTransfer when the event is fired. Refer to drop zones and the DataTransfer object to learn more.
You can turn an HTML element into a drop zone by adding an ondragover handler, which prevents the default event behavior. Add an ondrop handler to process the dropped DataTransfer.
The steps are as follows:
This tutorial covers creating a drop zone that accepts the Foundry object RID media type, but your implementation can replace this with a media type of your choice.
Enable items to be dropped on your drop zone
- Write functions to prevent the default
dragoveranddragenterevent handling. The default event behavior does not accept dropped data, so we cancel this behavior to allow the element to accept dropped data, which is necessary for drop zones.
// this is necessary to ensure the drop event will fire
// only prevent the default behavior if the drag payload is accepted

function handleDragOver(event){
    if(event.dataTransfer?.types.includes("application/x-vnd.palantir.rid.phonograph2-objects.object")){
        event.preventDefault();
    }
}

function handleDragEnter(event){
   if(event.dataTransfer?.types.includes("application/x-vnd.palantir.rid.phonograph2-objects.object")){
        event.preventDefault();
    }
}
- Add the
handleDragOverevent handler to your drop zone
<div
  id="my-cool-drop-zone"
  ondragover="handleDragOver(event)"
  ondragenter="handleDragEnter(event)"
>
  Drop Zone
</div>
Handle the drop
- Create a function to handle the drop by accessing data from the DataTransfer once it has been dropped, and prevent the default event behavior, which is to open link data. Call the DataTransfer
getDatafunction to return data from the DataTransfer in string format.getDatareturns an empty string if the DataTransfer has no data or if the DataTransfer has no data for that media type. Refer to the MDN getData documentation ↗ for more information on this method.
Below is an example of an ondrop callback for getting Foundry object RIDs from a DataTransfer. Replace the media type in the event.dataTransfer.getData call with a media type that reflects the type of data you would like to transfer.
function handleDrop(event) {
    // prevent default open-link behavior
    event.preventDefault();

    // get Foundry object RIDs data
    const data = event.dataTransfer.getData(
        "application/x-vnd.palantir.rid.phonograph2-objects.object"
    );

    try {
        if (data != null && data !== ""){
            // try to parse the returned data
            const dataParsed = JSON.parse(data);

            // print the data
            console.log(dataParsed);

            // do something with the data
            doCoolThingWithFoundryObjects(dataParsed);
        }
    } catch (error) {
        console.error("Unable to parse data", error)
    }
}
- Add the
handleDropfunction to your drop zone component as shown below:
<div
  id="my-cool-drop-zone"
  ondrop="handleDrop(event)"
  ondragover="handleDragOver(event)"
>
  Drop Zone
</div>
:::callout{theme="success"} At this point you should be able to drop data onto your drop zone. Refer to the Palantir media types documentation to find drag zones that can be dropped on your drop zone. :::
- (Recommended) We recommend using a runtime type guard/validator if possible when getting data off of the DataTransfer. While the media type to media type data connection exists as a contract, adding a type guard ensures that the received data follows that contract.
Refer to the following documentation for supported Palantir media types:
Style your drop zone
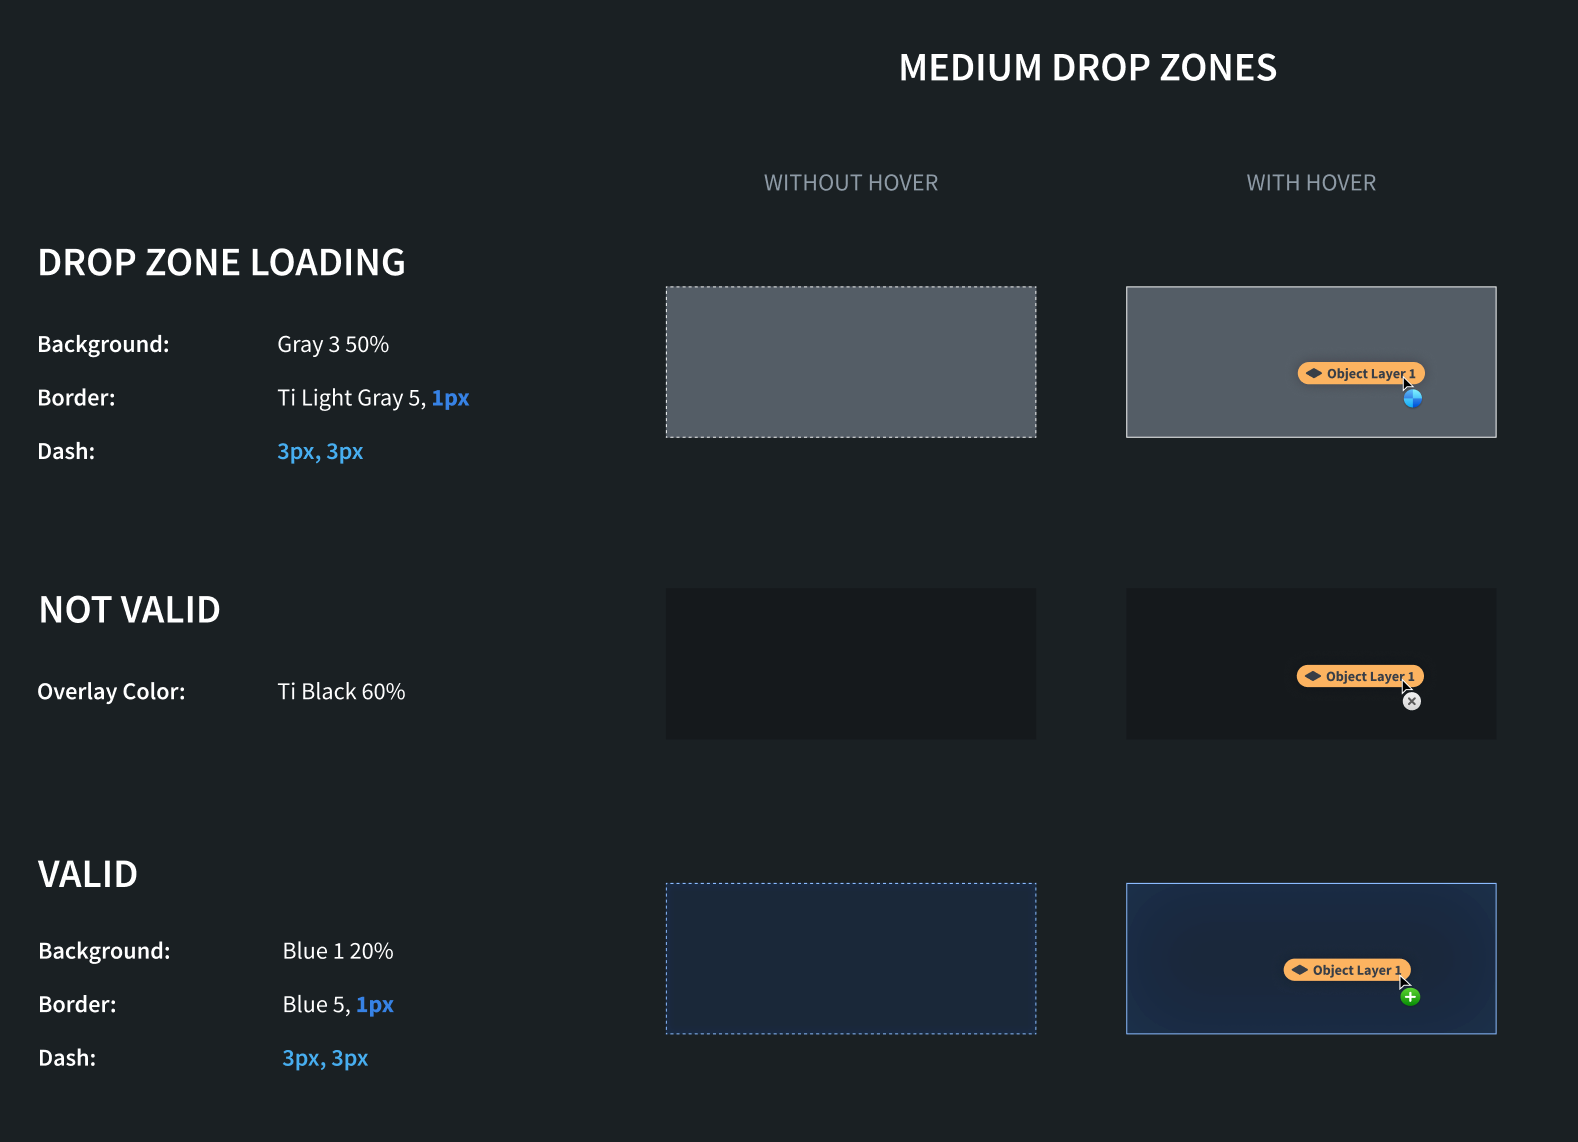
Applying styling to your drop zone is crucial so users can see whether drop zones accept their drag payload. Without this, usability of your drop zones will be suboptimal. We recommend applying different styling to your drop zone depending on whether the drag payload is valid for the drop zone, or if the drop zone needs to perform additional work to determine if it accepts the drag payload. Drop zone styling should be cleared after a drop, which is covered in the steps below.
:::callout{theme="neutral"} By the end of this tutorial your drop zone will "light up" if it accepts the drag payload, but this tutorial does not cover implementing the "invalid" and "loading" styles outlined in the design guidelines. We recommend implementing these additional styles for more cohesive and user-friendly drag-and-drop interactions. :::
After following steps one through four, your drop zone should "light up" when a user drags a payload onto your application with an accepted media type. After following steps five through seven, your drop zone will "light up" when a user starts dragging from inside of your application. After following step eight, the hover styling shown in the image below will be applied to your drop zone.
-
Copy CSS class implementations. In order to apply styling to your drop zone, create a CSS file for your styling and add the appropriate drop zone style classes from the design guidelines. Note that we have different style recommendations based on the size of your drop zone.
-
Add styling when your drop zone accepts the drag payload by writing a function to conditionally add styling if the drag payload contains an accepted media type. This function uses the classlist ↗ property to add an additional classname to our drop zone if it accepts the drag payload. See the design guidelines for the CSS drag hover styling.
function conditionallyApplyStylingToDropZone(event, className){
    // our drop zone accepts the drag payload if it has a Foundry object RIDs media type
    if(event.dataTransfer?.types.includes("application/x-vnd.palantir.rid.phonograph2-objects.object")){
        const dropzone = document.getElementById("my-cool-drop-zone");
        if(dropzone != null){
            // add the style's classname
            dropzone.classList.add(className);
        }
    }
}
- Write a function to remove the styling from the drop zone using the classlist property.
function removeStylingFromDropZone(){
    const dropzone = document.getElementById("my-cool-drop-zone");
    if(dropzone != null){
        dropzone.classList.remove(className);
    }
}
- Apply styling to your drop zone when data is dragged over it from an external drag zone by adding
dragenteranddragleaveevent handlers. Note that you will want to listen to these events on thecapturephase of the event in case child elements prevent the event from propagating farther upwards. See the MDN event listener capture documentation ↗ for more.
Here, we need to locally track how many times each event fires. These events will get fired by all child elements on the page.
let dragInsideApplicationCount = 0;

function handleDragEnter(event){
    if(dragInsideApplicationCount === 0){
        maybeApplyValidStylingToDropZone(event, "valid-small");
    }

    dragInsideApplicationCount += 1;
}

function handleDragLeave(event){
    if(dragInsideApplicationCount === 1){
        removeValidStylingFromDropZone("valid-small");
    }

    dragInsideApplicationCount -= 1;
}

document.addEventListener("drag-enter", handleDragEnter, {capture: true});
document.addEventListener("drag-leave", handleDragLeave, {capture: true});
:::callout{theme="neutral"}
The above code snippets will only make the drop zone light up if the drag was initiated from a drag zone on an external application or window. If you would like to make the drop zone light up for drag payloads coming from your application, you need to add a dragstart listener as detailed below.
:::
:::callout{theme="success"} At this point, you should be able to drag payloads from external applications or windows and have your drop zone light up if it accepts the drag payloads. Refer to the Palantir media type documentation to find drag zones that can be dragged onto your drop zone. Note that after the drag payload is dropped, the styling will still be applied to your drop zone; instructions for removing the styling on-drop are in a later step. :::
- Write a global
dragstartevent listener to apply a style to your drop zone when it accepts the drag payload. This event listener will fire when the user initiates the drag from a drag zone on the same page. This styling indicates that your drop zone accepts the drag payload. See the MDN drag start documentation ↗ for more.
document.addEventListener("dragstart", maybeApplyValidDropStylingToDropZone, {capture: true});
- Change the drop zone style when it is dragged over. In order to show users a visual change when the drag payload is on top of the drop zone, add
drag-enteranddrag-leavehandlers to your dropzone to apply and remove those styles. This differs from the globaldrag-enteranddrag-leaveevent listeners above in that these events will only be triggered bydragenteranddragleaveevents on the drop zone.
let dropHoveringOverDropZoneCount = 0;

function handleDragEnter(event){
    if (dropHoveringOverDropZoneCount === 0 && event.dataTransfer?.types.includes("application/x-vnd.palantir.rid.phonograph2-objects.object")){
        // allow the drop and apply styling if the drop zone accepts the drag payload
        event.preventDefault();
        conditionallyApplyStylingToDropZone(event, "valid-small-hover");
    }
    dropHoveringOverDropZoneCount += 1;
}

function handleDragLeave(event){
    if (dropHoveringOverDropZoneCount === 1){
        removeStylingFromDropZone("valid-small-hover");
    }
    dropHoveringOverDropZoneCount -= 1;
}
- Add the
handleDragEnterandhandleDragLeavedrag event handlers to your drop zone component:
<div
  id="my-cool-drop-zone"
  ondragover="handleDragOver(event)"
  ondrop="handleDrop(event)"
  ondragenter="handleDragEnter(event)"
  ondragleave="handleDragLeave(event)"
>
  Drop Zone
</div>
- Update the drop zone to perform style cleanup. After data is dropped, remove the drop style CSS classes from the drop zone. This is necessary so the drop zone does not stay in its "light up" stage. Also reset the drag counters so new drags events are handled from scratch.
function handleDrop(event) {
    // prevent default open-link behavior
    event.preventDefault();

    // perform some styling cleanup
    // remove CSS classes now that there is no active drag payload
    removeStylingFromDropZone("valid-small-hover");
    removeStylingFromDropZone("valid-small");

    // reset counters
    dropHoveringOverDropZoneCount = 0;
    dragInsideApplicationCount = 0;

    // get Foundry object RIDs data
    const data = event.dataTransfer.getData(
        "application/x-vnd.palantir.rid.phonograph2-objects.object"
    );

    try {
        if (data != null && data !== ""){
            // try to parse the returned data
            const dataParsed = JSON.parse(data);

            // print the data
            console.log("dropped data: ", dataParsed);

            // do something with the data
            doCoolThingWithFoundryObjects(dataParsed);
        }
    } catch (error) {
        console.error("Unable to parse data", error)
    }
}
:::callout{theme="success"} After this step, you should have a working drop zone. The drop zone should light up when it accepts the data on the drag payload, and the data should be printed in the console after the drag payload is dropped. Your drop zone should also remove styling after the drag payload has been dropped. :::
If your workflow involves transferring data between Gotham and Foundry, follow the data enrichment tutorial to implement this functionality.
中文翻译
创建拖放集成点
:::callout{theme="neutral"} 以下教程仅涵盖在传输或接受相同媒体类型的拖放区域之间进行拖放操作。例如,如果您的拖拽区域将 Foundry 对象 RID 媒体类型数据添加到 DataTransfer,则只能将其拖放到接受 Foundry 对象 RID 媒体类型的放置区域。如果您希望将 Foundry 对象 RID 数据拖放到接受 Gotham 对象 媒体类型的放置区域,则需要 为您的对象启用类型映射,并在完成本教程后继续学习 数据丰富教程。 :::
拖放功能允许用户在应用程序内部和之间动态移动数据。以下教程将教您如何在您的应用程序与 Palantir 平台(包括 Gotham 和 Foundry)之间拖放数据。只需在您的应用程序中添加一个拖放集成点,用户即可在您的应用程序和 Palantir 平台之间无缝执行工作流。
实现拖放区域包含两个主要组件:
:::callout{theme="neutral"} 我们建议安装最新版本的平台,以增强您的应用程序与 Palantir 平台之间的拖放互操作性。 :::
创建拖拽区域
拖拽区域是一个交互式 DOM 元素,允许用户"抓取"数据,并通过将其"放置"到放置区域来传输到其他地方。拖拽区域将数据写入 DataTransfer 对象,从而允许在用户拖拽 draggable 元素时进行数据传输。以下步骤详细说明了如何使元素可拖拽、向 DataTransfer 对象添加数据以及处理拖拽事件。有关这些概念的详细信息,请参阅 拖拽区域 和 DataTransfer 对象。
使 HTML 元素可拖拽
通过将 draggable 属性设置为 true,使 HTML 元素成为拖拽区域。要附加数据到拖拽事件,请添加一个 ondragstart 处理程序,该处理程序将在 DataTransfer 上设置数据。
<p id="p1" draggable="true" ondragstart="handleDragStart(event)">
    可拖拽元素
</p>
向 DataTransfer 添加数据
要向拖拽事件添加数据,请为附加的 DataTransfer 调用 dataTransfer.setData 方法。此方法以给定的媒体类型格式向 DataTransfer 添加数据。有关更多信息,请参阅 MDN DataTransfer 文档 ↗。
function handleDragStart(event) {
    event.dataTransfer.setData(
        <媒体类型>,
        <数据>
    );

   event.dataTransfer.effectAllowed = "move";
}
将上述 <媒体类型> 替换为拖拽数据的媒体类型,例如 Foundry 对象 RID 使用 application/x-vnd.palantir.rid.phonograph2-objects.object。将 <数据> 替换为数据的序列化版本,使用 JSON.stringify 将数据转换为字符串。请参阅 Palantir 媒体类型文档 来确定适合您用例的正确媒体类型。
:::callout{theme="warning"} 在向 DataTransfer 添加数据时,请牢记安全考虑。任何放置区域都将能够访问这些数据。 :::
以下是 Foundry 对象 RID 的拖拽开始处理程序示例:
function handleDragStart(event) {
    const foundryObjectRids = ["ri.phonograph2-objects.main.object.XXXXXXX", "ri.phonograph2-objects.main.object.YYYYYYY"]
    event.dataTransfer.setData(
        "application/x-vnd.palantir.rid.phonograph2-objects.object",
        JSON.stringify(foundryObjectRids)
    );

    event.dataTransfer.effectAllowed = "move";
}
此处理程序将 Foundry 对象 RID 媒体类型添加到 DataTransfer。当拖拽的 DataTransfer 被放置时,任何接受 Foundry 对象 RID 数据的放置区域都将能够接收 foundryObjectRids 中的数据。
:::callout{theme="success"} 至此,您应该能够从您的拖拽区域拖放到接受 DataTransfer 中媒体类型的放置区域。请参阅 Palantir 媒体类型 来查找接受您拖拽负载的放置区域,具体取决于媒体类型。 :::
创建放置区域
放置区域是 DOM 上的交互式元素,用于接收来自拖拽区域的"放置"数据。放置区域通过监听 ondrop 事件并在事件触发时访问事件 DataTransfer 中的信息来工作。请参阅 放置区域 和 DataTransfer 对象 以了解更多信息。
您可以通过添加 ondragover 处理程序(阻止默认事件行为)将 HTML 元素转换为放置区域。添加 ondrop 处理程序来处理放置的 DataTransfer。
步骤如下:
本教程涵盖创建接受 Foundry 对象 RID 媒体类型的放置区域,但您的实现可以将其替换为您选择的媒体类型。
允许项目放置到您的放置区域
- 编写函数来阻止默认的
dragover和dragenter事件处理。默认事件行为不接受放置的数据,因此我们取消此行为以允许元素接受放置的数据,这对于放置区域是必需的。
// 这对于确保放置事件能够触发是必要的
// 仅在拖拽负载被接受时阻止默认行为

function handleDragOver(event){
    if(event.dataTransfer?.types.includes("application/x-vnd.palantir.rid.phonograph2-objects.object")){
        event.preventDefault();
    }
}

function handleDragEnter(event){
   if(event.dataTransfer?.types.includes("application/x-vnd.palantir.rid.phonograph2-objects.object")){
        event.preventDefault();
    }
}
- 将
handleDragOver事件处理程序添加到您的放置区域
<div
  id="my-cool-drop-zone"
  ondragover="handleDragOver(event)"
  ondragenter="handleDragEnter(event)"
>
  放置区域
</div>
处理放置操作
- 创建一个函数来处理放置操作,方法是在数据被放置后从 DataTransfer 访问数据,并阻止默认事件行为(即打开链接数据)。调用 DataTransfer 的
getData函数以字符串格式返回 DataTransfer 中的数据。如果 DataTransfer 没有数据或没有该媒体类型的数据,getData将返回空字符串。有关此方法的更多信息,请参阅 MDN getData 文档 ↗。
以下是一个用于从 DataTransfer 获取 Foundry 对象 RID 的 ondrop 回调示例。将 event.dataTransfer.getData 调用中的媒体类型替换为反映您要传输的数据类型的媒体类型。
function handleDrop(event) {
    // 阻止默认的打开链接行为
    event.preventDefault();

    // 获取 Foundry 对象 RID 数据
    const data = event.dataTransfer.getData(
        "application/x-vnd.palantir.rid.phonograph2-objects.object"
    );

    try {
        if (data != null && data !== ""){
            // 尝试解析返回的数据
            const dataParsed = JSON.parse(data);

            // 打印数据
            console.log(dataParsed);

            // 对数据进行处理
            doCoolThingWithFoundryObjects(dataParsed);
        }
    } catch (error) {
        console.error("无法解析数据", error)
    }
}
- 将
handleDrop函数添加到您的放置区域组件,如下所示:
<div
  id="my-cool-drop-zone"
  ondrop="handleDrop(event)"
  ondragover="handleDragOver(event)"
>
  放置区域
</div>
:::callout{theme="success"} 至此,您应该能够将数据放置到您的放置区域上。请参阅 Palantir 媒体类型文档 来查找可以放置到您的放置区域的拖拽区域。 :::
- (推荐)我们建议在从 DataTransfer 获取数据时,尽可能使用运行时类型守卫/验证器。虽然媒体类型到媒体类型的数据连接作为契约存在,但添加类型守卫可以确保接收到的数据遵循该契约。
请参阅以下文档了解支持的 Palantir 媒体类型:
为放置区域设置样式
为放置区域应用样式至关重要,这样用户才能看到放置区域是否接受他们的拖拽负载。如果没有样式,放置区域的可用性将大打折扣。我们建议根据拖拽负载对放置区域是否有效,或者放置区域是否需要额外工作来确定是否接受拖拽负载,来为放置区域应用不同的样式。放置区域的样式应在放置后清除,这将在以下步骤中介绍。
:::callout{theme="neutral"} 在本教程结束时,如果您的放置区域接受拖拽负载,它将"亮起",但本教程不涵盖实现 设计指南 中概述的"无效"和"加载"样式。我们建议实现这些额外的样式,以获得更一致和用户友好的拖放交互。 :::
在完成步骤一到四之后,当用户将具有接受媒体类型的负载拖拽到您的应用程序上时,您的放置区域应该会"亮起"。在完成步骤五到七之后,当用户从您的应用程序内部开始拖拽时,您的放置区域将会"亮起"。在完成步骤八之后,下图中显示的悬停样式将应用于您的放置区域。
-
复制 CSS 类实现。为了将样式应用于您的放置区域,请为您的样式创建一个 CSS 文件,并从 设计指南 中添加适当的放置区域样式类。请注意,根据放置区域的大小,我们有不同的样式建议。
-
通过编写一个函数,在拖拽负载包含接受的媒体类型时有条件地添加样式,从而在放置区域接受拖拽负载时添加样式。此函数使用 classlist ↗ 属性,在放置区域接受拖拽负载时为其添加额外的类名。有关 CSS 拖拽悬停样式,请参阅 设计指南。
function conditionallyApplyStylingToDropZone(event, className){
    // 如果拖拽负载包含 Foundry 对象 RID 媒体类型,则我们的放置区域接受它
    if(event.dataTransfer?.types.includes("application/x-vnd.palantir.rid.phonograph2-objects.object")){
        const dropzone = document.getElementById("my-cool-drop-zone");
        if(dropzone != null){
            // 添加样式的类名
            dropzone.classList.add(className);
        }
    }
}
- 编写一个函数,使用 classlist 属性从放置区域移除样式。
function removeStylingFromDropZone(){
    const dropzone = document.getElementById("my-cool-drop-zone");
    if(dropzone != null){
        dropzone.classList.remove(className);
    }
}
- 通过添加
dragenter和dragleave事件处理程序,在数据从外部拖拽区域拖过放置区域时应用样式。请注意,您需要在事件的capture阶段监听这些事件,以防子元素阻止事件进一步向上传播。有关更多信息,请参阅 MDN 事件监听器捕获文档 ↗。
在这里,我们需要在本地跟踪每个事件触发的次数。这些事件将由页面上的所有子元素触发。
let dragInsideApplicationCount = 0;

function handleDragEnter(event){
    if(dragInsideApplicationCount === 0){
        maybeApplyValidStylingToDropZone(event, "valid-small");
    }

    dragInsideApplicationCount += 1;
}

function handleDragLeave(event){
    if(dragInsideApplicationCount === 1){
        removeValidStylingFromDropZone("valid-small");
    }

    dragInsideApplicationCount -= 1;
}

document.addEventListener("drag-enter", handleDragEnter, {capture: true});
document.addEventListener("drag-leave", handleDragLeave, {capture: true});
:::callout{theme="neutral"}
上述代码片段仅会在拖拽是从外部应用程序或窗口的拖拽区域发起时,使放置区域亮起。如果您希望放置区域对来自您应用程序的拖拽负载也亮起,则需要按照下面的详细说明添加一个 dragstart 监听器。
:::
:::callout{theme="success"} 至此,您应该能够从外部应用程序或窗口拖拽负载,并且如果您的放置区域接受这些拖拽负载,它将会亮起。请参阅 Palantir 媒体类型文档 来查找可以拖拽到您的放置区域的拖拽区域。请注意,在拖拽负载被放置后,样式仍将应用于您的放置区域;有关在放置时移除样式的说明,请参见后续步骤。 :::
- 编写一个全局的
dragstart事件监听器,以便在您的放置区域接受拖拽负载时应用样式。当用户从同一页面上的拖拽区域发起拖拽时,此事件监听器将触发。此样式表示您的放置区域接受拖拽负载。有关更多信息,请参阅 MDN 拖拽开始文档 ↗。
document.addEventListener("dragstart", maybeApplyValidDropStylingToDropZone, {capture: true});
- 在拖拽经过放置区域时更改放置区域样式。为了在拖拽负载位于放置区域上方时向用户显示视觉变化,请为您的放置区域添加
drag-enter和drag-leave处理程序来应用和移除这些样式。这与上面的全局drag-enter和drag-leave事件监听器不同,因为这些事件仅由放置区域上的dragenter和dragleave事件触发。
let dropHoveringOverDropZoneCount = 0;

function handleDragEnter(event){
    if (dropHoveringOverDropZoneCount === 0 && event.dataTransfer?.types.includes("application/x-vnd.palantir.rid.phonograph2-objects.object")){
        // 如果放置区域接受拖拽负载,则允许放置并应用样式
        event.preventDefault();
        conditionallyApplyStylingToDropZone(event, "valid-small-hover");
    }
    dropHoveringOverDropZoneCount += 1;
}

function handleDragLeave(event){
    if (dropHoveringOverDropZoneCount === 1){
        removeStylingFromDropZone("valid-small-hover");
    }
    dropHoveringOverDropZoneCount -= 1;
}
- 将
handleDragEnter和handleDragLeave拖拽事件处理程序添加到您的放置区域组件:
<div
  id="my-cool-drop-zone"
  ondragover="handleDragOver(event)"
  ondrop="handleDrop(event)"
  ondragenter="handleDragEnter(event)"
  ondragleave="handleDragLeave(event)"
>
  放置区域
</div>
- 更新放置区域以执行样式清理。数据被放置后,从放置区域移除放置样式 CSS 类。这是必要的,这样放置区域就不会停留在"亮起"状态。同时重置拖拽计数器,以便从头开始处理新的拖拽事件。
function handleDrop(event) {
    // 阻止默认的打开链接行为
    event.preventDefault();

    // 执行一些样式清理
    // 由于没有活动的拖拽负载,移除 CSS 类
    removeStylingFromDropZone("valid-small-hover");
    removeStylingFromDropZone("valid-small");

    // 重置计数器
    dropHoveringOverDropZoneCount = 0;
    dragInsideApplicationCount = 0;

    // 获取 Foundry 对象 RID 数据
    const data = event.dataTransfer.getData(
        "application/x-vnd.palantir.rid.phonograph2-objects.object"
    );

    try {
        if (data != null && data !== ""){
            // 尝试解析返回的数据
            const dataParsed = JSON.parse(data);

            // 打印数据
            console.log("放置的数据:", dataParsed);

            // 对数据进行处理
            doCoolThingWithFoundryObjects(dataParsed);
        }
    } catch (error) {
        console.error("无法解析数据", error)
    }
}
:::callout{theme="success"} 完成此步骤后,您应该拥有一个可用的放置区域。当放置区域接受拖拽负载上的数据时,它应该亮起,并且在拖拽负载被放置后,数据应打印在控制台中。在拖拽负载被放置后,您的放置区域还应移除样式。 :::
如果您的工作流涉及 在 Gotham 和 Foundry 之间传输数据,请按照 数据丰富教程 来实现此功能。