Getting started with function-backed time series(函数支持的时间序列入门指南)
This guide will help you get started with creating a function-backed time series that can be used in Quiver analyses to enable real-time forecasting workflows.
Prerequisites
To set up function-backed time series, you need the following resources:
- A Foundry function that returns a numeric time series using the time series SDK.
- A tagged version of that function to reference in Quiver.
Set up a function-backed time series in Quiver
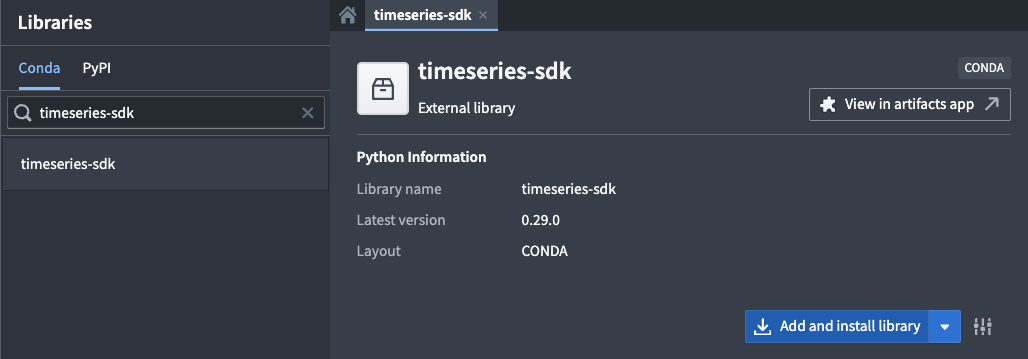
- Install the time series SDK: In Code Repositories, add the
timeseries-sdklibrary to your code repository using the Libraries tab.
-
Write a Python function: Create a function that returns a serialized pandas DataFrame with the following columns:
-
timestamp: A pandas timestamp. value: A numeric value, for example int32 or float.
The time series SDK provides a library for serializing a pandas DataFrame as shown in the example below.
from functions.api import function
from timeseries_sdk.types import TimeSeries
from ontology_sdk.ontology.objects import Machine
import pandas as pd

@function
def performance_prophet_forecast(
    machine: Machine,
    periods: int = 96,      # number of future steps
    freq: str = "15min",    # sampling frequency
) -> list[bytes]:
    """
    Forecast a machine's performance_score using Prophet.
    """
    from prophet import Prophet

    # Retrieve performance score data (columns: timestamp, value)
    df = machine.performance_score.to_pandas(all_time=True)

    if df.empty:
        return TimeSeries.serialize(pd.DataFrame(columns=["timestamp", "value"]))

    # Prepare the data for Prophet
    df = df.rename(columns={"timestamp": "ds", "value": "y"}).sort_values("ds")
    model = Prophet().fit(df)

    # Create future data frame for forecast
    future = model.make_future_dataframe(periods=periods, freq=freq, include_history=True)
    forecast = model.predict(future)

    # Format the forecast output
    out = forecast[["ds", "yhat"]].rename(columns={"ds": "timestamp", "yhat": "value"})
    return TimeSeries.serialize(out)
-
Publish the function: Publish your function and tag a version.
-
Use the function in Quiver:
- Add a Code function time series card.

- Select your function, choose the correct version, and configure its inputs.
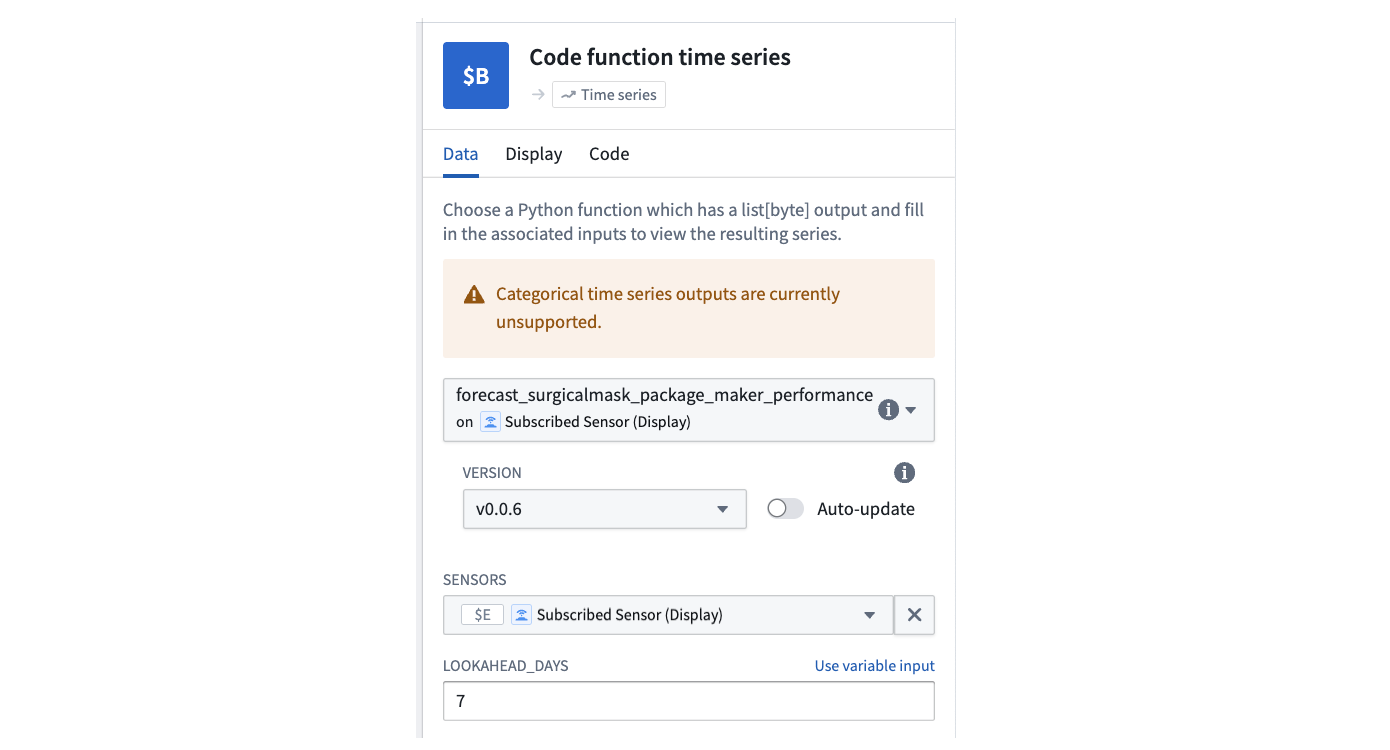
- Optionally, add another instance of the card to compare multiple scenarios side-by-side.
中文翻译
函数支持的时间序列入门指南
本指南将帮助您创建函数支持的时间序列(function-backed time series),该序列可用于 Quiver 分析,实现实时预测工作流。
前提条件
要设置函数支持的时间序列,您需要以下资源:
- 一个使用时间序列 SDK(time series SDK)返回数值型时间序列的 Foundry 函数(function)。
- 该函数的已标记版本(tagged version),用于在 Quiver 中引用。
在 Quiver 中设置函数支持的时间序列
- 安装时间序列 SDK: 在代码仓库(Code Repositories)中,使用 Libraries 选项卡将
timeseries-sdk库添加到您的代码仓库。
-
编写 Python 函数: 创建一个函数,返回包含以下列的序列化 pandas DataFrame:
-
timestamp: 一个 pandas 时间戳。 value: 一个数值,例如 int32 或 float。
时间序列 SDK 提供了一个用于序列化 pandas DataFrame 的库,如下例所示。
from functions.api import function
from timeseries_sdk.types import TimeSeries
from ontology_sdk.ontology.objects import Machine
import pandas as pd

@function
def performance_prophet_forecast(
    machine: Machine,
    periods: int = 96,      # 未来步数
    freq: str = "15min",    # 采样频率
) -> list[bytes]:
    """
    使用 Prophet 预测机器的 performance_score。
    """
    from prophet import Prophet

    # 获取性能评分数据(列:timestamp, value)
    df = machine.performance_score.to_pandas(all_time=True)

    if df.empty:
        return TimeSeries.serialize(pd.DataFrame(columns=["timestamp", "value"]))

    # 为 Prophet 准备数据
    df = df.rename(columns={"timestamp": "ds", "value": "y"}).sort_values("ds")
    model = Prophet().fit(df)

    # 创建用于预测的未来数据框
    future = model.make_future_dataframe(periods=periods, freq=freq, include_history=True)
    forecast = model.predict(future)

    # 格式化预测输出
    out = forecast[["ds", "yhat"]].rename(columns={"ds": "timestamp", "yhat": "value"})
    return TimeSeries.serialize(out)
-
发布函数: 发布您的函数并标记一个版本。
-
在 Quiver 中使用函数:
- 添加一个 代码函数时间序列卡片(Code function time series card)。
- 选择您的函数,选择正确的版本,并配置其输入。
- (可选)添加另一个卡片实例,以并排比较多个场景。