Add a DICOM media set(添加 DICOM 媒体集)
This guide will walk through how to import DICOM (.dcm) files to Foundry as a media set.

Part 1: Import DICOM files
First, you will need to create a new media set and add the DICOM files to the media set.
-
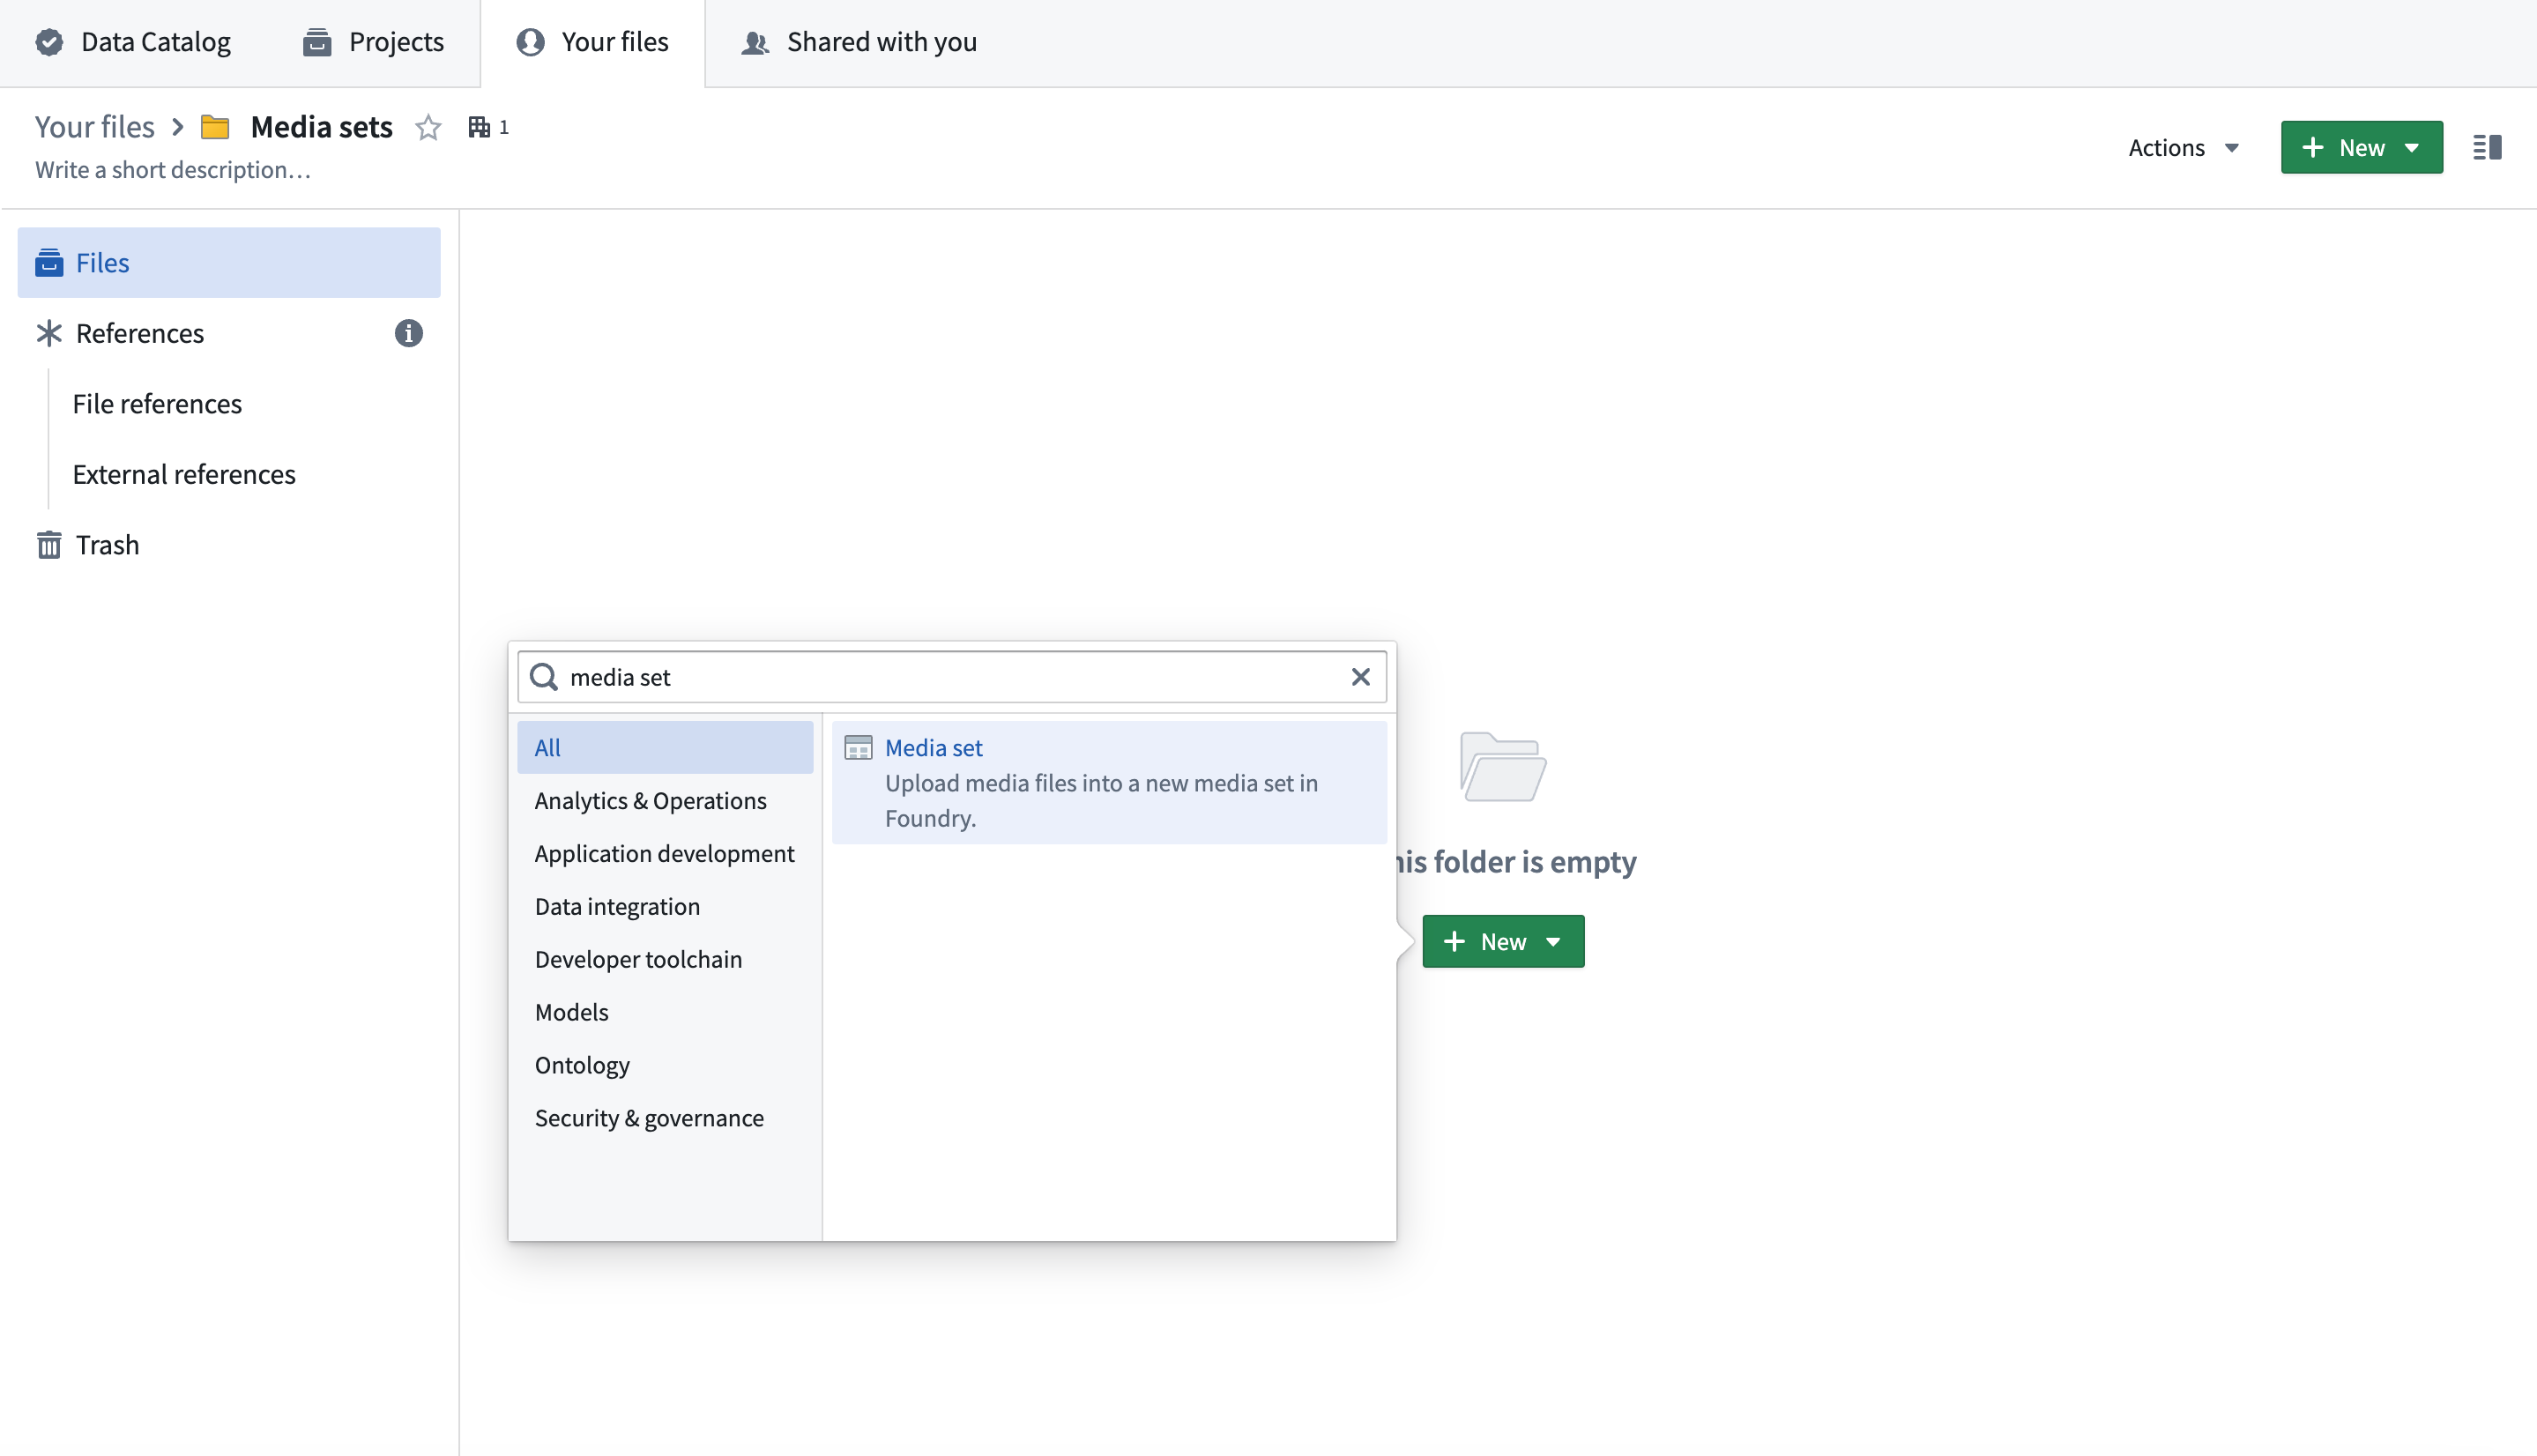
Navigate to the folder in which the media set will be created. Select New > Media set.
-
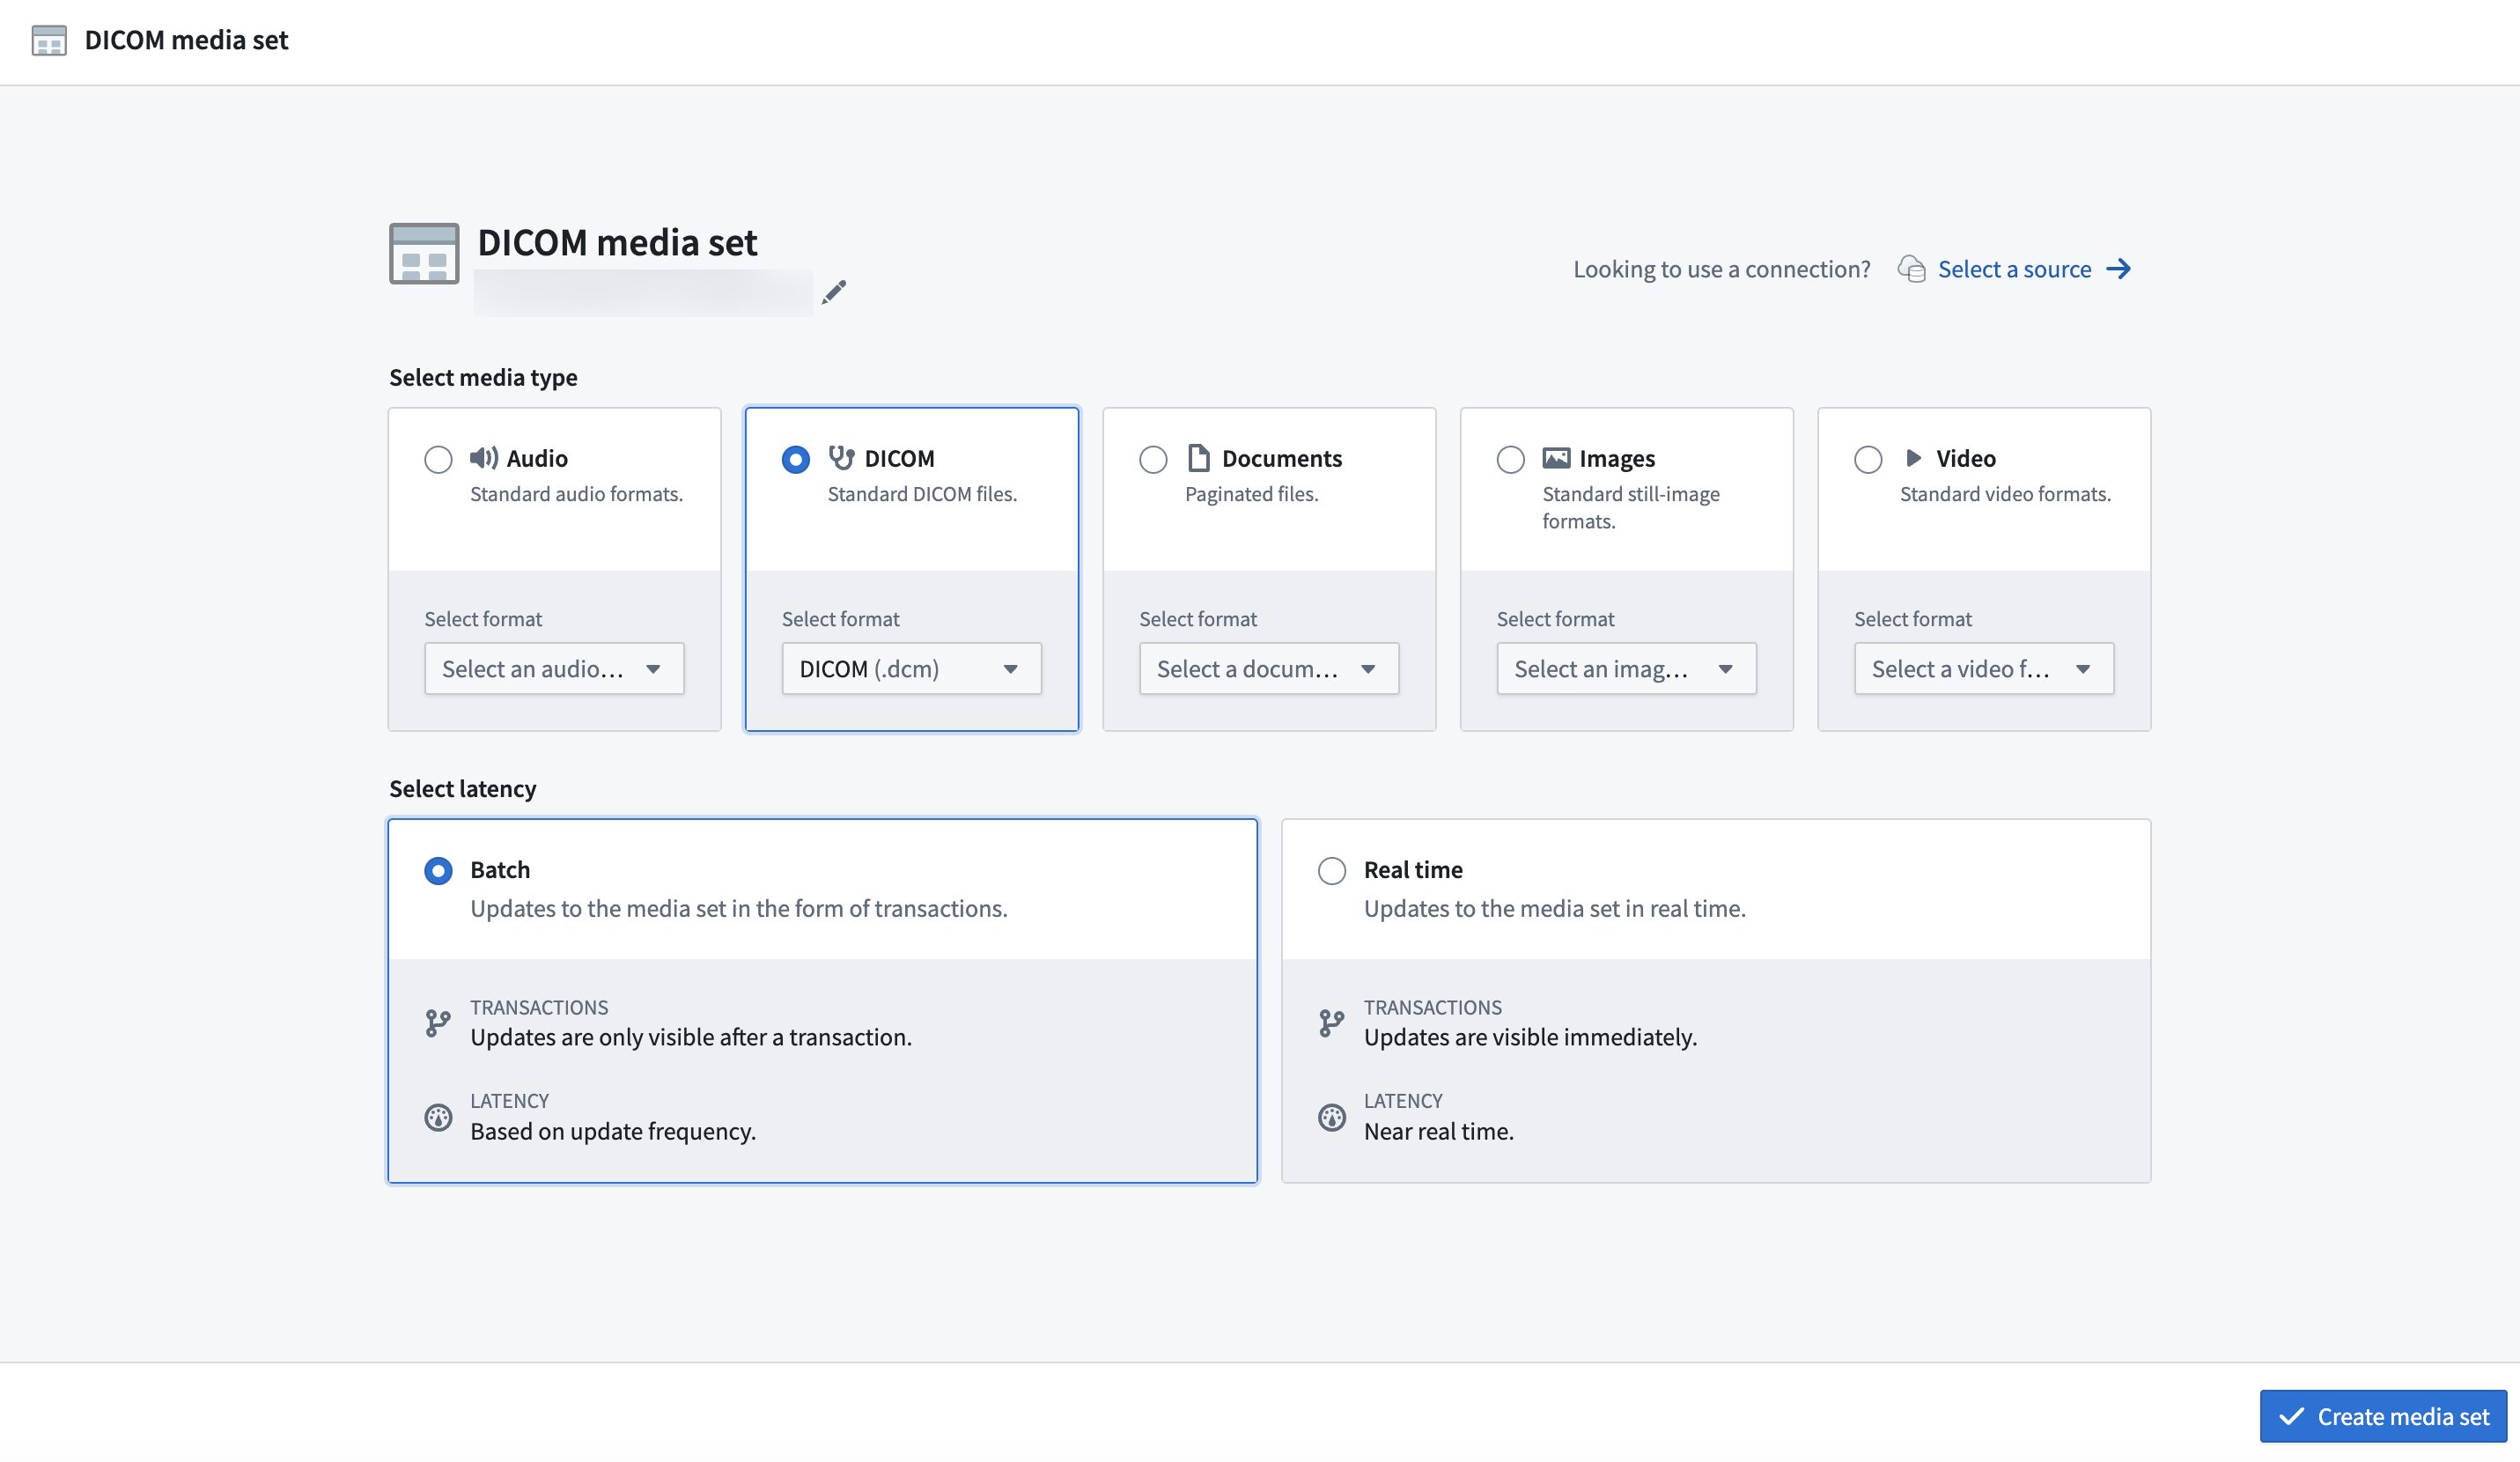
Enter a name for your media set. Select DICOM as the media type and select Batch as the latency. Select Create media set to create the DICOM media set.
-
Next, add one or more
.dcmfiles to the media set.
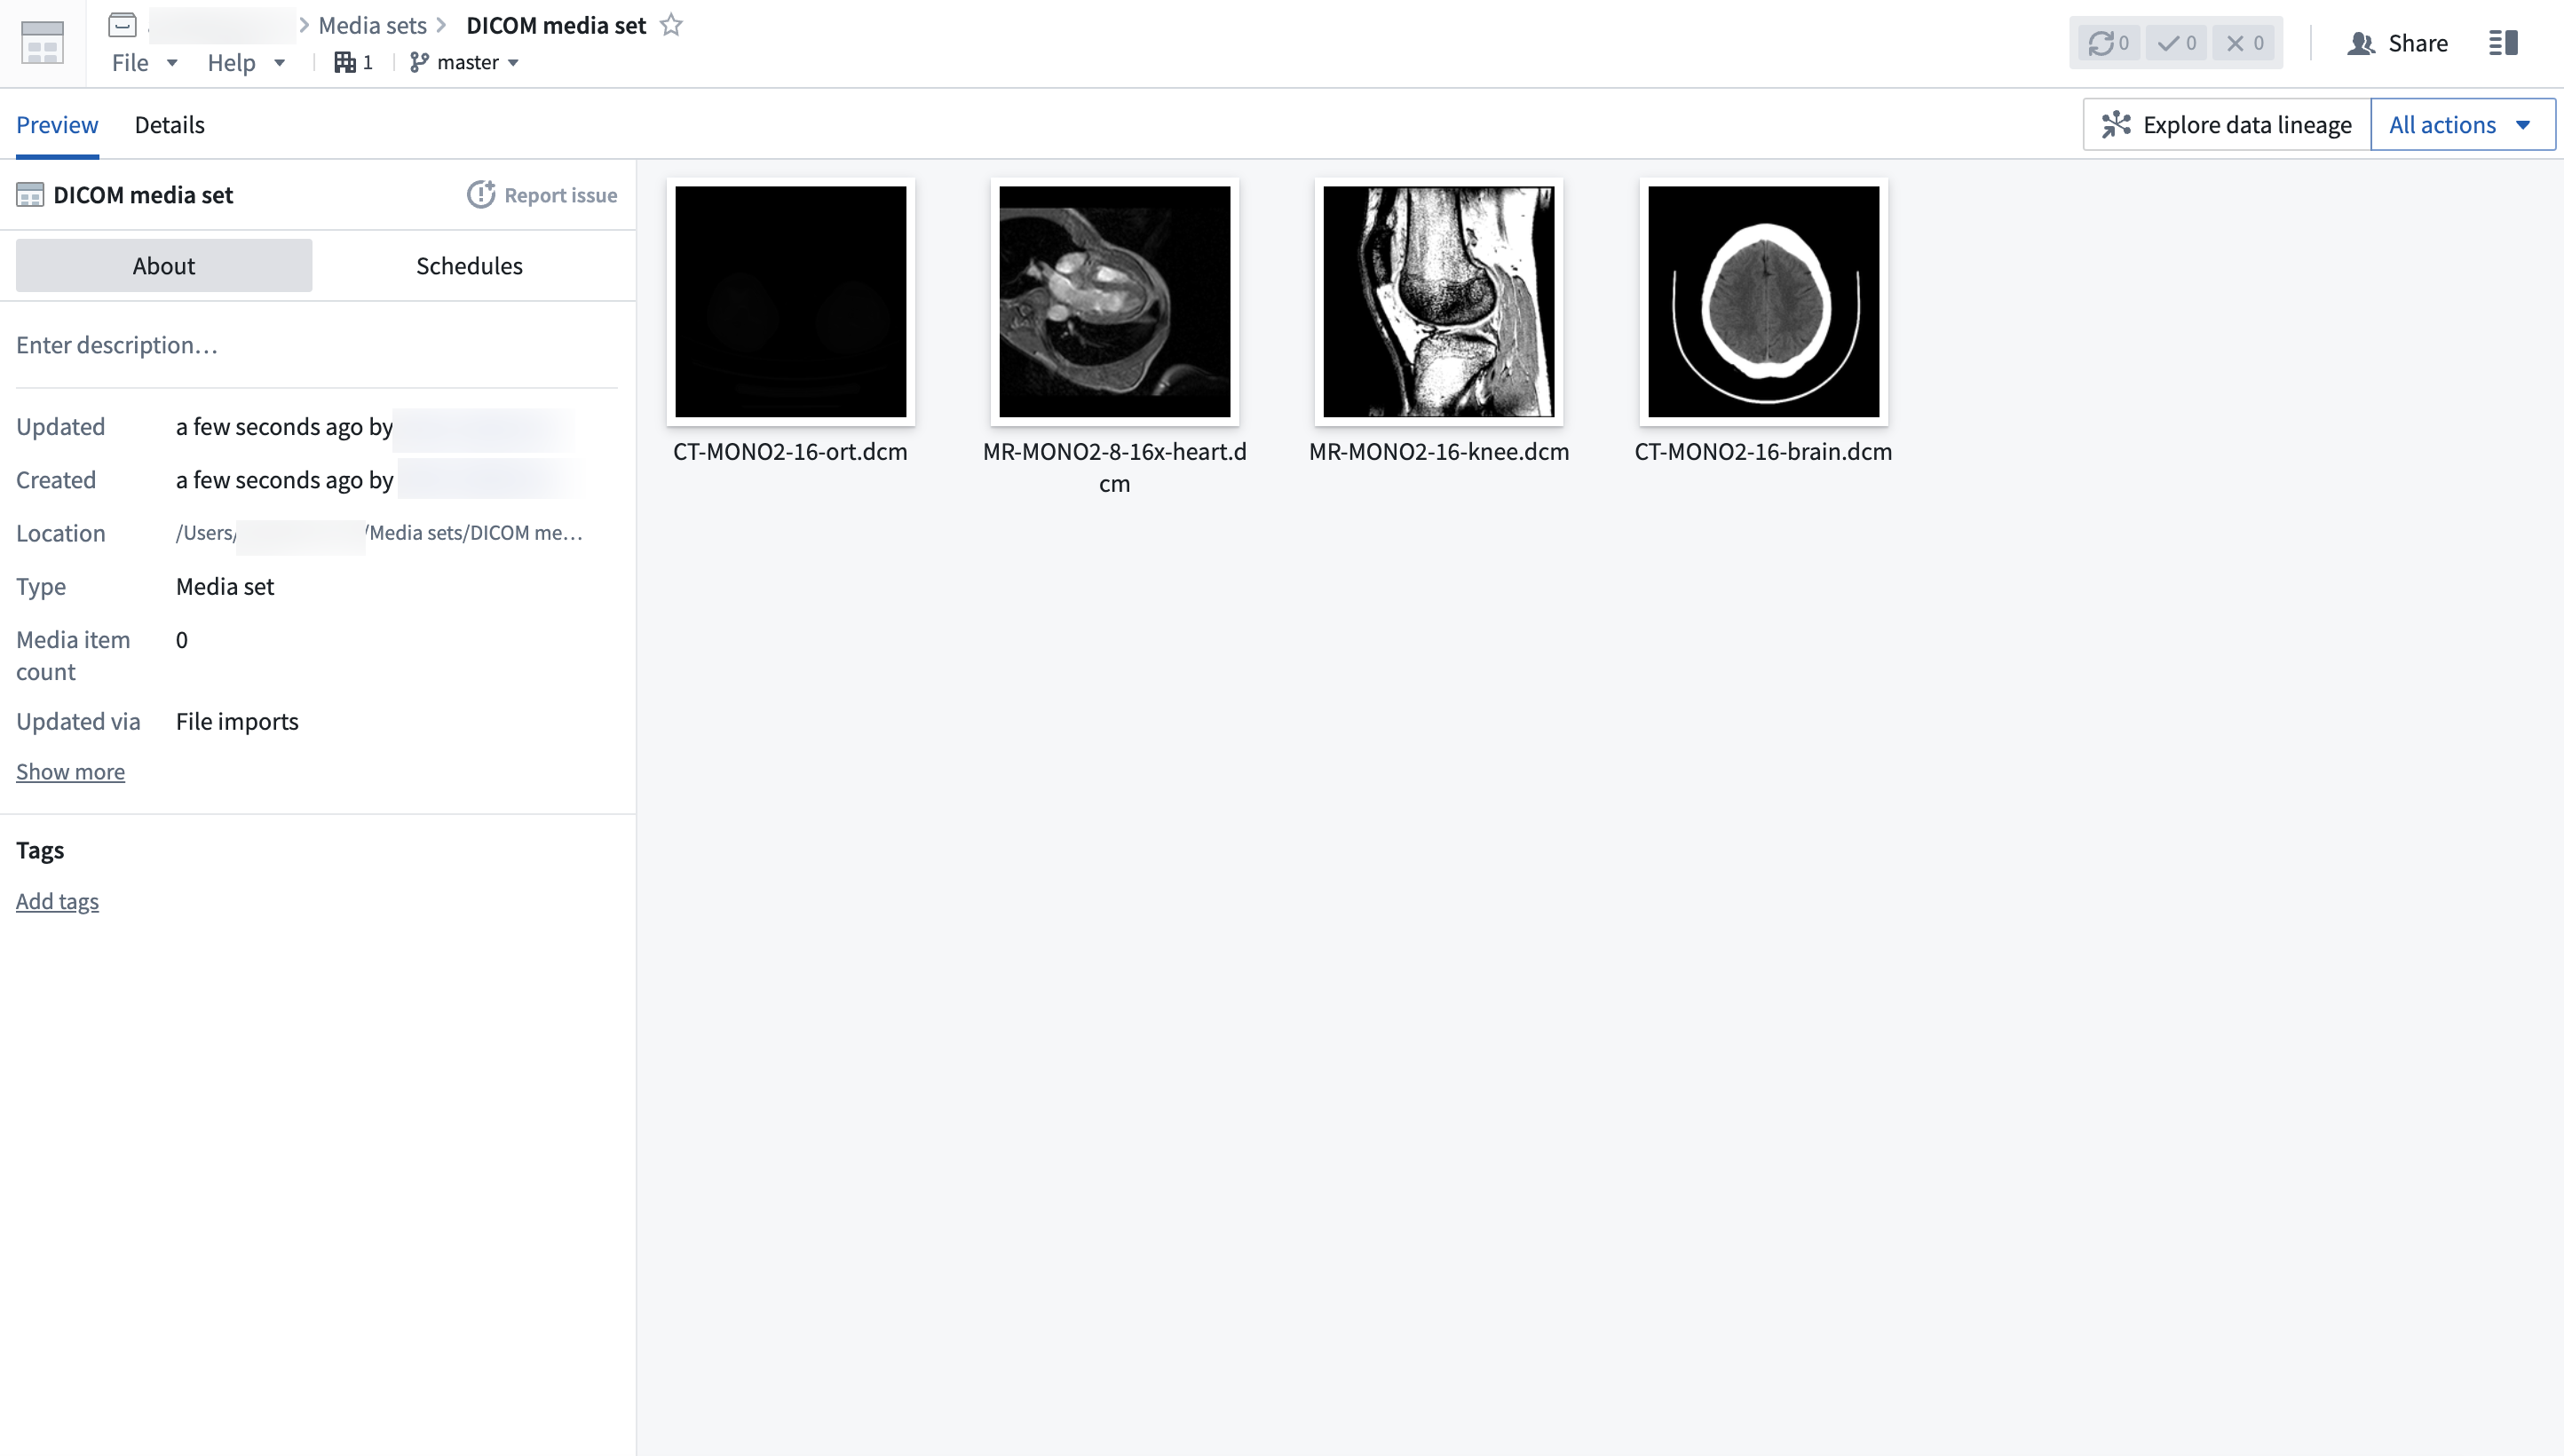
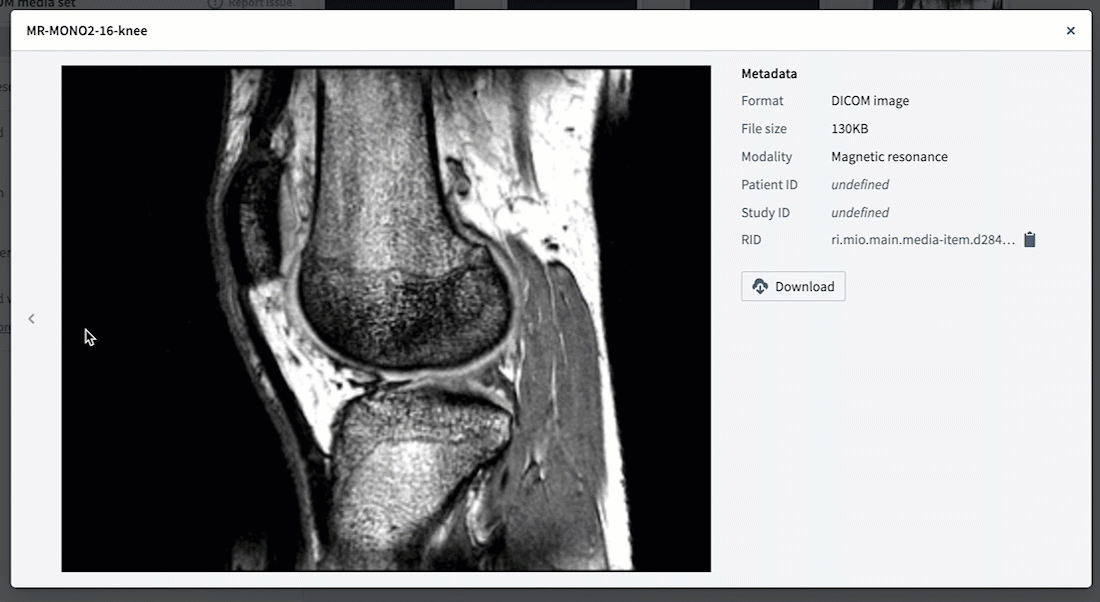
The DICOM media set type includes metadata such as Patient ID and Study ID.
You can select a DICOM file and drag left and right and up and down to change the contrast and exposure.
Part 2: Create object type
Next, you will need to create a new pipeline to transform the media set to an object type that you can use in Foundry.
Learn more about creating pipelines for media sets.
-
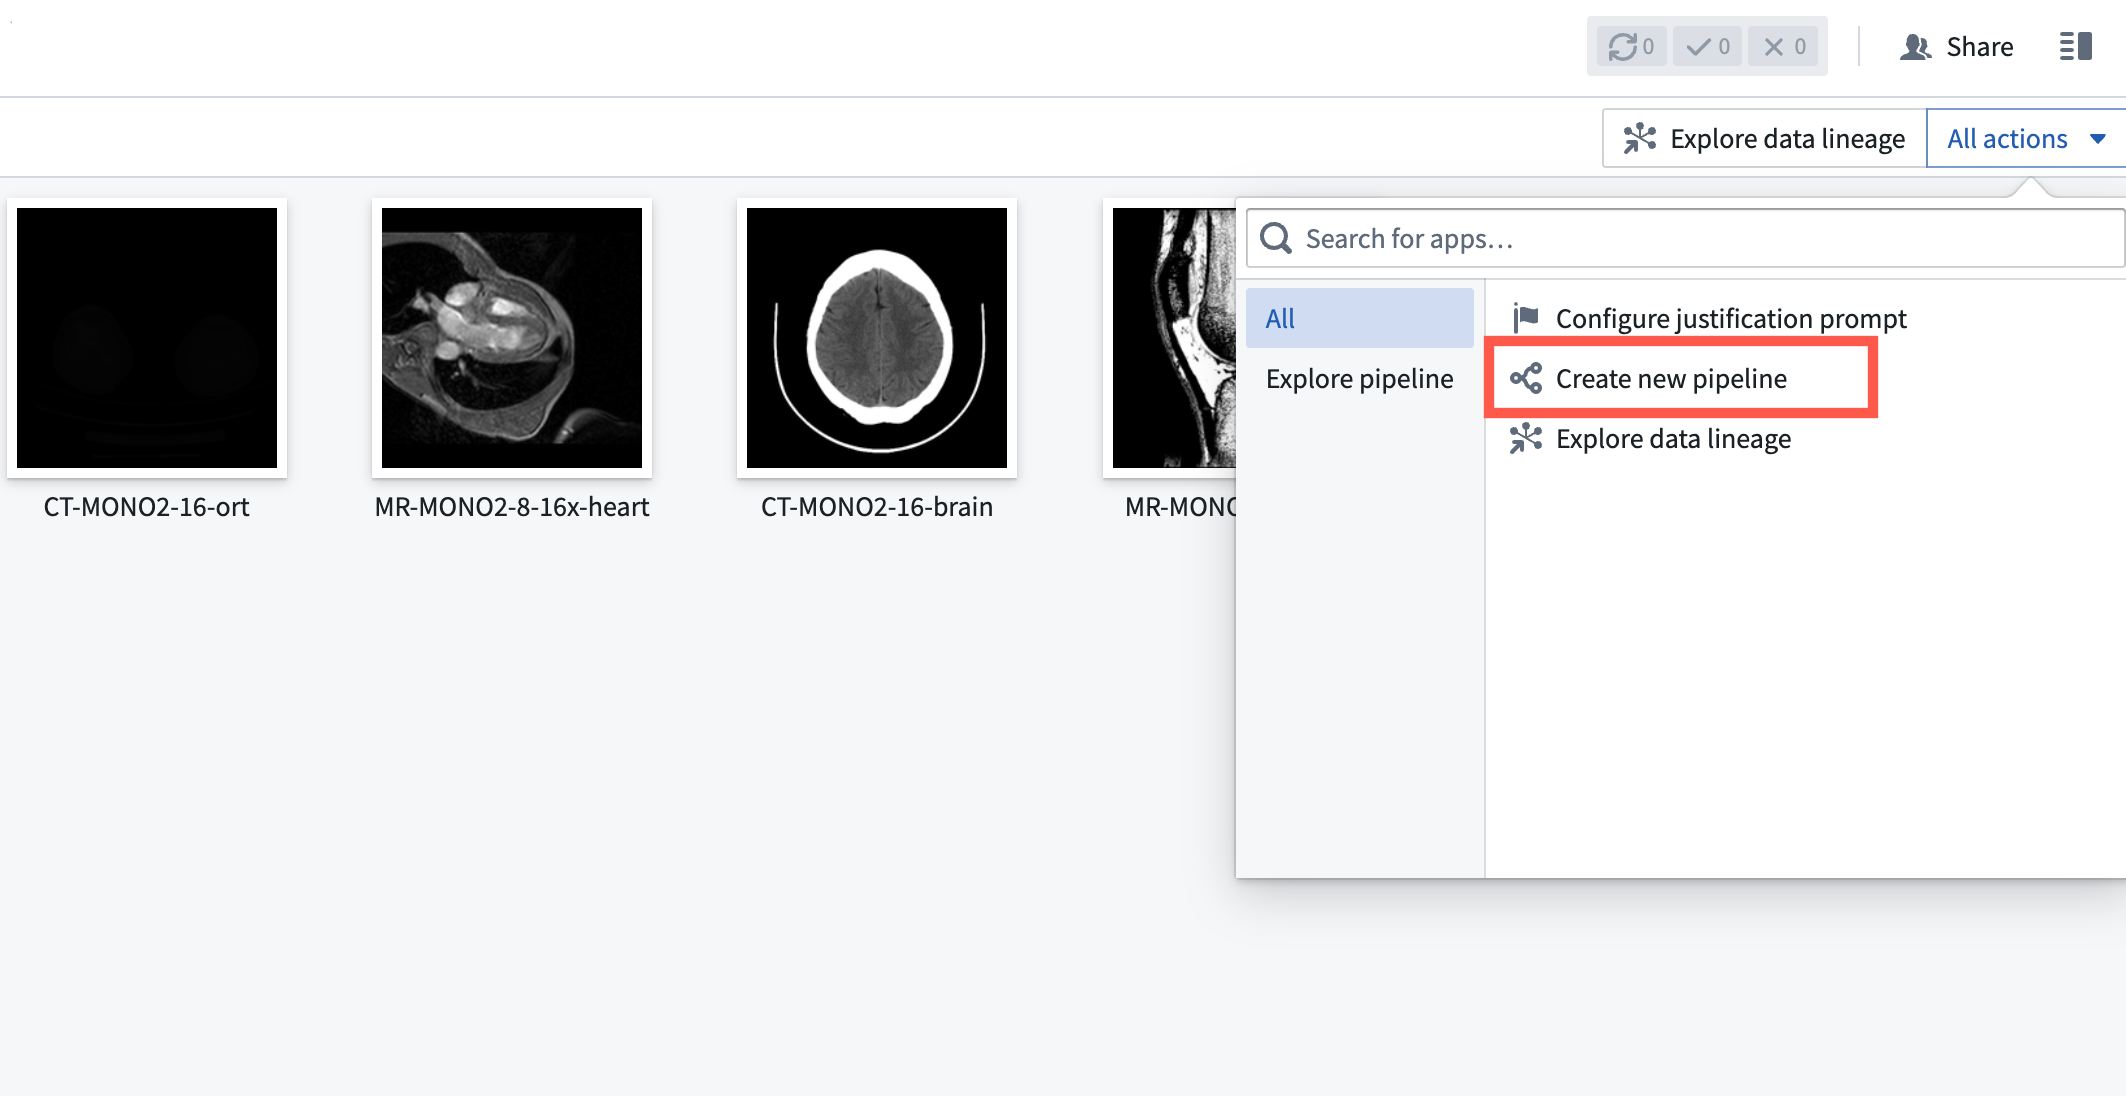
Create a pipeline by selecting Create new pipeline from the All actions dropdown.
-
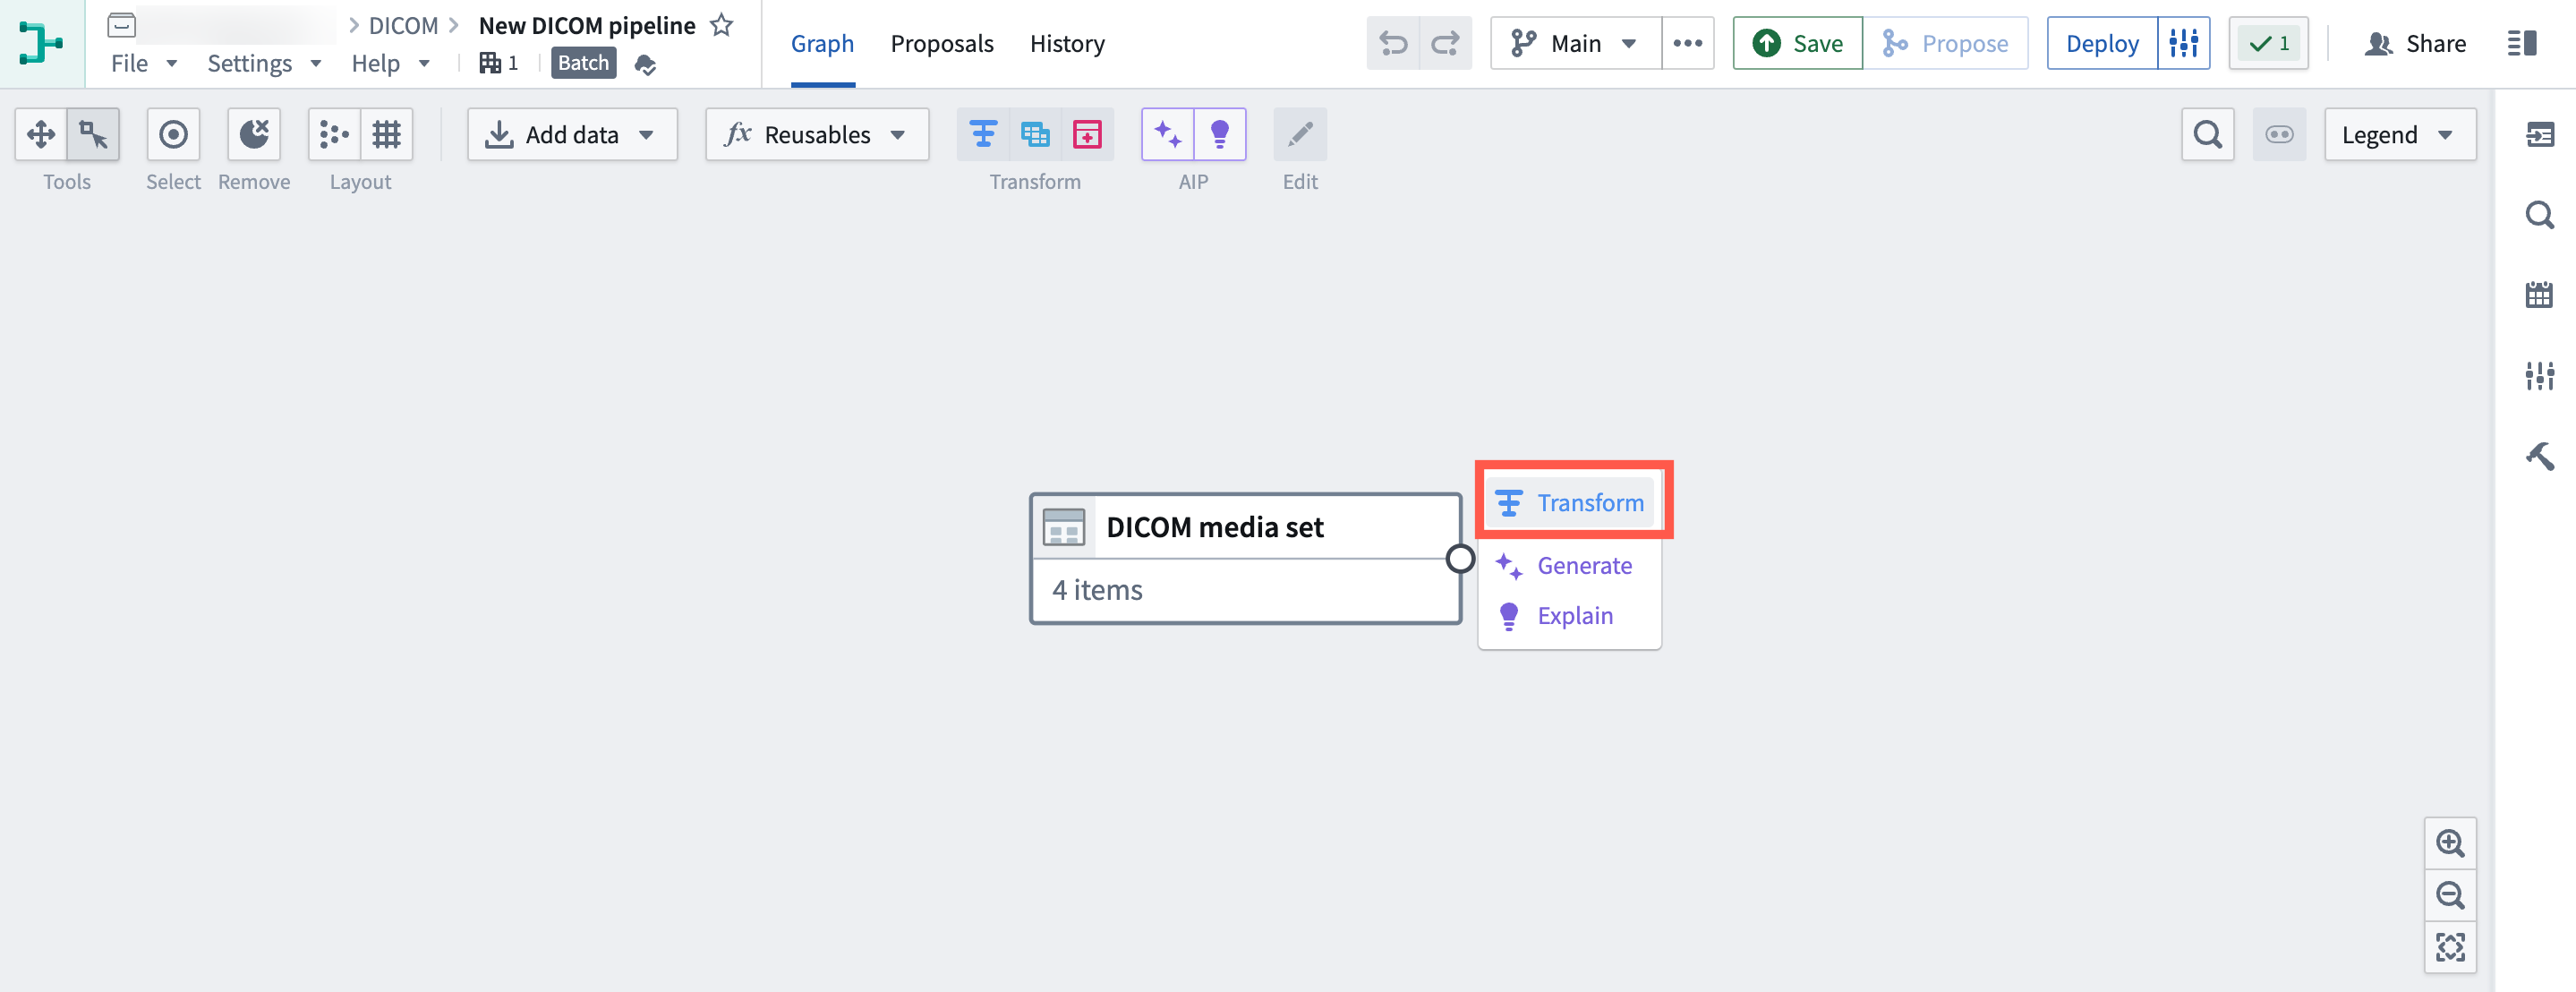
The media set will automatically be added to the pipeline. Select Transform to convert the media set to a table.
-
Select Convert media set to table rows, then select Apply.
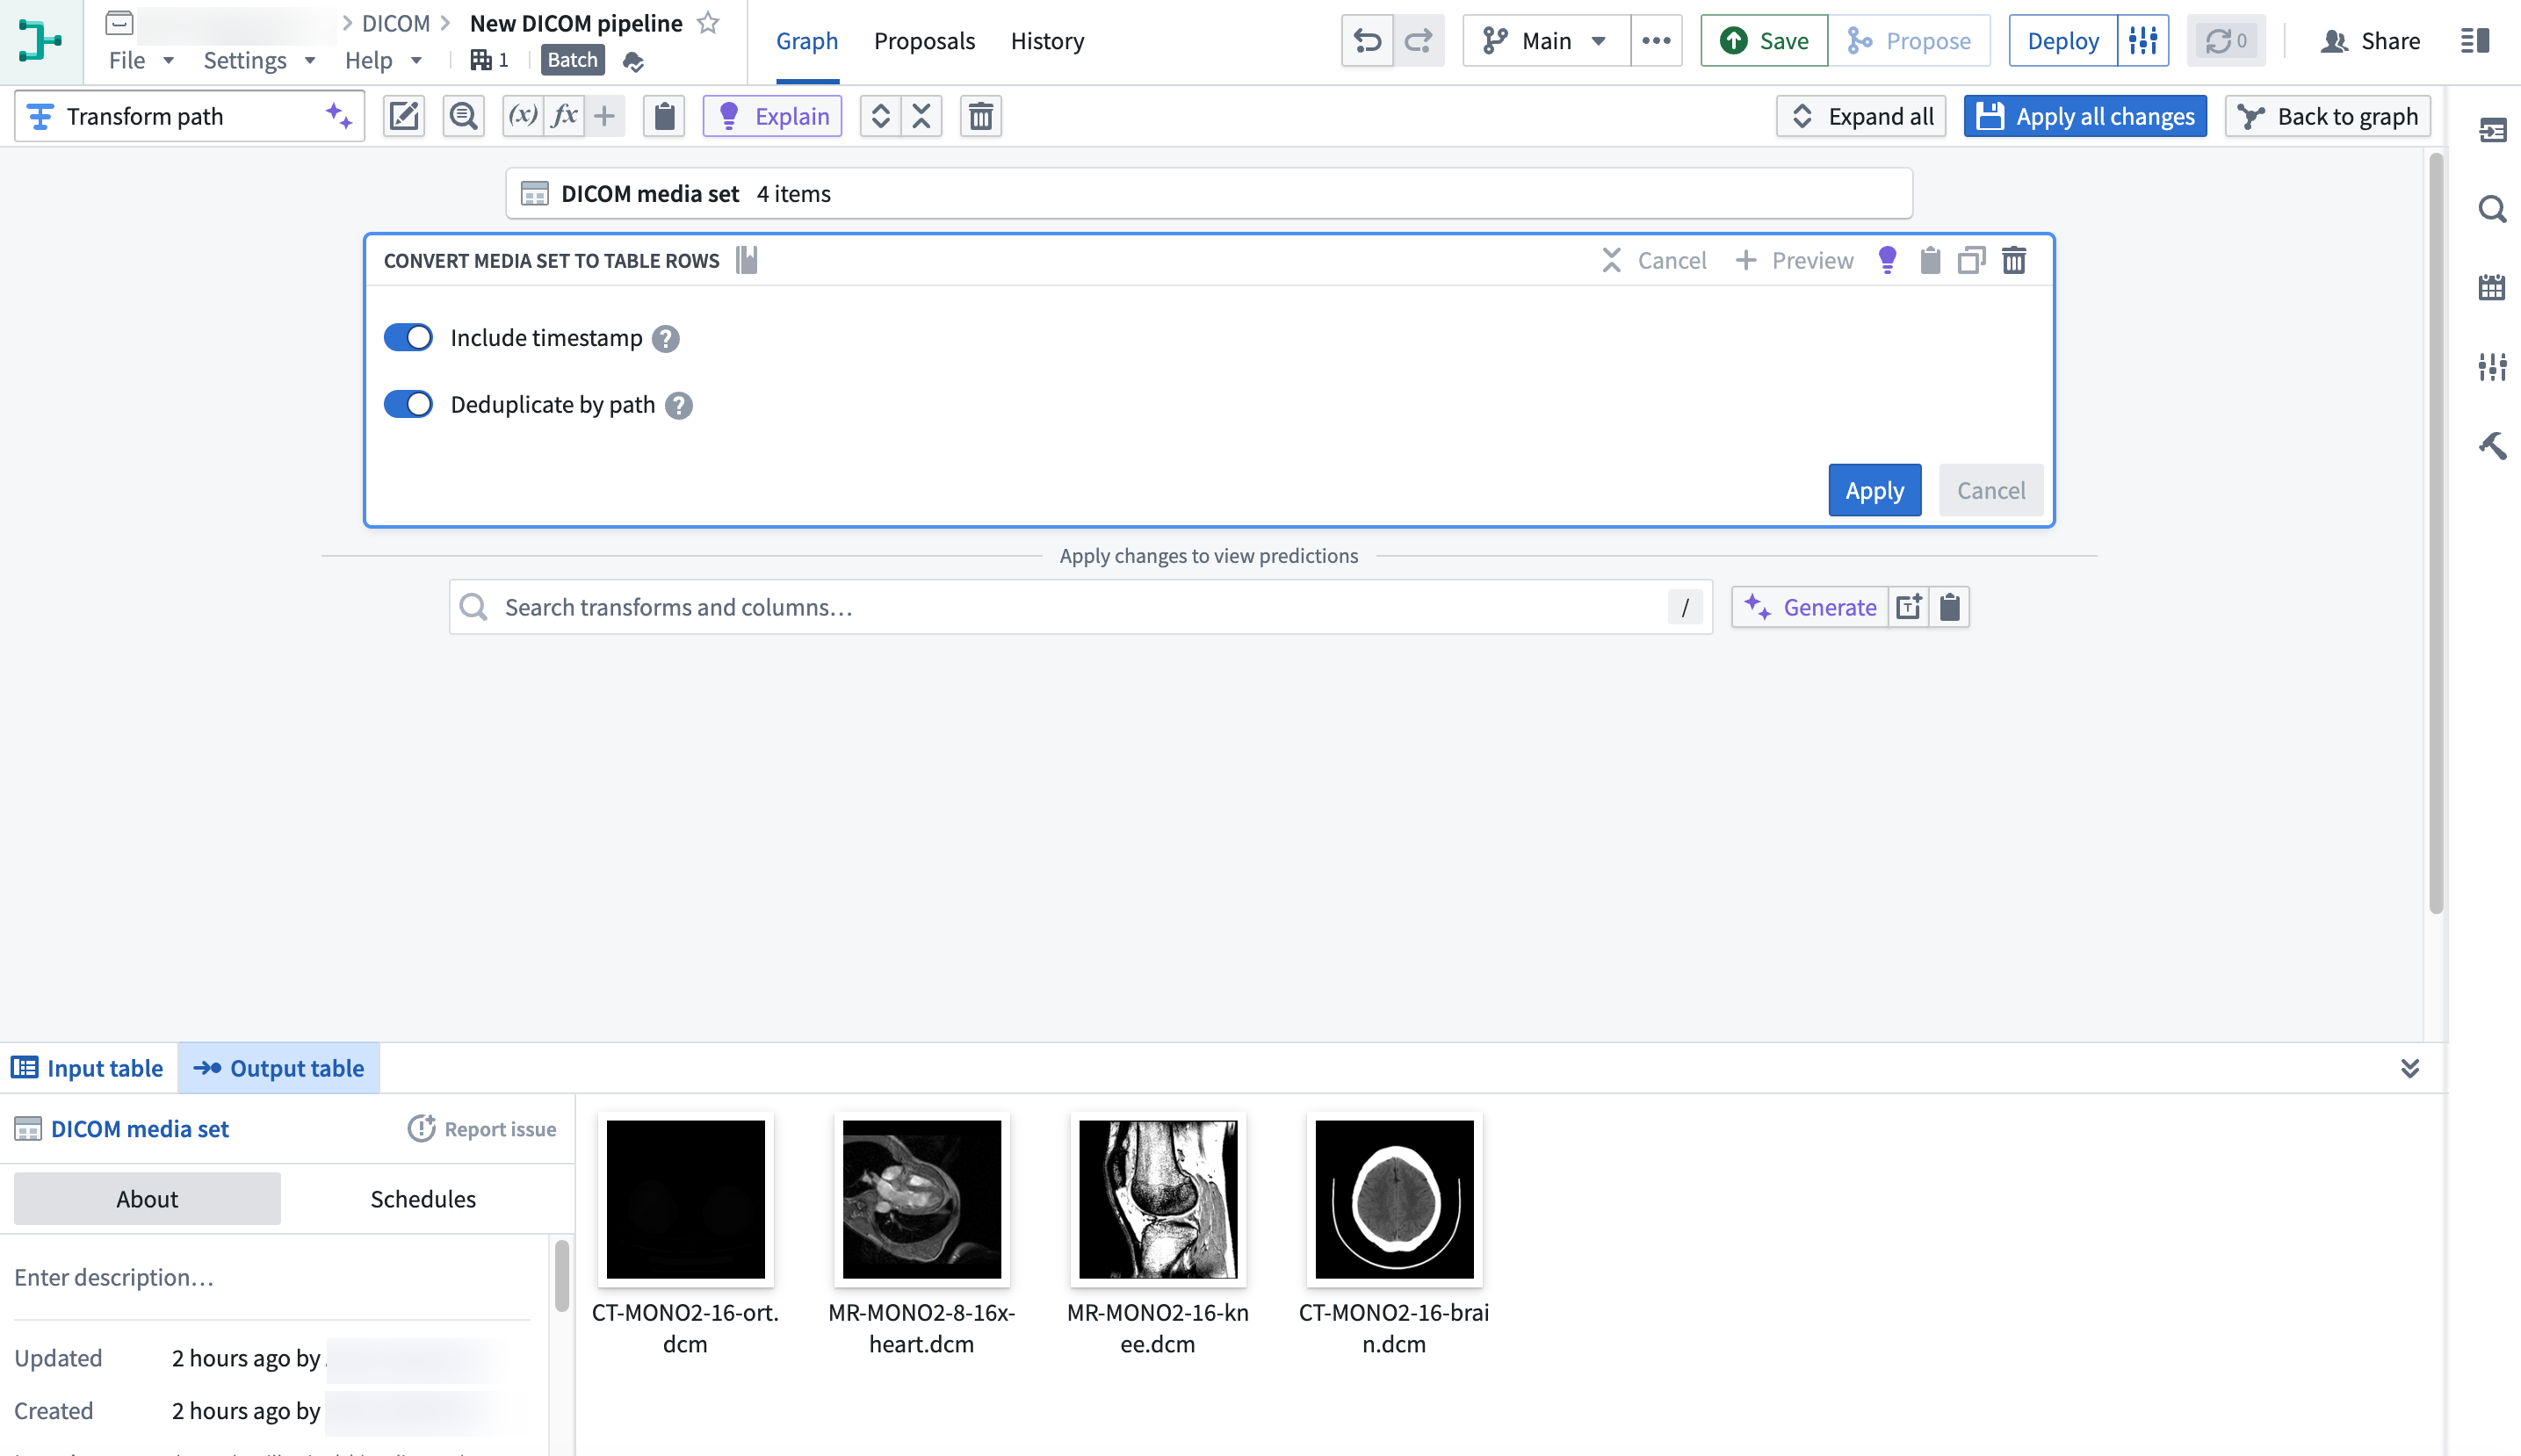
In the resulting table, each row represents a DICOM file in the media set.

- Create an object type by selecting Add pipeline output from the Pipeline outputs menu in the right panel.
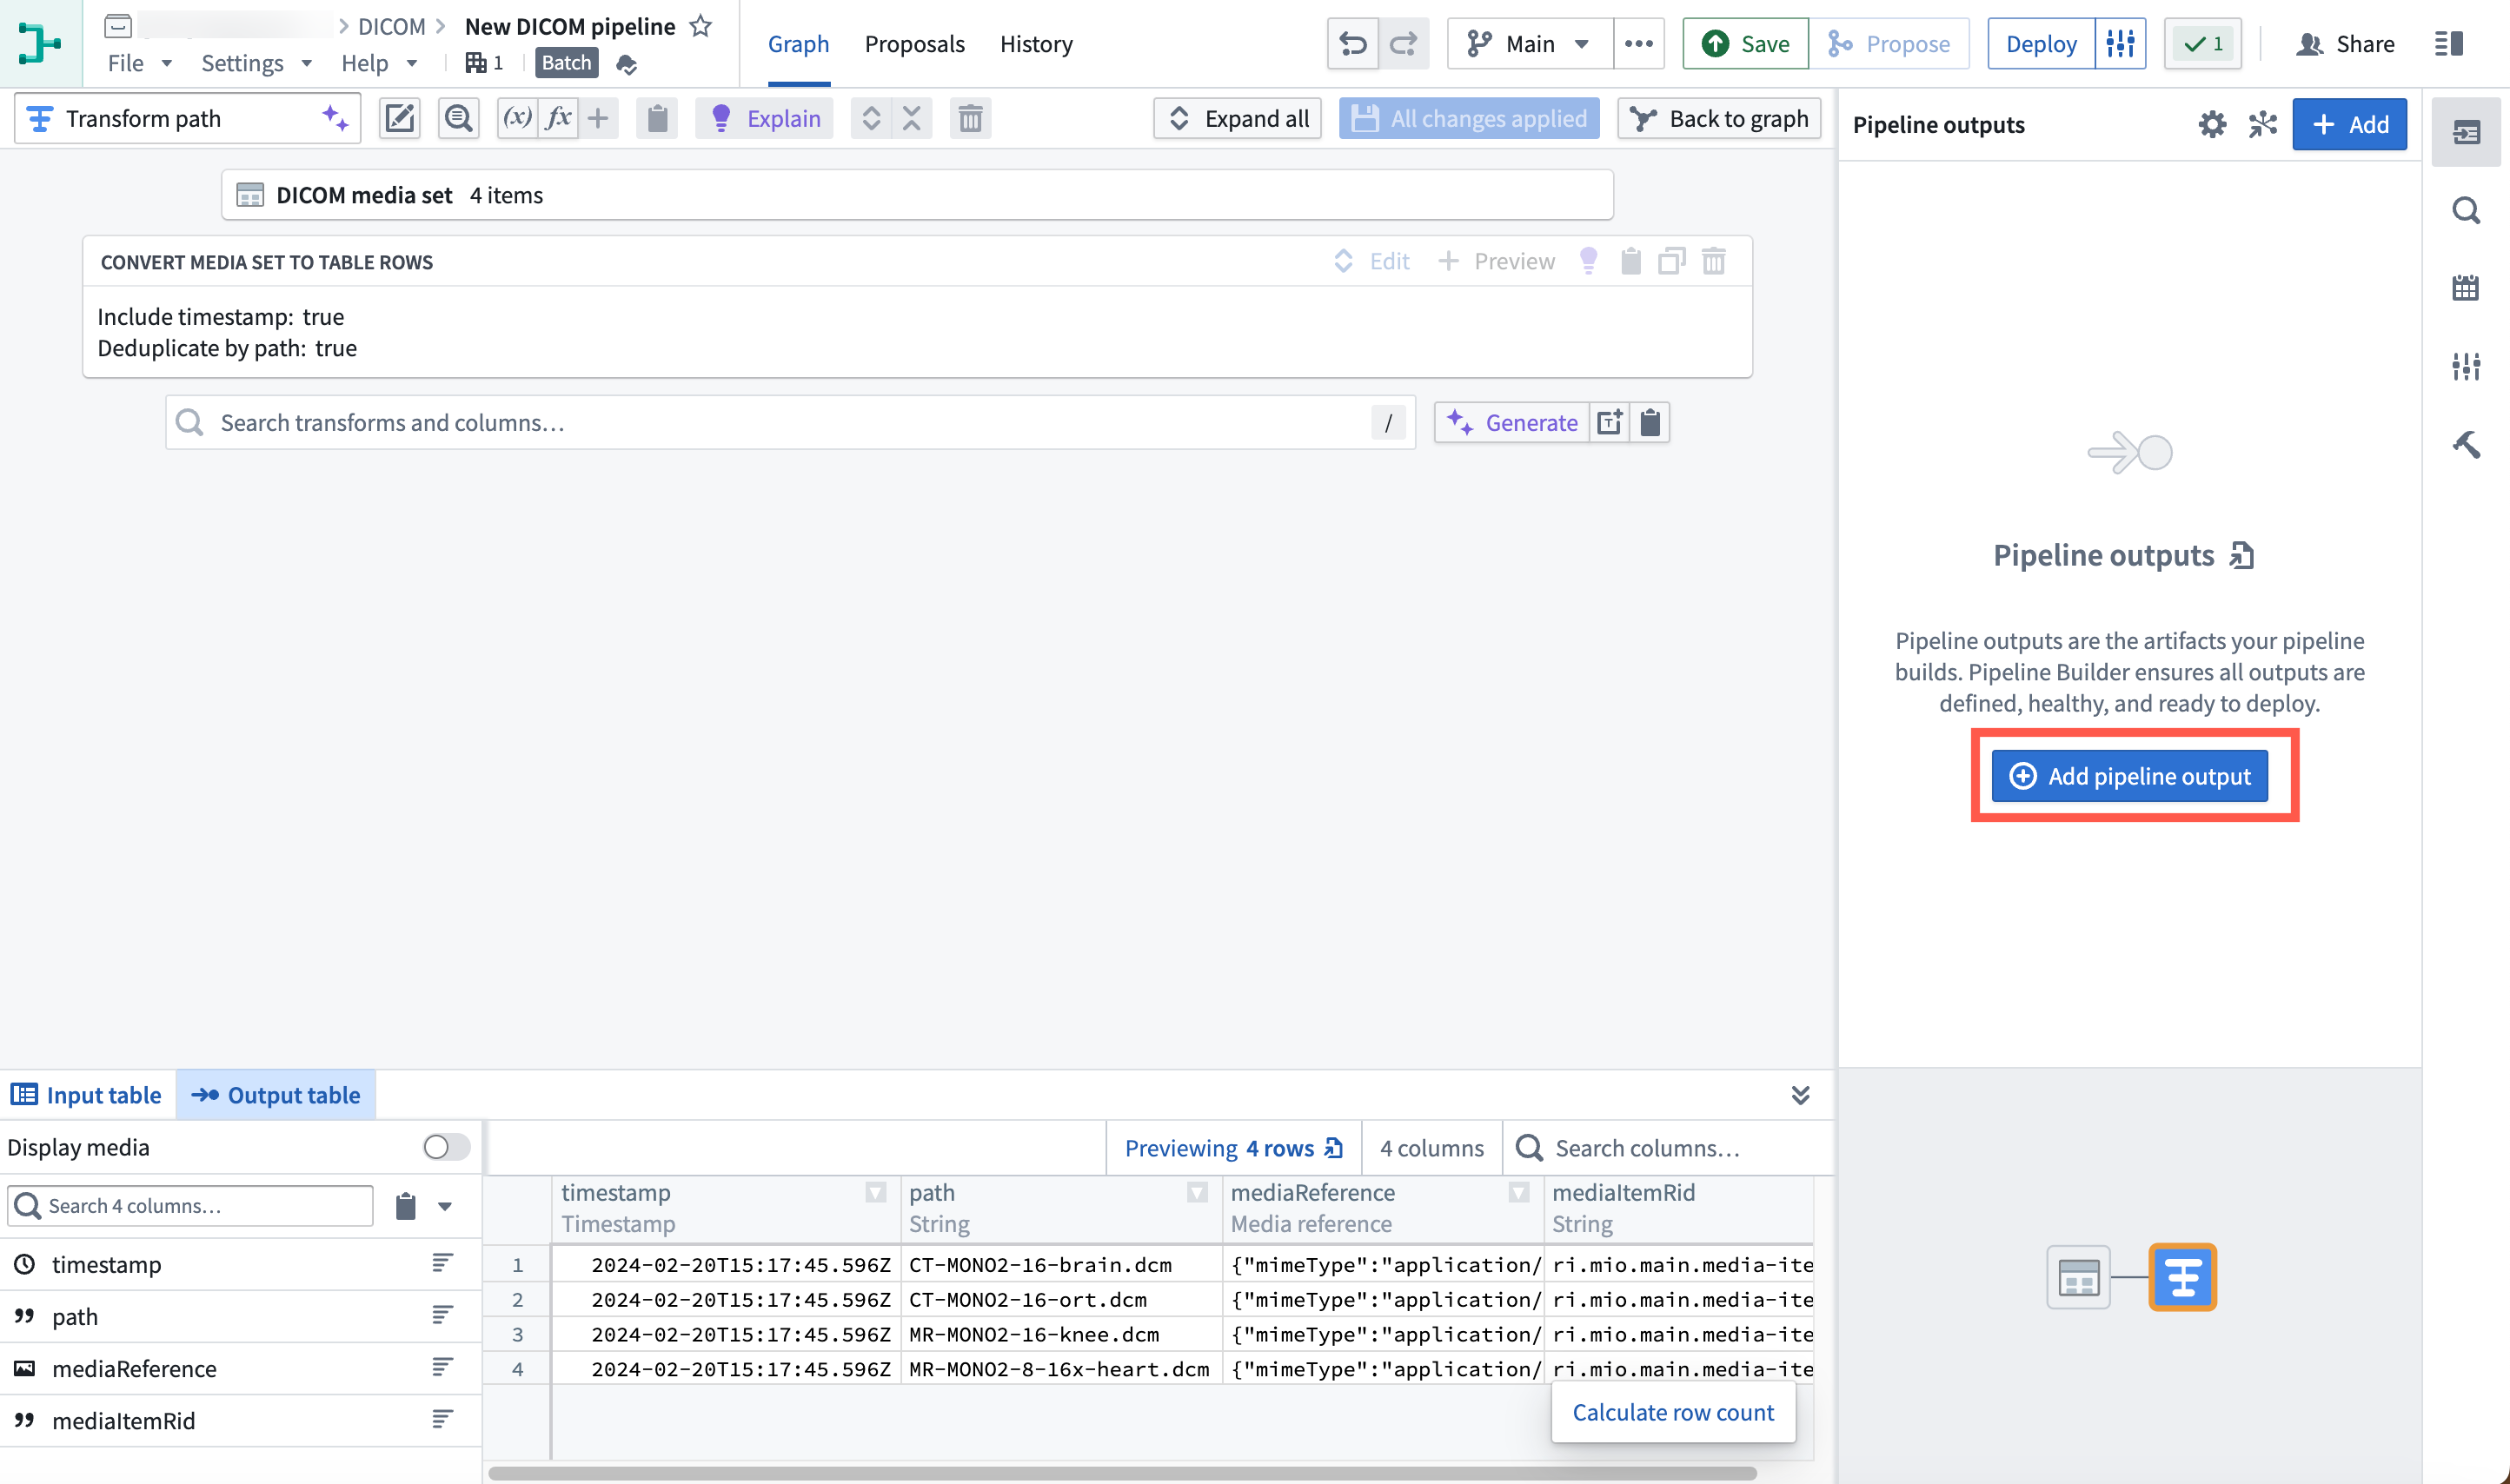
Select the Object type option.

- Enter a name for the object type, for example
DICOM media set. You can set theMedia Item Ridproperty as the primary key by selecting the three dots to the right of the property and then selecting Set as primary key.

When you are finished, you can save and deploy the pipeline.
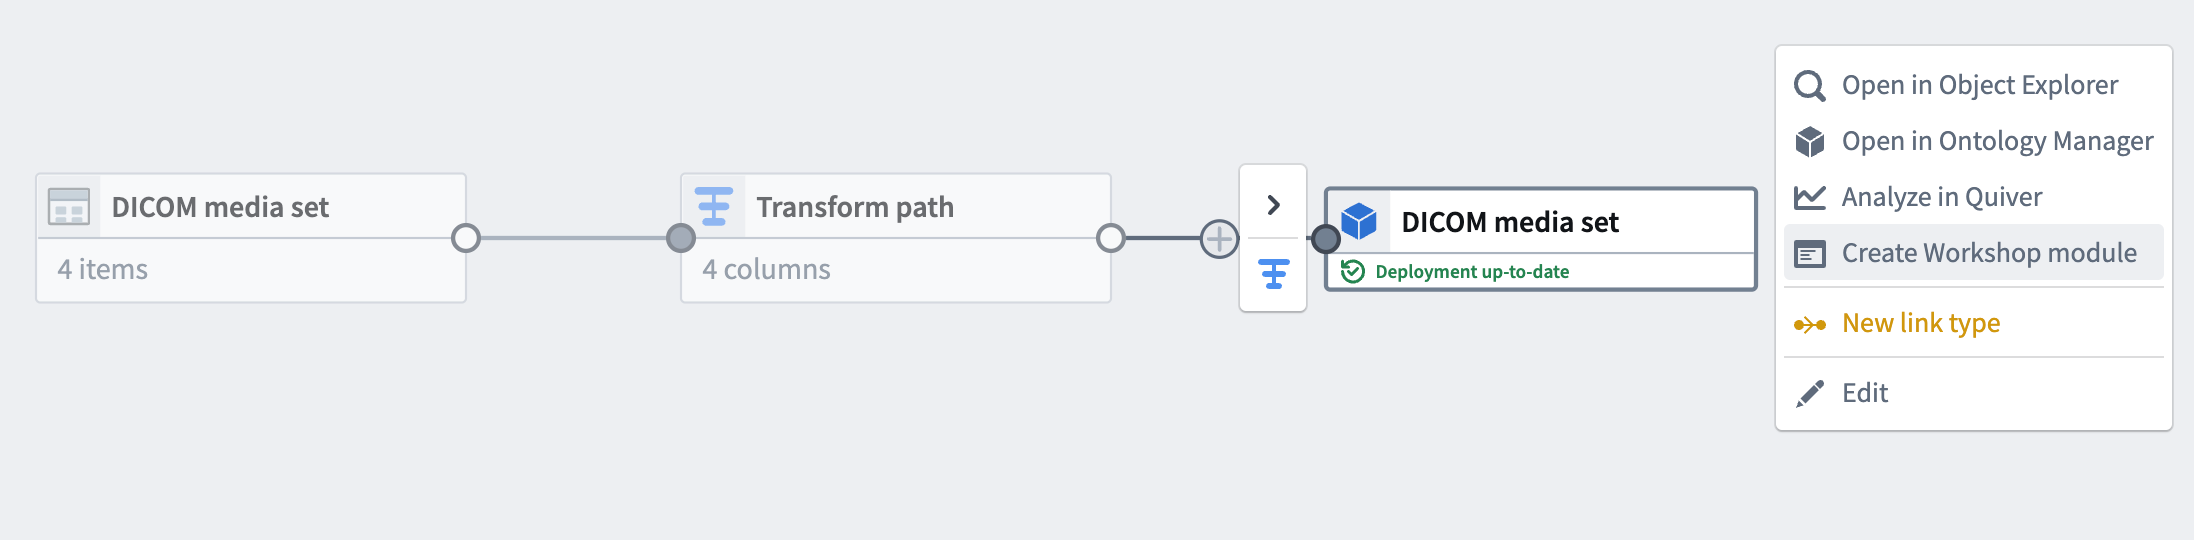
After the pipeline is deployed, you can view the object type in Object Explorer or Ontology Manager.
(Optional) Part 3: Create Workshop module
You can open Workshop by selecting Create Workshop module.
Workshop will automatically generate helpful widgets like an object table and preview.
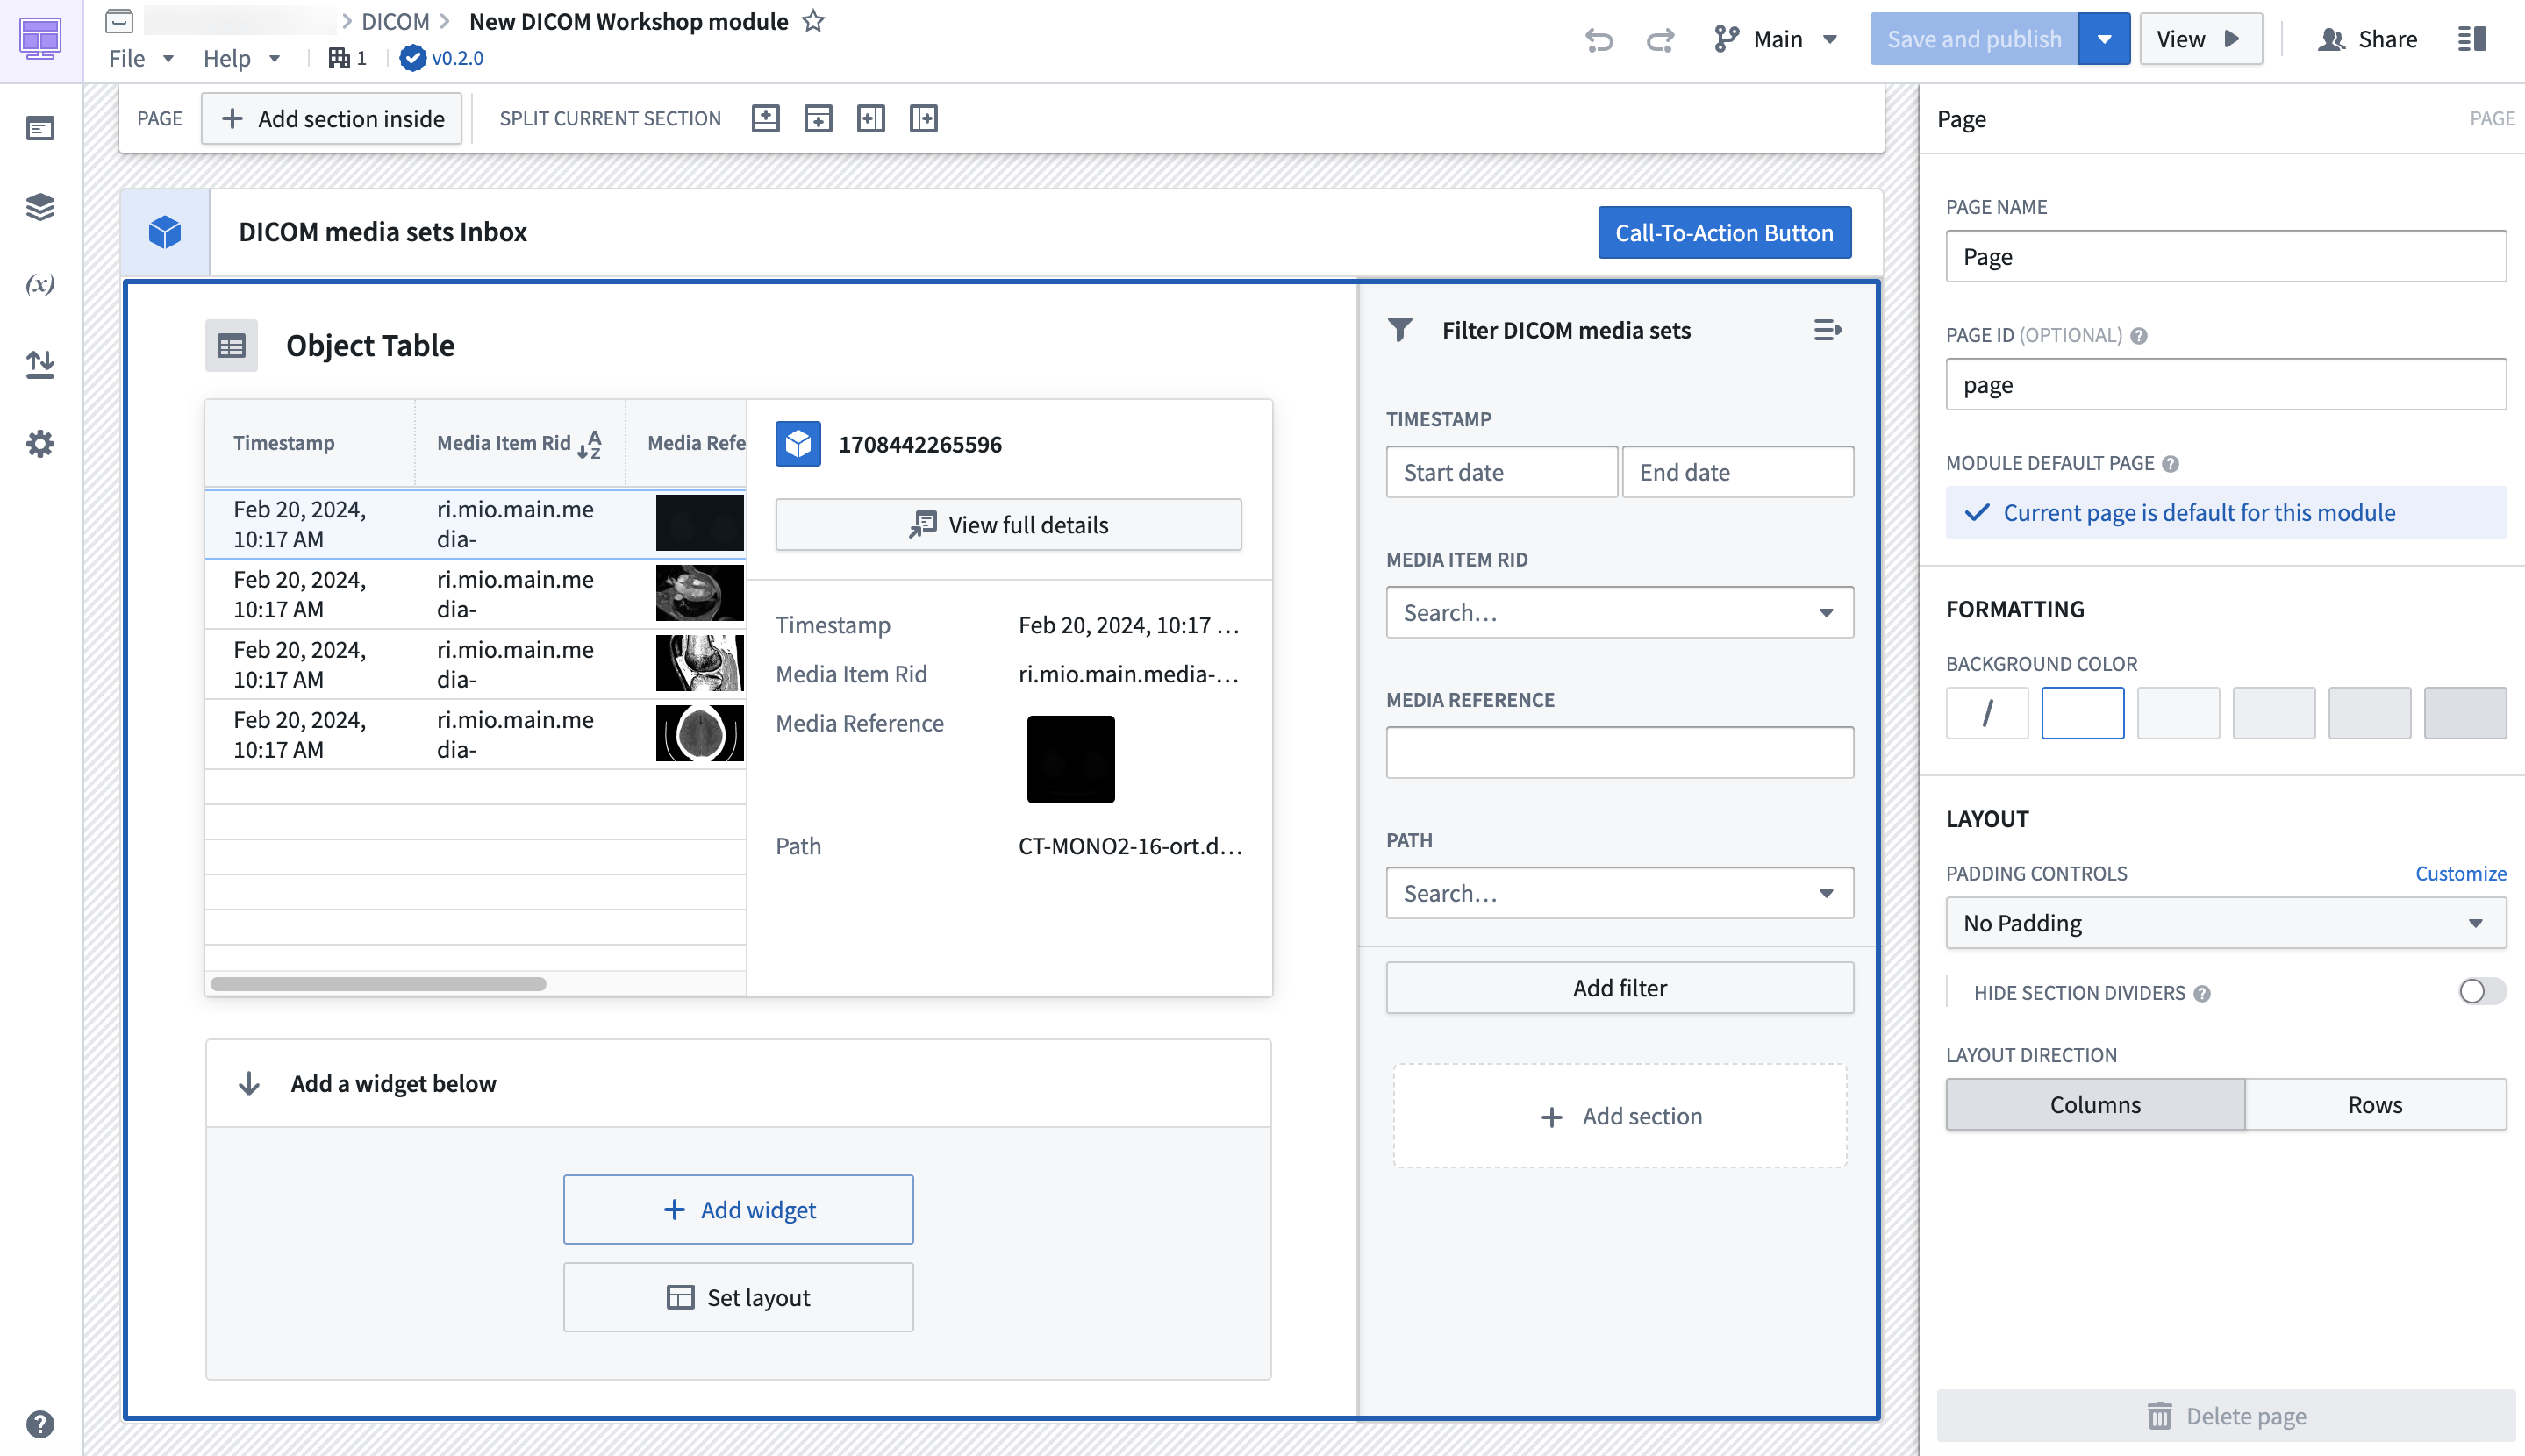
Learn more about creating widgets in Workshop.
中文翻译
添加 DICOM 媒体集
本指南将介绍如何将 DICOM(.dcm)文件作为媒体集导入 Foundry。
第一部分:导入 DICOM 文件
首先,您需要创建一个新的媒体集,并将 DICOM 文件添加到该媒体集中。
-
导航到要创建媒体集的文件夹。选择 新建 > 媒体集。
-
为媒体集输入名称。选择 DICOM 作为媒体类型,并选择 批量 作为延迟。选择 创建媒体集 以创建 DICOM 媒体集。
-
接下来,将一个或多个
.dcm文件添加到媒体集中。
DICOM 媒体集类型包含元数据,例如 患者 ID(Patient ID)和 研究 ID(Study ID)。
您可以选中一个 DICOM 文件,然后左右或上下拖动以调整对比度和曝光度。
第二部分:创建对象类型
接下来,您需要创建一个新的管道,将媒体集转换为可在 Foundry 中使用的对象类型。
-
从 所有操作 下拉菜单中选择 创建新管道 来创建管道。
-
媒体集将自动添加到管道中。选择 转换 以将媒体集转换为表格。
-
选择 将媒体集转换为表格行,然后选择 应用。
在生成的表格中,每一行代表媒体集中的一个 DICOM 文件。
- 从右侧面板的 管道输出 菜单中选择 添加管道输出 来创建对象类型。
选择 对象类型 选项。
- 为对象类型输入名称,例如
DICOM 媒体集。您可以通过选择属性右侧的三个点,然后选择 设为主键,将媒体项 RID(Media Item Rid)属性设为主键。
完成后,您可以保存并部署管道。
管道部署后,您可以在对象浏览器(Object Explorer)或本体管理器(Ontology Manager)中查看该对象类型。
(可选)第三部分:创建 Workshop 模块
您可以通过选择 创建 Workshop 模块 来打开 Workshop。
Workshop 将自动生成有用的组件,例如对象表格和预览。