Deploy AIP Chatbots to AIP Assist(将 AIP Chatbots 部署到 AIP Assist)
Serving custom content sources with AIP Assist dramatically expands the application assistance available to users. This feature also integrates with AIP Chatbot Studio (formerly AIP Agent Studio), allowing users to set up dedicated LLM-powered assistants, which use custom content sources, context from the Ontology or tools such as functions. Developers can now create custom-made assistants, without coding or LLM expertise.
As a sample use case, imagine developers are building an application that needs to be rolled out to hundreds or thousands of users. With the integration of AIP Chatbot Studio and AIP Assist, developers can now quickly configure and ship custom LLM-powered assistants, or AIP Chatbots, to provide immediate, interactive support based on custom content sources.
AIP Chatbots and Chatbot Studio
To understand this feature, familiarize yourself with the concept of an AIP Chatbot and the AIP Chatbot Studio application:
AIP Chatbots: Interactive, LLM-powered assistants equipped with enterprise-specific information and tools.
AIP Chatbot Studio: Allows users to build no-code AIP Chatbots and deploy them internally in the Palantir platform and externally with our OSDK.
Create content and register custom sources
The first step to creating custom source-backed AIP Chatbots is getting your custom content onto the Palantir platform. There are currently two methods of adding custom content sources that can be registered with AIP Assist:
- (Recommended) Notepad documents
- In-platform custom documentation (Markdown files in a
documentationtype repository in Code Repositories).
For this tutorial, we will explore the first option. For more information on this functionality refer to register content sources with AIP Assist.
:::callout{theme="neutral"} This feature may not currently be available on all enrollments. If you do not see the option to add Notepad documents to AIP Assist, contact your Palantir representative to find out if your enrollment is eligible. :::
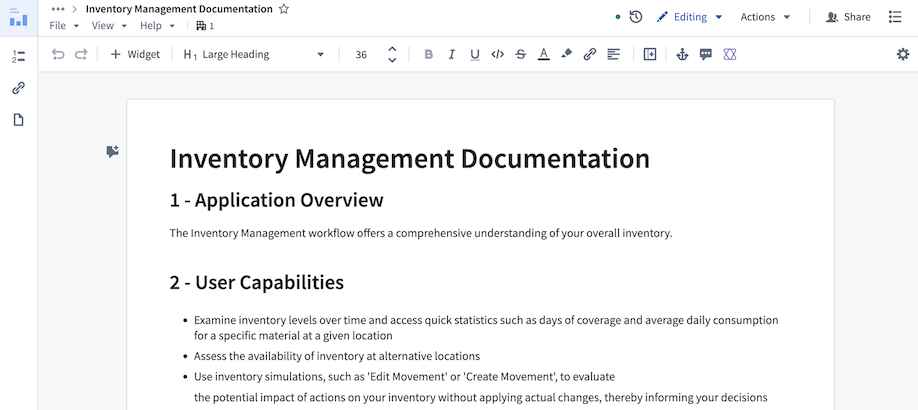
- In Notepad, create a new document by selecting + New document. Write or paste your content and give your document a title and a brief description of its contents. In the example below, we added information about our example application - the Inventory Management Application.
-
Make sure to organize your content into headings and subsections. Having a heading structure significantly improves the accuracy of responses, as content is segmented based on headings. Refer to the custom content source best practices for more information.
-
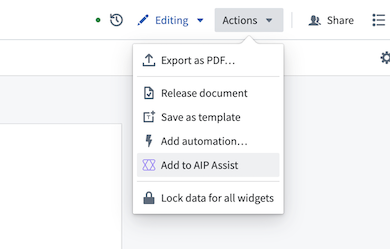
Register your content with AIP Assist. You can do this by selecting Actions > Add to AIP Assist. Note that it may take some time for this to appear as the document becomes discoverable to AIP Assist.
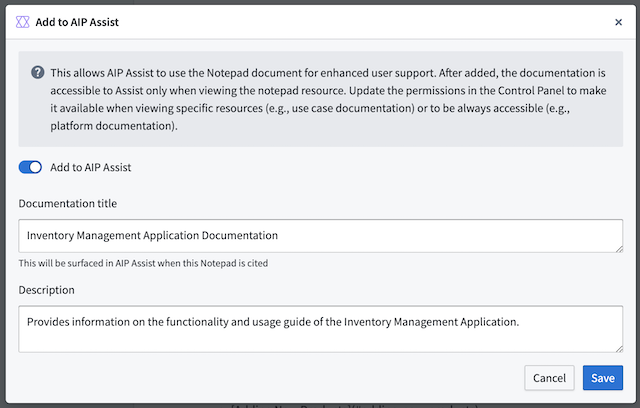
- Give your document a title and description briefly explaining the contents of the document, and save. AIP Assist and AIP Chatbots will now be aware of this document.
Note: This will not affect the behavior of AIP Assist or AIP Chatbots in any way. This just makes content available to AIP Assist. You still need to build and deploy an AIP Chatbot that leverages it.
Create an AIP Chatbot and deploy it to AIP Assist
-
Navigate to the AIP Chatbot Studio application and select + New AIP Chatbot.
-
You will be presented with a setup wizard to assist with AIP Chatbot creation. Start by giving your chatbot a name and a description. These will show up for users when discovering and using your chatbot, so make sure to make it descriptive. You may also provide an icon for your chatbot to help with discovery:

Note: AIP Chatbots are Palantir filesystem resources. They will be permissioned down to the filesystem location where they are saved. Users will only be able to access your chatbot if they have read access to the location where it is saved and access to the custom content source backing it.
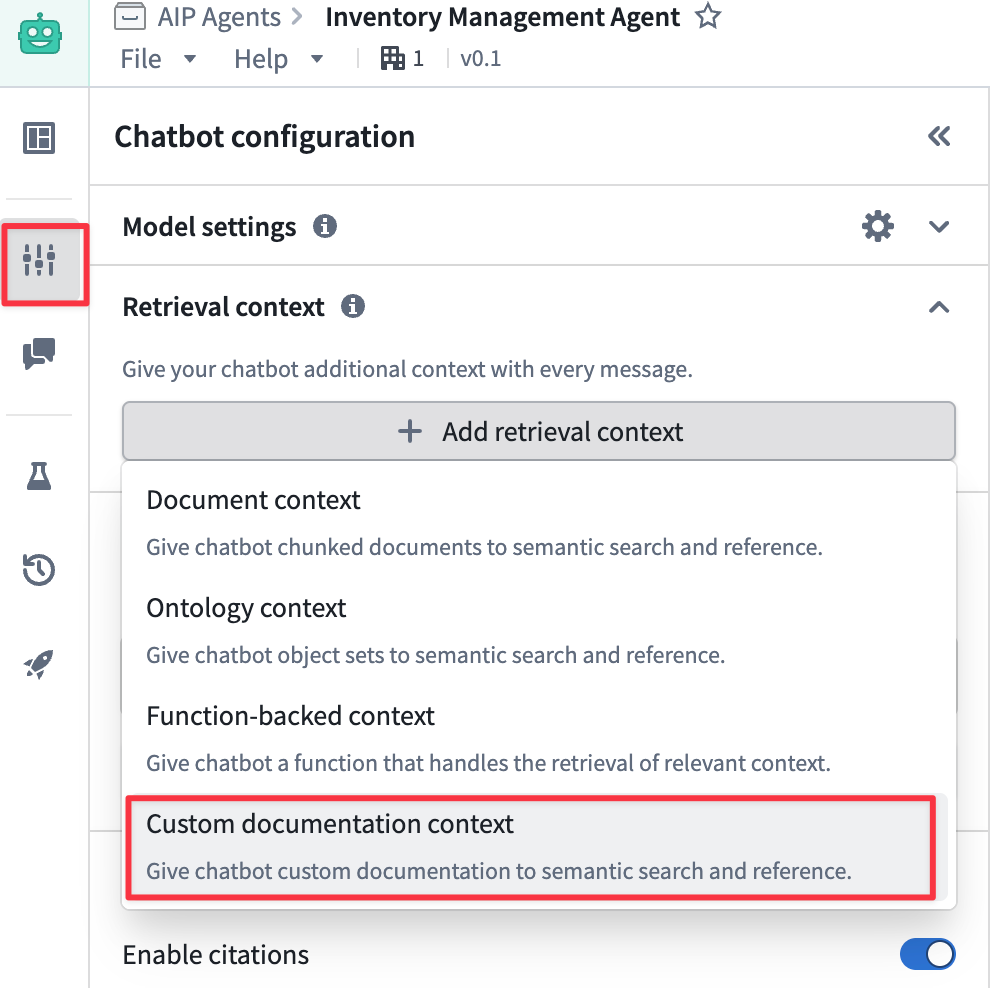
- After saving the chatbot, you will be redirected to the AIP Chatbot Studio editor. Navigate to the Chatbot configuration section, and under Retrieval context select Custom documentation context and choose your previously indexed document. If it does not appear in the list, go back to step one and ensure that you added it to AIP Assist. You can choose many different documents to serve as the search context for your AIP Chatbot. See AIP Chatbot Studio documentation for more information on other AIP Chatbot features.
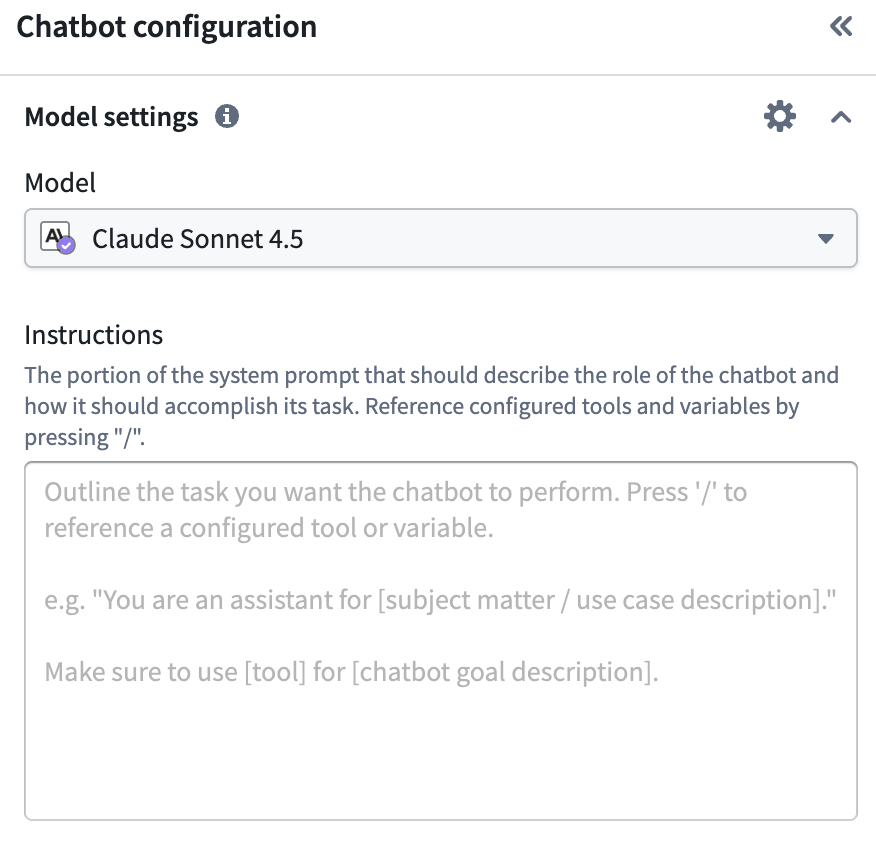
- You can also choose which model you want the chatbot to use. Users of your chatbot should have access to this model. Additionally, you can customize the AIP Chatbot behavior by providing custom instructions.
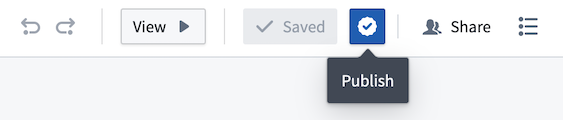
- Publish your AIP Chatbot by selecting the blue checkmark icon at the top right to publish. This will publish the first version of your chatbot (1.0). Any changes you make from here will require you to publish a new version for them to take effect.
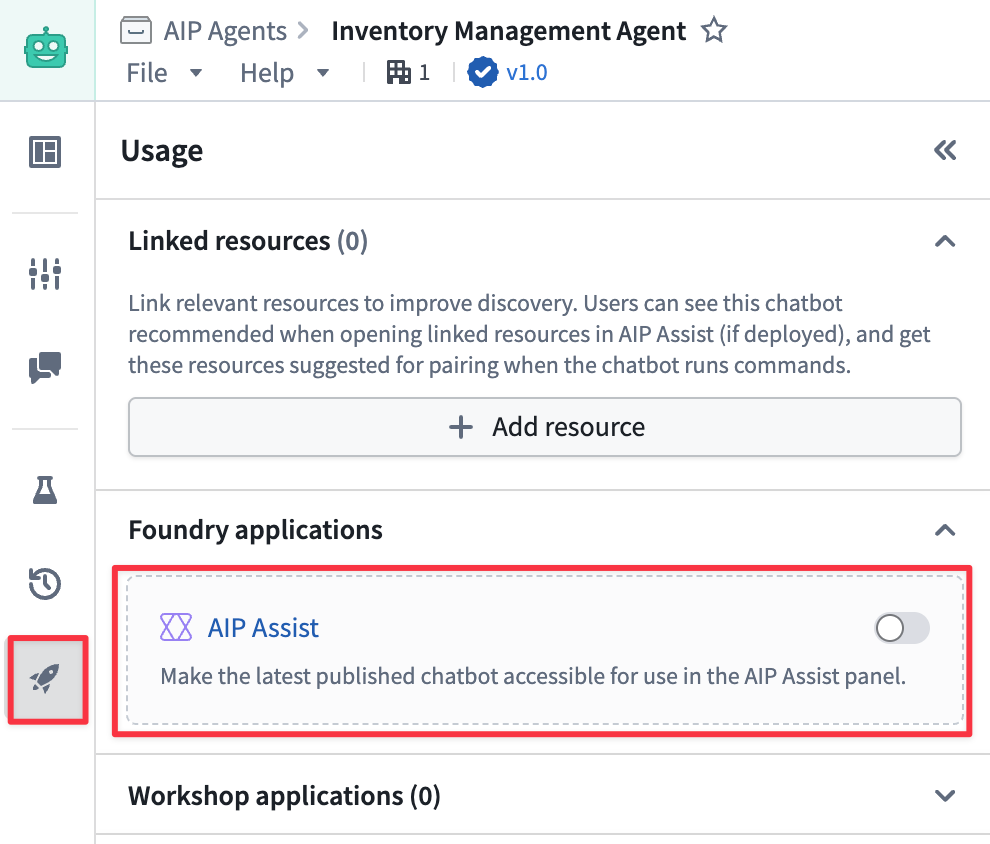
- Make the chatbot available for use in AIP Assist. To do this, open the Usage section, and enable the AIP Assist toggle.
Interact with your new AIP Chatbot
Now that you have created an AIP Assist Chatbot and provided it with access to your Notepad content, you are ready to start interacting with it in AIP Assist.
- Start a new conversation in AIP Assist. You should see your new chatbot available in the AIP Assist Modes selector.
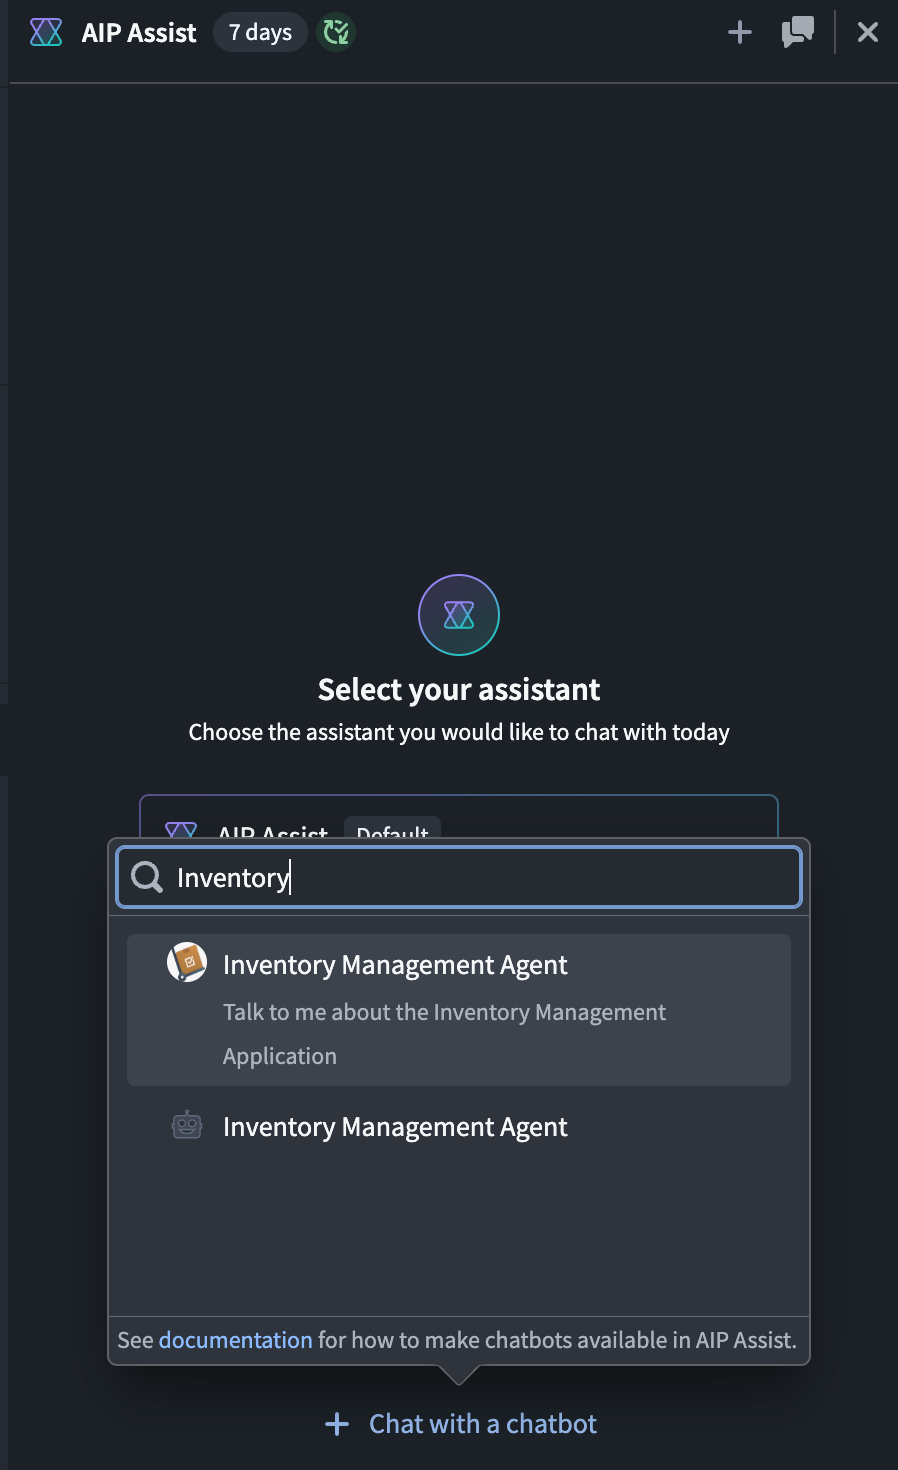
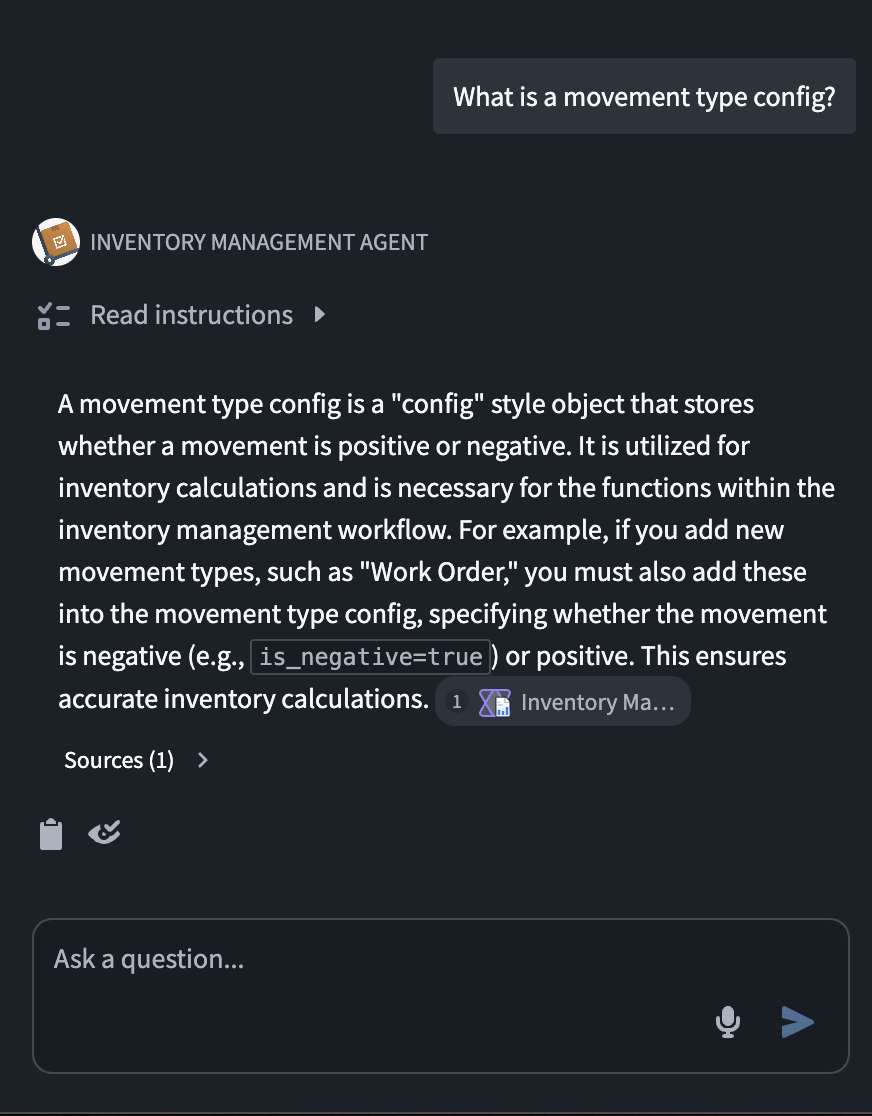
- Select your chatbot and fire off your first question!
中文翻译
将 AIP Chatbots 部署到 AIP Assist
通过 AIP Assist 提供自定义内容源,可显著扩展用户可用的应用程序辅助功能。此功能还与 AIP Chatbot Studio(原 AIP Agent Studio)集成,允许用户设置专用的、由 LLM 驱动的助手,这些助手可使用自定义内容源、来自 Ontology 的上下文或诸如 functions 之类的工具。开发者现在无需编码或具备 LLM 专业知识,即可创建定制助手。
以一个示例用例来说,假设开发者正在构建一个需要推广给数百或数千名用户的应用程序。通过集成 AIP Chatbot Studio 和 AIP Assist,开发者现在可以快速配置并交付定制的、由 LLM 驱动的助手(即 AIP Chatbots),以基于自定义内容源提供即时、交互式的支持。
AIP Chatbots 与 Chatbot Studio
要理解此功能,请先熟悉 AIP Chatbot 的概念以及 AIP Chatbot Studio 应用程序:
AIP Chatbots: 交互式、由 LLM 驱动的助手,配备有企业特定信息和工具。
AIP Chatbot Studio: 允许用户在 Palantir 平台内部构建无代码的 AIP Chatbots,并通过我们的 OSDK 将其部署到外部。
创建内容并注册自定义源
创建基于自定义源的 AIP Chatbots 的第一步是将您的自定义内容上传到 Palantir 平台。目前有两种方法可以添加可与 AIP Assist 注册的自定义内容源:
- (推荐) Notepad 文档
- 平台内 自定义文档(代码仓库中
documentation类型仓库内的 Markdown 文件)。
在本教程中,我们将探讨第一种方法。有关此功能的更多信息,请参阅向 AIP Assist 注册内容源。
:::callout{theme="neutral"} 此功能可能并非在所有注册环境中都可用。如果您在 AIP Assist 中看不到添加 Notepad 文档的选项,请联系您的 Palantir 代表,以确认您的注册环境是否符合条件。 :::
- 在 Notepad 中,选择 + New document 创建一个新文档。编写或粘贴您的内容,并为文档指定标题和简短的内容描述。在下面的示例中,我们添加了关于示例应用程序(库存管理应用程序)的信息。
-
确保将您的内容组织成标题和子部分。拥有标题结构可以显著提高响应的准确性,因为内容会根据标题进行分段。有关更多信息,请参阅自定义内容源最佳实践。
-
向 AIP Assist 注册您的内容。您可以通过选择 Actions > Add to AIP Assist 来完成此操作。请注意,文档变为 AIP Assist 可发现状态可能需要一些时间。
- 为您的文档指定标题和描述,简要说明文档内容,然后保存。现在,AIP Assist 和 AIP Chatbots 将能够识别此文档。
注意: 这不会以任何方式影响 AIP Assist 或 AIP Chatbots 的行为。这只是使内容对 AIP Assist 可用。您仍然需要构建并部署一个利用该内容的 AIP Chatbot。
创建 AIP Chatbot 并将其部署到 AIP Assist
-
导航到 AIP Chatbot Studio 应用程序,然后选择 + New AIP Chatbot。
-
系统将显示一个设置向导,以协助创建 AIP Chatbot。首先,为您的聊天机器人指定名称和描述。这些信息将在用户发现和使用您的聊天机器人时显示,因此请确保其具有描述性。您还可以为聊天机器人提供一个图标,以帮助用户发现它:
注意: AIP Chatbots 是 Palantir 文件系统资源。它们的权限将继承自其保存位置的文件系统权限。用户只有同时拥有其保存位置的读取权限以及对其所依赖的自定义内容源的访问权限,才能访问您的聊天机器人。
- 保存聊天机器人后,您将被重定向到 AIP Chatbot Studio 编辑器。导航到 Chatbot configuration 部分,在 Retrieval context 下选择 Custom documentation context,然后选择您之前索引的文档。如果该文档未出现在列表中,请返回第一步,确保您已将其添加到 AIP Assist。您可以选择多个不同的文档作为 AIP Chatbot 的搜索上下文。有关其他 AIP Chatbot 功能的更多信息,请参阅 AIP Chatbot Studio 文档。
- 您还可以选择聊天机器人要使用的模型。您的聊天机器人的用户应有权访问此模型。此外,您可以通过提供自定义指令来定制 AIP Chatbot 的行为。
- 通过选择右上角的蓝色勾选图标来发布您的 AIP Chatbot。这将发布您的聊天机器人的第一个版本(1.0)。此后您所做的任何更改都需要发布新版本才能生效。
- 使聊天机器人可在 AIP Assist 中使用。为此,请打开 Usage 部分,并启用 AIP Assist 切换开关。
与您的新 AIP Chatbot 交互
现在您已创建了一个 AIP Assist Chatbot 并为其提供了对 Notepad 内容的访问权限,您可以开始在 AIP Assist 中与之交互了。
- 在 AIP Assist 中开始一个新的对话。您应该会在 AIP Assist 的 Modes 选择器中看到您的新聊天机器人。
- 选择您的聊天机器人,然后提出您的第一个问题!