Getting started(入门指南)
This guide demonstrates how to access AIP Chatbot Studio, introduces the AIP Chatbot Studio interface, describes how to set up a basic AIP Chatbot equipped with the information and tools that you choose, and how to deploy and monitor the AIP Chatbot in production.
Access AIP Chatbot Studio
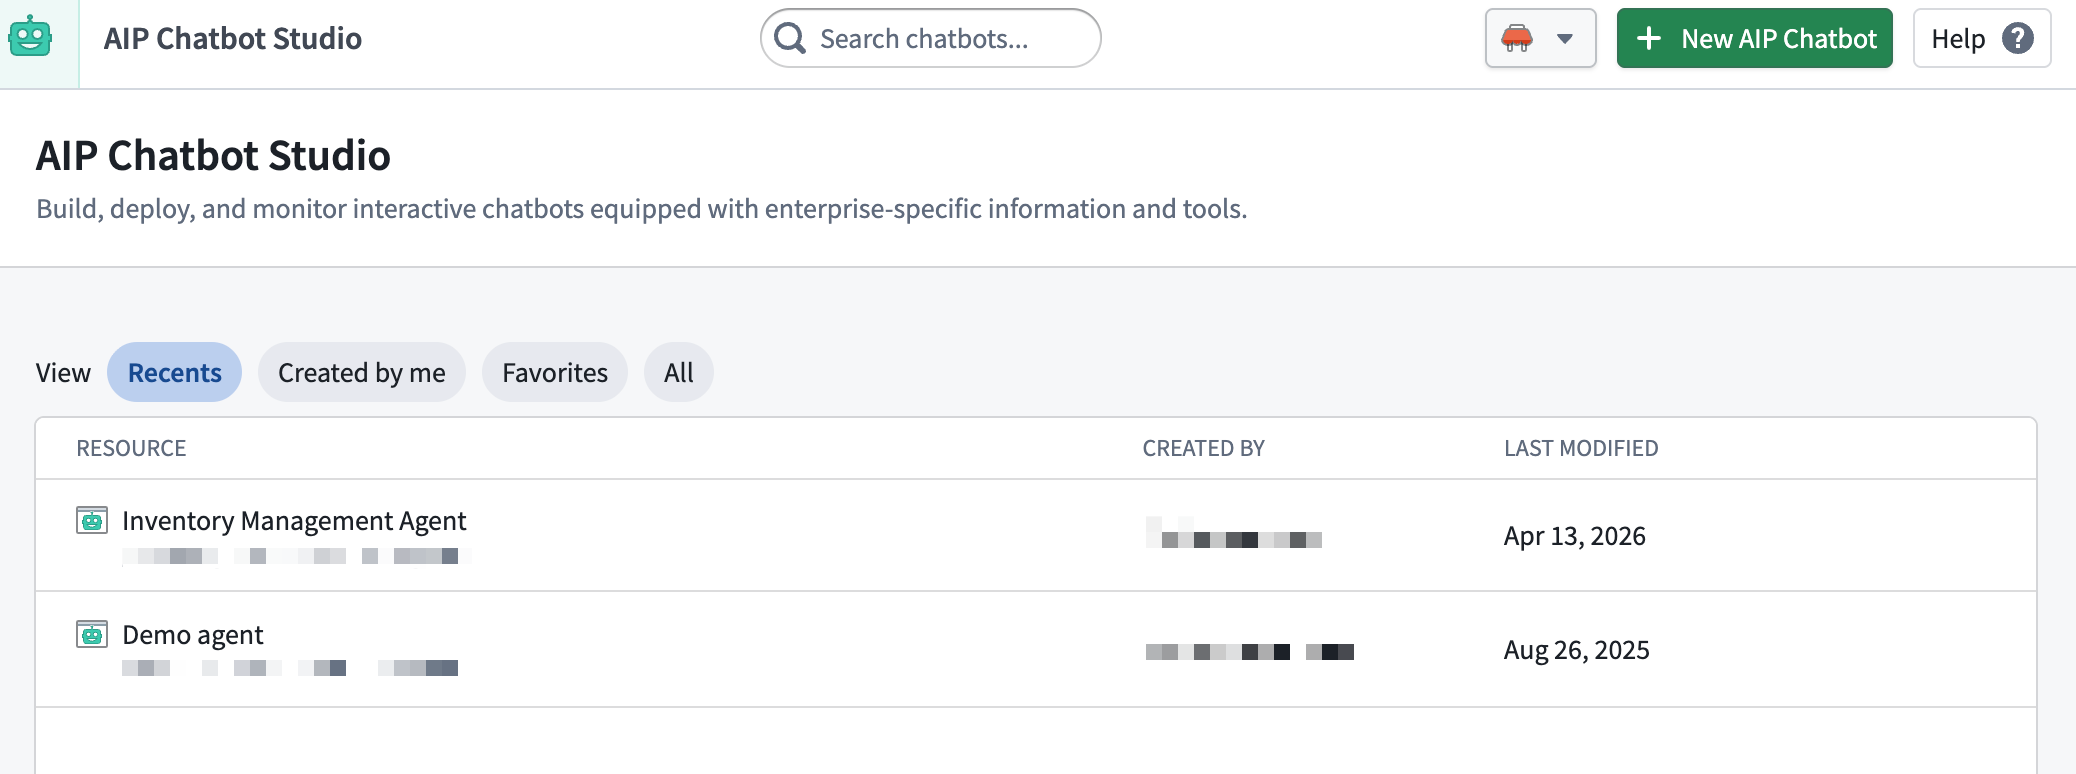
AIP Chatbot Studio can be accessed from the platform’s workspace navigation bar or by using the quick search shortcuts CMD + J (macOS) or CTRL + J (Windows). Alternatively, you can create a new AIP Chatbot from your Files by selecting + New and then selecting AIP Chatbot, as shown below.

After opening AIP Chatbot Studio, you can create a new AIP Chatbot file.
Create an AIP Chatbot
AIP Chatbots are Palantir filesystem resources that have granular access control and can be created like any other filesystem resource, as shown in the image above, in the previous section.
You may also select the New AIP Chatbot option from within AIP Chatbot Studio.
Alternatively, create an AIP Chatbot from within AIP Threads.
Set up an AIP Chatbot
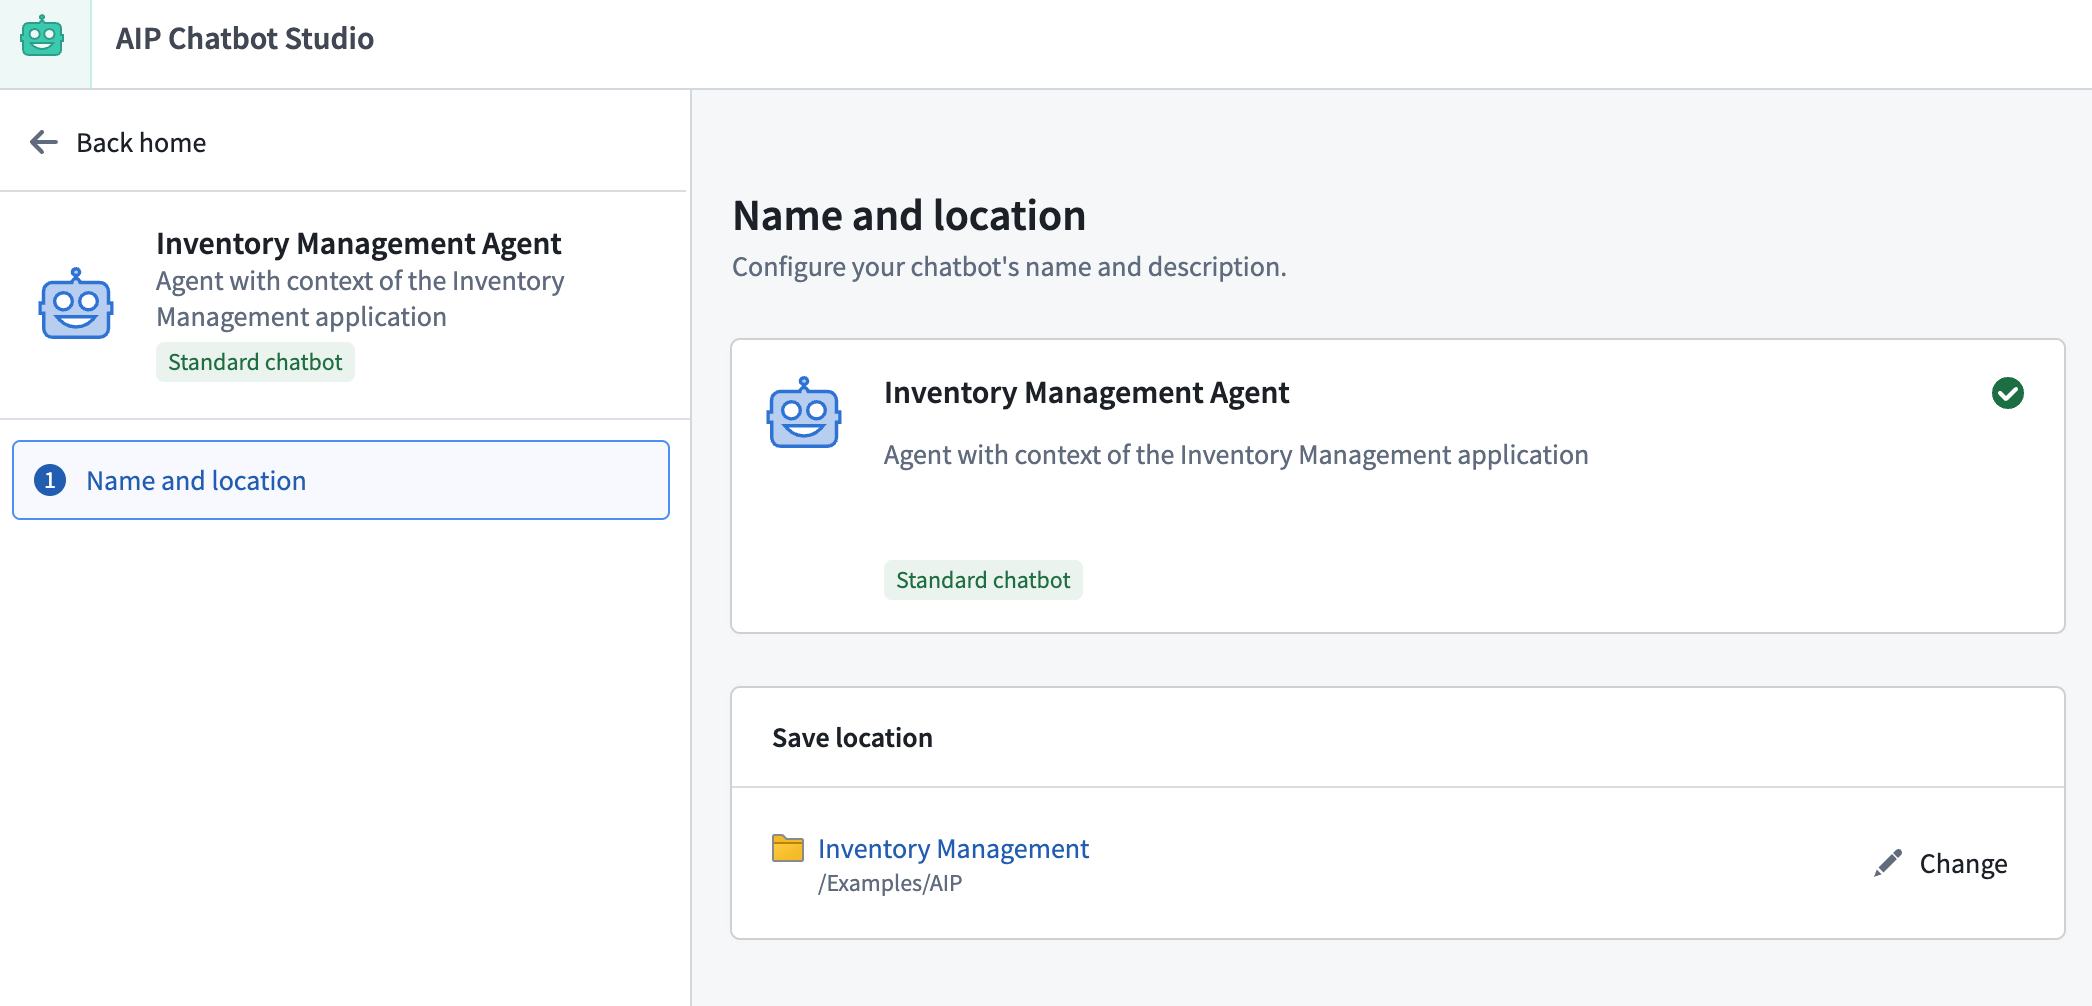
Add the name, description, and a photo as an avatar for your AIP Chatbot. This enables you to white-label your chatbot to fit the context of your application. If an avatar is not provided, a gray robot icon will be used as the default.
Next, you will need to configure the enterprise-specific information and tools that will be equipped to your AIP Chatbot, as detailed in the following sections.
Types of information and tools
- Retrieval context: Simple and fast, recommended for most use cases.
- Application state: To contextualize chatbots in Workshop.
- Tools: Used in complex and action-taking chatbots.
These configurations are what enable the LLM to be useful to your enterprise, your workflow, and your task.
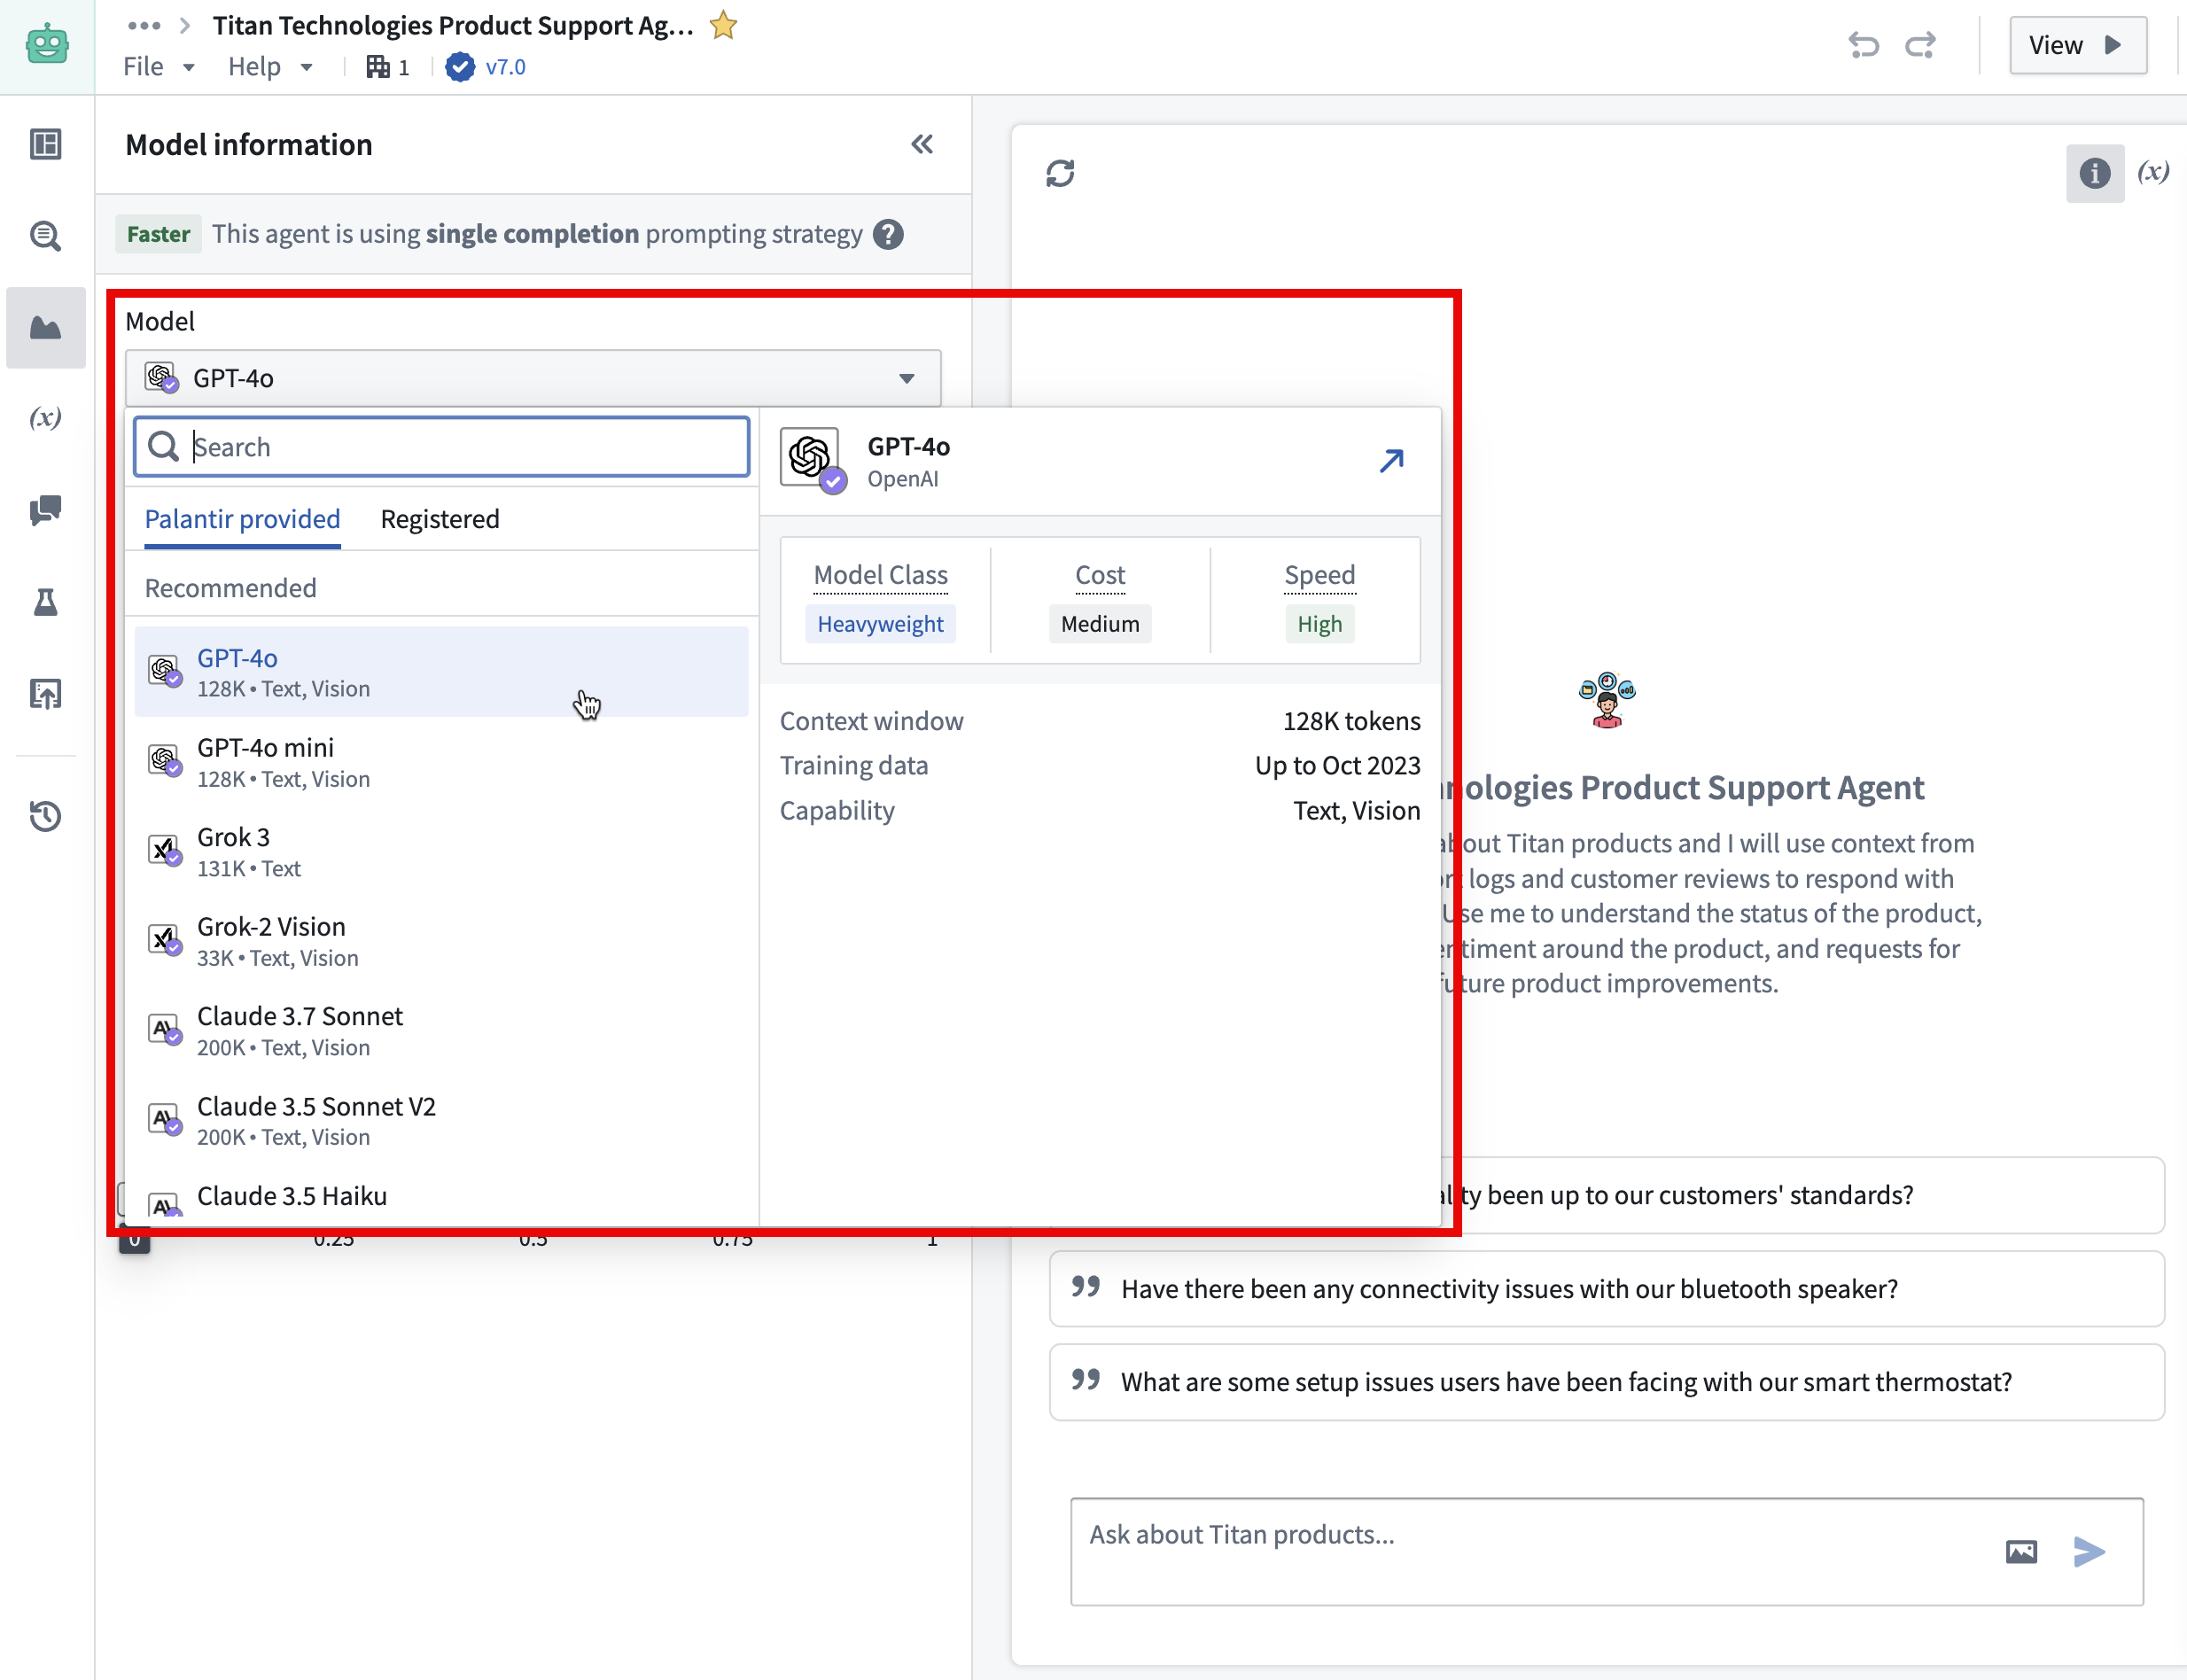
Choose a large language model (LLM)
The models available to you are a subset of those enabled on your enrollment.
Modify the system prompt
The system prompt should outline the AIP Chatbot's function within the context of the current application. By pressing / on your keyboard, you can refer to the configured tools and application state and guide the AIP Chatbot on how to coordinate their usage. Make sure to describe the underlying business logic and the appropriate situations for using the right tools in context.
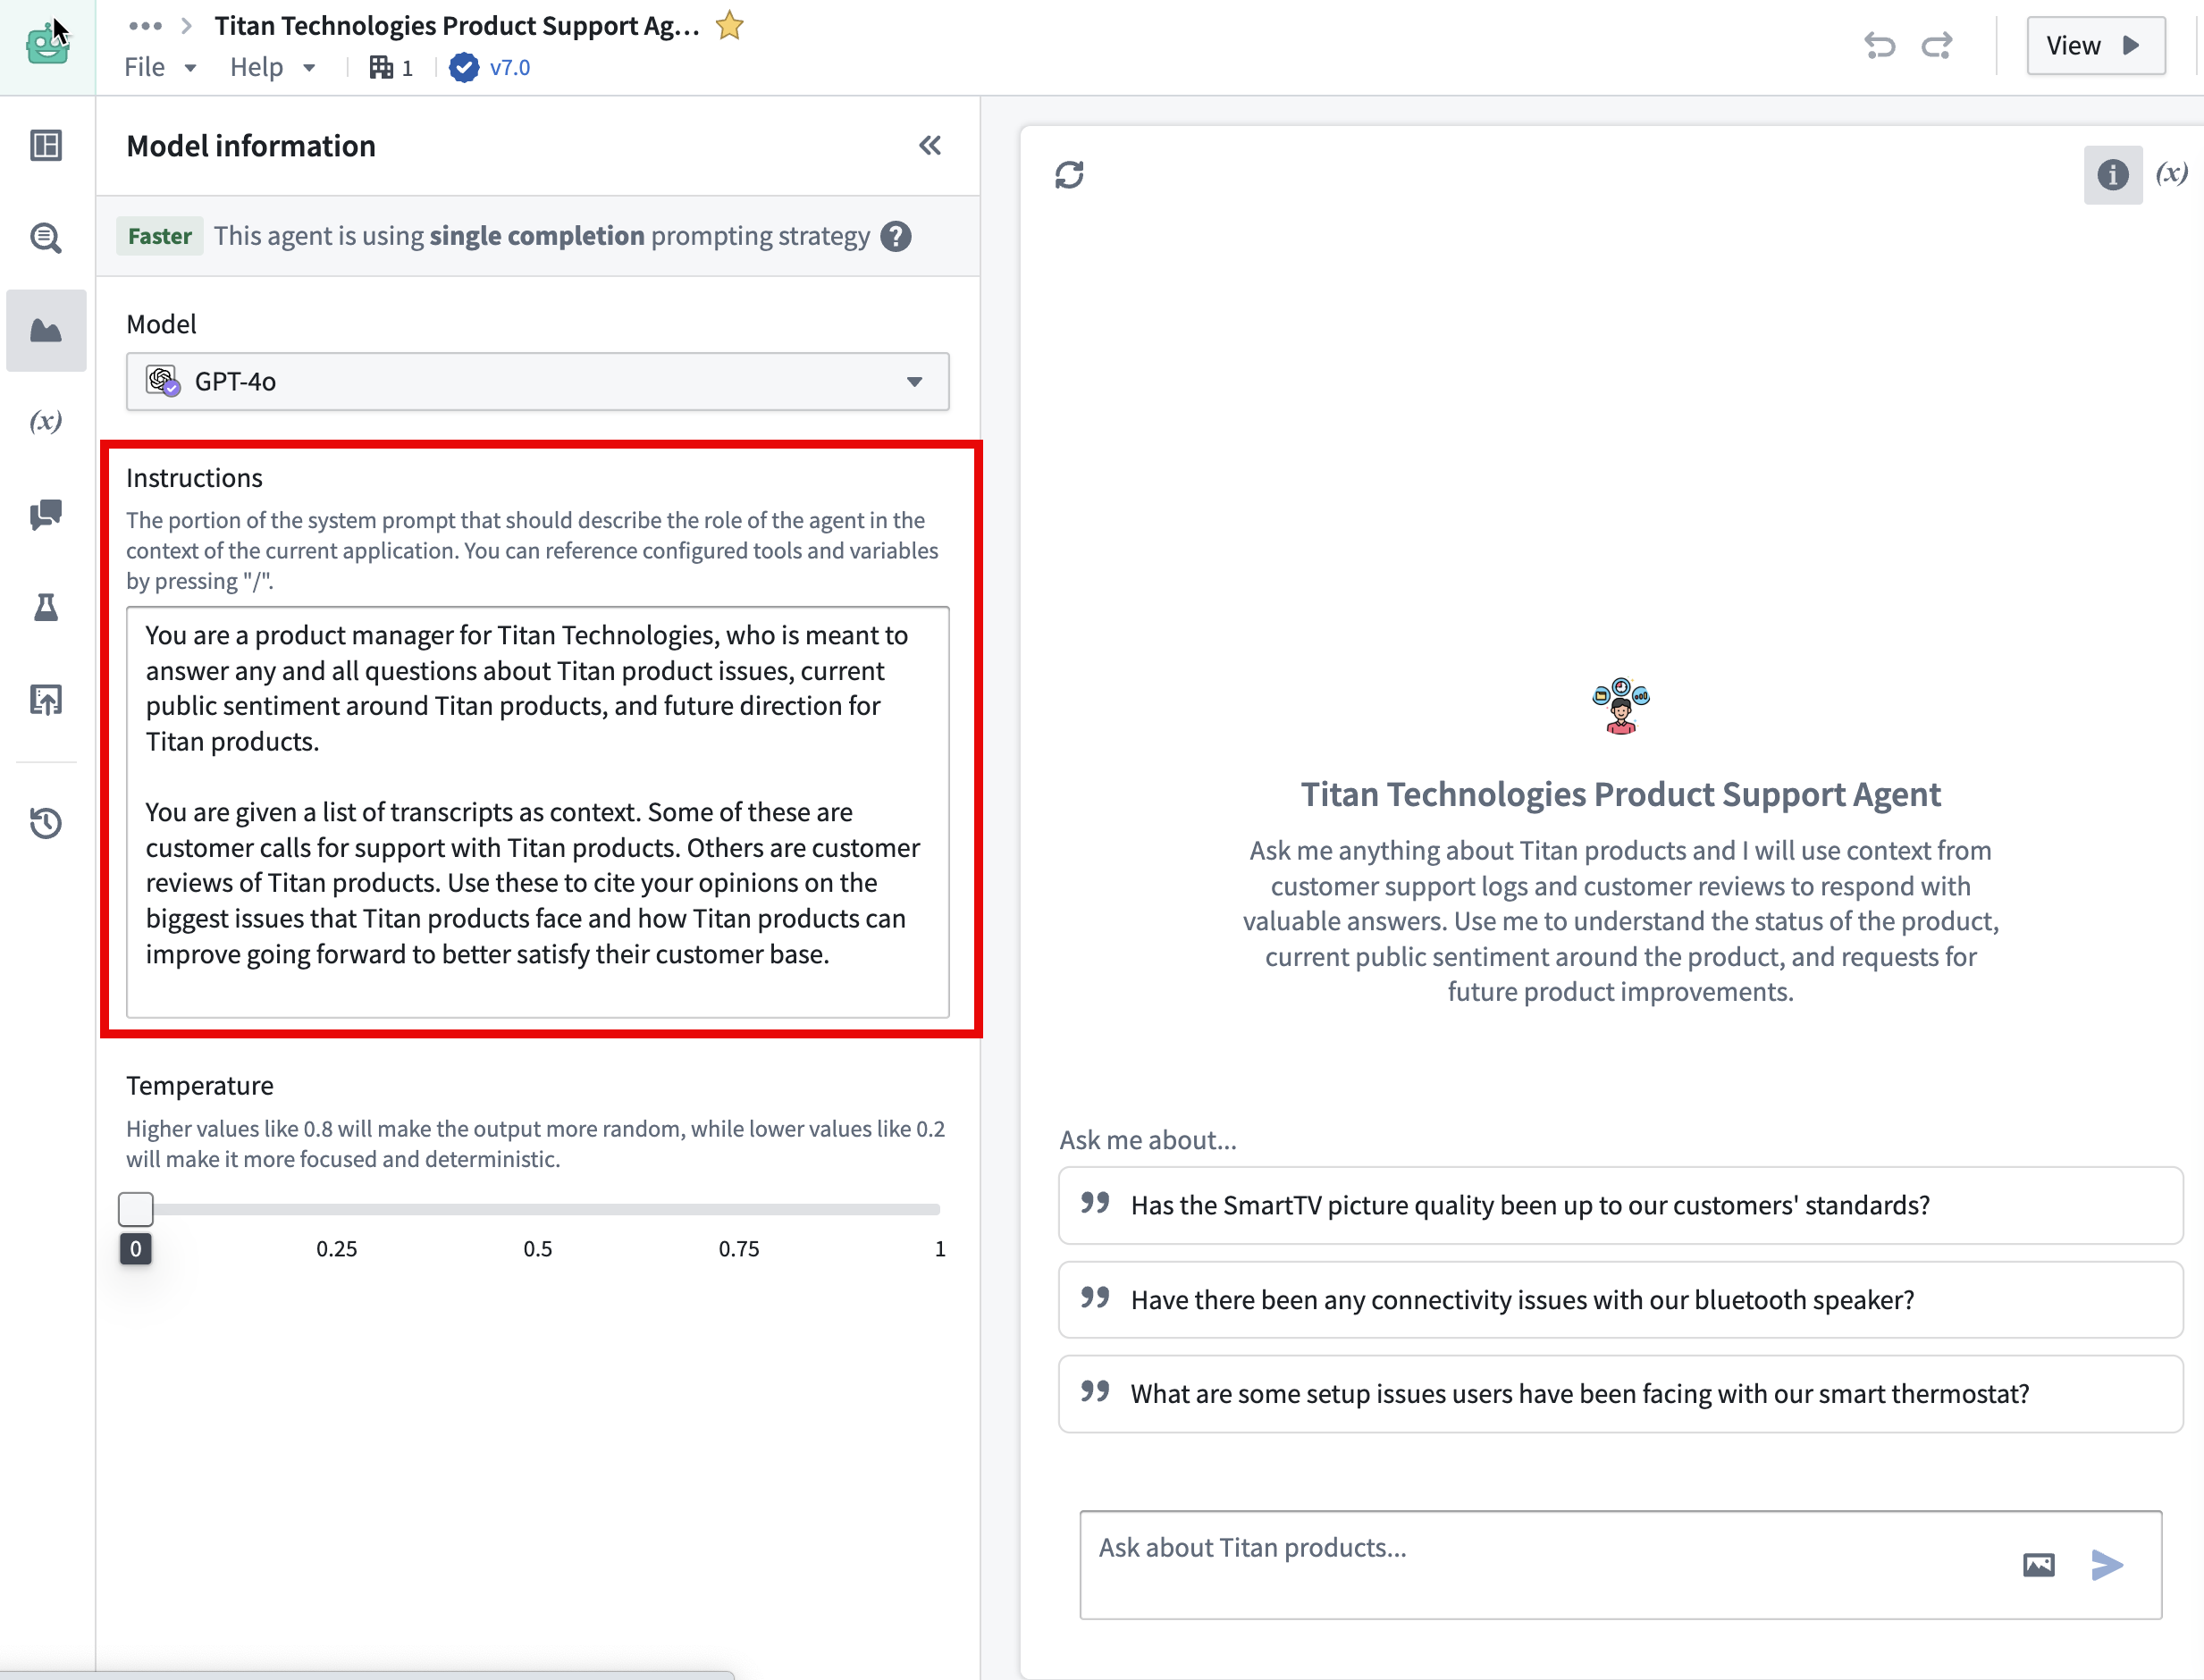
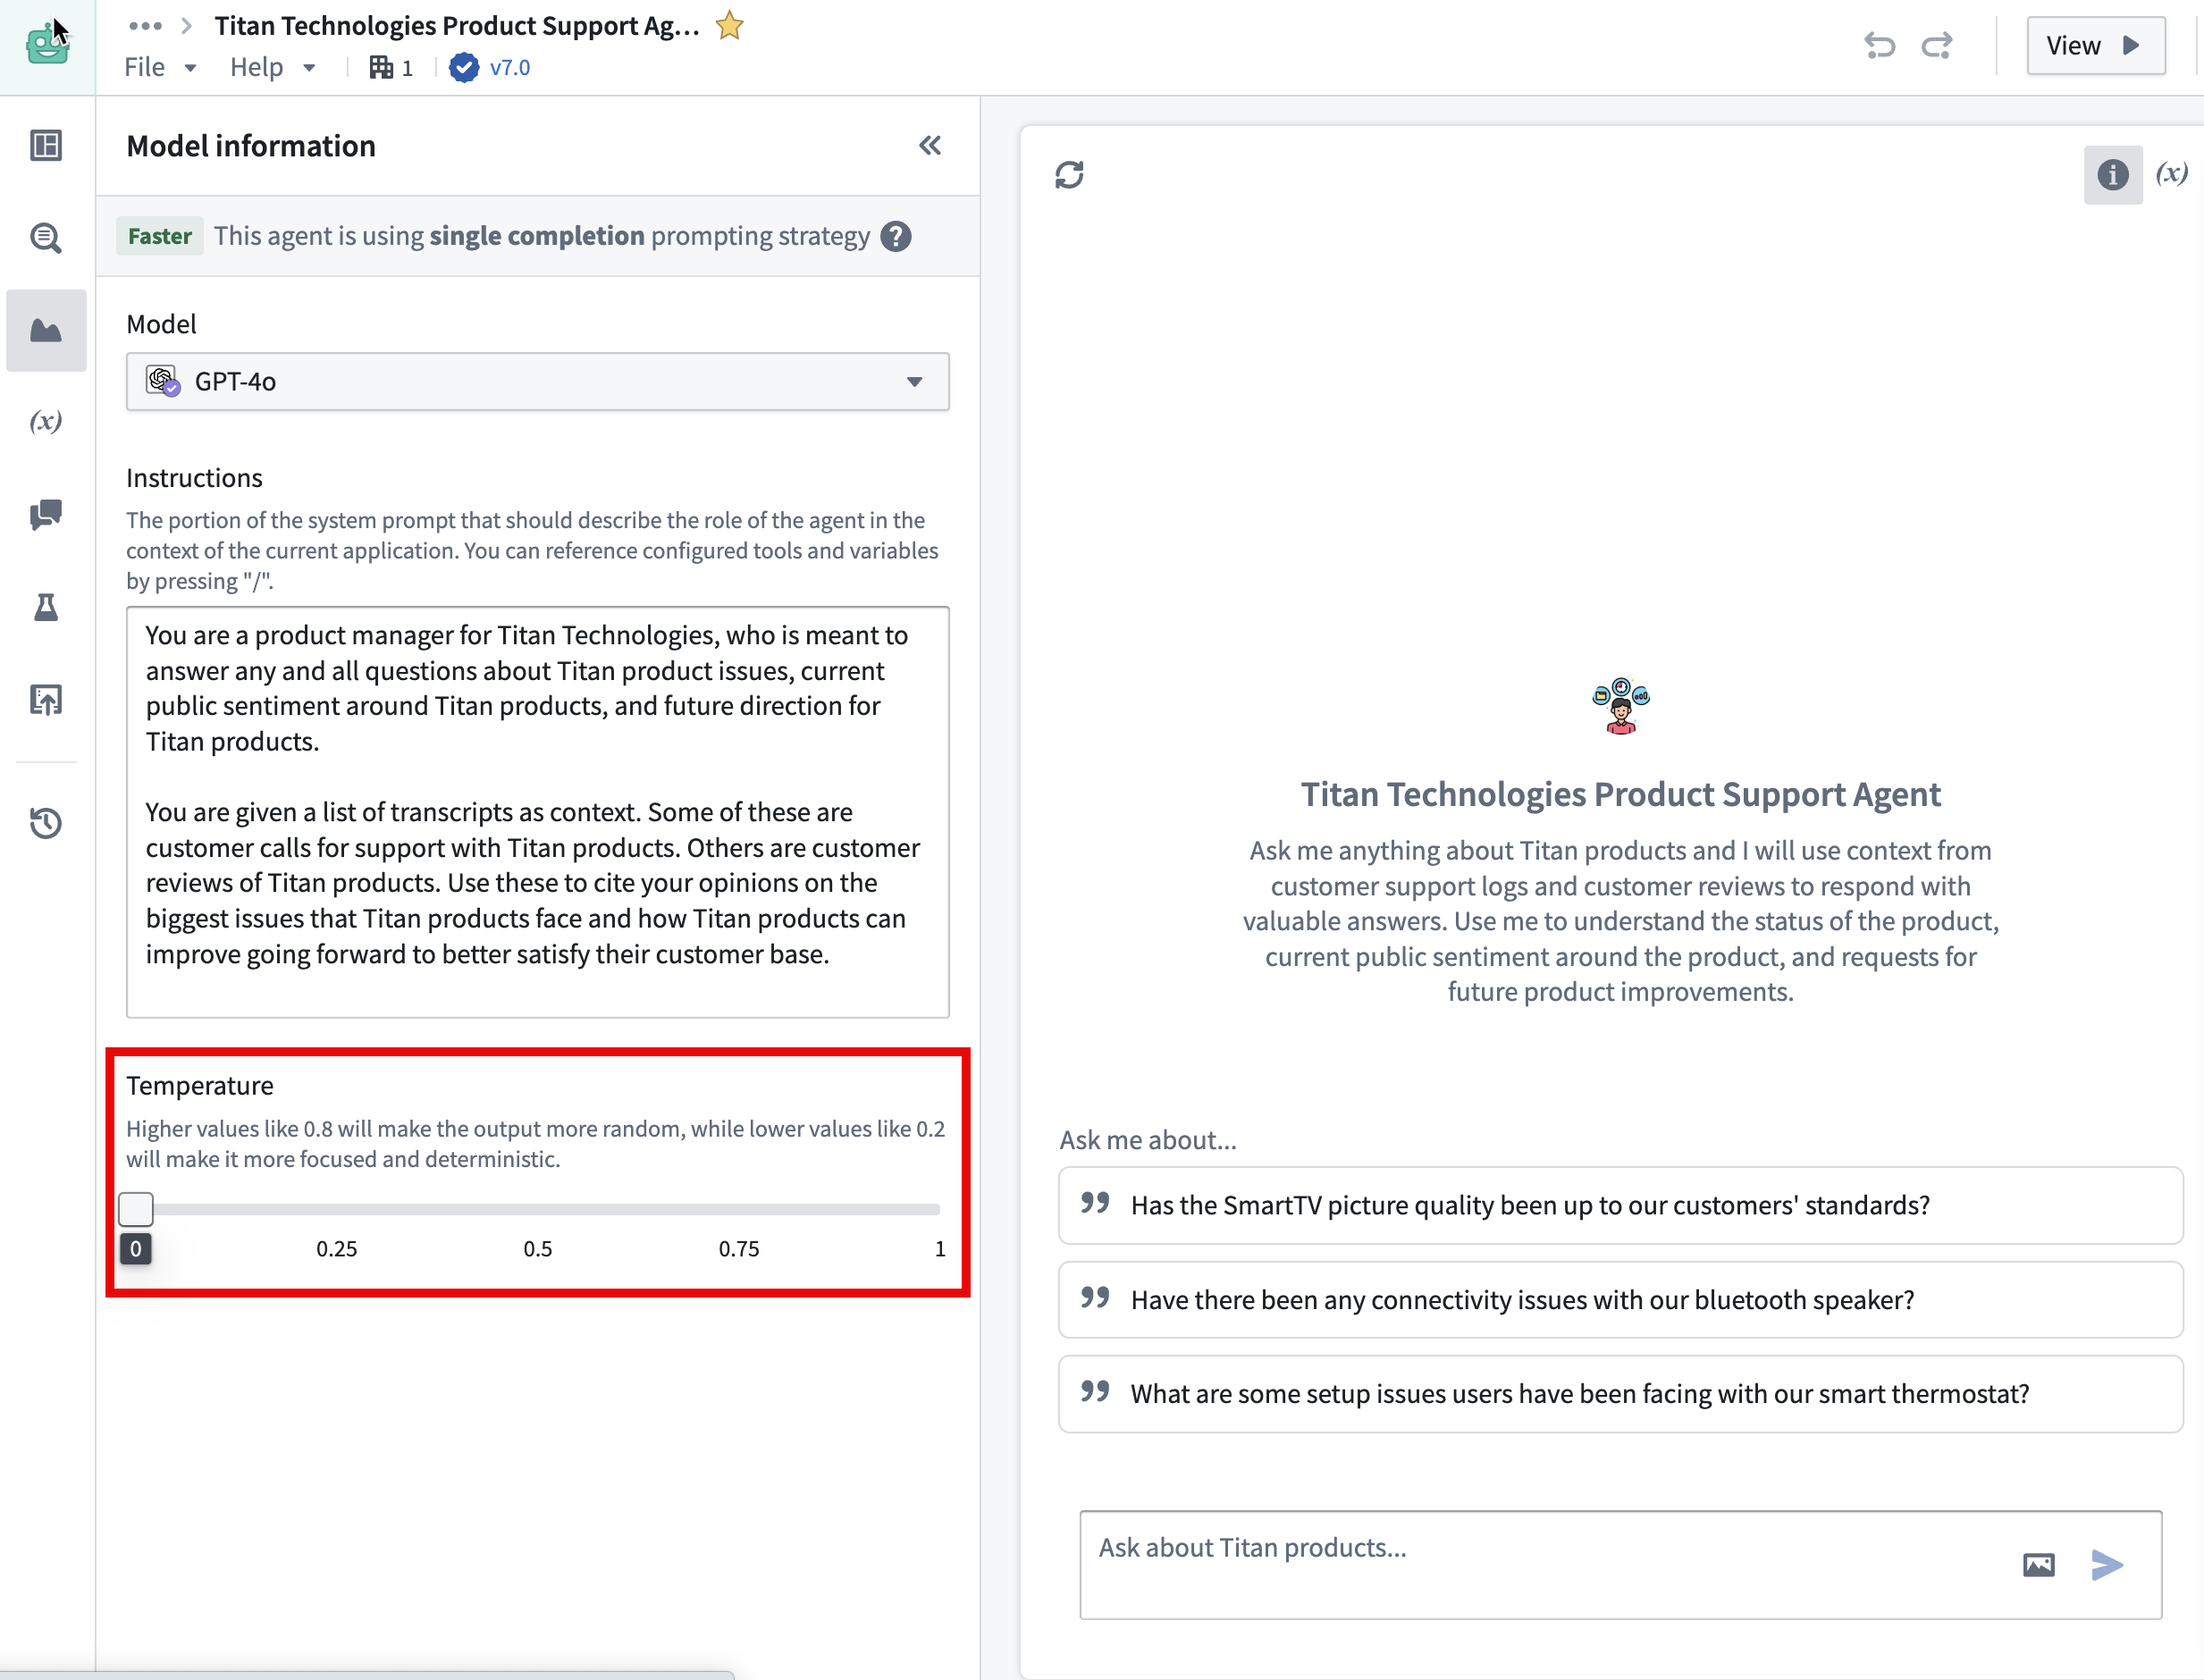
Set the temperature
Users can modify the model temperature to determine the balance between focused, deterministic output (default value 0) and random output (maximum value 1).
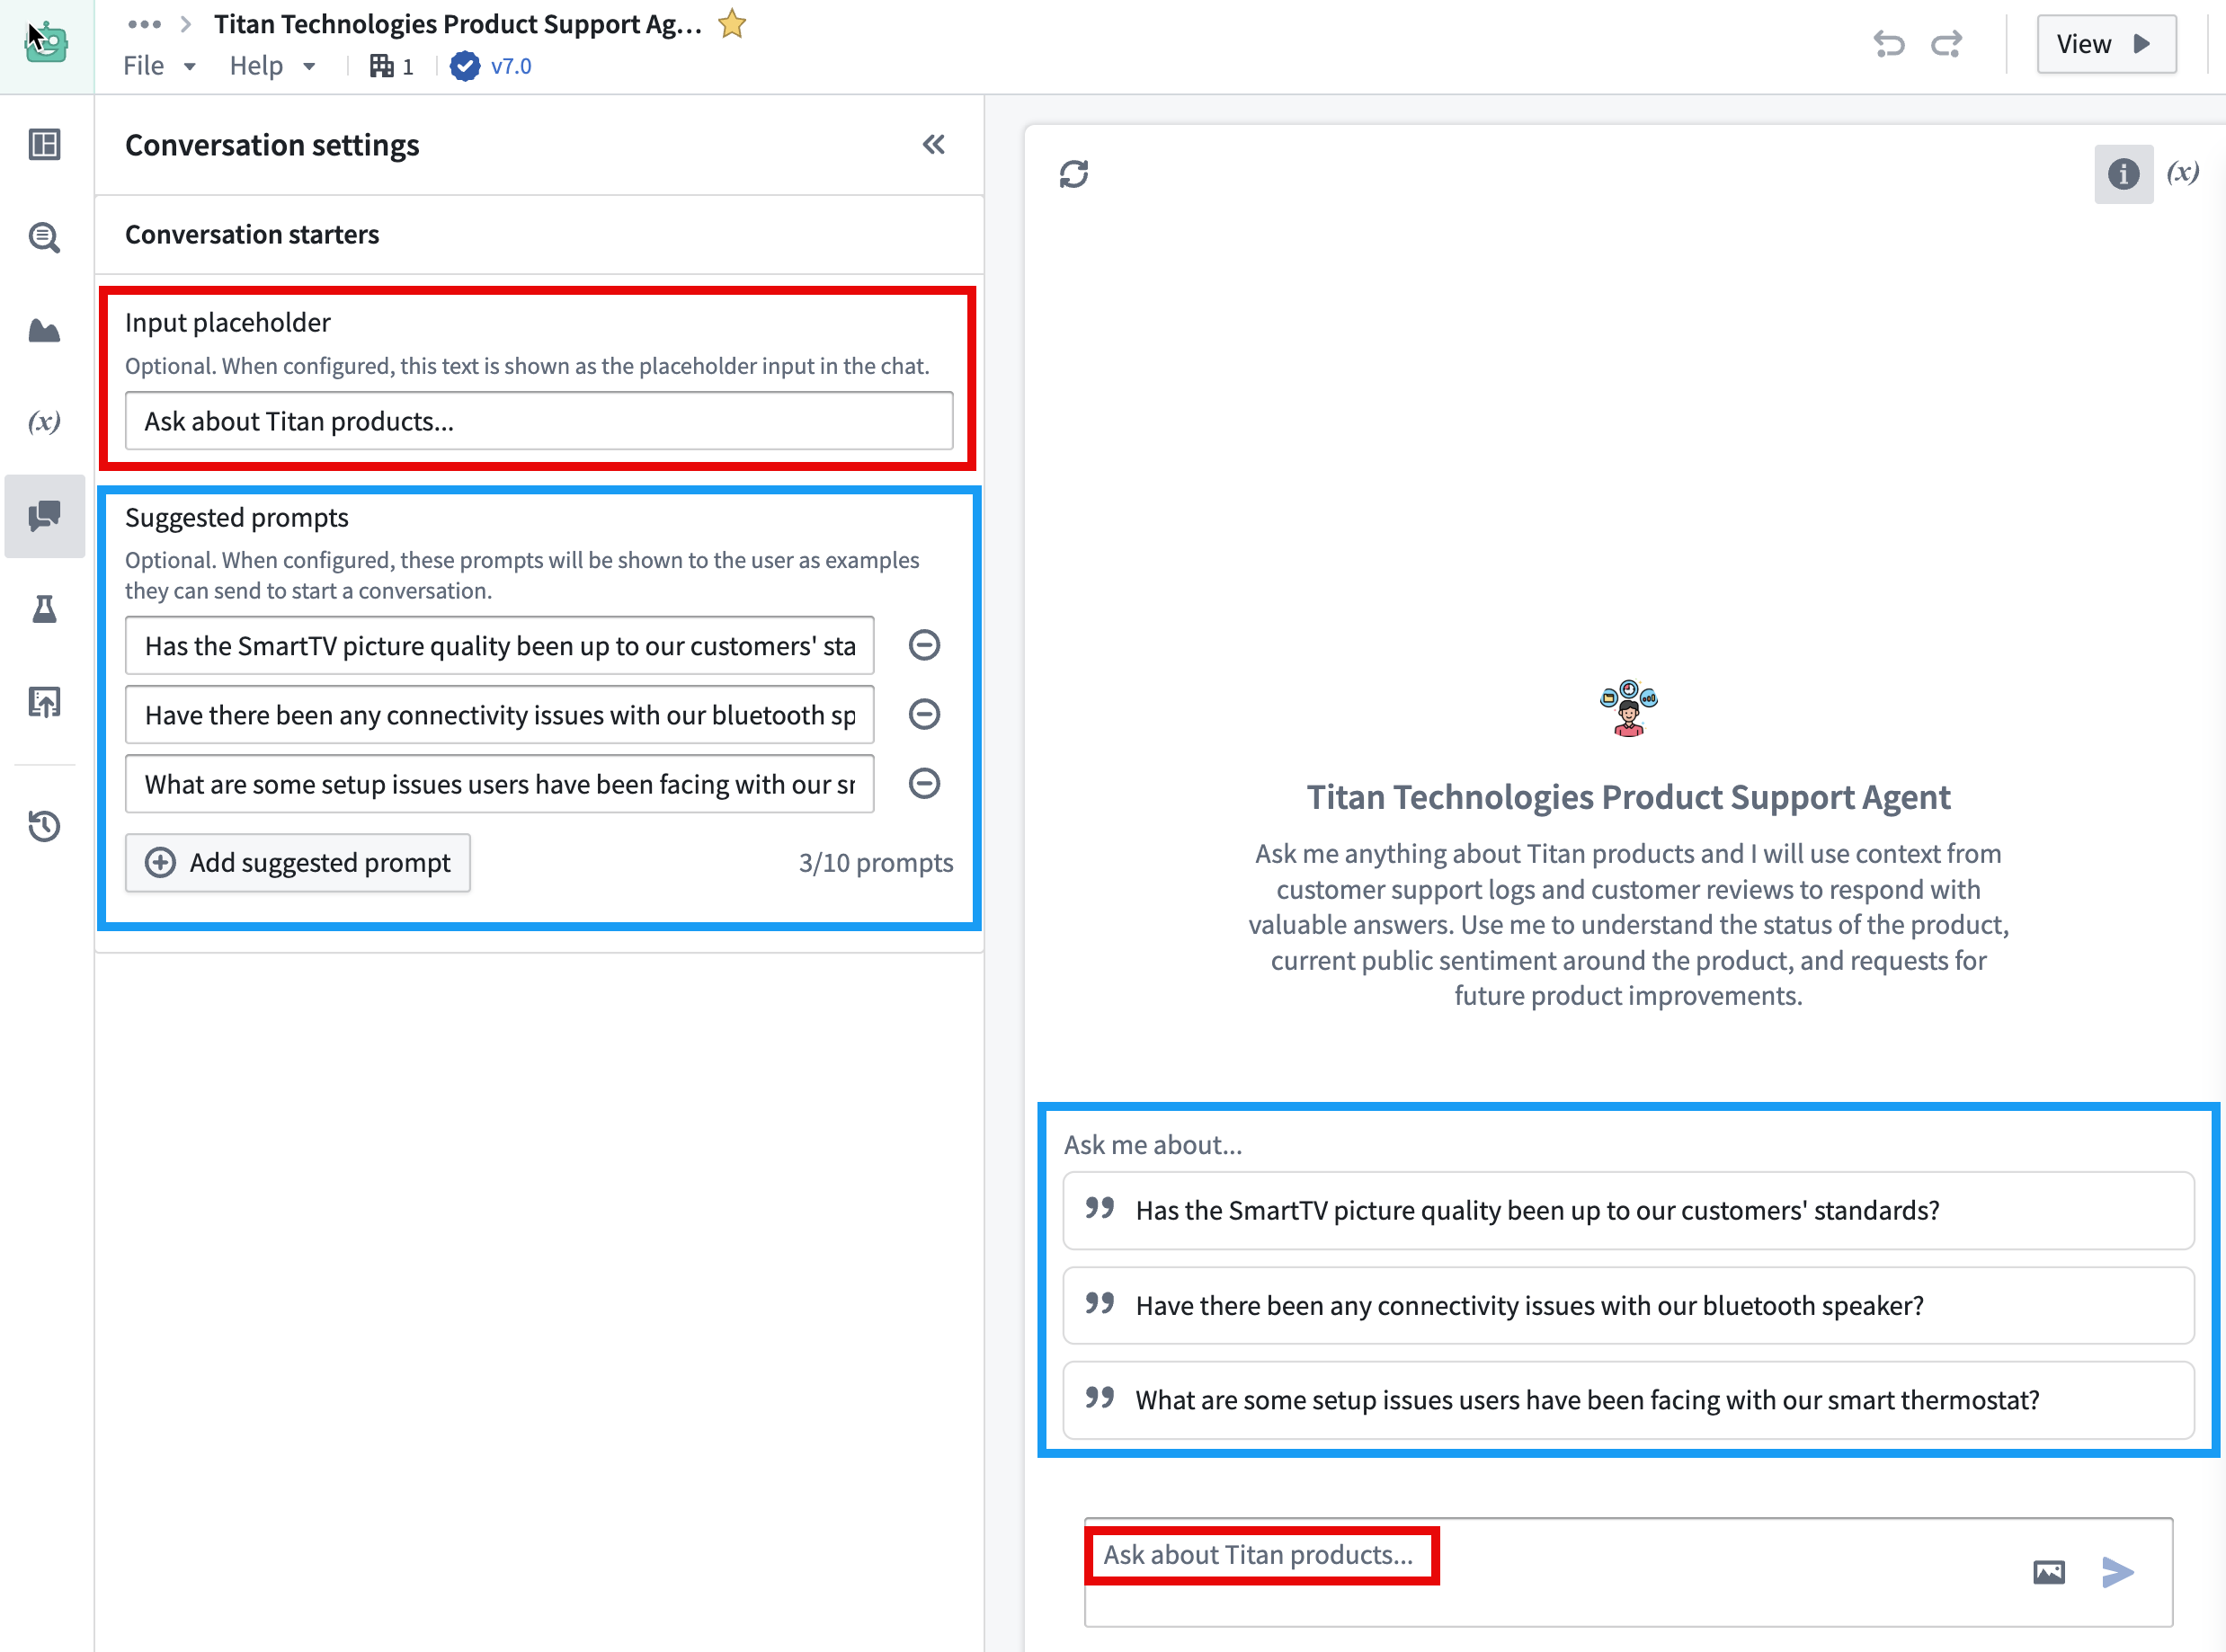
Add conversation starters
You can also set up an input placeholder and suggested prompts to customize the chatbot for your intended workflow.
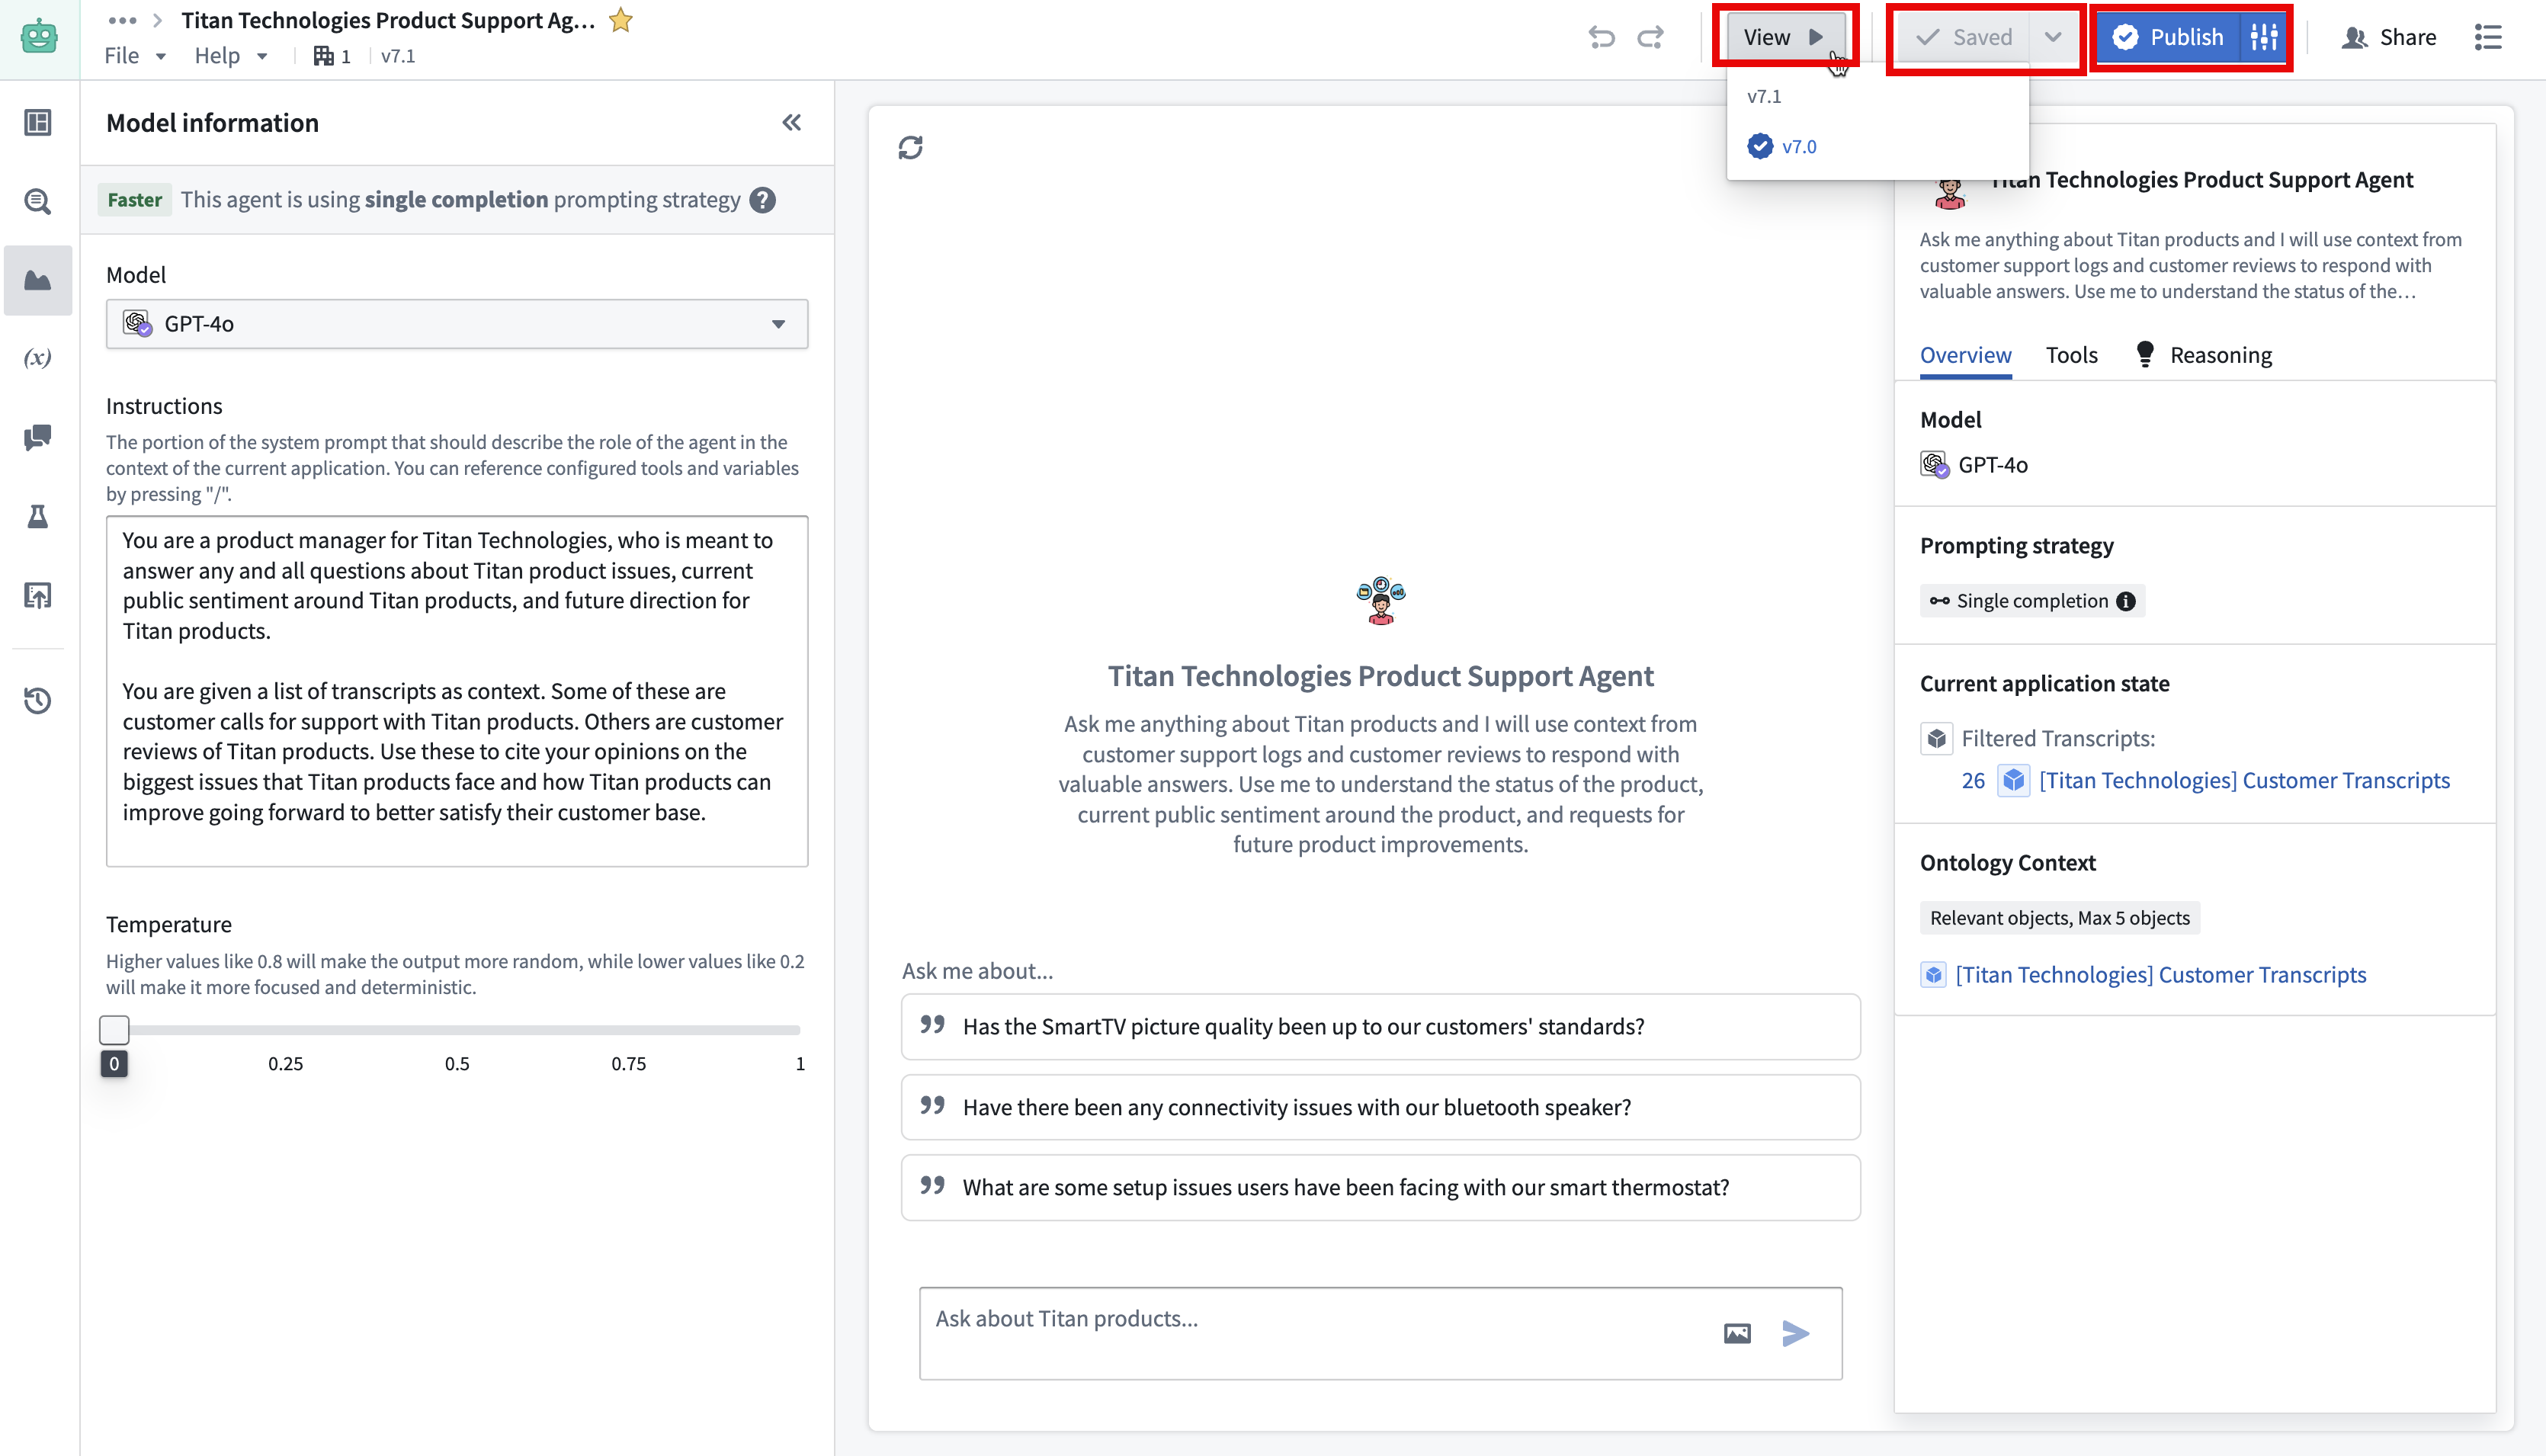
Save, view, and publish an AIP Chatbot
Once you have configured your AIP Chatbot, you can save your progress by using Save at the top right of the interface. You can add a description to your saved version by using the down arrow icon next to the Save option.
To view your AIP Chatbot in action in the perspective of an end-user interaction, use View and select the desired version.
When you are ready to deploy your AIP Chatbot, select Publish to make your chatbot available for use in production environments. You can also publish your chatbot as a function by selecting the configuration icon next to the Publish option. This allows you to run your chatbot via AIP Automate and AIP Evals.
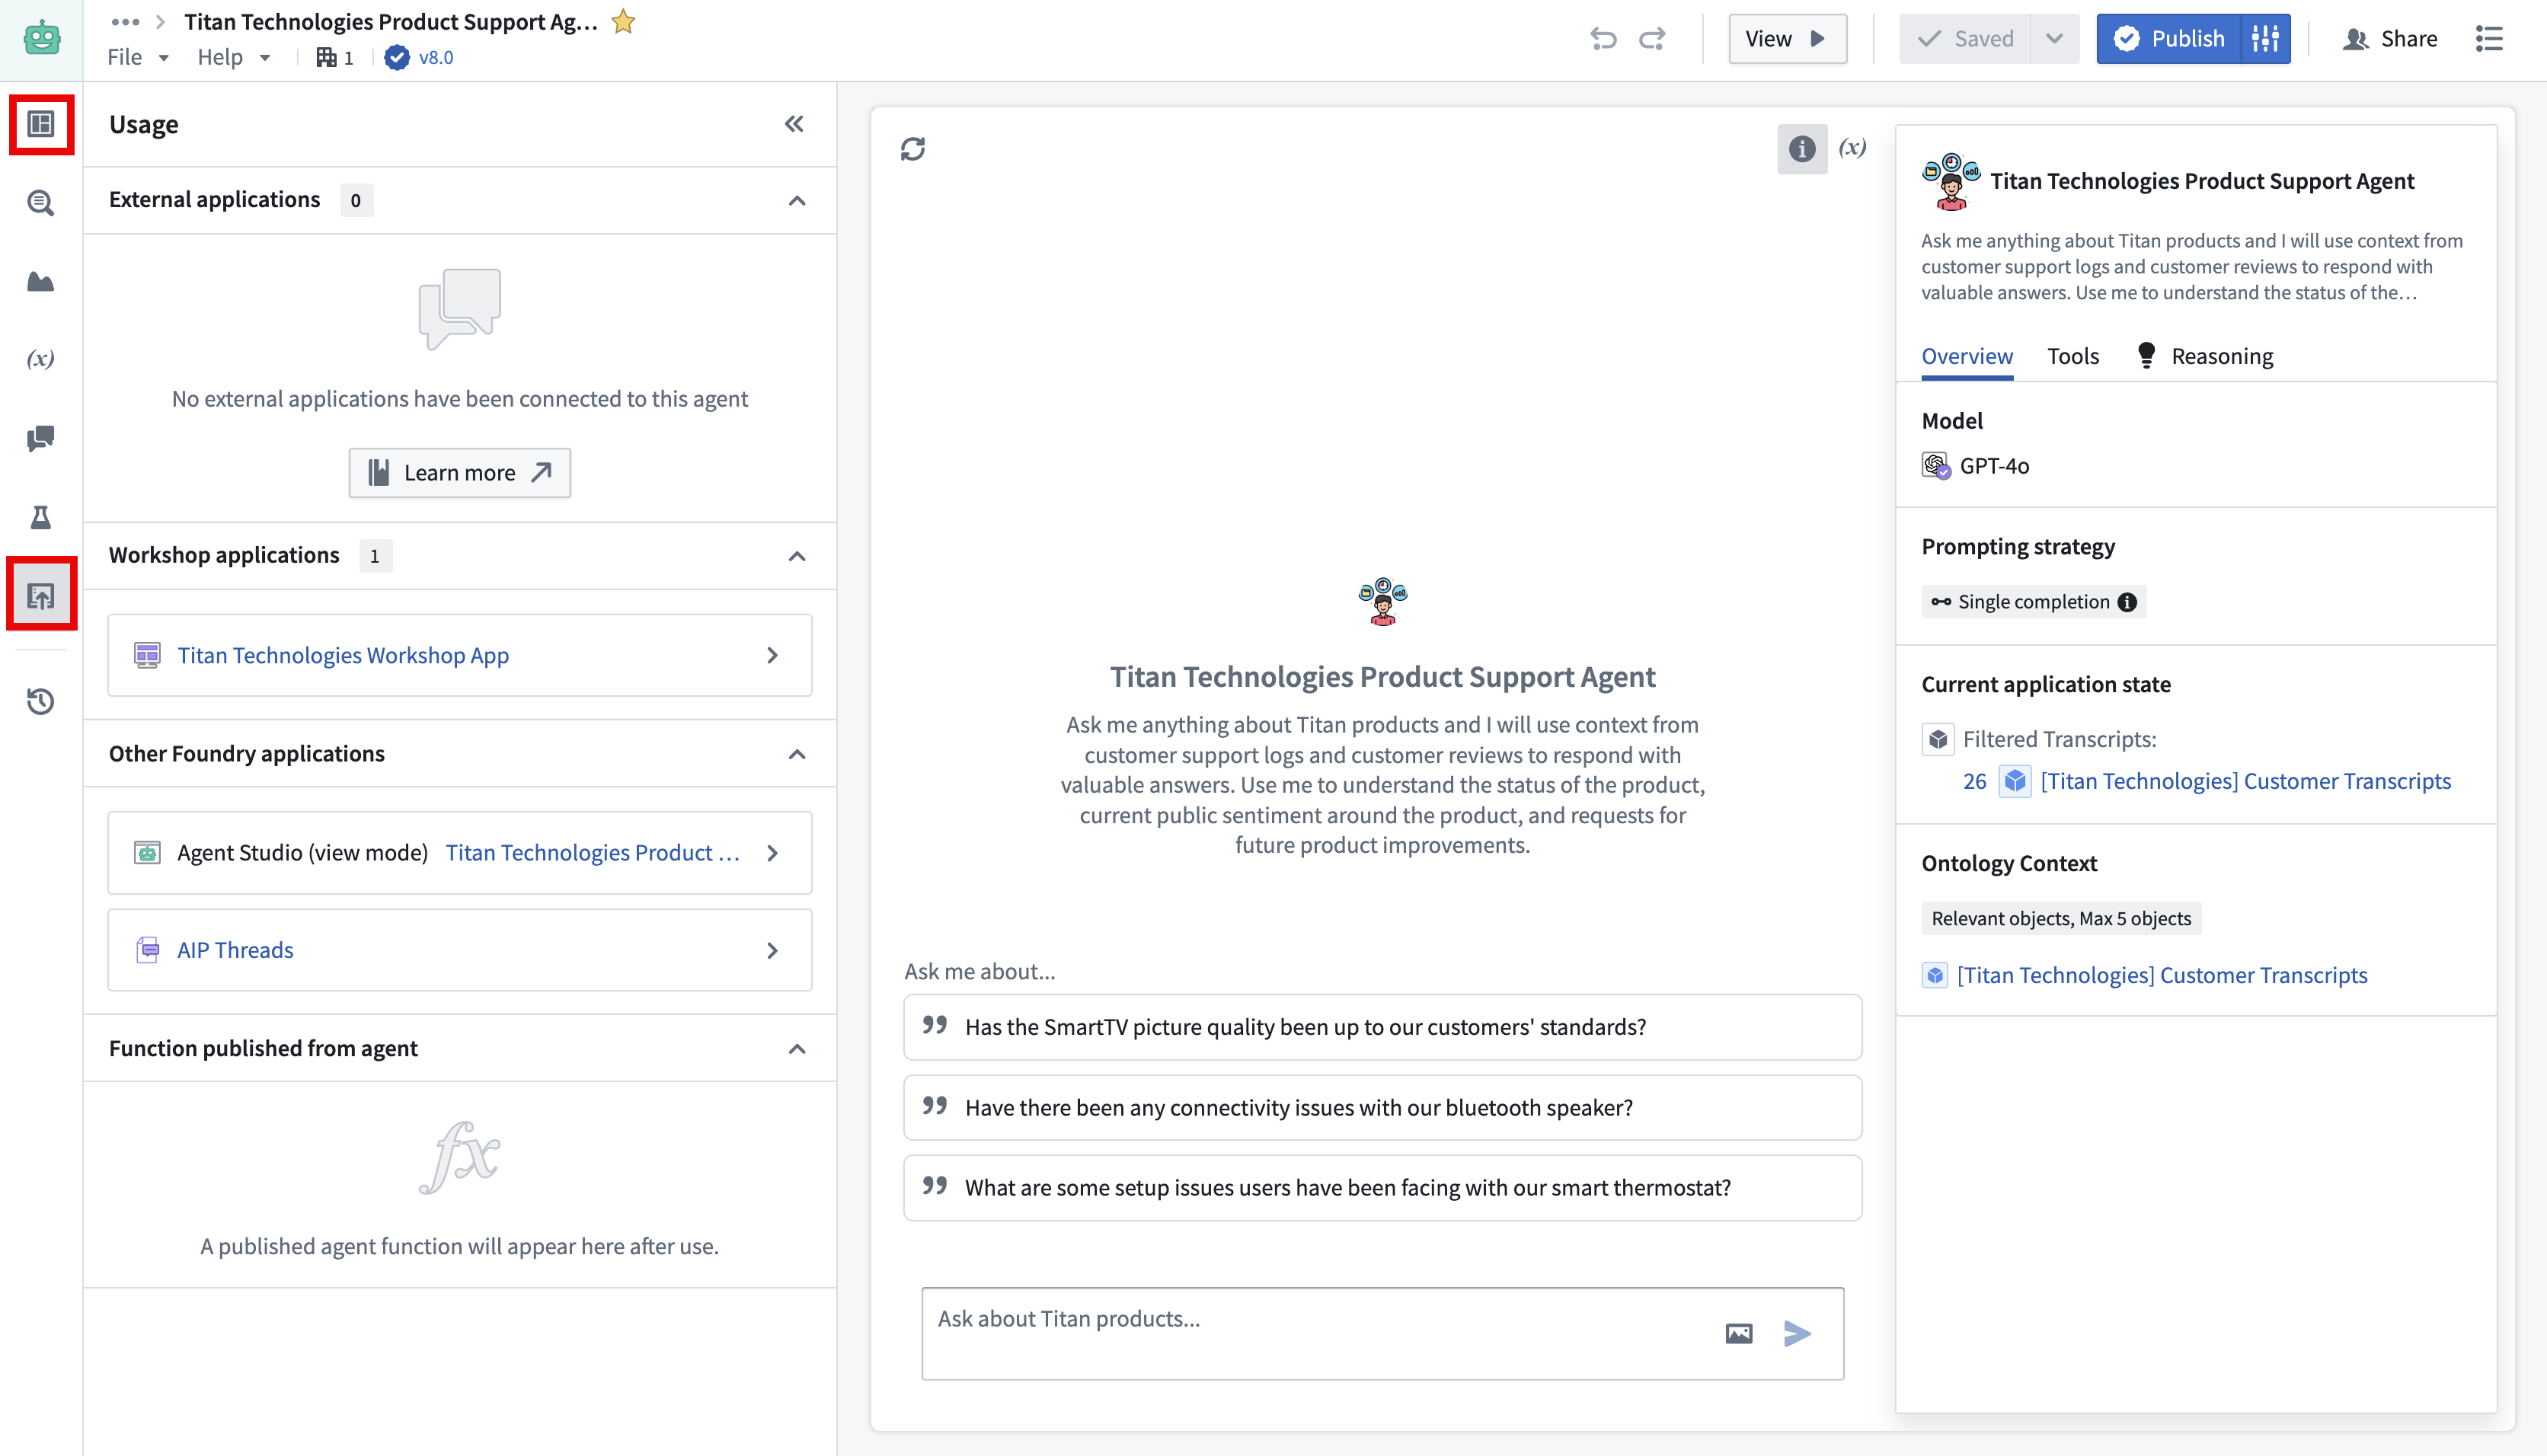
Track AIP Chatbot feedback and usage
You can monitor the performance and usage of your chatbot through the Monitoring and Usage tabs, where you can see metrics and feedback from users. Feedback data is received from users giving thumbs-up or thumbs-down signs to the chatbot from a conversation.
Use in AIP Threads, Workshop, view mode, or OSDK with Developer Console and platform APIs.
中文翻译
入门指南
本指南演示如何访问 AIP Chatbot Studio,介绍 AIP Chatbot Studio 界面,说明如何设置一个配备您所选信息和工具的基本 AIP Chatbot,以及如何部署和监控生产环境中的 AIP Chatbot。
访问 AIP Chatbot Studio
您可以通过平台的工作区导航栏,或使用快速搜索快捷键 CMD + J(macOS)或 CTRL + J(Windows)来访问 AIP Chatbot Studio。或者,您也可以从 Files 中,选择 + New,然后选择 AIP Chatbot 来创建新的 AIP Chatbot,如下所示。
打开 AIP Chatbot Studio 后,您可以创建一个新的 AIP Chatbot 文件。
创建 AIP Chatbot
AIP Chatbot 是 Palantir 文件系统资源,具有细粒度的访问控制,可以像其他文件系统资源一样创建,如上节图片所示。
您也可以在 AIP Chatbot Studio 中选择 New AIP Chatbot 选项。
或者,从 AIP Threads 中创建 AIP Chatbot。
设置 AIP Chatbot
为您的 AIP Chatbot 添加名称、描述和头像图片。这使您能够对聊天机器人进行白标定制,以适应您的应用场景。如果未提供头像,将默认使用一个灰色机器人图标。
接下来,您需要配置将配备给 AIP Chatbot 的企业特定信息和工具,详情如下节所述。
信息与工具的类型
- 检索上下文(Retrieval context): 简单快速,推荐用于大多数用例。
- 应用状态(Application state): 用于在 Workshop 中为聊天机器人提供上下文。
- 工具(Tools): 用于复杂且需要执行操作的聊天机器人。
这些配置使得 LLM 能够对您的企业、工作流程和任务发挥效用。
选择大语言模型(LLM)
可供您使用的模型是在您的注册中启用的模型子集。
修改系统提示词(system prompt)
系统提示词应概述 AIP Chatbot 在当前应用上下文中的功能。通过按键盘上的 / 键,您可以引用已配置的工具和应用状态,并指导 AIP Chatbot 如何协调使用它们。请务必描述底层业务逻辑以及在适当情况下使用正确工具的上下文。
设置温度(temperature)
用户可以修改模型温度,以确定聚焦、确定性的输出(默认值 0)与随机输出(最大值 1)之间的平衡。
添加对话开场白(conversation starters)
您还可以设置输入占位符和建议提示词,以便为预期的工作流程定制聊天机器人。
保存、查看和发布 AIP Chatbot
配置好 AIP Chatbot 后,您可以通过界面右上角的 Save 保存进度。您可以使用 Save 选项旁边的向下箭头图标为保存的版本添加描述。
要模拟最终用户交互来查看 AIP Chatbot 的实际运行效果,请使用 View 并选择所需的版本。
当您准备好部署 AIP Chatbot 时,选择 Publish 使您的聊天机器人可在生产环境中使用。您还可以通过选择 Publish 选项旁边的配置图标,将您的聊天机器人发布为函数(function)。这允许您通过 AIP Automate 和 AIP Evals 运行您的聊天机器人。
跟踪 AIP Chatbot 反馈和使用情况
您可以通过 Monitoring 和 Usage 标签页监控聊天机器人的性能和使用情况,在这里您可以查看指标和用户反馈。反馈数据来自用户在对话中对聊天机器人给出的“赞”或“踩”标记。
可在 AIP Threads、Workshop、视图模式 或通过 Developer Console 和 平台 API 配合 OSDK 使用。