Example: Upload a scikit-learn model(示例:上传 scikit-learn 模型)
The below documentation provides an example of how to integrate a model into Foundry from existing model files. For a step-by-step guide, refer to our documentation on how to publish a model from pre-trained files.
Create the model from model files
The following example uses a model that was trained locally using the Iris classification dataset ↗ published by UC Irvine. The dataset has four features; sepal_length, sepal_width, petal_length and petal_width and can be used to build a model that predicts the specific specifies of the iris flower.
In this example, we assume the model was trained locally as a K-nearest neighbors classifier ↗ with the scikit-learn library ↗. This example also assumes the model was trained with Python 3.8.0 and scikit-learn 1.3.2.
After training, the model is saved as a pickle file ↗, as defined below.
from sklearn.datasets import load_iris
from sklearn.model_selection import train_test_split
from sklearn.neighbors import KNeighborsClassifier

import pickle

iris = load_iris()
X = iris.data
y = iris.target

X_train, X_test, y_train, y_test = train_test_split(
    X, y, test_size=0.4, random_state=4)

knn = KNeighborsClassifier(n_neighbors = 5)
knn.fit(X_train, y_train)

with open("iris_model.pkl", "wb") as f:
    pickle.dump(knn, f)
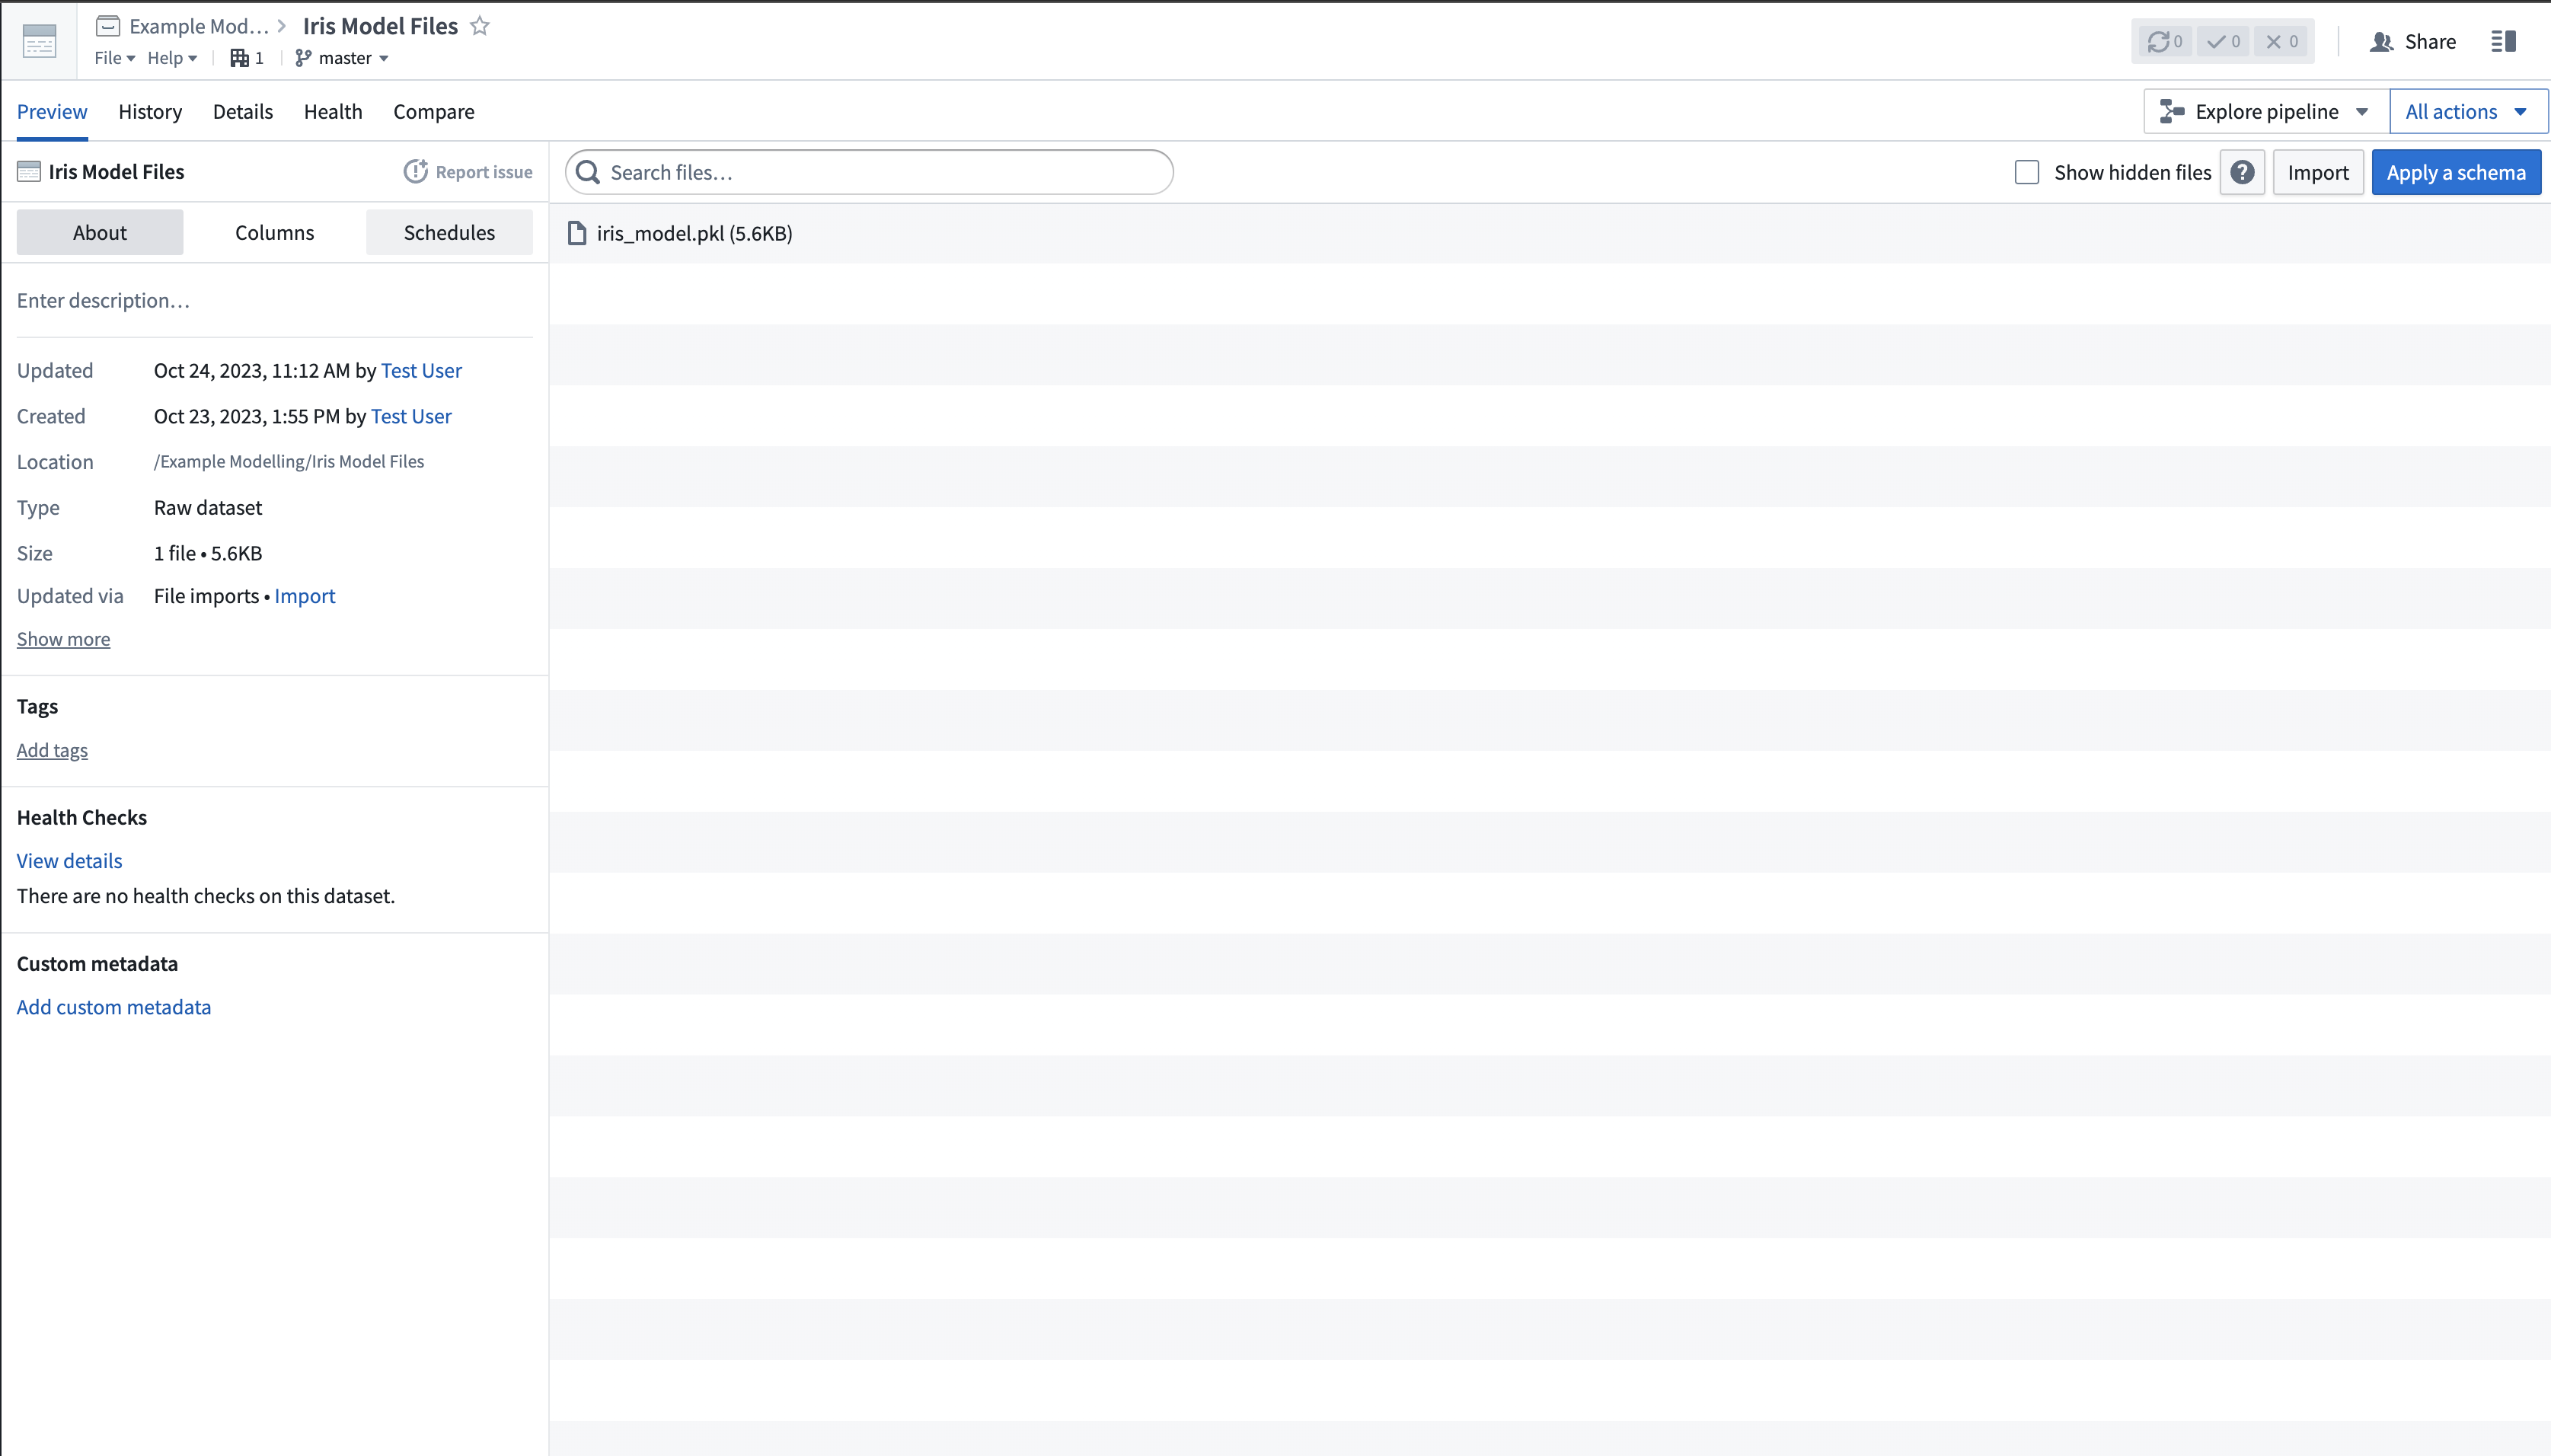
1. Upload the model files to an unstructured dataset
The scikit-train model files are uploaded to Palantir as an unstructured dataset, as shown in the image below:
2. Create a Model Training template to define your model adapter logic
In the Code Repositories application, create a new Model Integration repository with the Model Training language template, then add a dependency on scikit-learn 1.3.2. Define your logic to read the model files and publish a model.
3. Publish your model files as a model
Once the model adapter logic is executed, the model will be published in the platform.
from transforms.api import transform, Input
import palantir_models as pm
from palantir_models.transforms import ModelOutput
from palantir_models.serializers import DillSerializer
import pickle
import os


@transform(
    model_files=Input("<Your Input Path>"),
    model_output=ModelOutput("<Your Output path>")
)
def compute(model_files, model_output):
    fs = model_files.filesystem()
    with fs.open("iris_model.pkl", "rb") as f:
        model = pkl.load(f)

    model_adapter = IrisModelAdapter(model, "target")
    model_output.publish(
        model_adapter=model_adapter
    )


class IrisModelAdapter(pm.ModelAdapter):

    @auto_serialize(
        model=DillSerializer(),
        prediction_column_name=DillSerializer()
    )
    def __init__(self, model, prediction_column_name="target"):
        self.model = model
        self.prediction_column_name = prediction_column_name

    @classmethod
    def api(cls):
        column_names = ["sepal_length", "sepal_width", "petal_length", "petal_width"]
        columns =[(name, float) for name in column_names]
        inputs = {"df_in": pm.Pandas(columns=columns)}
        outputs = {"df_out": pm.Pandas(columns=columns+[("target", int)])}
        return inputs, outputs

    def predict(self, df_in):
        inference_data = df_in

        predictions = self.model.predict(inference_data.values)
        inference_data[self.prediction_column_name] = predictions
        return inference_data
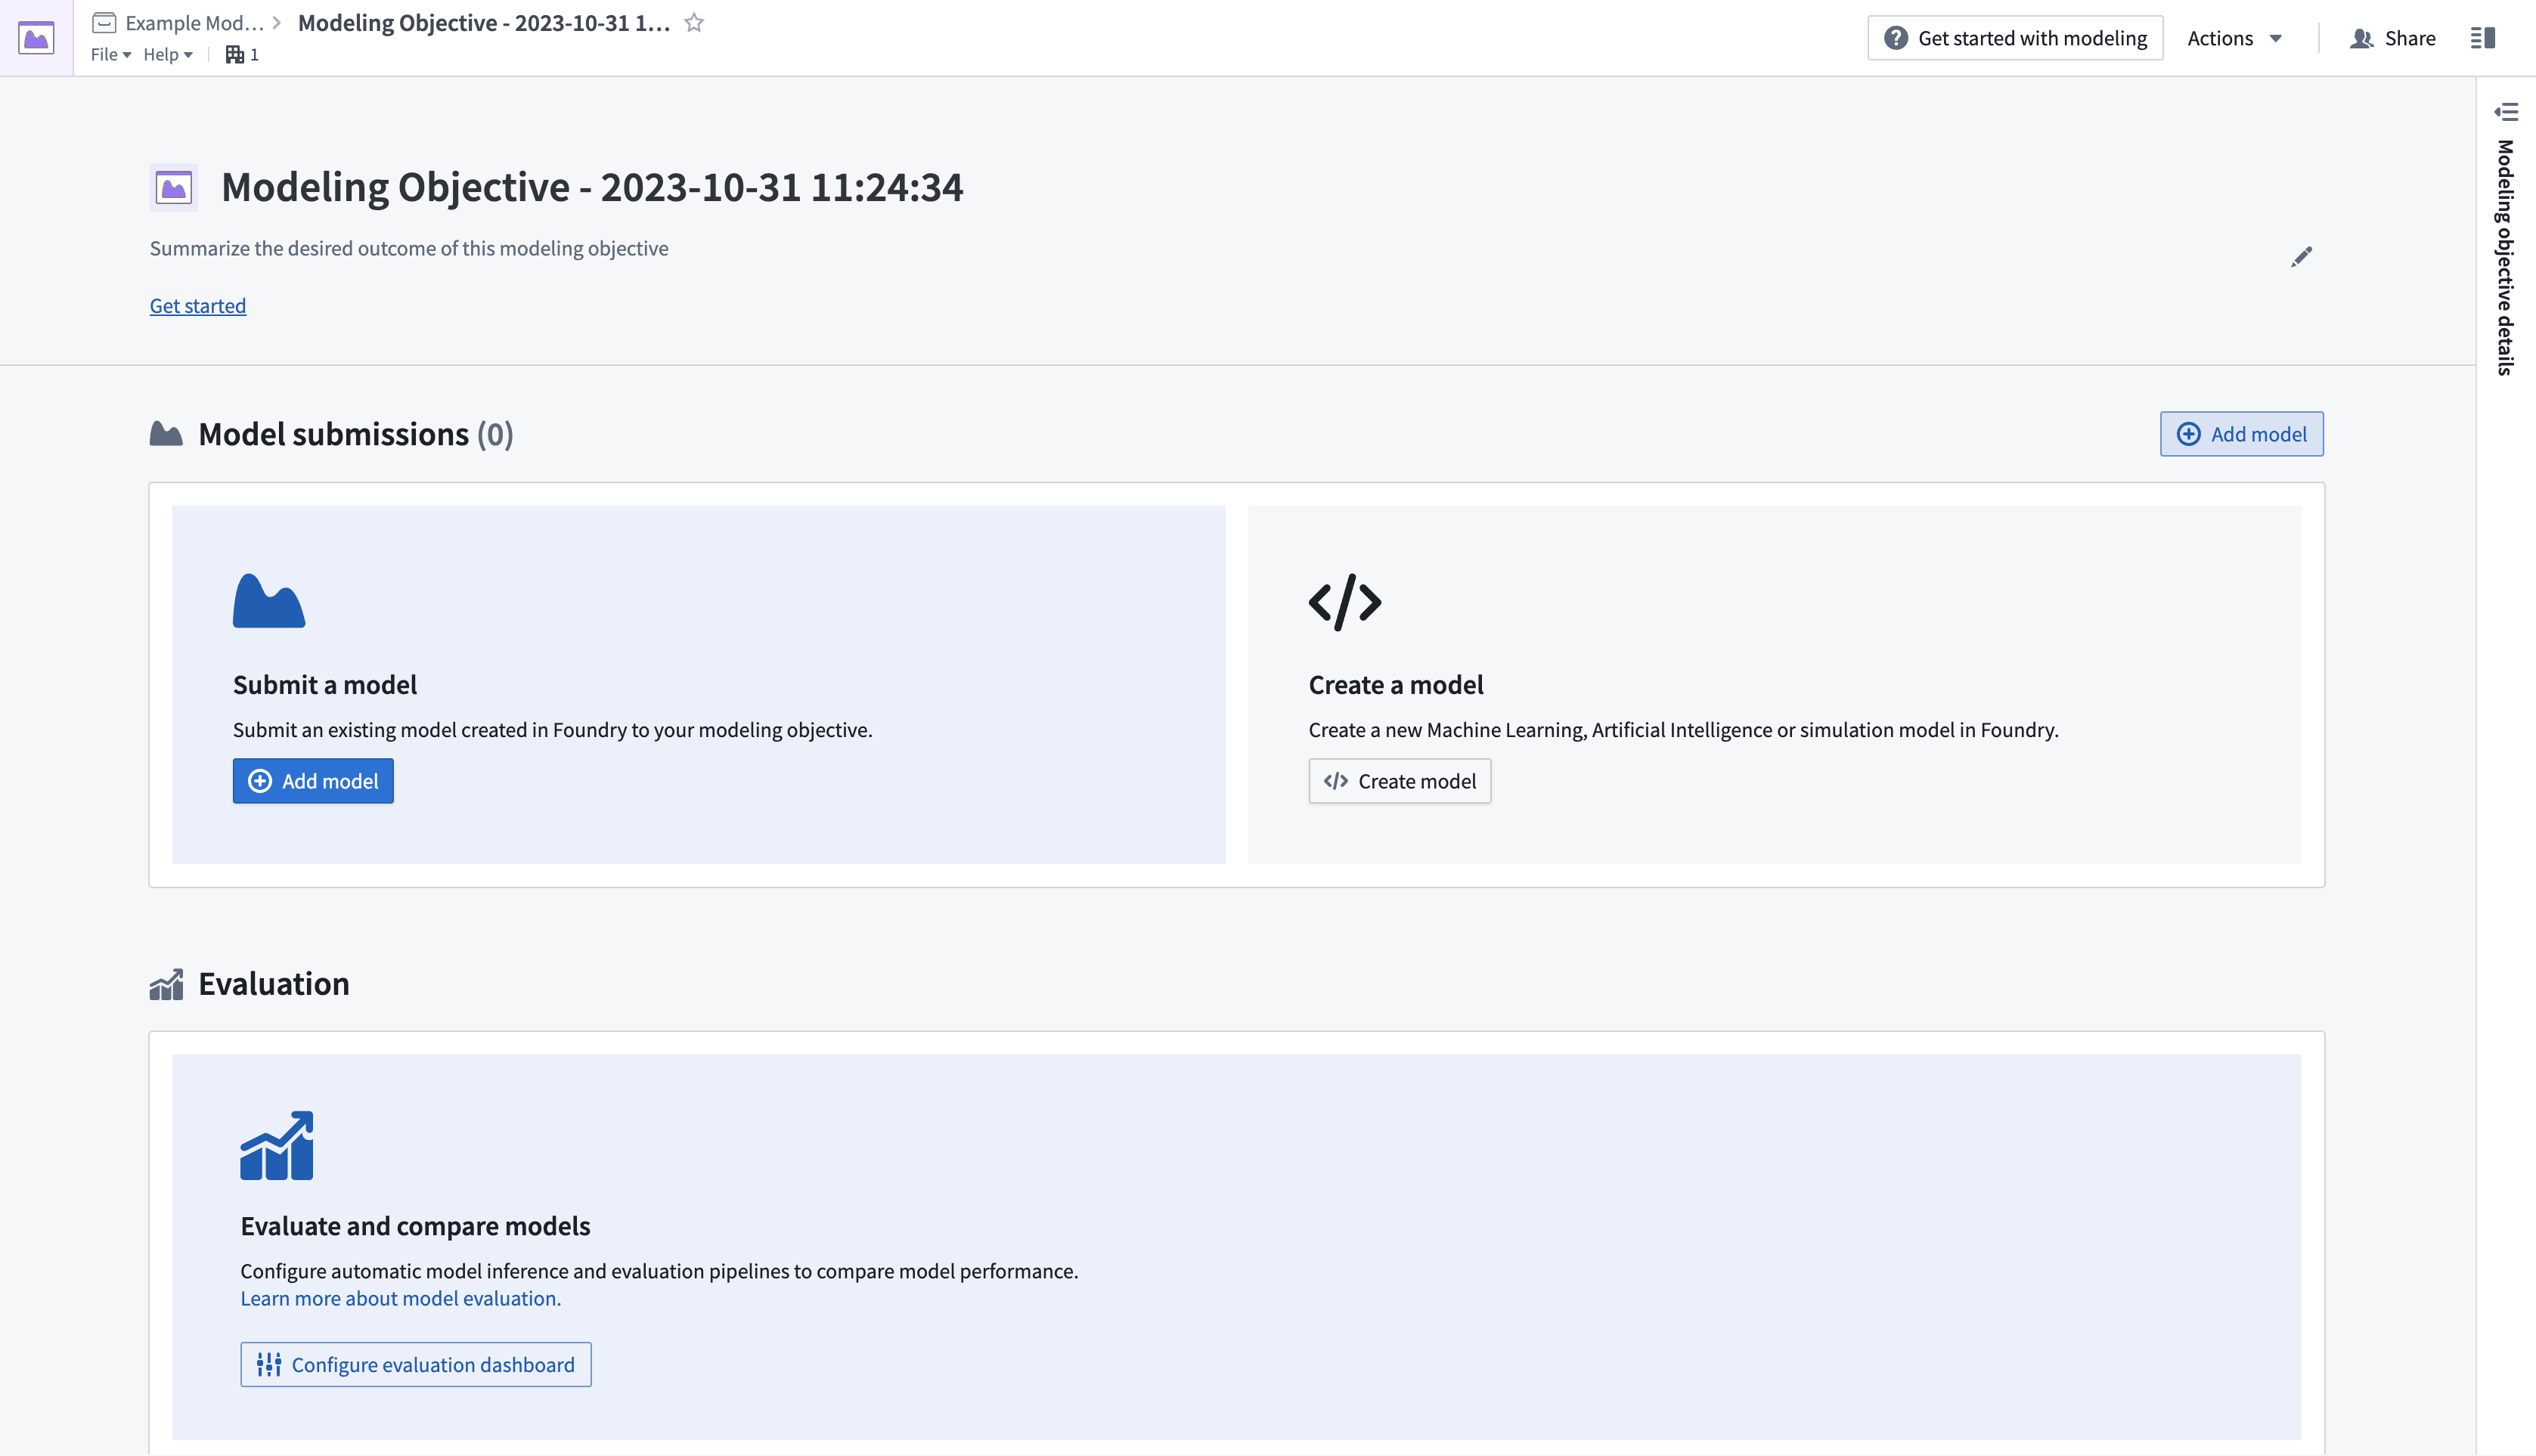
4. Consume the published model
Once the model is published, it is ready to be consumed for inference in the platform. For this example, we will create a new modeling objective and submit the model.
- Create a new modeling objective by navigating to the Project folder where you wish the objective to live, then selecting New > Modeling Objective. This will open the Modeling Objectives application.
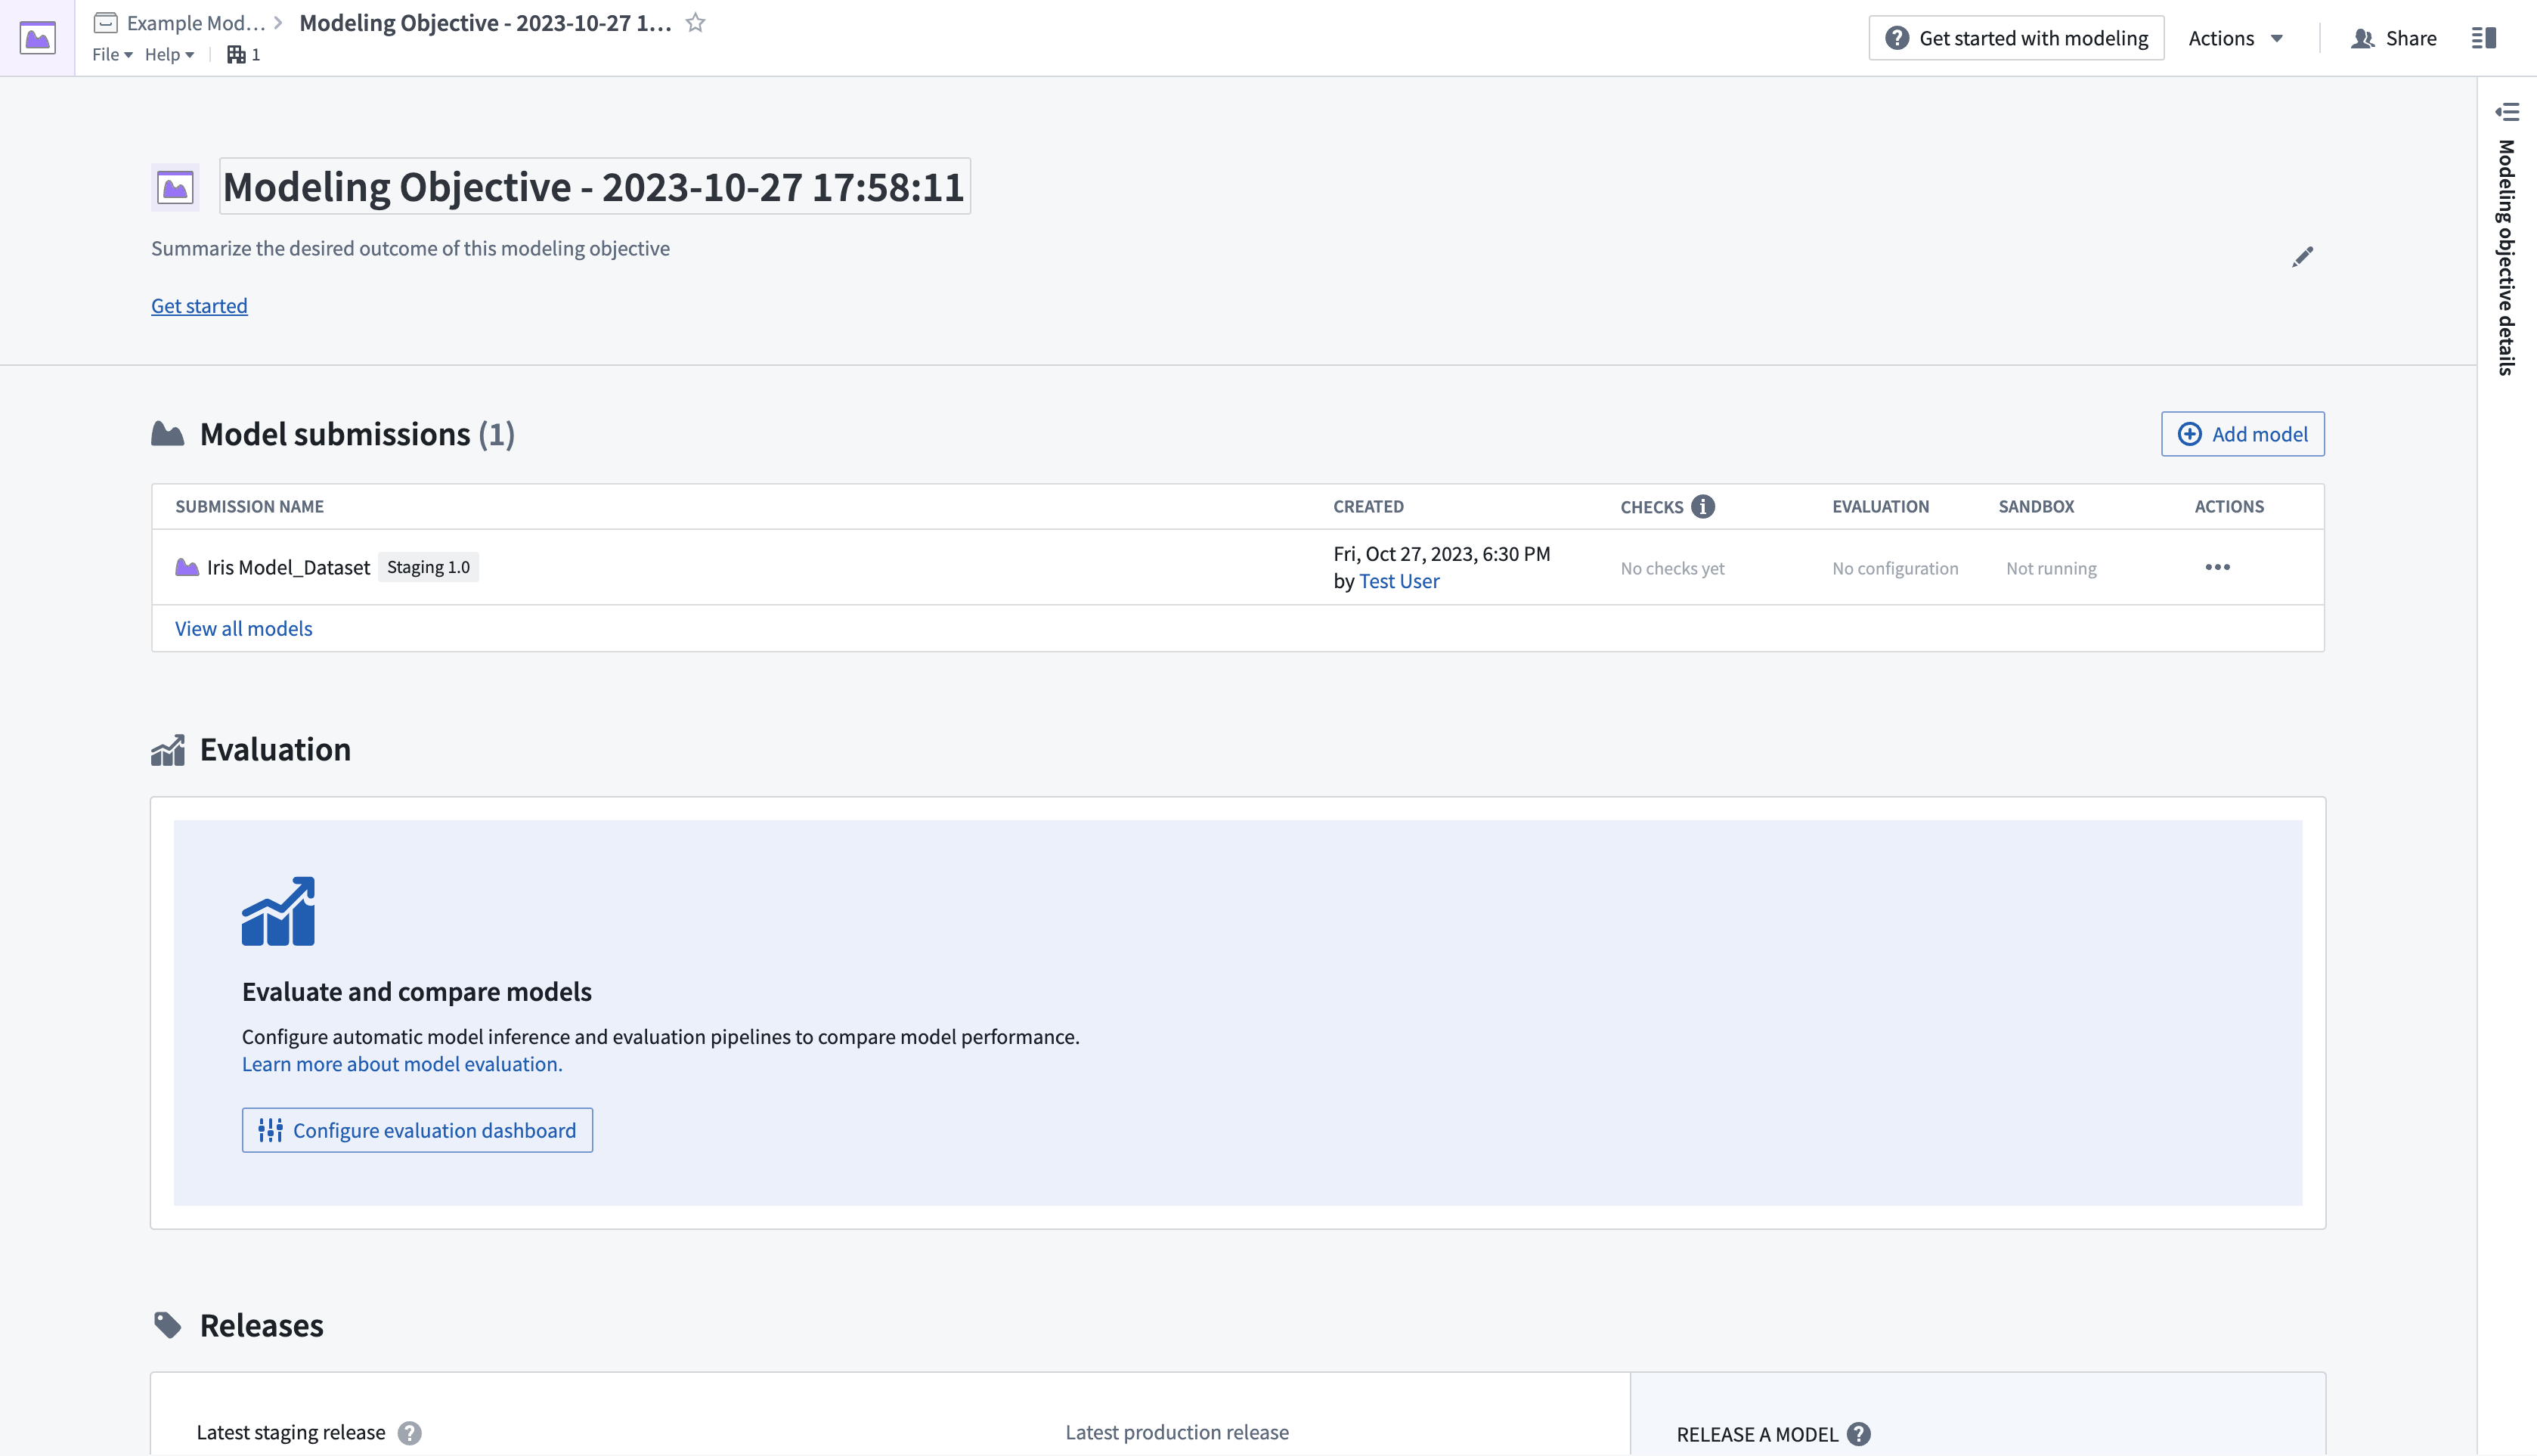
- Next, submit a model to the objective. In the Model Submissions > Submit a Model section, select Add Model to open a dialog, as shown below.
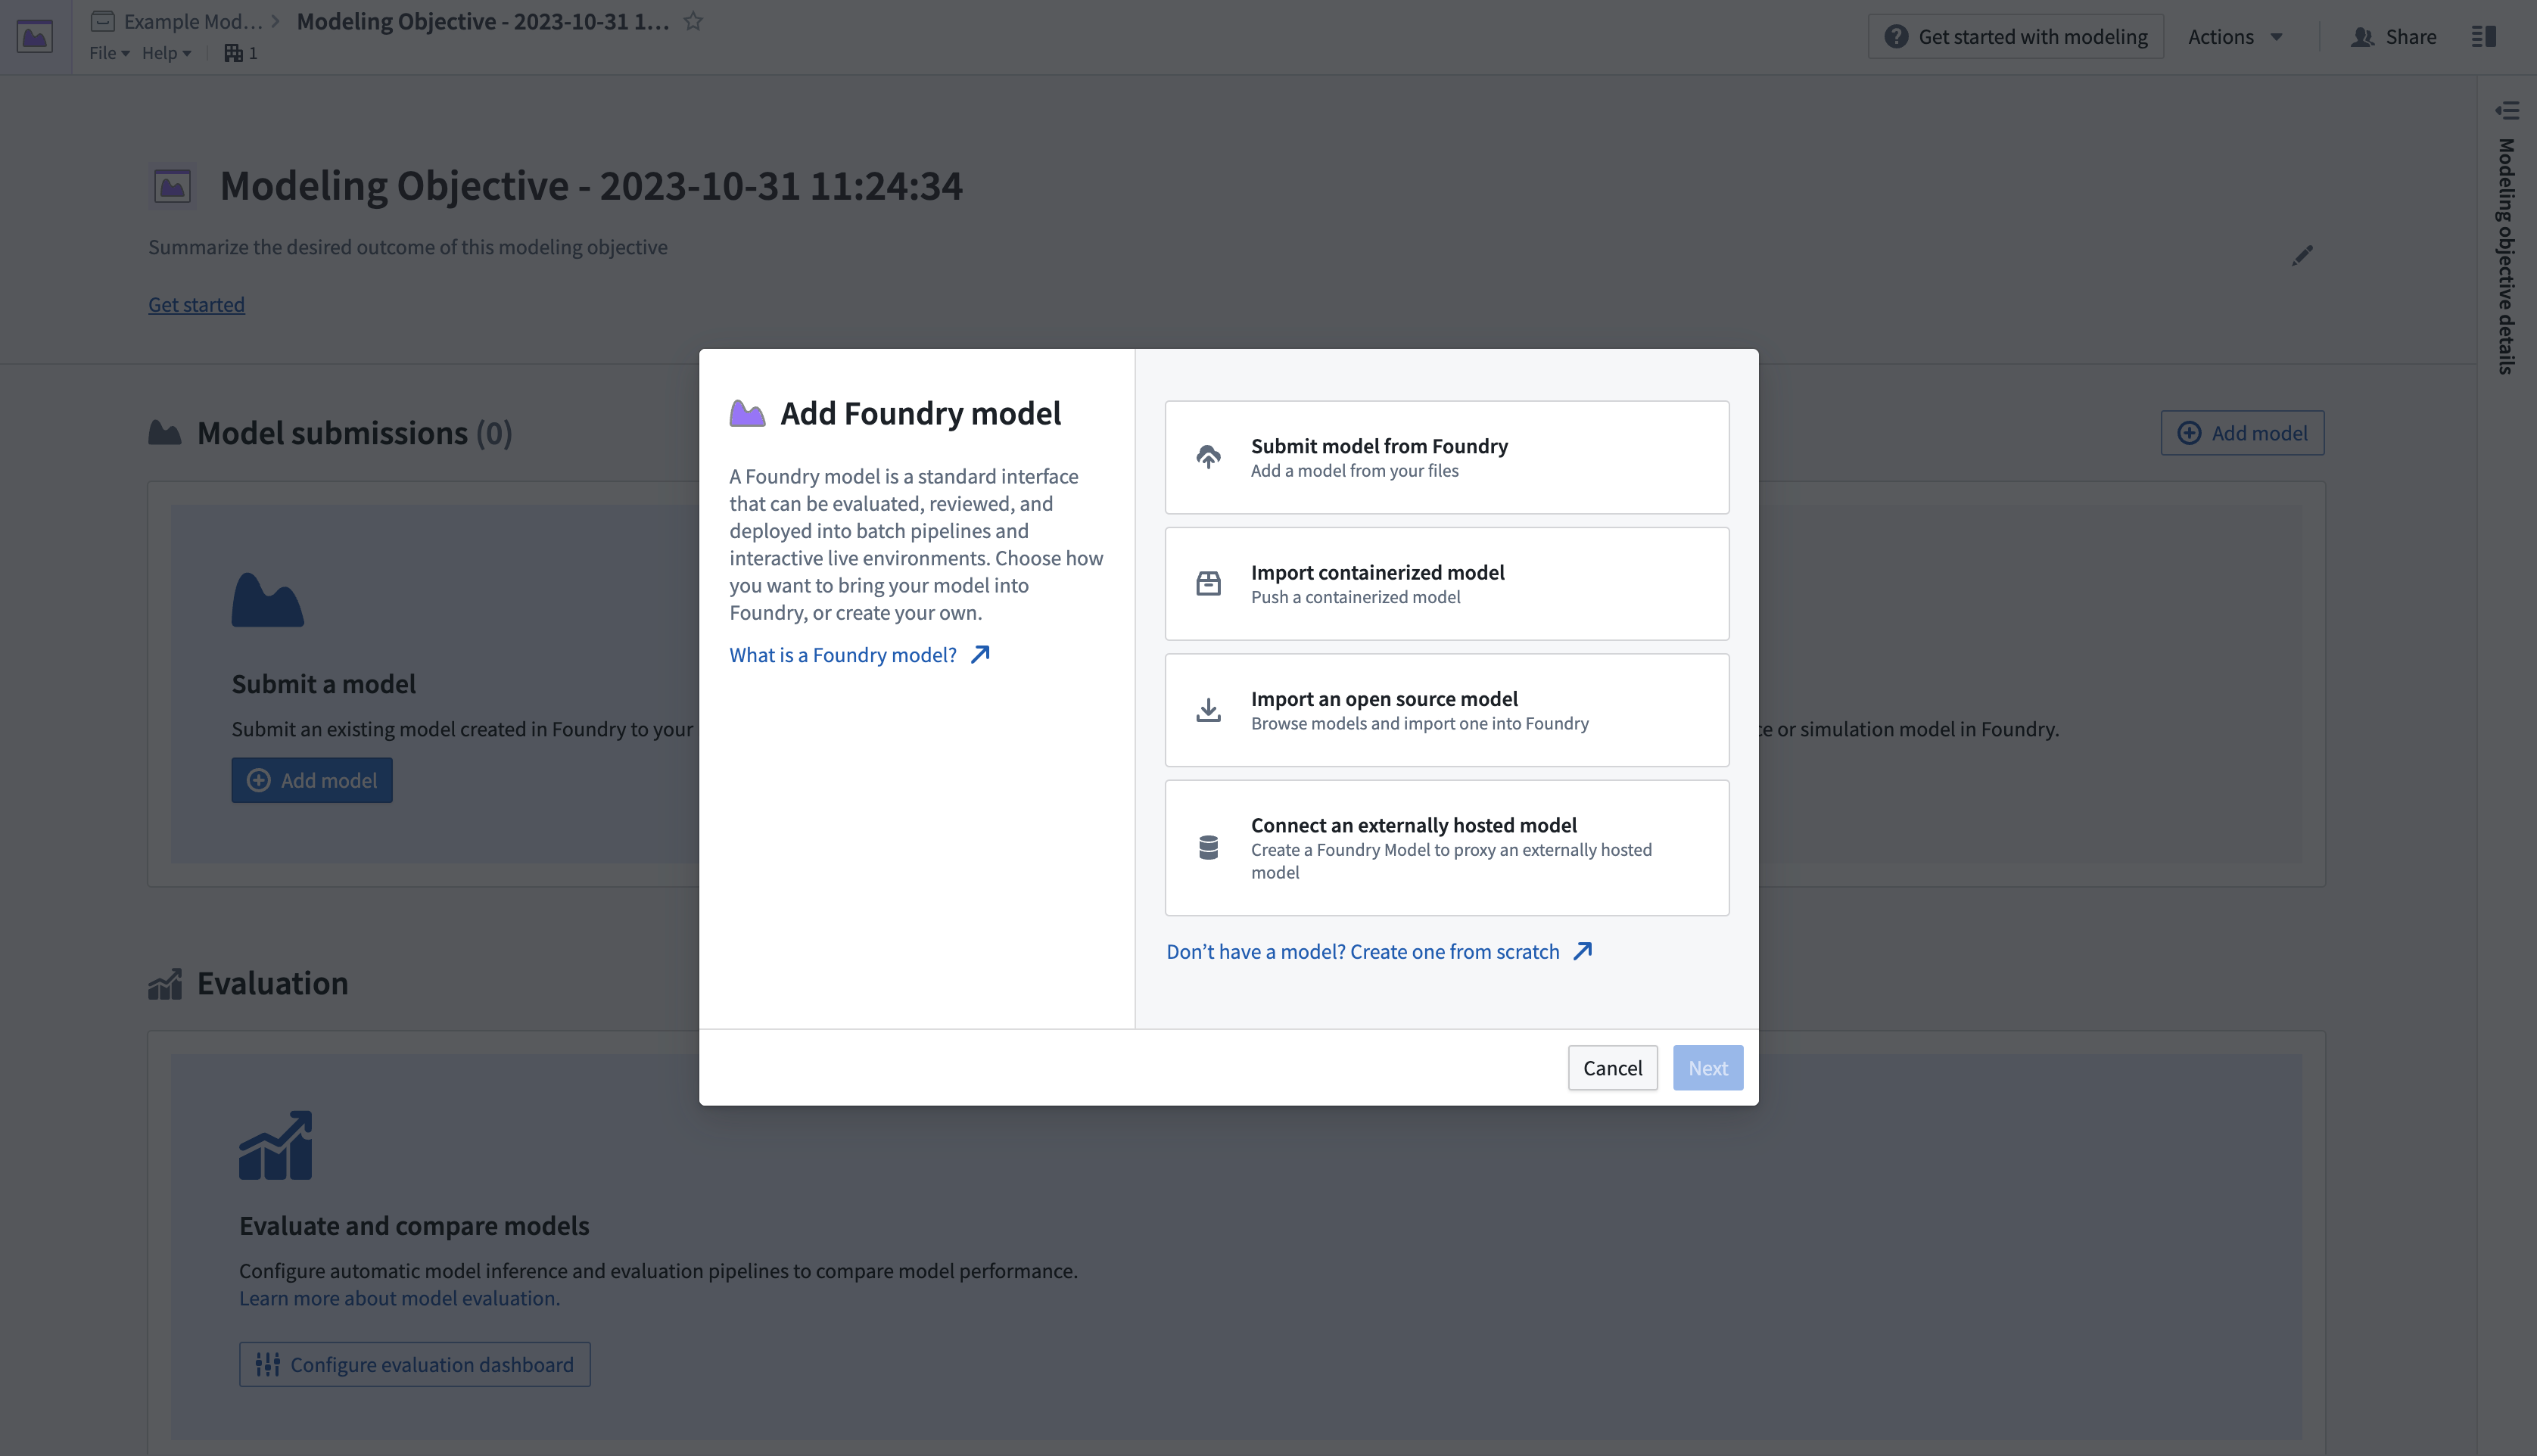
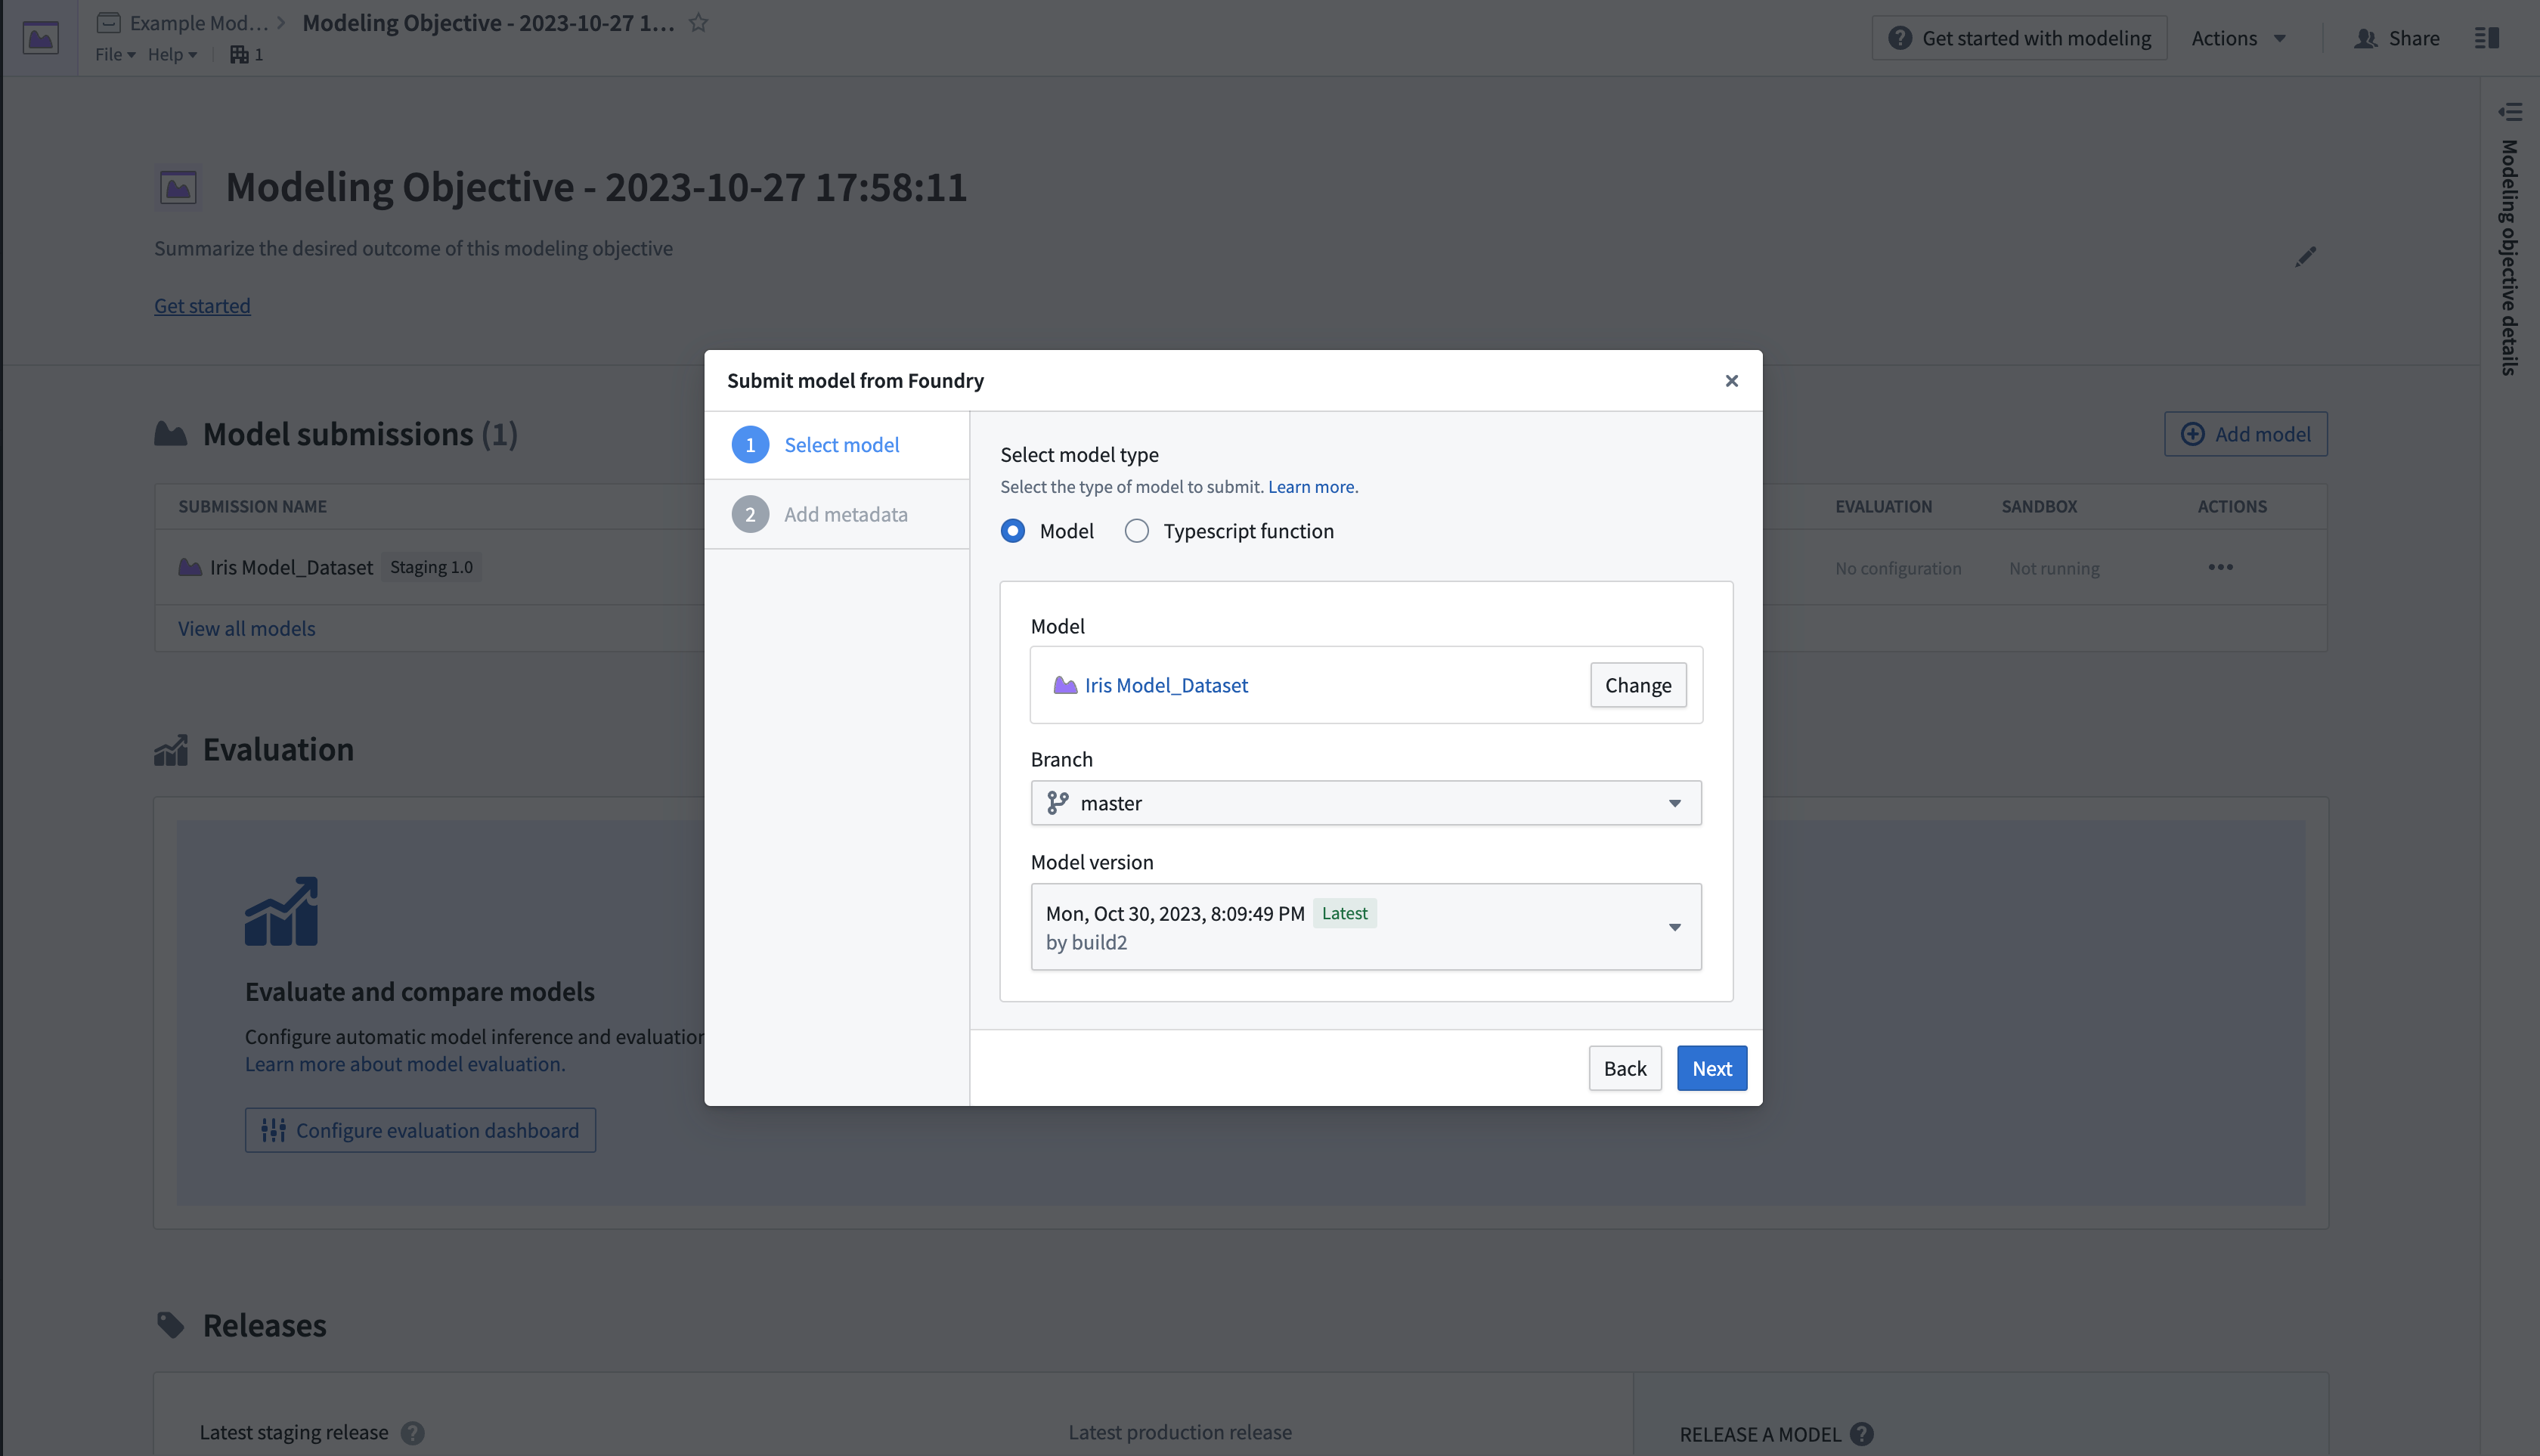
- Select Submit model from Foundry, then select Next to open a dialog where you can load the published model from its location in the platform.
- Once the model is submitted, you will be directed back to the modeling objective overview page, where a Model submissions section will show information about the submission.
- Select the newly submitted model from the Model submissions section to open the model page.
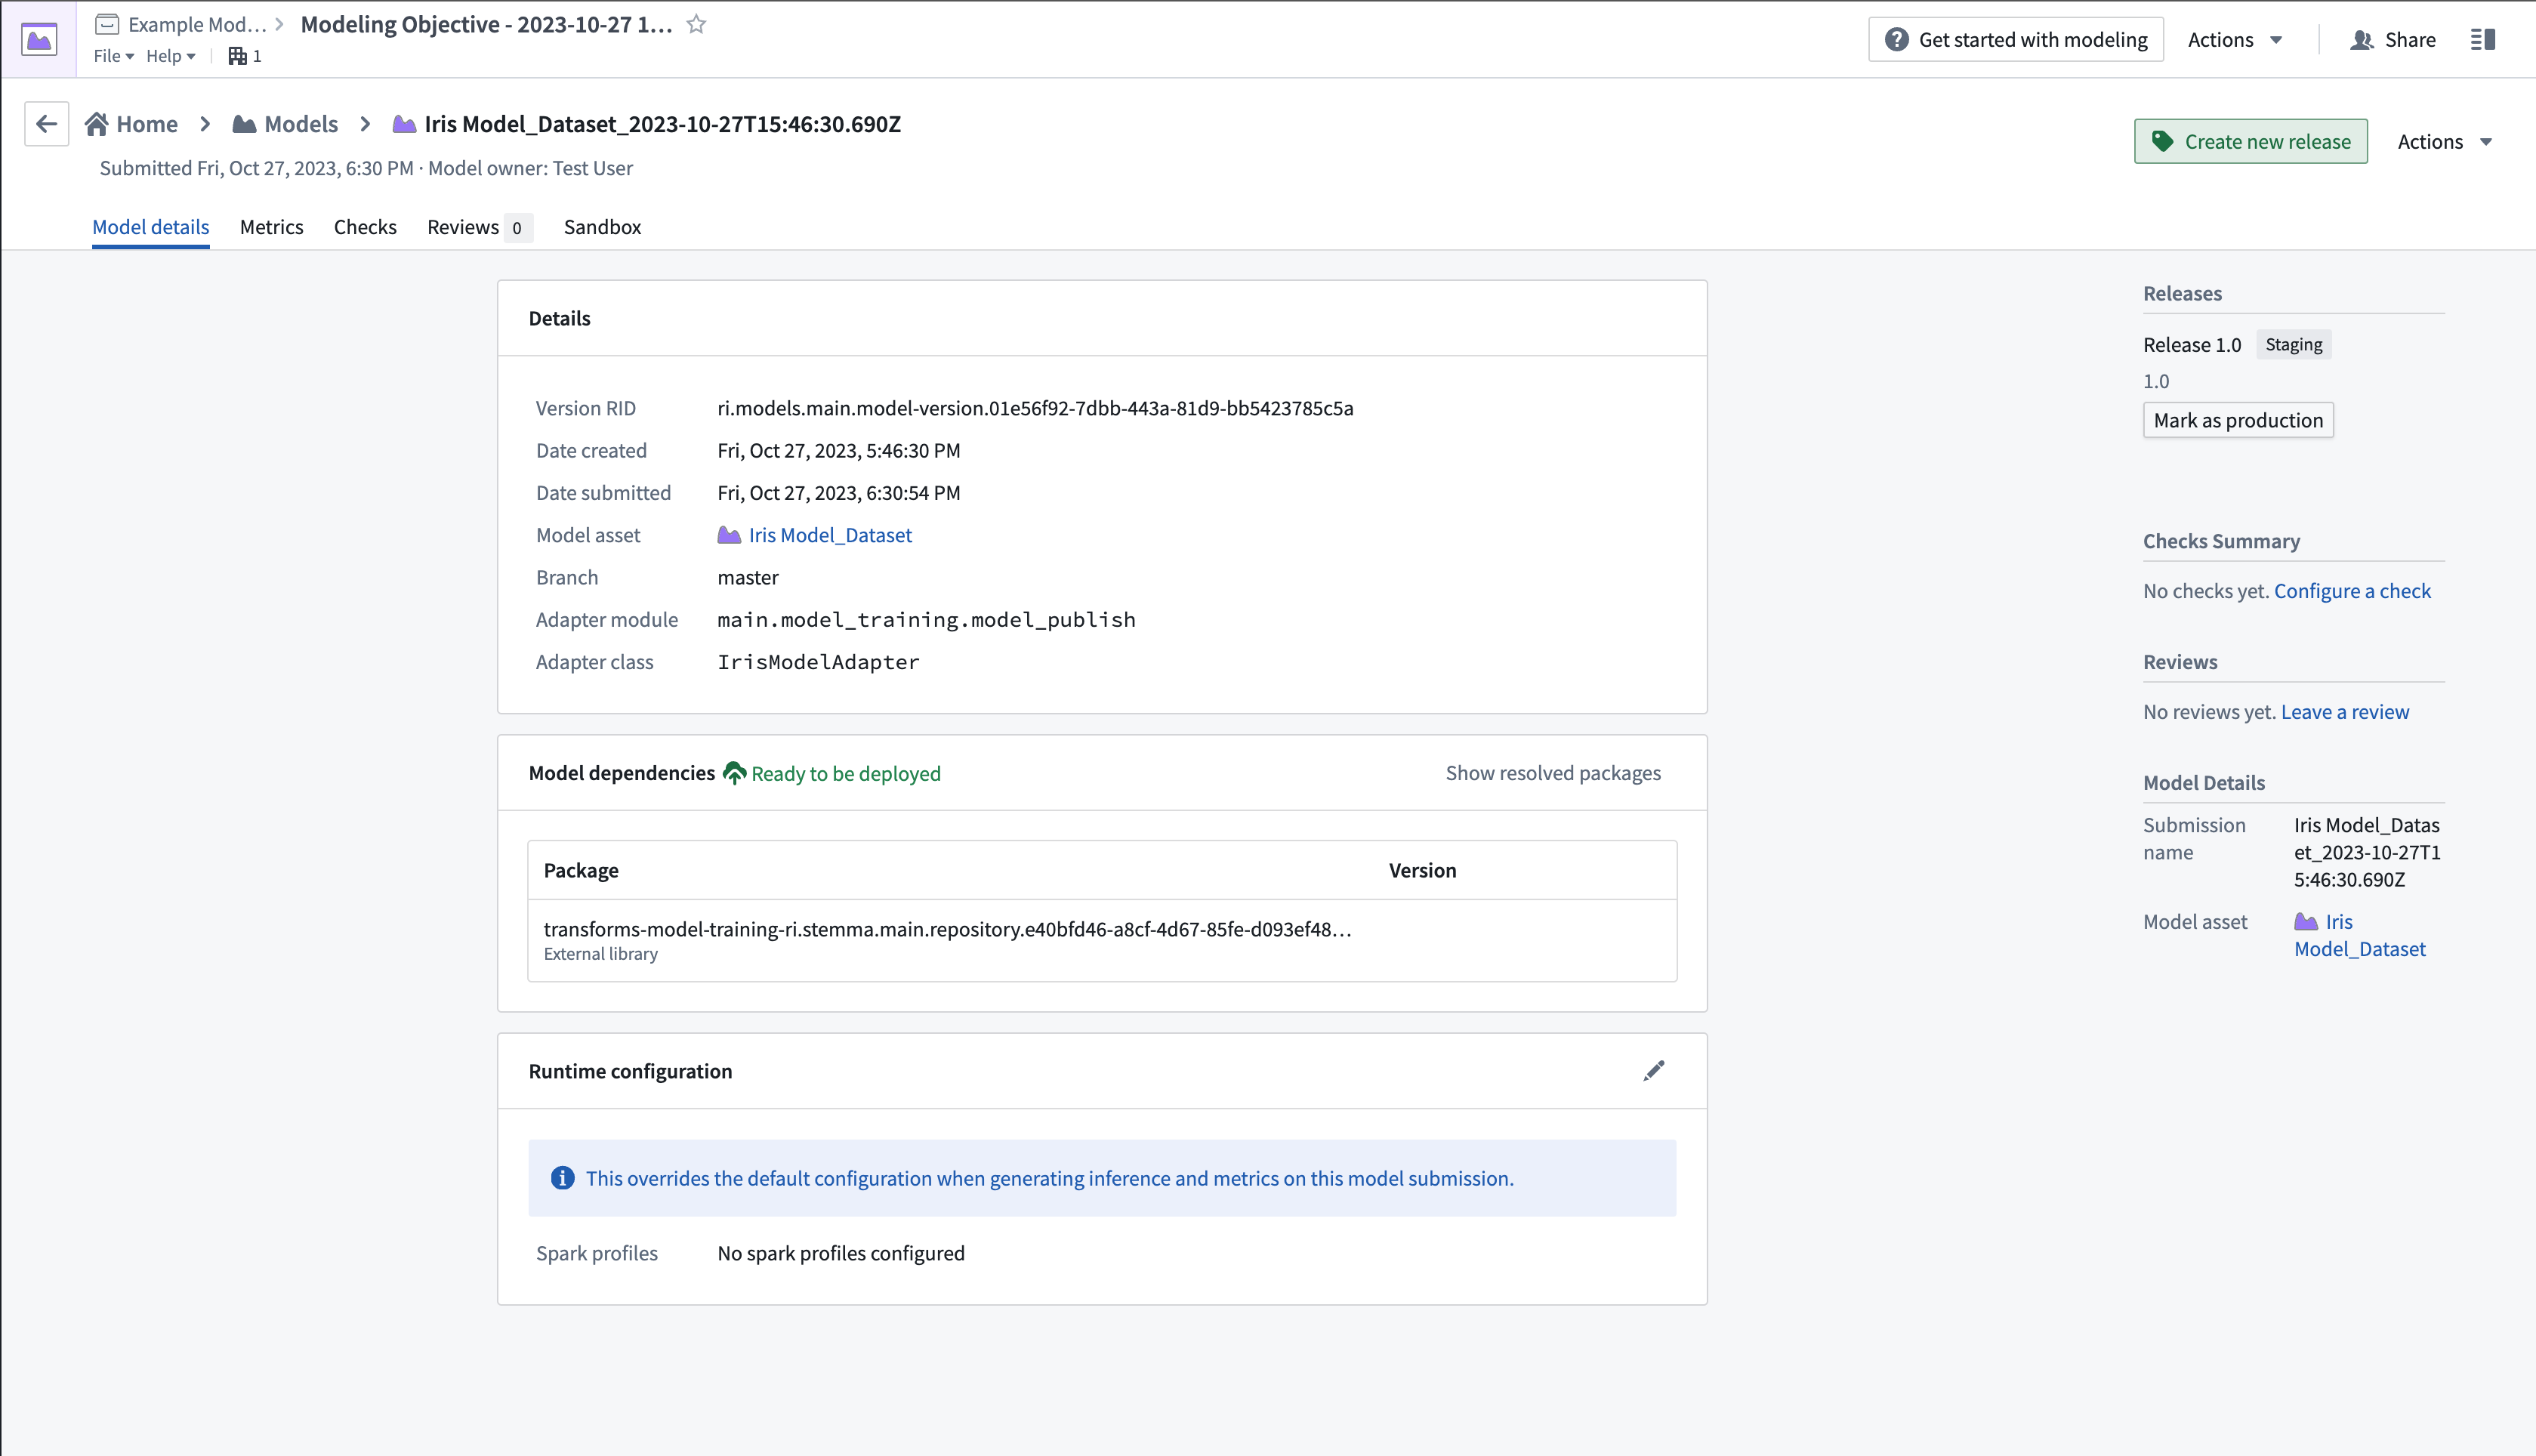
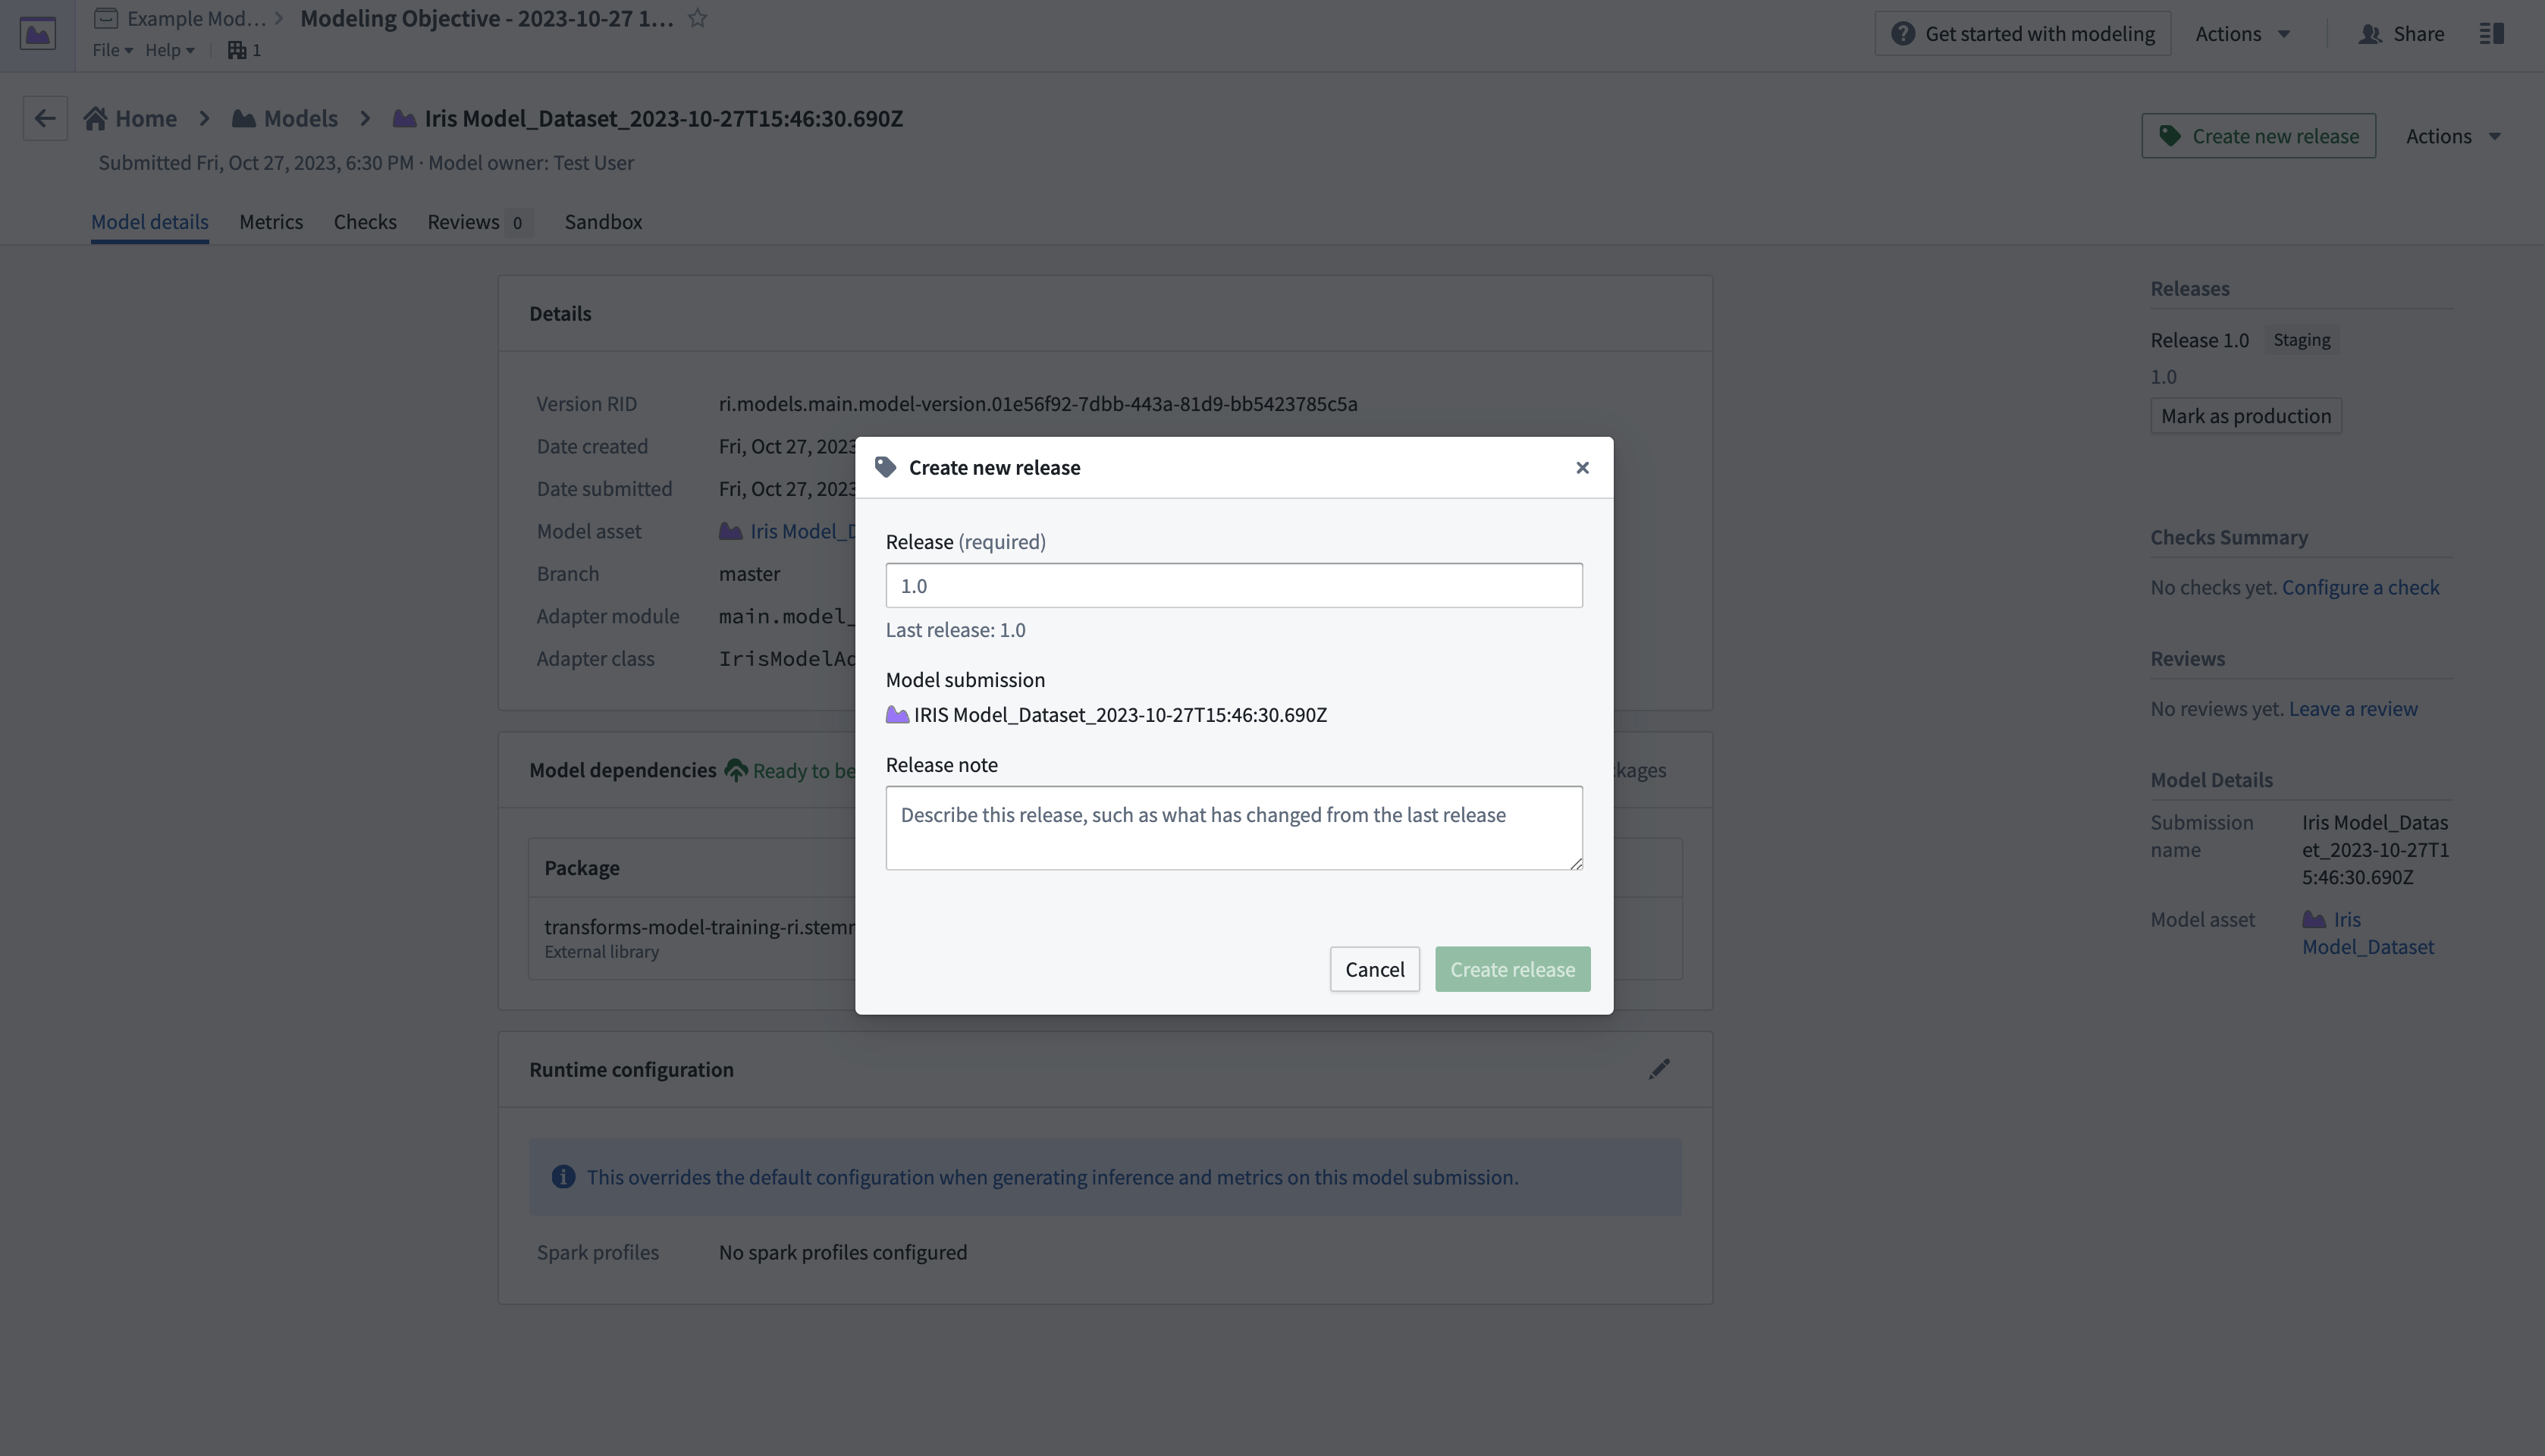
- Select Create new release in the upper right corner to open a new window to create a release.
- After creating a release, return to the modeling objective overview page by selecting the name in the top left of the screen. Scroll down to Deployments, then select Create deployment to open another dialog window.
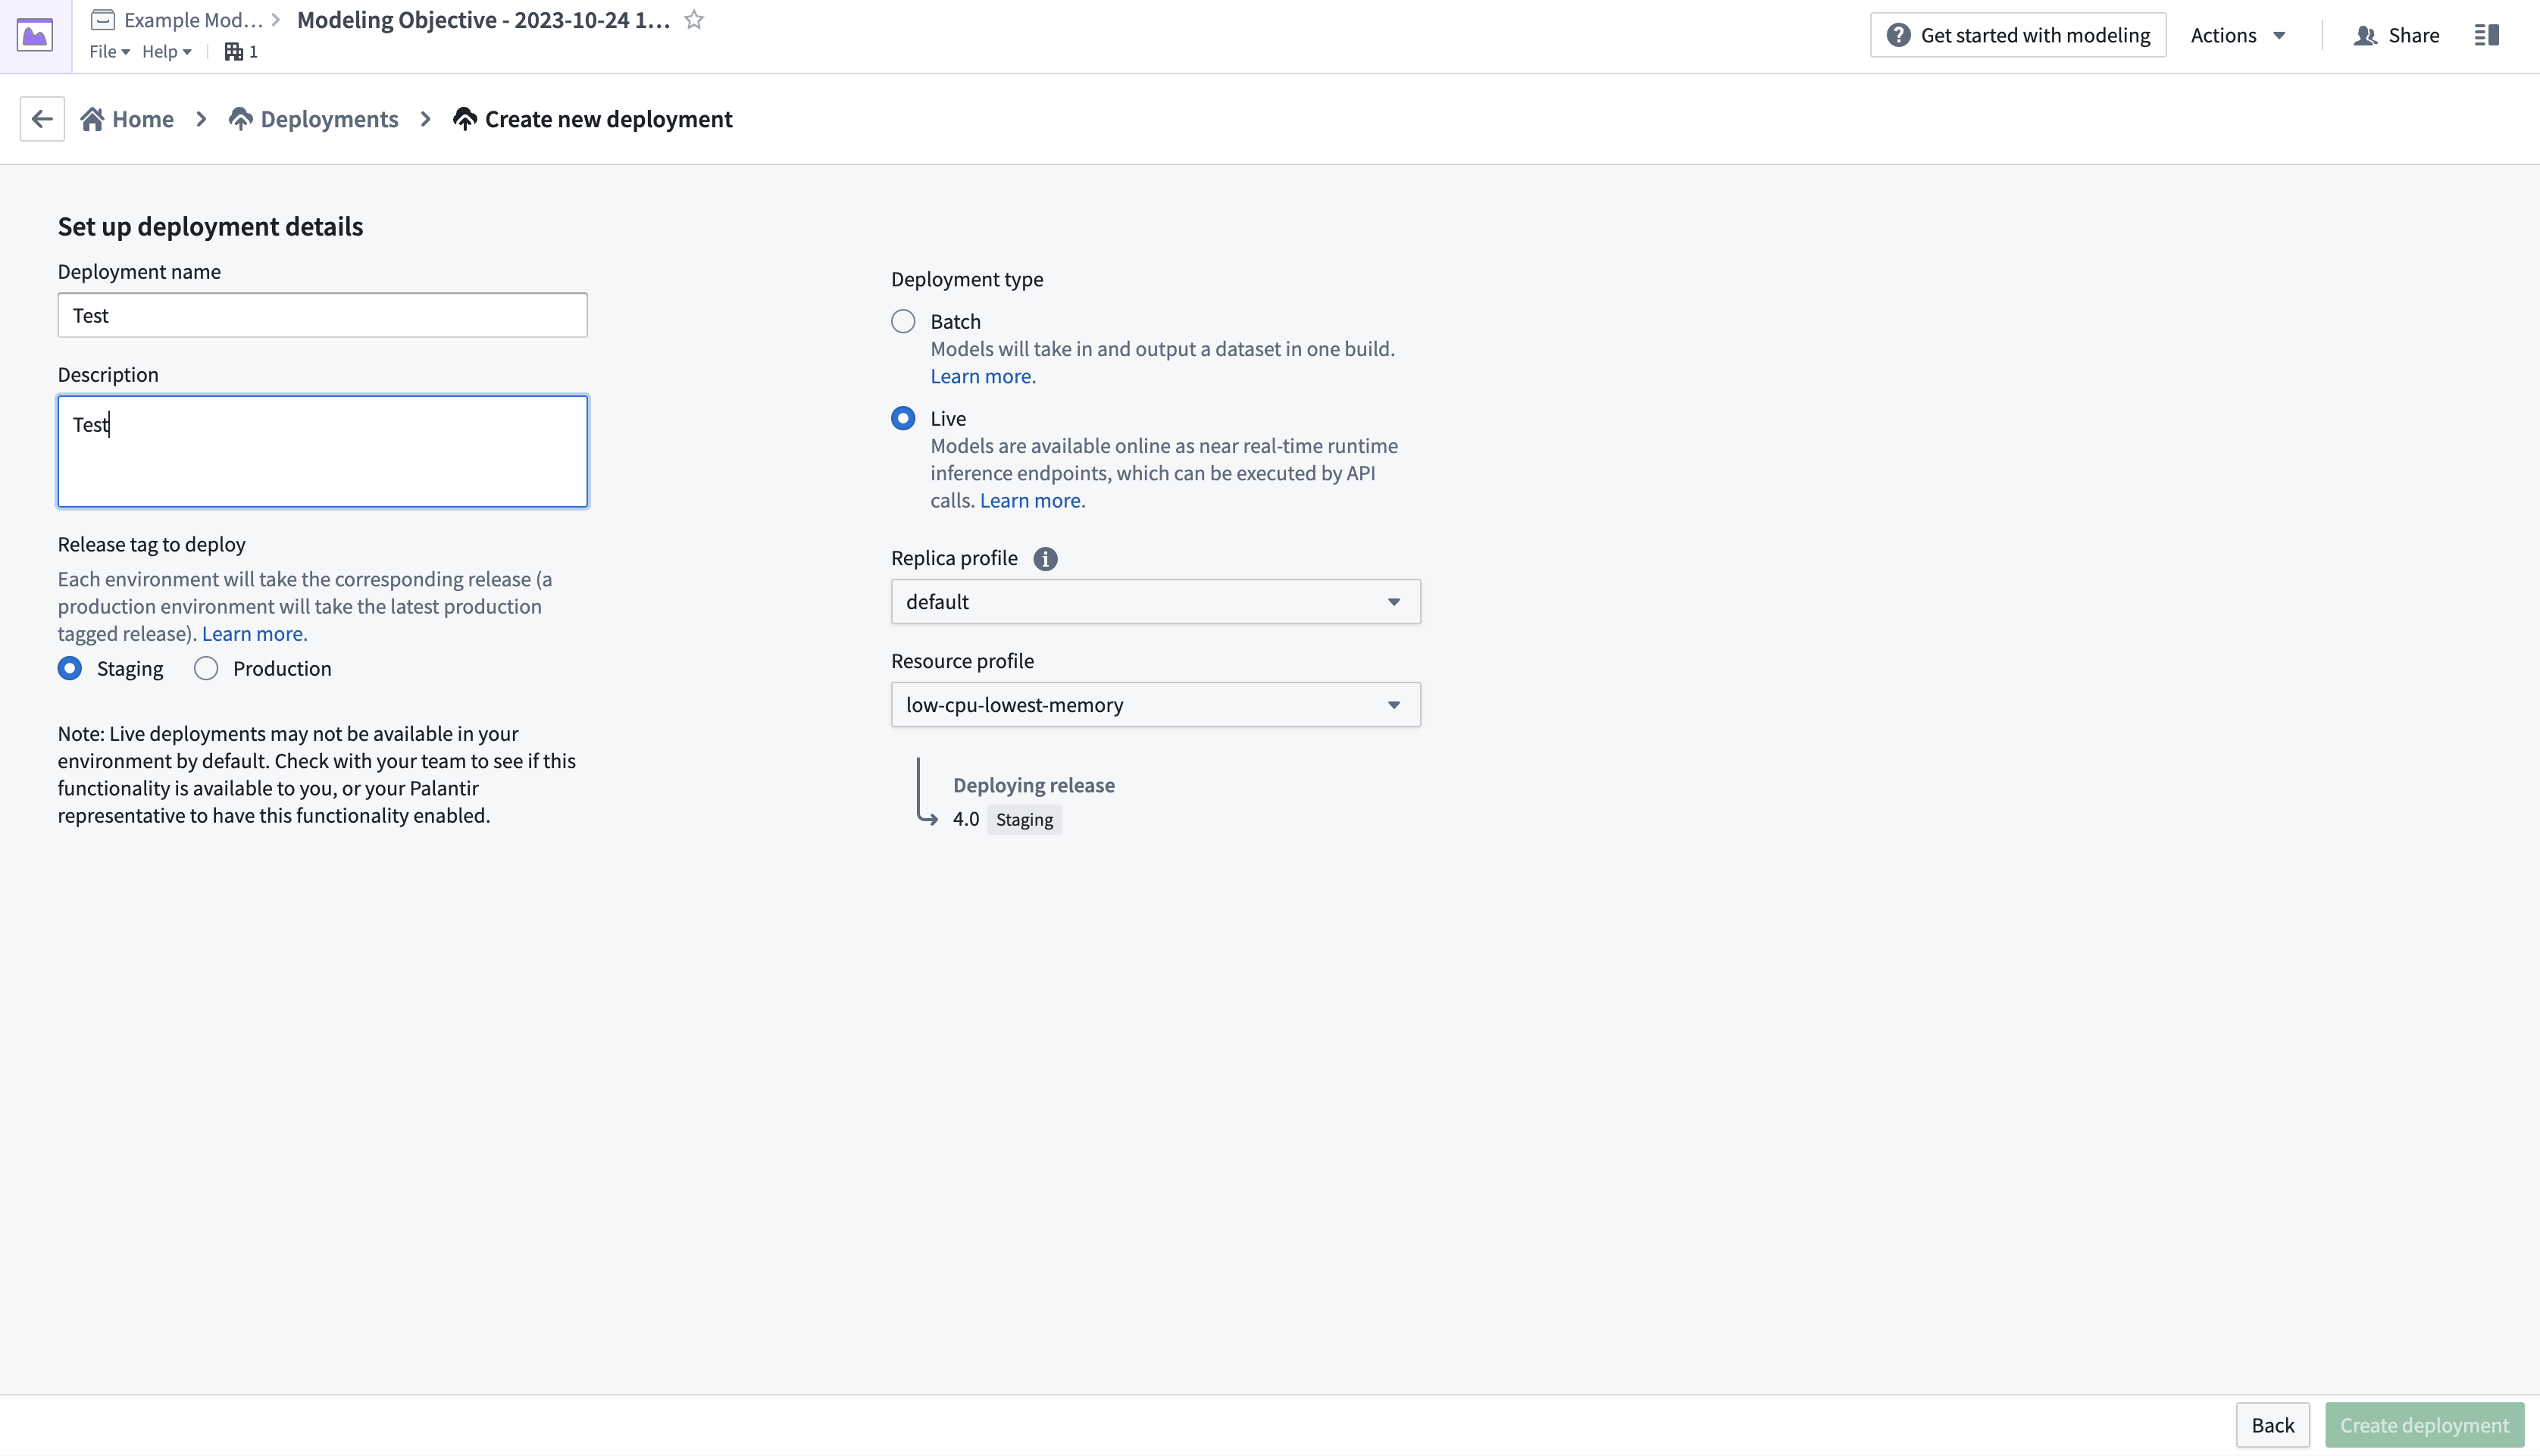
- Complete the setup form, then select Create deployment in the bottom right corner. Return to the modeling objective overview, scroll down to Deployments, then select the newly deployed model to test.
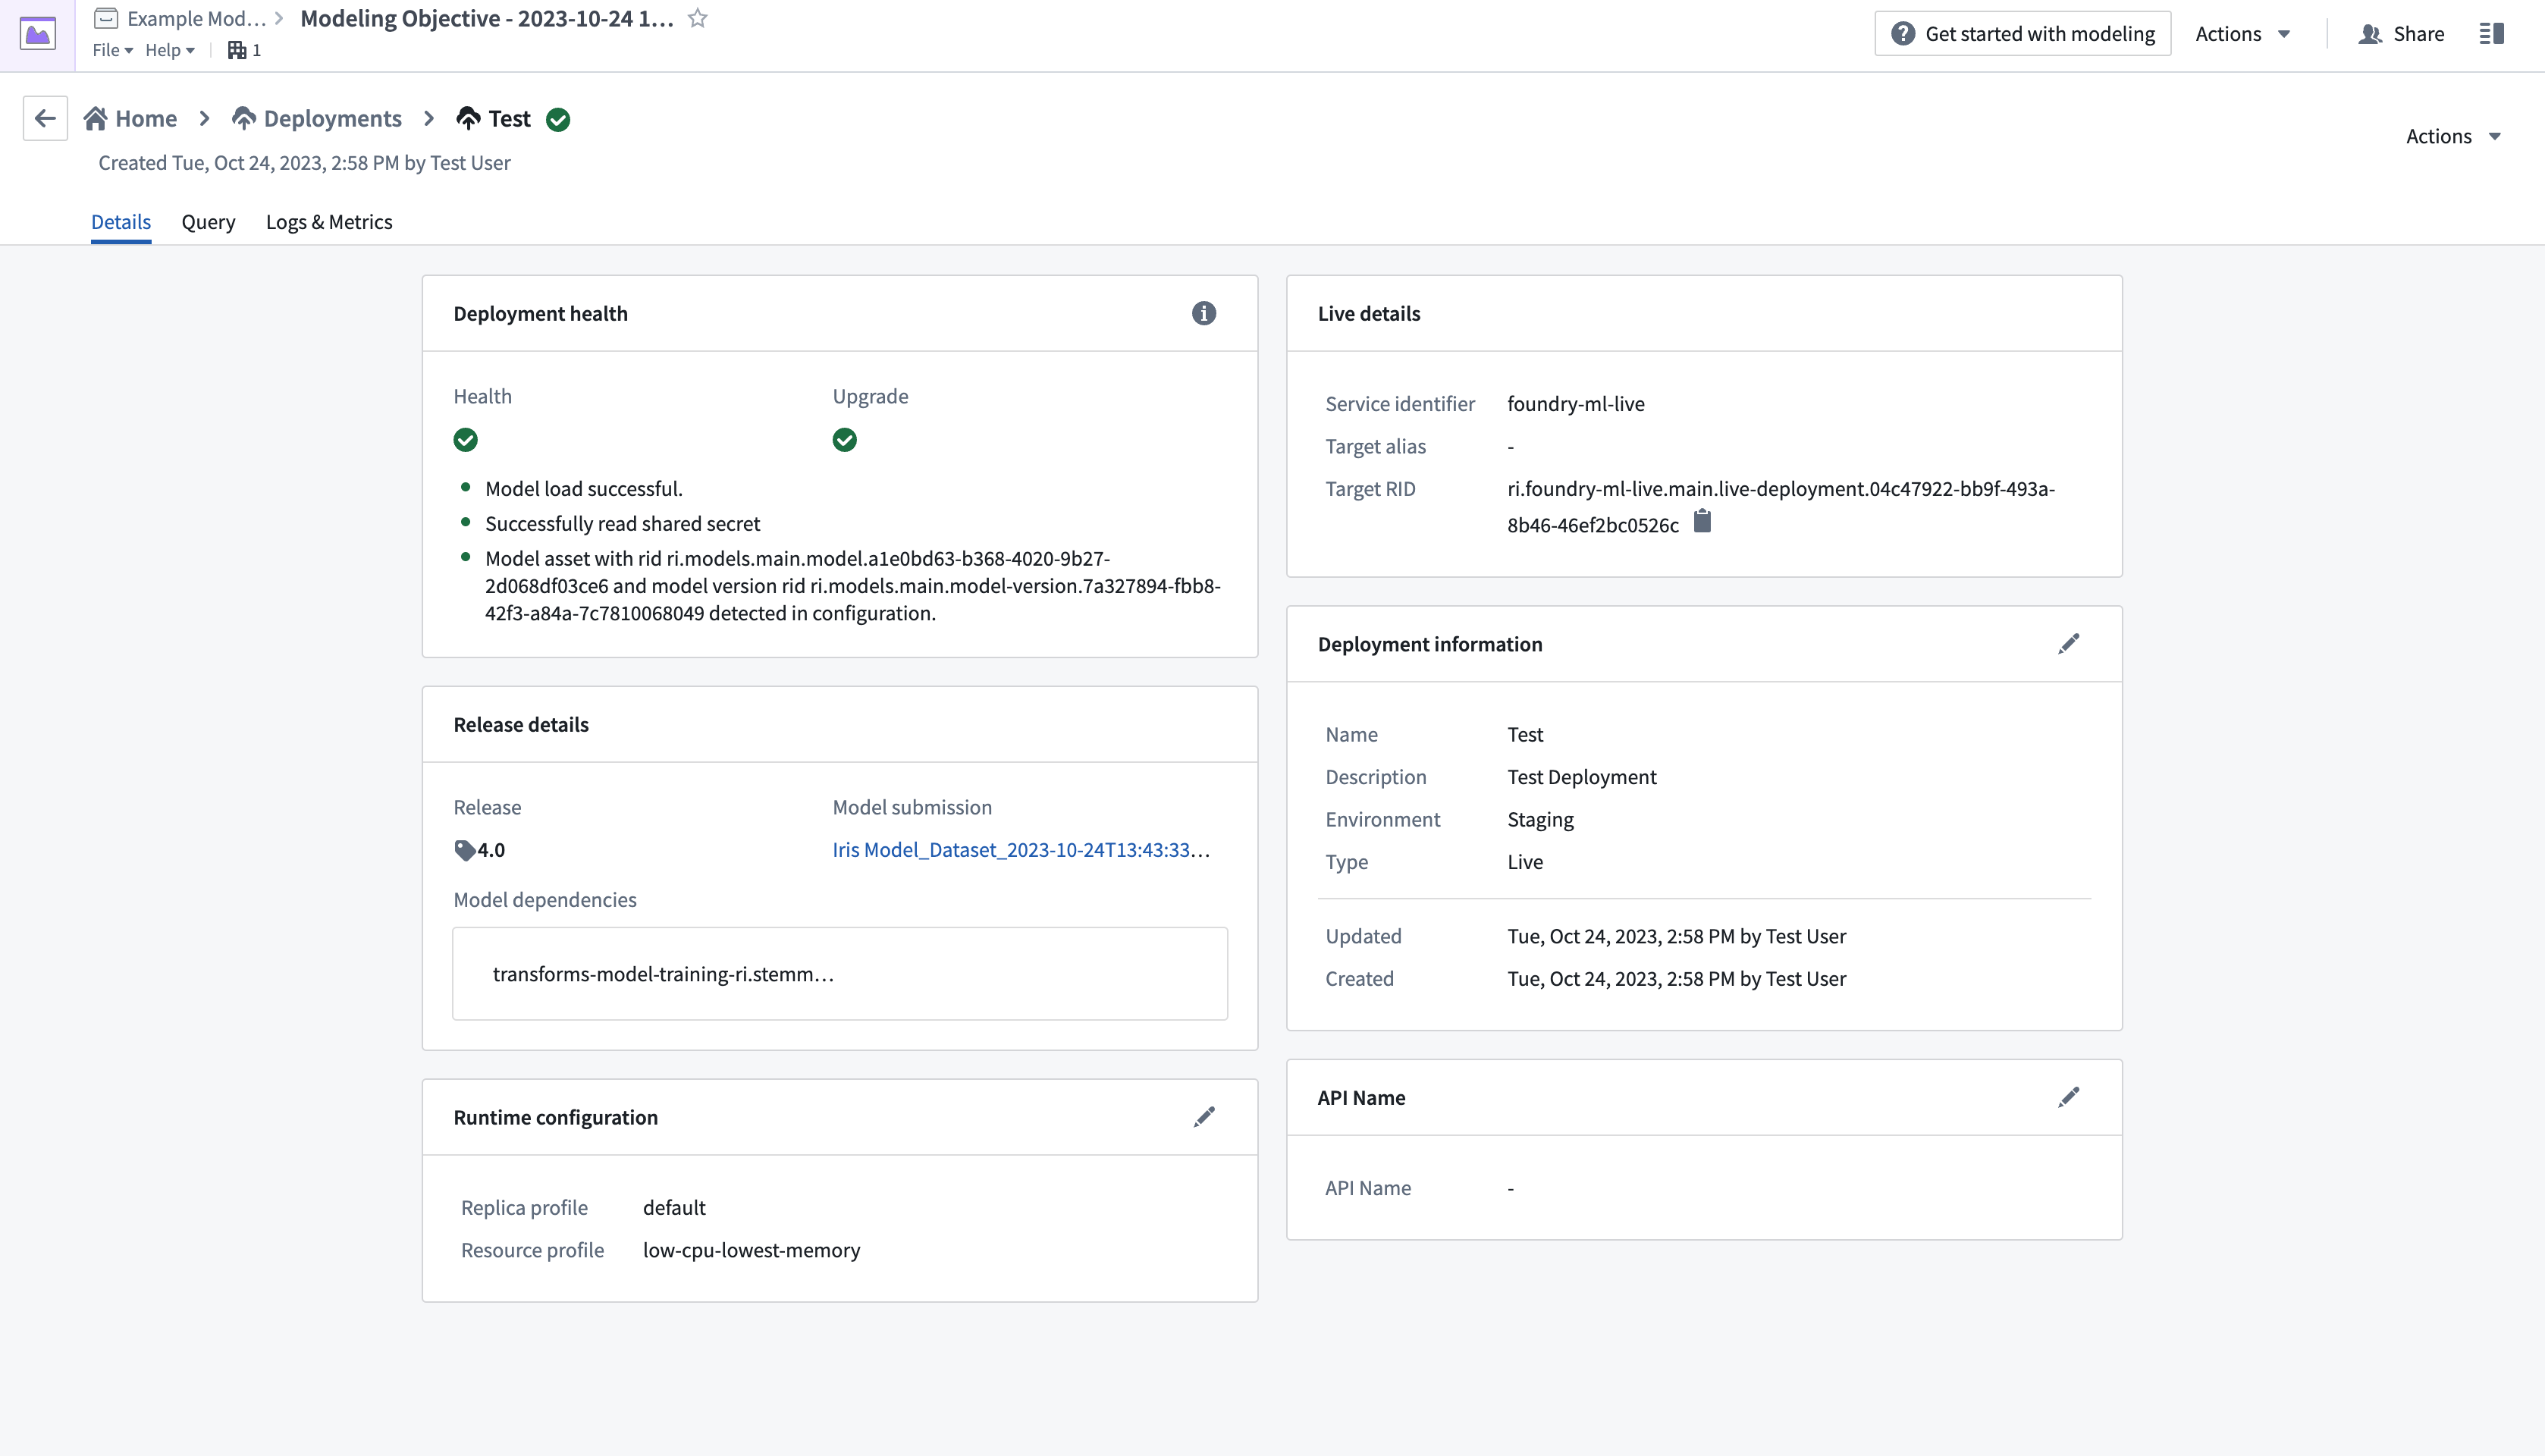
- From the Query tab on the top left of the page, test the model by adding values and observing the outputs.

More details on creating and querying a live deployment can be found in the live deployment documentation.
中文翻译
示例:上传 scikit-learn 模型
以下文档提供了一个示例,说明如何从现有模型文件将模型集成到 Foundry 中。如需分步指南,请参阅我们关于从预训练文件发布模型的文档。
从模型文件创建模型
以下示例使用了一个模型,该模型使用加州大学欧文分校发布的鸢尾花分类数据集 ↗在本地训练而成。该数据集包含四个特征:sepal_length(花萼长度)、sepal_width(花萼宽度)、petal_length(花瓣长度)和 petal_width(花瓣宽度),可用于构建预测鸢尾花具体种类的模型。
在本示例中,我们假设该模型是使用 scikit-learn 库 ↗ 作为 K-近邻分类器 ↗ 在本地训练的。本示例还假设模型是使用 Python 3.8.0 和 scikit-learn 1.3.2 训练的。
训练完成后,模型保存为 pickle 文件 ↗,如下所示。
from sklearn.datasets import load_iris
from sklearn.model_selection import train_test_split
from sklearn.neighbors import KNeighborsClassifier

import pickle

iris = load_iris()
X = iris.data
y = iris.target

X_train, X_test, y_train, y_test = train_test_split(
    X, y, test_size=0.4, random_state=4)

knn = KNeighborsClassifier(n_neighbors = 5)
knn.fit(X_train, y_train)

with open("iris_model.pkl", "wb") as f:
    pickle.dump(knn, f)
1. 将模型文件上传到非结构化数据集
scikit-learn 模型文件作为非结构化数据集上传到 Palantir,如下图所示:
2. 创建模型训练模板以定义模型适配器逻辑
在代码仓库应用中,使用模型训练语言模板创建一个新的模型集成仓库,然后添加对 scikit-learn 1.3.2 的依赖。定义读取模型文件和发布模型的逻辑。
3. 将模型文件发布为模型
模型适配器逻辑执行后,模型将在平台中发布。
from transforms.api import transform, Input
import palantir_models as pm
from palantir_models.transforms import ModelOutput
from palantir_models.serializers import DillSerializer
import pickle
import os


@transform(
    model_files=Input("<Your Input Path>"),
    model_output=ModelOutput("<Your Output path>")
)
def compute(model_files, model_output):
    fs = model_files.filesystem()
    with fs.open("iris_model.pkl", "rb") as f:
        model = pkl.load(f)

    model_adapter = IrisModelAdapter(model, "target")
    model_output.publish(
        model_adapter=model_adapter
    )


class IrisModelAdapter(pm.ModelAdapter):

    @auto_serialize(
        model=DillSerializer(),
        prediction_column_name=DillSerializer()
    )
    def __init__(self, model, prediction_column_name="target"):
        self.model = model
        self.prediction_column_name = prediction_column_name

    @classmethod
    def api(cls):
        column_names = ["sepal_length", "sepal_width", "petal_length", "petal_width"]
        columns =[(name, float) for name in column_names]
        inputs = {"df_in": pm.Pandas(columns=columns)}
        outputs = {"df_out": pm.Pandas(columns=columns+[("target", int)])}
        return inputs, outputs

    def predict(self, df_in):
        inference_data = df_in

        predictions = self.model.predict(inference_data.values)
        inference_data[self.prediction_column_name] = predictions
        return inference_data
4. 使用已发布的模型
模型发布后,即可在平台中用于推理。在本示例中,我们将创建一个新的建模目标并提交模型。
- 导航到希望建模目标所在的项目文件夹,然后选择新建 > 建模目标来创建新的建模目标。这将打开建模目标应用。
- 接下来,向该目标提交一个模型。在模型提交 > 提交模型部分,选择添加模型以打开对话框,如下所示。
- 选择从 Foundry 提交模型,然后选择下一步以打开对话框,您可以在其中从平台中的位置加载已发布的模型。
- 模型提交后,您将返回建模目标概览页面,其中的模型提交部分将显示有关提交的信息。
- 从模型提交部分选择新提交的模型,以打开模型页面。
- 选择右上角的创建新发布以打开新窗口来创建发布。
- 创建发布后,选择屏幕左上角的名称返回建模目标概览页面。向下滚动到部署,然后选择创建部署以打开另一个对话框窗口。
- 完成设置表单,然后选择右下角的创建部署。返回建模目标概览页面,向下滚动到部署,然后选择新部署的模型进行测试。
- 从页面左上角的查询选项卡,通过添加值并观察输出来测试模型。
有关创建和查询实时部署的更多详细信息,请参阅实时部署文档。