Upload images with a container model(使用容器模型上传镜像)
This page guides you through the process of uploading an image with a container-backed model. During this workflow, you will create a Model, push an image to the model resource, and configure a model version.
1. Create a model
To create a container-backed model, first create the resource to which the image will be pushed. This resource will control the model permissions; users with Viewer permission on this resource will be able to pull the image back out of Foundry.
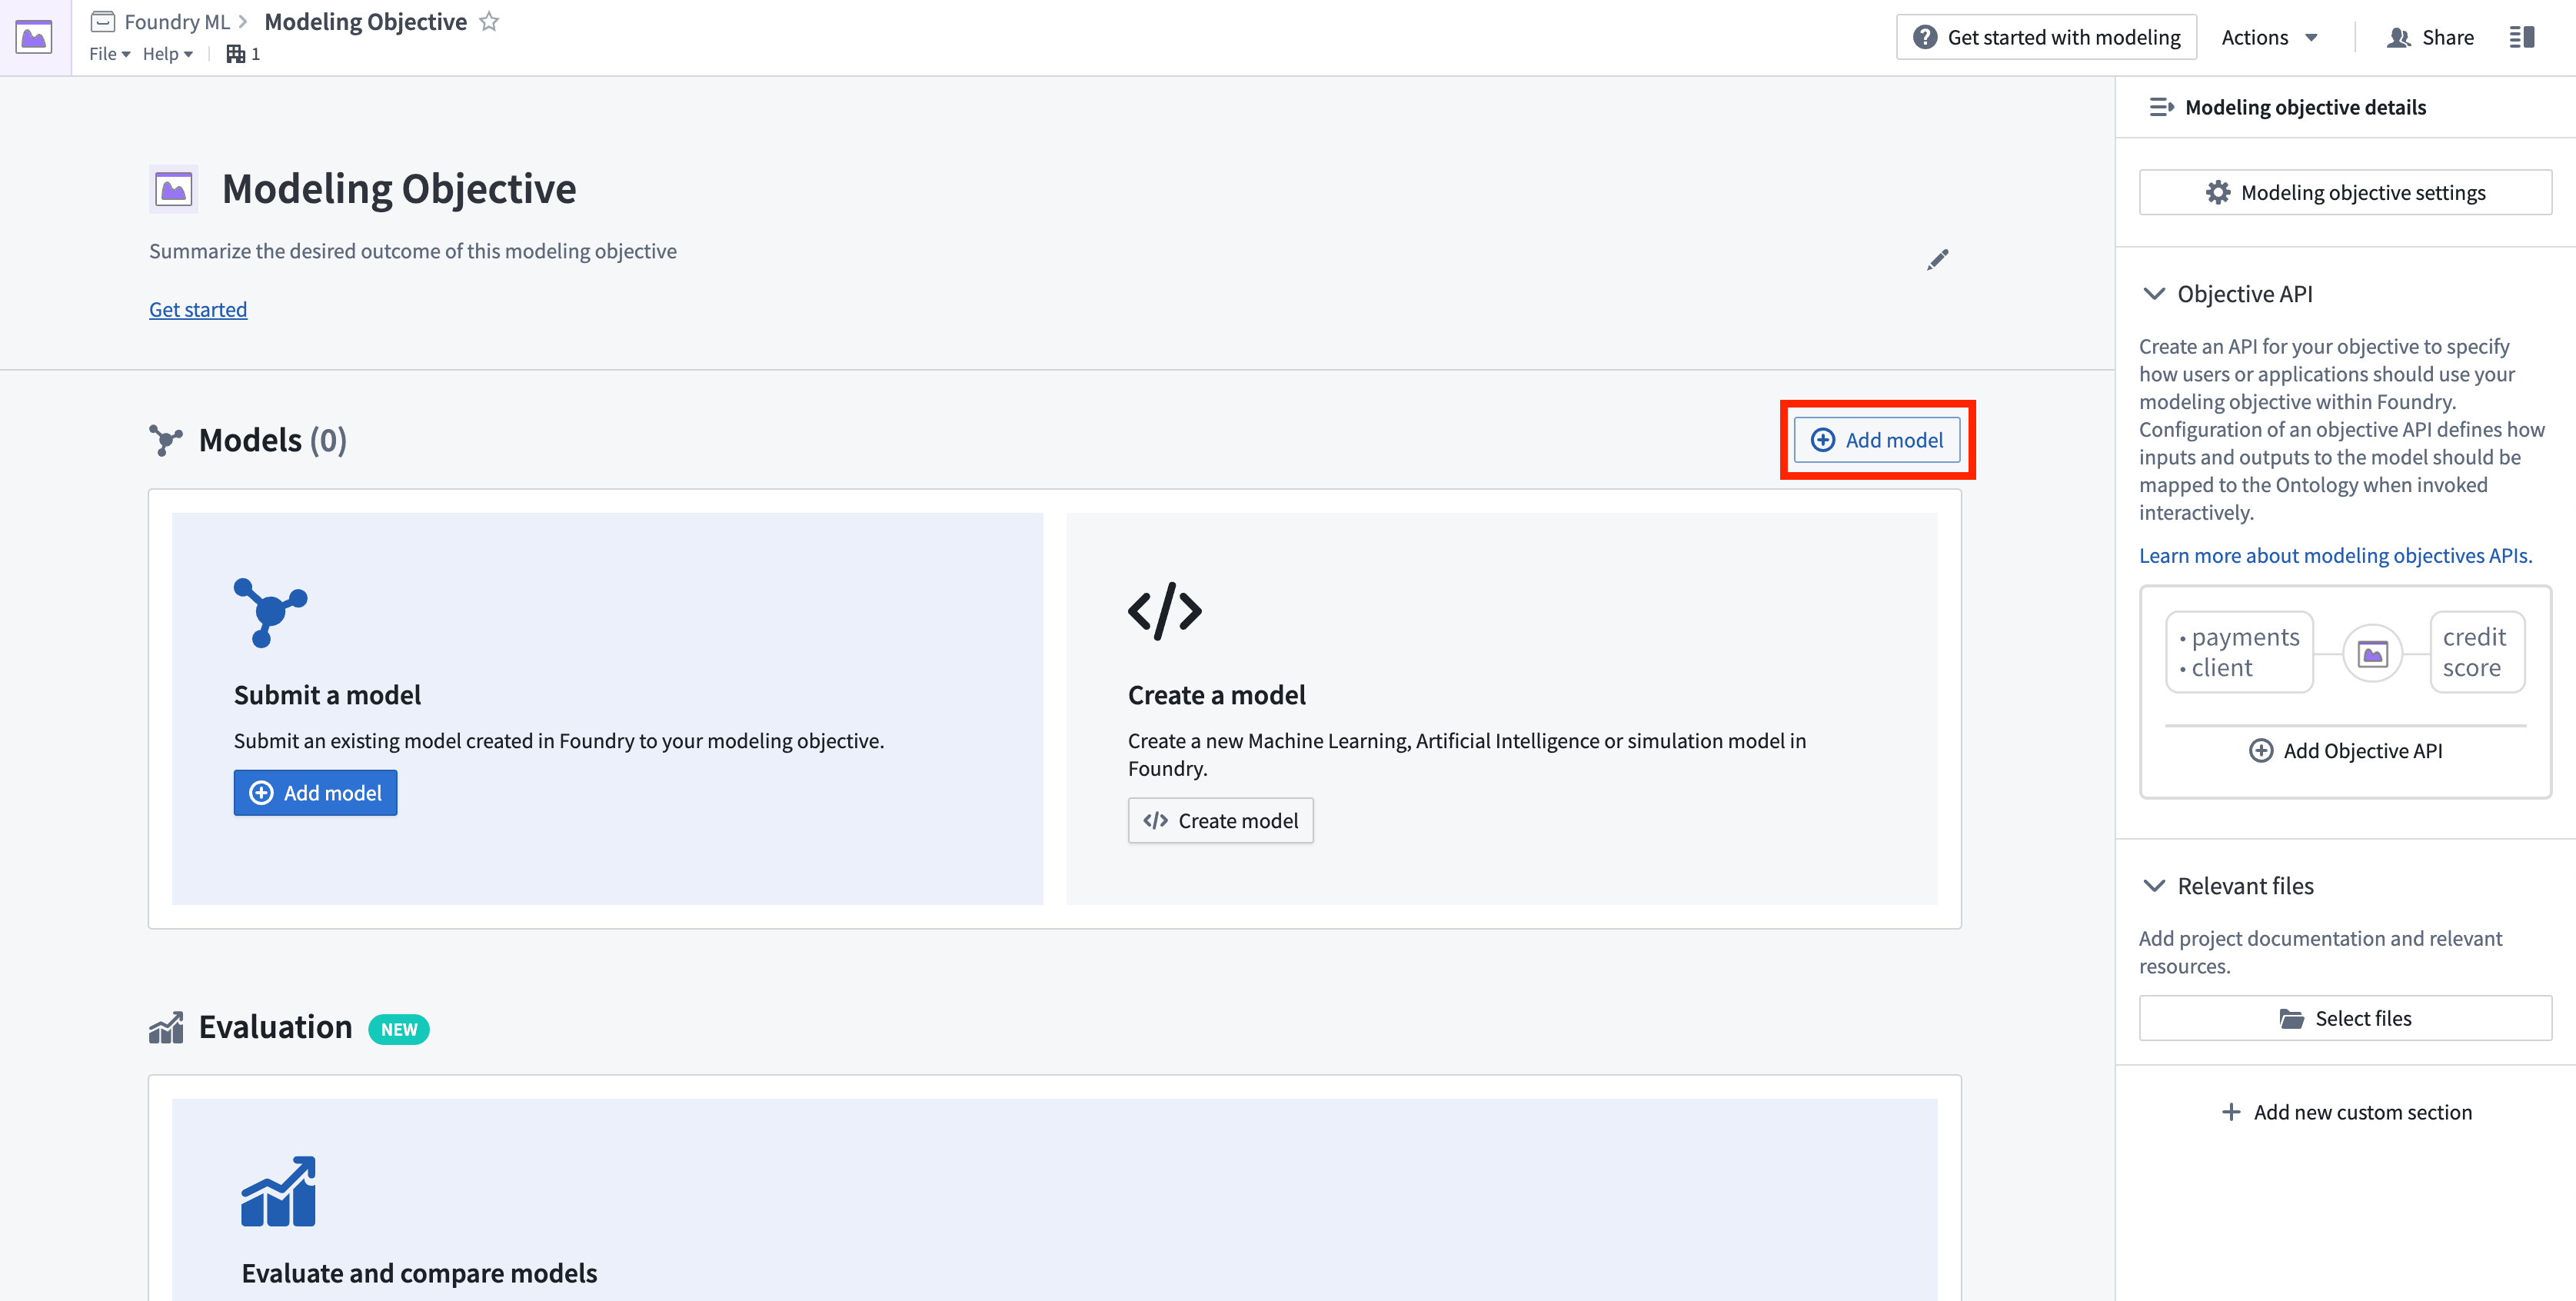
Create a new model by navigating to any modeling objective and select +Add model, then Import containerized model.

2. Push an image to the model
:::callout{theme="warning"} The image(s) you push must adhere to Foundry's image requirements. :::
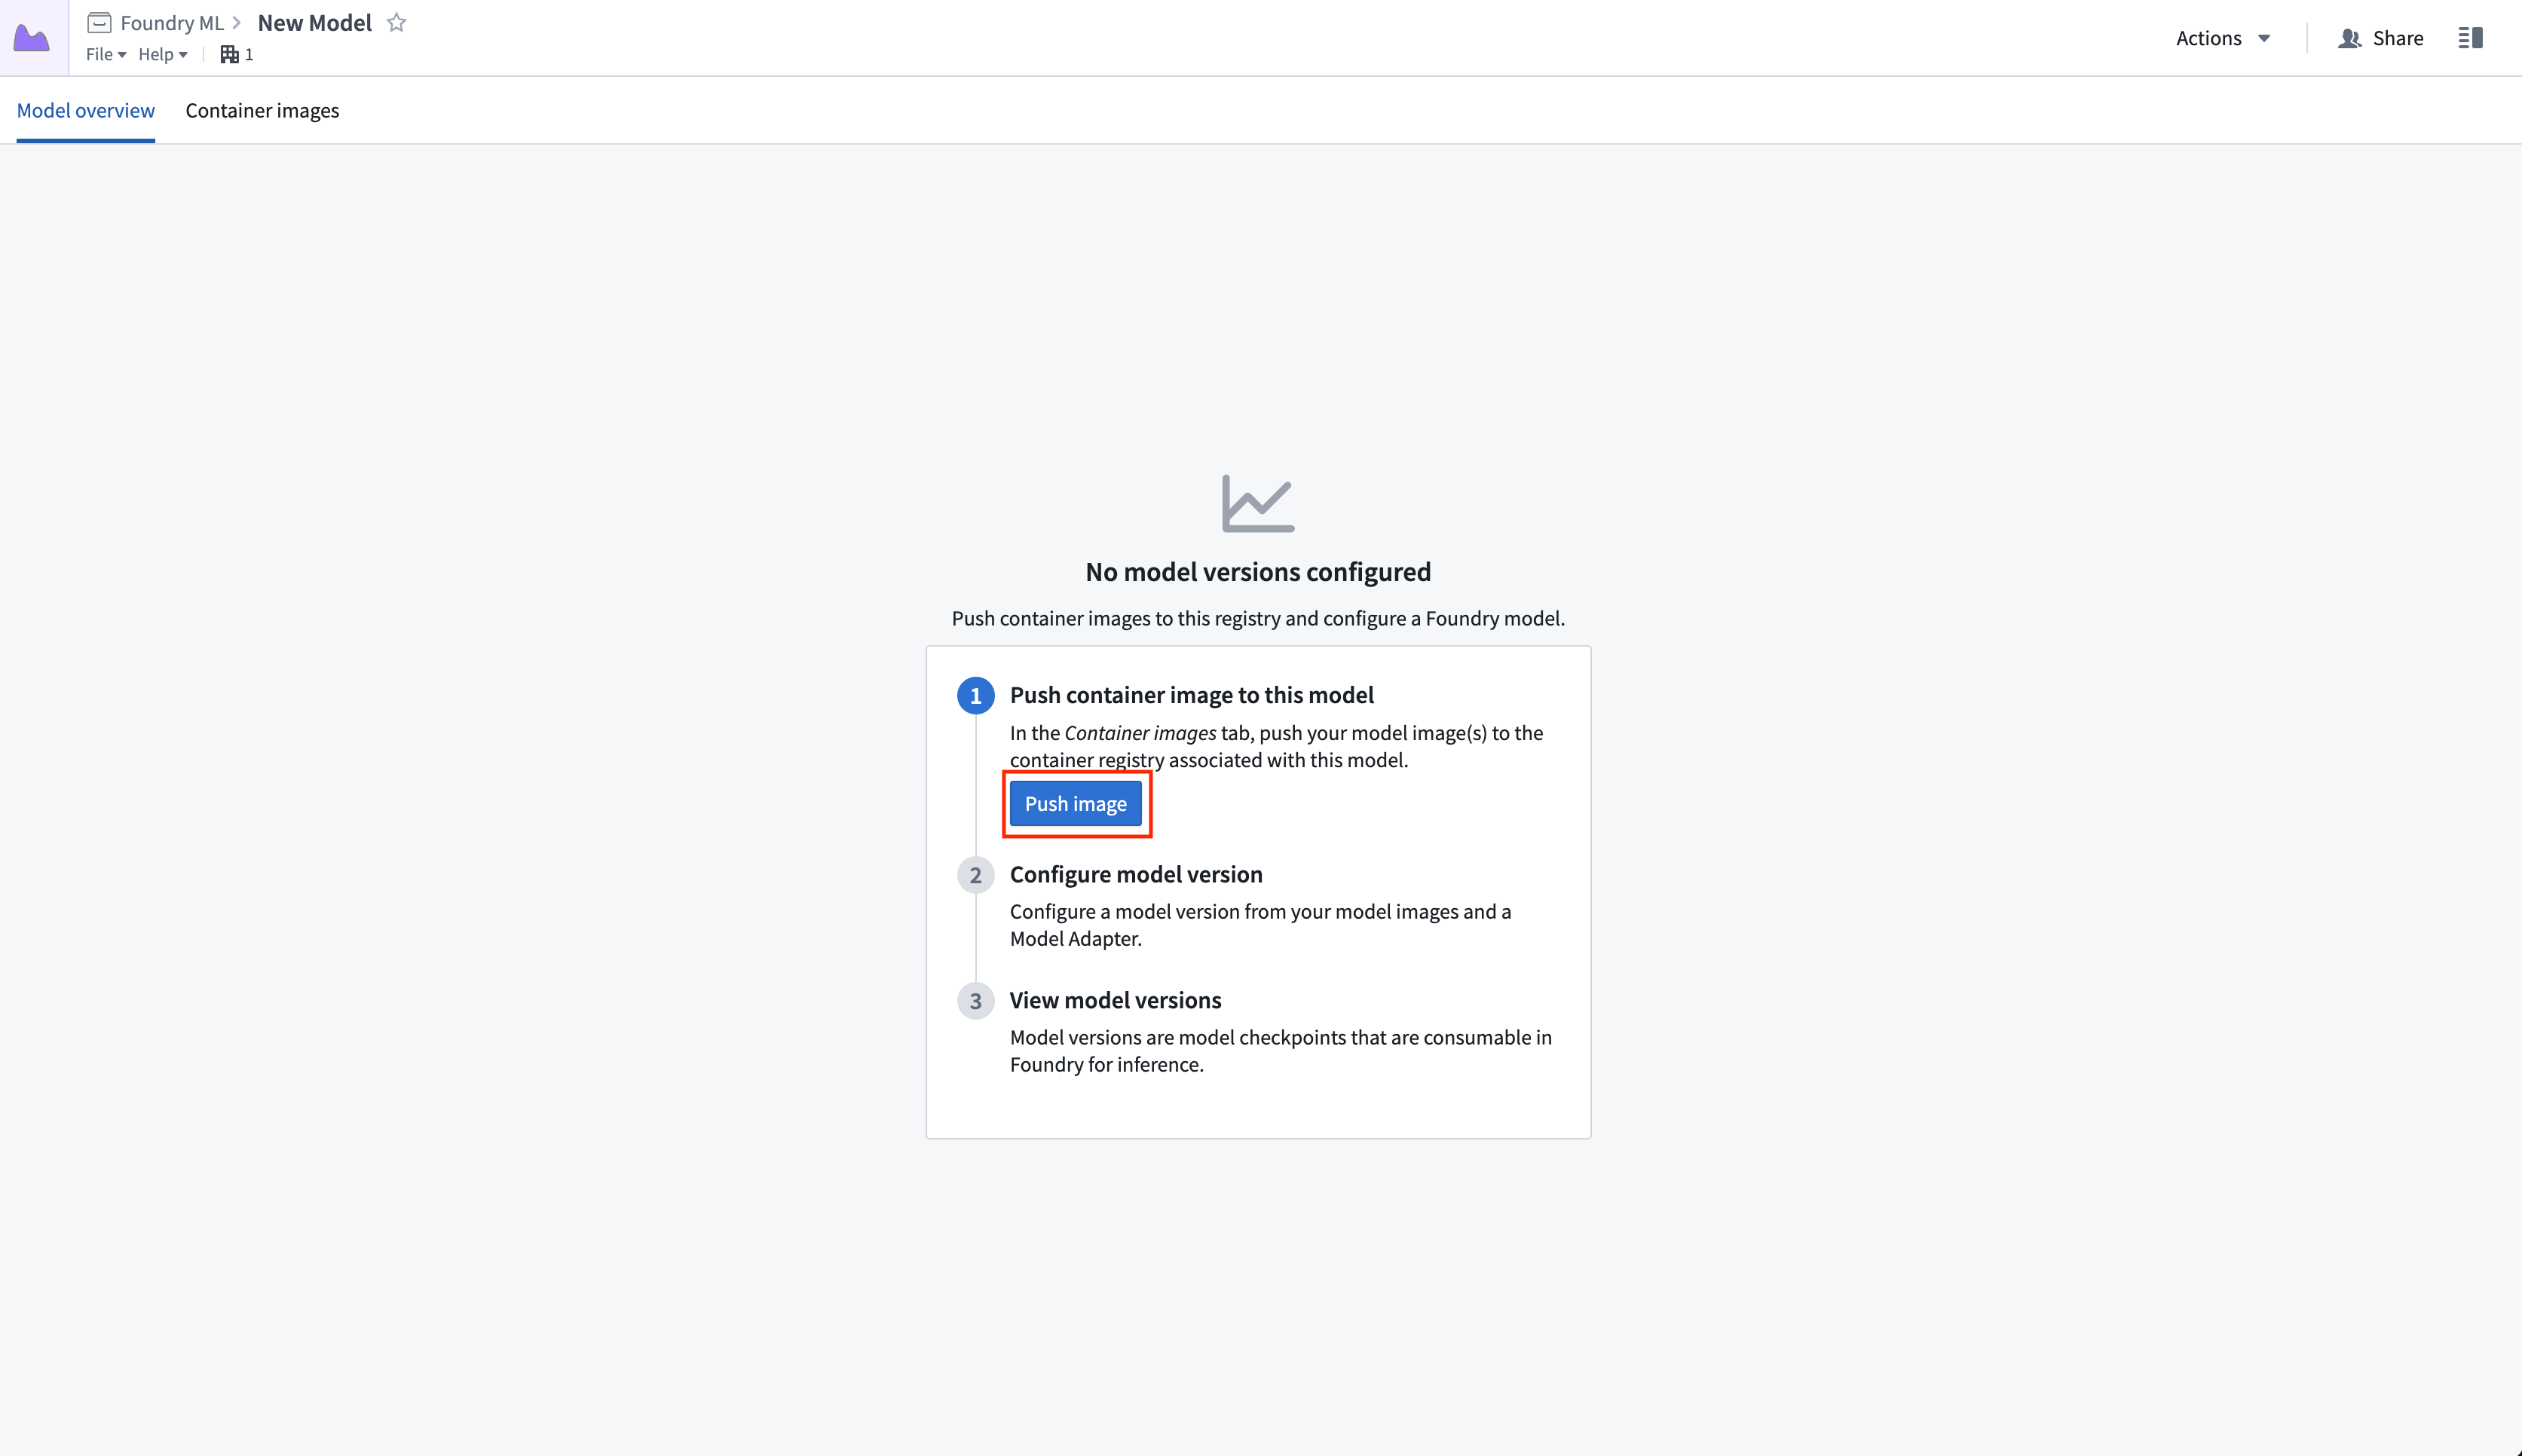
After creating a model resource in Palantir, follow the instructions to push your images into the Asset.
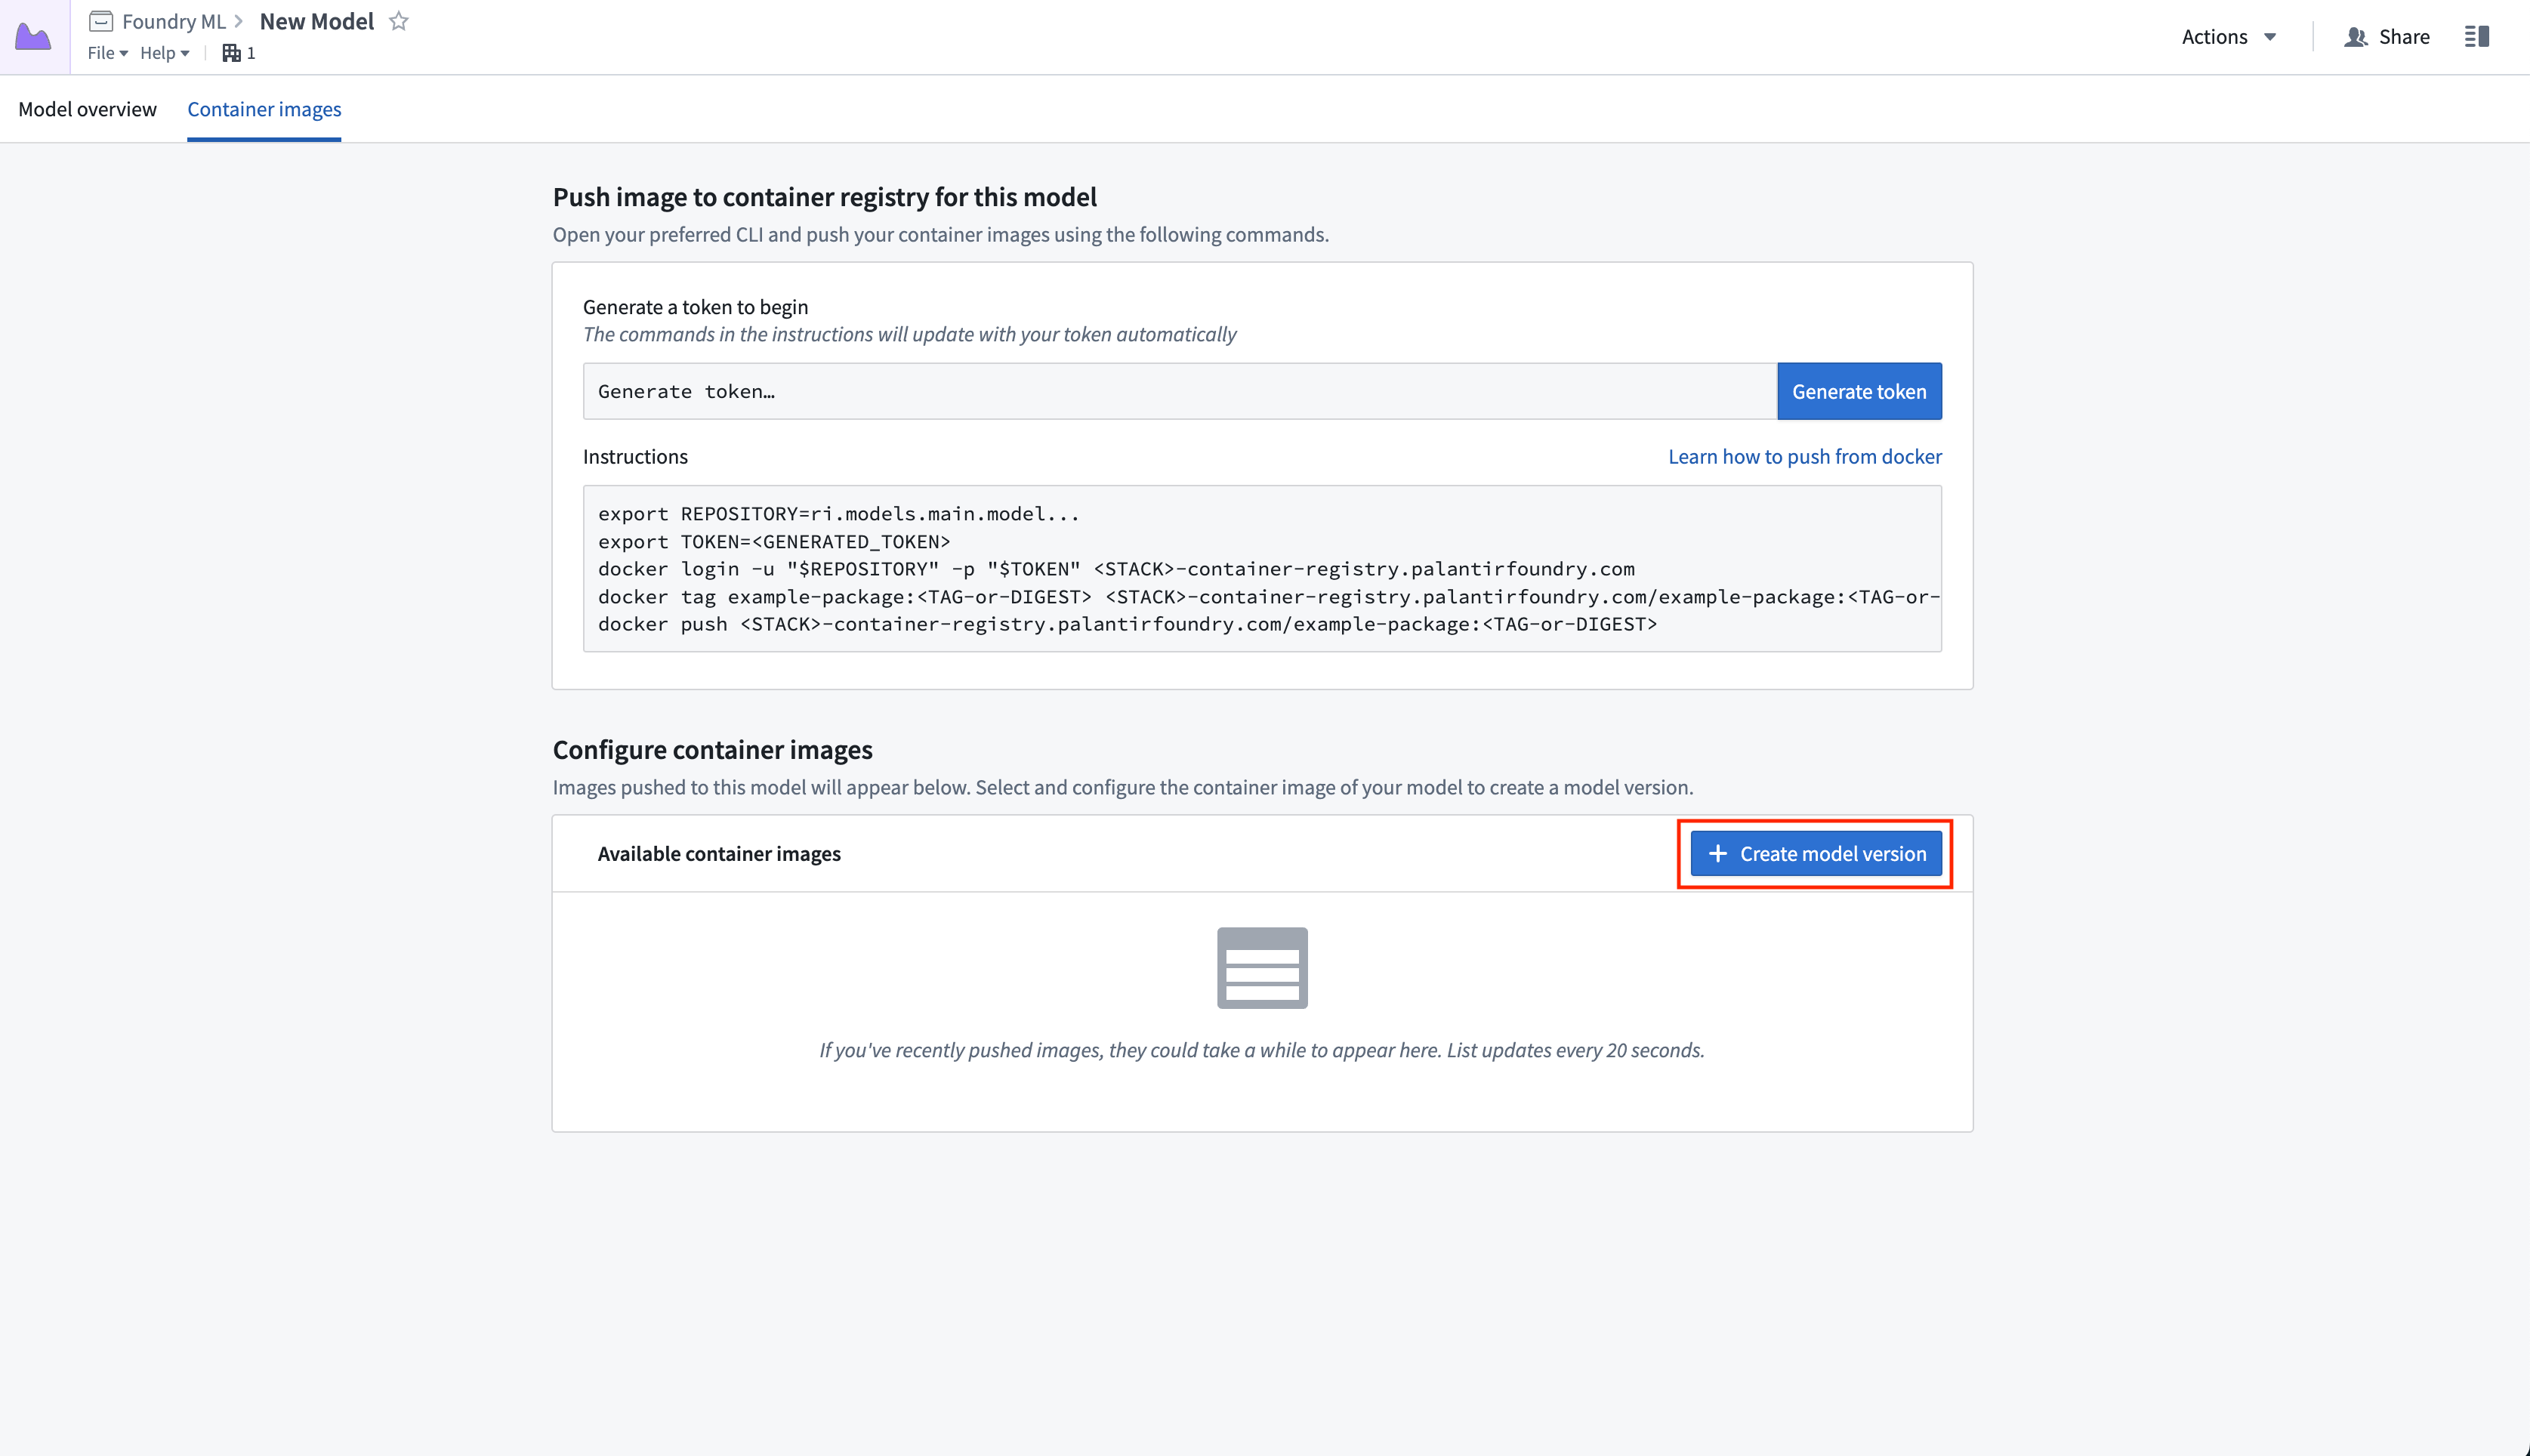
Select Generate token, then copy the block of default commands and edit them to replace example-package:<TAG> with the image name and tag (or digest) present in your local Docker repository. Note that the tag is not allowed to be 'latest' per the image requirements. Executing these commands will push the relevant image into the model, where it can be accessed by anyone with Viewer permissions.
Once the images have been successfully pushed and are available in the container images list, select Create model version to start configuring your version. To do this, you must first author a container model adapter created with the model adapter library template.
:::callout{theme="neutral"} Depending on the size of the image(s), it may take several minutes for your container images to be available in the model. :::
To iterate on your model adapter implementation before publishing, use the sidecar decorator to test how the logic will work with the container already present in the Model. Follow the steps in the sidecar transforms decorator documentation to create a new transforms repository with the decorator enabled, using the model you just created as the backing Artifacts repository. Then, define a local Python file within the transforms repository that implements the adapter and manually instantiate it as shown below:
from transforms.api import transform, Input, Output
from transforms.sidecar import sidecar, Volume
# This assumes you created a Python class testAdapter.py under a `myproject` folder and defined a class TestModelAdapter that implements palantir_models' ModelAdapter class.
from myproject.testAdapter import TestModelAdapter
import palantir_models.transforms


@sidecar(image='image-name', tag='1.0.0', volumes=[Volume("shared")])
@transform(
    output=Output("ri.foundry.main.dataset.<RID>"),
    source_df=Input("ri.foundry.main.dataset.<RID>"),
)
def compute(source_df, output):
    testingEntrypoint = TestModelAdapter(
       "/opt/palantir/sidecars/shared-volumes/shared",
       # Note that the port here should reflect the port on which your specific image is listening.
       "localhost:PORT")
    testingEntrypoint.transform_write(source_df, output)
3. Configure the model version
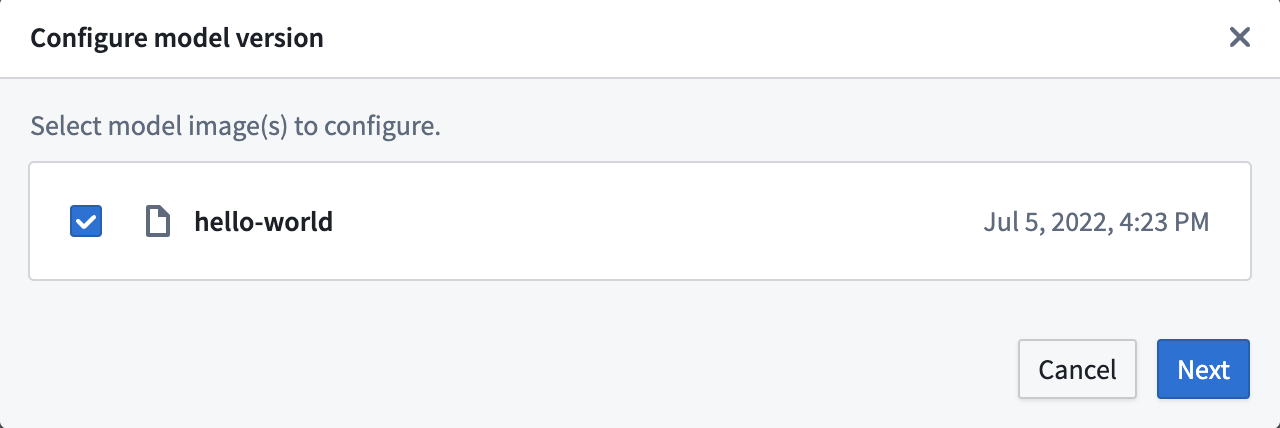
On the Configure model Version page, select one or more container images to be included in the specific model version. Select Next to proceed to the model version configuration.
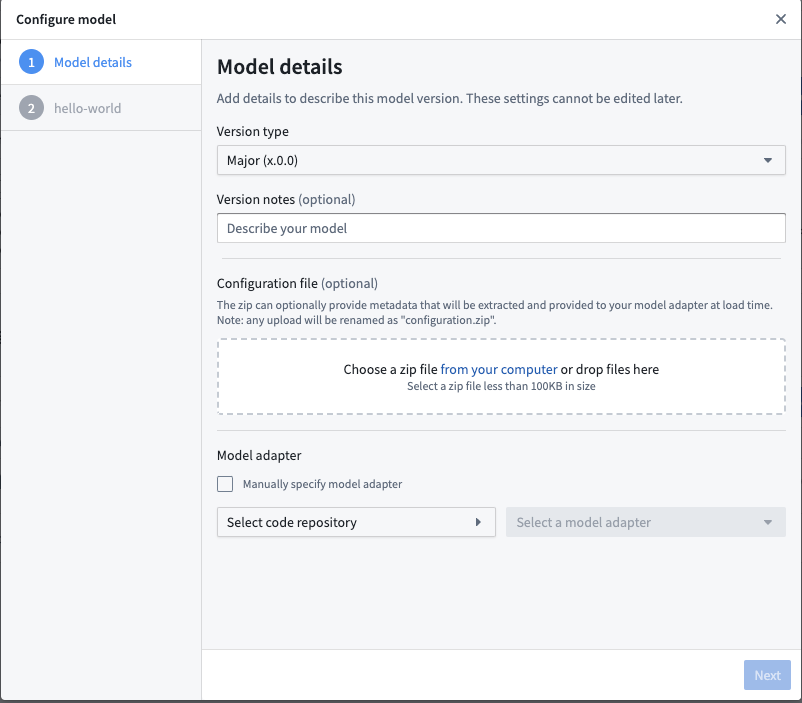
On the Model details page of the Configure model dialog, configure the type of semantic version change to make. Then, add an optional description and configuration file and select the adapter you created. Choose your model adapter repository in the Model adapter configuration section, and the Select a model adapter dropdown will populate with the latest versions of any valid adapters defined in the repository.
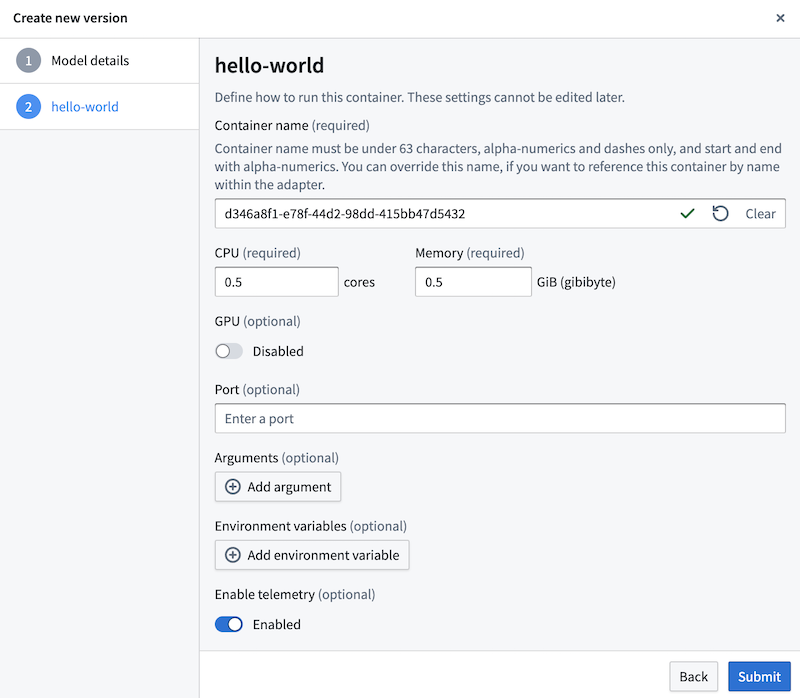
Finally, configure any optional runtime information for each image, including memory constraints, arguments, any environment variables, or a new exec command. Note that specifying the port on which the image is listening is critical if your adapter uses the requests library. You can configure the runtime information for each image selected for the model version.
Models can be configured to produce telemetry logs. If your container supports telemetry, you can enable it to the model version on the step shown in the screenshot below.
4. View model versions
Once the model version is created, its metadata will appear in the Model overview tab of the model page. There, use the left side panel to view and navigate to past versions.
From this page, you can submit to a Modeling Objective using the + icon on the top right or the Actions dropdown. You can also use the model as an input to a Python transform. Note that if the model is backed by a container, you are required to specify the second optional argument in the ModelInput class, selecting a version RID to use in the transform. You must also add a dependency on the model adapter in your transforms repository. Examples of this could look as follows:
from transforms.api import transform, Input, Output
from palantir_models.transforms import ModelInput


@transform(
    output=Output("/path/to/output/output_dataset"),
    model=ModelInput(
        "ri.models.main.model.<RID>",
        "ri.models.main.model-version.<RID>"),
    source_df=Input("/path/to/input/input_dataset"),
)
def compute(model, source_df, output):
    model.transform_write(source_df, output)
中文翻译
使用容器模型上传镜像
本指南将引导您完成使用容器化模型上传镜像的完整流程。在此工作流中,您将创建一个模型(Model)、将镜像推送到模型资源,并配置模型版本(model version)。
1. 创建模型
要创建容器化模型,首先需要创建用于推送镜像的资源。该资源将控制模型的权限;拥有该资源Viewer权限的用户将能够从Foundry拉取镜像。
导航至任意建模目标(modeling objective),选择 +添加模型,然后选择 导入容器化模型,即可创建新模型。
2. 推送镜像到模型
:::callout{theme="warning"} 您推送的镜像必须符合Foundry的镜像要求。 :::
在Palantir中创建模型资源后,按照说明将镜像推送到资产(Asset)中。
选择 生成令牌,然后复制默认命令块并进行编辑,将example-package:<TAG>替换为本地Docker仓库中的镜像名称和标签(或摘要)。请注意,根据镜像要求,标签不能为'latest'。执行这些命令将把相关镜像推送到模型中,任何拥有Viewer权限的用户都可以访问该镜像。
镜像成功推送并显示在容器镜像列表中后,选择 创建模型版本 开始配置您的版本。为此,您首先需要使用模型适配器库模板编写一个容器模型适配器。
:::callout{theme="neutral"} 根据镜像的大小,容器镜像可能需要几分钟才能在模型中可用。 :::
在发布前迭代模型适配器实现时,可以使用sidecar装饰器测试逻辑如何与模型中已有的容器配合工作。按照sidecar转换装饰器文档中的步骤,使用您刚创建的模型作为底层制品仓库(Artifacts repository),创建一个启用了装饰器的新转换仓库。然后,在转换仓库中定义一个实现适配器的本地Python文件,并手动实例化,如下所示:
from transforms.api import transform, Input, Output
from transforms.sidecar import sidecar, Volume
# 假设您在`myproject`文件夹下创建了一个testAdapter.py文件,
# 并定义了一个实现palantir_models中ModelAdapter类的TestModelAdapter类。
from myproject.testAdapter import TestModelAdapter
import palantir_models.transforms


@sidecar(image='image-name', tag='1.0.0', volumes=[Volume("shared")])
@transform(
    output=Output("ri.foundry.main.dataset.<RID>"),
    source_df=Input("ri.foundry.main.dataset.<RID>"),
)
def compute(source_df, output):
    testingEntrypoint = TestModelAdapter(
       "/opt/palantir/sidecars/shared-volumes/shared",
       # 注意,此处的端口应反映您的特定镜像正在监听的端口。
       "localhost:PORT")
    testingEntrypoint.transform_write(source_df, output)
3. 配置模型版本
在 配置模型版本 页面上,选择一个或多个容器镜像以包含在特定的模型版本中。选择 下一步 继续配置模型版本。
在 配置模型 对话框的 模型详情 页面上,配置语义版本变更的类型。然后,添加可选的描述和配置文件,并选择您创建的适配器。在 模型适配器 配置部分选择您的模型适配器仓库,选择模型适配器 下拉菜单将显示仓库中定义的所有有效适配器的最新版本。
最后,为每个镜像配置可选的运行时信息,包括内存限制、参数、环境变量或新的执行命令。请注意,如果您的适配器使用requests库,指定镜像监听的端口至关重要。您可以为模型版本中选择的每个镜像配置运行时信息。
模型可以配置为生成遥测日志。如果您的容器支持遥测,您可以在下图中所示的步骤中为模型版本启用遥测功能。
4. 查看模型版本
模型版本创建完成后,其元数据将显示在模型页面的 模型概览 选项卡中。在此处,使用左侧面板查看和导航到历史版本。
在此页面上,您可以使用右上角的 + 图标或 操作 下拉菜单提交到建模目标。您还可以将模型用作Python转换的输入。请注意,如果模型由容器支持,您需要在ModelInput类中指定第二个可选参数,选择要在转换中使用的版本RID。您还必须在转换仓库中添加对模型适配器的依赖。示例如下:
from transforms.api import transform, Input, Output
from palantir_models.transforms import ModelInput


@transform(
    output=Output("/path/to/output/output_dataset"),
    model=ModelInput(
        "ri.models.main.model.<RID>",
        "ri.models.main.model-version.<RID>"),
    source_df=Input("/path/to/input/input_dataset"),
)
def compute(model, source_df, output):
    model.transform_write(source_df, output)