Define modeling objective API(定义建模目标 API)
:::callout{theme="warning" title="Sunsetted functionality"} The below documentation describes binding models to the ontology in Modeling Objectives, which is no longer recommended for most use cases. Consider direct model deployment as a function instead to use models in downstream applications, including Workshop, Slate, Actions, and more. :::
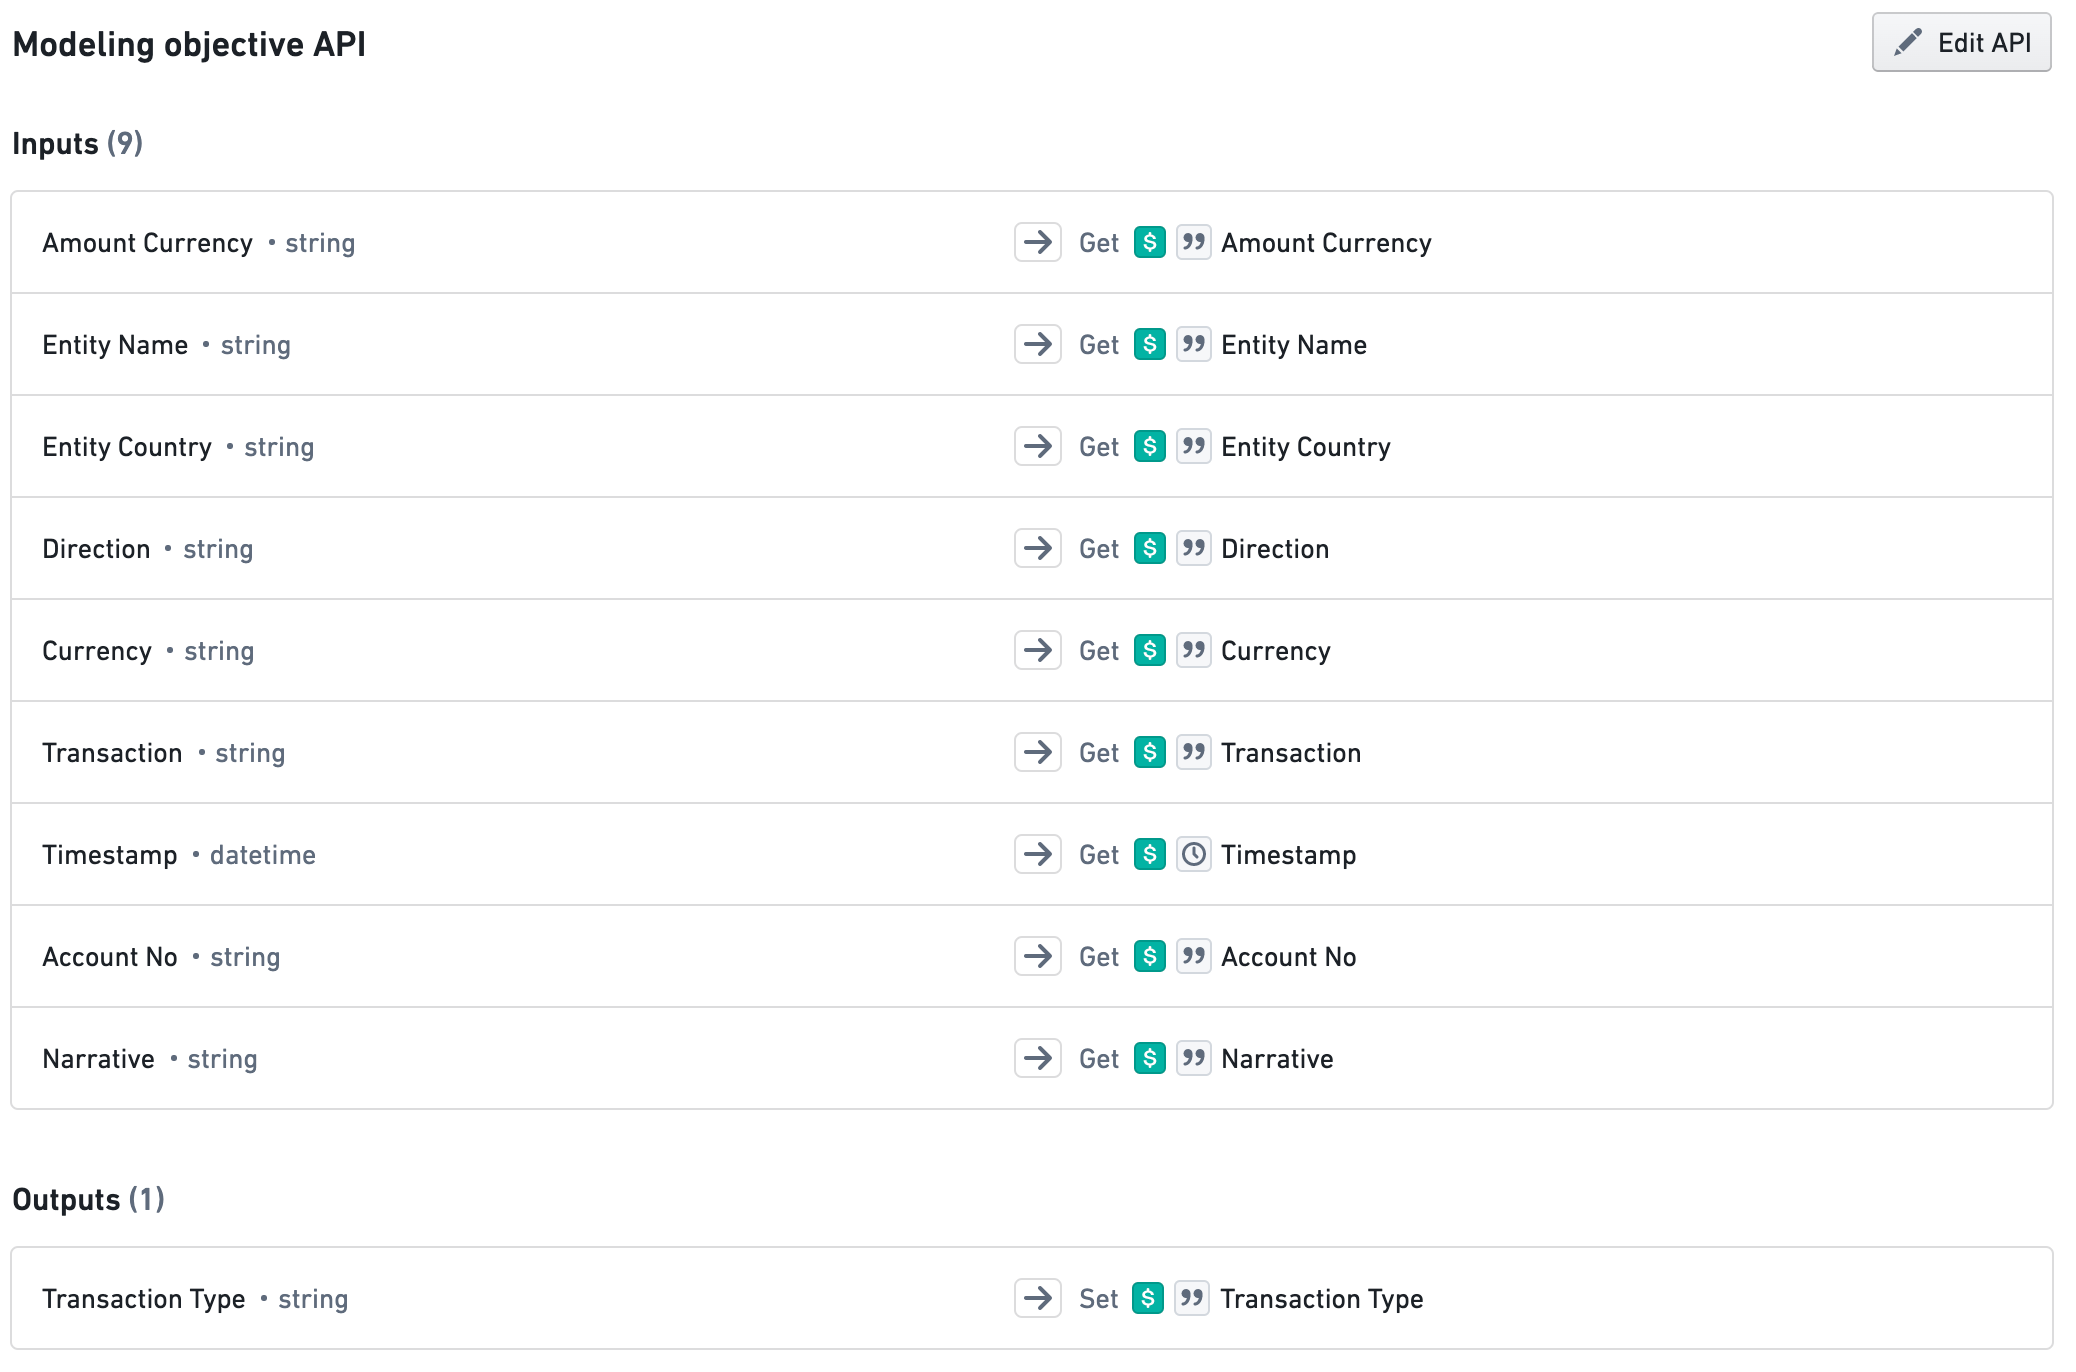
To specify how users or applications should use your modeling objective within Foundry, you can create an API for your objective.
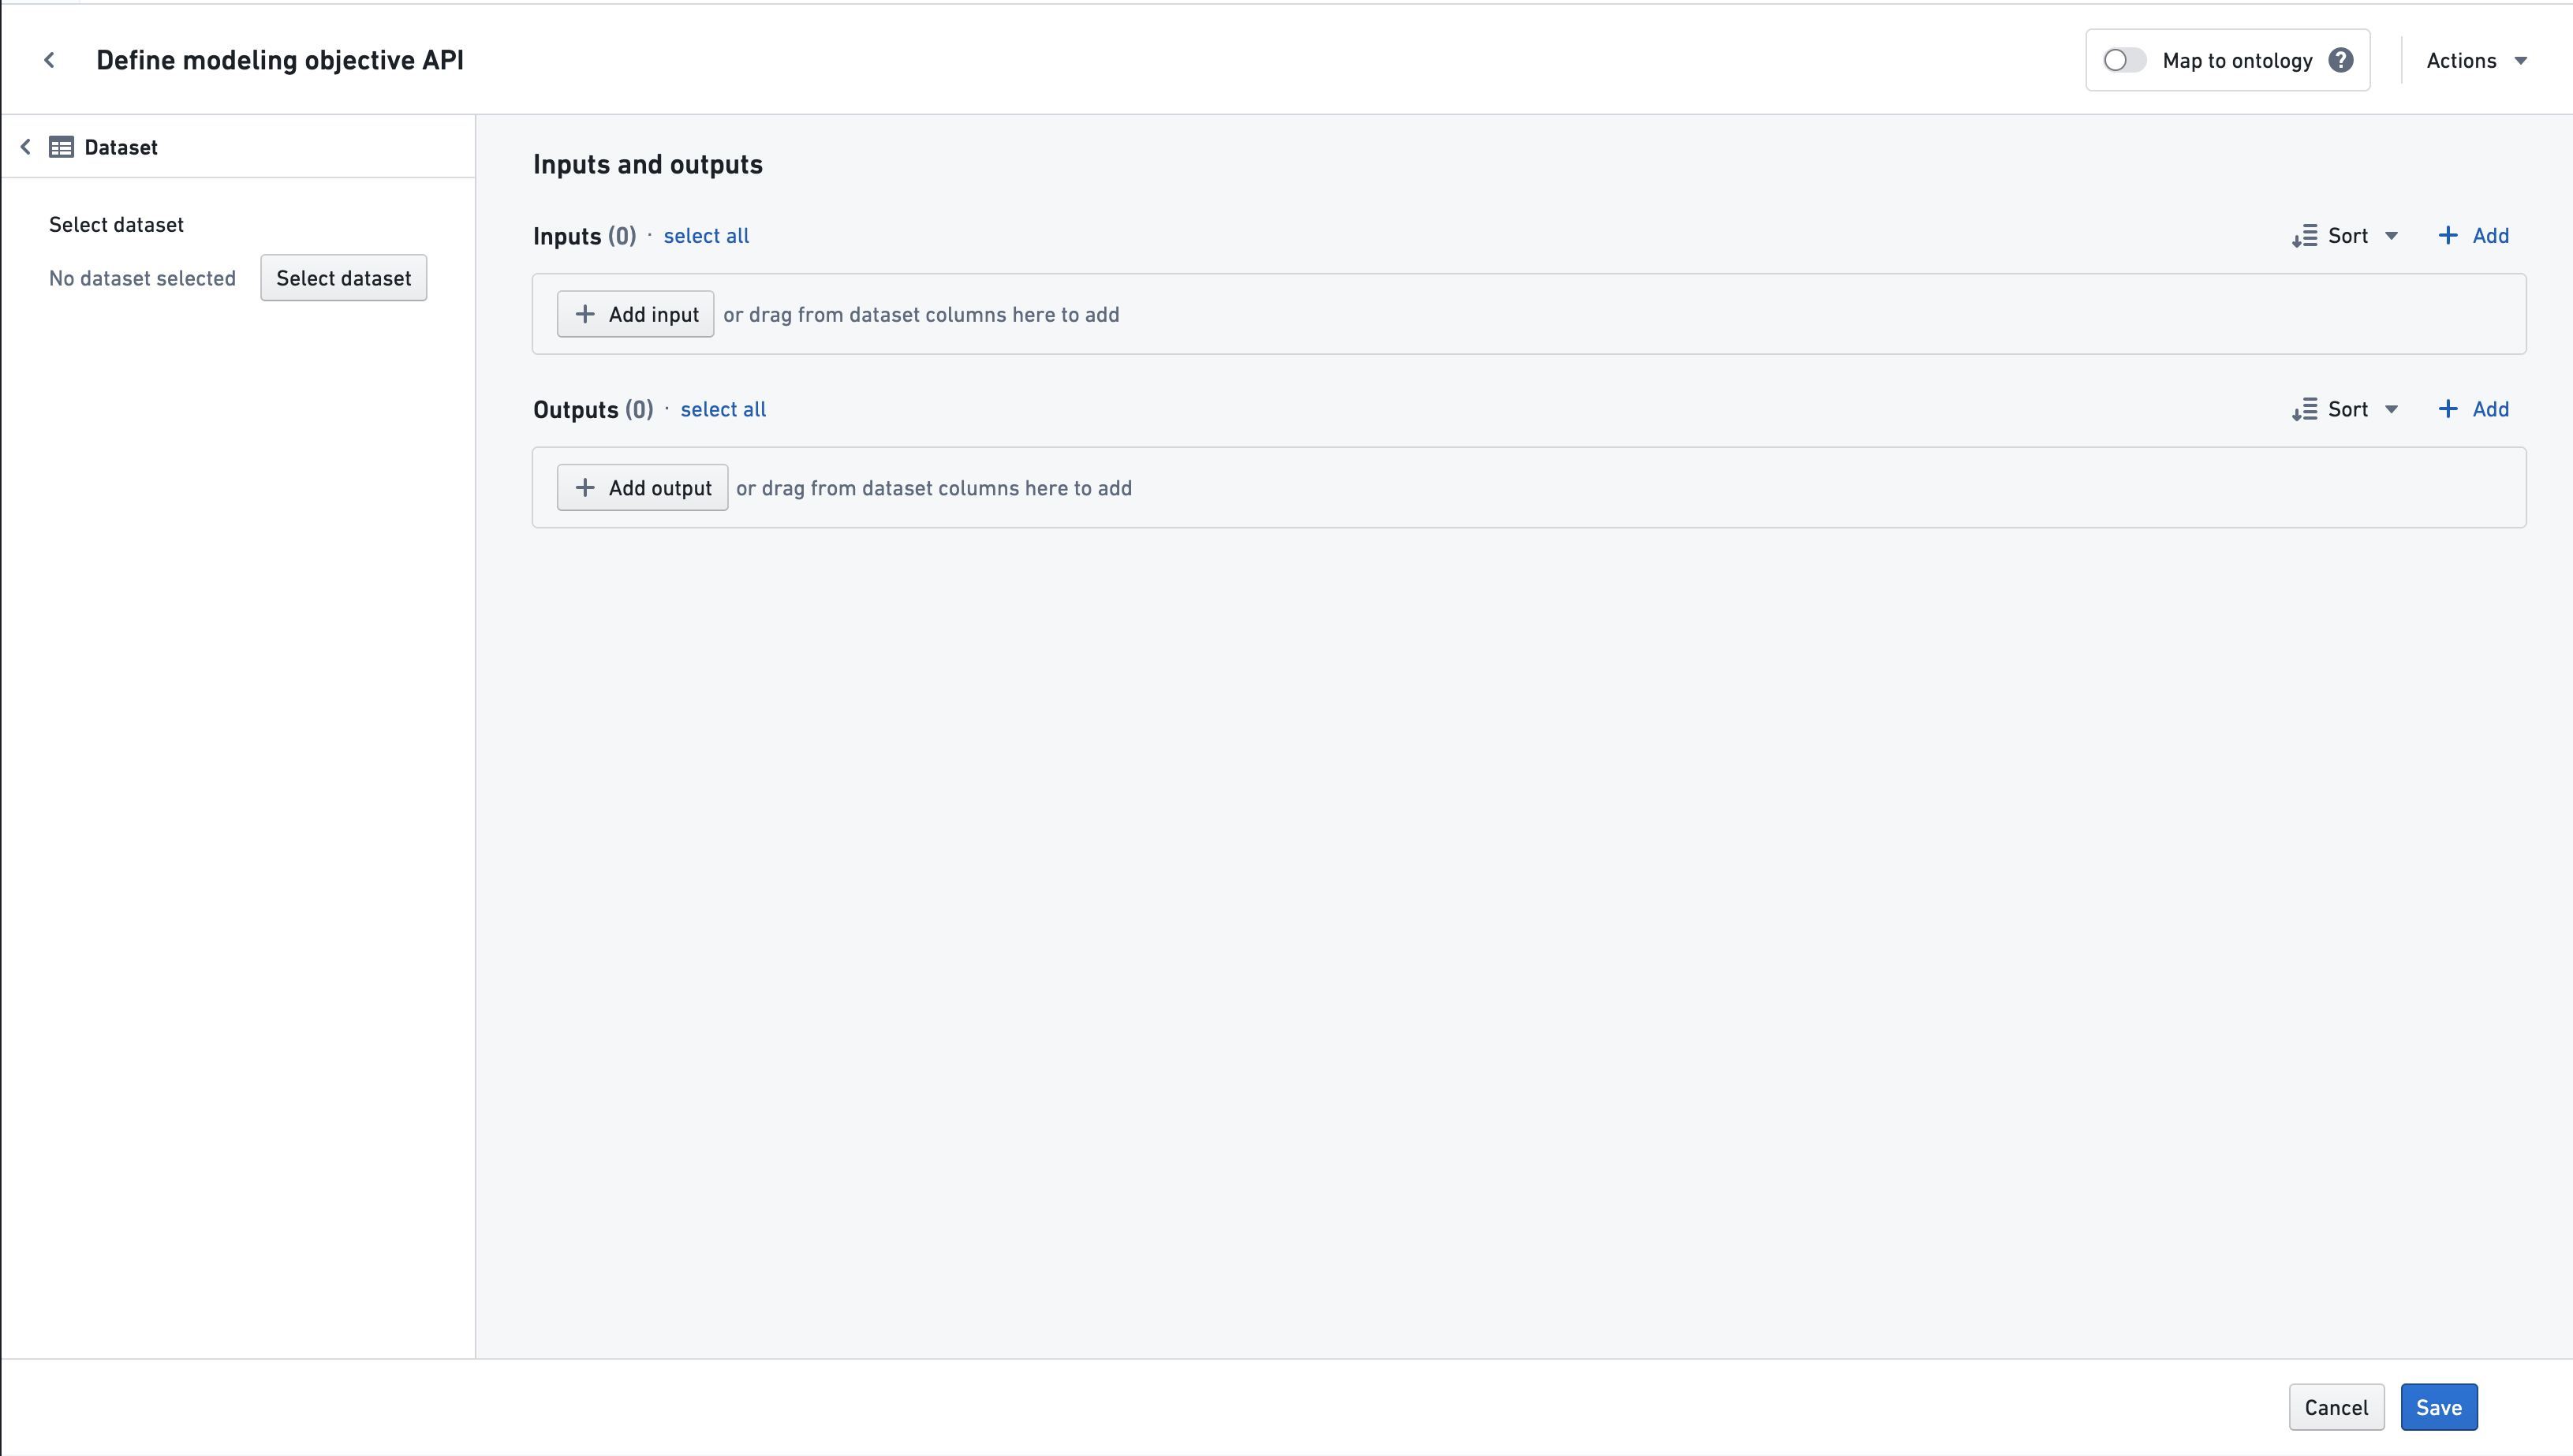
To define input and output APIs for a new objective, select Modeling objective details and edit the Objective API section. This will take you to the Define modeling objective API page, as shown below:
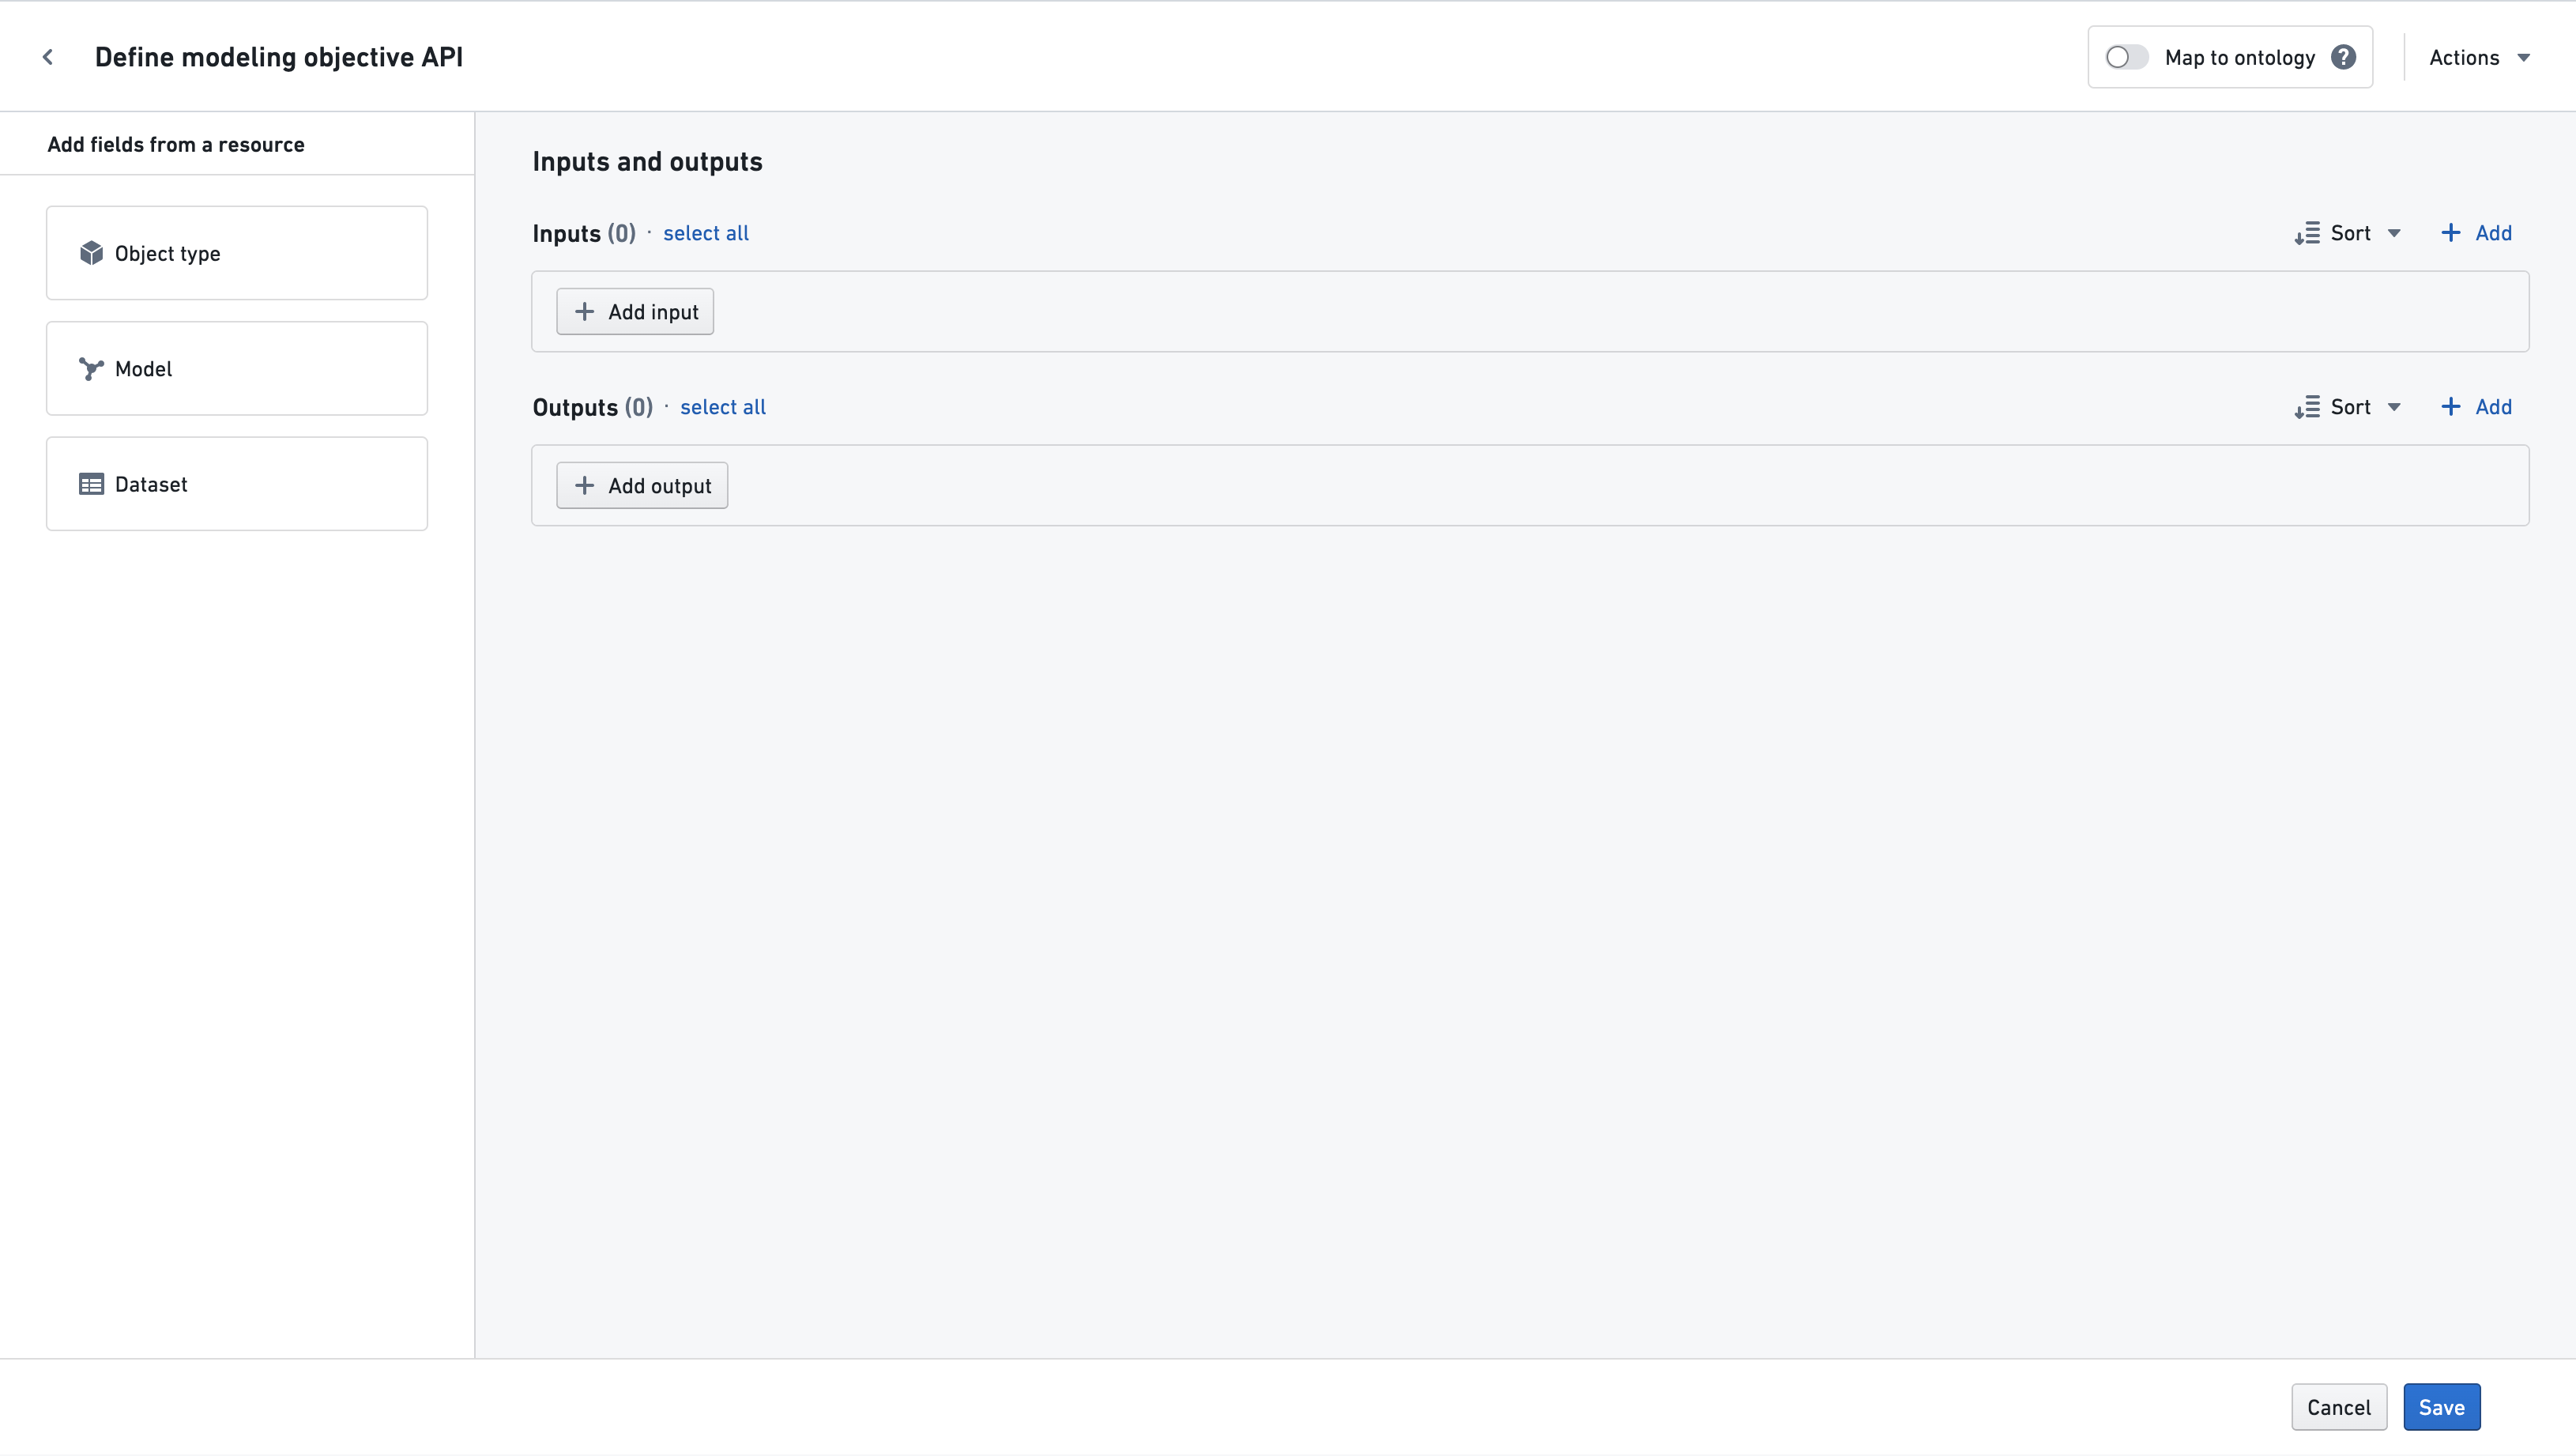
On the left-hand panel (shown above) labeled Define initial objective API, you can choose one of the following methods to help start populating the modeling objective API (or you can manually define the inputs and outputs on the right):
- If you select Object Type, proceed to the documentation on mapping object properties.
- If you already have a model in mind that you would like to submit to this objective, you can start from the Model's API by following the steps below by selecting Model. At this time, this workflow is only supported for ontology-backed models.
- If you want your objective API to have inputs or outputs based on columns of any existing Foundry dataset, selecting Dataset will let you easily create properties based on those columns, as described in the documentation here.
Manually defining API input and outputs
To manually define an API, you can directly specify input and output properties and then select an object type to map properties to the ontology.
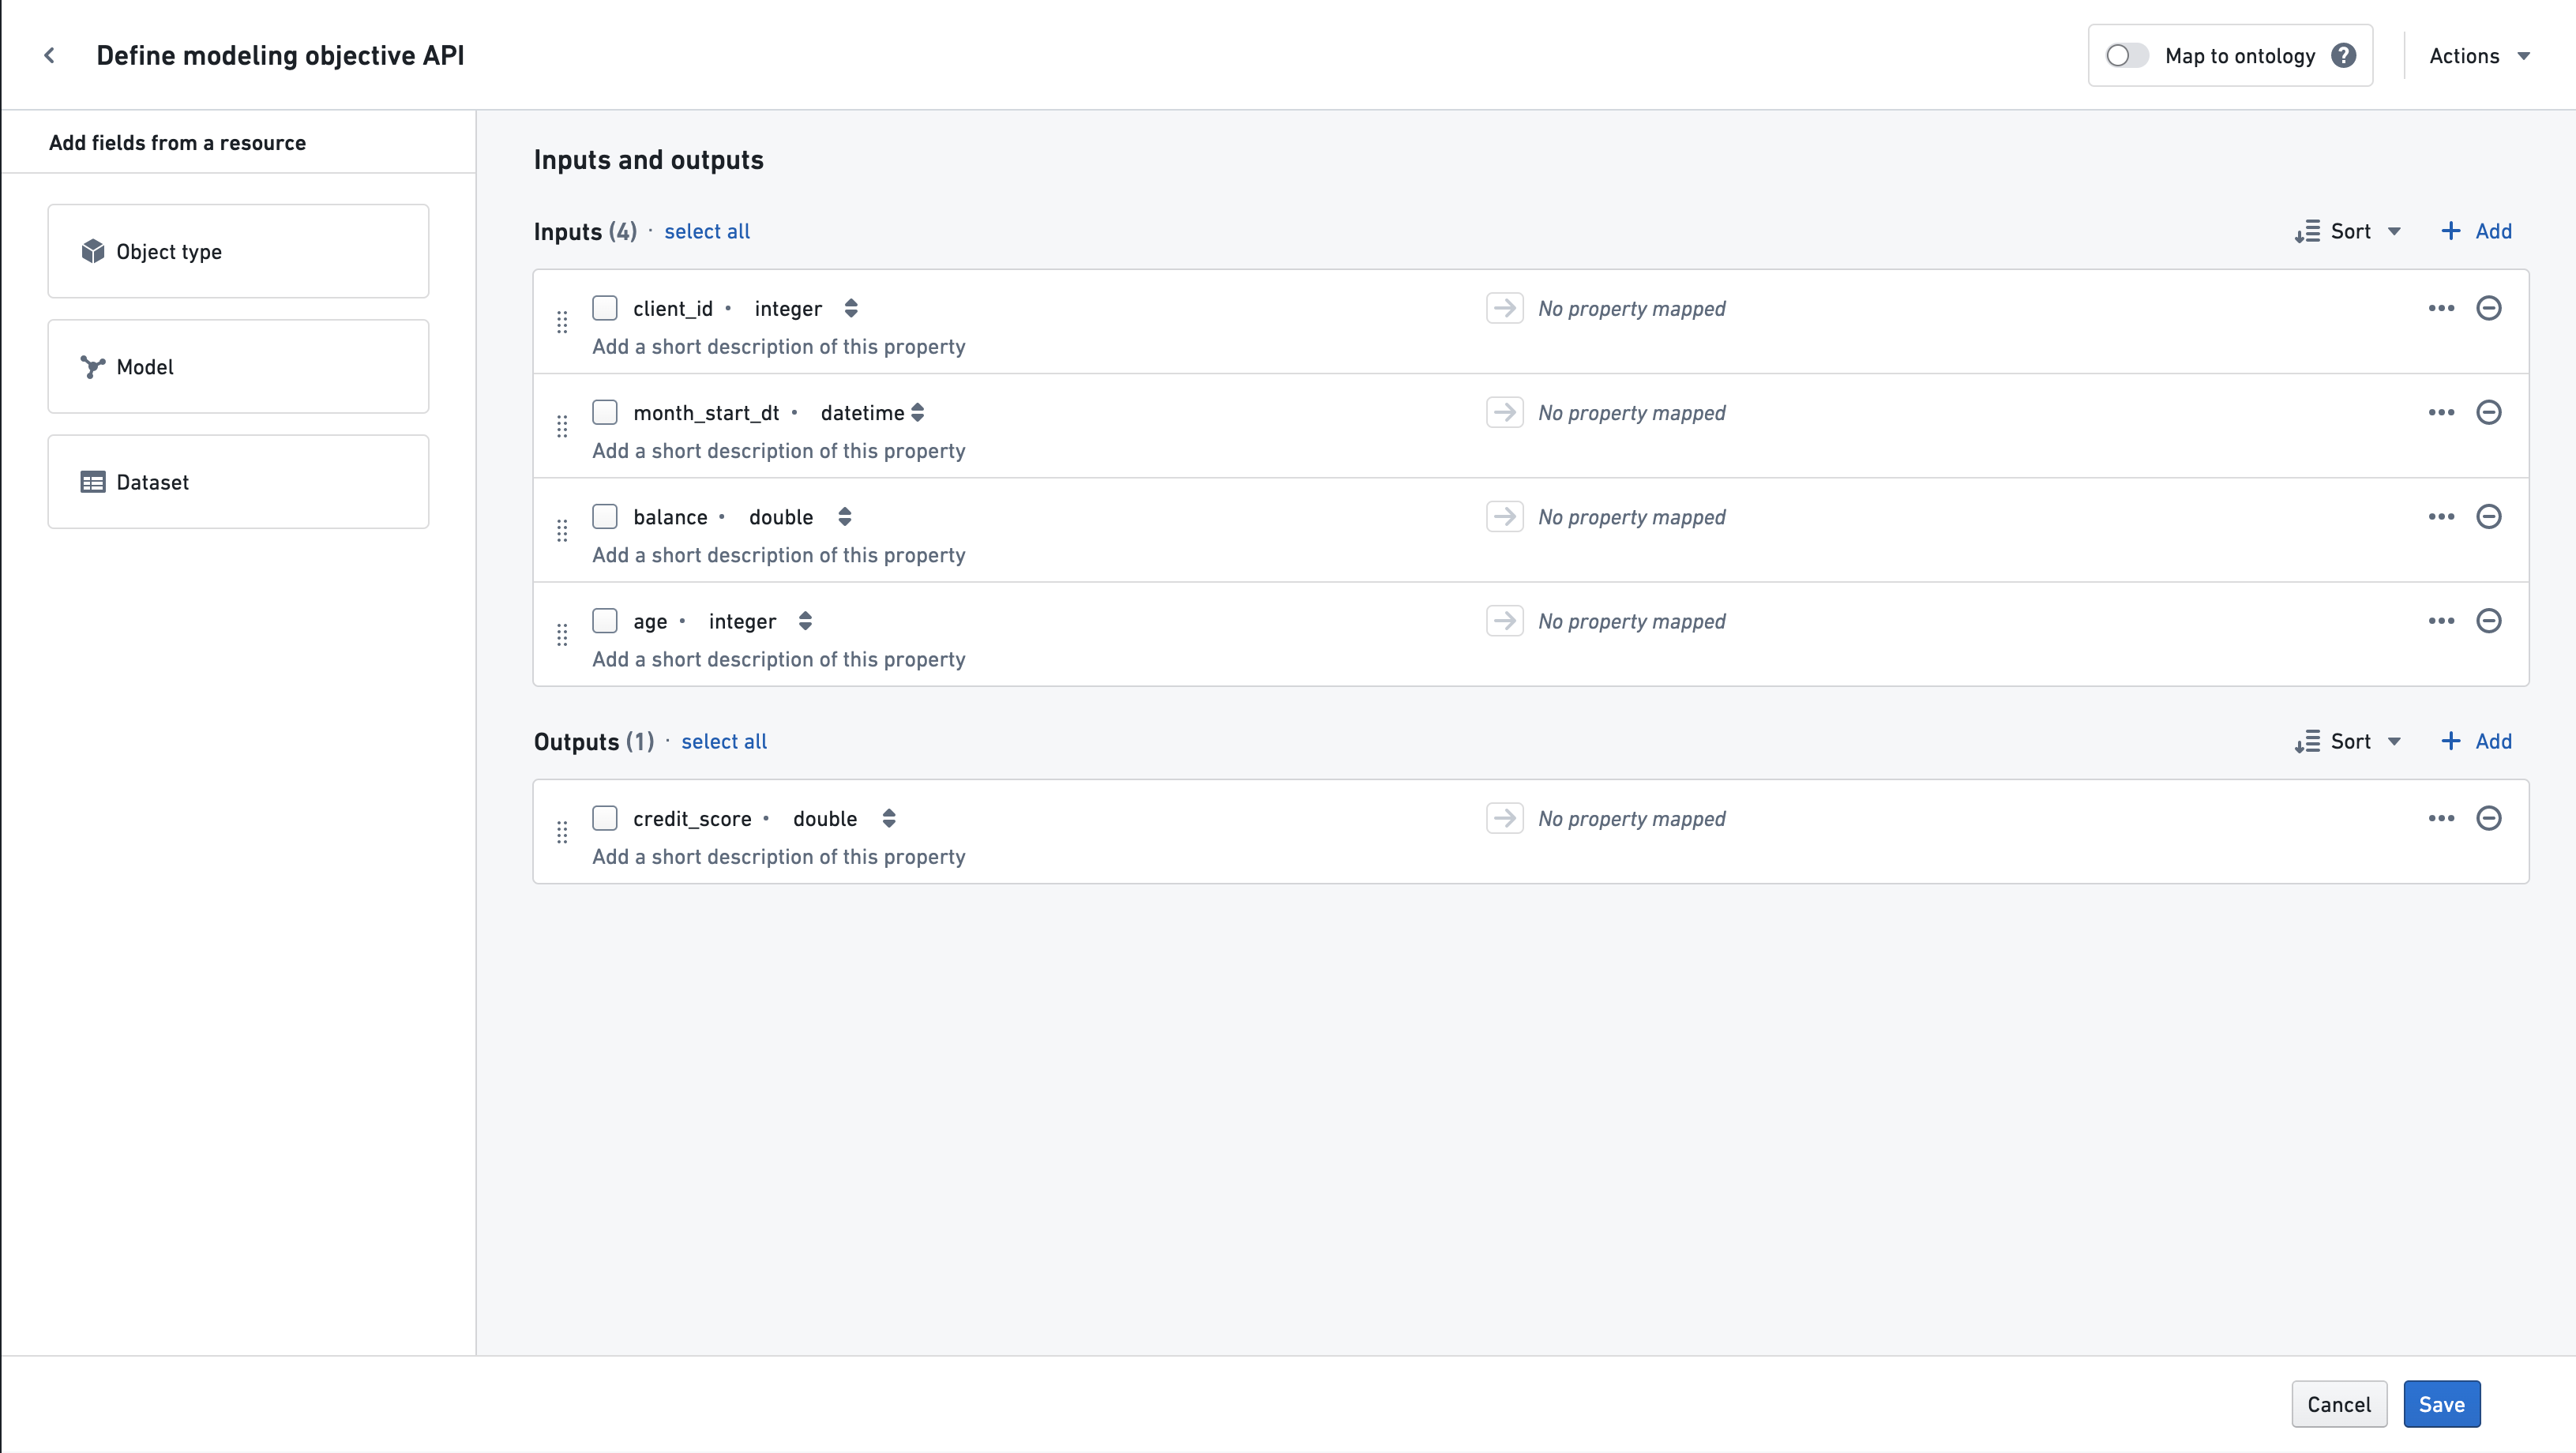
Click the “Add input” or “Add output” button, and specify the property name, the type, and, optionally, the description. The type should be one of:
booleandatetimedoublelongintegerstring
If the type of the property is expected to be unknown, the any type should be used.
After defining input and output properties, you can optionally map them to object properties, as described in the next section.
:::callout{theme="neutral"} The API defines the format of the input and output for any models submitted to the modeling objective. The input will be given as single dataframe, and the column names of this dataframe should match the names given in the Inputs section shown above. Similarly, the modeling objective will expect model's output dataframe to have columns matching those specified in Outputs. :::
Mapping your objective API to the Ontology
You can provide additional metadata to each field in your objective API by mapping (also known as binding) each field to an object property in the Ontology. Mapping properties is highly recommended if the modeling objective should use data from the Ontology or if the modeling objective will be used to power operational applications that are backed by the Ontology.
For example, using Scenarios in a Workshop application requires that your objective API to be mapped to the Ontology. This is because Scenarios will use these input mappings to fetch the appropriate input data when executing your model and use the output mappings to determine ontological properties to overwrite.
See below for what mapping means for input and output properties:
- For an input property, this indicates that the data for that property should be pulled from the mapped object type and property.
- For an output property, this indicates that the model output for that property must be compatible with, and may be written to, the mapped object type property.
:::callout{theme="neutral"} Ontology mappings can be used by operational applications to fetch inputs to your model and subsequently overwrite ontology properties with the output of your model. For this reason, it is very important you understand how applications may be using your objective if you add ontology mappings. :::
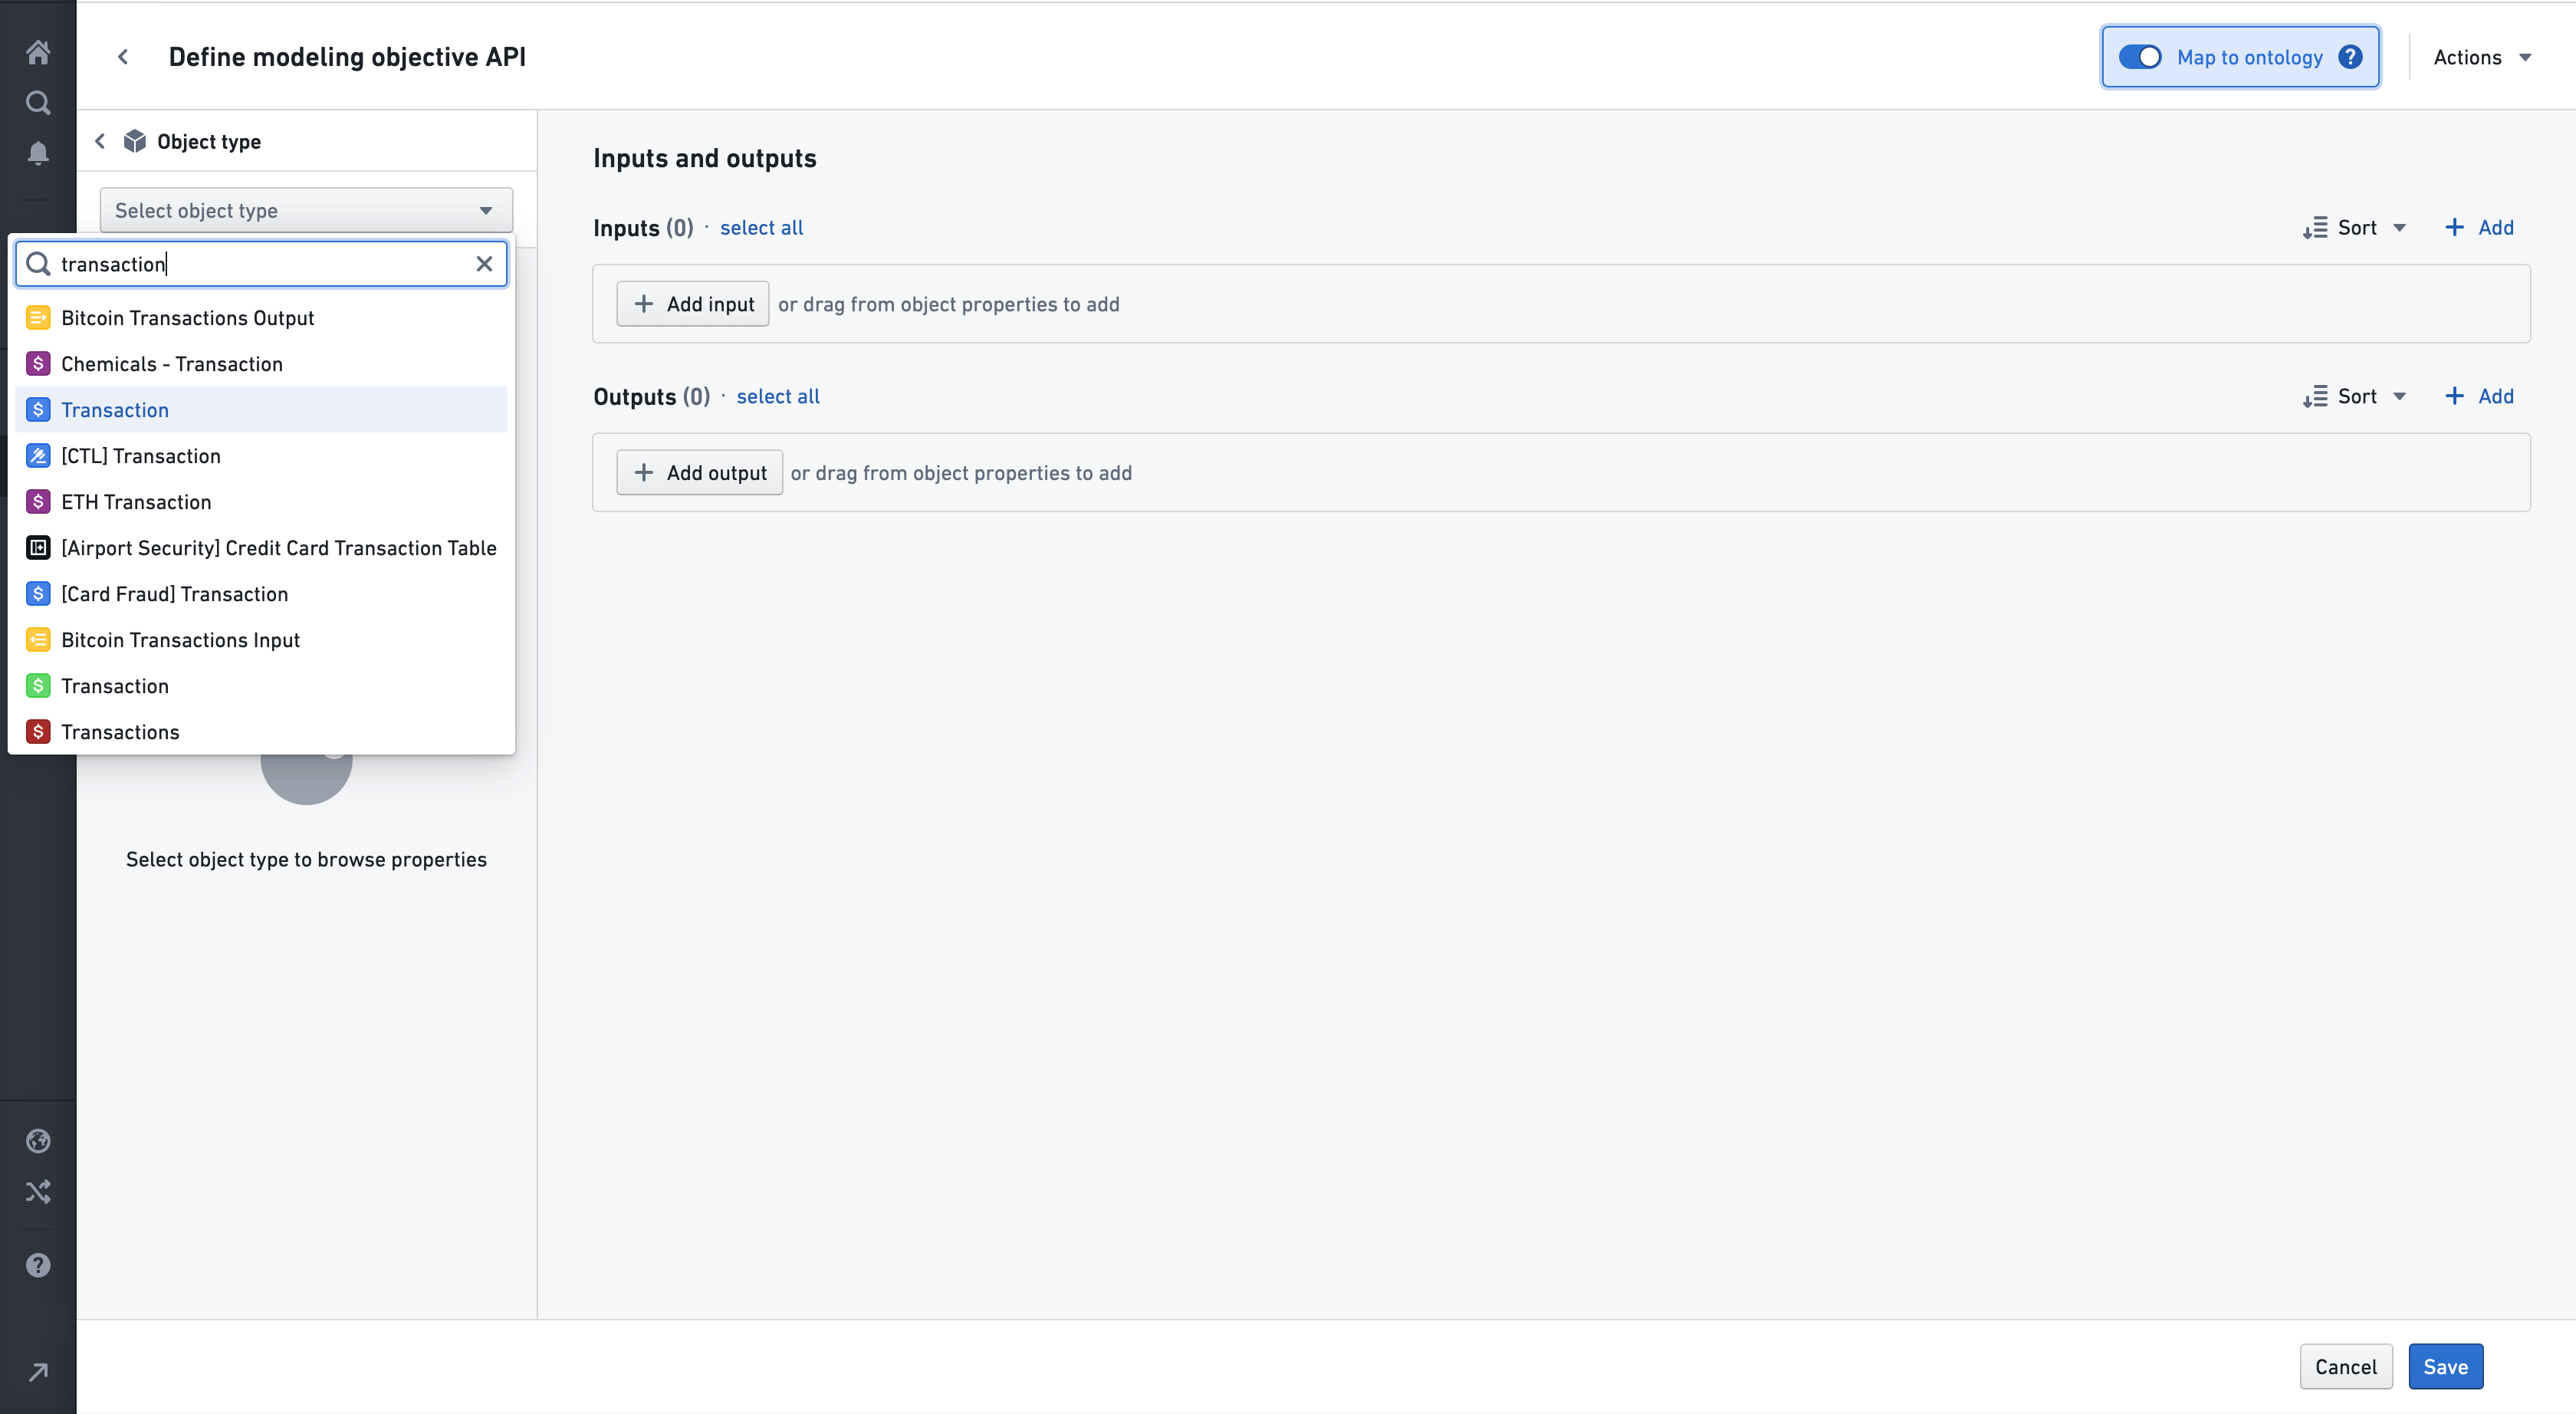
To map to object properties, you can either select "object type" on the left, or toggle the "Map to Ontology" switch in the top-right. From there, select the "root" object type you want to map to. The object properties available for mapping will be those on this object, as well as any objects linked to the selected object by a many-to-one relation.
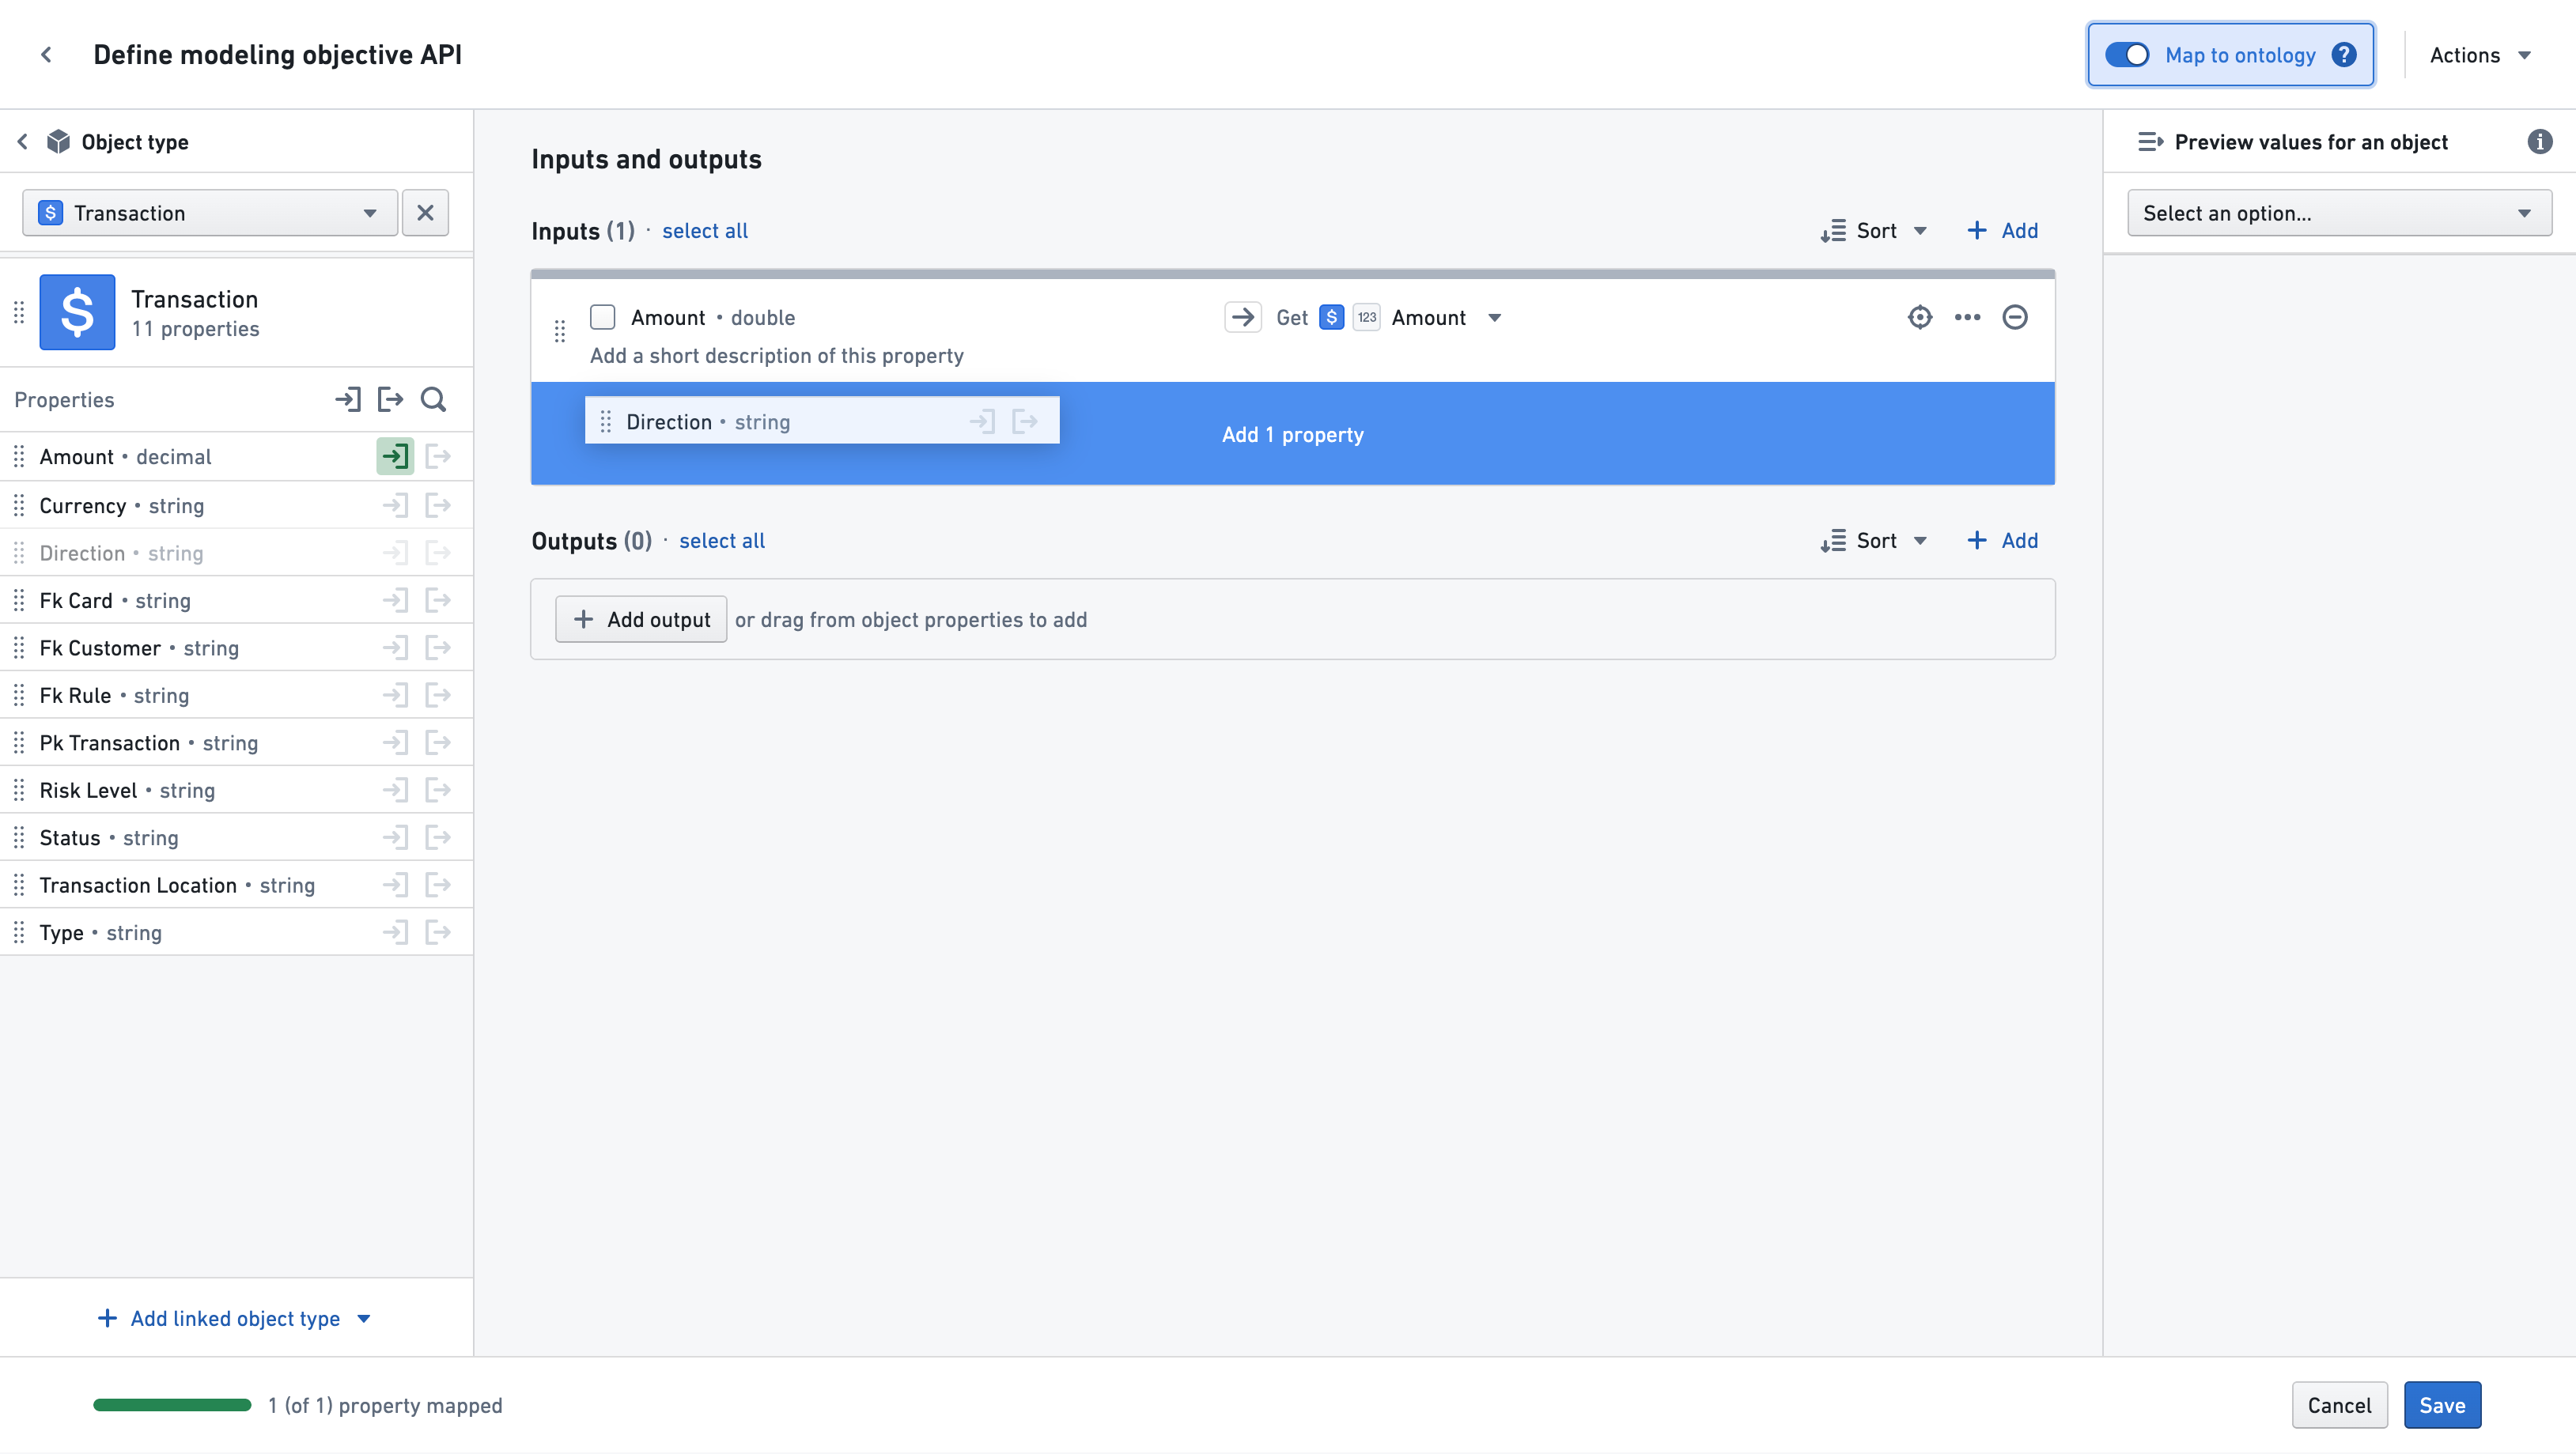
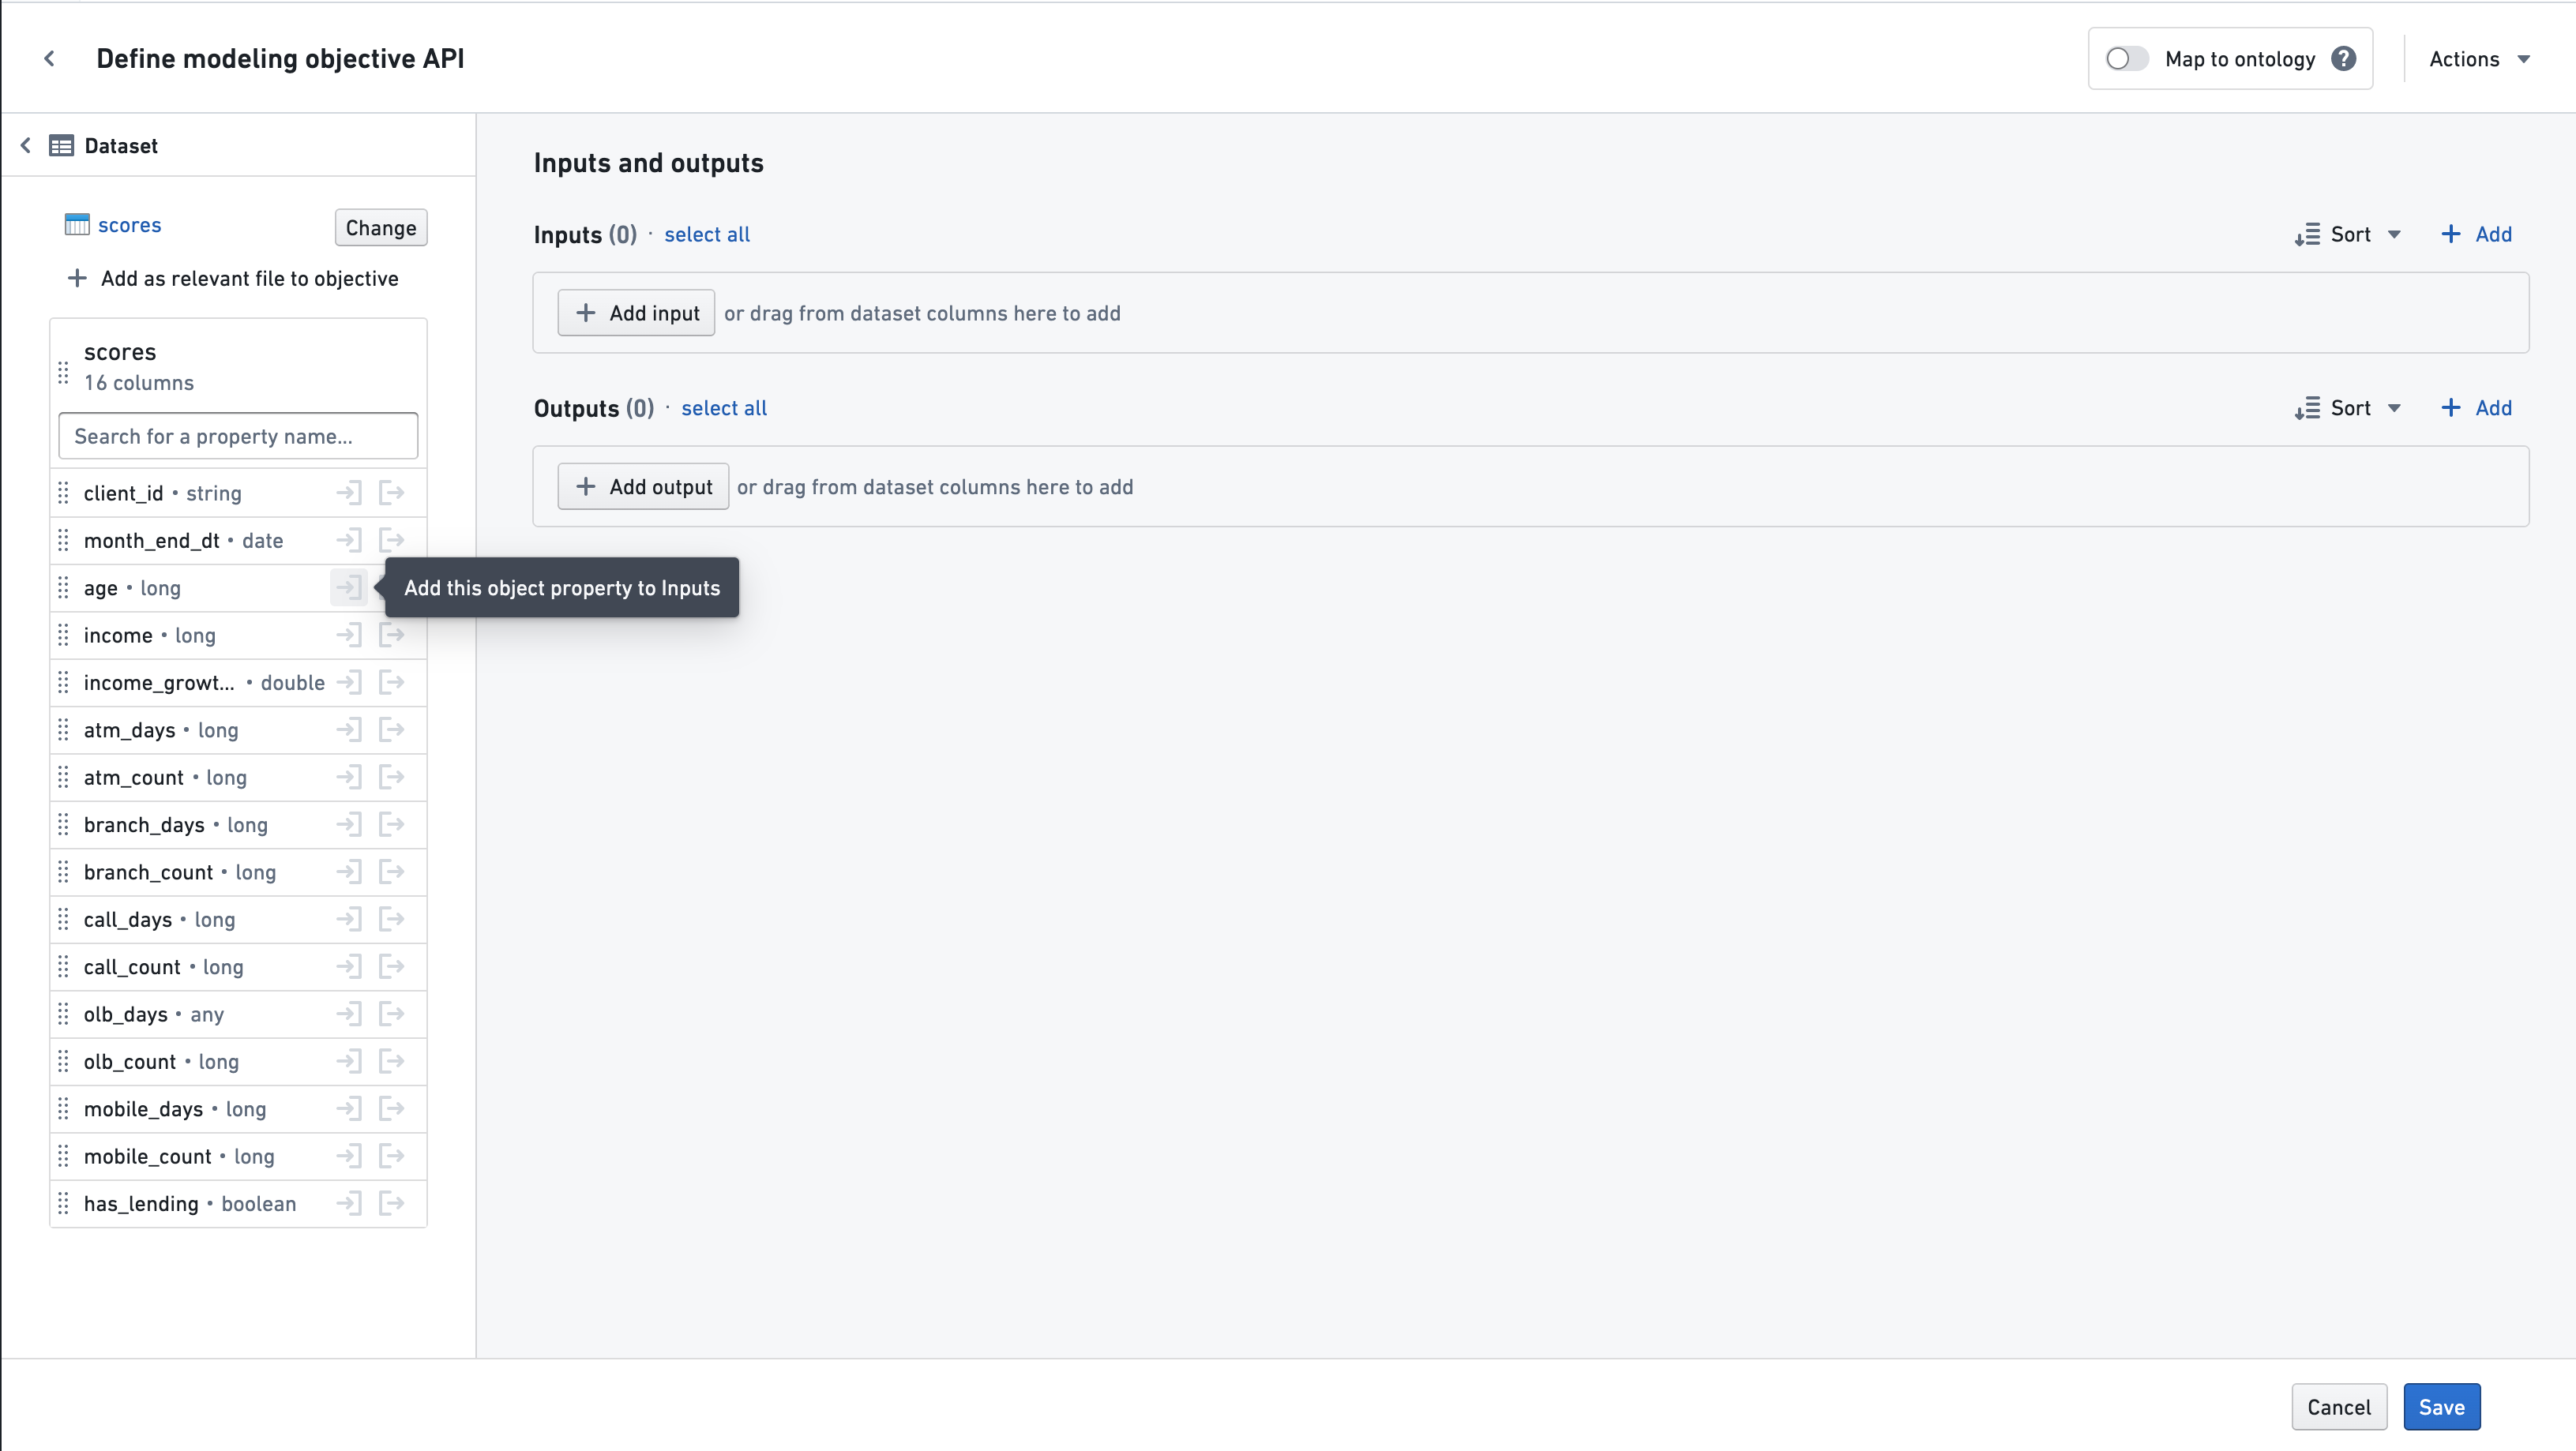
After selecting an object type, all the properties of that object type will be available for mapping. To map a property, click the In or Out button next to the property:
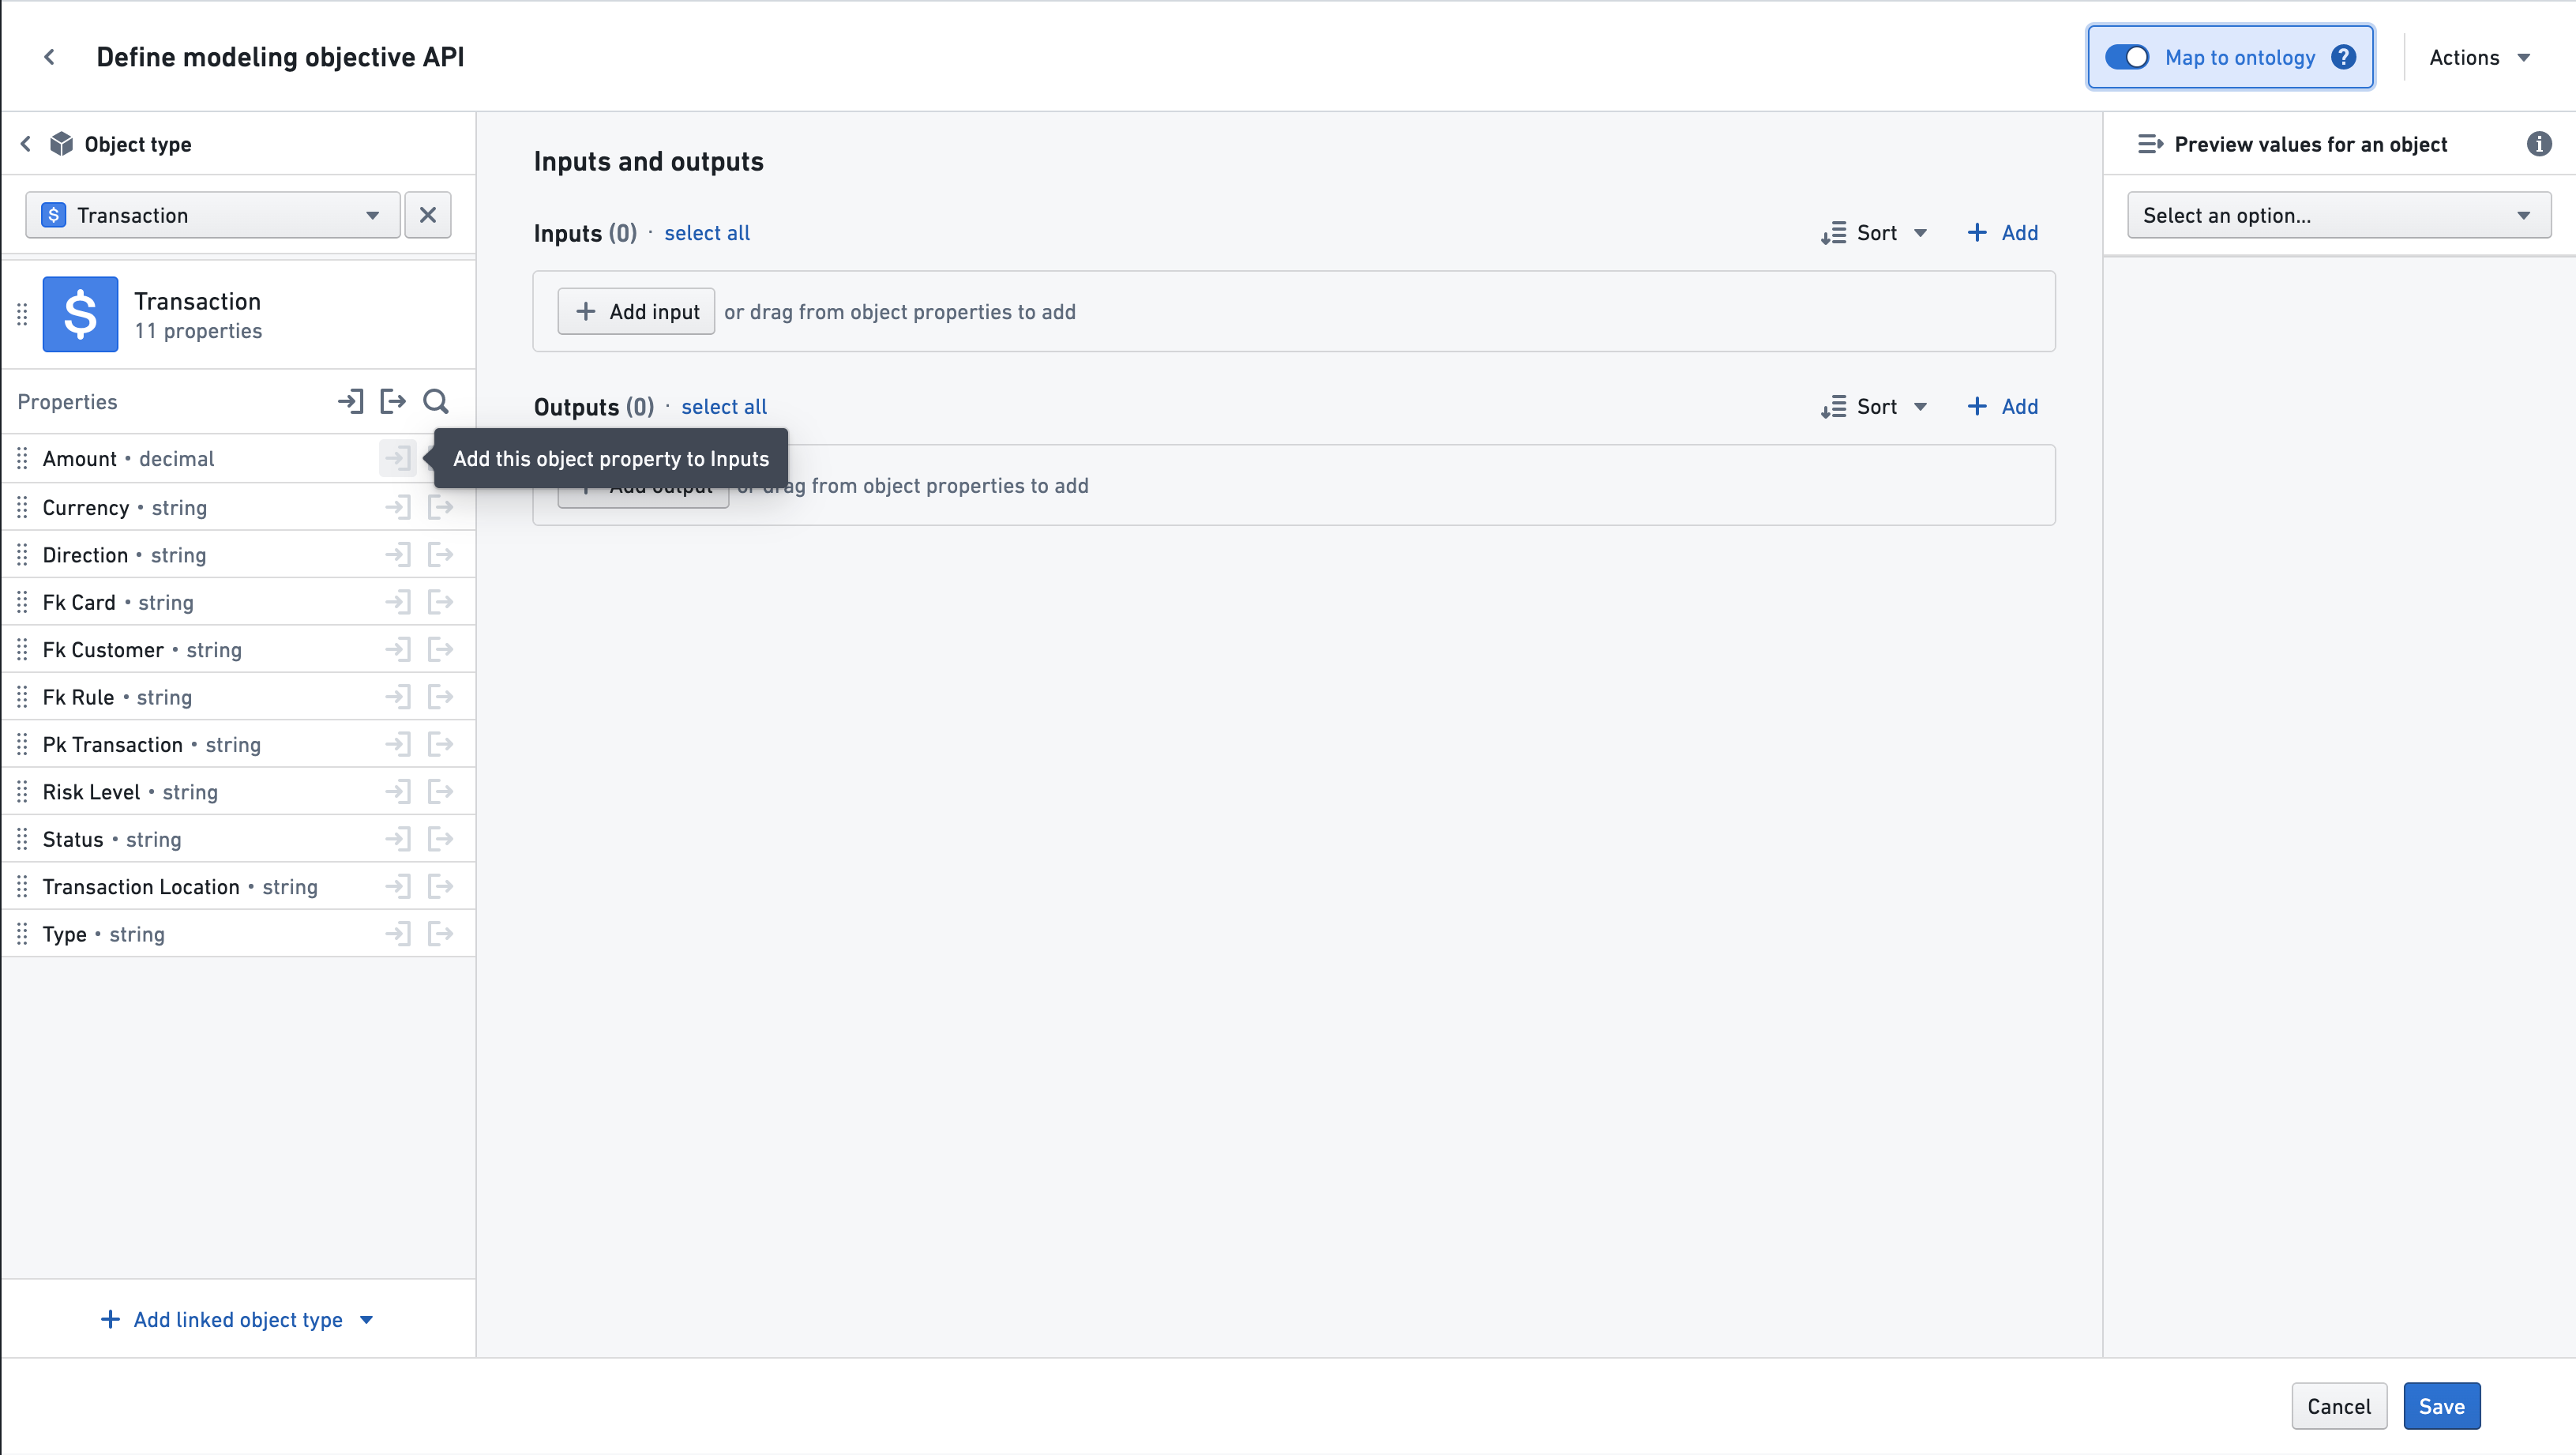
The property type can also be dragged to the Inputs or Outputs section, via the drag handle on the left side of the property.
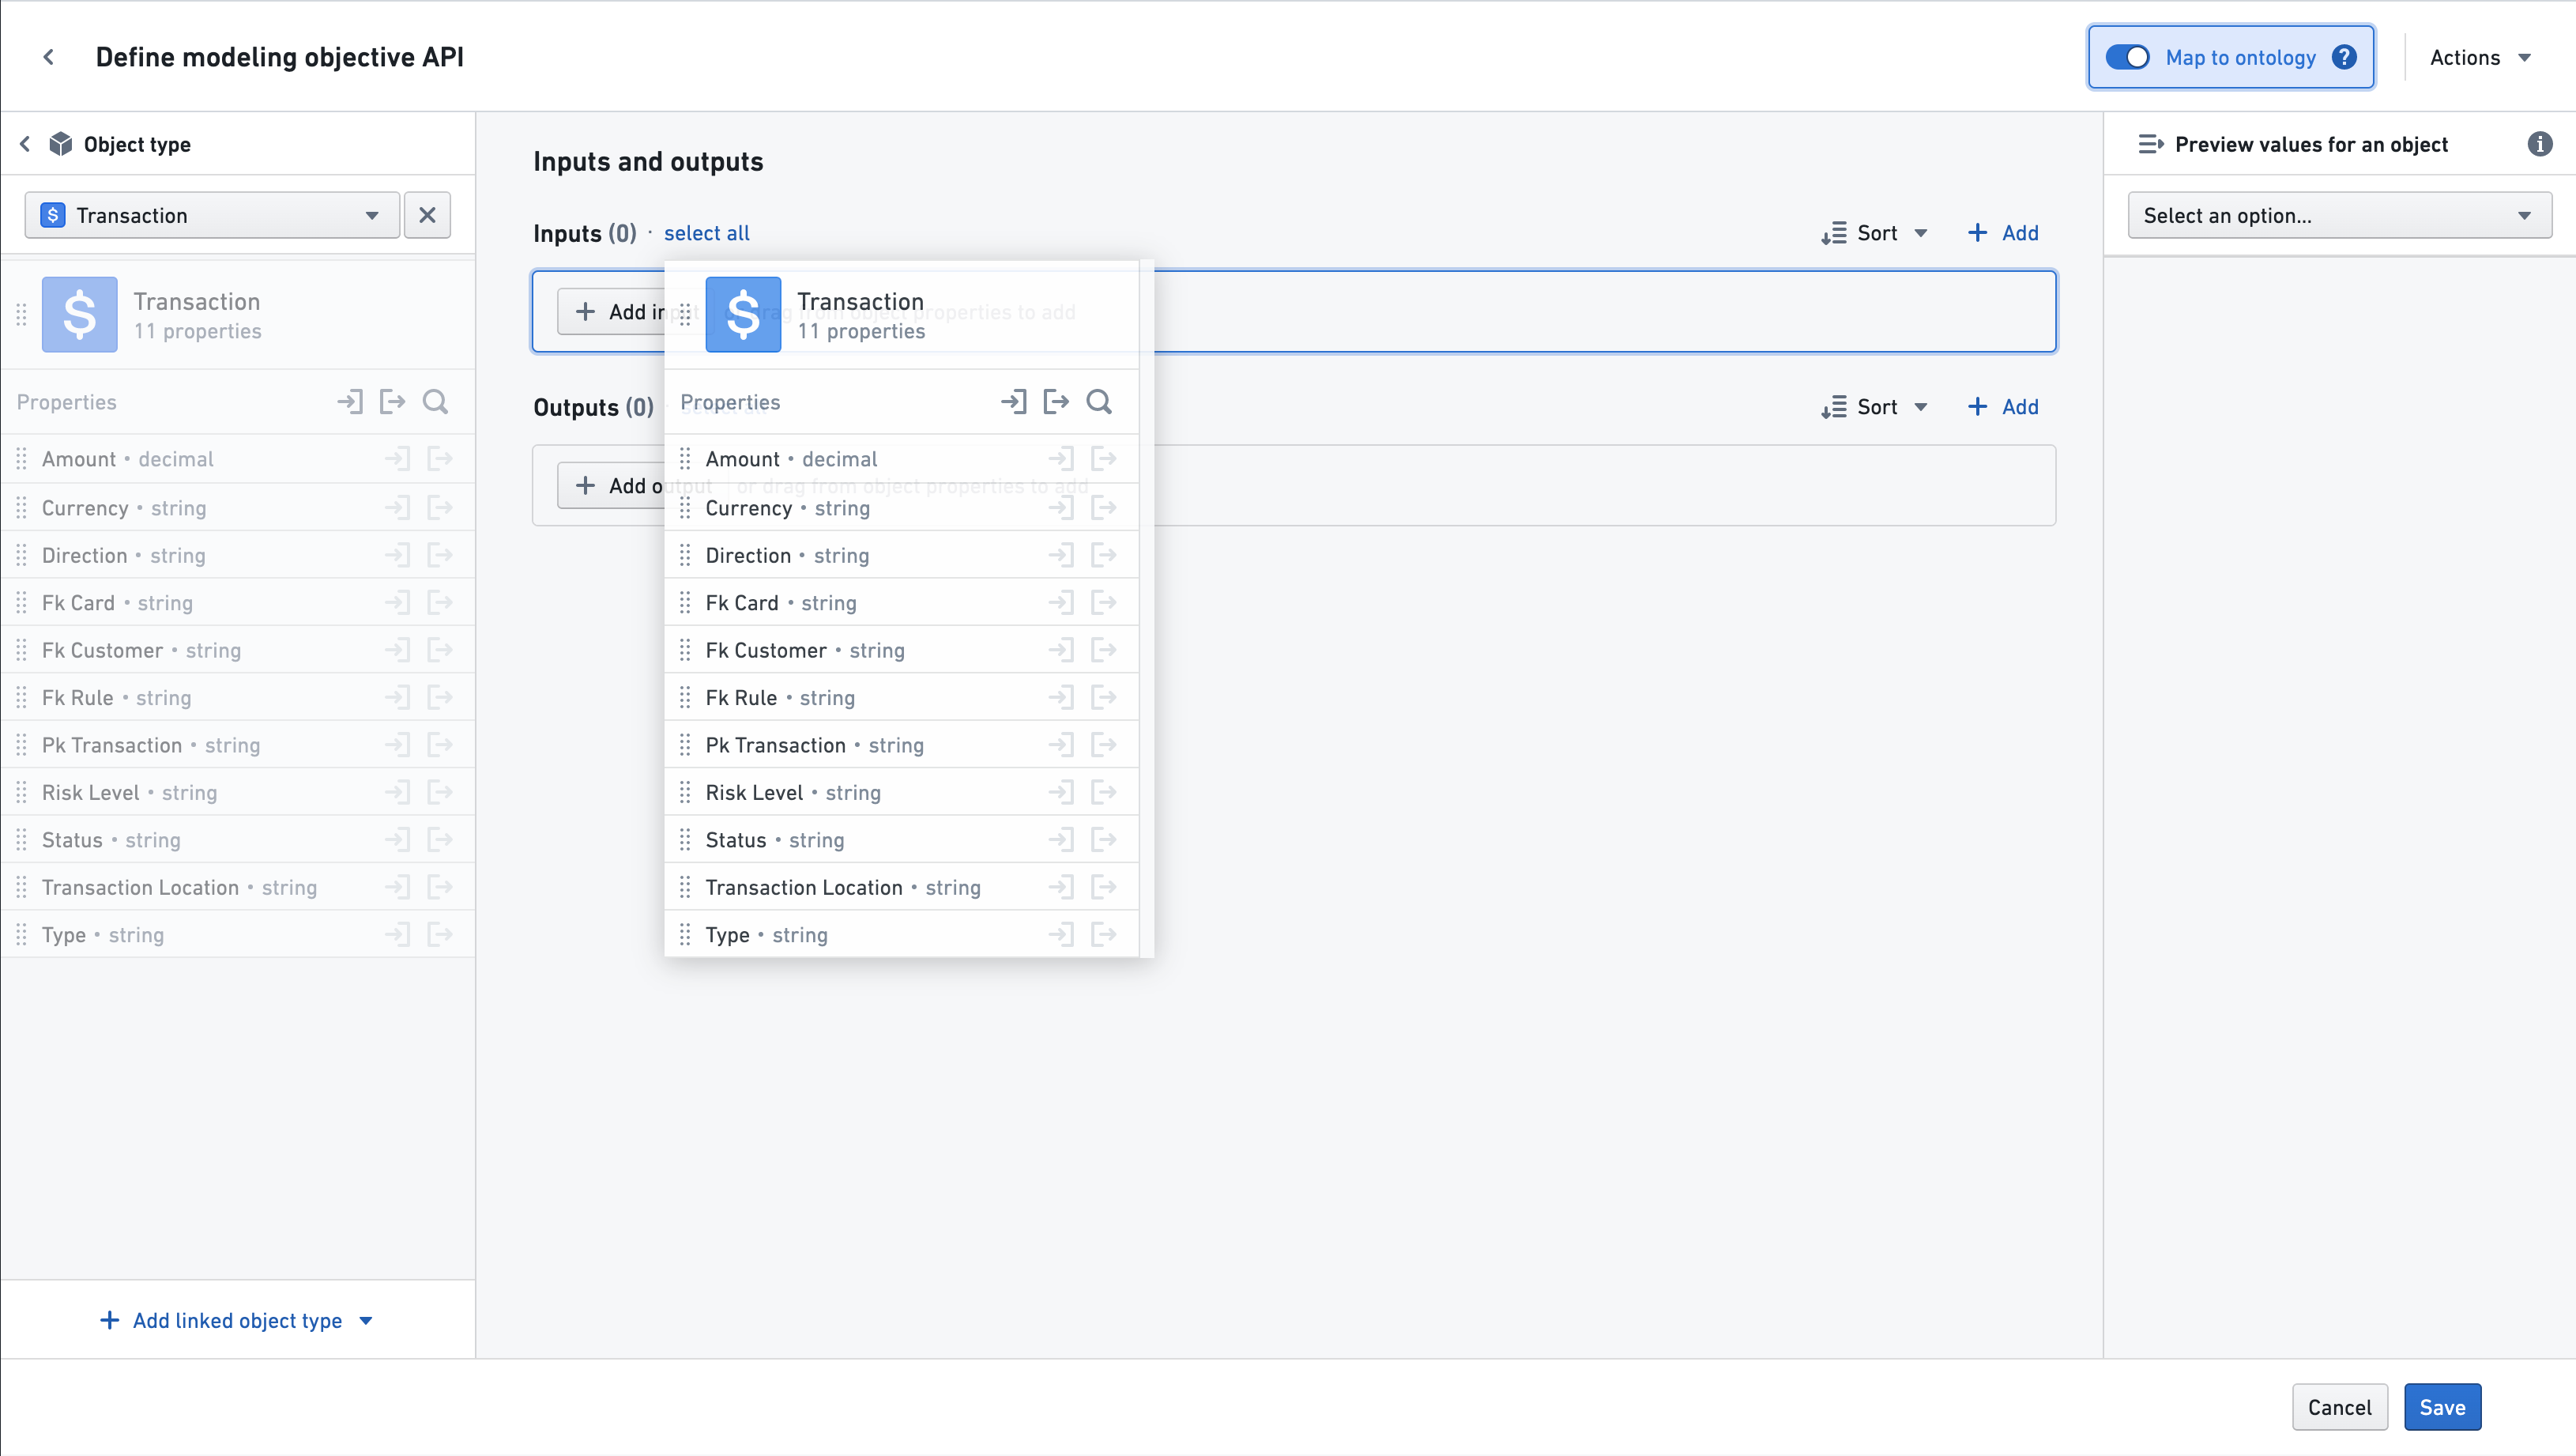
All the properties of the object type can also be added at once, by dragging the entire object card via the drag handle to the left of the object icon:
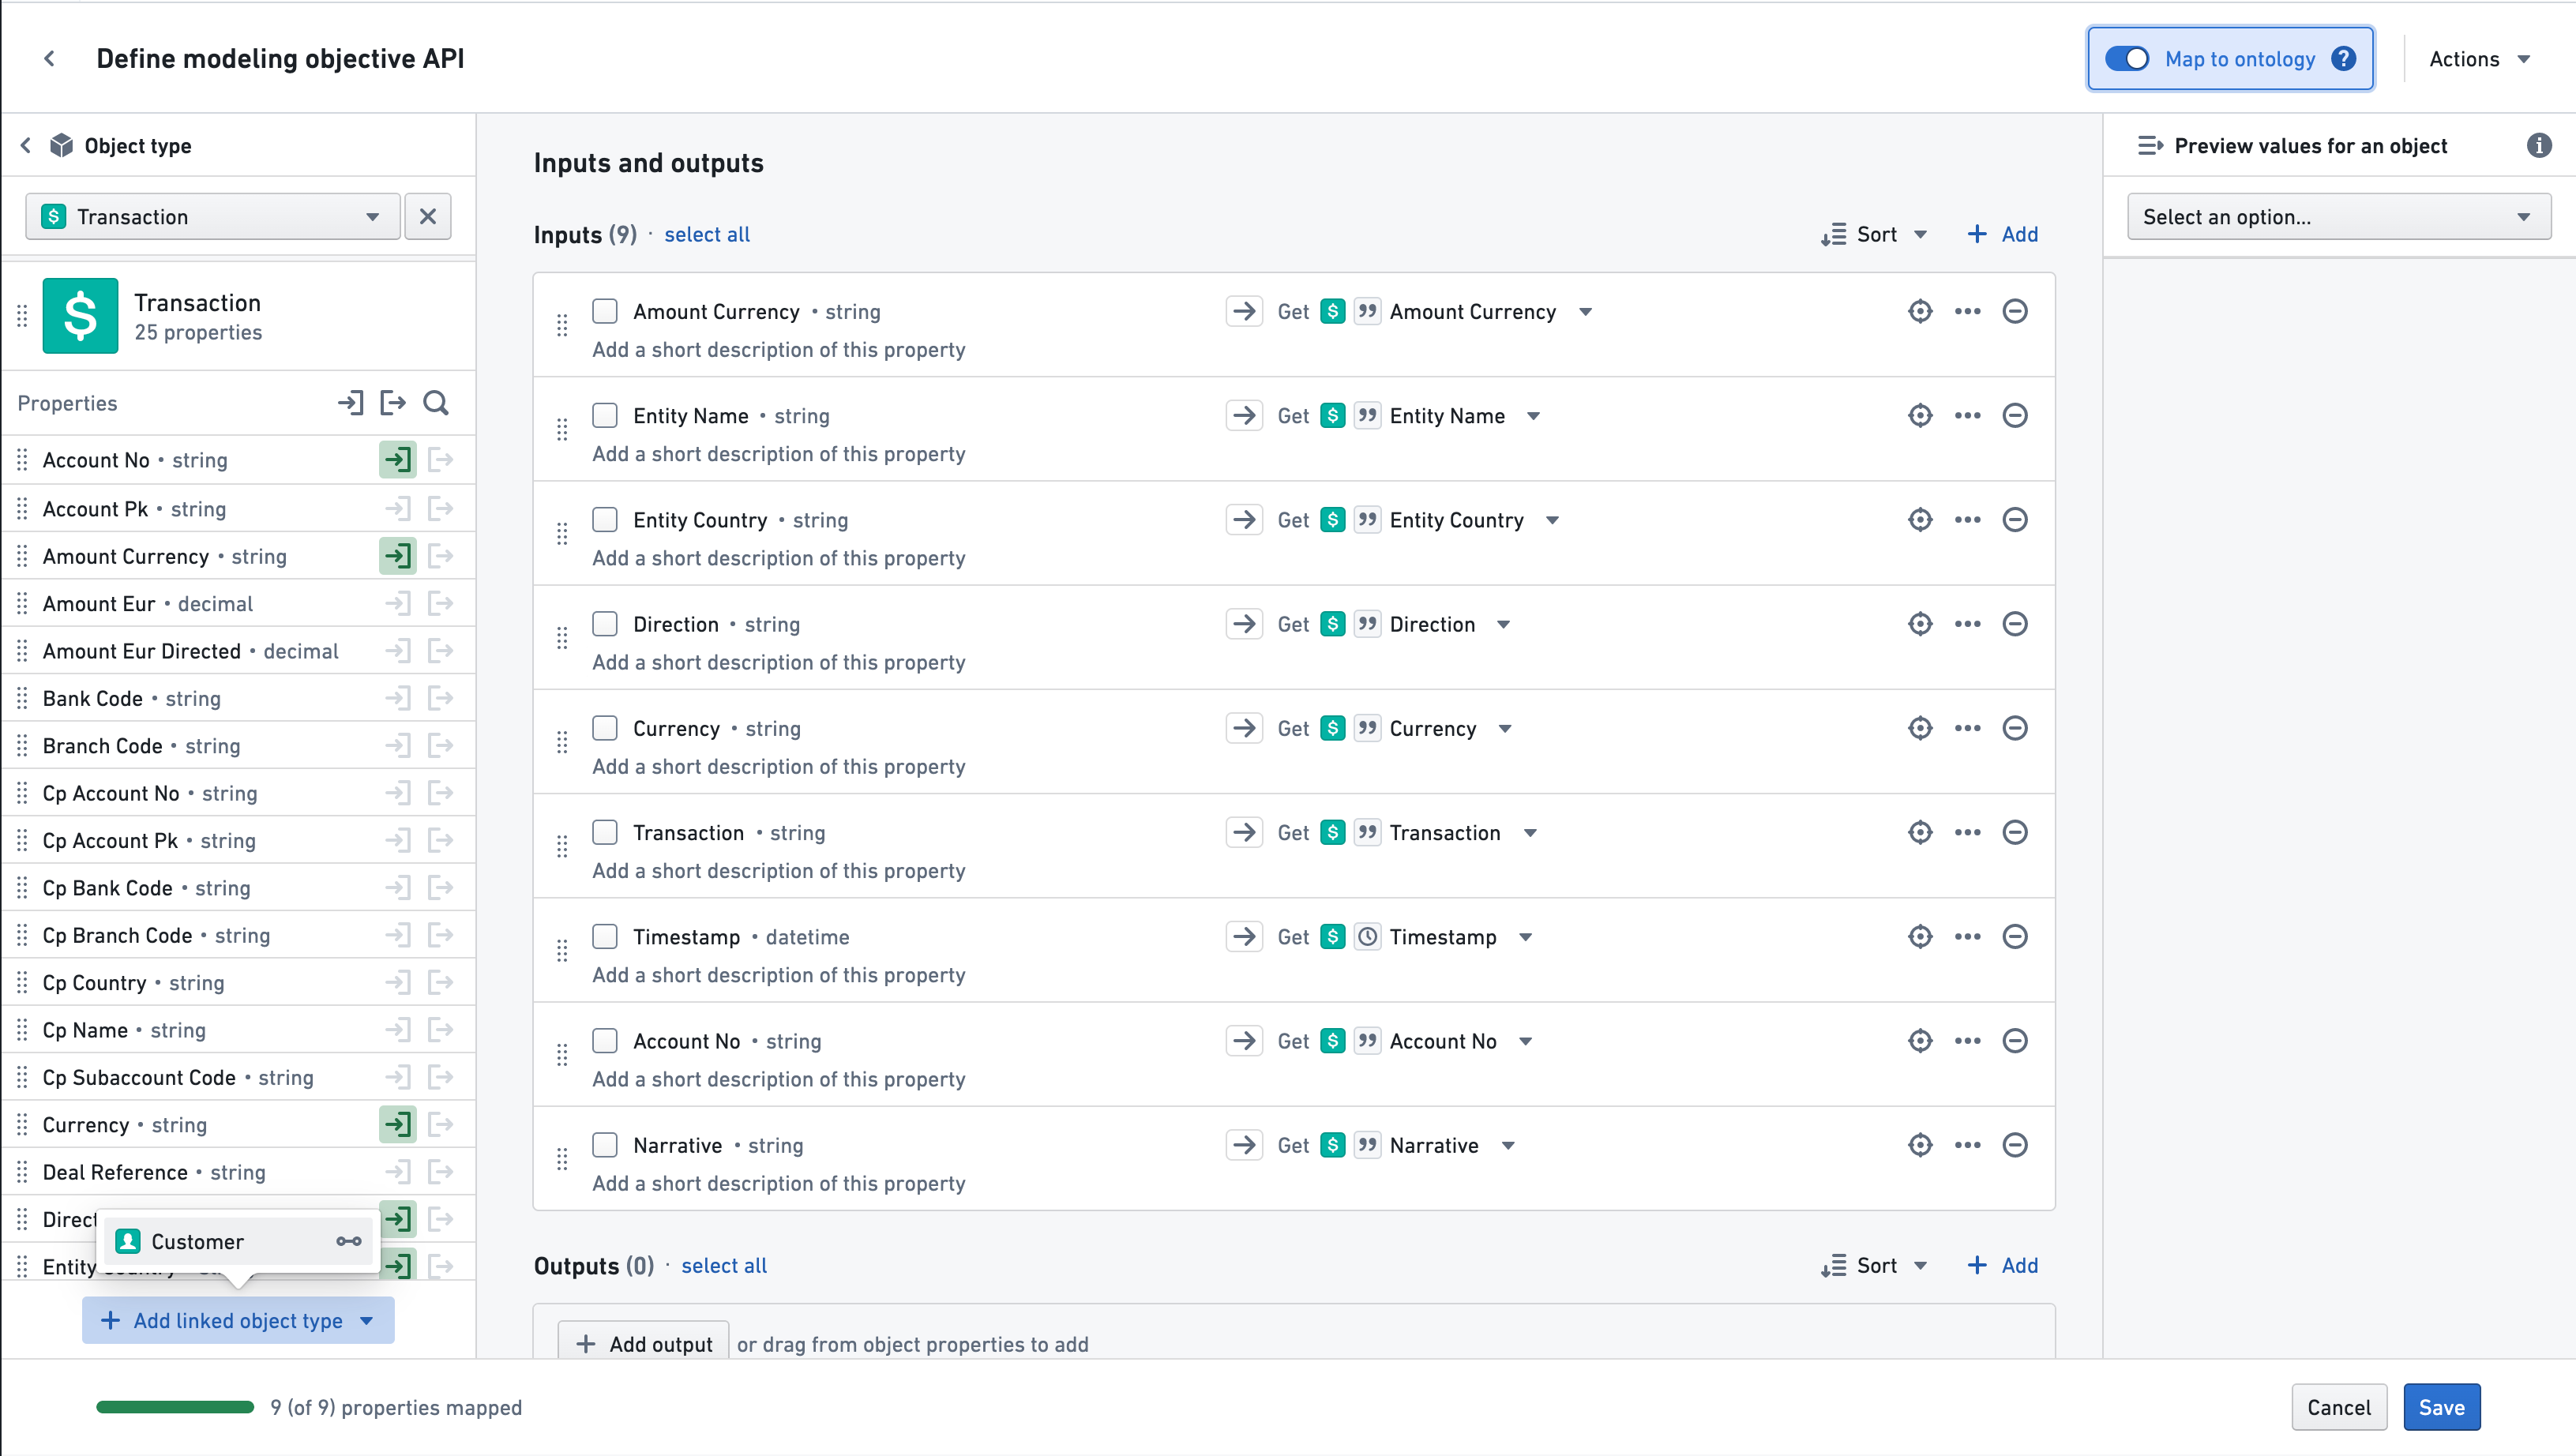
To map properties from a linked object type, scroll down to the bottom of the left side bar. If a linked object is available, the Add linked object type button should be visible. Select that button and choose a linked object type.
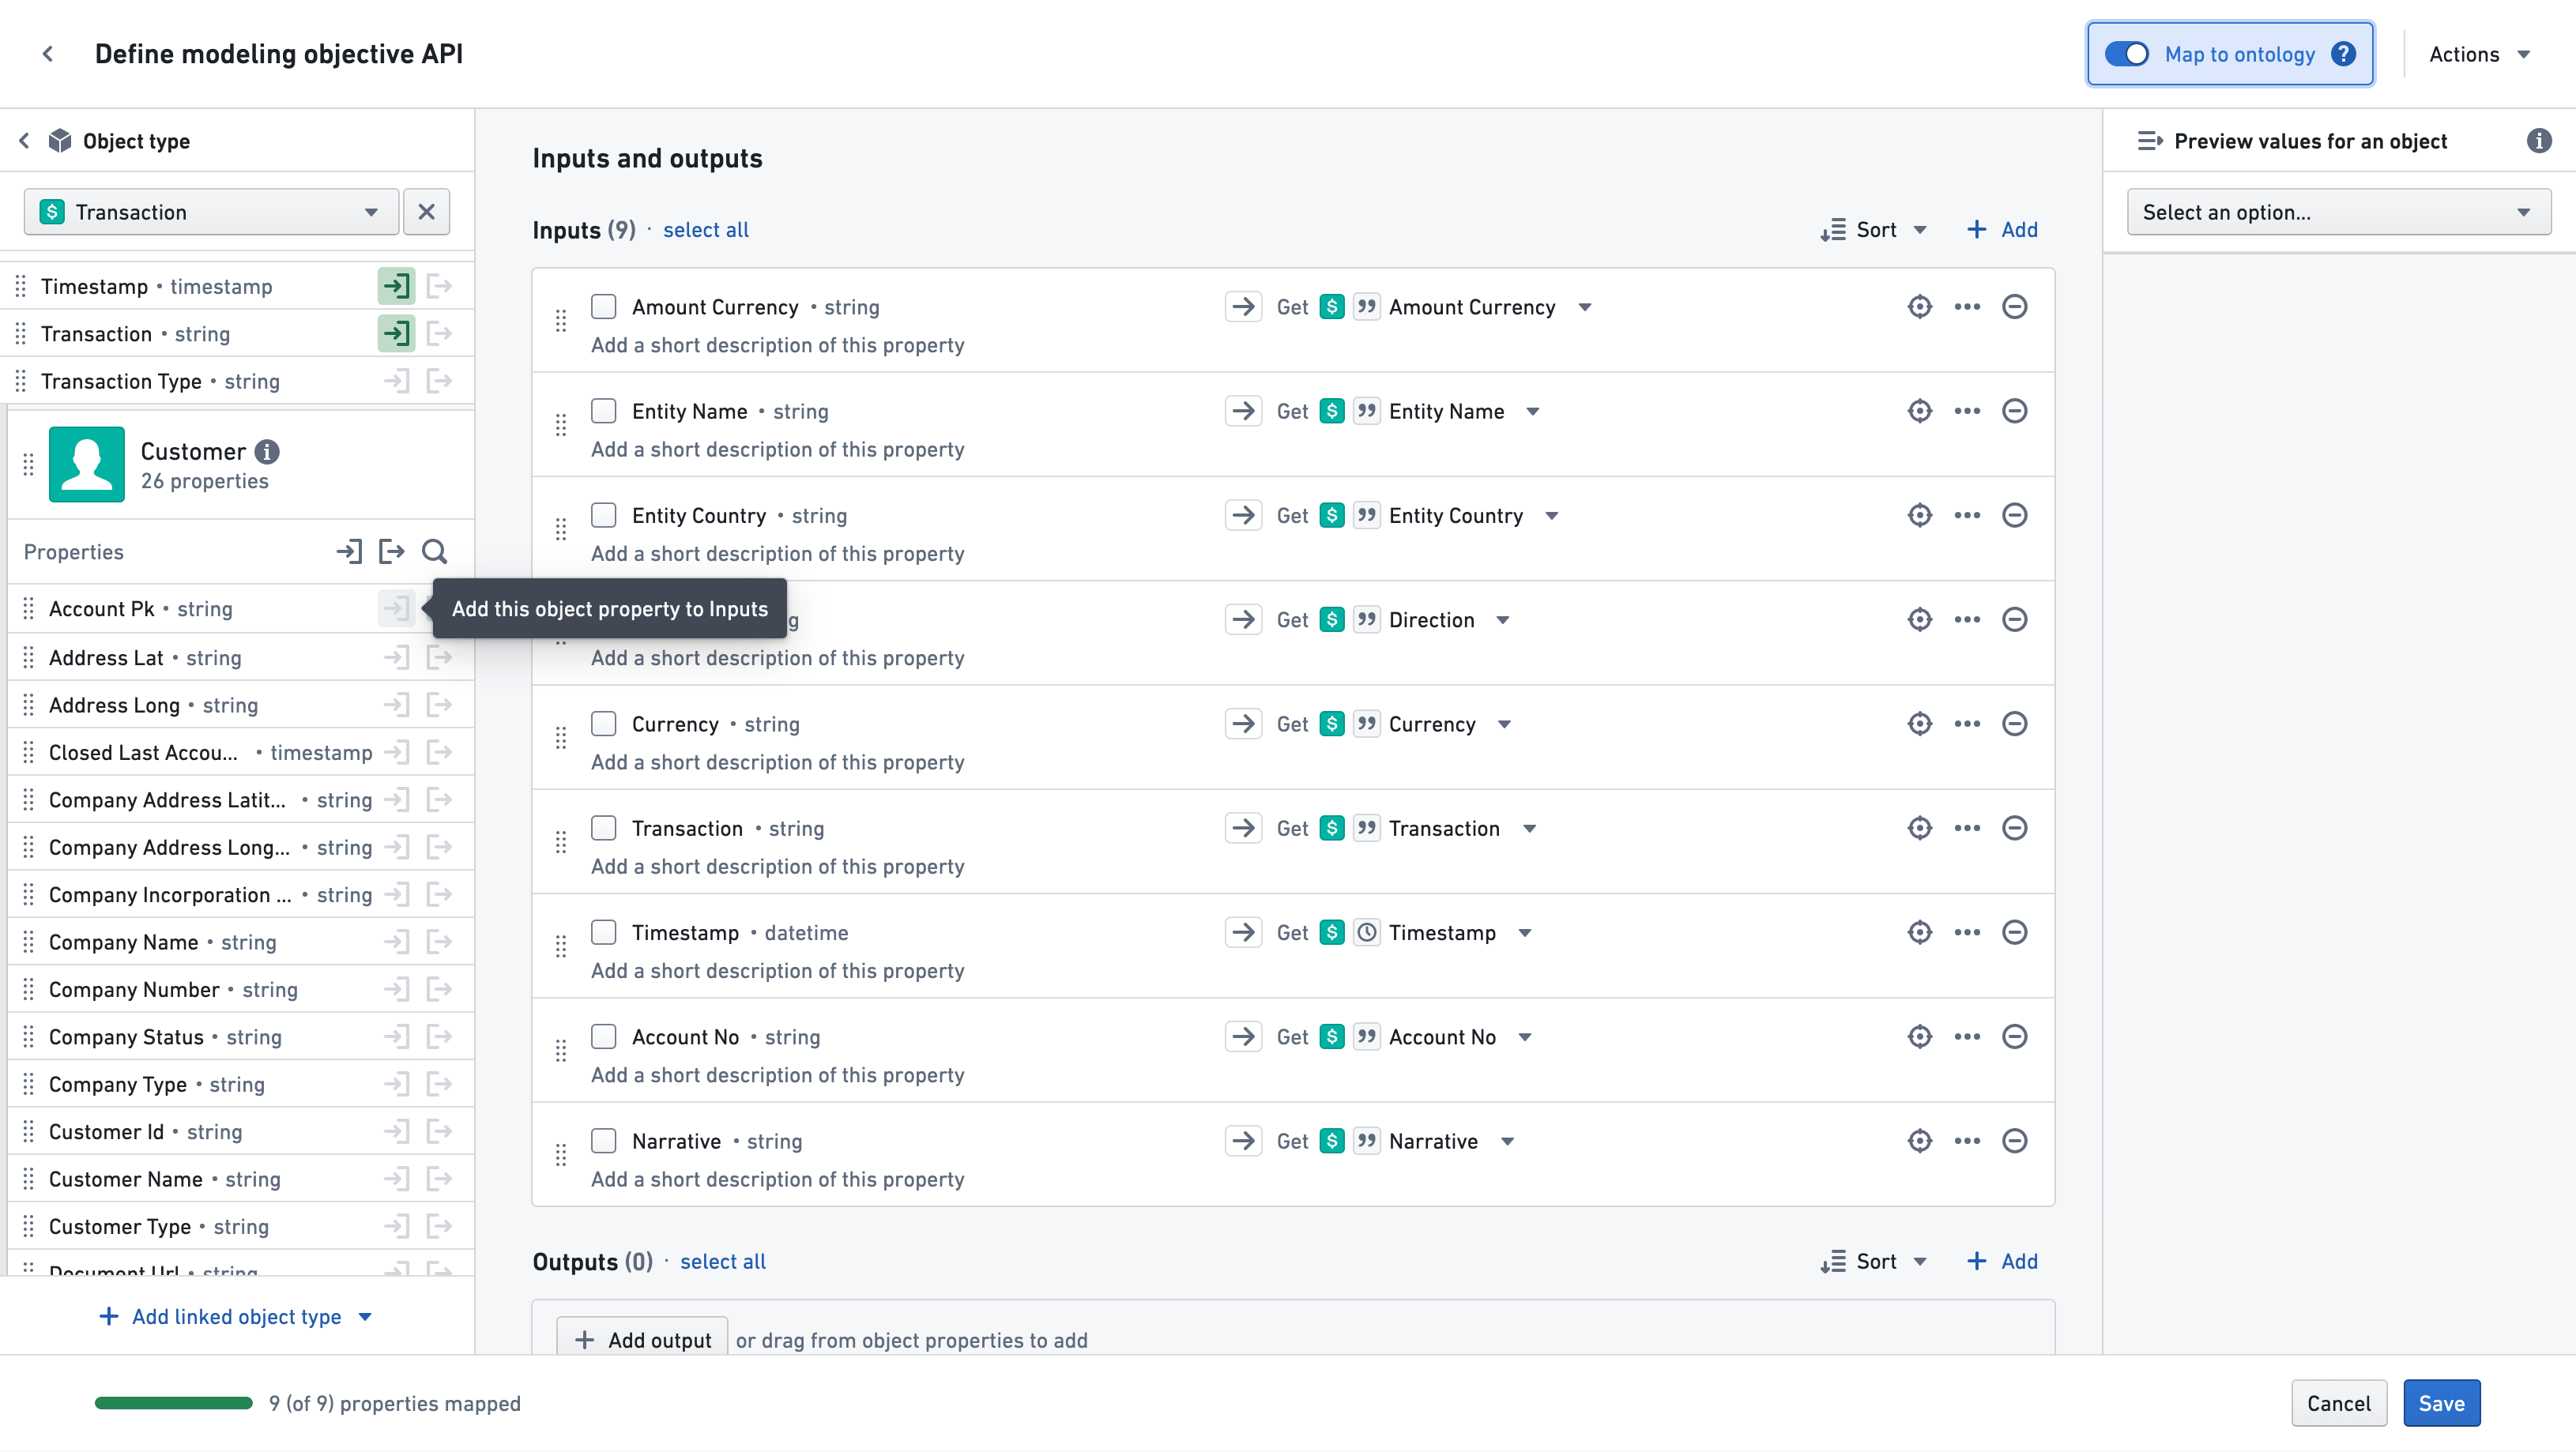
That linked object’s properties will now be available for mapping:
By default, mapped properties will have the same name, type, and description as the object property types they are mapped to. If desired, the name and description can be changed to better suit the objective.
Once mapping has been finished, select the Save button in order to save the input and output API mapping to the objective. This API will now document the expected input and output specifications of models that are submitted to this objective.
Selecting Save at any point will save objective API properties and take you back to the main modeling objective page.
Adding properties from dataset columns
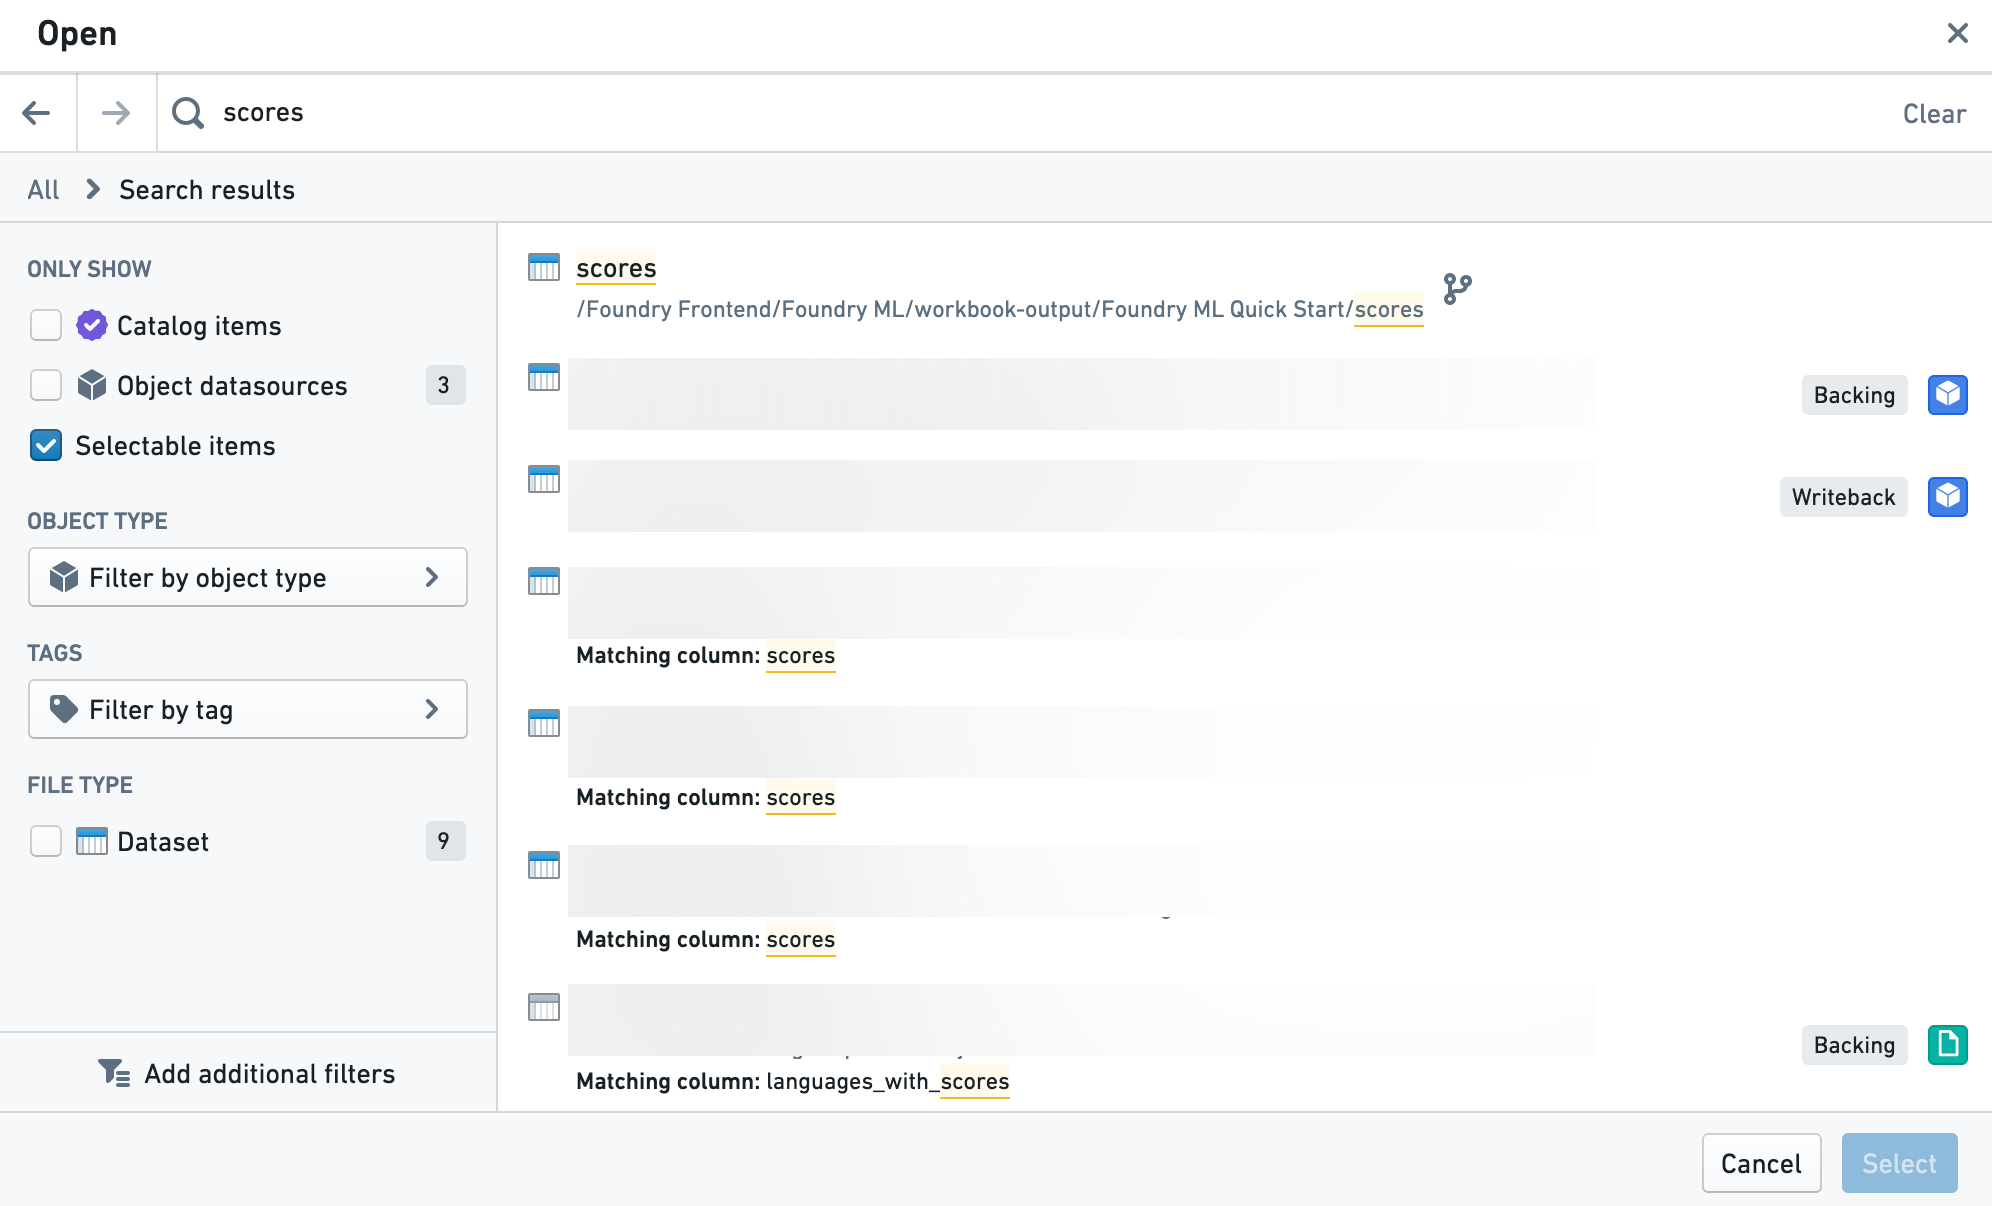
Choose Dataset from the dropdown on the left side to start adding properties to your objective API from existing Foundry datasets.
Use the Select Dataset button to browse the file directory and locate your dataset.
If you want to use the dataset on a branch other than the default branch, use the branch selector menu.
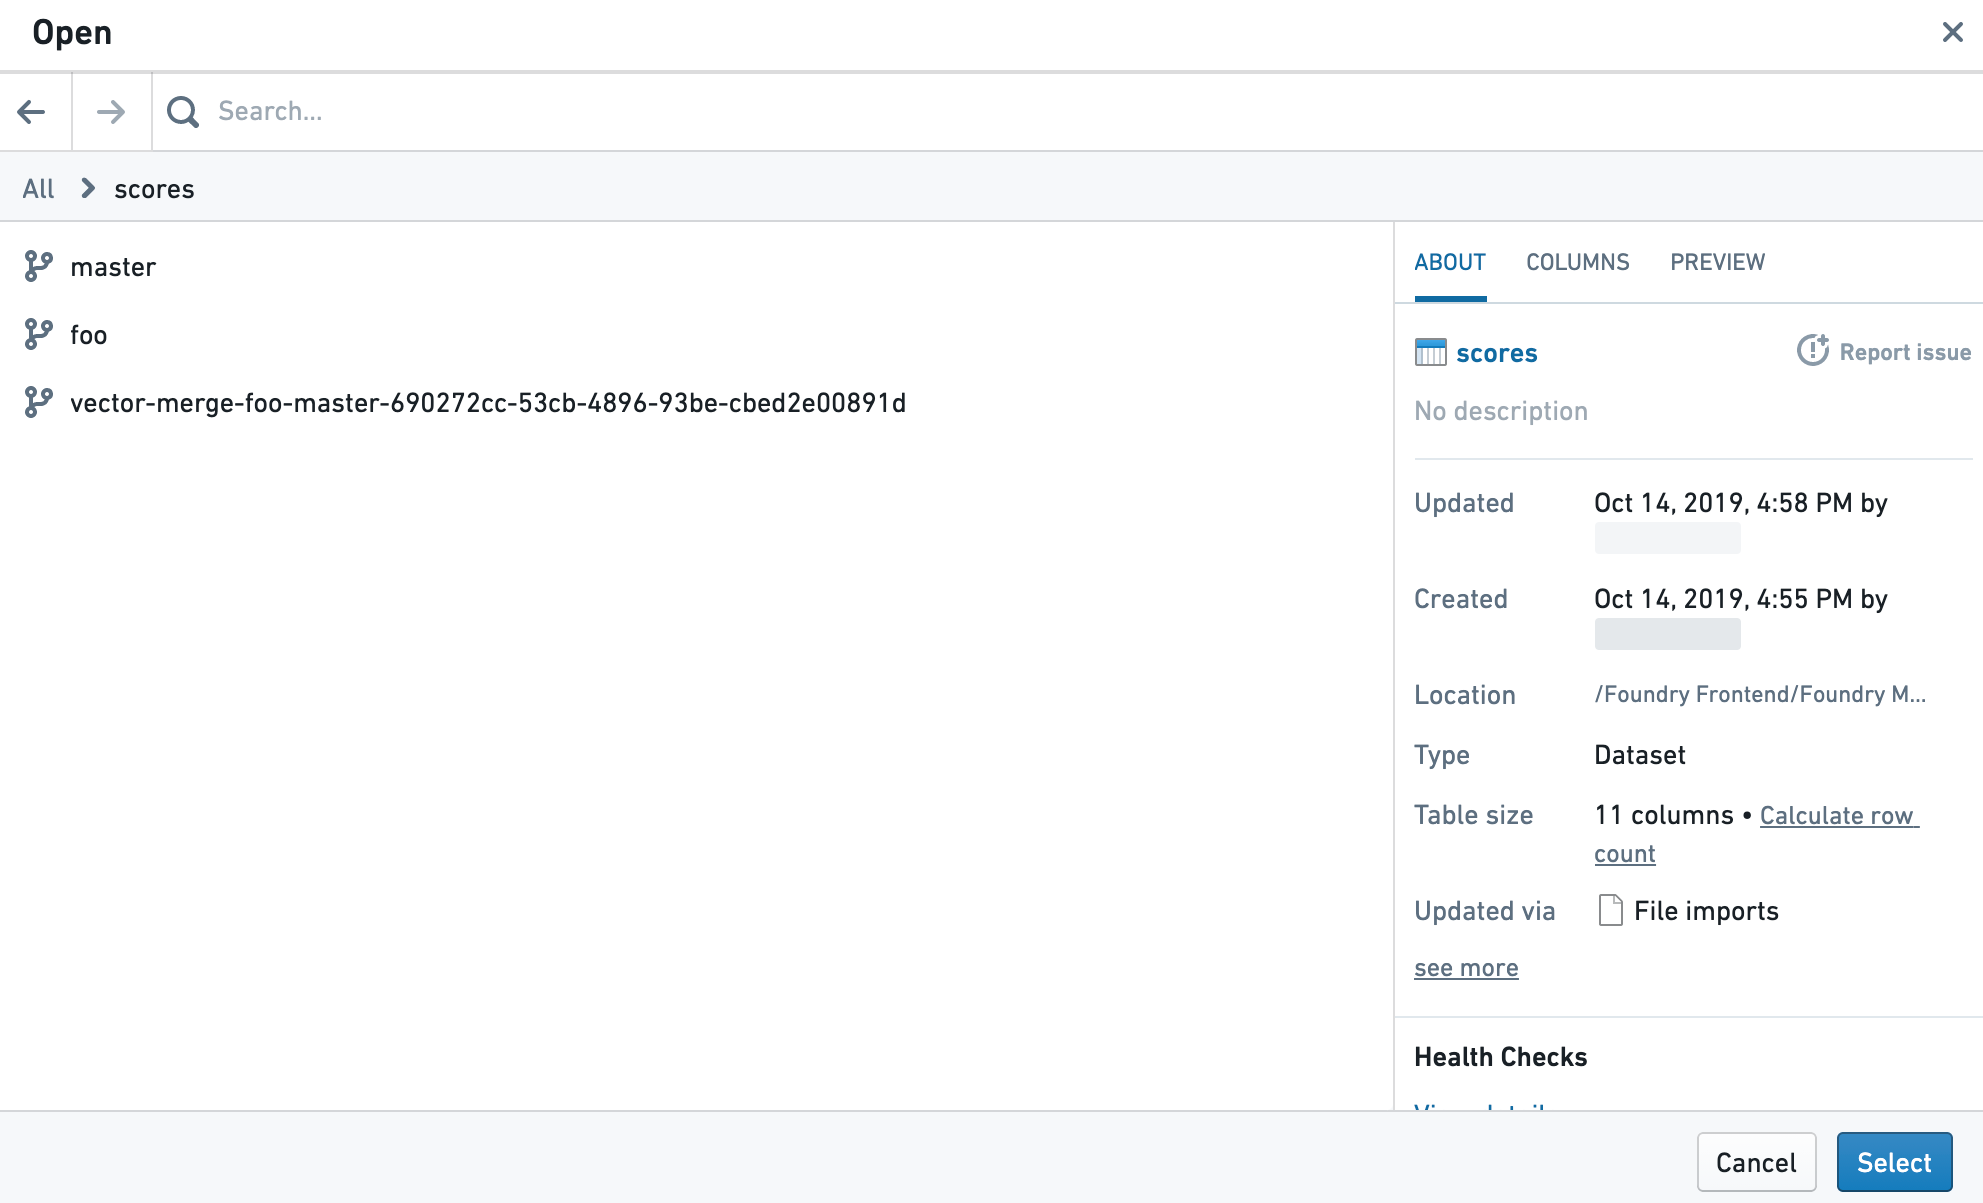
Once you have selected your dataset, you will see all of the dataset's columns listed in the sidebar.
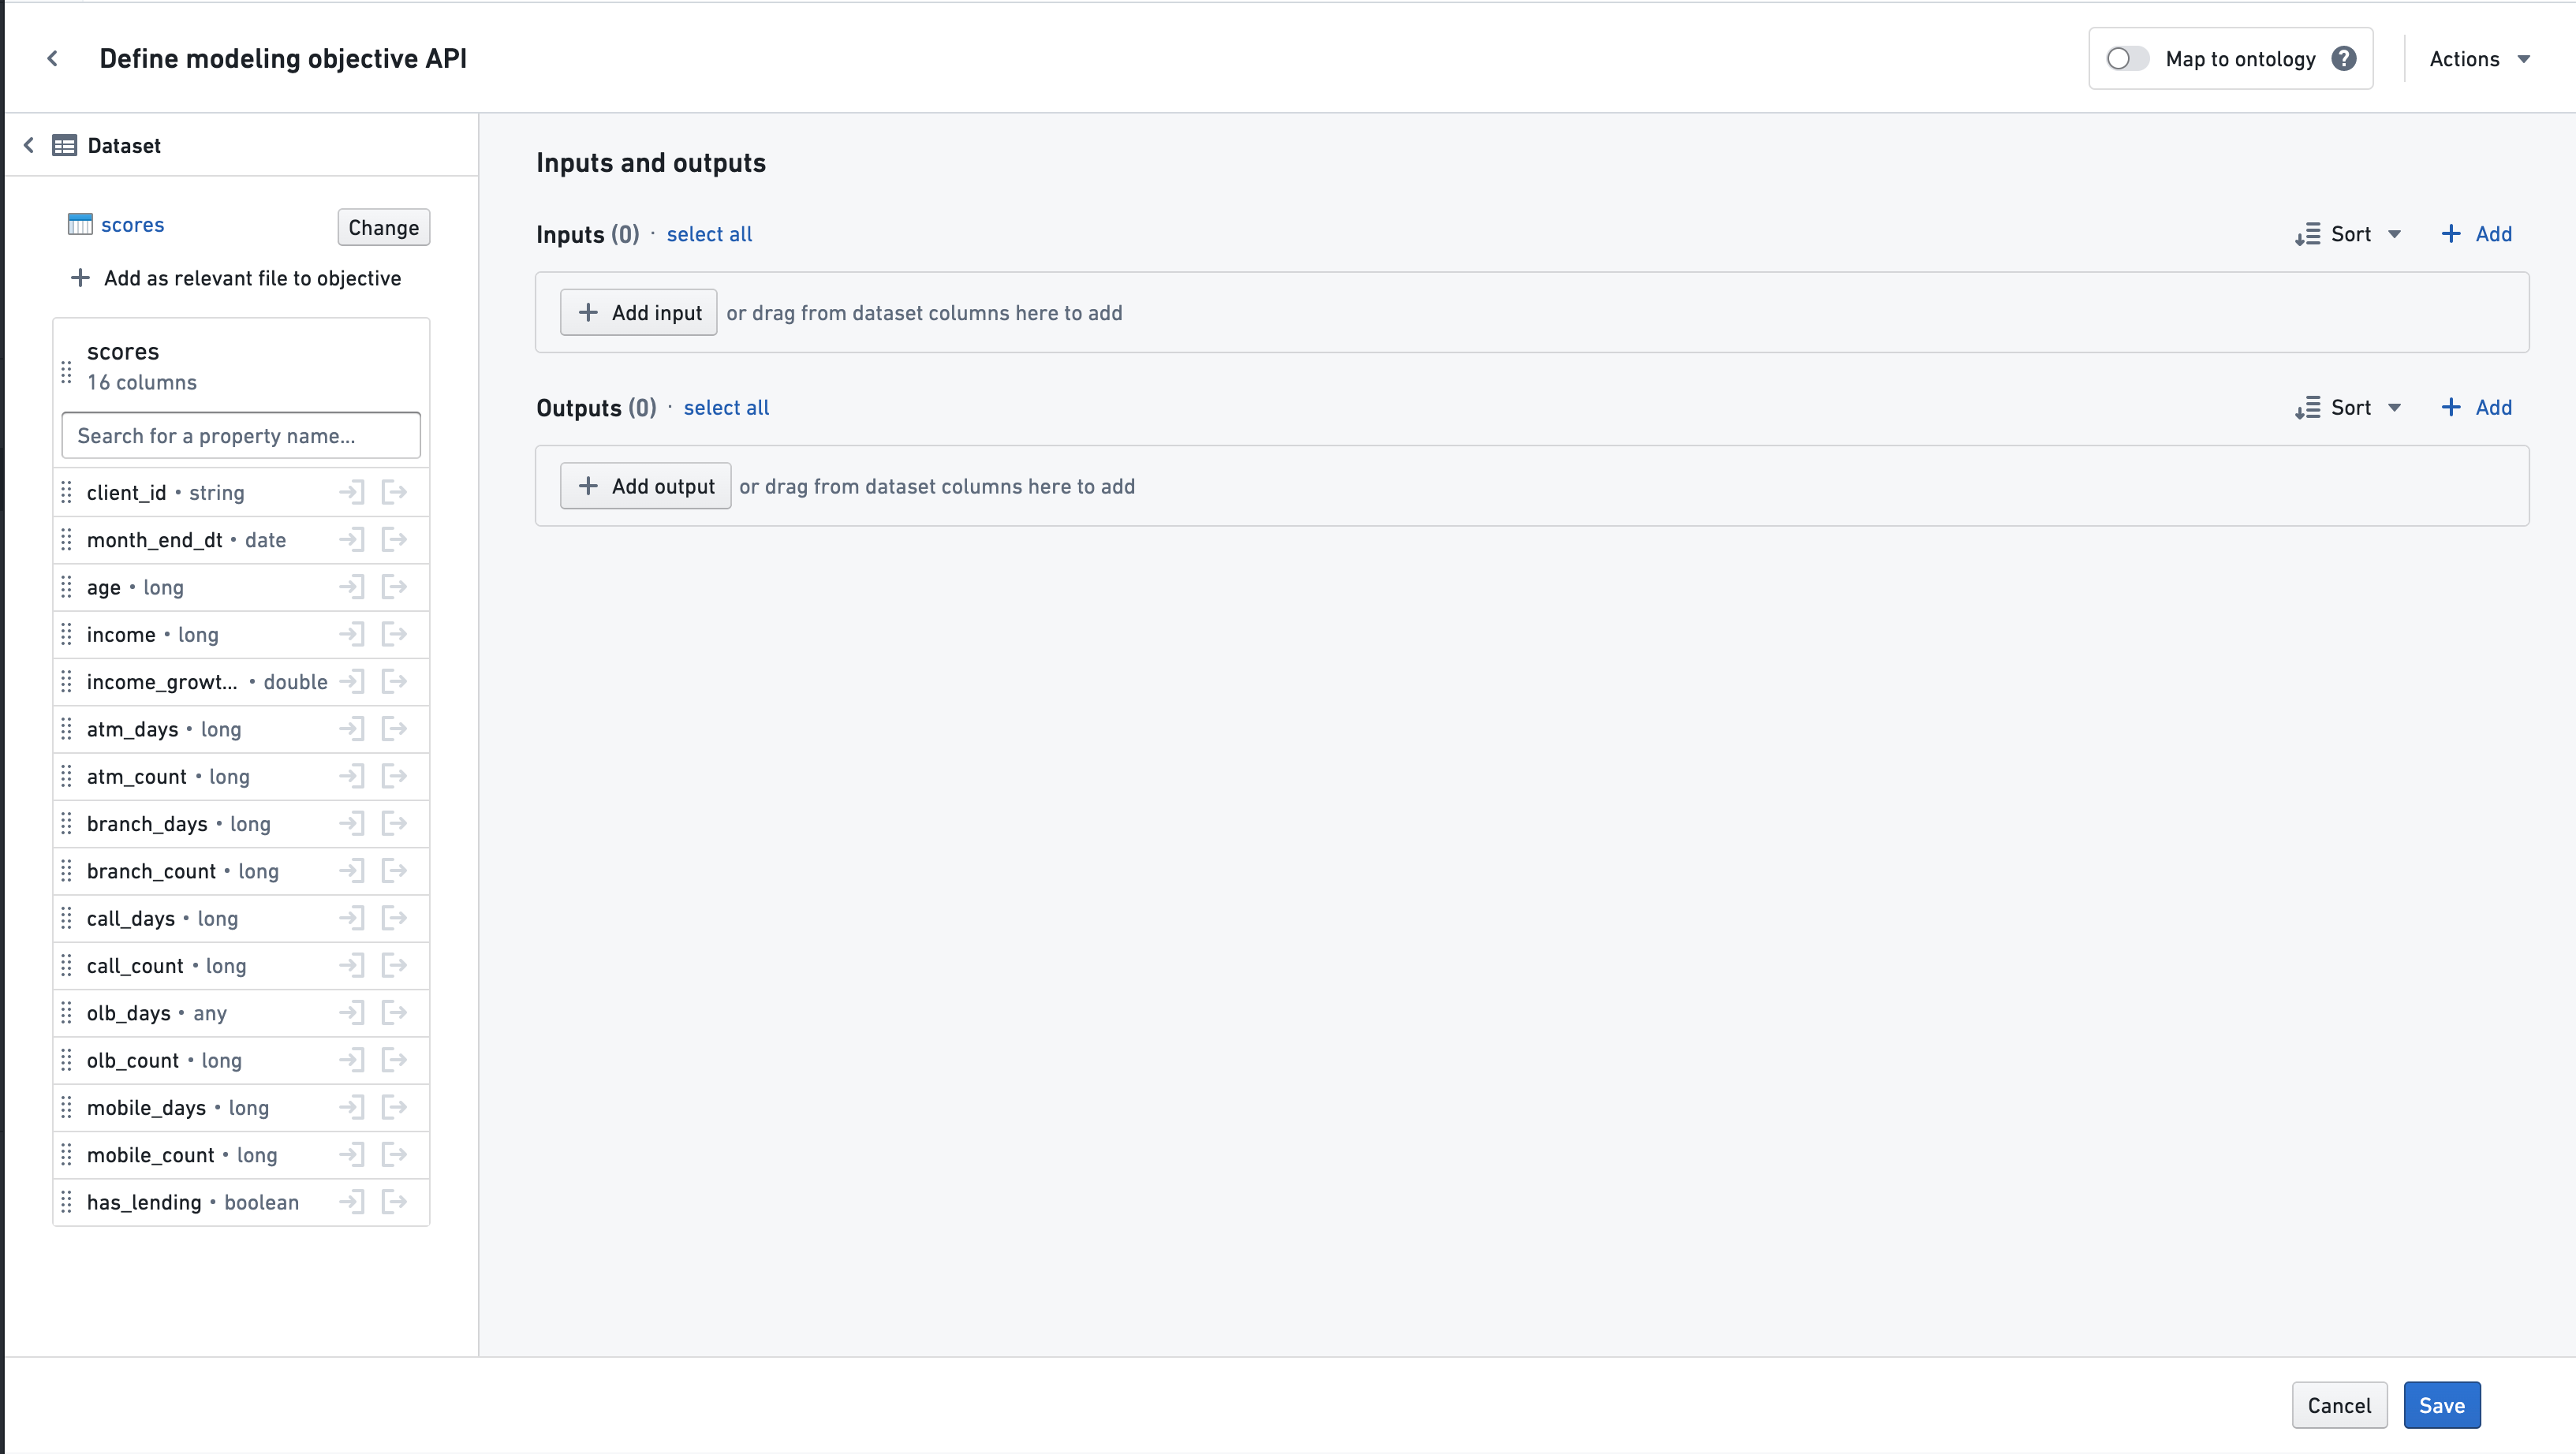
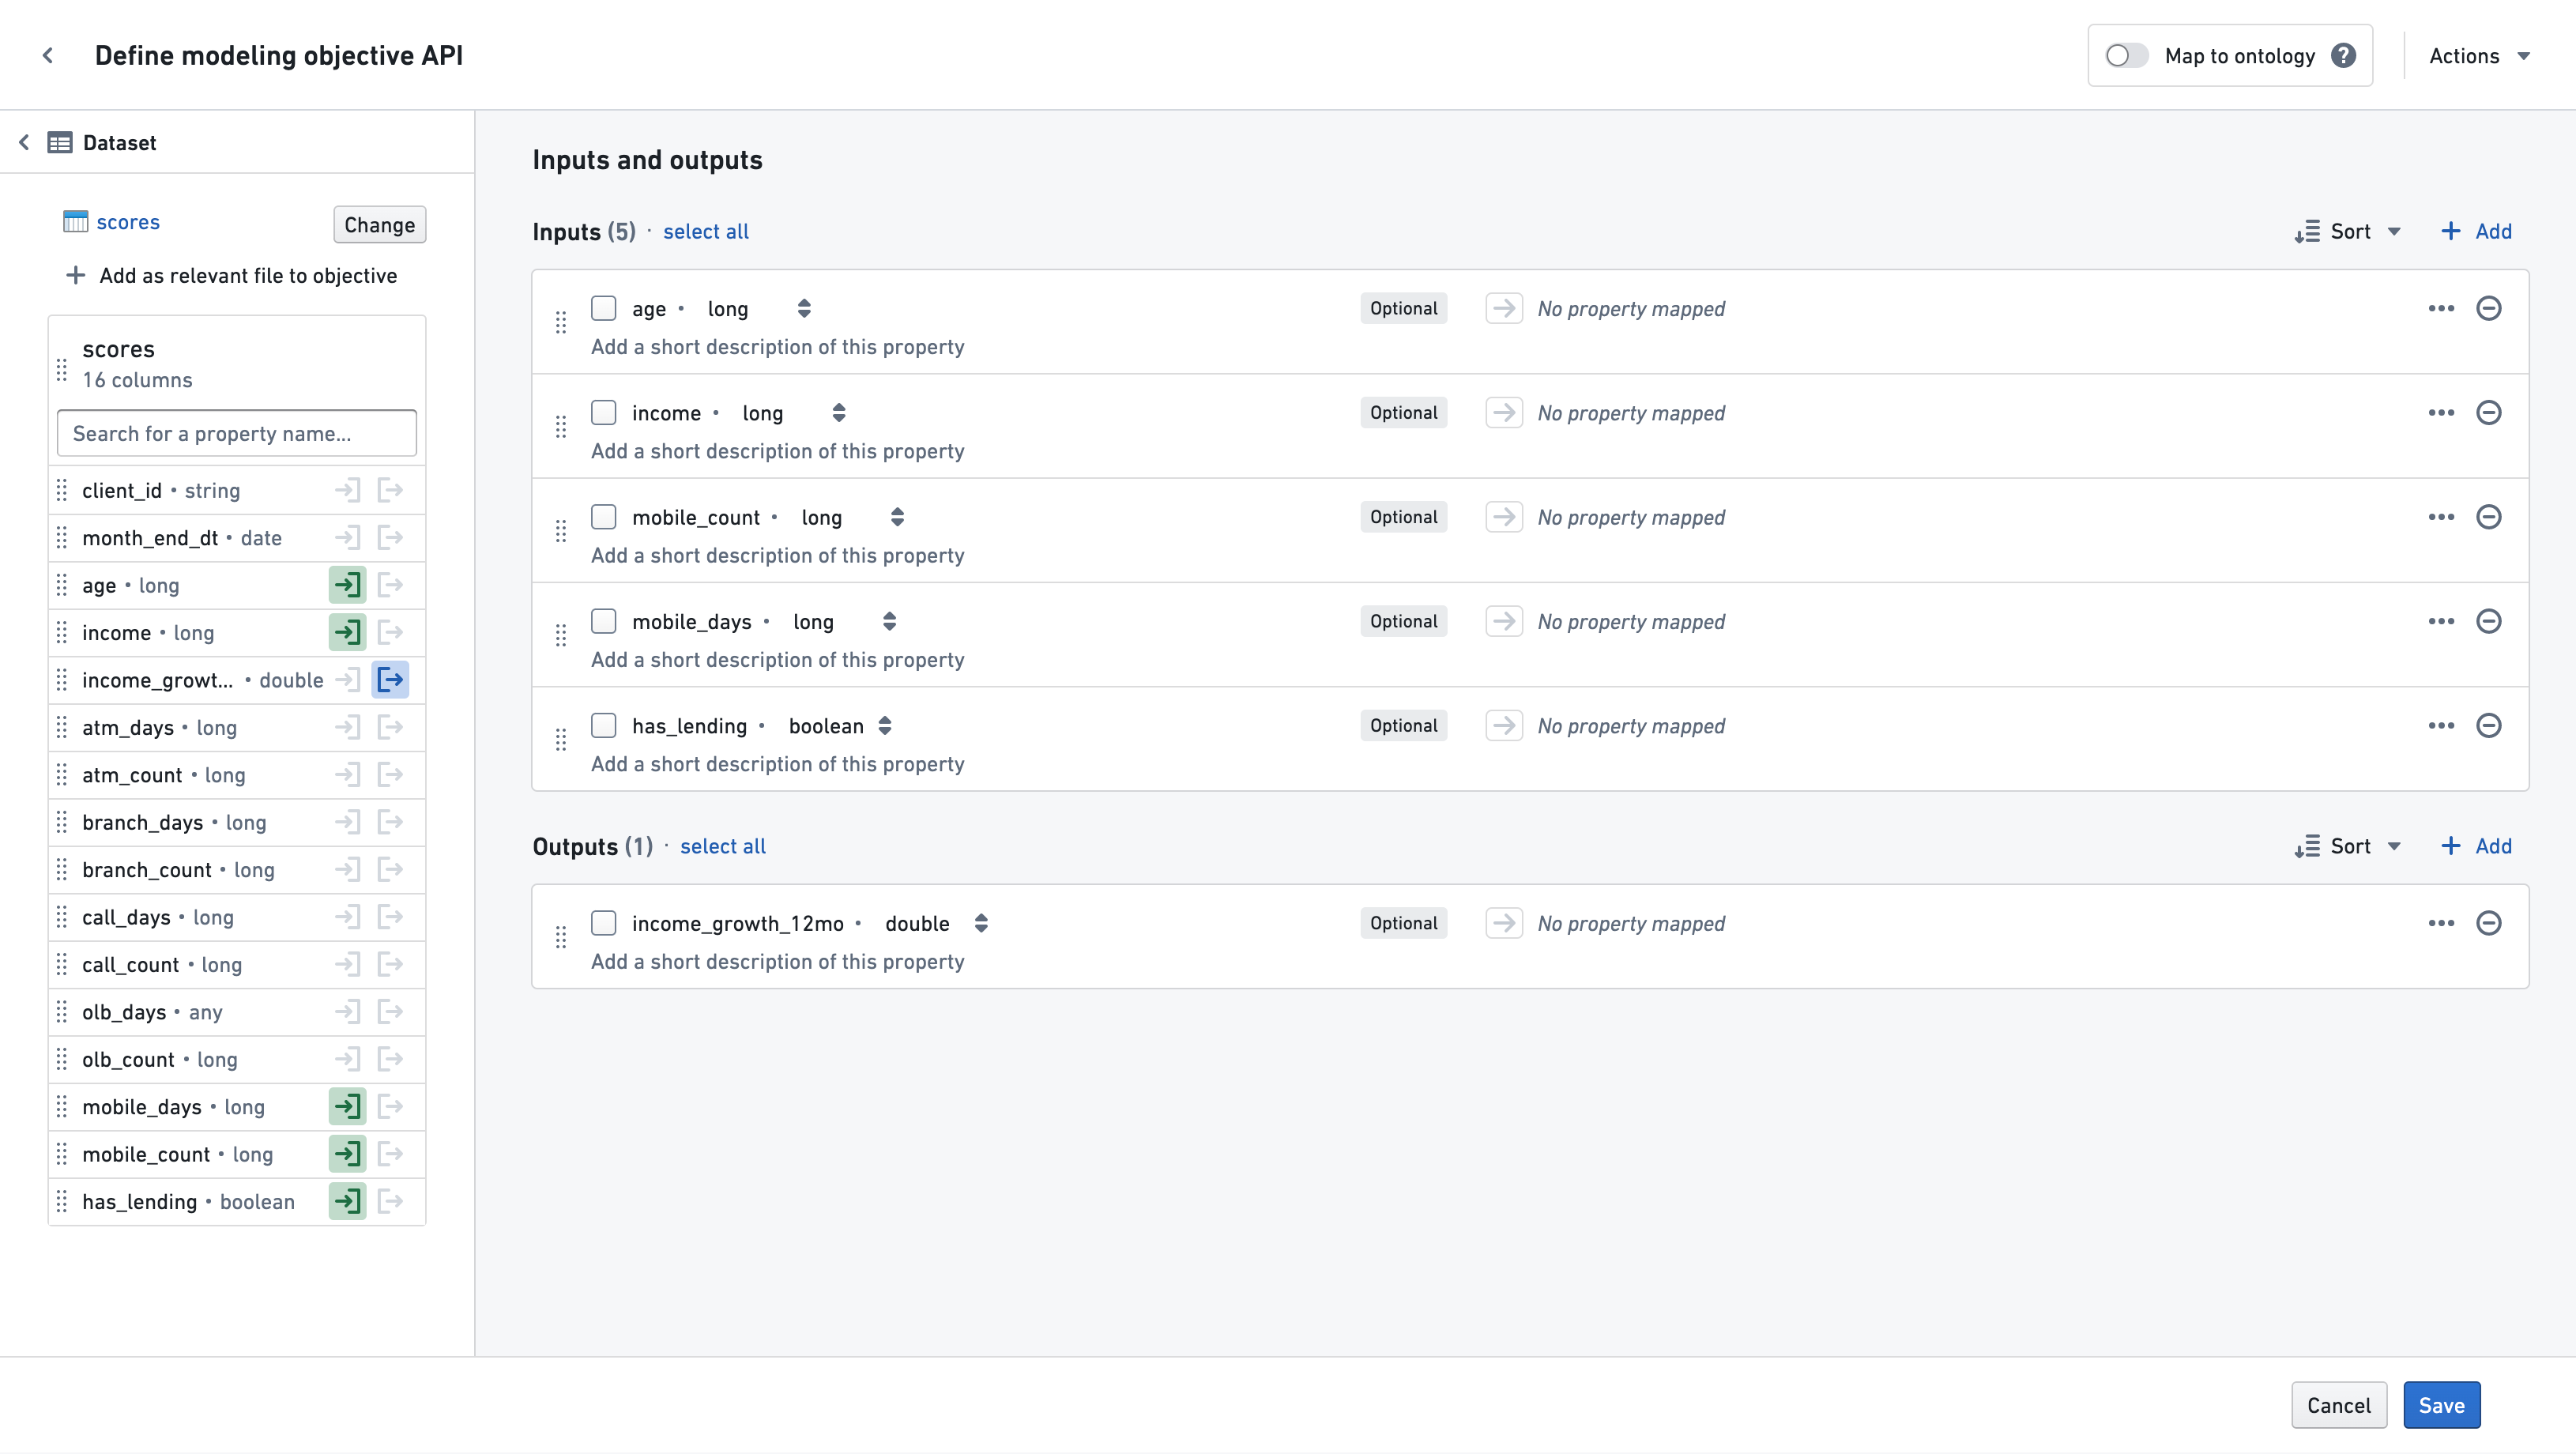
Use the In or Out buttons to add a column to the objective API's input or output. Properties can also be dragged in using the drag handle to the left of the column name. All properties from a dataset can be added at once by dragging the entire dataset card via the drag handle to the left of the dataset name.
The column's base property type will be listed if it is a supported type of a modeling objective API. Otherwise, it will be listed as "any."
To save the dataset you are working from as a relevant file for the objective, select Add as relevant file to objective. At any point, you may select another dataset to work from by selecting Change in the sidebar. You may also map properties to the ontology by selecting Map to ontology and following the instructions to map object properties.
Choosing to Save at any point will save the objective API properties and take you back to the main objective page.
Adding properties from a model
Choose Model from the dropdown on the left side to start adding properties to your objective API from an existing Model.
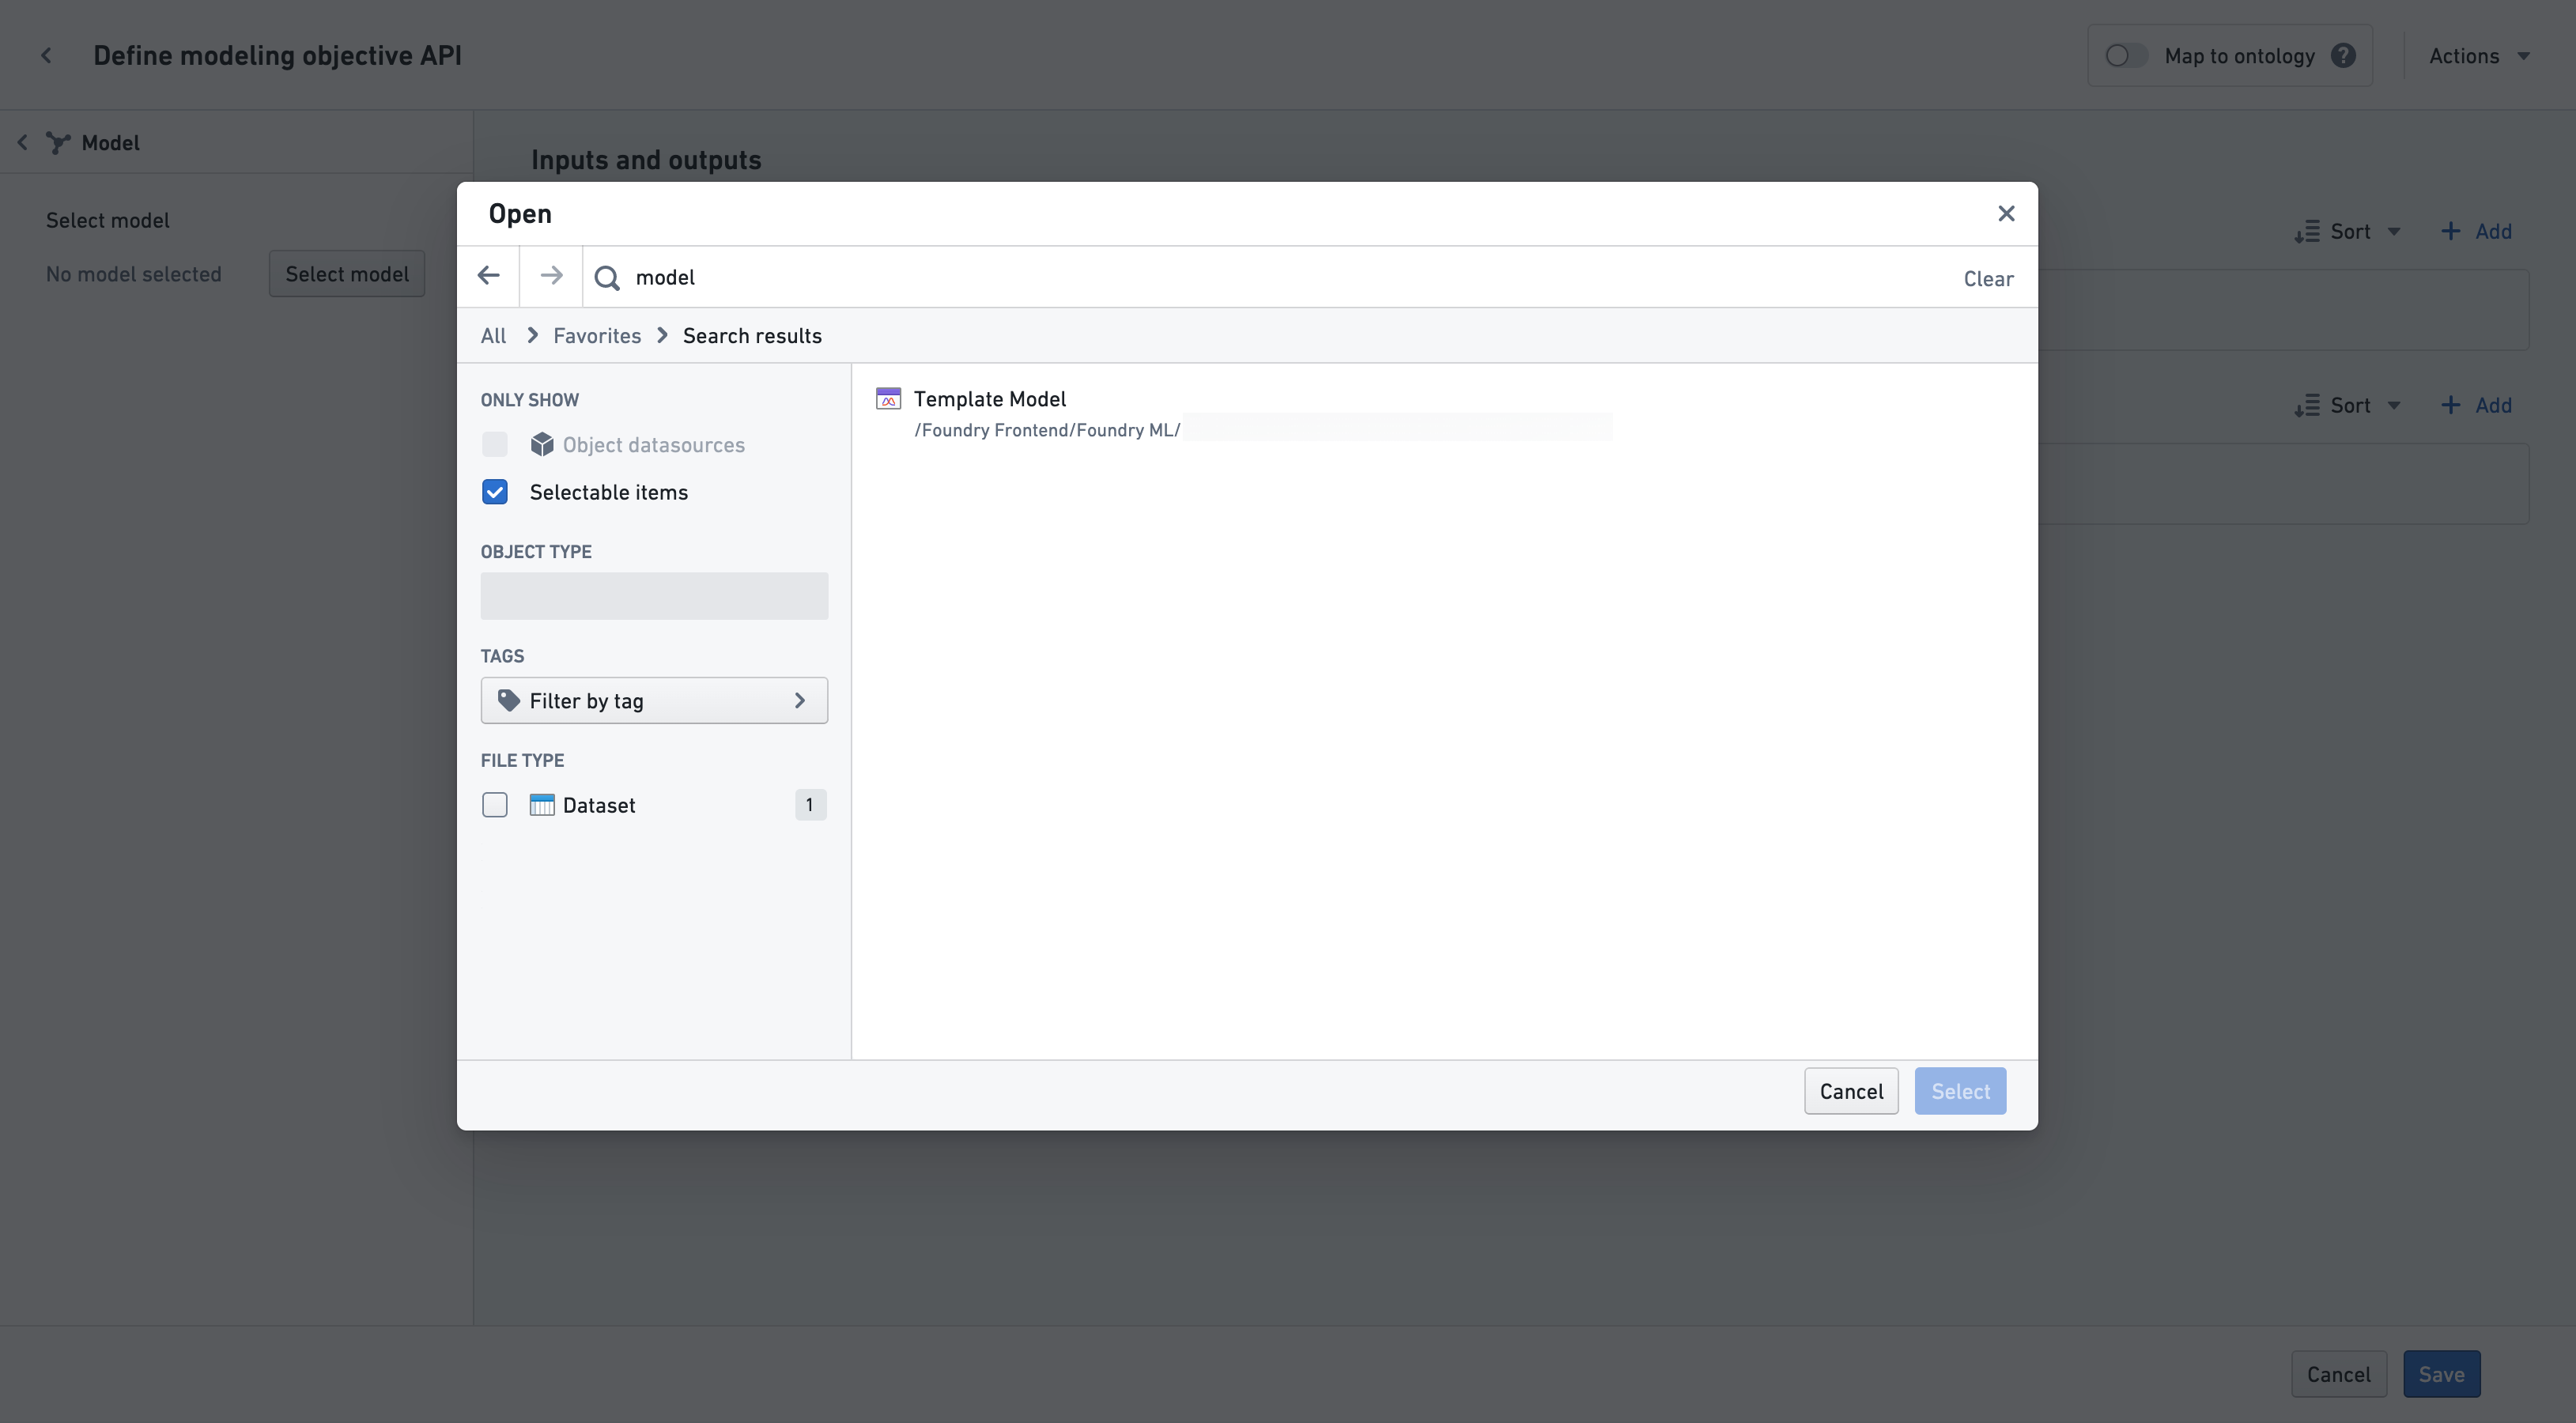
Use the Select Model button to browse the file directory and select a model.
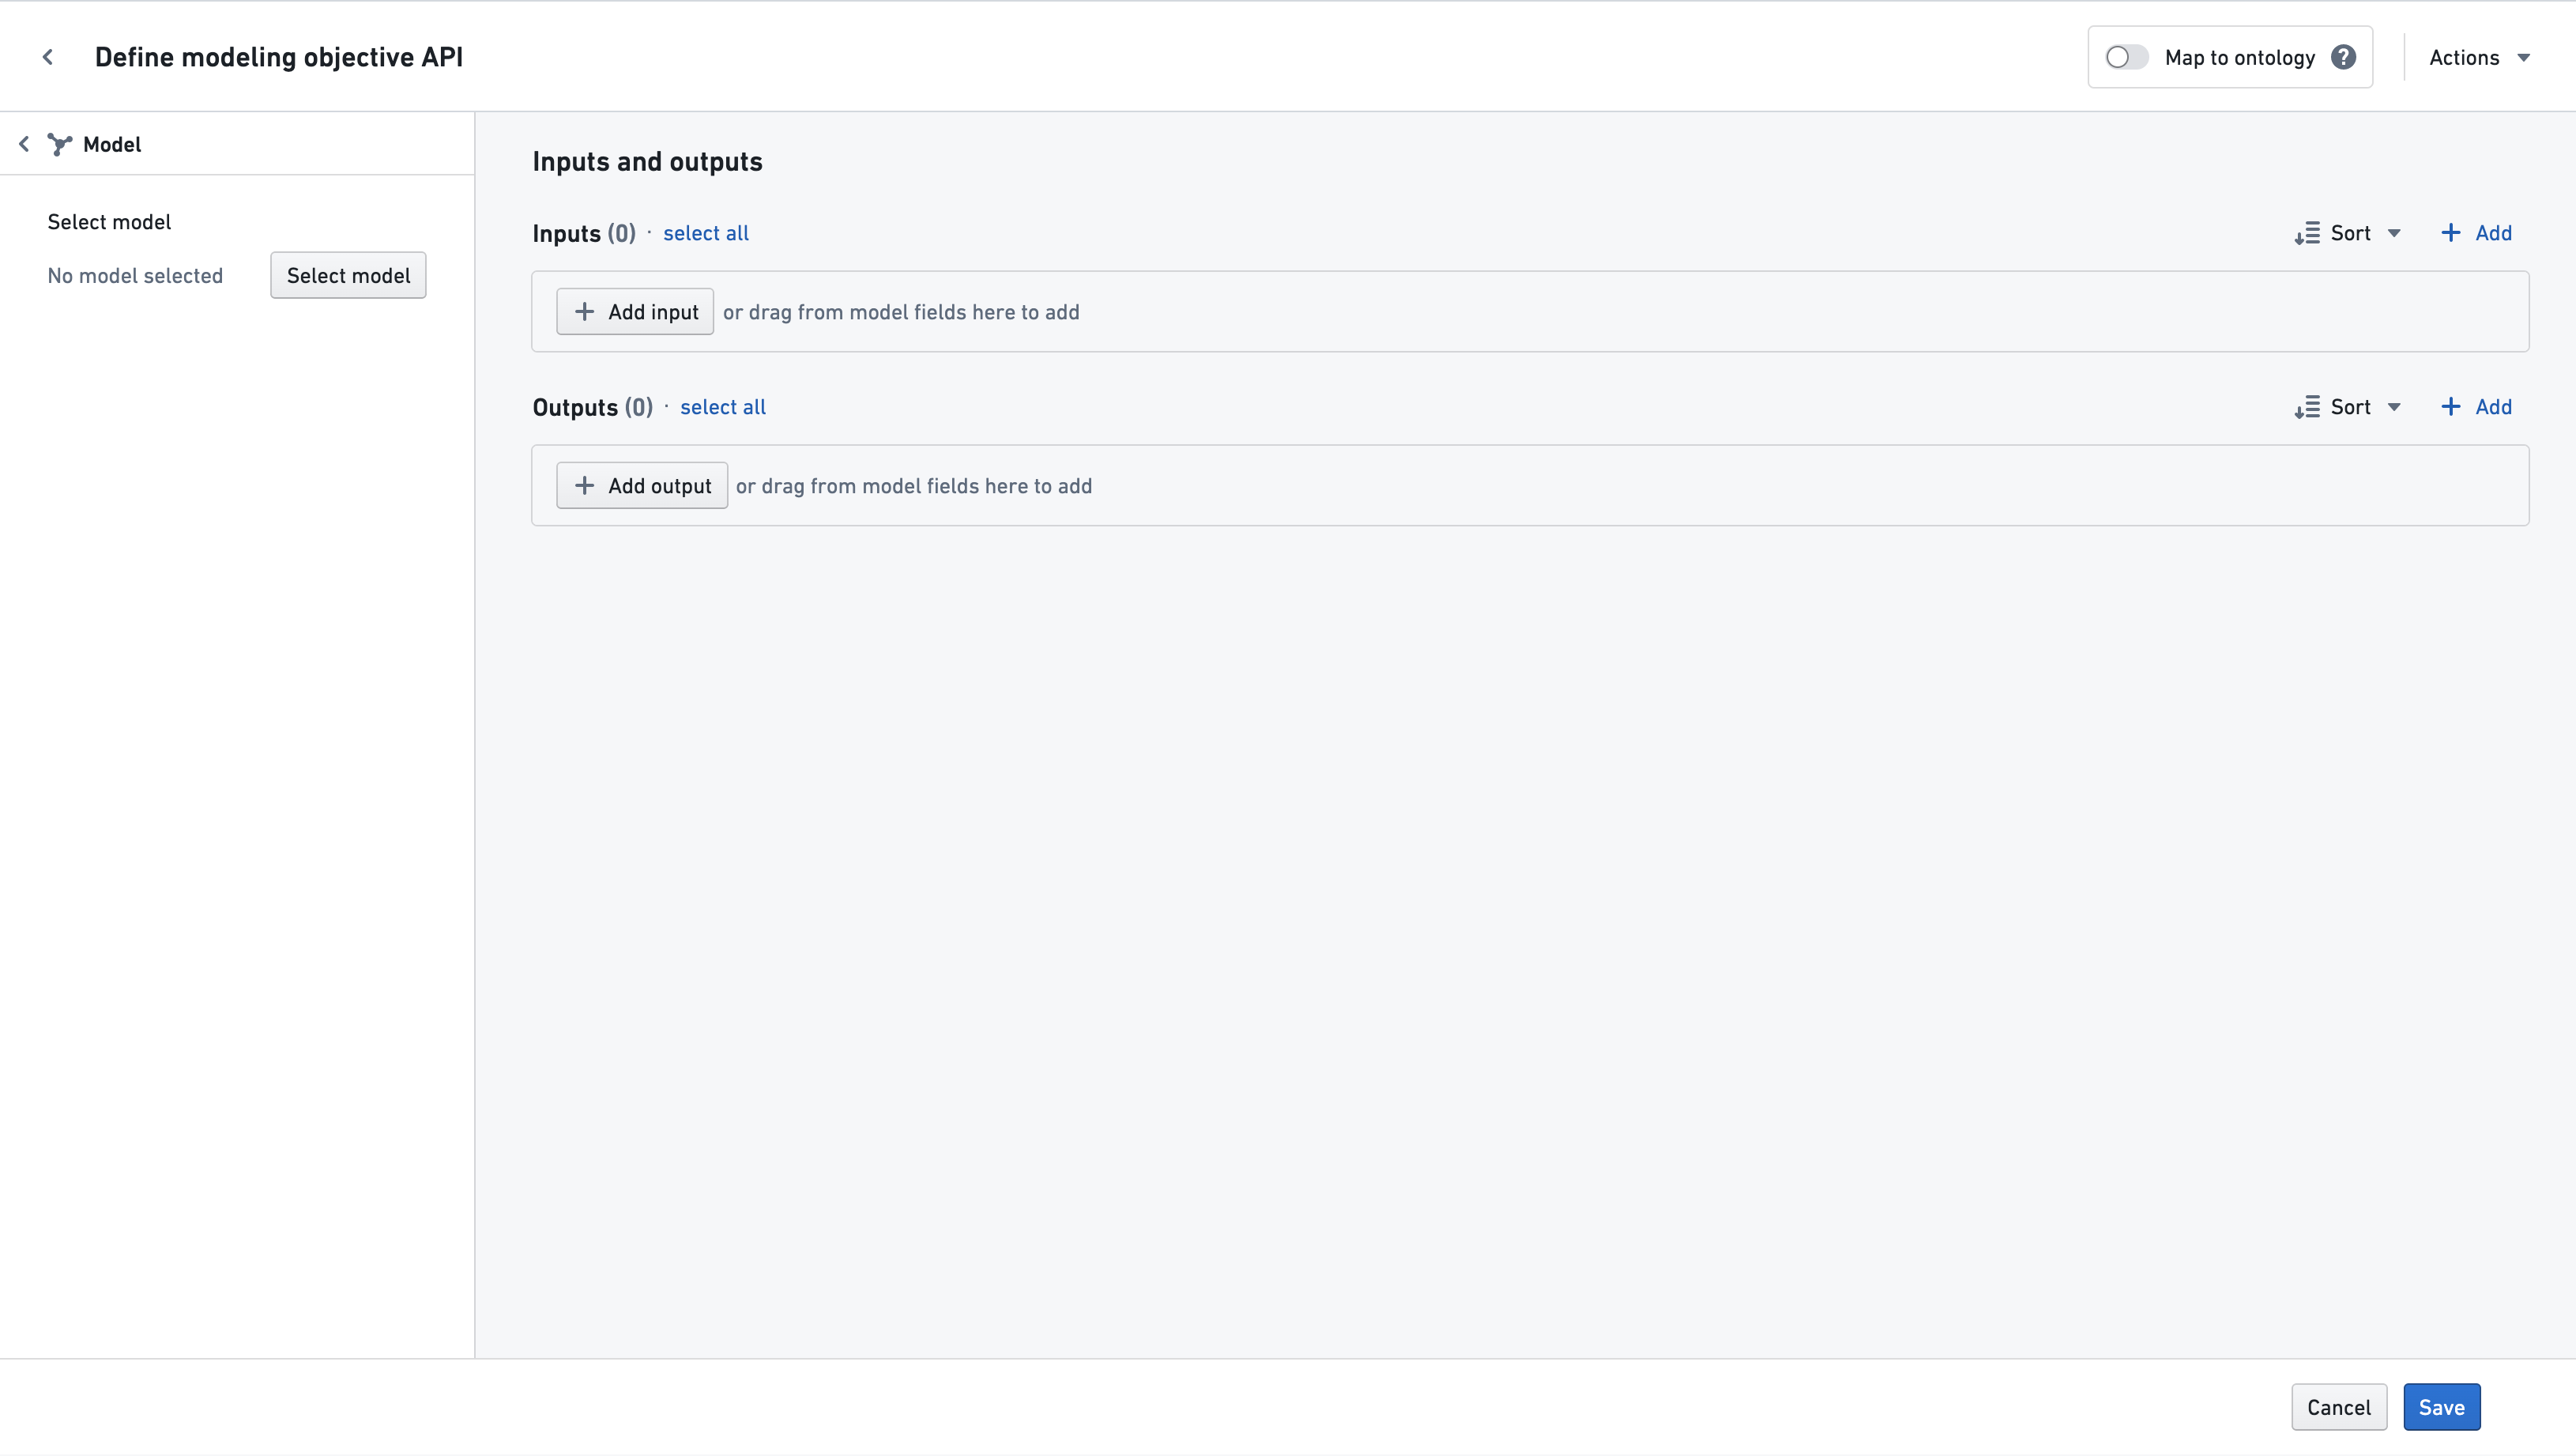
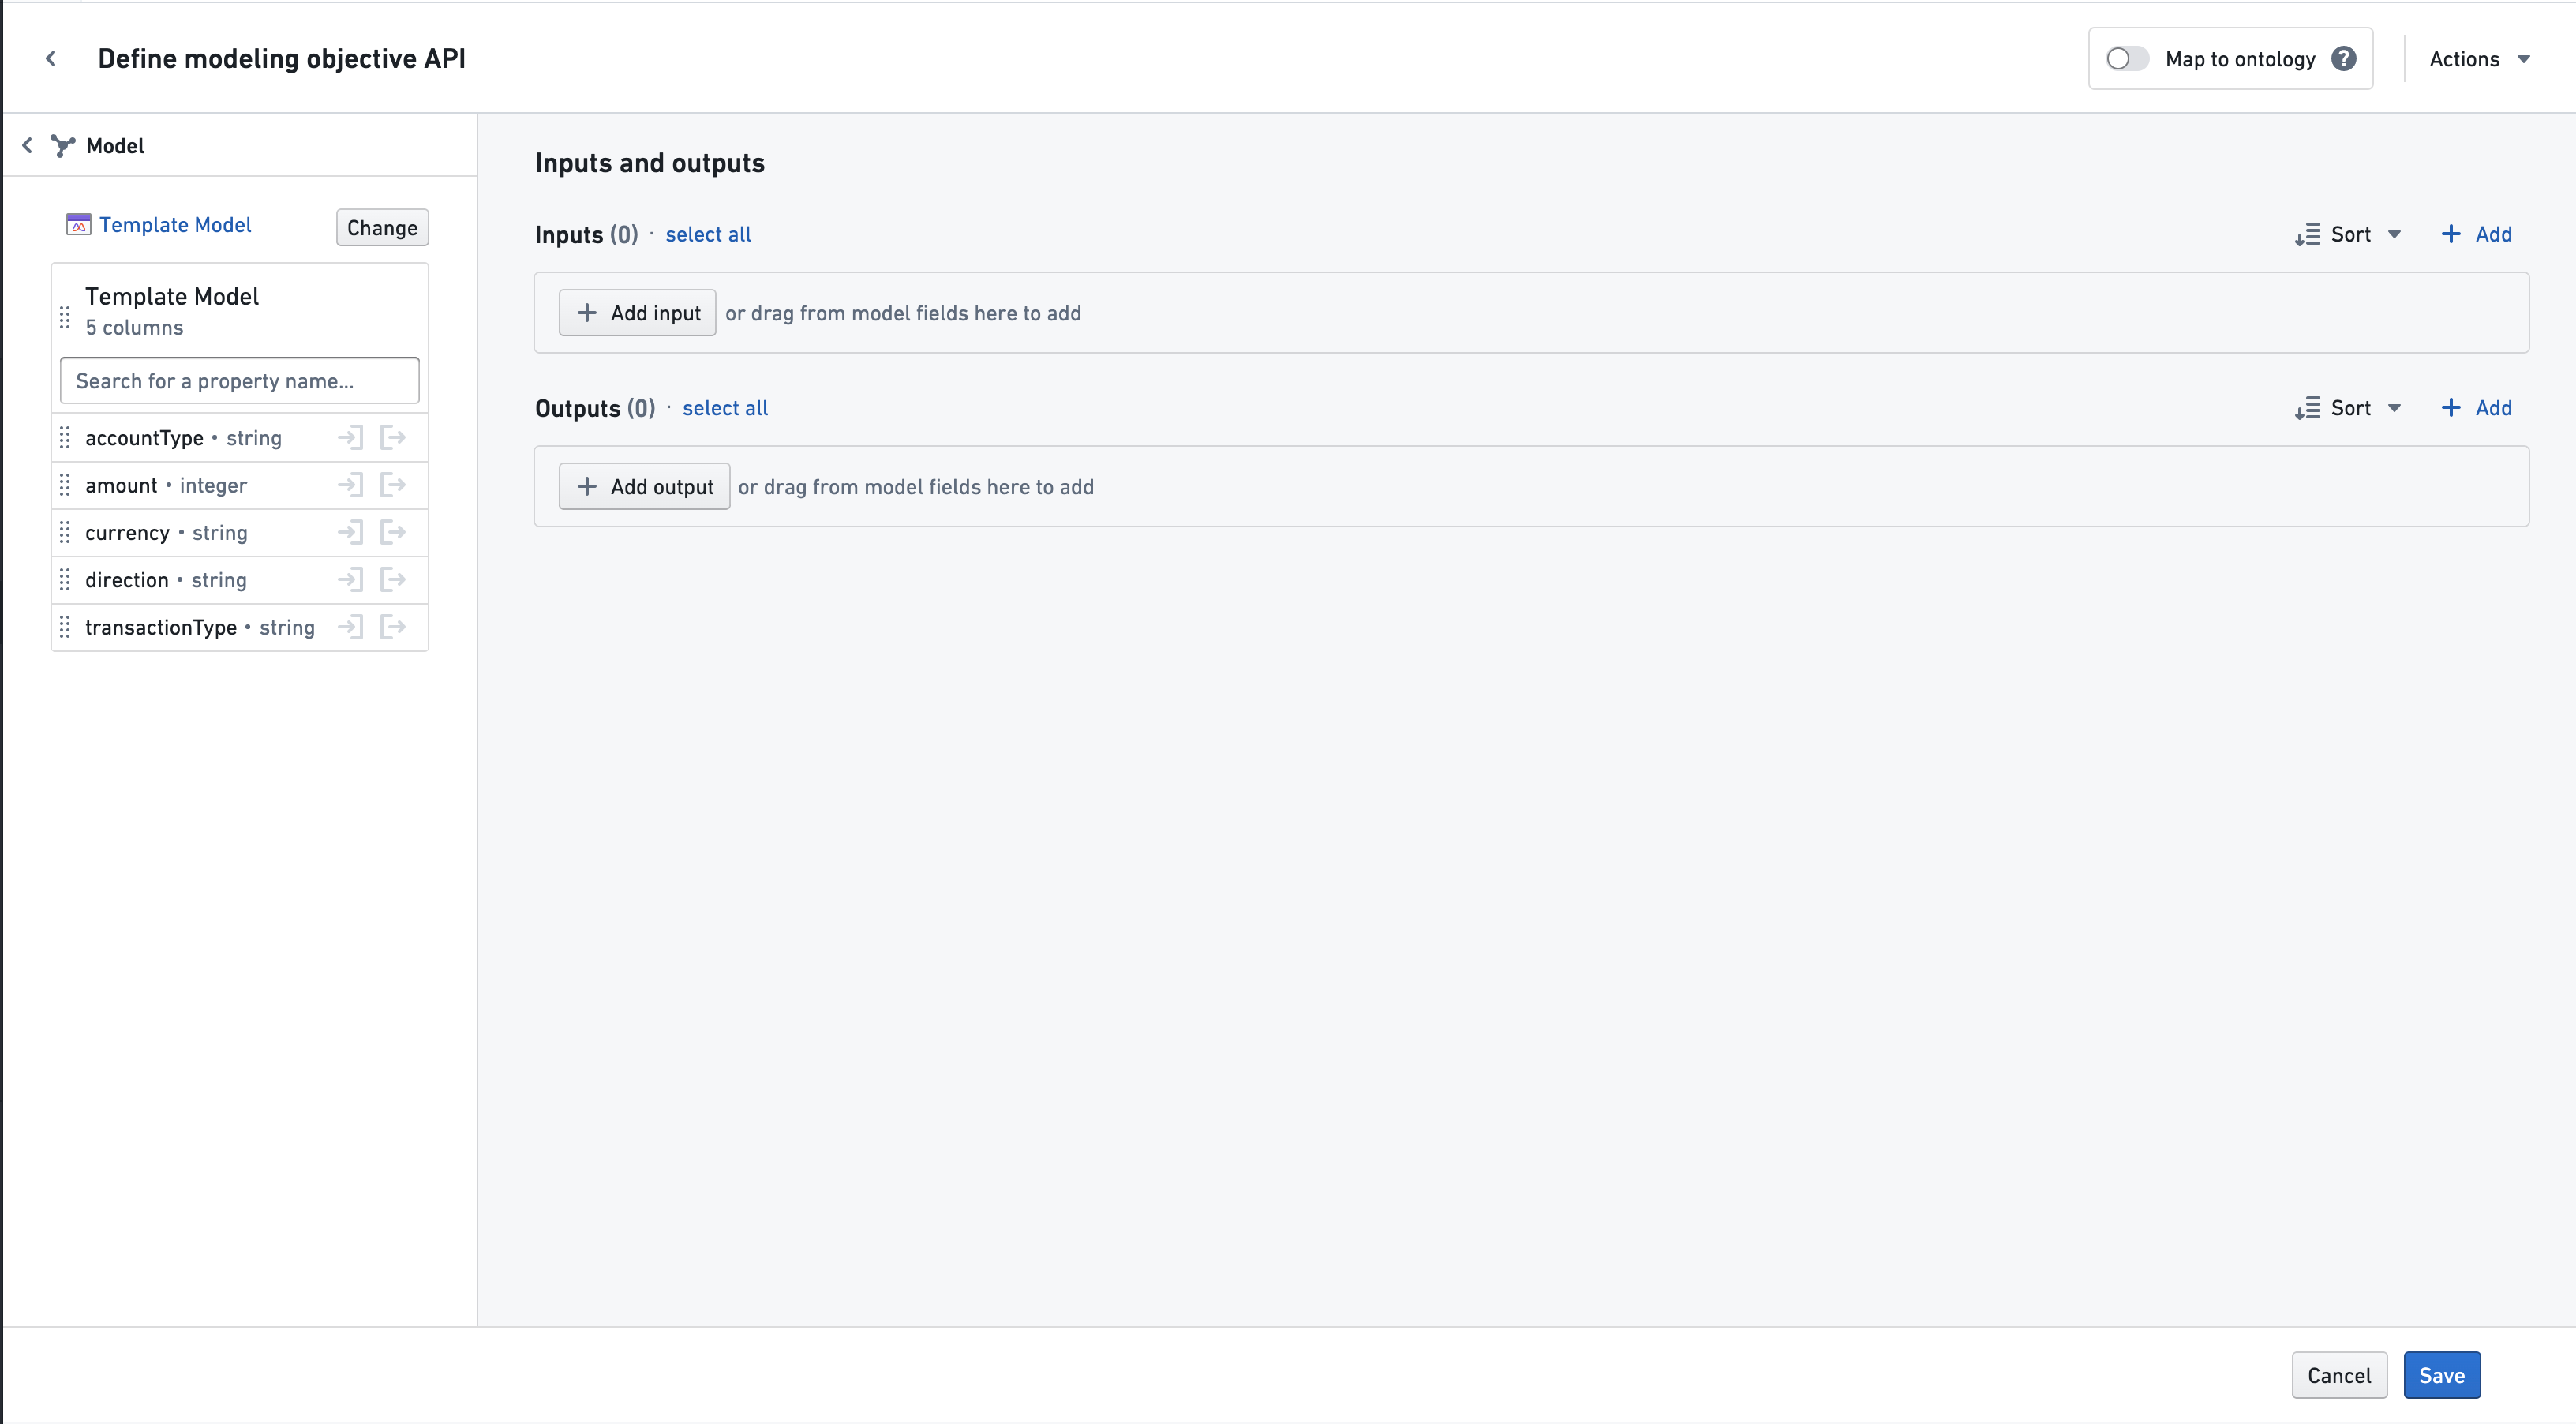
After selecting a model, you will see all of the model's input and output properties listed in the sidebar.
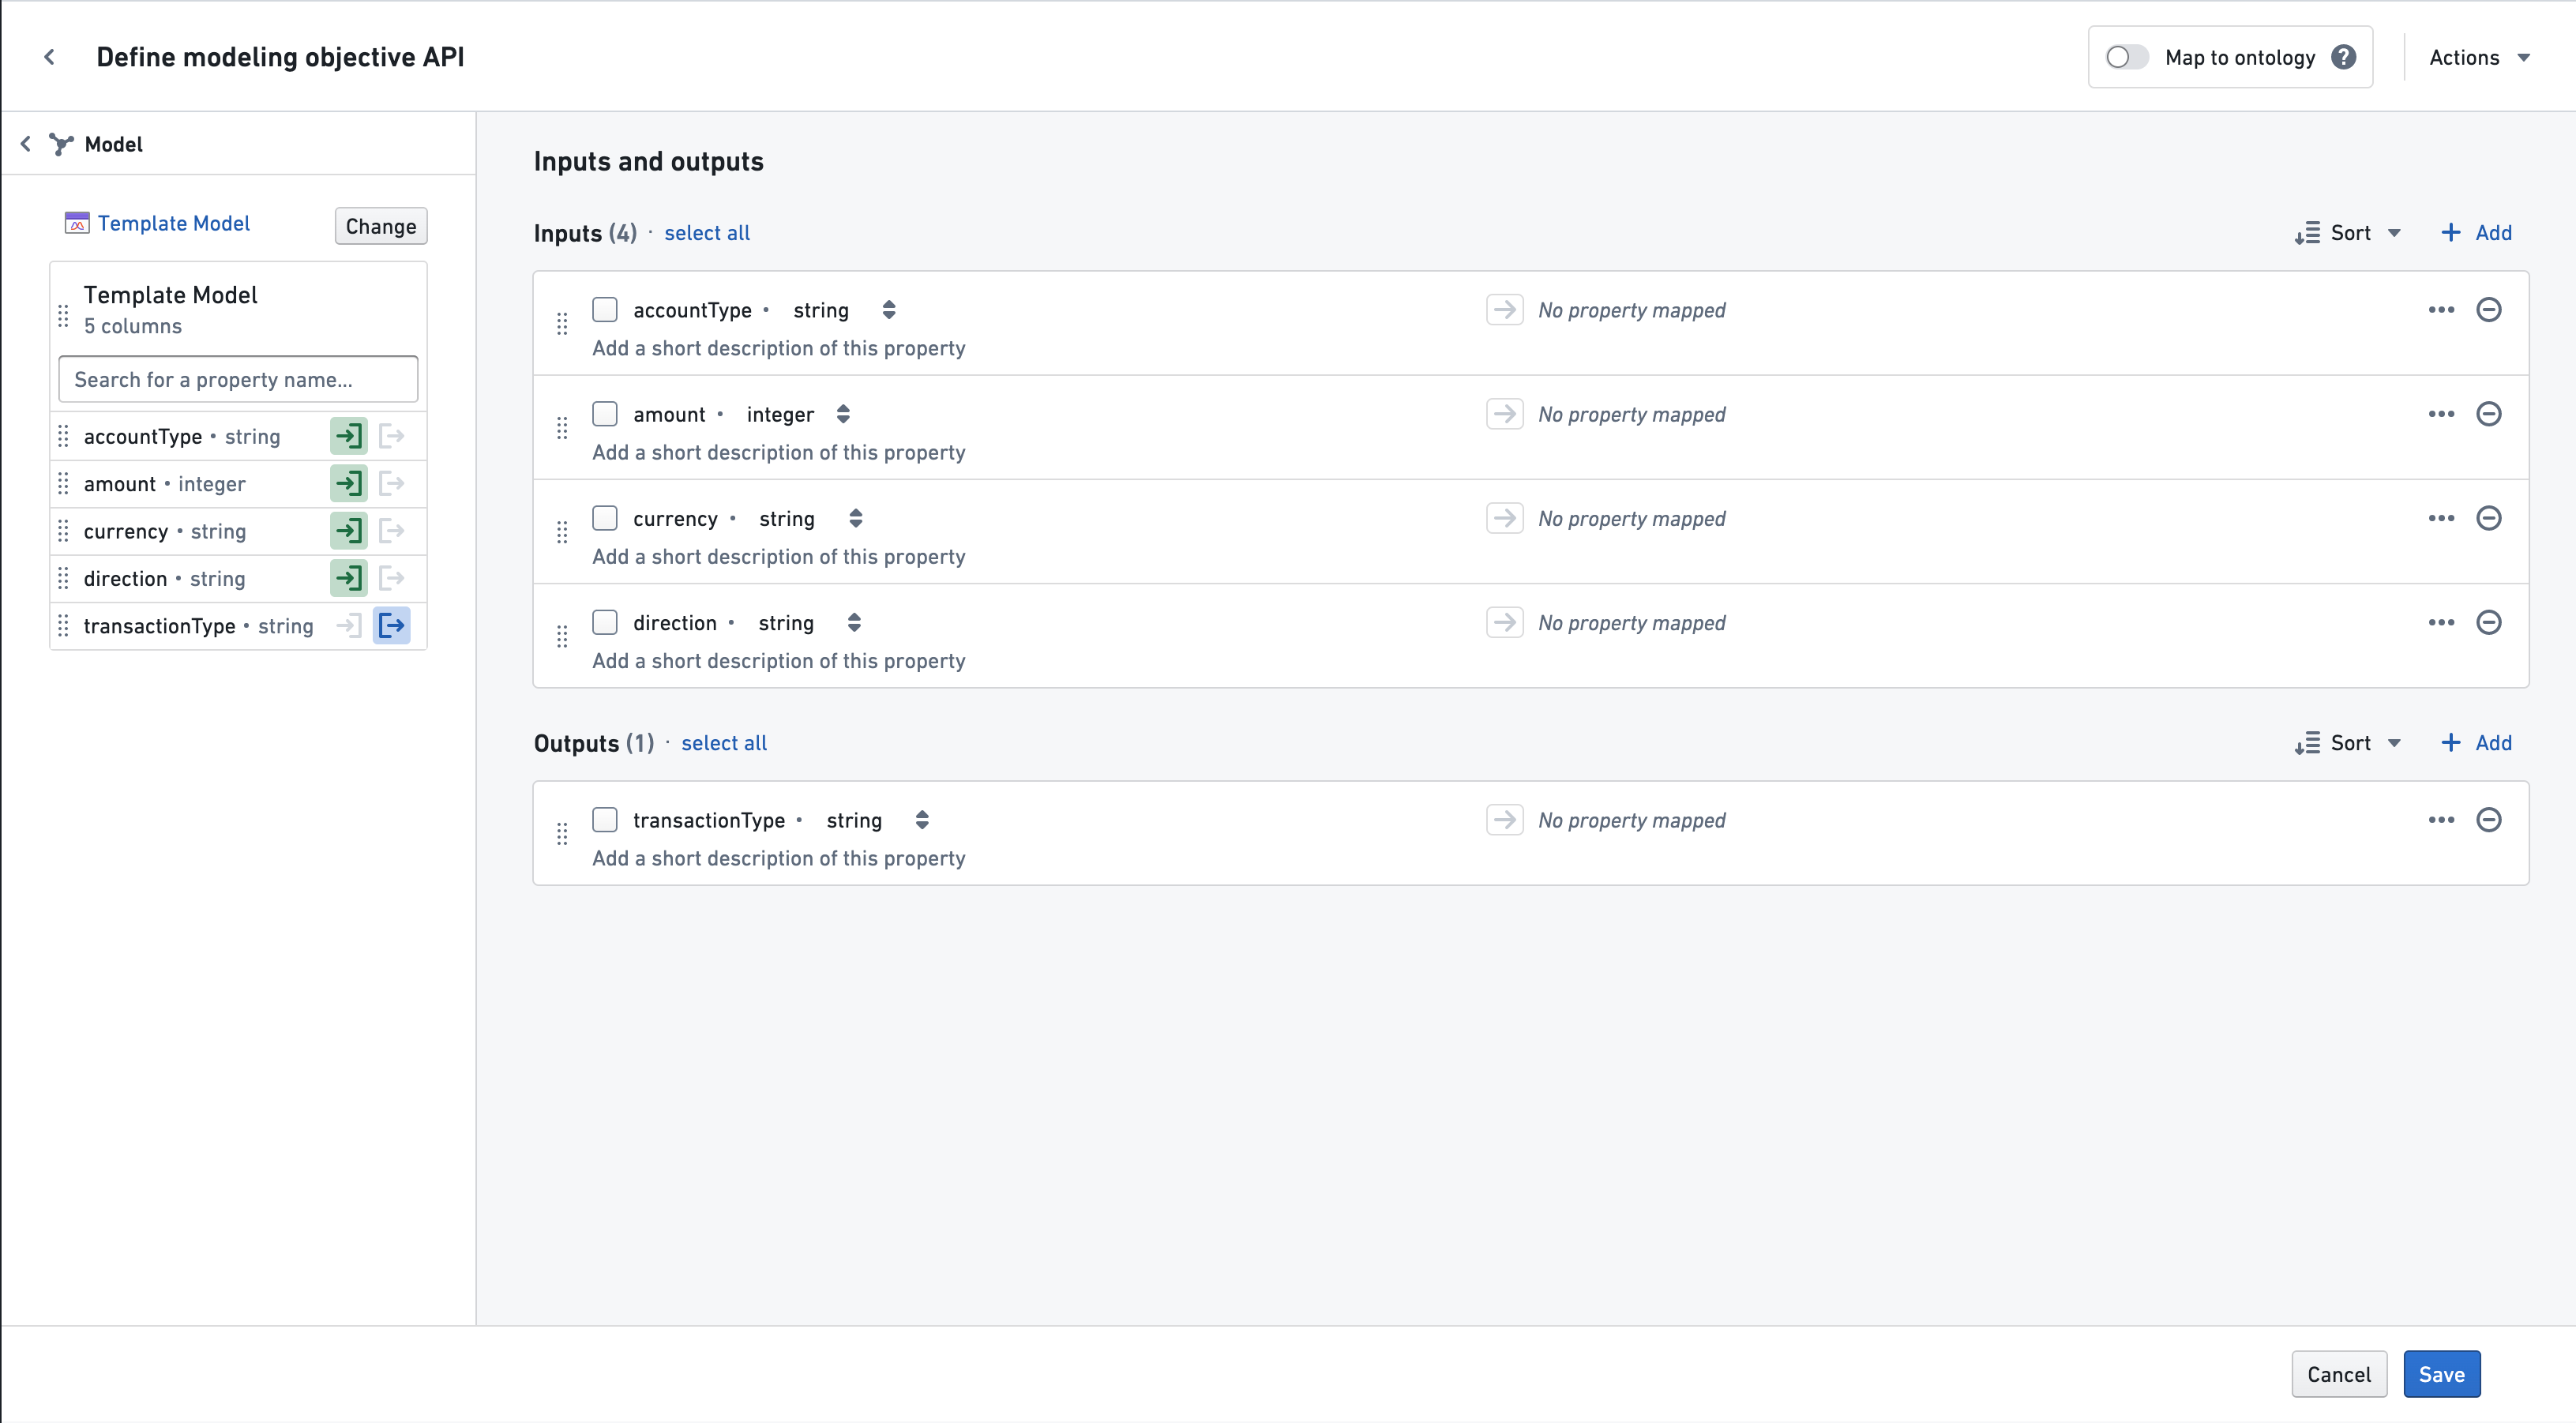
Use the In or Out buttons to add a column to the objective API's input or output. Properties can also be dragged in using the drag handle to the left of the column name. All properties from a model can also be added at once by dragging the entire model card via the drag handle to the left of the model name.
To save the model you are working from as a relevant file for the objective, select Add as relevant file to objective. At any point, you may select another model to work from by selecting Change in the sidebar. You may also map properties to the ontology by selecting Map to ontology and following the instructions to map object properties.
Clicking Save at any point will save the objective API properties and take you back to the main objective page.
中文翻译
定义建模目标 API
:::callout{theme="warning" title="已弃用功能"} 以下文档描述了在建模目标(Modeling Objectives)中将模型绑定到本体(Ontology)的方法,该方法已不再推荐用于大多数用例。请考虑使用直接模型部署为函数的方式,以便在下游应用中使用模型,包括 Workshop、Slate、Actions 以及更多。 :::
要指定用户或应用程序应如何在 Foundry 中使用您的建模目标,您可以为该目标创建一个 API。
要为新的目标定义输入和输出 API,请选择 建模目标详情 并编辑 目标 API 部分。这将带您进入 定义建模目标 API 页面,如下所示:
在左侧面板(如上所示)标记为 定义初始目标 API 的位置,您可以选择以下方法之一来开始填充建模目标 API(或者您可以在右侧手动定义输入和输出):
- 如果选择 对象类型(Object Type),请参阅关于将对象属性映射到本体的文档。
- 如果您已有想要提交到此目标的模型,可以通过选择 模型(Model),按照以下步骤从模型的 API 开始。目前,此工作流仅支持基于本体的模型。
- 如果您希望目标 API 的输入或输出基于任何现有 Foundry 数据集的列,选择 数据集(Dataset) 将让您轻松地基于这些列创建属性,如此处文档所述。
手动定义 API 输入和输出
要手动定义 API,您可以直接指定输入和输出属性,然后选择对象类型将属性映射到本体。
点击 添加输入 或 添加输出 按钮,并指定属性名称、类型以及可选的描述。类型应为以下之一:
booleandatetimedoublelongintegerstring
如果属性的类型预期未知,则应使用 any 类型。
定义输入和输出属性后,您可以选择将它们映射到对象属性,如下一节所述。
:::callout{theme="neutral"} API 定义了提交到建模目标的任何模型的输入和输出格式。输入将以单个 dataframe 的形式给出,该 dataframe 的列名应与上方输入部分中给出的名称匹配。同样,建模目标将期望模型的输出 dataframe 具有与输出部分中指定的列相匹配的列。 :::
将目标 API 映射到本体
您可以通过将目标 API 中的每个字段映射(也称为绑定)到本体中的对象属性,为每个字段提供额外的元数据。如果建模目标应使用本体中的数据,或者建模目标将用于驱动基于本体的运营应用程序,则强烈建议映射属性。
例如,在 Workshop 应用程序中使用场景(Scenarios)要求您的目标 API 映射到本体。这是因为场景将使用这些输入映射在执行模型时获取适当的输入数据,并使用输出映射确定要覆盖的本体属性。
以下说明了映射对输入和输出属性的含义:
- 对于输入属性,表示该属性的数据应从映射的对象类型和属性中提取。
- 对于输出属性,表示该属性的模型输出必须与映射的对象类型属性兼容,并且可以写入该属性。
:::callout{theme="neutral"} 运营应用程序可以使用本体映射来获取模型的输入,随后用模型输出覆盖本体属性。因此,如果您添加本体映射,了解应用程序可能如何使用您的目标非常重要。 :::
要映射到对象属性,您可以在左侧选择 对象类型,或切换右上角的 映射到本体 开关。然后,选择要映射的 根 对象类型。可用于映射的对象属性将是该对象上的属性,以及通过多对一关系链接到所选对象的任何对象的属性。
选择对象类型后,该对象类型的所有属性都将可用于映射。要映射属性,请点击属性旁边的 输入 或 输出 按钮:
也可以通过属性左侧的拖动手柄将属性类型拖到 输入 或 输出 部分。
还可以通过对象图标左侧的拖动手柄拖动整个对象卡片,一次性添加对象类型的所有属性:
要映射来自链接对象类型的属性,请滚动到左侧边栏的底部。如果存在链接对象,则 添加链接对象类型 按钮应可见。选择该按钮并选择一个链接对象类型。
该链接对象的属性现在将可用于映射:
默认情况下,映射的属性将具有与它们映射到的对象属性类型相同的名称、类型和描述。如果需要,可以更改名称和描述以更好地适应目标。
映射完成后,选择 保存 按钮以将输入和输出 API 映射保存到目标。此 API 现在将记录提交到此目标的模型的预期输入和输出规范。
在任何时候选择 保存 将保存目标 API 属性,并将您带回主建模目标页面。
从数据集列添加属性
从左侧下拉菜单中选择 数据集,开始从现有 Foundry 数据集向目标 API 添加属性。
使用 选择数据集 按钮浏览文件目录并定位您的数据集。
如果您想使用非默认分支上的数据集,请使用分支选择器菜单。
选择数据集后,您将在侧边栏中看到数据集的所有列。
使用 输入 或 输出 按钮将列添加到目标 API 的输入或输出。属性也可以通过列名左侧的拖动手柄拖入。通过数据集名称左侧的拖动手柄拖动整个数据集卡片,可以一次性添加数据集的所有属性。
如果列的基本属性类型是建模目标 API 支持的类型,则会列出该类型。否则,它将列为 "any"。
要将您正在使用的数据集保存为目标的相关文件,请选择 添加为目标的相关文件。在任何时候,您可以通过选择侧边栏中的 更改 来选择另一个数据集进行工作。您还可以通过选择 映射到本体 并按照映射对象属性的说明将属性映射到本体。
在任何时候选择 保存 将保存目标 API 属性,并将您带回主目标页面。
从模型添加属性
从左侧下拉菜单中选择 模型,开始从现有模型向目标 API 添加属性。
使用 选择模型 按钮浏览文件目录并选择一个模型。
选择模型后,您将在侧边栏中看到模型的所有输入和输出属性。
使用 输入 或 输出 按钮将列添加到目标 API 的输入或输出。属性也可以通过列名左侧的拖动手柄拖入。通过模型名称左侧的拖动手柄拖动整个模型卡片,可以一次性添加模型的所有属性。
要将您正在使用的模型保存为目标的相关文件,请选择 添加为目标的相关文件。在任何时候,您可以通过选择侧边栏中的 更改 来选择另一个模型进行工作。您还可以通过选择 映射到本体 并按照映射对象属性的说明将属性映射到本体。
在任何时候点击 保存 将保存目标 API 属性,并将您带回主目标页面。