Getting started with Automate(开始使用自动化(Automate))
:::callout{theme="neutral"} This tutorial assumes you already have data integrated into your Foundry Ontology. If you have not yet done this, learn how to create your Ontology. :::
This tutorial will walk you through creating your first simple automation with the Automate application.
Create from the Automate application
Start by opening the Automate application from the application sidebar. This will take you to the Overview page of the Automate application.
The Overview page shows a list of your recent automation activity, including counts of total automations you can see, automations owned by you, automations of which you are a recipient, and paused automations. You can also see lists of recently viewed automations, failures within the last four weeks, and recently triggered automations.
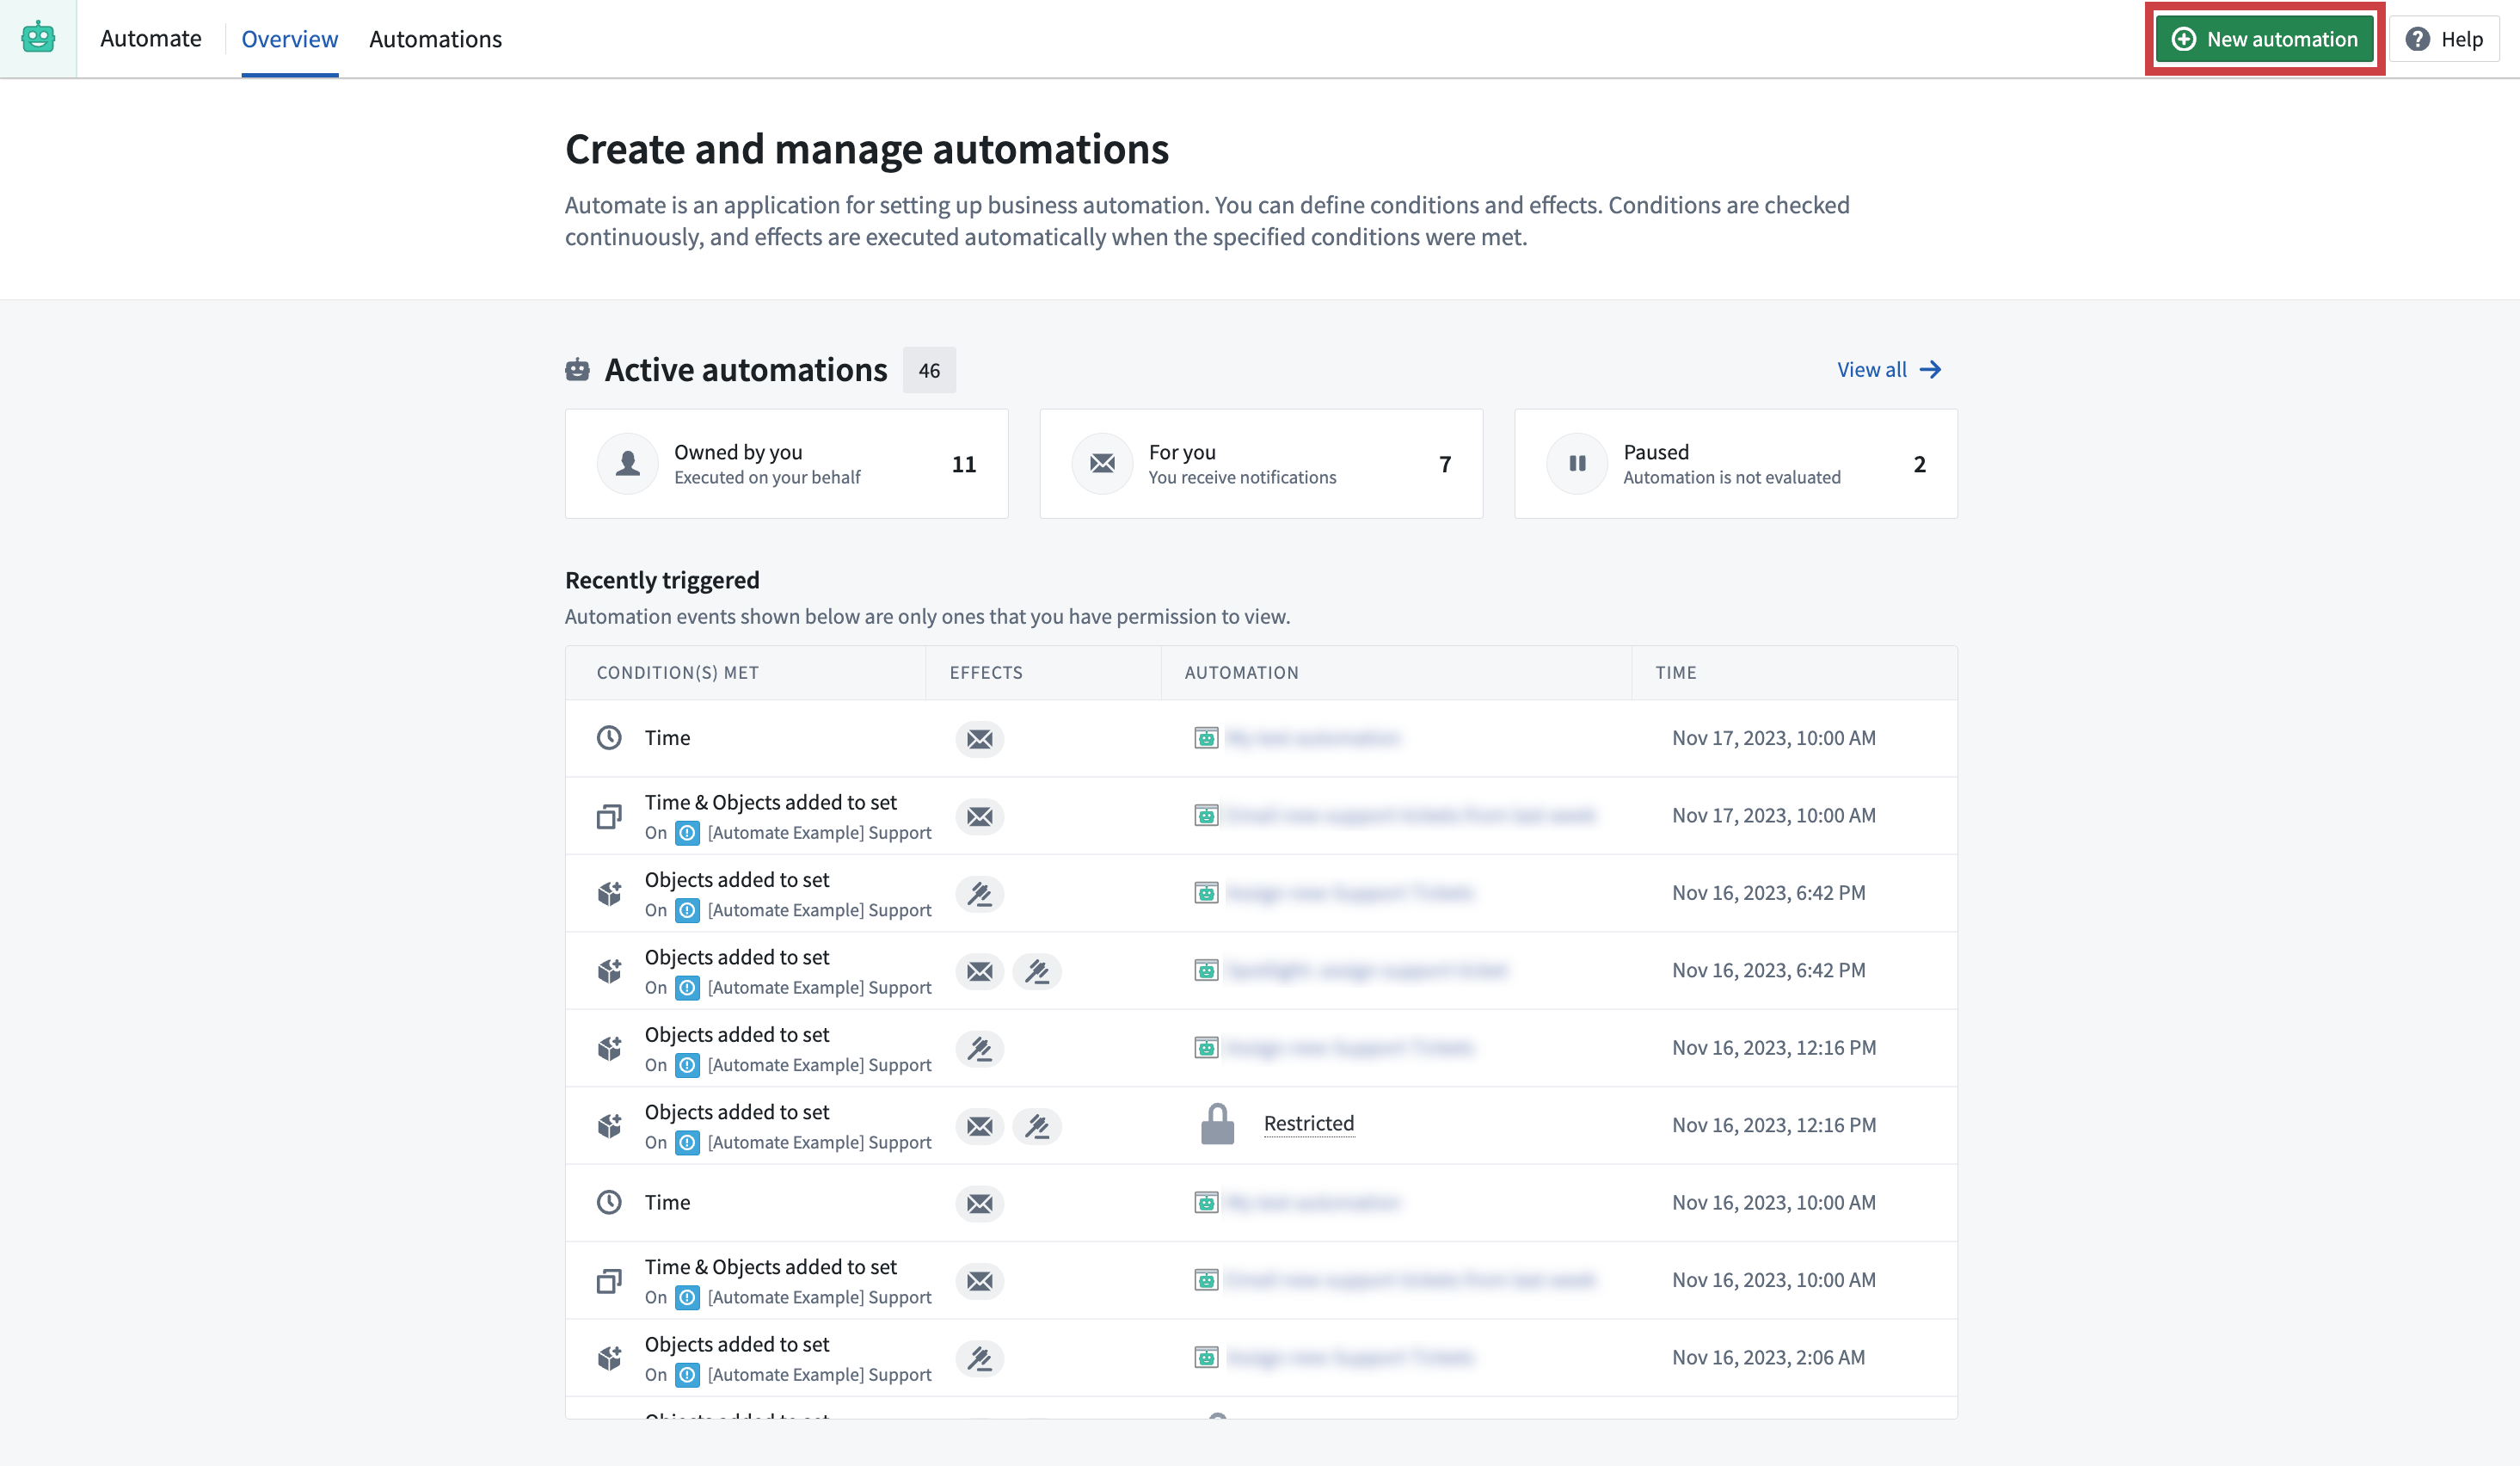
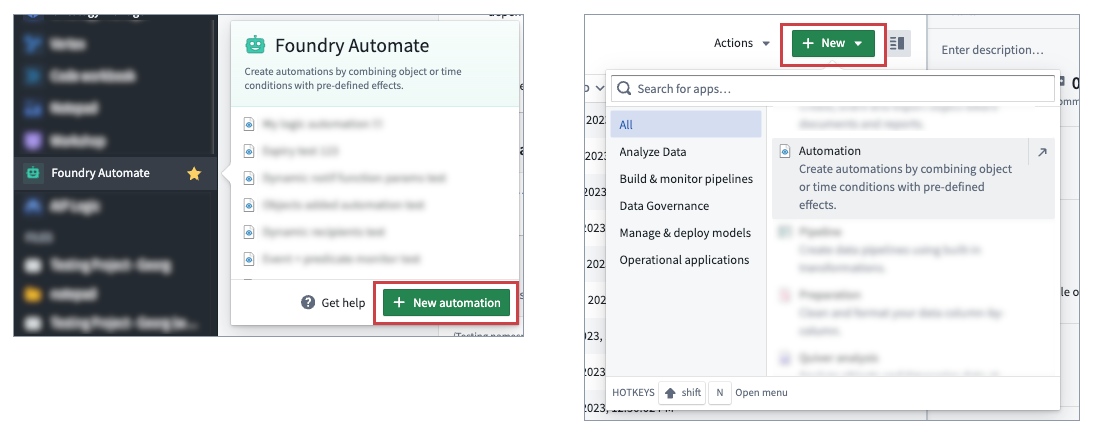
To create your first automation, select + New automation in the top right of the page. Alternatively, you can:
- Hover over the Automate application icon in the Foundry sidebar and select + New automation; or
- Select + New from within a Compass folder and select Automation.
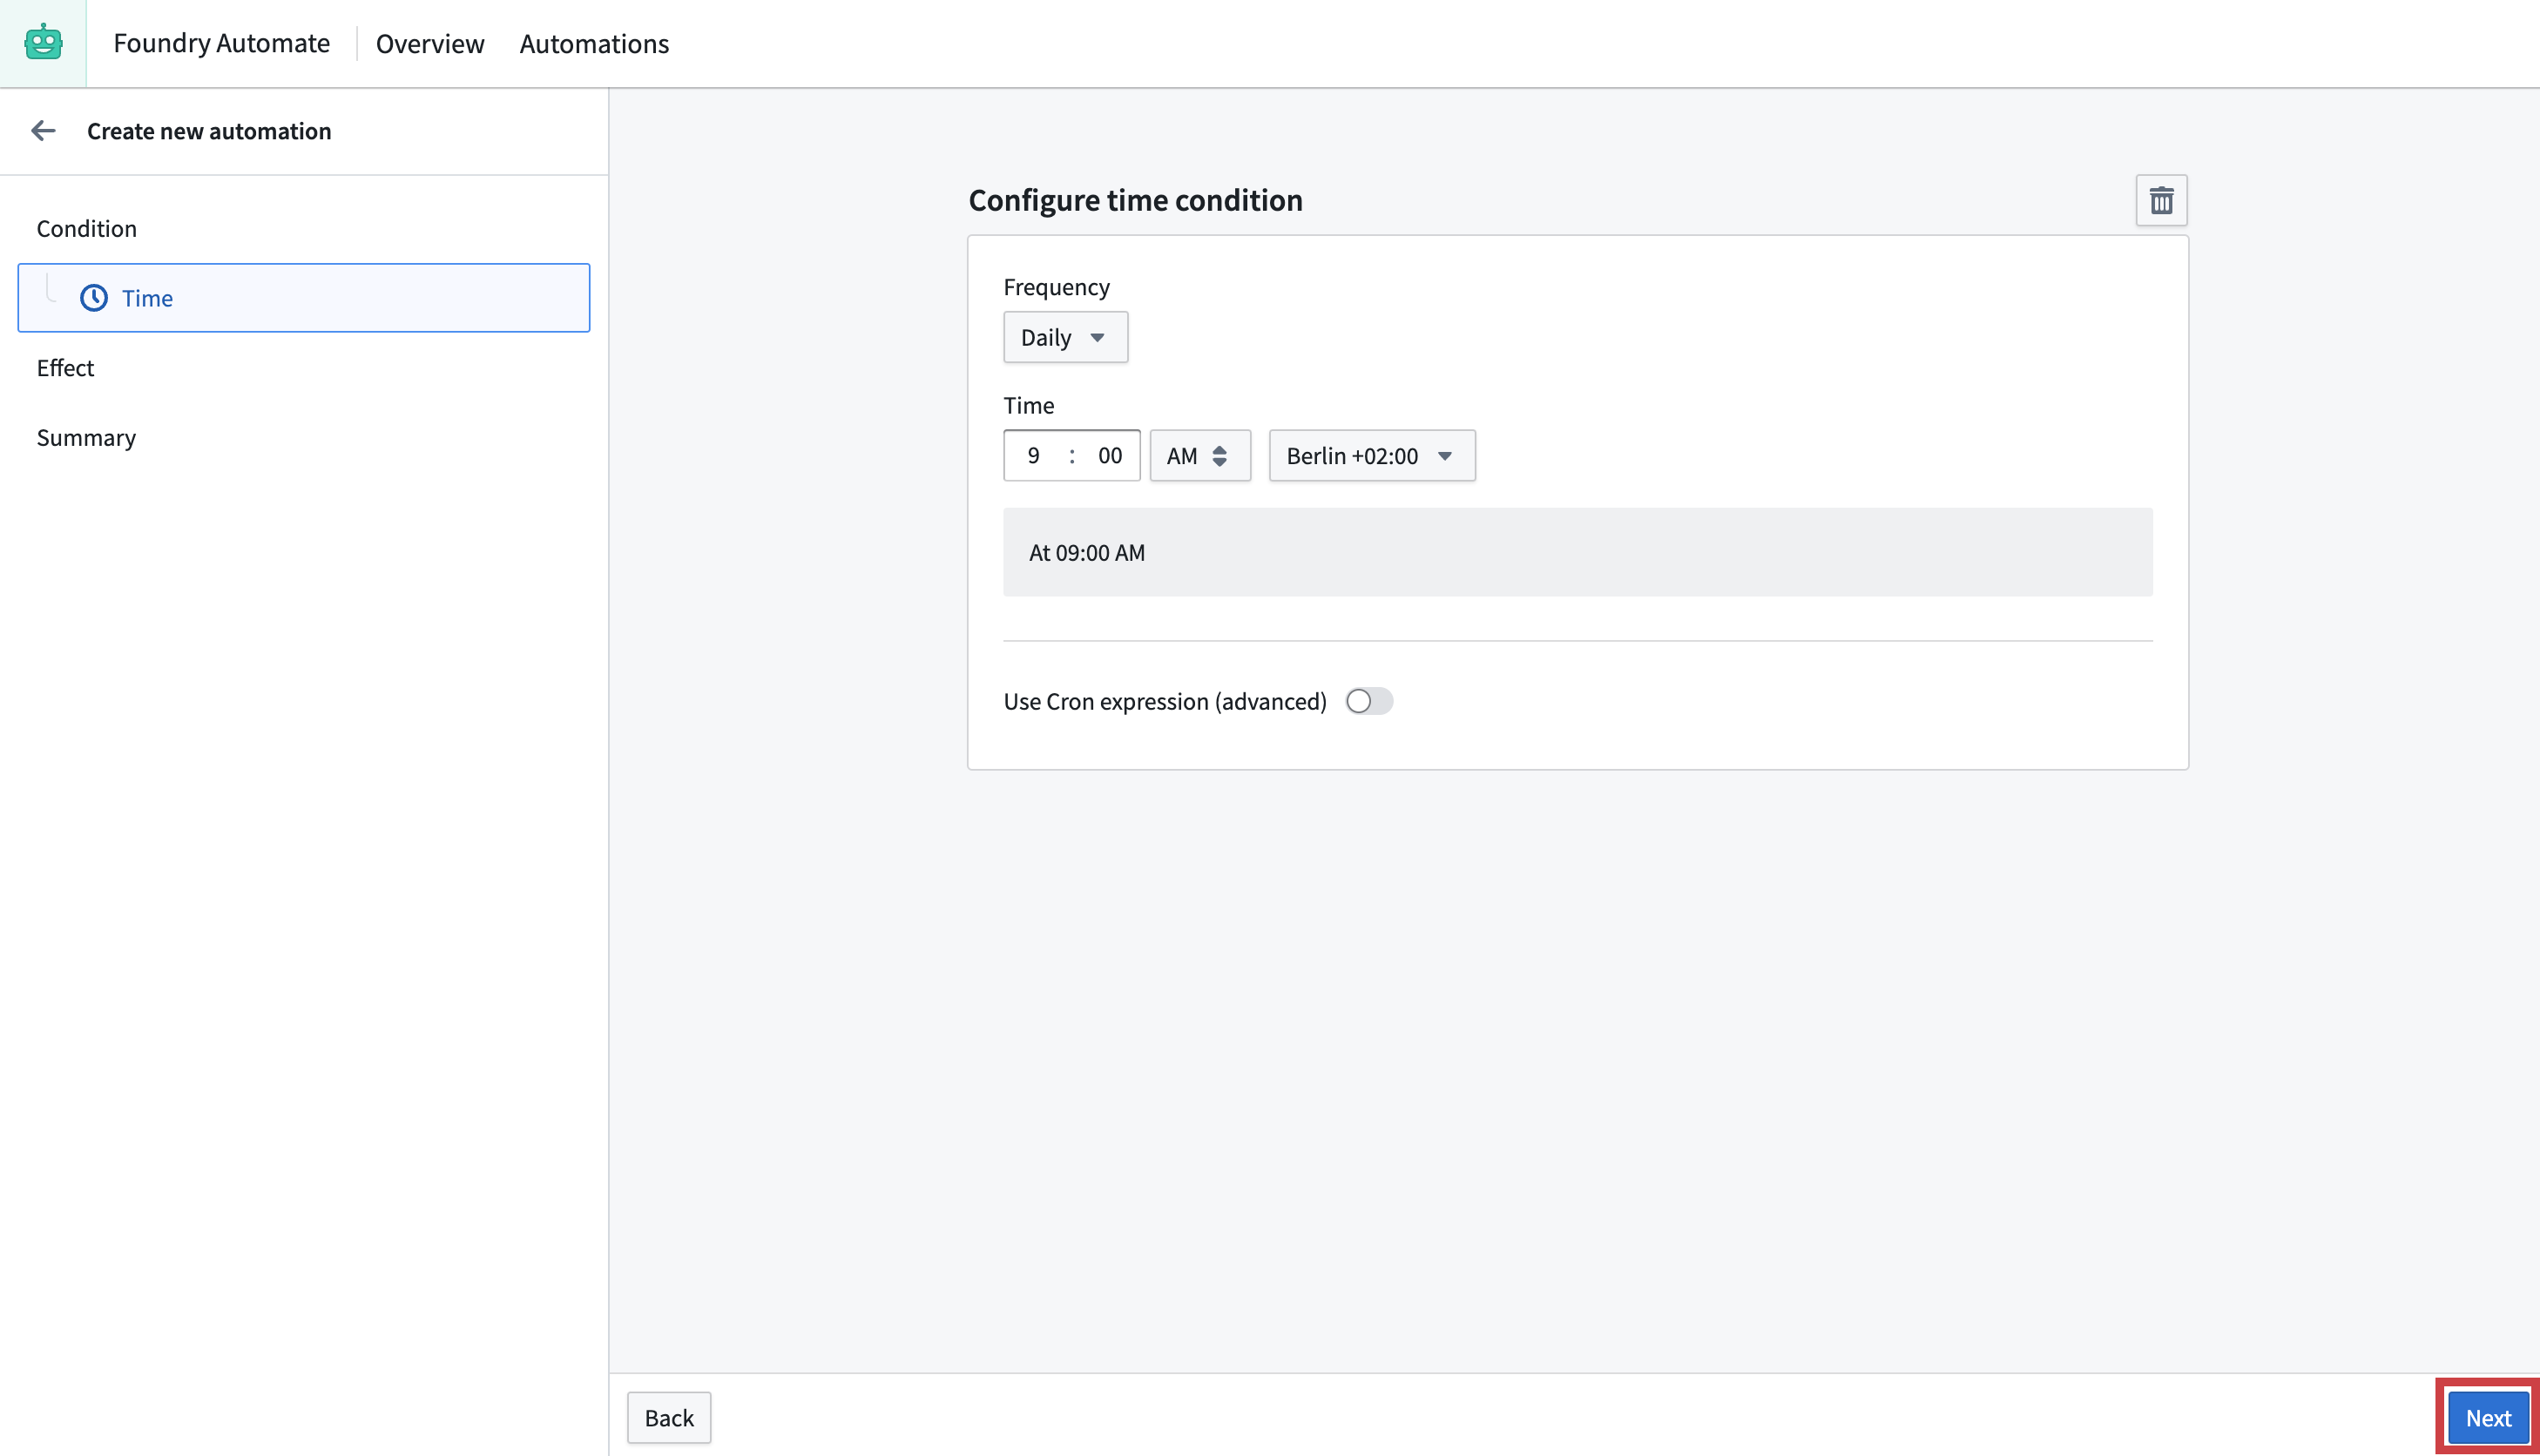
You will be taken to the automation creation wizard (shown below) where you can start to define your automation conditions. In this example, you will add a simple Time condition.

For now, leave the time configuration page as is and continue on to the Effect page by selecting Next as shown in the image below.
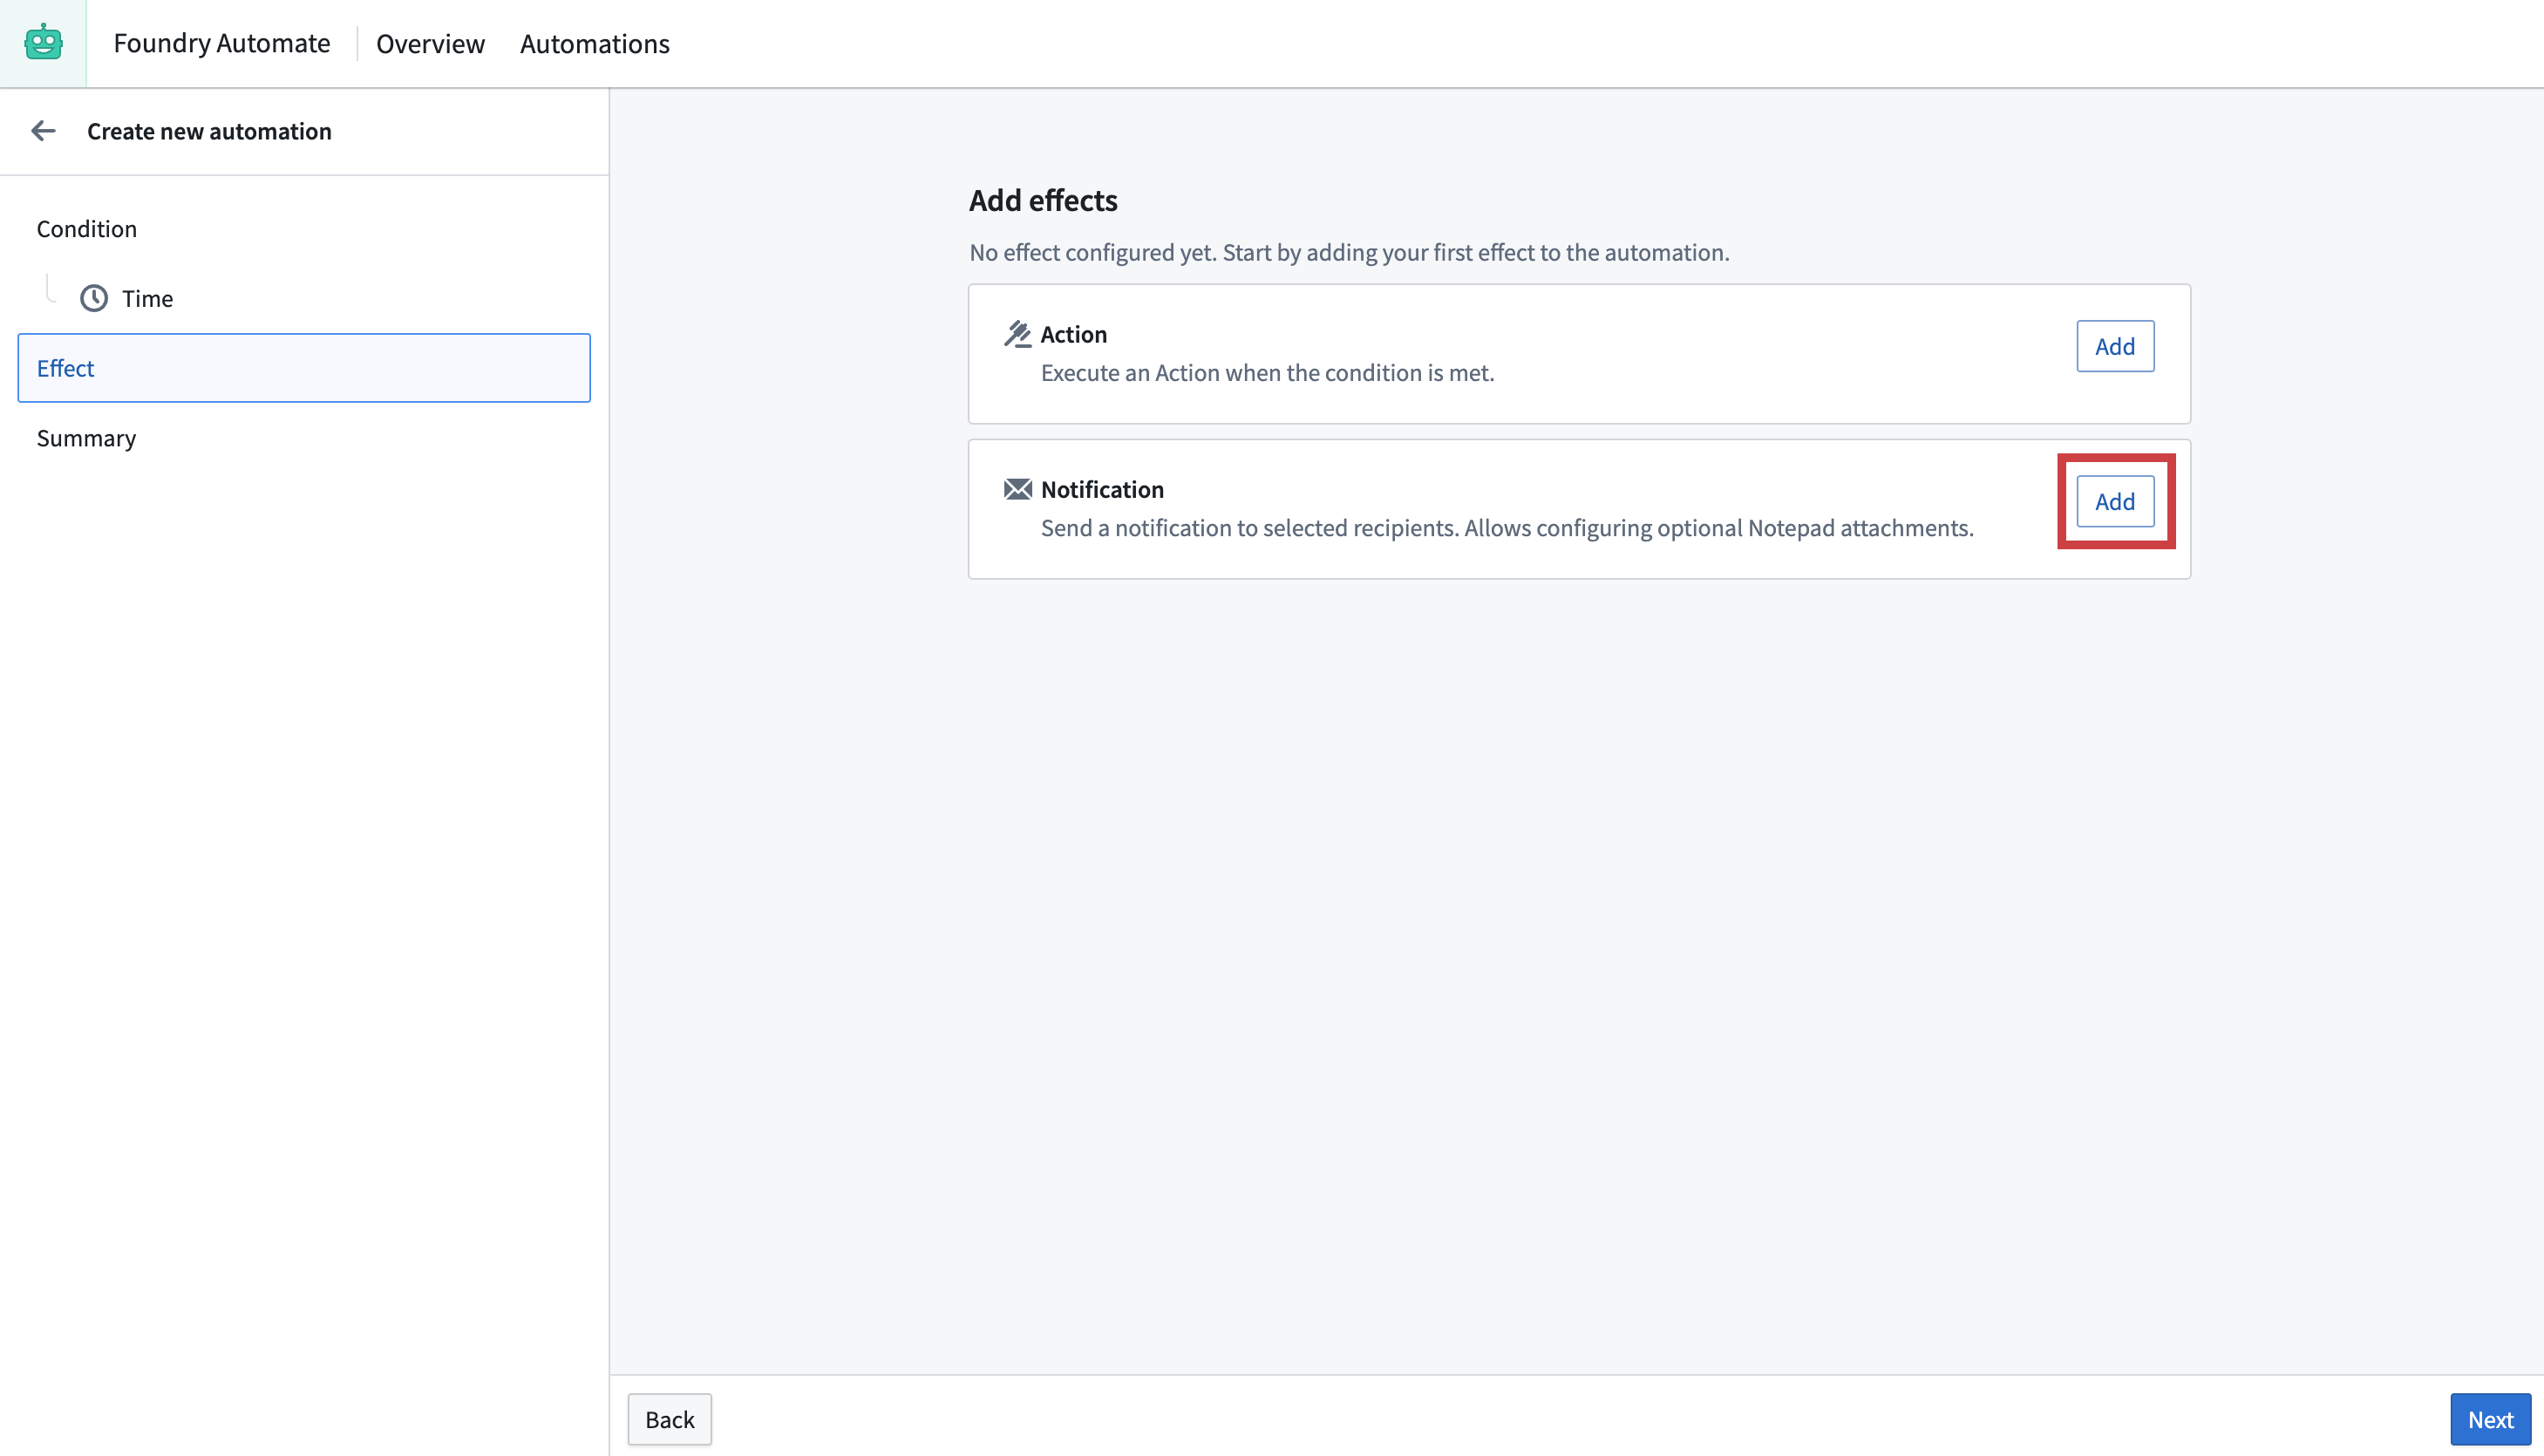
From the Effect page, you can add one or more effects to execute when the time condition is met. Choose Add on the Notification card to proceed to the Notification effect configuration page.
The notification effect offers many configuration options. For now, add yourself as a static recipient in the Recipients text input. Define a heading and message for your notification, then choose Preview to view how the message will appear to recipients. Select Next to return to the Effect page.
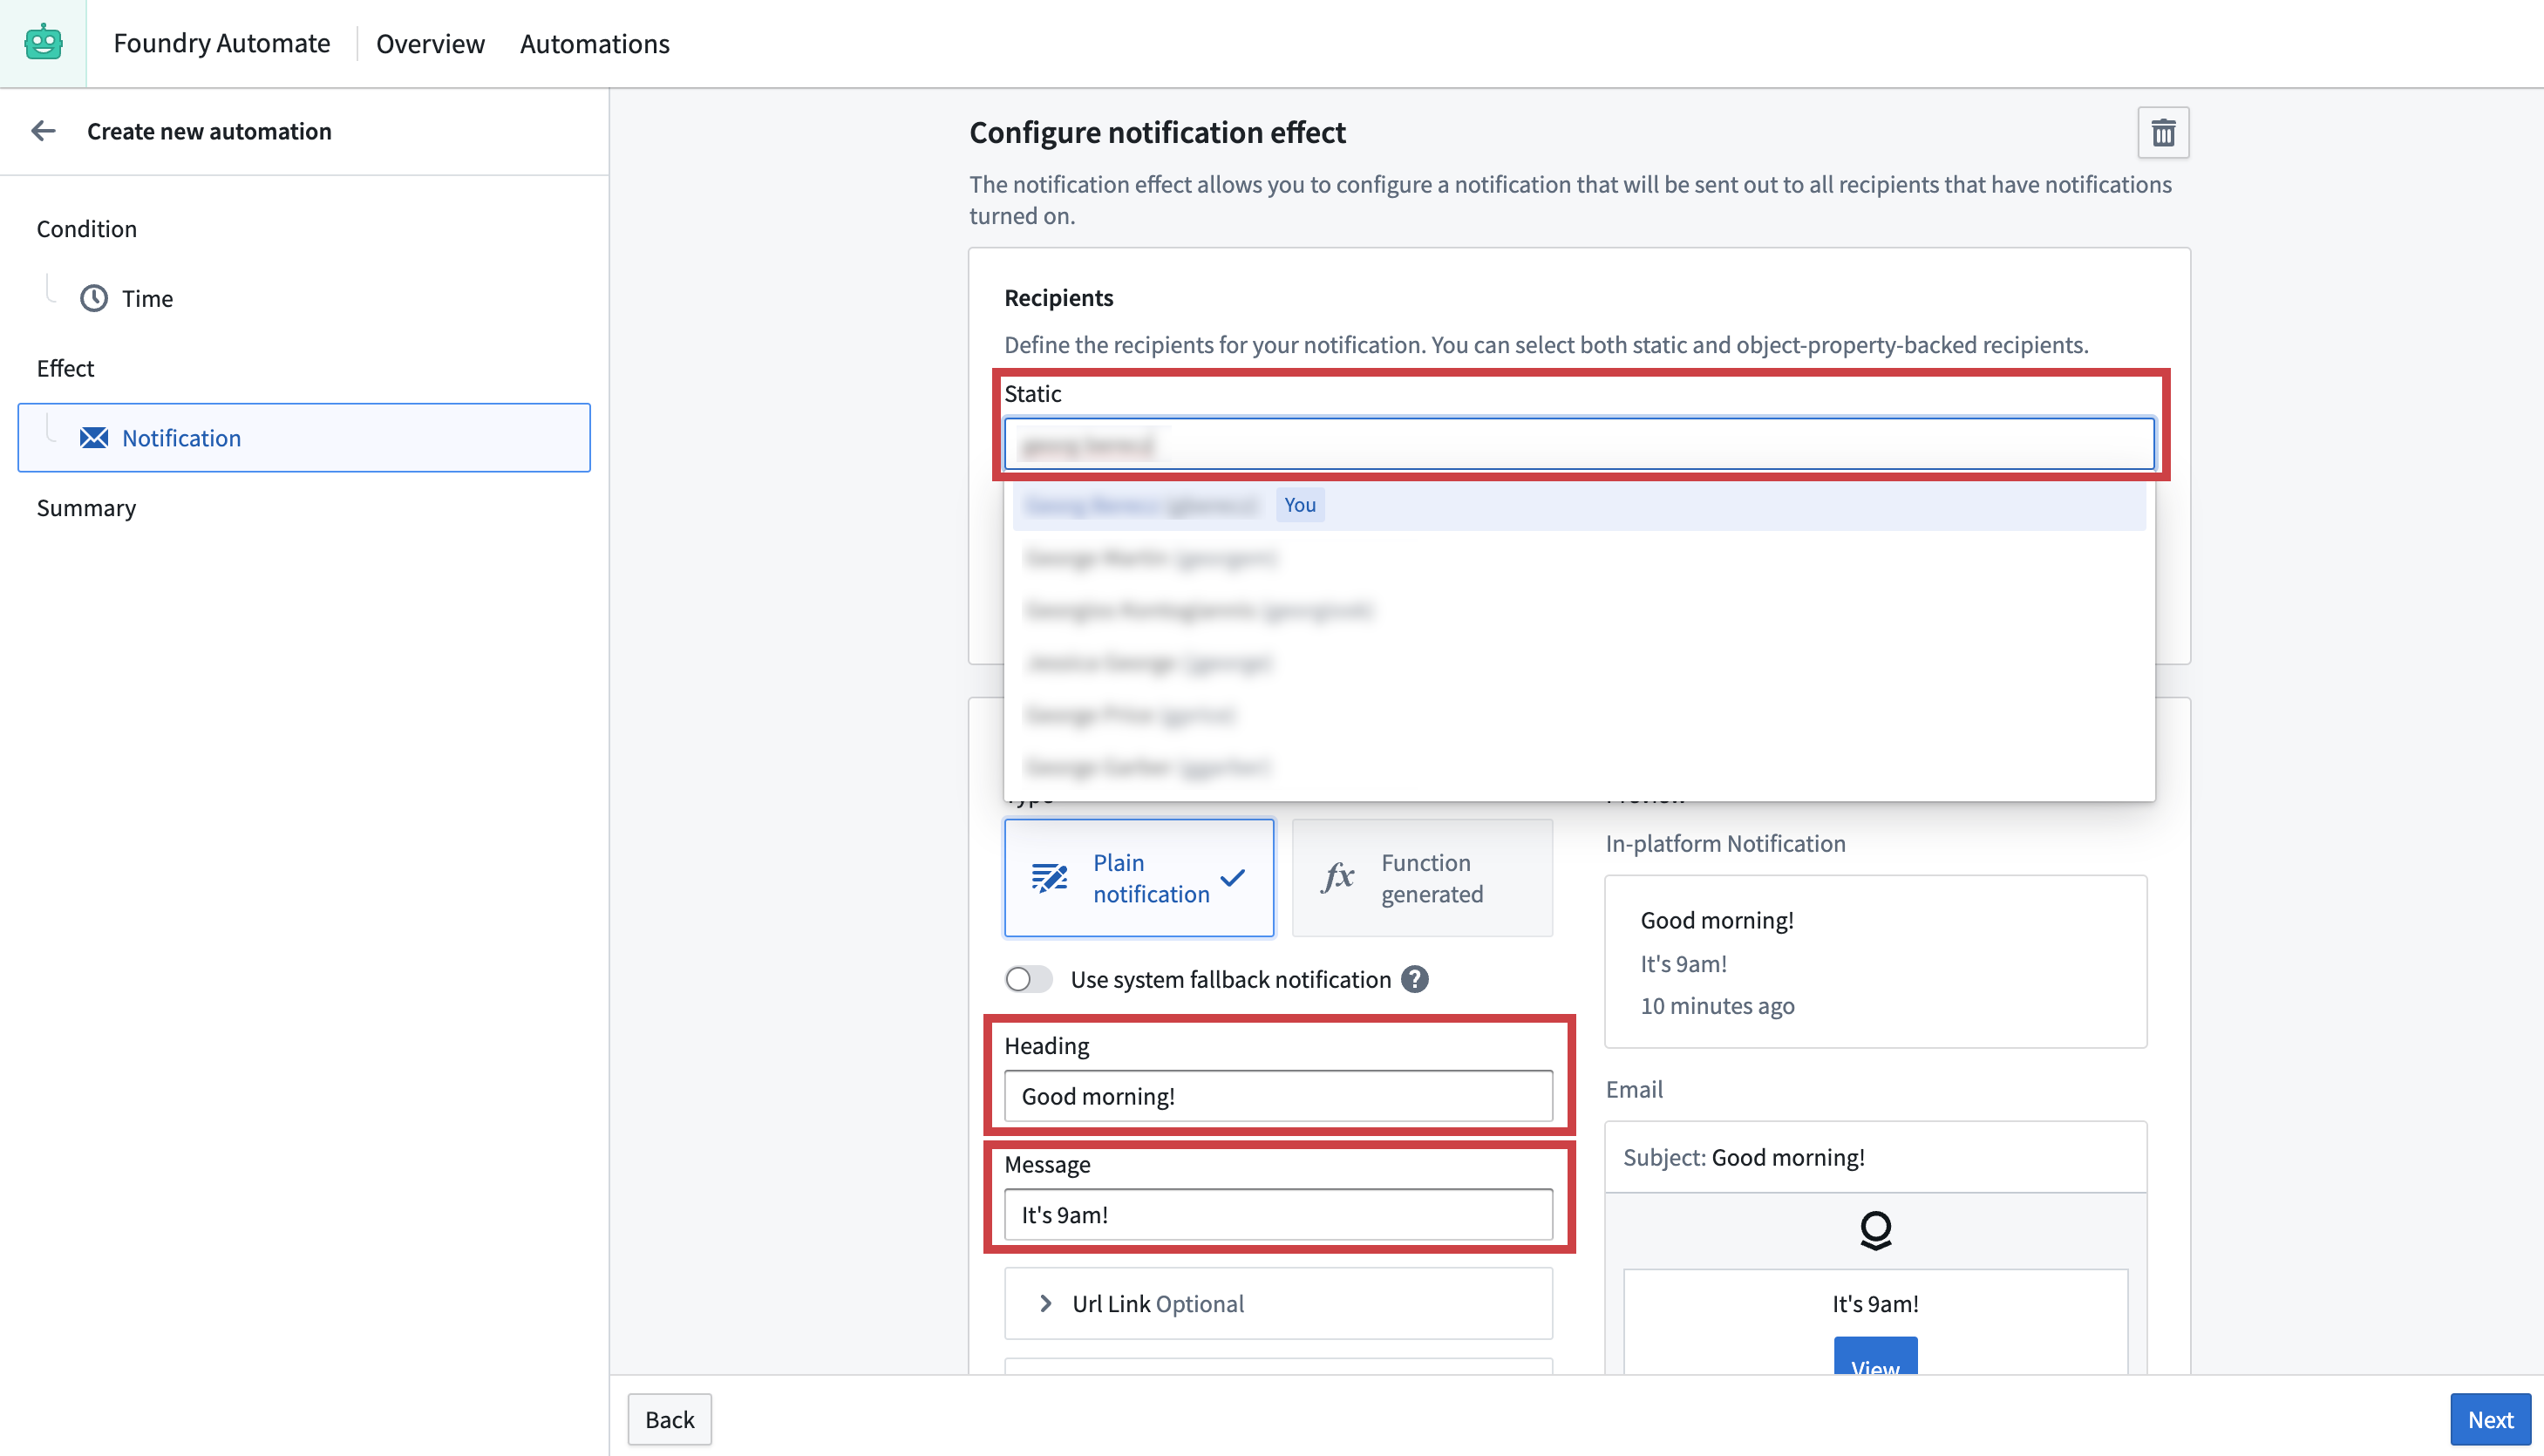
You can choose to add additional effects to your notification, but for this example you will continue to the automation Summary page by selecting Next again.
The Summary page shows a condensed view of the conditions and effects configured for your automation. Select Create automation to add a file name, save location, and expiration date (Indefinitely, Immediately, or Until a certain date), and permissions for the automation.
Upon successful creation, you will be redirected to the detail screen of your newly created automation, where a success banner will be displayed.
Select the Automate icon in the top toolbar to return to the Automate overview page. The Recent activities section will populate with events once your automations trigger.

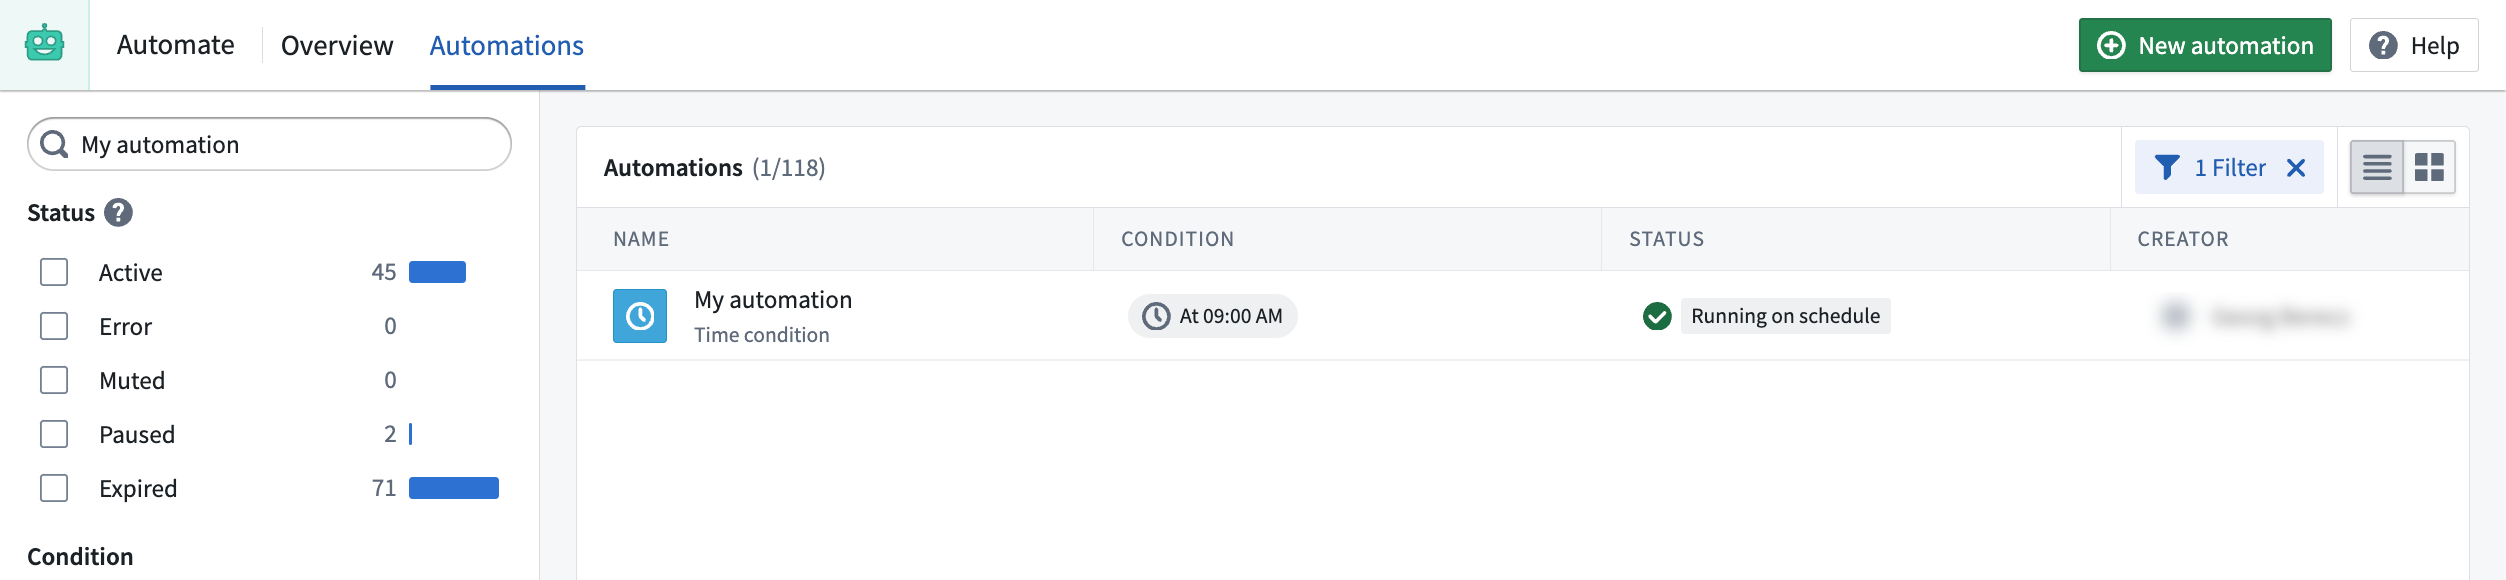
To inspect your newly created automation, navigate to the Automations tab to view the table of all automations visible with your current permissions. Use the filter pane on the left to search for specific automations, such as the one you just created.
For more information about configuration options, review the various conditions and effects documentation. Alternatively, explore the examples section for more complex Automate use cases.
中文翻译
开始使用自动化(Automate)
:::callout{theme="neutral"} 本教程假设您已将数据集成到Foundry本体论(Ontology)中。如果尚未完成此操作,请了解如何创建您的本体论(Ontology)。 :::
本教程将引导您使用自动化(Automate)应用程序创建第一个简单的自动化流程。
从自动化(Automate)应用程序创建
首先,从应用程序侧边栏打开自动化(Automate)应用程序。这将带您进入自动化(Automate)应用程序的概览(Overview)页面。
概览(Overview)页面显示您最近的自动化活动列表,包括您可查看的自动化总数、您拥有的自动化、您作为接收者的自动化以及已暂停的自动化。您还可以看到最近查看的自动化、过去四周内的失败记录以及最近触发的自动化列表。
要创建您的第一个自动化,请选择页面右上角的+ 新建自动化(New automation)。或者,您也可以:
- 将鼠标悬停在Foundry侧边栏中的自动化(Automate)应用程序图标上,然后选择+ 新建自动化(New automation);或
- 在Compass文件夹中选择+ 新建(New),然后选择自动化(Automation)。
您将进入自动化创建向导(如下所示),在此处您可以开始定义自动化条件。在本示例中,您将添加一个简单的时间(Time)条件。
现在,保持时间配置页面不变,然后选择下一步(Next)继续进入效果(Effect)页面,如下图所示。
在效果(Effect)页面中,您可以添加一个或多个效果,以便在满足时间条件时执行。选择通知(Notification)卡片上的添加(Add),进入通知(Notification)效果配置页面。
通知效果(notification effect)提供多种配置选项。现在,在接收者(Recipients)文本输入框中将您自己添加为静态接收者。为您的通知定义标题和消息,然后选择预览(Preview)查看消息在接收者眼中的显示效果。选择下一步(Next)返回效果(Effect)页面。
您可以选择为通知添加其他效果,但在本示例中,您将再次选择下一步(Next)继续进入自动化摘要(Summary)页面。
摘要(Summary)页面以简洁视图显示为自动化配置的条件和效果。选择创建自动化(Create automation)以添加文件名、保存位置、过期日期(无限期(Indefinitely)、立即(Immediately)或截止至(Until)某个日期)以及自动化的权限(permissions for the automation)。
创建成功后,您将被重定向到新创建自动化的详细信息页面,并显示成功横幅。
选择顶部工具栏中的自动化(Automate)图标,返回自动化(Automate)概览页面。当您的自动化触发后,最近活动(Recent activities)部分将填充相关事件。
要检查您新创建的自动化,请导航至自动化(Automations)选项卡,查看当前权限下所有可见自动化的表格。使用左侧的筛选窗格搜索特定的自动化,例如您刚刚创建的自动化。
有关配置选项的更多信息,请查阅各种条件和效果的文档。或者,探索示例部分(examples section),了解更复杂的自动化(Automate)使用案例。