Deploy workflow(部署工作流)
You can deploy a new Foundry Rules workflow from within the Rules application. From the application, generate the required objects and Actions for your workflow.
-
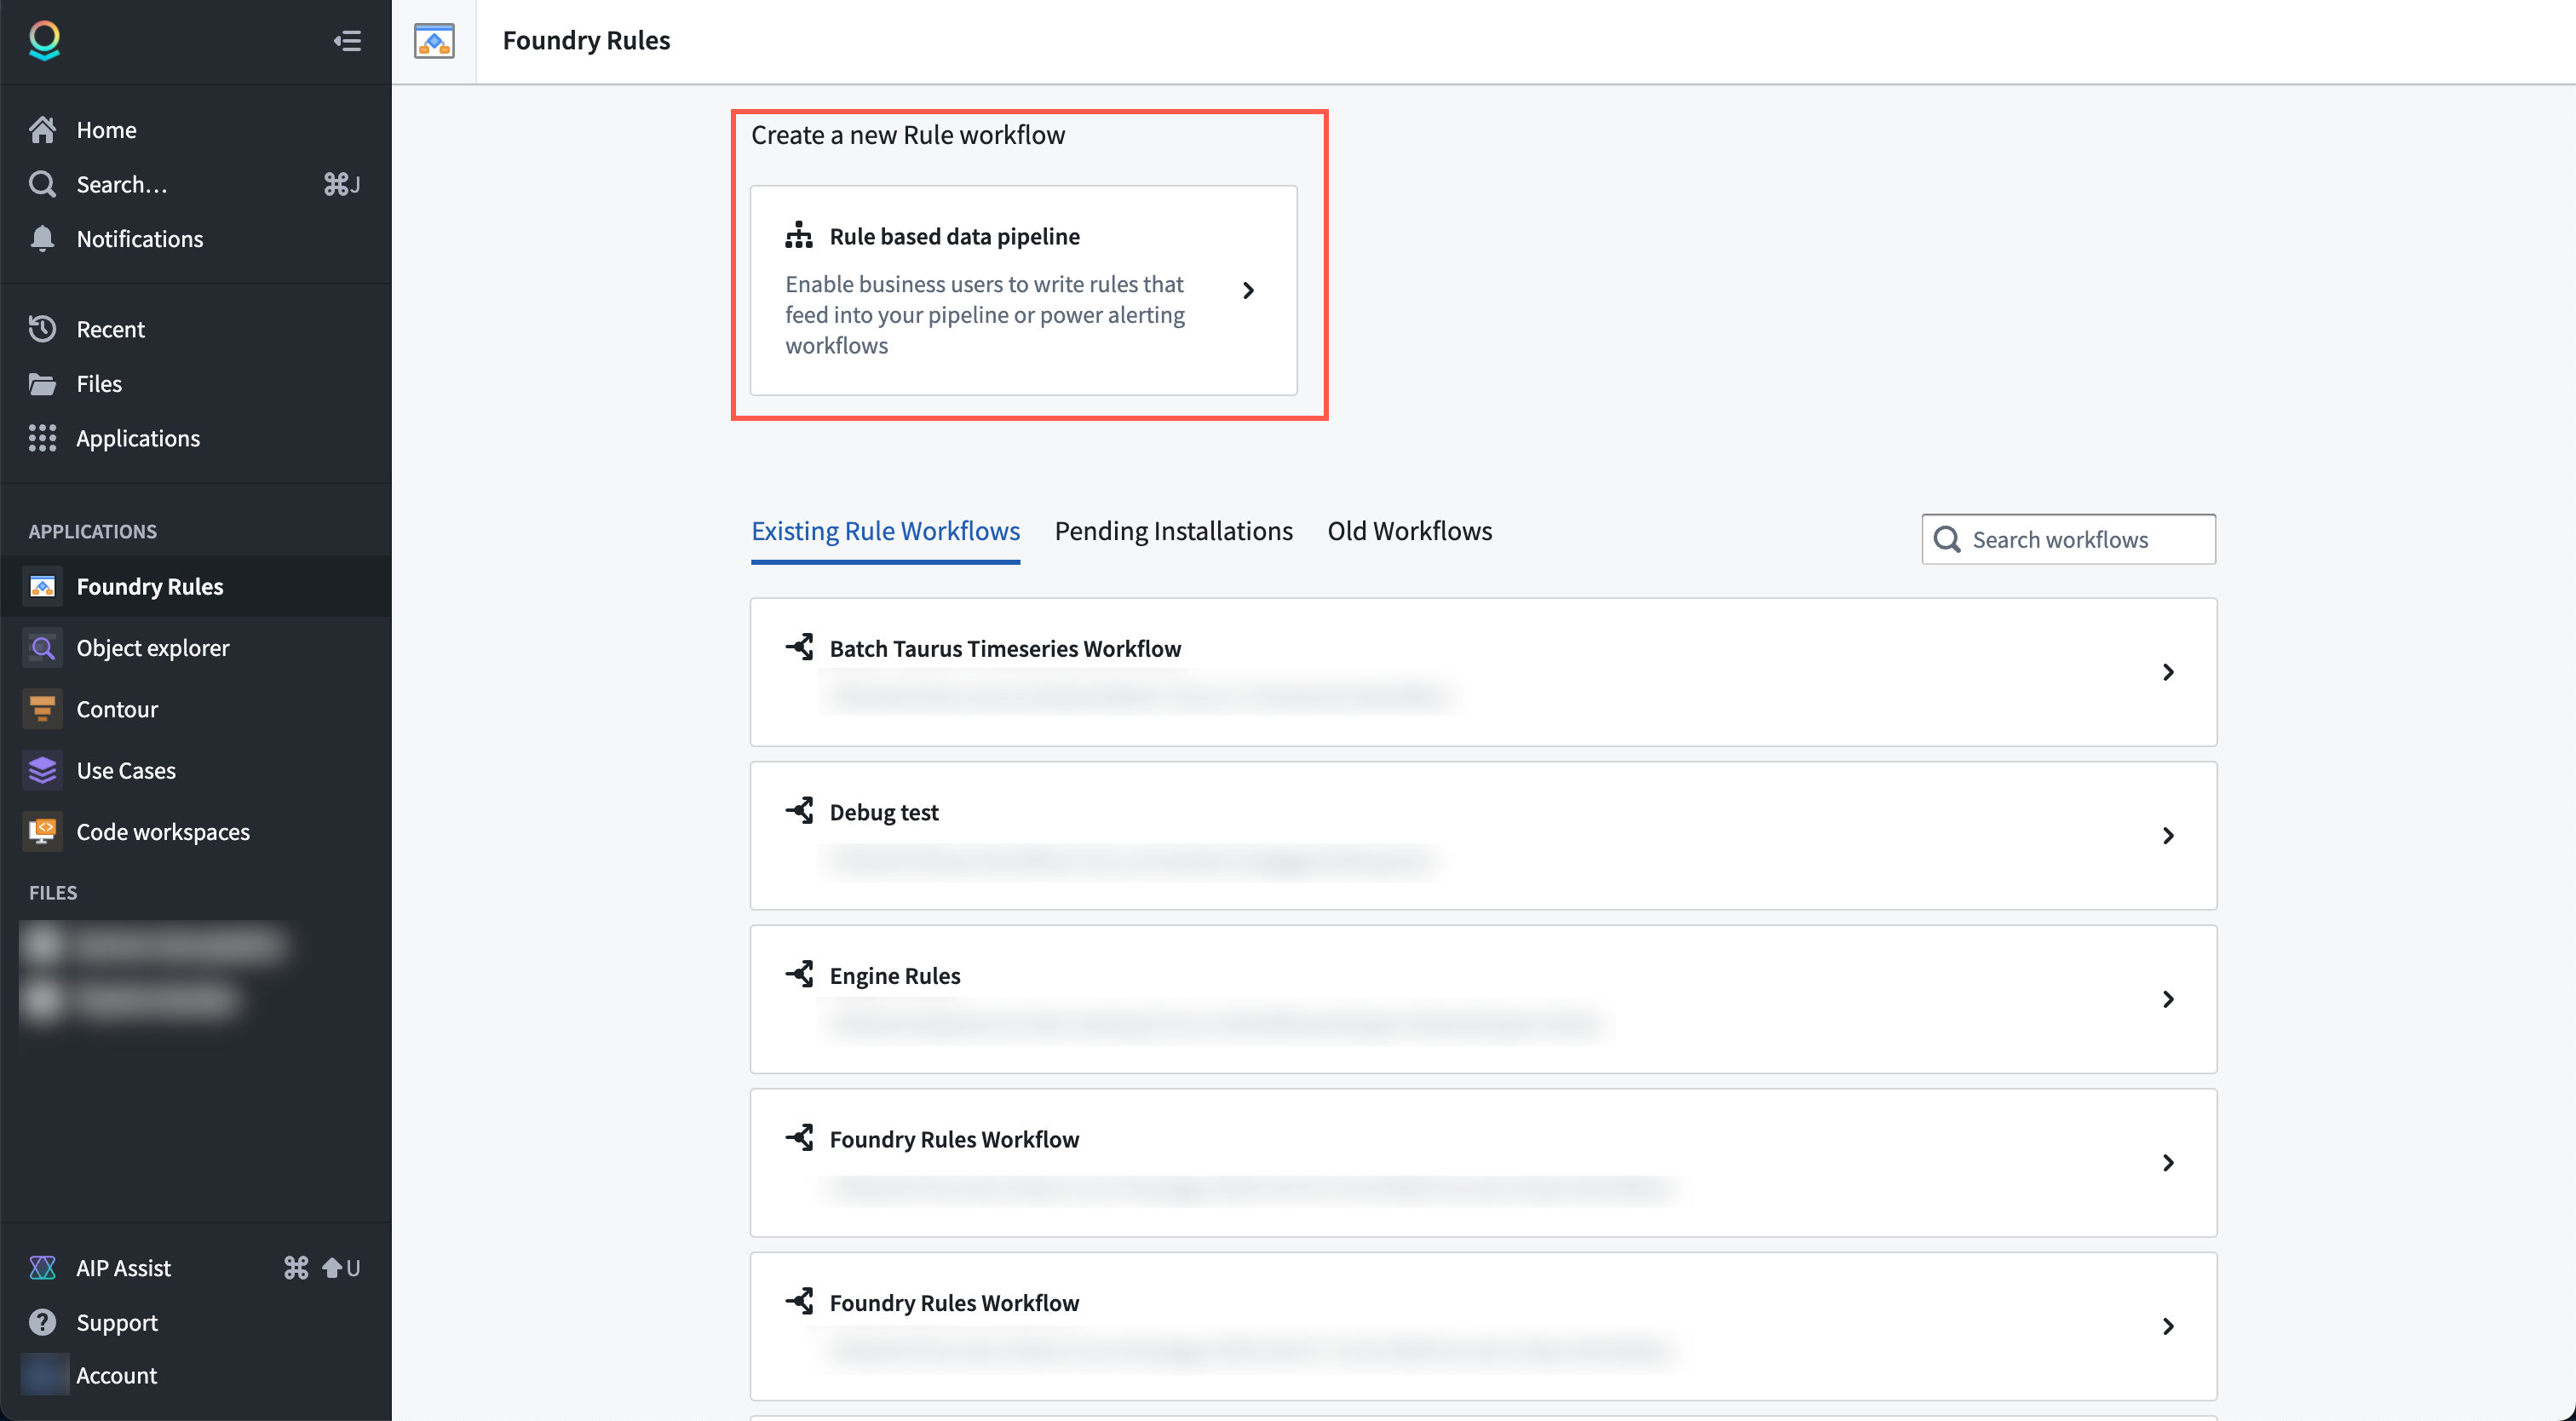
Deploy a new Rules workflow: Find and select the Foundry Rules application in the sidebar, then select Rule-based data pipeline.
-
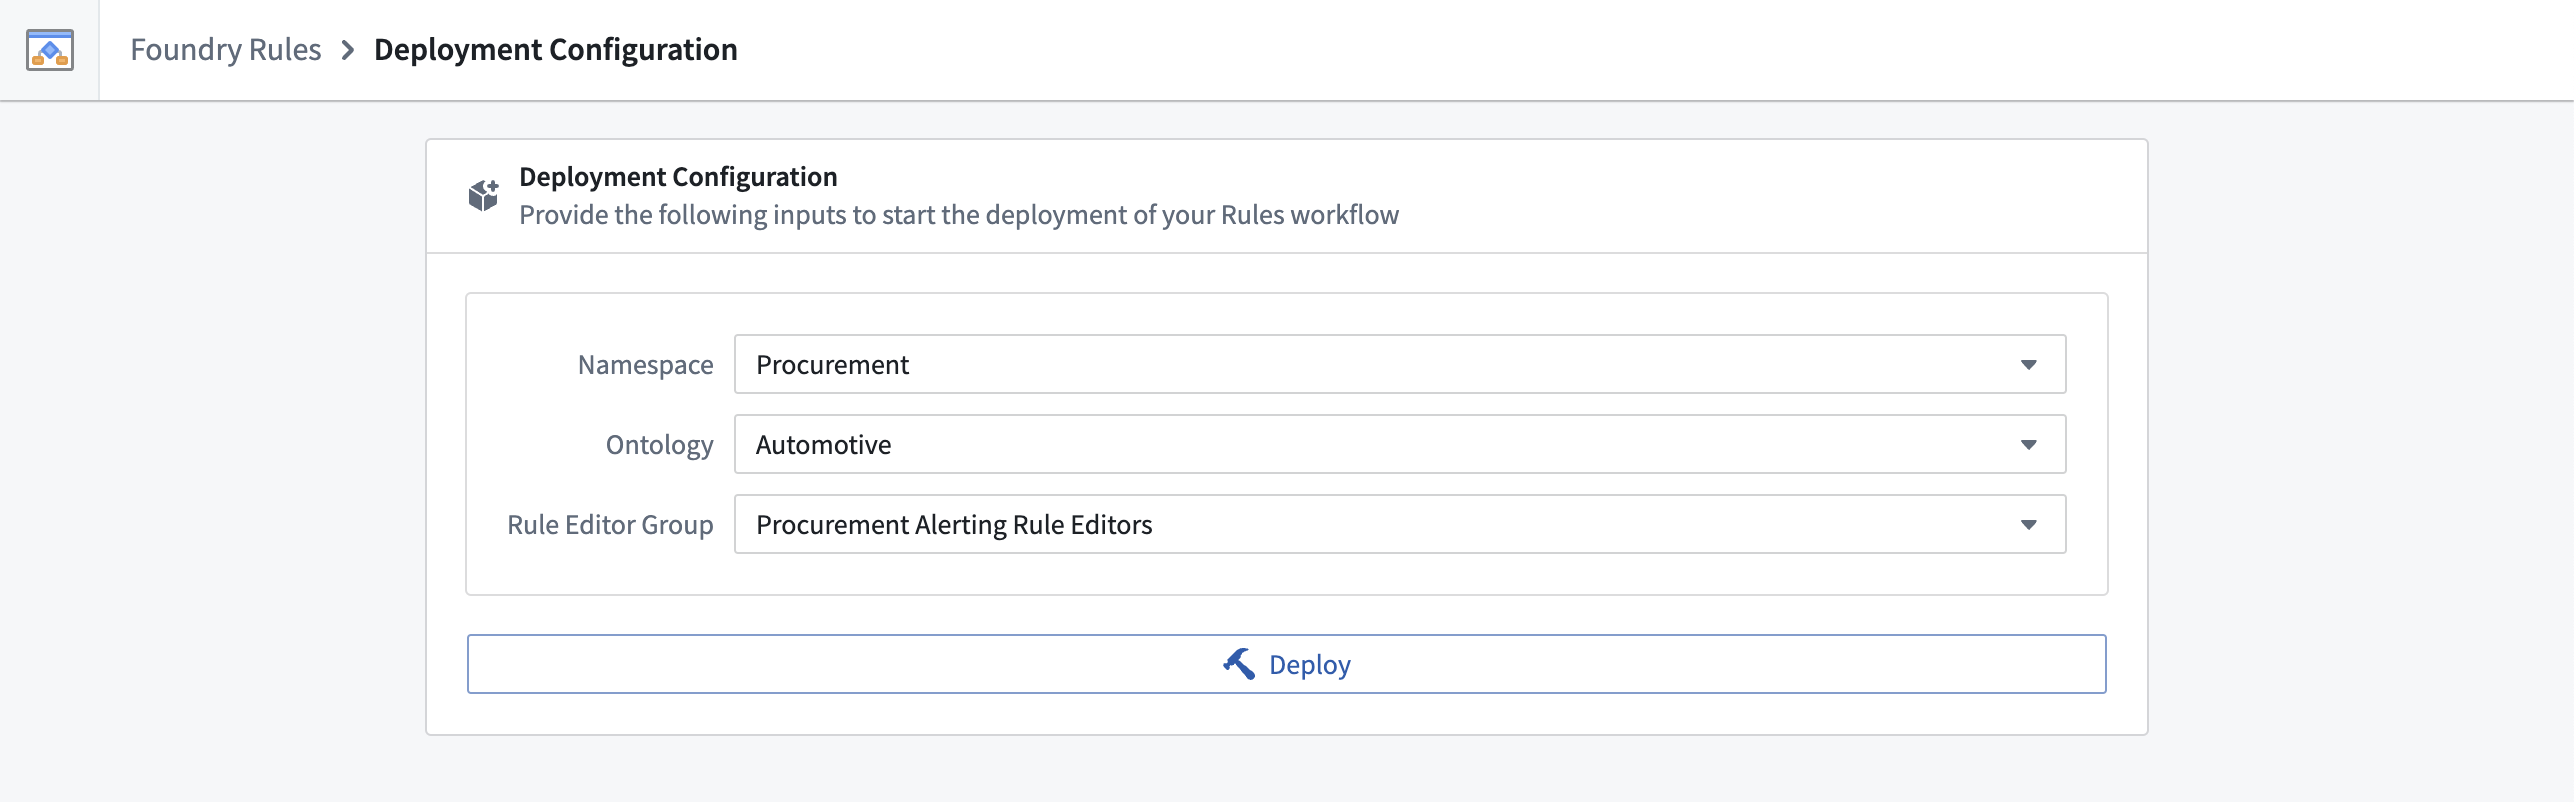
Provide configuration: The application will create a new project for you that includes the relevant backing datasets, Foundry Rules workflow, and Workshop application resource.
-
Choose the relevant space.
- Choose the relevant Ontology. If you have multiple Ontologies, select the Ontology that contains all the object types on which you would like to define your rules.
-
The Rule editor group is used for the submission criteria of the actions. Users in this group are able to create proposals to add, edit, delete rules, and also, to decide on proposals. This configuration is meant as a starting point as you can configure the submission criteria on the rule actions later. To change the submission criteria on the action types, review the FAQ.
-
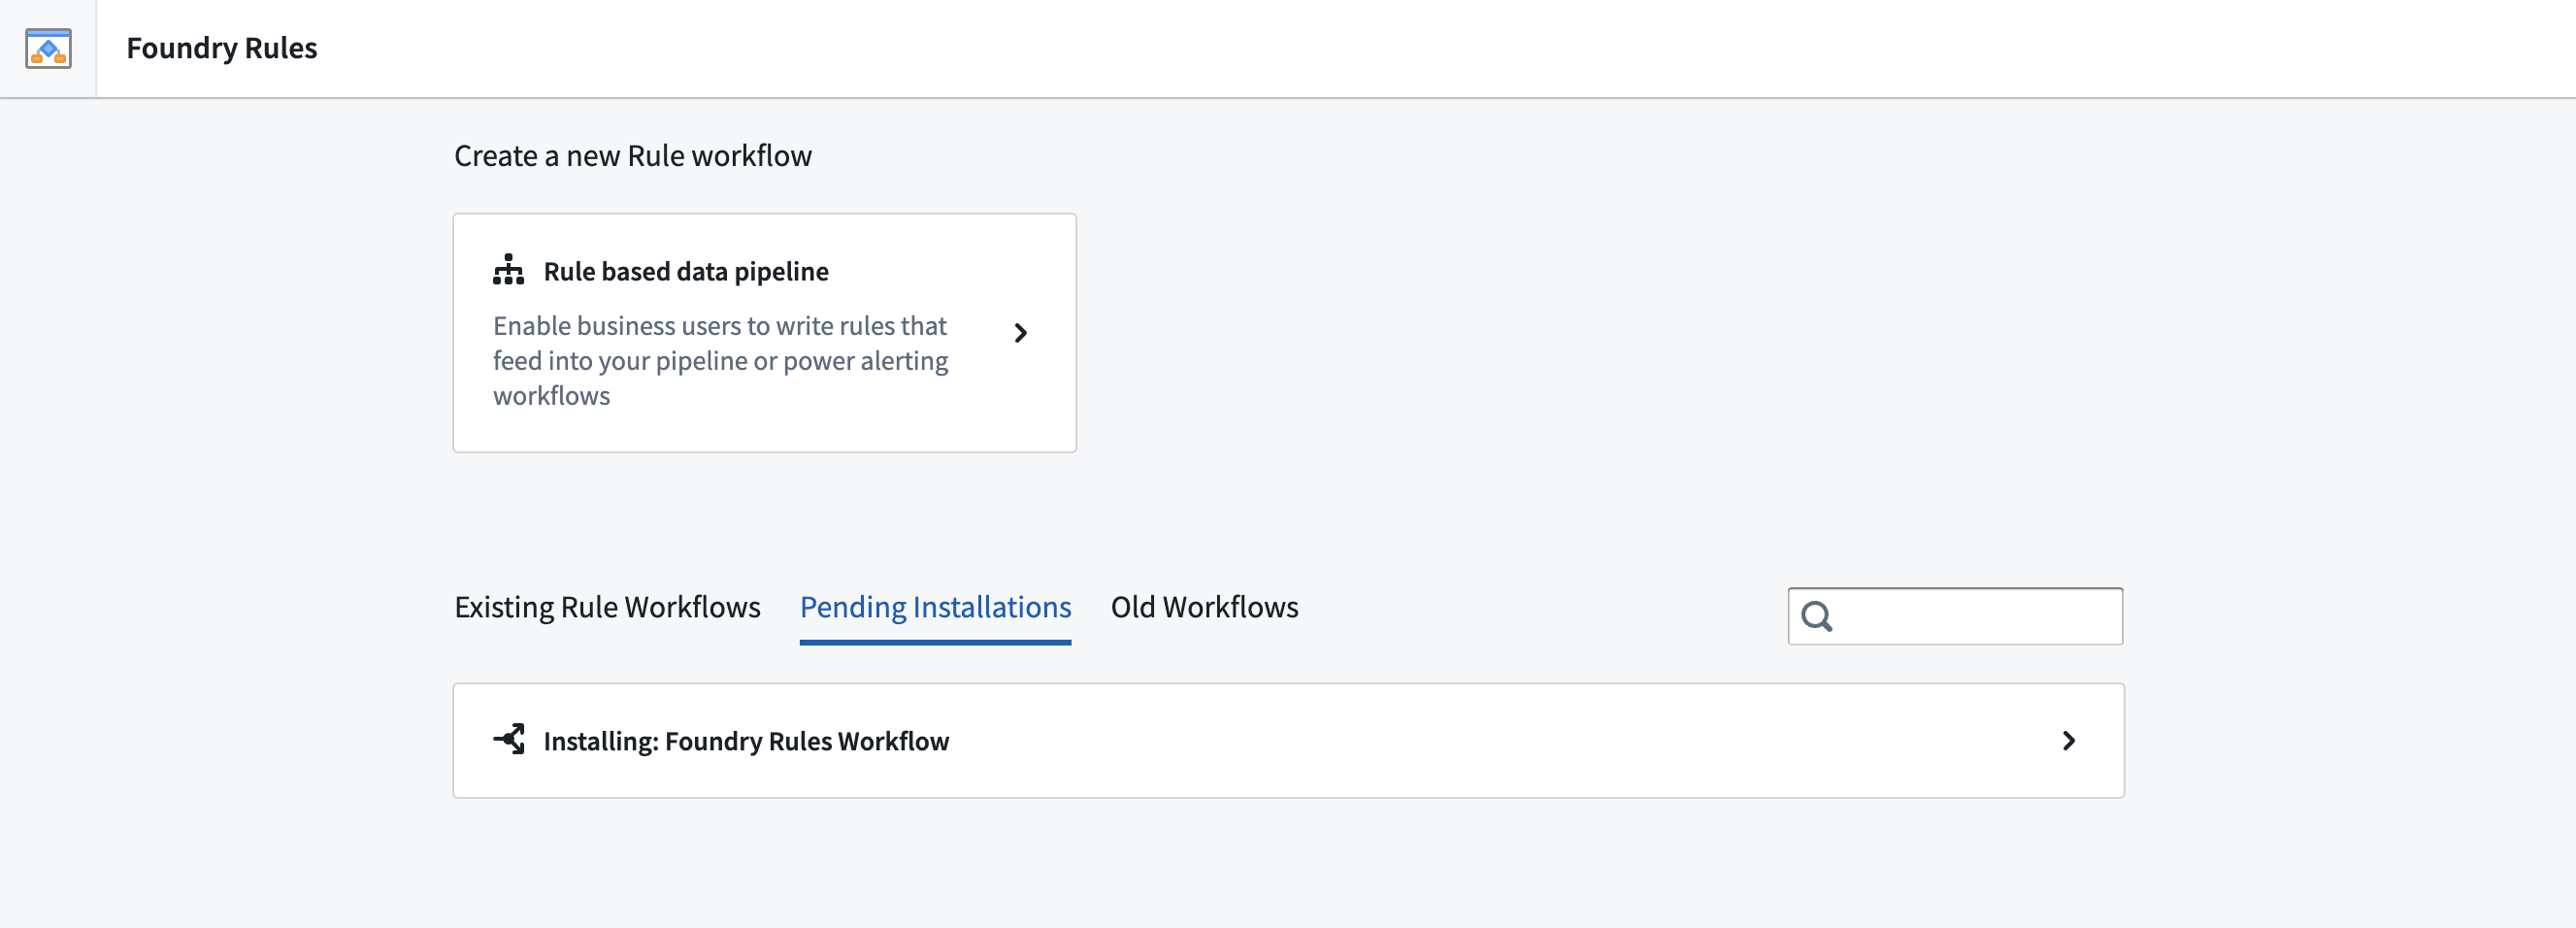
Deploy: Once the fields have been completed, select Deploy. The deploy process takes about two to three minutes in the background during which you can safely navigate away. Pending and completed installations can be found on the main page under Pending installations or Existing Rule Workflows. All workflows have the default name "Foundry Rules Workflow" and a timestamp in the list of existing workflows. You may rename the workflow by renaming the corresponding resource in your project folder.
After completing the above steps, learn how to configure the workflow.
FAQ
How do I change the submission criteria on the action types?
To update your submission criteria on the action types, navigate to the Workshop application, select Edit. Then, review the Rule Editor configuration panel on the right as shown below.

Then, hover your cursor over the "i" icon inline with the Create add proposal action's "Create a proposal to add a rule" dropdown option.
From the new pop up, select View Action Configuration.
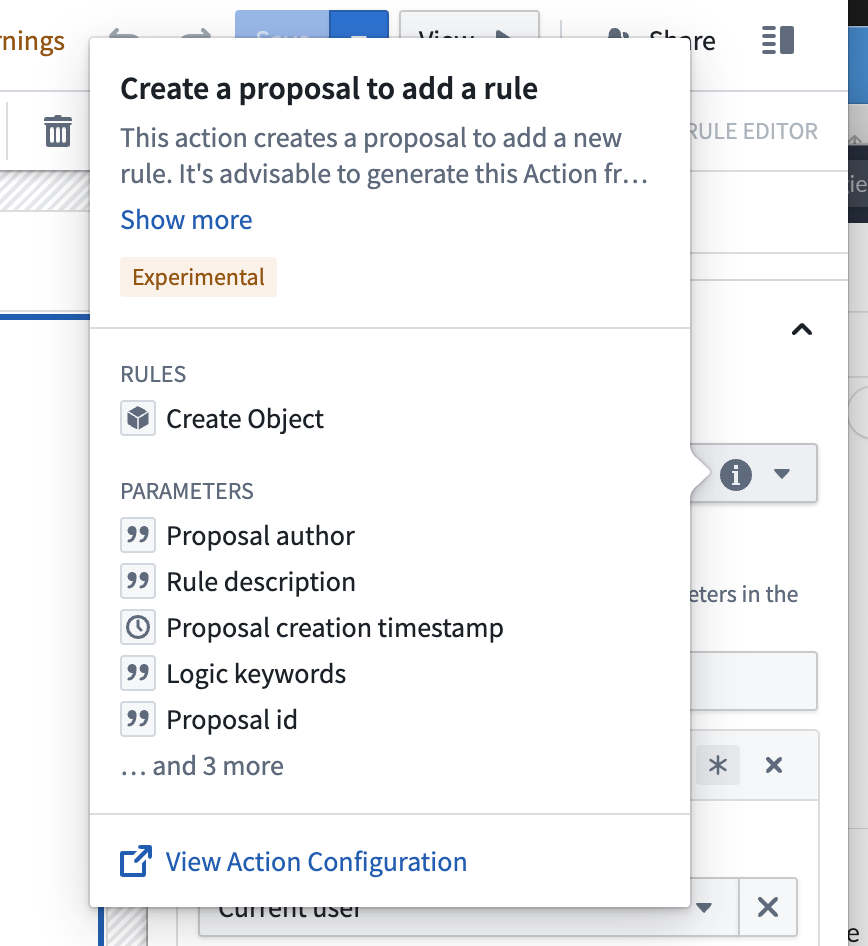
From here, you will be able to change the submission criteria.
中文翻译
部署工作流
您可以直接在 Rules 应用程序中部署新的 Foundry Rules 工作流。通过该应用程序,为工作流生成所需的对象和操作(Actions)。
-
部署新的 Rules 工作流: 在侧边栏中找到并选择 Foundry Rules 应用程序,然后选择 基于规则的数据管道(Rule-based data pipeline)。
-
提供配置: 应用程序将为您创建一个新项目,其中包含相关的支持数据集(backing datasets)、Foundry Rules 工作流以及 Workshop 应用程序资源。
-
选择相关的空间(space)。
- 选择相关的本体(Ontology)。如果您有多个本体,请选择包含您希望定义规则的所有对象类型(object types)的本体。
-
规则编辑器组(Rule editor group)用于操作的提交标准(submission criteria)。该组中的用户能够创建提案以添加、编辑、删除规则,并有权决定提案。此配置仅作为起点,您之后可以在规则操作上配置提交标准。要更改操作类型的提交标准,请参阅常见问题解答。
-
部署: 完成字段填写后,选择 部署(Deploy)。部署过程在后台大约需要两到三分钟,期间您可以安全地离开当前页面。待处理和已完成的安装可在主页的 待处理安装(Pending installations) 或 现有规则工作流(Existing Rule Workflows) 下找到。所有工作流在现有工作流列表中均以默认名称 "Foundry Rules Workflow" 及时间戳显示。您可以通过重命名项目文件夹中的相应资源来重命名工作流。
完成上述步骤后,了解如何配置工作流。
常见问题解答
如何更改操作类型的提交标准?
要更新操作类型的提交标准,请导航至 Workshop 应用程序,选择 编辑(Edit)。然后,查看右侧的规则编辑器配置面板(Rule Editor configuration panel),如下所示。
接着,将光标悬停在 创建添加提案操作(Create add proposal action) 的 "创建添加规则提案" 下拉选项旁边的 "i" 图标上。
在弹出的新窗口中,选择 查看操作配置(View Action Configuration)。
在此处,您将能够更改提交标准。