Getting started(入门指南)
This guide demonstrates how to access AIP Logic, introduces the AIP Logic interface, and describes how to set up a basic Logic function by composing LLM blocks and examining the LLM’s chain of thought (CoT) in the Debugger.
Access AIP Logic
AIP Logic can be accessed from the platform’s workspace navigation bar or by using the quick search shortcuts CMD + J (macOS) or CTRL + J (Windows). Alternatively, you can create a new Logic function from your Files by selecting +New and then selecting AIP Logic, as shown below.

After opening AIP Logic, you can create a new Logic file. Note that Logic files must be saved in a project folder, not in your home folder.
Application interface
There are three main components of AIP Logic’s interface, numbered left-to-right in the notional screenshot below:
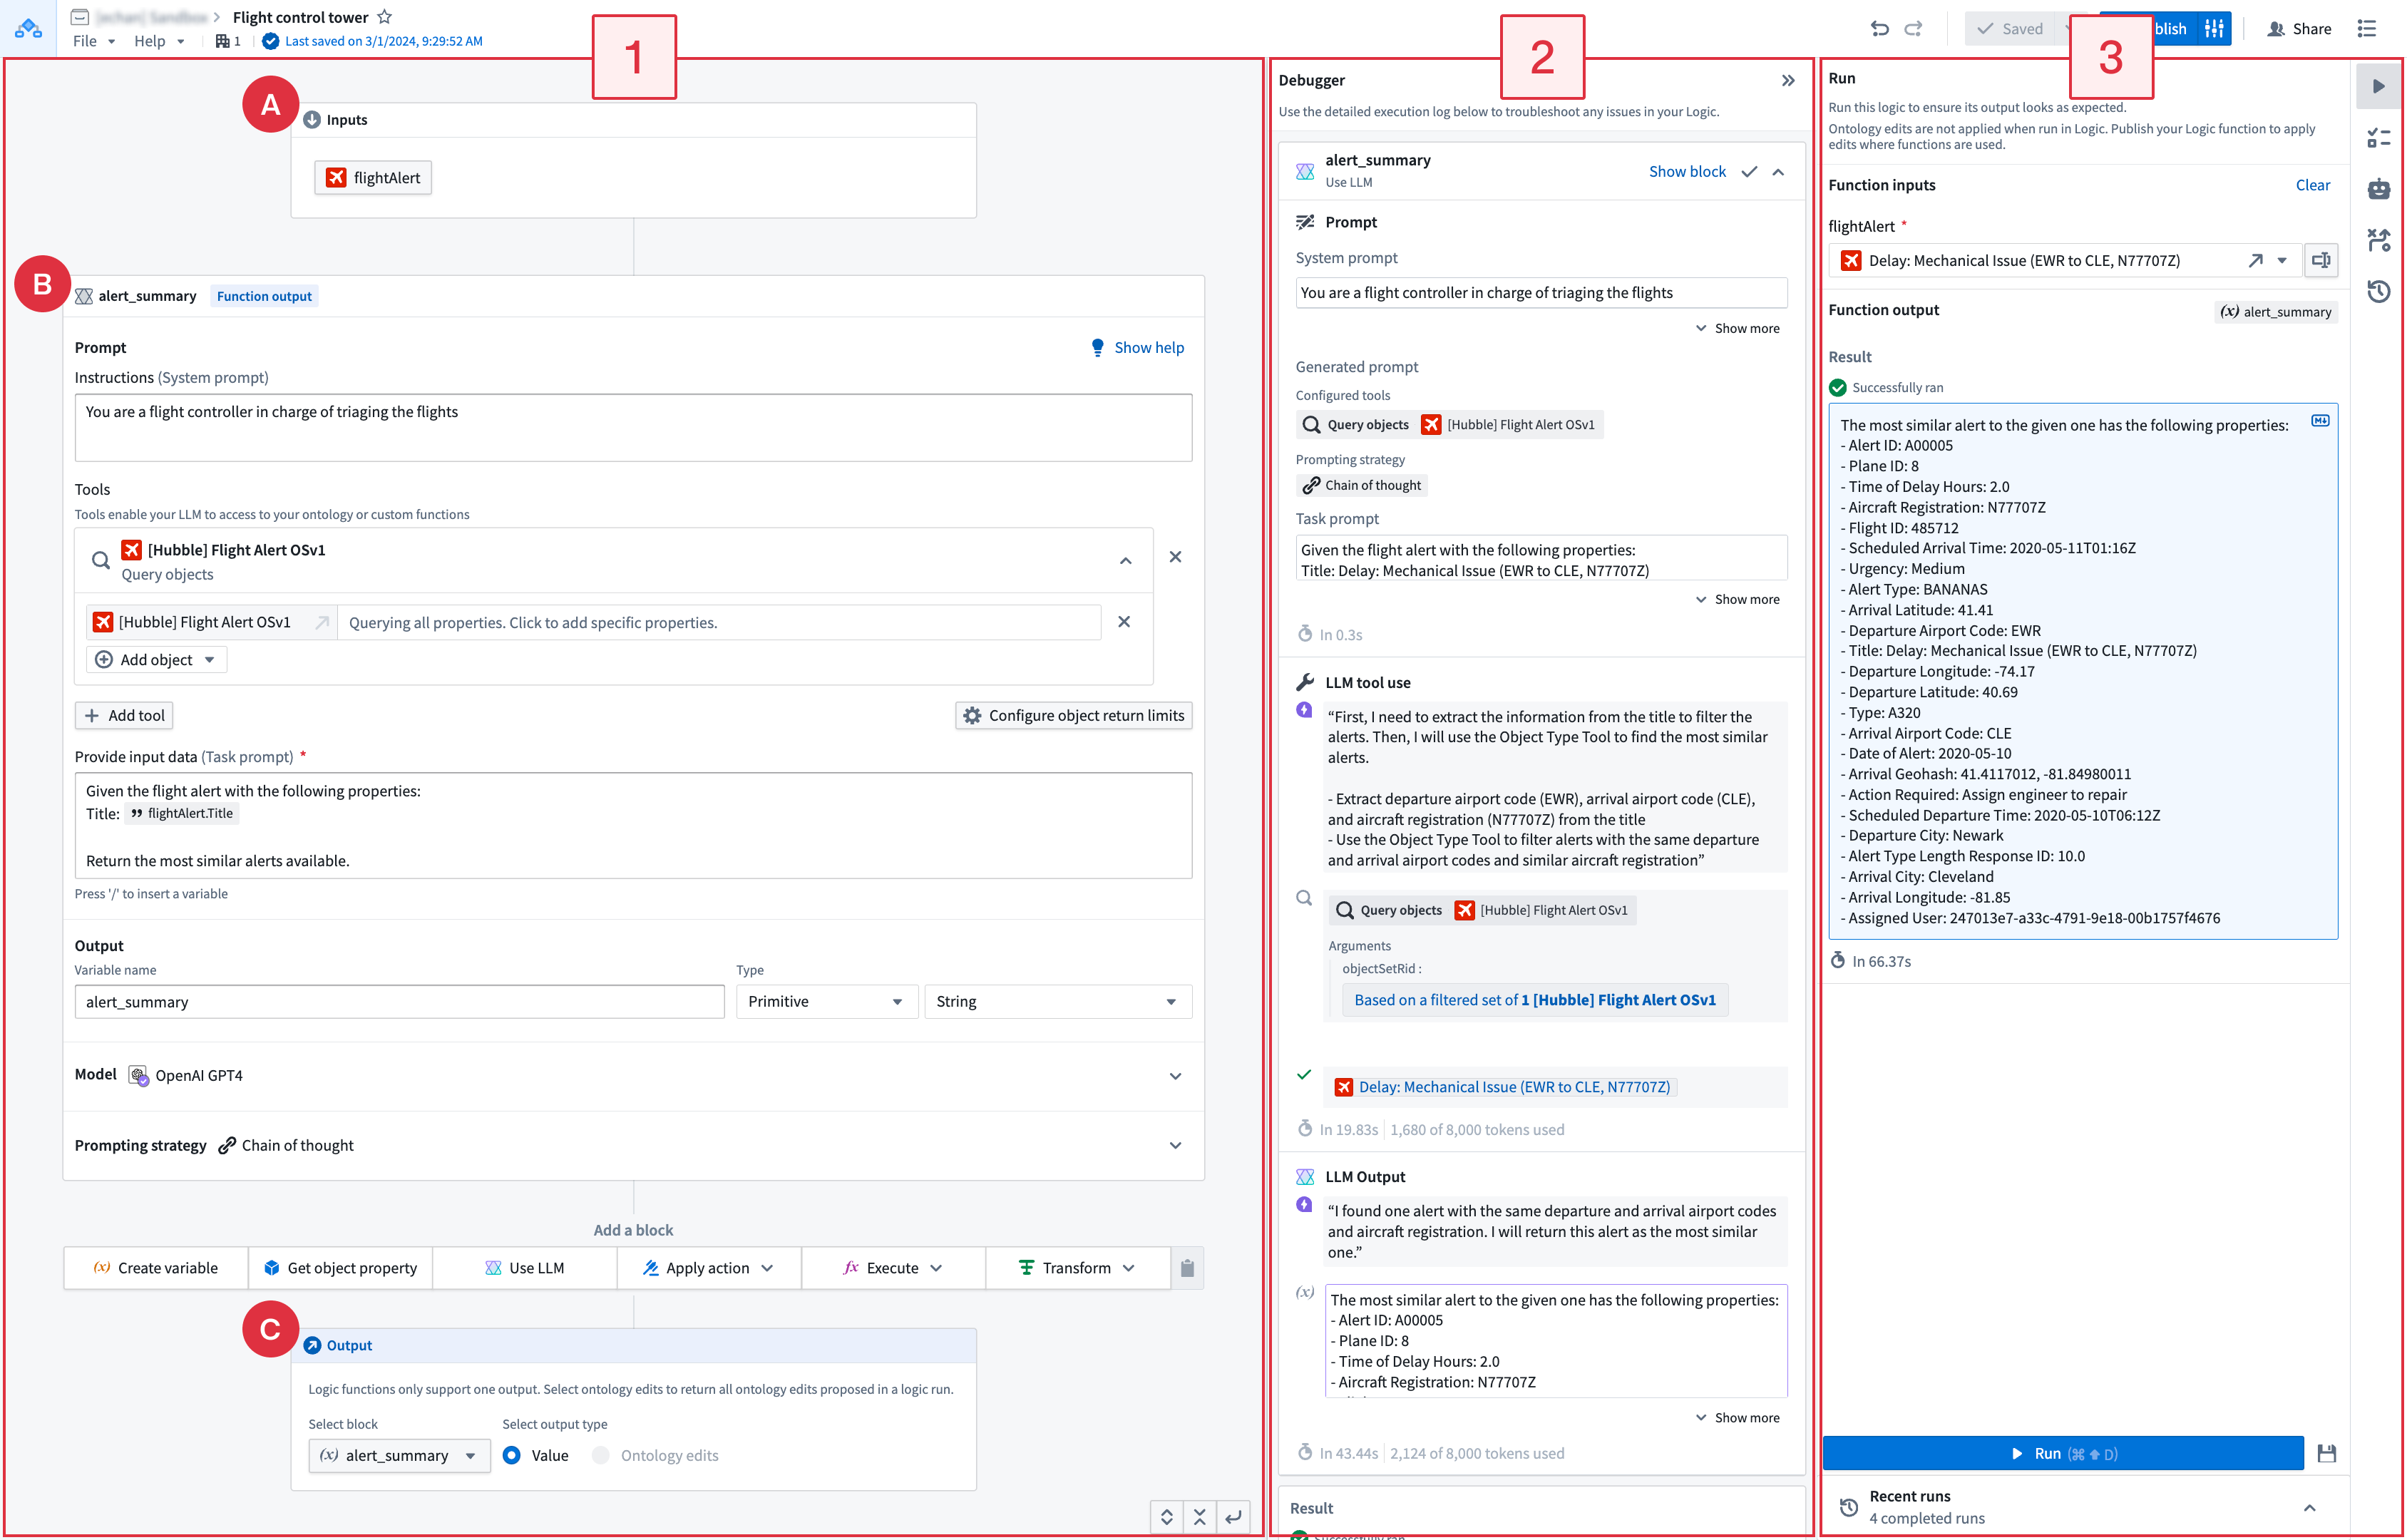
Workflow overview
In a typical AIP Logic workflow, you might begin by configuring the input (A), blocks (B), and outputs (C) on the left panel (1), then using the Run panel (3) to generate a sample output. After running your Logic, you will be able to see the LLM’s chain-of-thought (CoT) prompting in the Debugger (2) and the steps the LLM took to produce the output. You can also visualize your final output in the Debugger in combination with the Run panel. The Run panel enables you to see the most recent Logic runs and create unit tests. On the right-hand sidebar, you can find more functionality, such as integration of Logic with the Automate application.
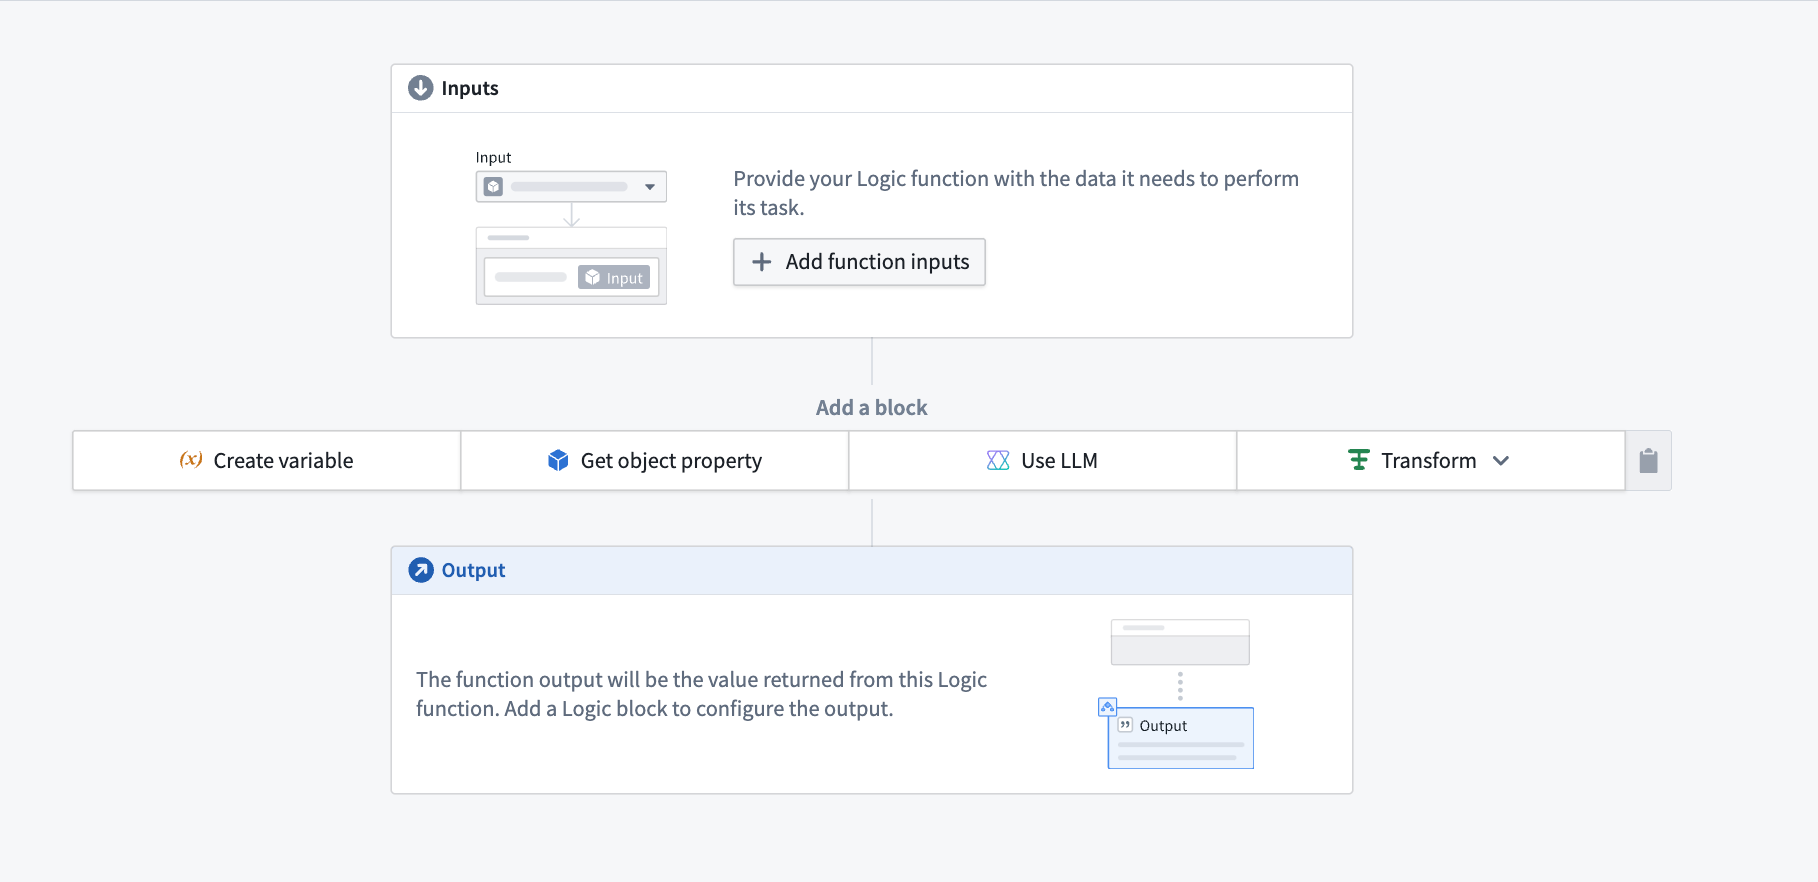
Inputs, blocks, and outputs configuration
When you first begin using AIP, you will see the Run panel on the right and three types of boards on the left: inputs, for optionally choosing an object and its properties, blocks for defining your Logic instructions, and outputs that represent the desired Logic function results. The output from one block can be fed into subsequent blocks.
The screenshot below shows the configuration area for inputs, blocks, and outputs with the Run panel collapsed.
Inputs
AIP Logic takes a variety of inputs. In the Inputs block (labeled as "A" in the application interface guide), you can specify the input name and type. Supported inputs include array, boolean, date, double, float, integer, long, media reference, model, object, object list, object set, short, string, struct, and timestamp.
Blocks
An AIP Logic function is composed of blocks (labeled as "B" in the application interface guide). There are many different types of blocks, some examples are: create variable, apply action, execute function, and use LLM. The output of a block can be used in subsequent blocks. The common blocks mentioned above are further detailed in blocks.
Outputs
You can define an intermediary output for every Logic block. The last block in your Logic path is the output of Logic function, labeled as "C" in the application interface guide.
-
Block output: Intermediary outputs that are passed between blocks. The output of your block can either be a primitive or an object for use in subsequent blocks.
-
Logic function output: The output of the Logic function that you want to return. This can be either a Value (primitive or object) or all the Ontology edits that your function has made.
Debugger
Once you have composed your Logic function, you can test the Logic function by selecting Run on the right side of the view. When the Logic has been run, Debugger will open to display the LLM’s chain-of-thought (CoT).
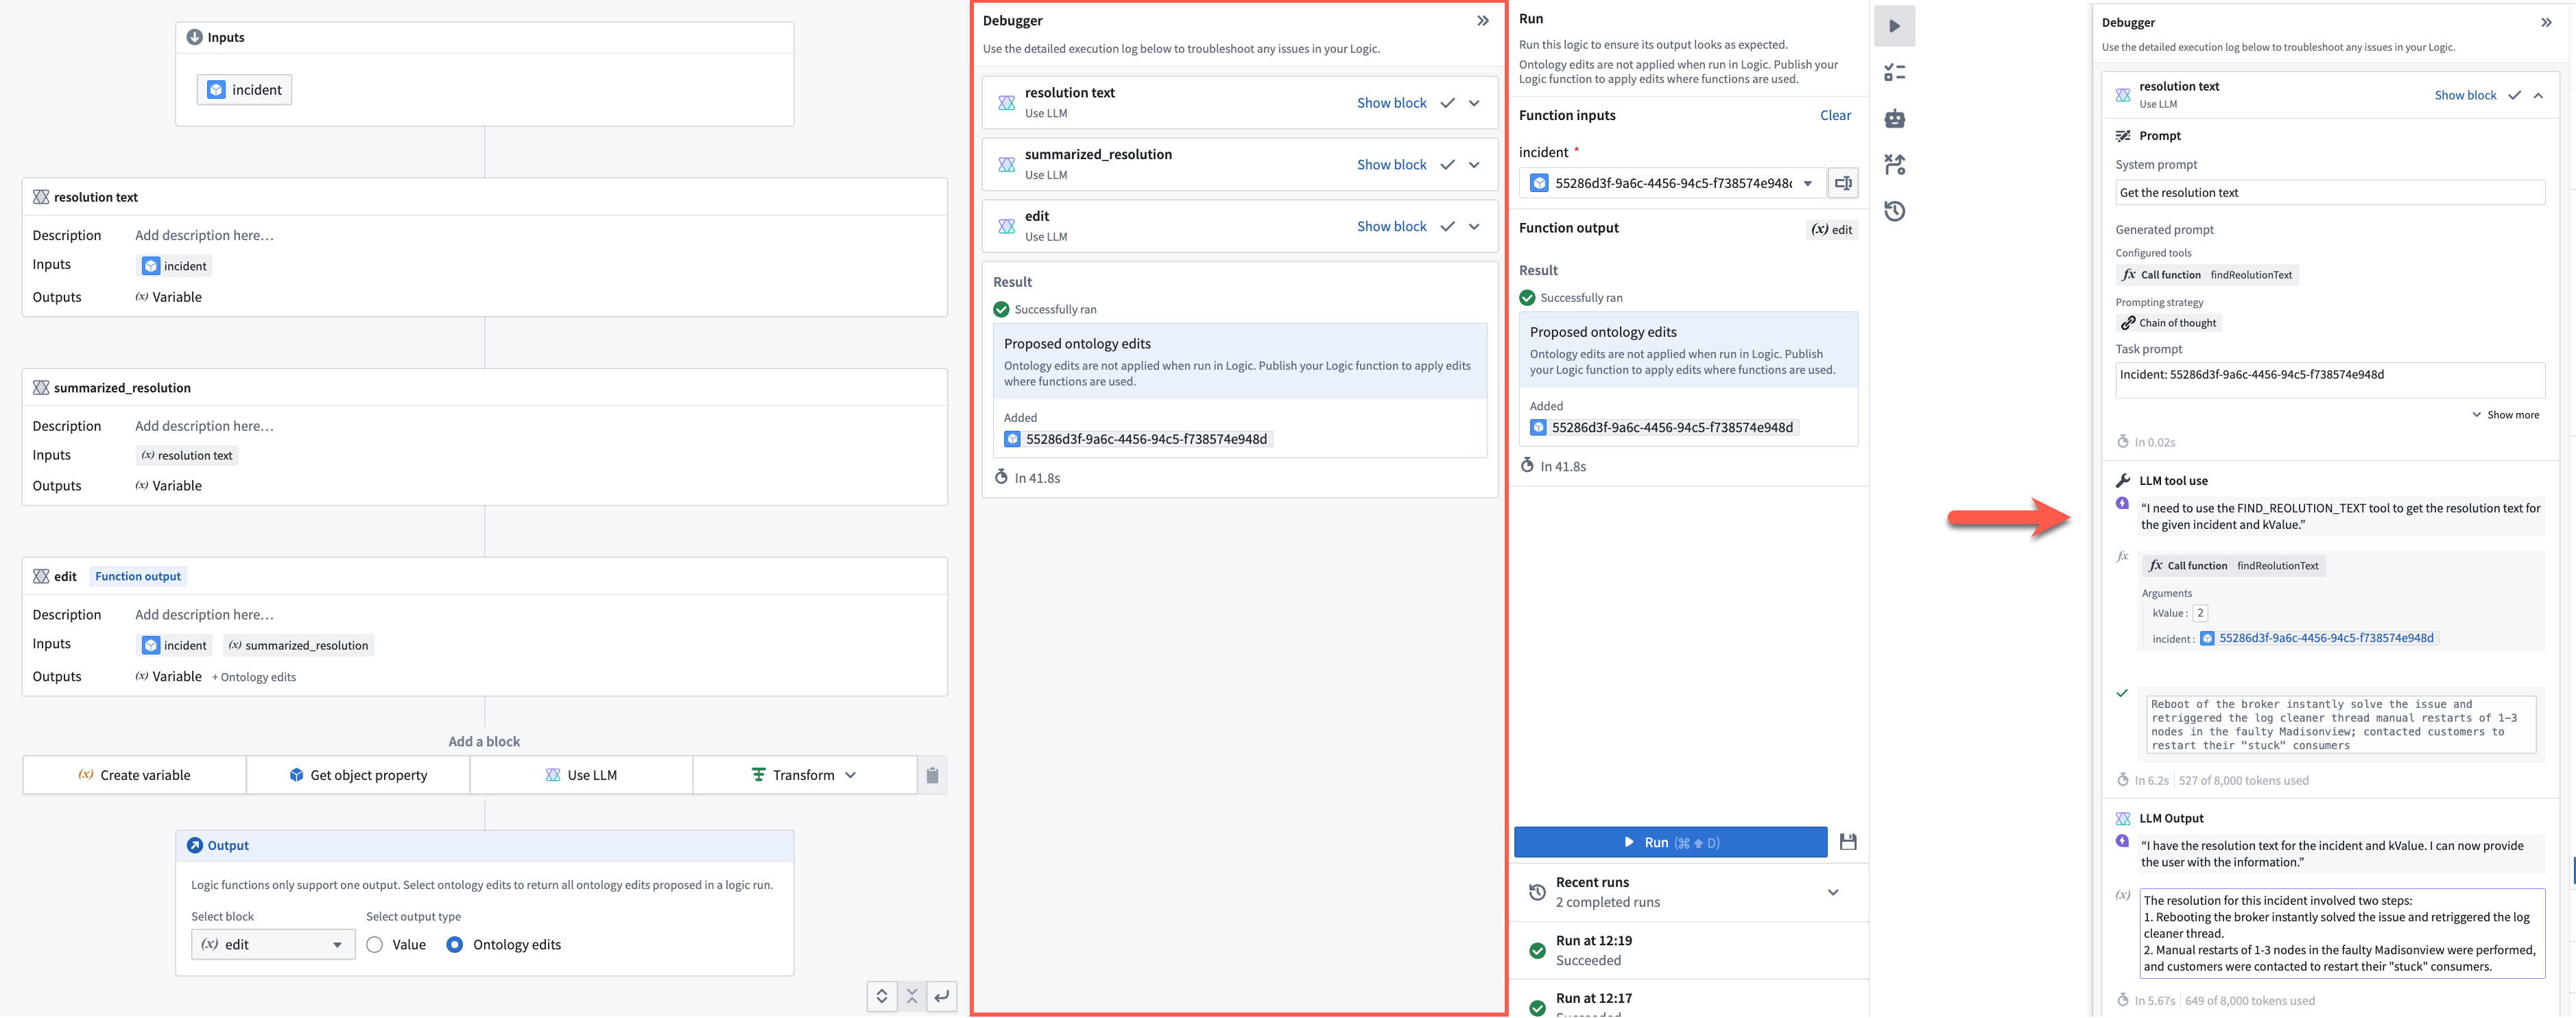
The debugger allows you to expand and collapse block cards, clear tool calls, and easily review generated prompts, making it easier to interpret the chain of thought.
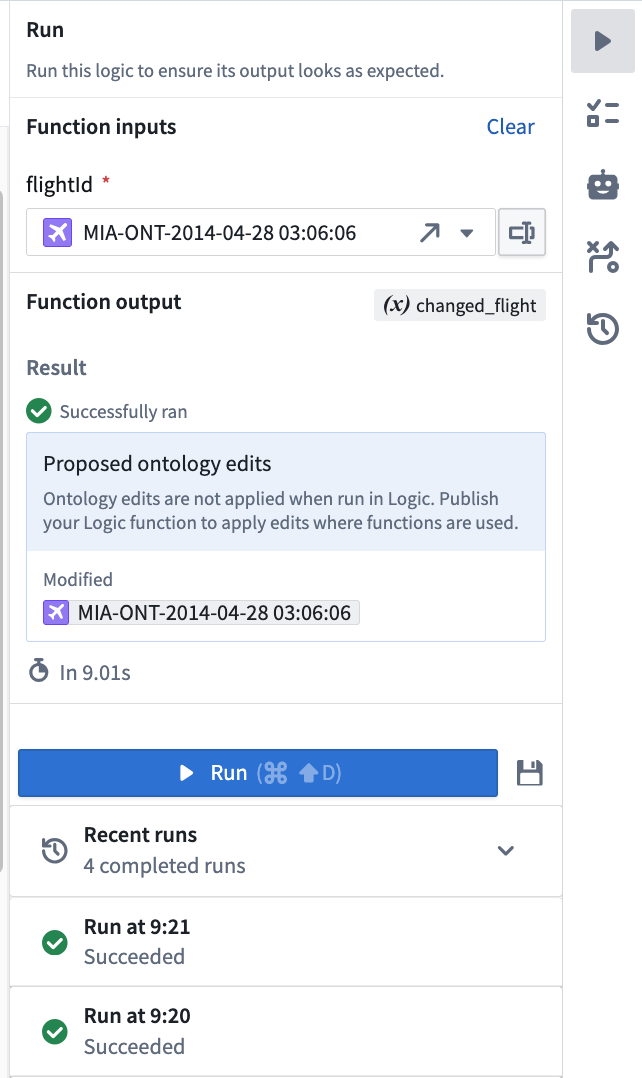
Run panel
From the Run panel, you can run and evaluate your Logic, as well as review recent runs. The right-hand sidebar lets you set unit tests, run automations, and view run history.

At the bottom of the Run panel, you can also select any of your recent runs to view their output and debug log.
Select the unit tests icon (![]() ) to save a version of your input for performance evaluation purposes.
) to save a version of your input for performance evaluation purposes.

Use a Logic function
Logic functions can be used the same way you would use a regular function on objects (FoO) in the platform.
- You can back an action with a Logic function, then call the action from Workshop.

- You can also call a Logic function to back a Markdown widget in Workshop; in this case, the output type from the Logic function must be a string.

- You can call a Logic function in other Logic functions, as well as in functions on objects, via the Ontology function tool in AIP Logic.
Running a Logic function via the command line
In the Uses tab you can copy a curl request to run the logic outside of Foundry in your terminal. Note this isn't available for Logics that return ontology edits.

Make Ontology edits using Logic functions
When running the function in Logic, you will see all the proposed Ontology edits in your scenario in the Debugger. These edits will not actually be executed. If you wish to apply your edits to the Ontology, either:
- Call your Logic function from an action; or,
- Call your Logic function from an automation. You can start creating a new automation from your Logic dashboard using the Automations
 option located on the right-hand side.
For a Logic function to be able to edit the Ontology, you must:
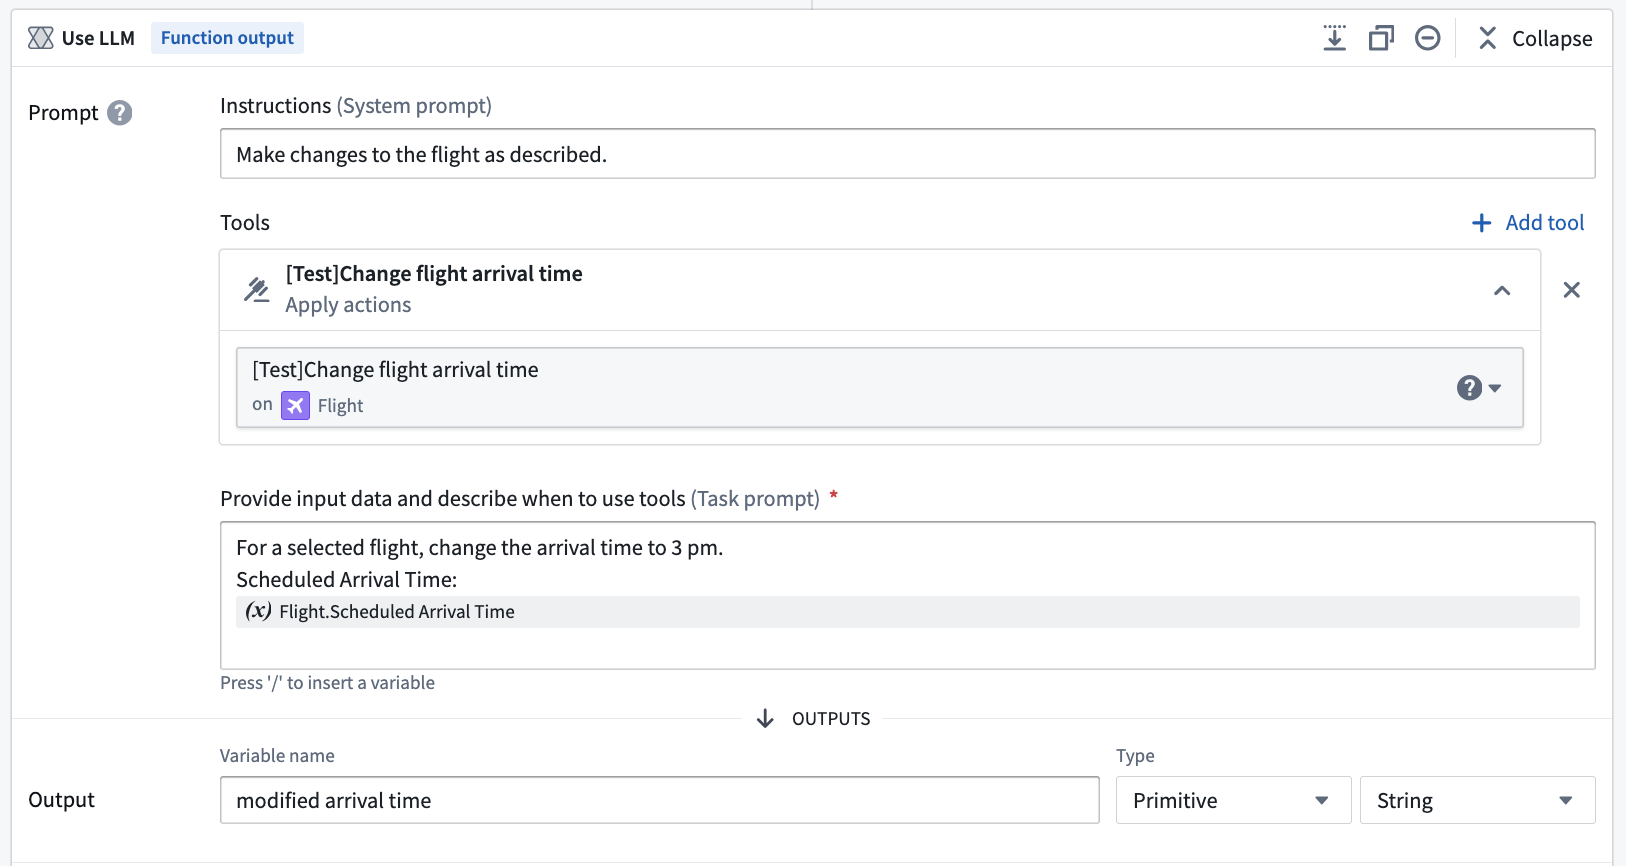
- Set up an Apply actions tool in a Use LLM block that the Logic function can call. This allows the LLM to edit the Ontology.
-
When you are done iterating on your Logic function, find and select the Publish option located next to save to publish the Logic function.
-
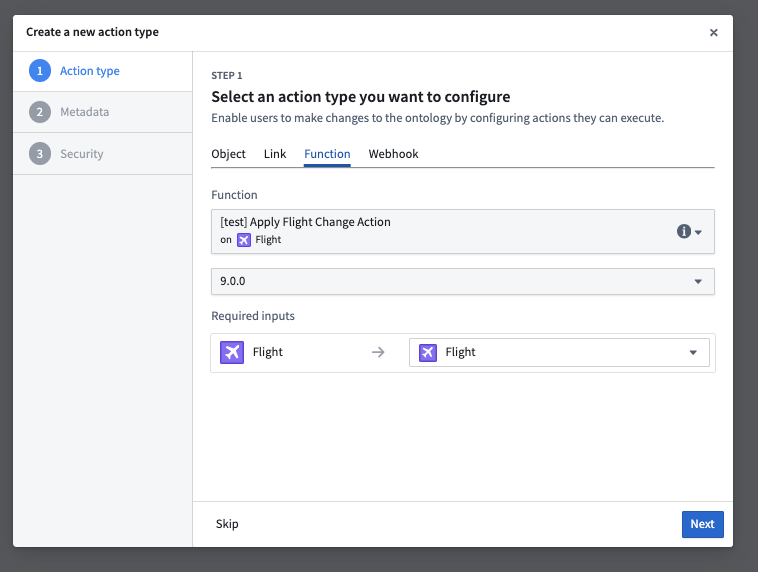
Next, create a new action backed by the Logic function you have just published.
- You can now use this new action in a Workshop module to power an operational workflow.

Comparison view
In the version history tab you can compare two versions of a logic to see what changed between them. Specifically what blocks were edited, added, or removed.

Next steps
If you have access to AIP Logic, we recommend that you begin experimenting with LLM blocks to interact with your Ontology and build out a use case of your own. You may find it helpful to review the documentation on Functions in the platform.
中文翻译
入门指南
本指南演示如何访问 AIP Logic,介绍 AIP Logic 界面,并描述如何通过组合 LLM 模块并在调试器中查看 LLM 的思维链 (CoT) 来设置基本 Logic 函数。
访问 AIP Logic
可通过平台工作区导航栏或使用快速搜索快捷键 CMD + J(macOS)或 CTRL + J(Windows)访问 AIP Logic。或者,您也可以从 Files 中选择 +New,然后选择 AIP Logic 来创建新的 Logic 函数,如下图所示。
打开 AIP Logic 后,您可以创建新的 Logic 文件。请注意,Logic 文件必须保存在项目文件夹中,而非个人主文件夹。
应用界面
AIP Logic 界面包含三个主要组件,在下文示意图中从左至右编号:
工作流概述
在典型的 AIP Logic 工作流中,您可能首先在左侧面板 (1) 配置输入 (A)、模块 (B) 和输出 (C),然后使用运行面板 (3) 生成示例输出。运行 Logic 后,您可以在调试器 (2) 中查看 LLM 的思维链 (CoT) 提示以及 LLM 生成输出所采取的步骤。您还可以结合运行面板在调试器中可视化最终输出。运行面板使您能够查看最近的 Logic 运行记录并创建单元测试。在右侧边栏中,您可以找到更多功能,例如 Logic 与 Automate 应用的集成。
输入、模块和输出配置
首次使用 AIP 时,您将看到右侧的运行面板和左侧三种类型的板块:输入(用于选择对象及其属性)、模块(用于定义 Logic 指令)和输出(代表所需的 Logic 函数结果)。一个模块的输出可以馈送到后续模块中。
下图显示了输入、模块和输出的配置区域,其中运行面板已折叠。
输入
AIP Logic 接受多种输入。在输入模块(在应用界面指南中标记为"A")中,您可以指定输入名称和类型。支持的输入类型包括:数组 (array)、布尔值 (boolean)、日期 (date)、双精度浮点数 (double)、浮点数 (float)、整数 (integer)、长整数 (long)、媒体引用 (media reference)、模型 (model)、对象 (object)、对象列表 (object list)、对象集 (object set)、短整数 (short)、字符串 (string)、结构体 (struct) 和时间戳 (timestamp)。
模块
AIP Logic 函数由模块组成(在应用界面指南中标记为"B")。模块有多种类型,例如:创建变量、应用操作、执行函数和使用 LLM。模块的输出可用于后续模块。上述常见模块的详细信息请参见模块。
输出
您可以为每个 Logic 模块定义中间输出。Logic 路径中的最后一个模块是 Logic 函数的输出,在应用界面指南中标记为"C"。
-
模块输出: 在模块之间传递的中间输出。模块的输出可以是基本类型 (primitive) 或对象 (object),供后续模块使用。
-
Logic 函数输出: 您希望返回的 Logic 函数输出。可以是值(基本类型或对象)或函数所做的所有本体编辑 (Ontology edits)。
调试器
组合好 Logic 函数后,您可以通过选择视图右侧的运行来测试 Logic 函数。Logic 运行后,调试器将打开并显示 LLM 的思维链 (CoT)。
调试器允许您展开和折叠模块卡片、清除工具调用,并轻松查看生成的提示,从而更易于解读思维链。
运行面板
通过运行面板,您可以运行和评估 Logic,以及查看最近的运行记录。右侧边栏允许您设置单元测试、运行自动化以及查看运行历史。
在运行面板底部,您还可以选择任何最近的运行记录来查看其输出和调试日志。
选择单元测试图标 (![]() ) 可保存输入版本用于性能评估。
) 可保存输入版本用于性能评估。
使用 Logic 函数
Logic 函数的使用方式与平台中常规的对象函数 (FoO) 相同。
- 您可以使用 Logic 函数支持操作 (action),然后从 Workshop 调用该操作。
- 您还可以调用 Logic 函数来支持 Workshop 中的 Markdown 微件;在这种情况下,Logic 函数的输出类型必须是字符串。
- 您可以在其他 Logic 函数以及对象函数中,通过 AIP Logic 中的 Ontology function 工具调用 Logic 函数。
通过命令行运行 Logic 函数
在 Uses 选项卡中,您可以复制 curl 请求,以便在 Foundry 之外的终端中运行 Logic。请注意,对于返回本体编辑的 Logic,此功能不可用。
使用 Logic 函数进行本体编辑
在 Logic 中运行函数时,您将在调试器中看到场景中所有提议的本体编辑。这些编辑实际上不会被执行。如果您希望将编辑应用到本体,请执行以下任一操作:
- 从操作中调用您的 Logic 函数;或
- 从自动化中调用您的 Logic 函数。您可以从 Logic 仪表板使用右侧的 Automations 选项开始创建新的自动化。
要使 Logic 函数能够编辑本体,您必须:
- 在 Use LLM 模块中设置一个 Apply actions tool,供 Logic 函数调用。这允许 LLM 编辑本体。
-
完成 Logic 函数的迭代后,找到并选择保存旁边的 Publish 选项来发布 Logic 函数。
-
接下来,创建一个由刚发布的 Logic 函数 支持的新操作。
- 现在,您可以在 Workshop 模块中使用此新操作来驱动运营工作流。
比较视图
在版本历史选项卡中,您可以比较两个 Logic 版本,查看它们之间的差异,具体包括哪些模块被编辑、添加或删除。
后续步骤
如果您有权访问 AIP Logic,我们建议您开始尝试使用 LLM 模块与本体进行交互,并构建自己的用例。查阅平台中关于函数的文档可能会对您有所帮助。