Configure scoped sessions(配置作用域会话(scoped sessions))
Scoped sessions enable a user to pick a subset of pre-defined Markings to access during their Foundry session to create a visual separation between different types of work. Scoped sessions function across both the Foundry file system and ontology workspaces.
Scoped sessions improve platform security by reducing the chances of accidental cross-pollination of work across different purposes in Foundry. For example, a user working on a particular healthcare research project may be prohibited from using information in another healthcare research project (even though they may have access), since the intermingling of data could compromise the validity of their research. By siloing a user’s session to the purpose they’re currently working on, the risk of cross-pollination is reduced and the user can work with greater confidence.
An administrator can configure scoped sessions for your Organization from within Control Panel. Scoped sessions should be configured carefully since they can affect all users who log into Foundry and may potentially lead to the display of a Foundry workspace banner. For this reason, scoped sessions are disabled by default.
To enable scoped sessions for your Organization, we recommend following these high-level steps:
- Review your Marking setup
- Create scoped sessions
- Review scoped sessions settings
- Enable scoped sessions
Review your Marking setup
Scoped sessions restrict access based on a user's Marking membership. Therefore, to restrict a user's scope throughout the platform, you must both:
- Have the correct users as members of the correct Markings, and
- Have Markings applied to projects, folder, or files in the way you want to focus a user's access in Foundry.
For example, assume Anya Kimball is a user who should only work on a specific research project at a given time and not see any other research projects. This is a good use case for using scoped sessions. To begin setting up scoped sessions, first ensure that Anya is a member of the correct set of research Markings.

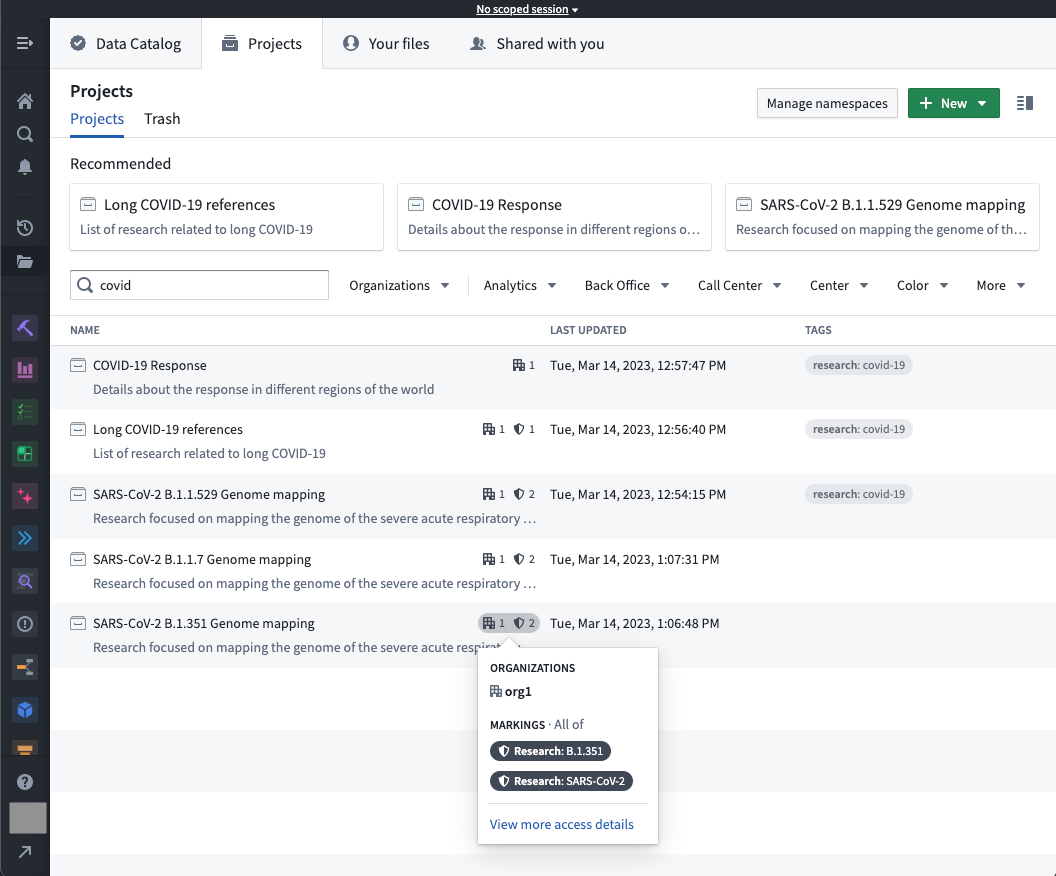
Then you would confirm that the research Markings are applied correctly throughout the Foundry platform. Users will be able to see anything that has one or more of the Markings included in the scoped session. Also, users will be able to see anything that does not have a Marking.
Create scoped sessions
You can create a scoped session by selecting New scoped session under the Session presets tab. Complete the form that pops up to create the new scoped session. After creation, you can edit the same set of details available during the creation process.
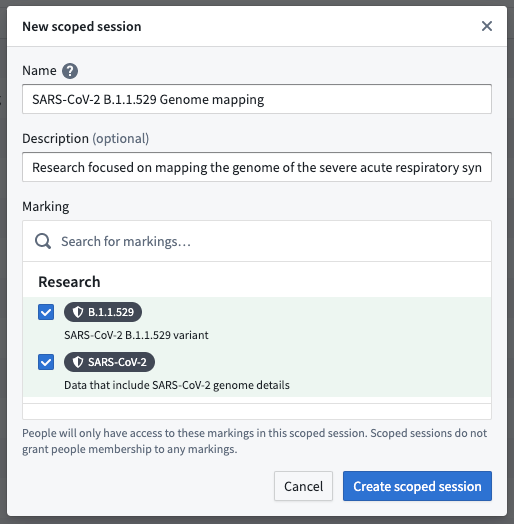
Only users who are members of all the Markings selected in the scoped session will be able to choose this scoped session. In this example, Anya is a member of all required research-related Markings, so she will be able to select from all available scoped sessions when she logs into Foundry.
You can change the Markings for a given scoped session by selecting Manage in the right-side panel. You can also delete a scoped session with the Delete scoped session button.
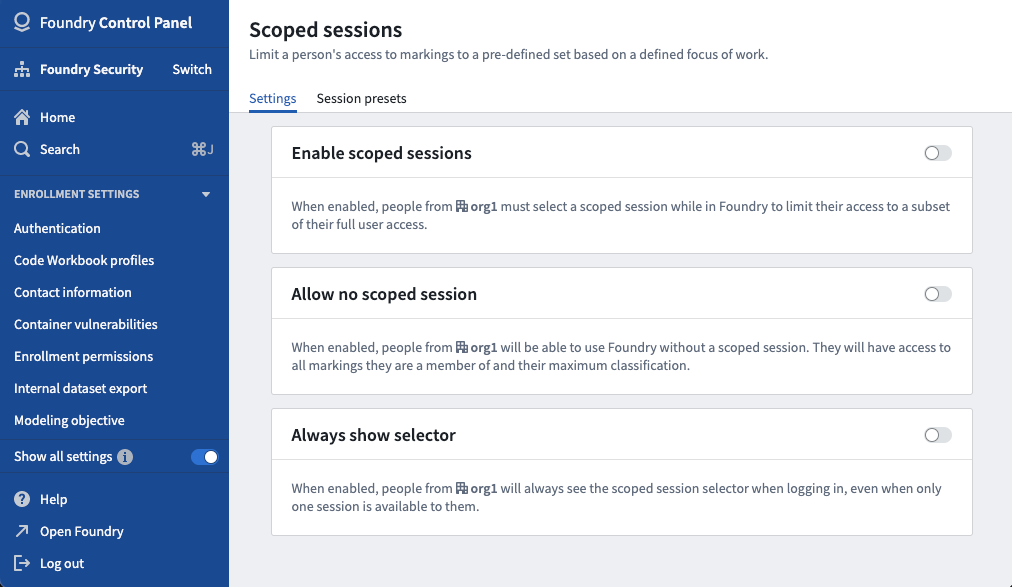
Review scoped sessions settings
Before enabling scoped sessions, you need to consider if 1) you want to allow users to work without scoped sessions, which is the "Allow no scoped session" setting and/or 2) you want users to always see the scoped session selector, which is the "Always show selector" setting.
Allow no scoped session
When no scoped session is enabled, people from your Organization will be able to use Foundry without a scoped session. Users with no scoped session enabled will have access to all of their Markings. This is the same access that a user would have if scoped sessions are disabled for your Organization.

You can enable no scoped session for all users in your Organization, for members of select groups only, or for all users except members of selected groups. This provides more control over who can bypass scoped sessions. Typically, administrators or support users should be allowed to pick the no scoped session option.
Always show selector
When always show selector is enabled, people from your Organization will always see the scoped session selector when logging in, even if only one session is available to them.
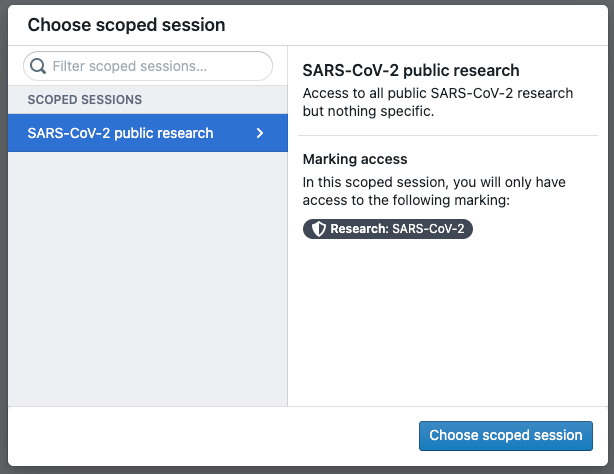
When always show selector is disabled, a user with access to only one scoped session will not see the scoped session dialog (seen in the example above) when logging in; instead, they will automatically log into the only available scoped session.
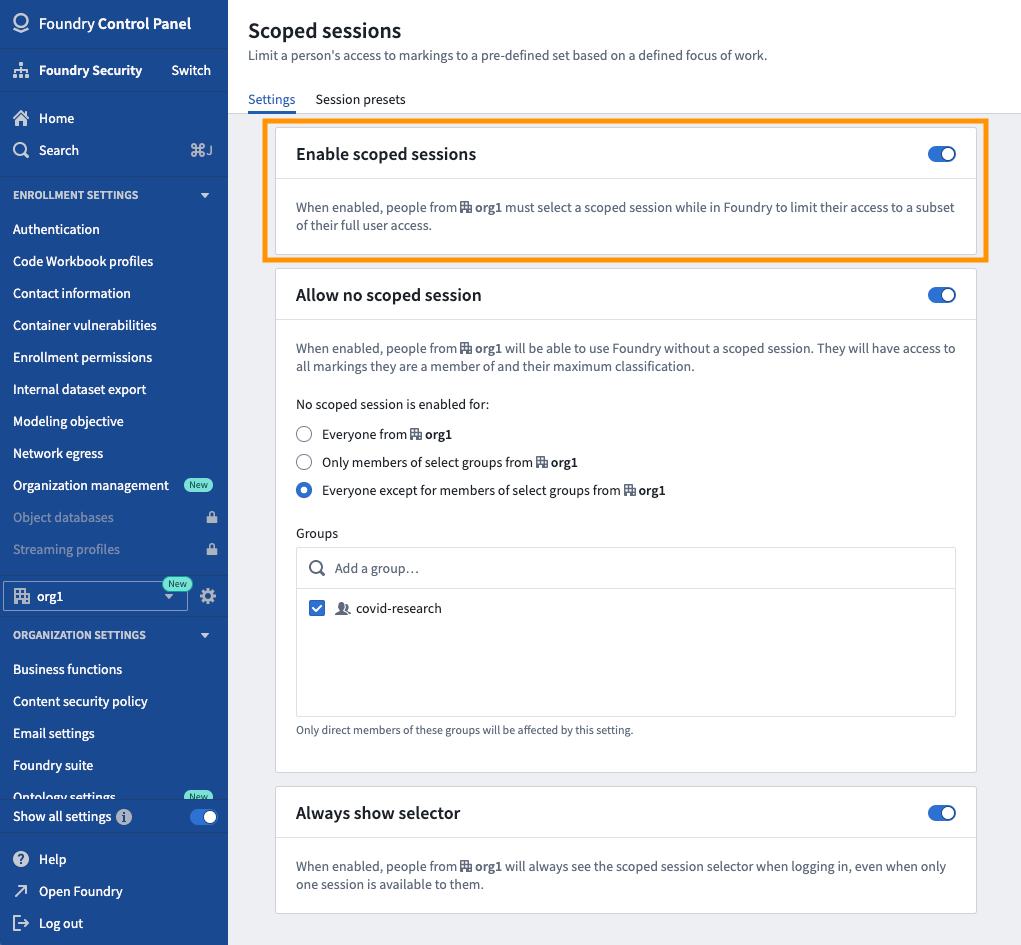
Enable scoped sessions
Toggle on enable scoped sessions to complete the setup of scoped sessions. When scoped sessions are enabled, some users from your Organization may need to select a scoped session when working in Foundry, which will limit their access to a subset of their full user access. If a user has access to more than one scoped session, they will see the scoped session dialog.
Enabling scoped sessions does not mean all users will necessarily see the scoped session dialog or the scoped session banner; this depends on the scoped session settings and the user's Marking membership.
In the following scenario, for example, the user would not see the scoped session dialog or the scoped session banner:
- The user is not a member of any of the Markings used in the scoped sessions.
- No scoped session is enabled for this user.
- Always show selector is disabled.
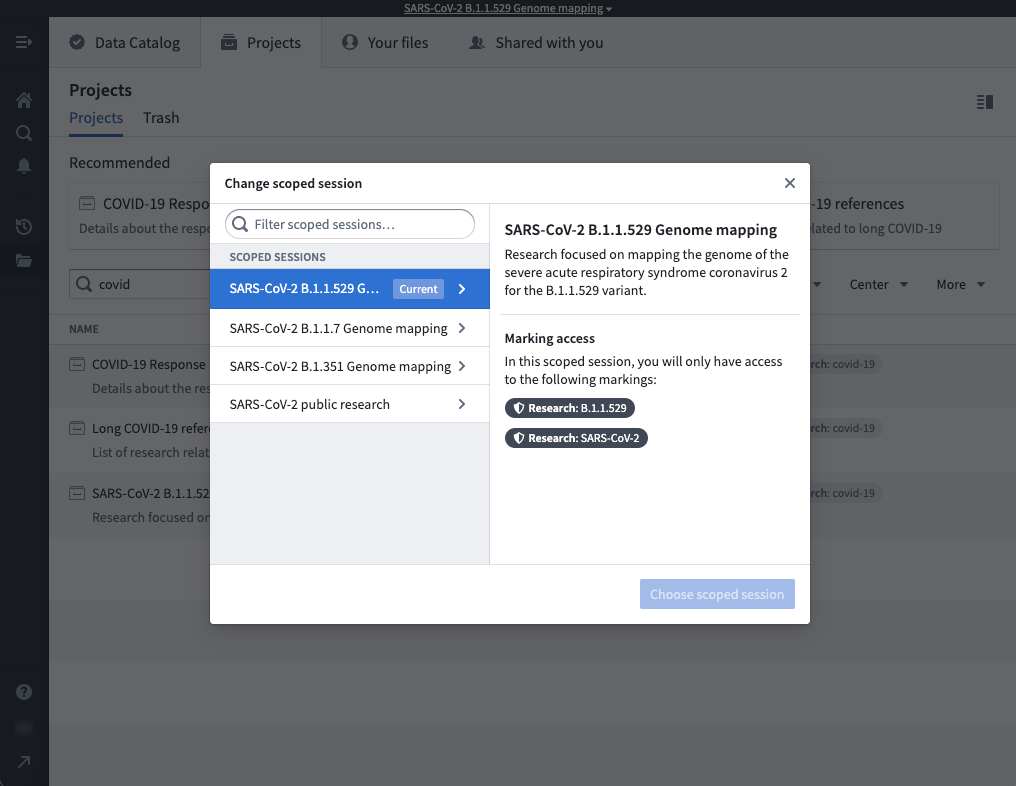
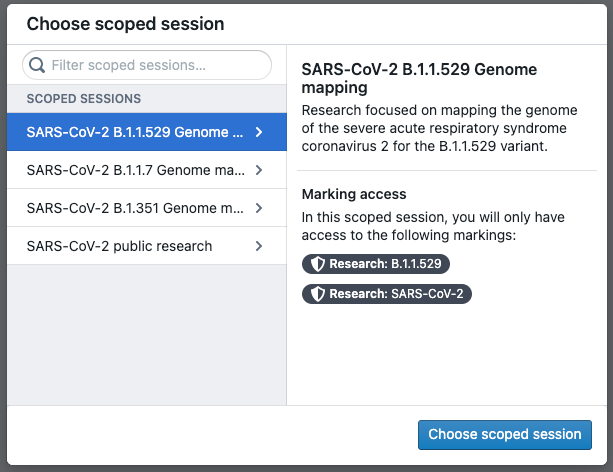
To continue with our example of Anya from above, after scoped sessions are enabled, Anya would see the dialog below when she logs into Foundry.
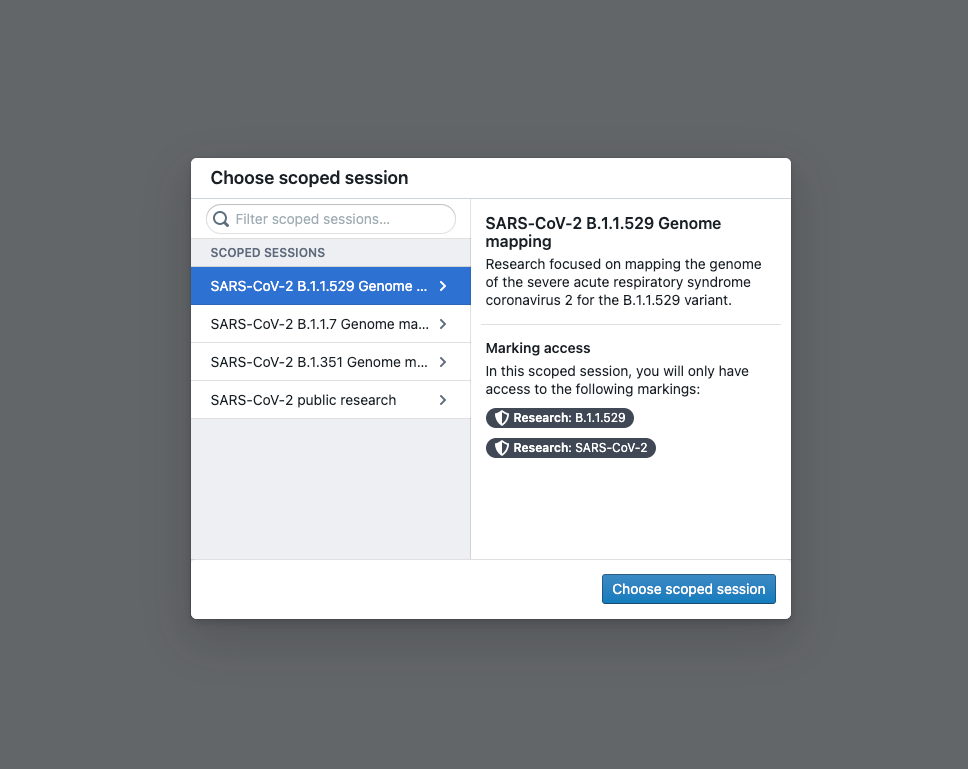
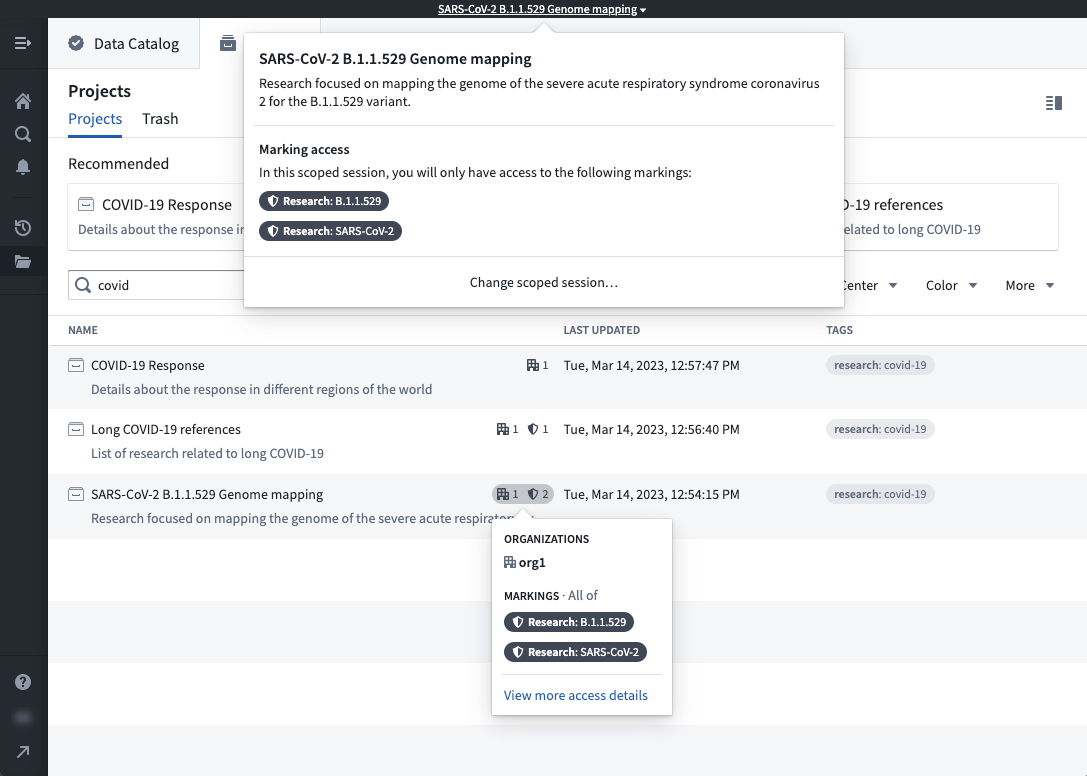
After selecting the SARS-CoV-2 B.1.1.529 Genome mapping scoped session, Anya would only have access to projects, folders, and files that have no Markings on them or have either the B.1.1.529 and/or SARS-CoV-2 Markings on them.
More details about scoped sessions from a user's perspective can be found in the Markings documentation.
中文翻译
配置作用域会话(scoped sessions)
作用域会话(scoped sessions)允许用户在其Foundry会话期间选择一组预定义的标记(Markings)子集进行访问,从而在不同类型的工作之间实现视觉隔离。作用域会话可同时在Foundry文件系统和本体(ontology)工作区中生效。
作用域会话可降低Foundry中不同用途的工作内容意外交叉污染的风险,从而提升平台安全性。例如,参与某一医疗研究项目的用户可能被禁止使用另一医疗研究项目的信息(即便他们拥有访问权限),因为数据混同可能会损害其研究的有效性。通过将用户会话隔离到其当前正在处理的工作用途中,可以降低交叉污染风险,让用户更放心地开展工作。
管理员可在控制面板(Control Panel)中为您的组织配置作用域会话。作用域会话的配置需要谨慎操作,因为它们会影响所有登录Foundry的用户,还可能会在Foundry工作区显示横幅。因此,作用域会话默认处于禁用状态。
如需为您的组织启用作用域会话,我们建议遵循以下总体步骤: 1. 检查您的标记配置 2. 创建作用域会话 3. 检查作用域会话设置 4. 启用作用域会话
检查您的标记配置
作用域会话会基于用户的标记成员身份限制访问权限。因此,要在整个平台范围内限制用户的访问范围,您必须同时满足以下两个条件: * 让正确的用户加入对应的标记,且 * 按照您期望的用户访问聚焦范围,将标记应用到对应的项目、文件夹或文件上。
例如,假设用户Anya Kimball在特定时间段内仅应处理某一个特定研究项目,不应看到其他任何研究项目,这就是作用域会话的典型适用场景。要开始配置作用域会话,首先要确保Anya已加入对应的研究标记集合。
接下来您需要确认研究标记在整个Foundry平台中都已正确应用。用户可以看到作用域会话包含的任意一个或多个标记关联的所有内容,同时也可以看到没有绑定任何标记的内容。
创建作用域会话
您可以在会话预设(Session presets)标签页下选择新建作用域会话(New scoped session)来创建作用域会话,填写弹出的表单即可完成新作用域会话的创建。创建完成后,您仍可以编辑创建过程中设置的所有详细信息。
只有同时属于作用域会话中选中的所有标记的用户,才能选择该作用域会话。在本例中,Anya是所有所需研究相关标记的成员,因此她登录Foundry时可以选择所有可用的作用域会话。
您可以选择右侧面板中的管理(Manage)来修改指定作用域会话的标记,也可以通过删除作用域会话(Delete scoped session)按钮删除作用域会话。
检查作用域会话设置
在启用作用域会话之前,您需要考虑两个设置:1)是否允许用户在无作用域会话的情况下工作,即"允许无作用域会话"设置;2)是否希望用户始终看到作用域会话选择器,即"始终显示选择器"设置。
允许无作用域会话
启用无作用域会话选项后,您组织内的用户可以在不启用作用域会话的情况下使用Foundry。未启用作用域会话的用户可以访问其拥有权限的所有标记对应的内容,这与组织禁用作用域会话时用户的访问权限一致。
您可以为组织内所有用户、仅指定用户组的成员,或除指定用户组成员外的所有用户启用无作用域会话选项,这可以让您更灵活地控制哪些用户可以绕过作用域会话限制。通常情况下,应该允许管理员或支持用户选择无作用域会话选项。
始终显示选择器
启用始终显示选择器选项后,您组织内的用户登录时始终会看到作用域会话选择器,即便他们只有一个可用的会话。
禁用始终显示选择器选项时,仅有一个可用作用域会话的用户登录时不会看到作用域会话弹窗(如上例所示),而是会自动登录到唯一可用的作用域会话中。
启用作用域会话
切换开启启用作用域会话(enable scoped sessions)即可完成作用域会话的配置。启用作用域会话后,您组织内的部分用户在Foundry中工作时可能需要选择一个作用域会话,这会将他们的访问权限限制在其完整用户访问权限的子集内。如果用户有权访问多个作用域会话,将看到作用域会话选择弹窗。
启用作用域会话并不意味着所有用户都一定会看到作用域会话弹窗或作用域会话横幅,这取决于作用域会话设置和用户的标记成员身份。
例如,在以下场景中,用户不会看到作用域会话弹窗或作用域会话横幅: * 用户不属于作用域会话使用的任何标记 * 该用户已启用无作用域会话权限 * 始终显示选择器处于禁用状态
回到上文提到的Anya的例子,启用作用域会话后,Anya登录Foundry时会看到如下弹窗。
选择SARS-CoV-2 B.1.1.529 Genome mapping作用域会话后,Anya仅能访问未绑定任何标记,或绑定了B.1.1.529和/或SARS-CoV-2标记的项目、文件夹和文件。