Configure SAML 2.0 integration for Entra ID (Azure AD)(为 Entra ID(Azure AD)配置 SAML 2.0 集成)
This section contains steps specific to Entra ID (formerly known as Azure AD) for configuring the SAML 2.0 integration as part of the broader end-to-end authentication via SAML 2.0 tutorial.
You can also find a quickstart guide ↗ in the Microsoft documentation.
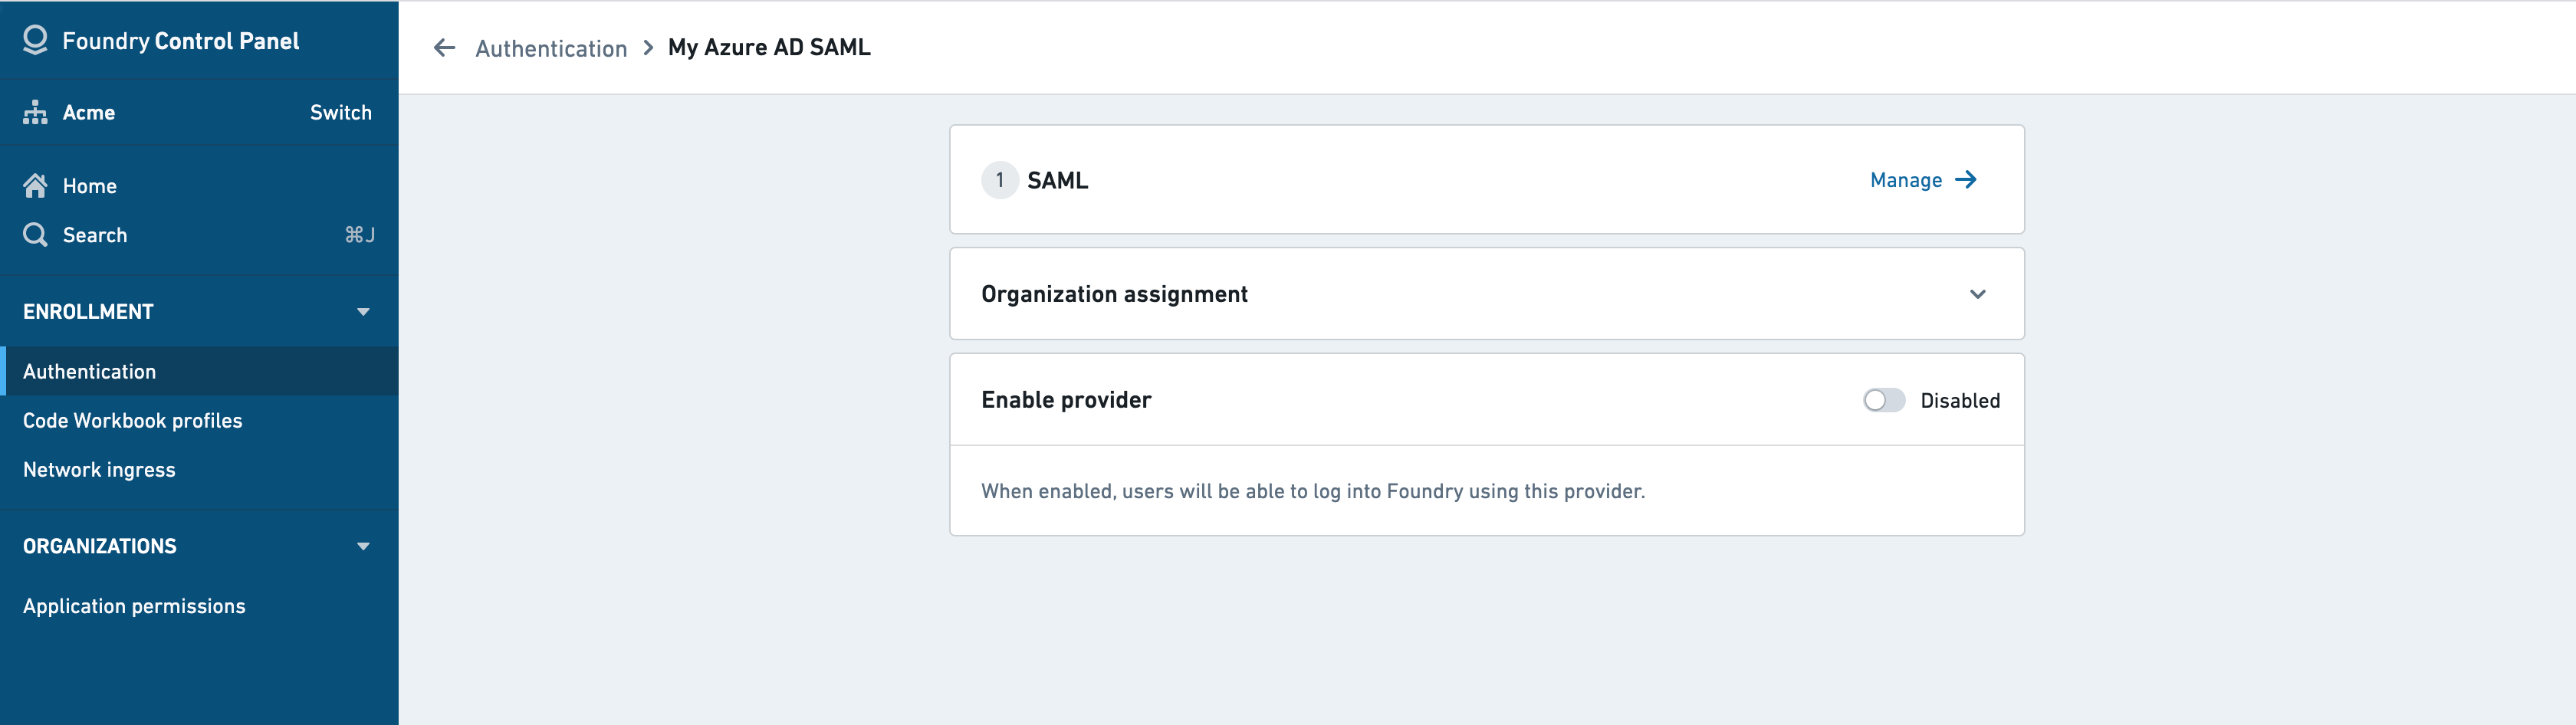
If you received a Foundry setup link to configure your initial SAML integration, skip to the next step. Otherwise, you can add a new SAML provider by going to the Authentication tab in Control Panel and selecting Manage in the SAML section.
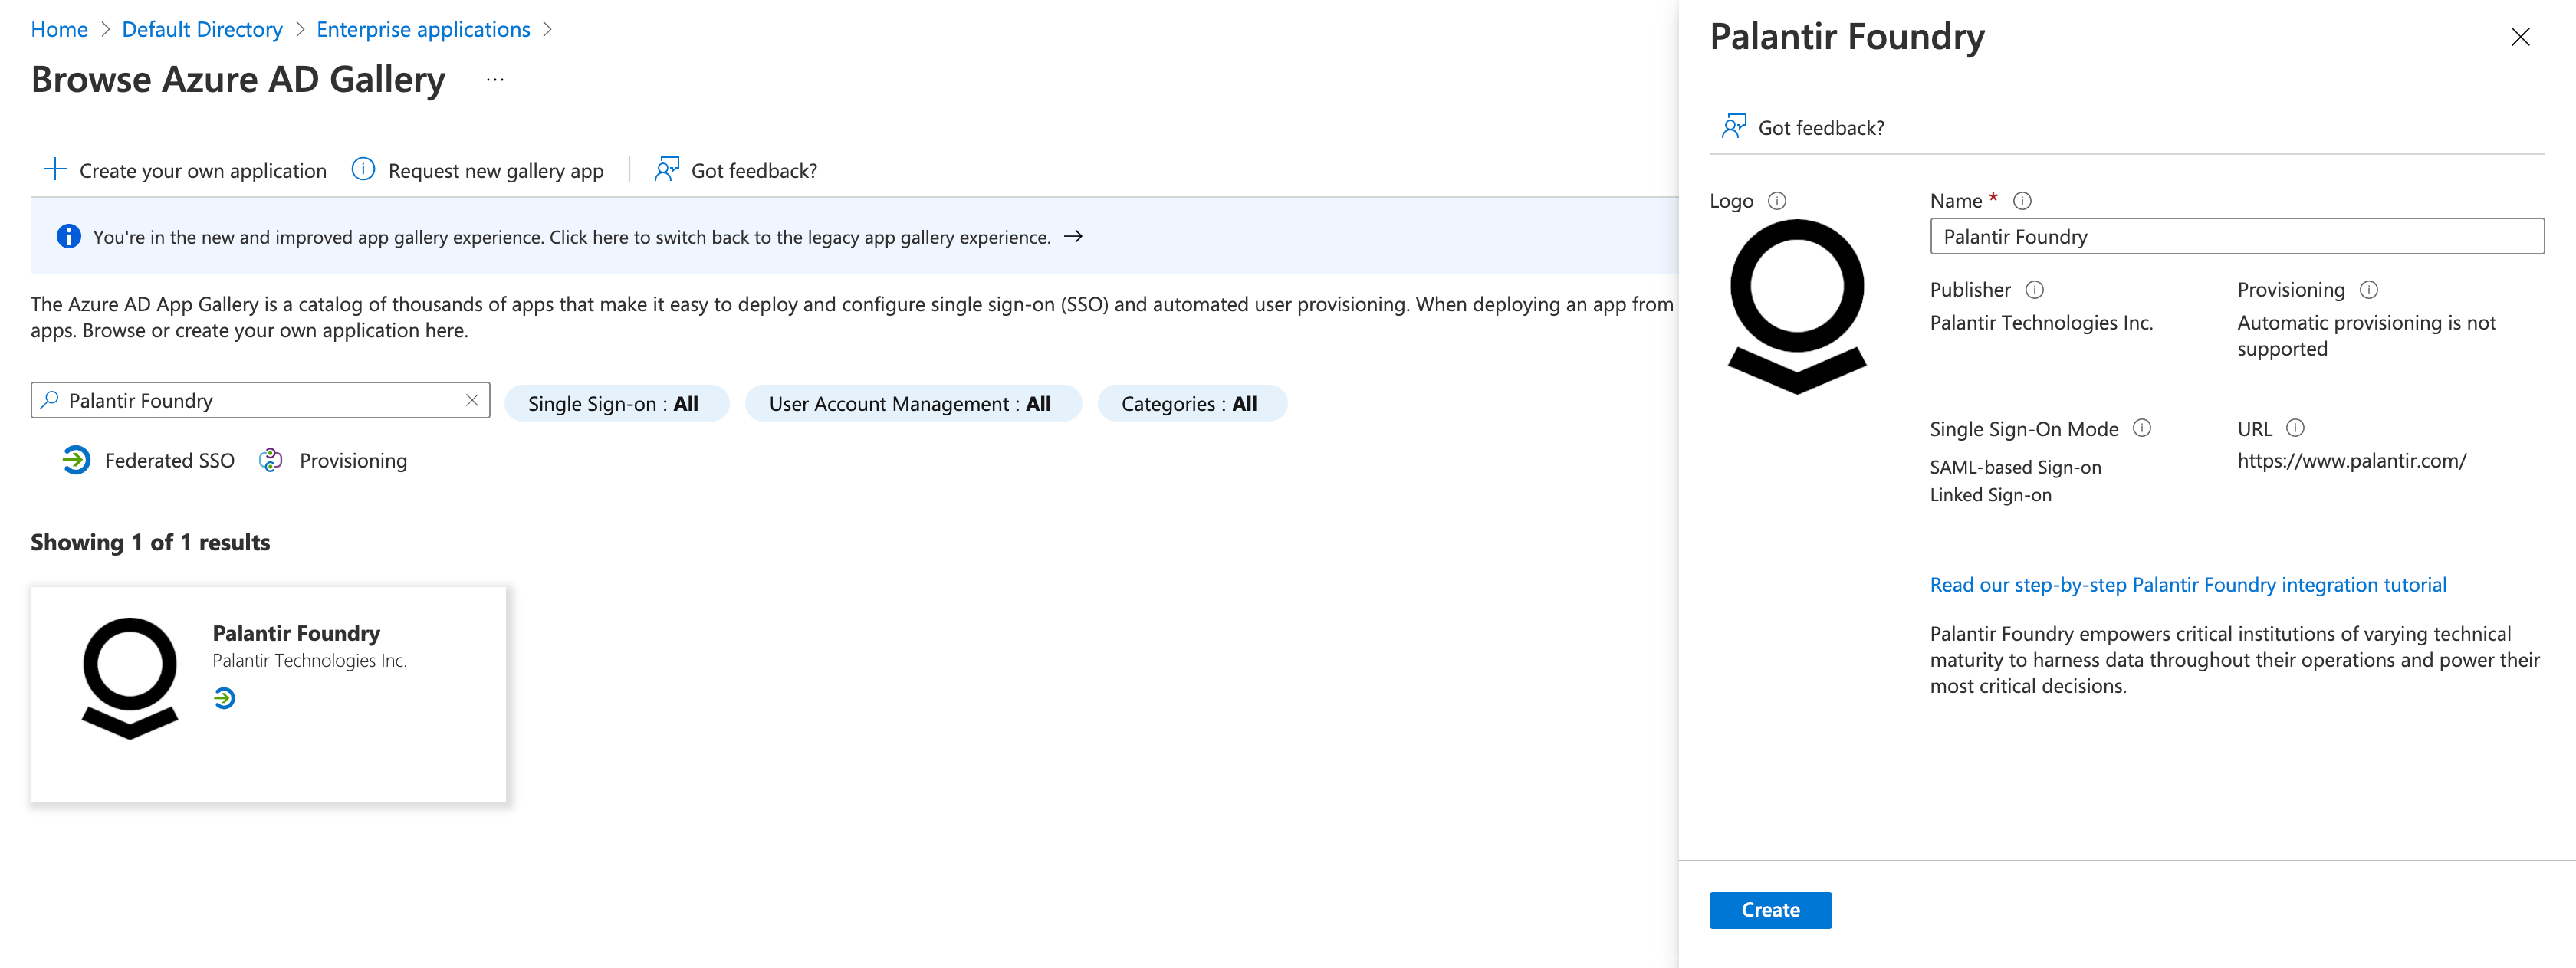
In the Azure Portal ↗, select Microsoft Entra ID, then Enterprise Applications, and New application. Search for Palantir Foundry and then select Create.
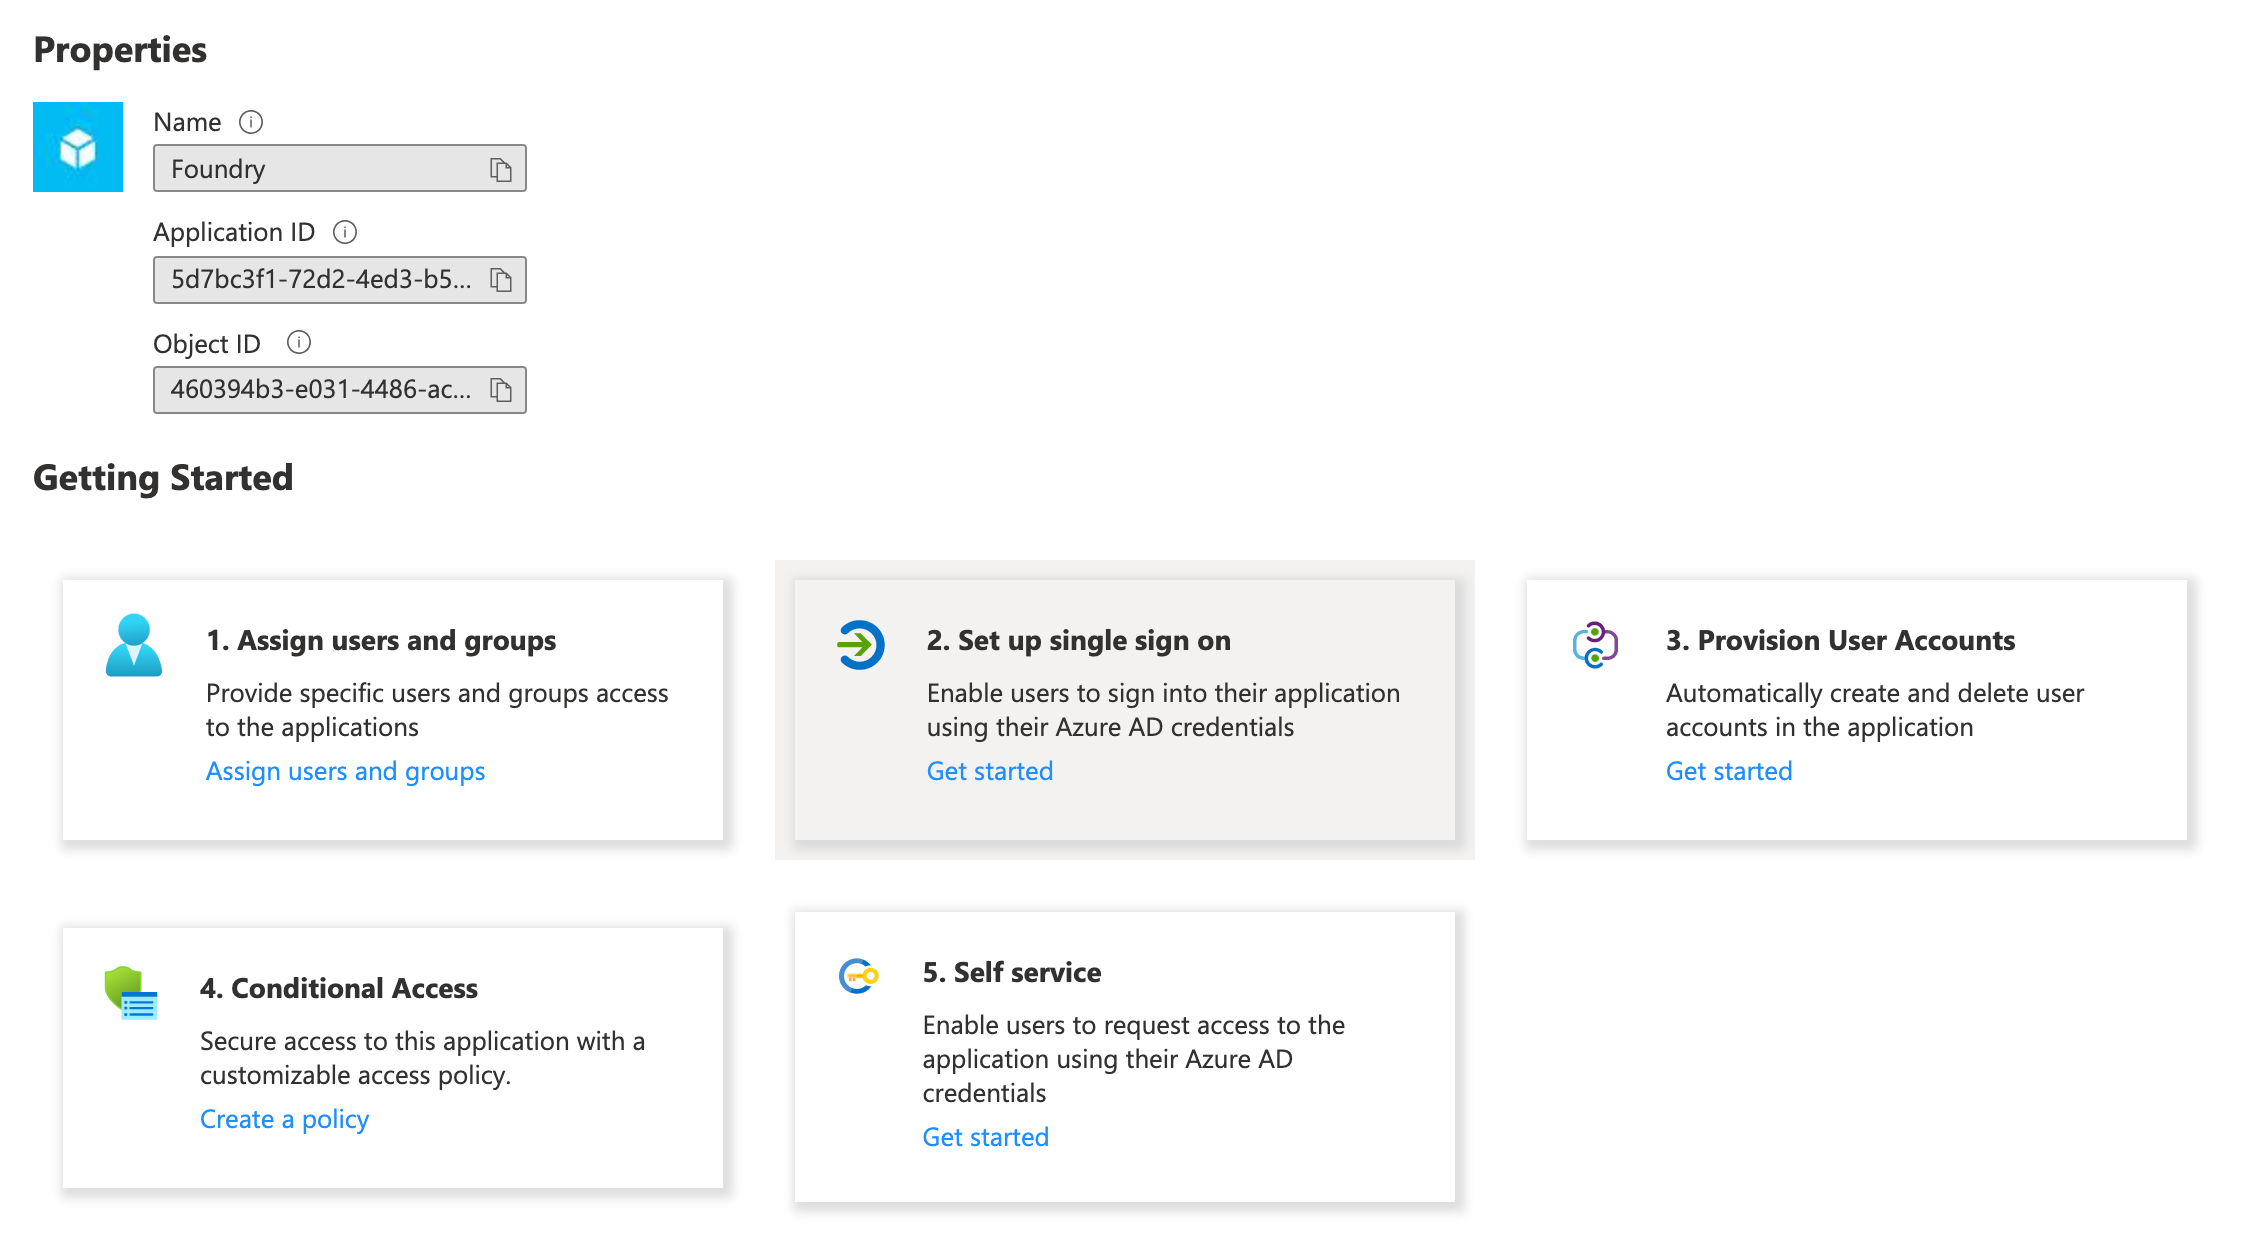
Once created, select the Getting Started box for 2. Set up single sign on.
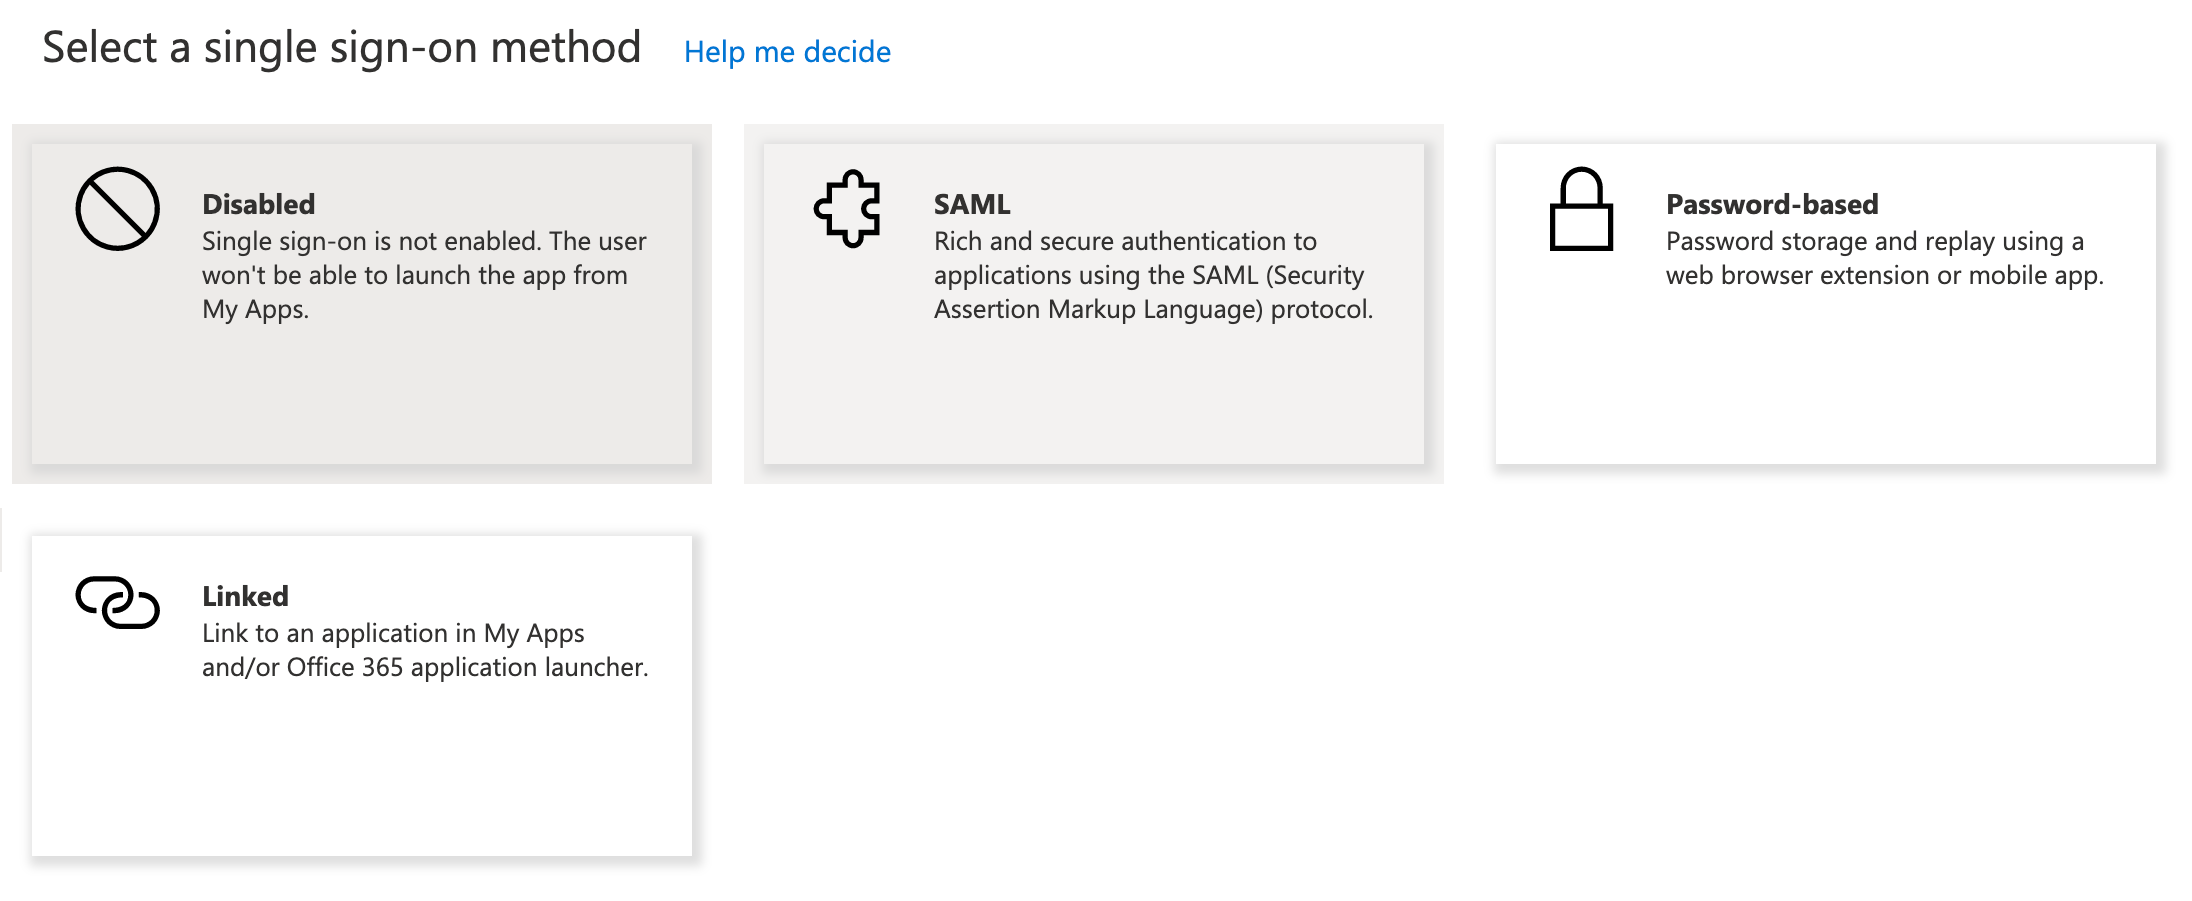
You will then be prompted to select a single sign-on method. Choose SAML.
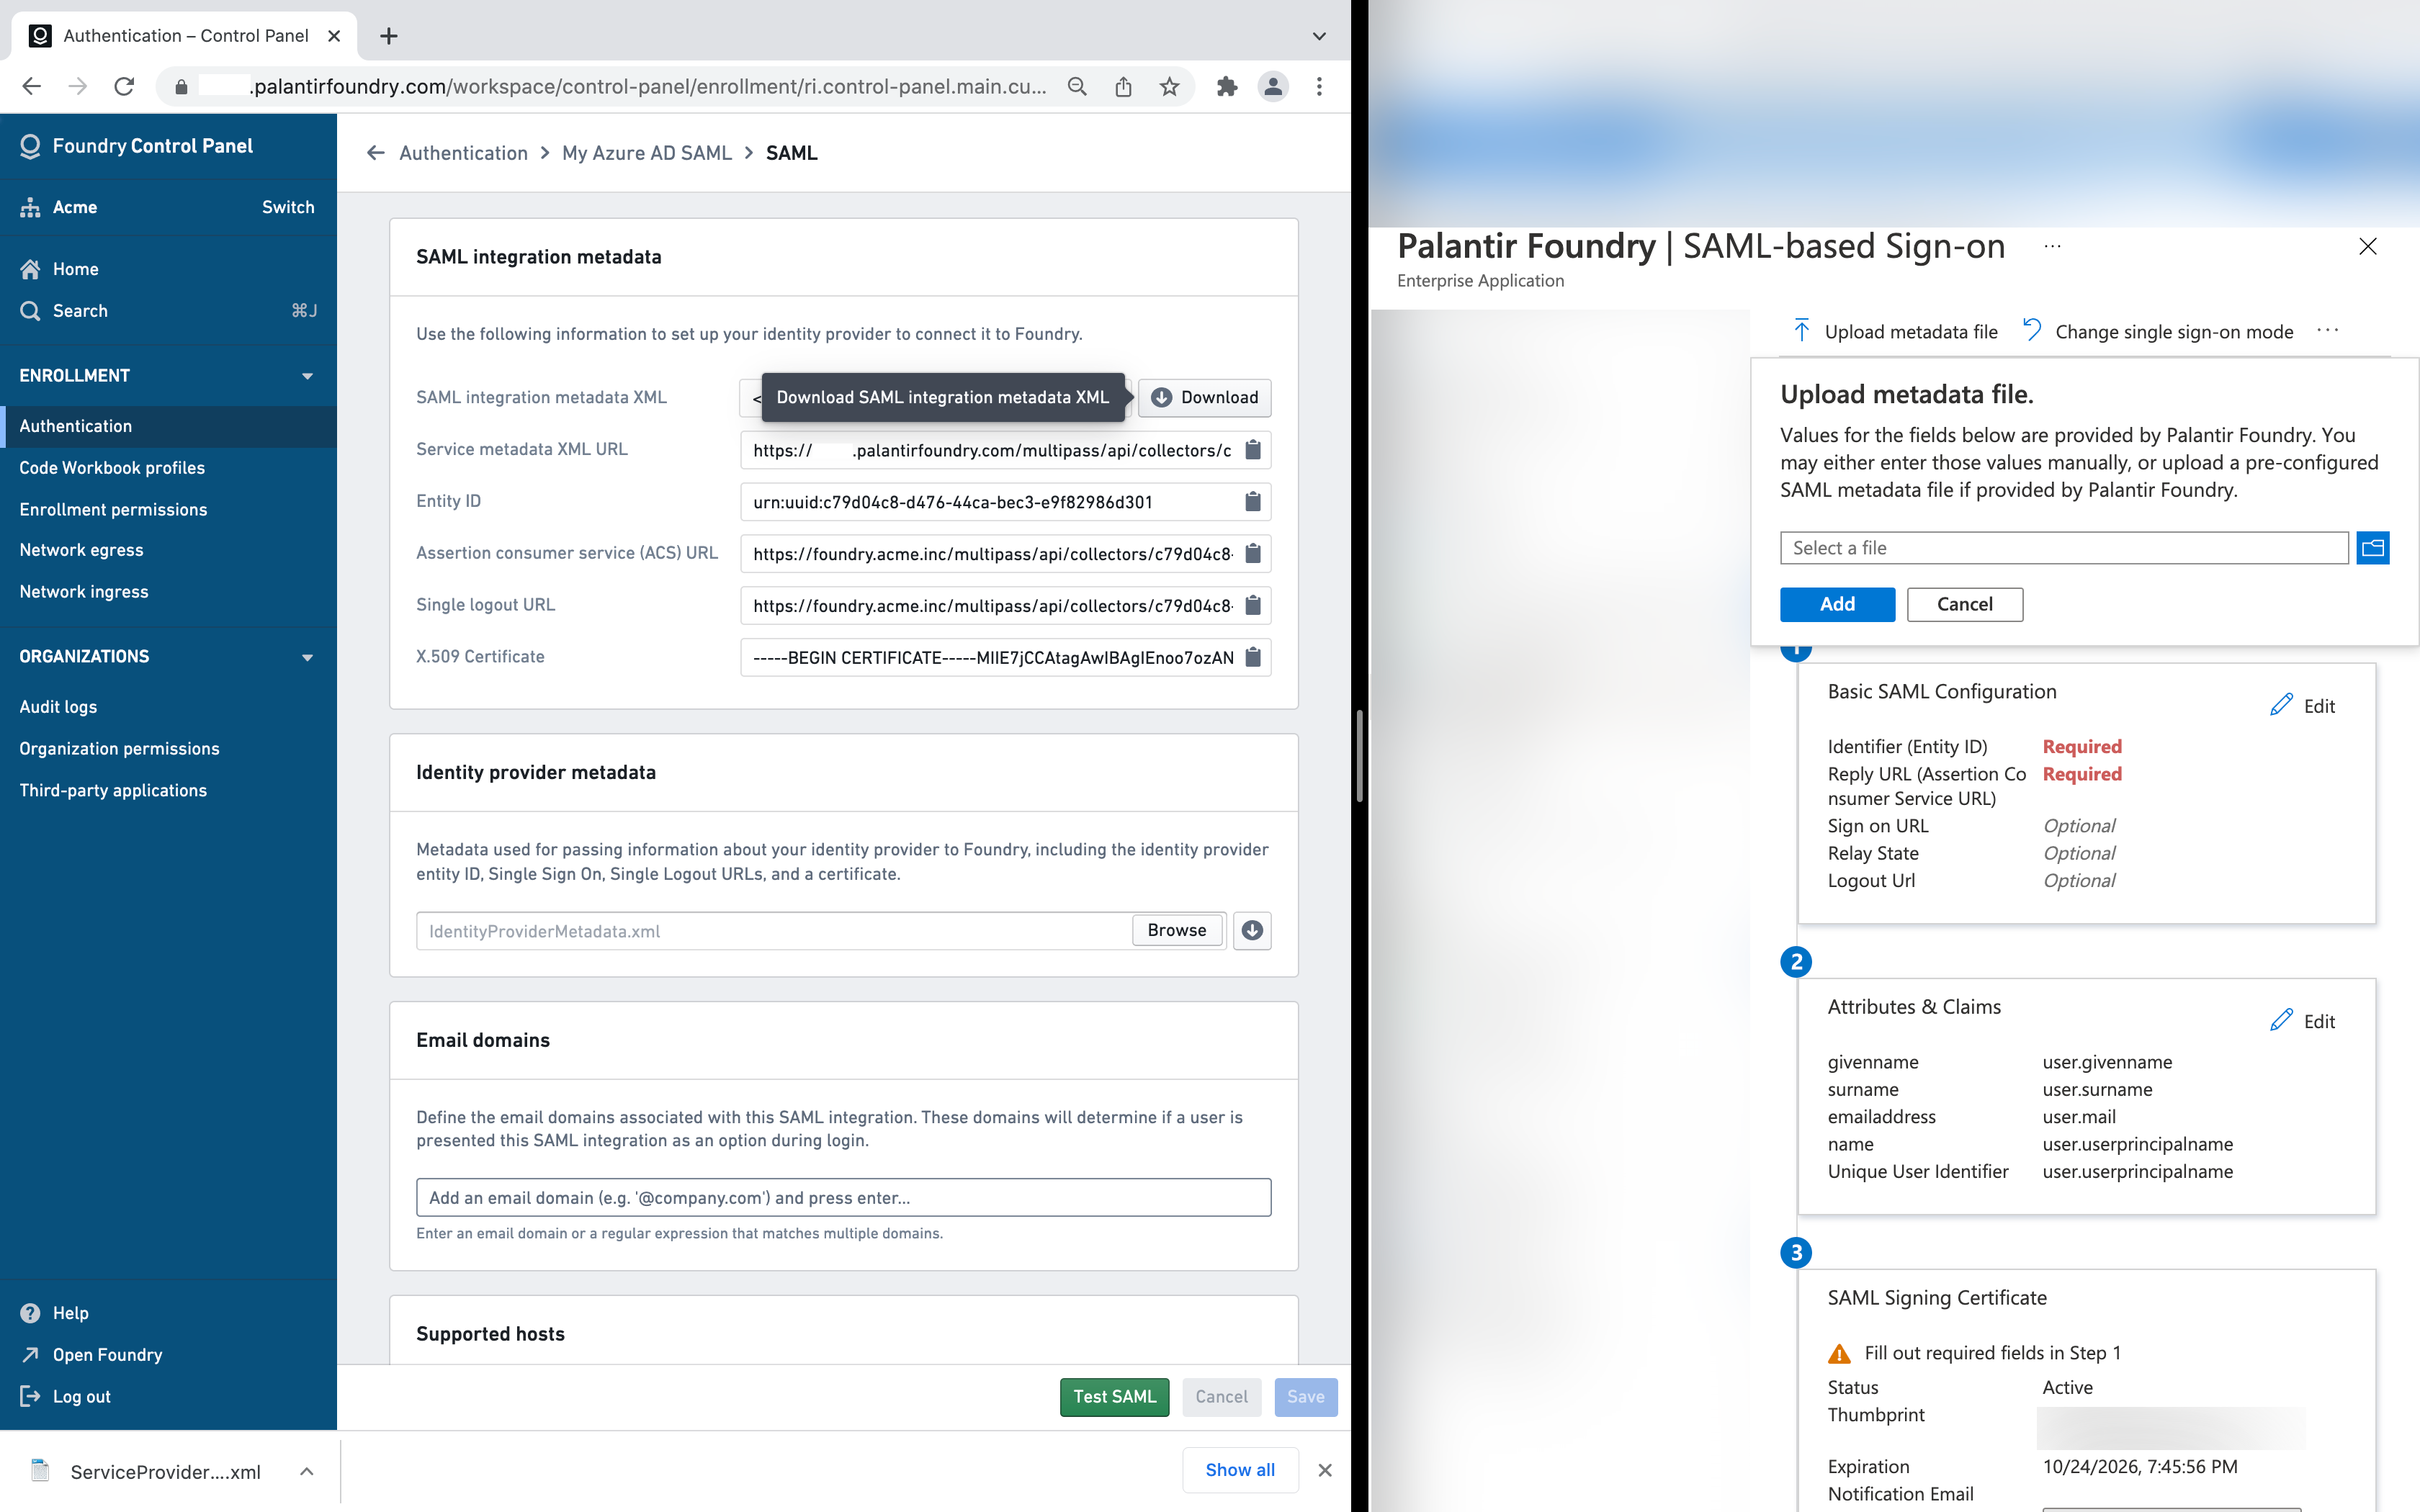
SAML integration metadata
In Foundry, download the SAML integration metadata XML, upload the XML to Azure using Upload metadata file, and then Save.
Attribute mapping
You can define the following mappings for user attributes in Attribute mapping. If using a Foundry setup link, Azure attribute mappings will be pre-filled.
- ID:
NameID - Username:
http://schemas.xmlsoap.org/ws/2005/05/identity/claims/name - Email:
http://schemas.xmlsoap.org/ws/2005/05/identity/claims/emailaddress - First name:
http://schemas.xmlsoap.org/ws/2005/05/identity/claims/givenname - Last name:
http://schemas.xmlsoap.org/ws/2005/05/identity/claims/surname
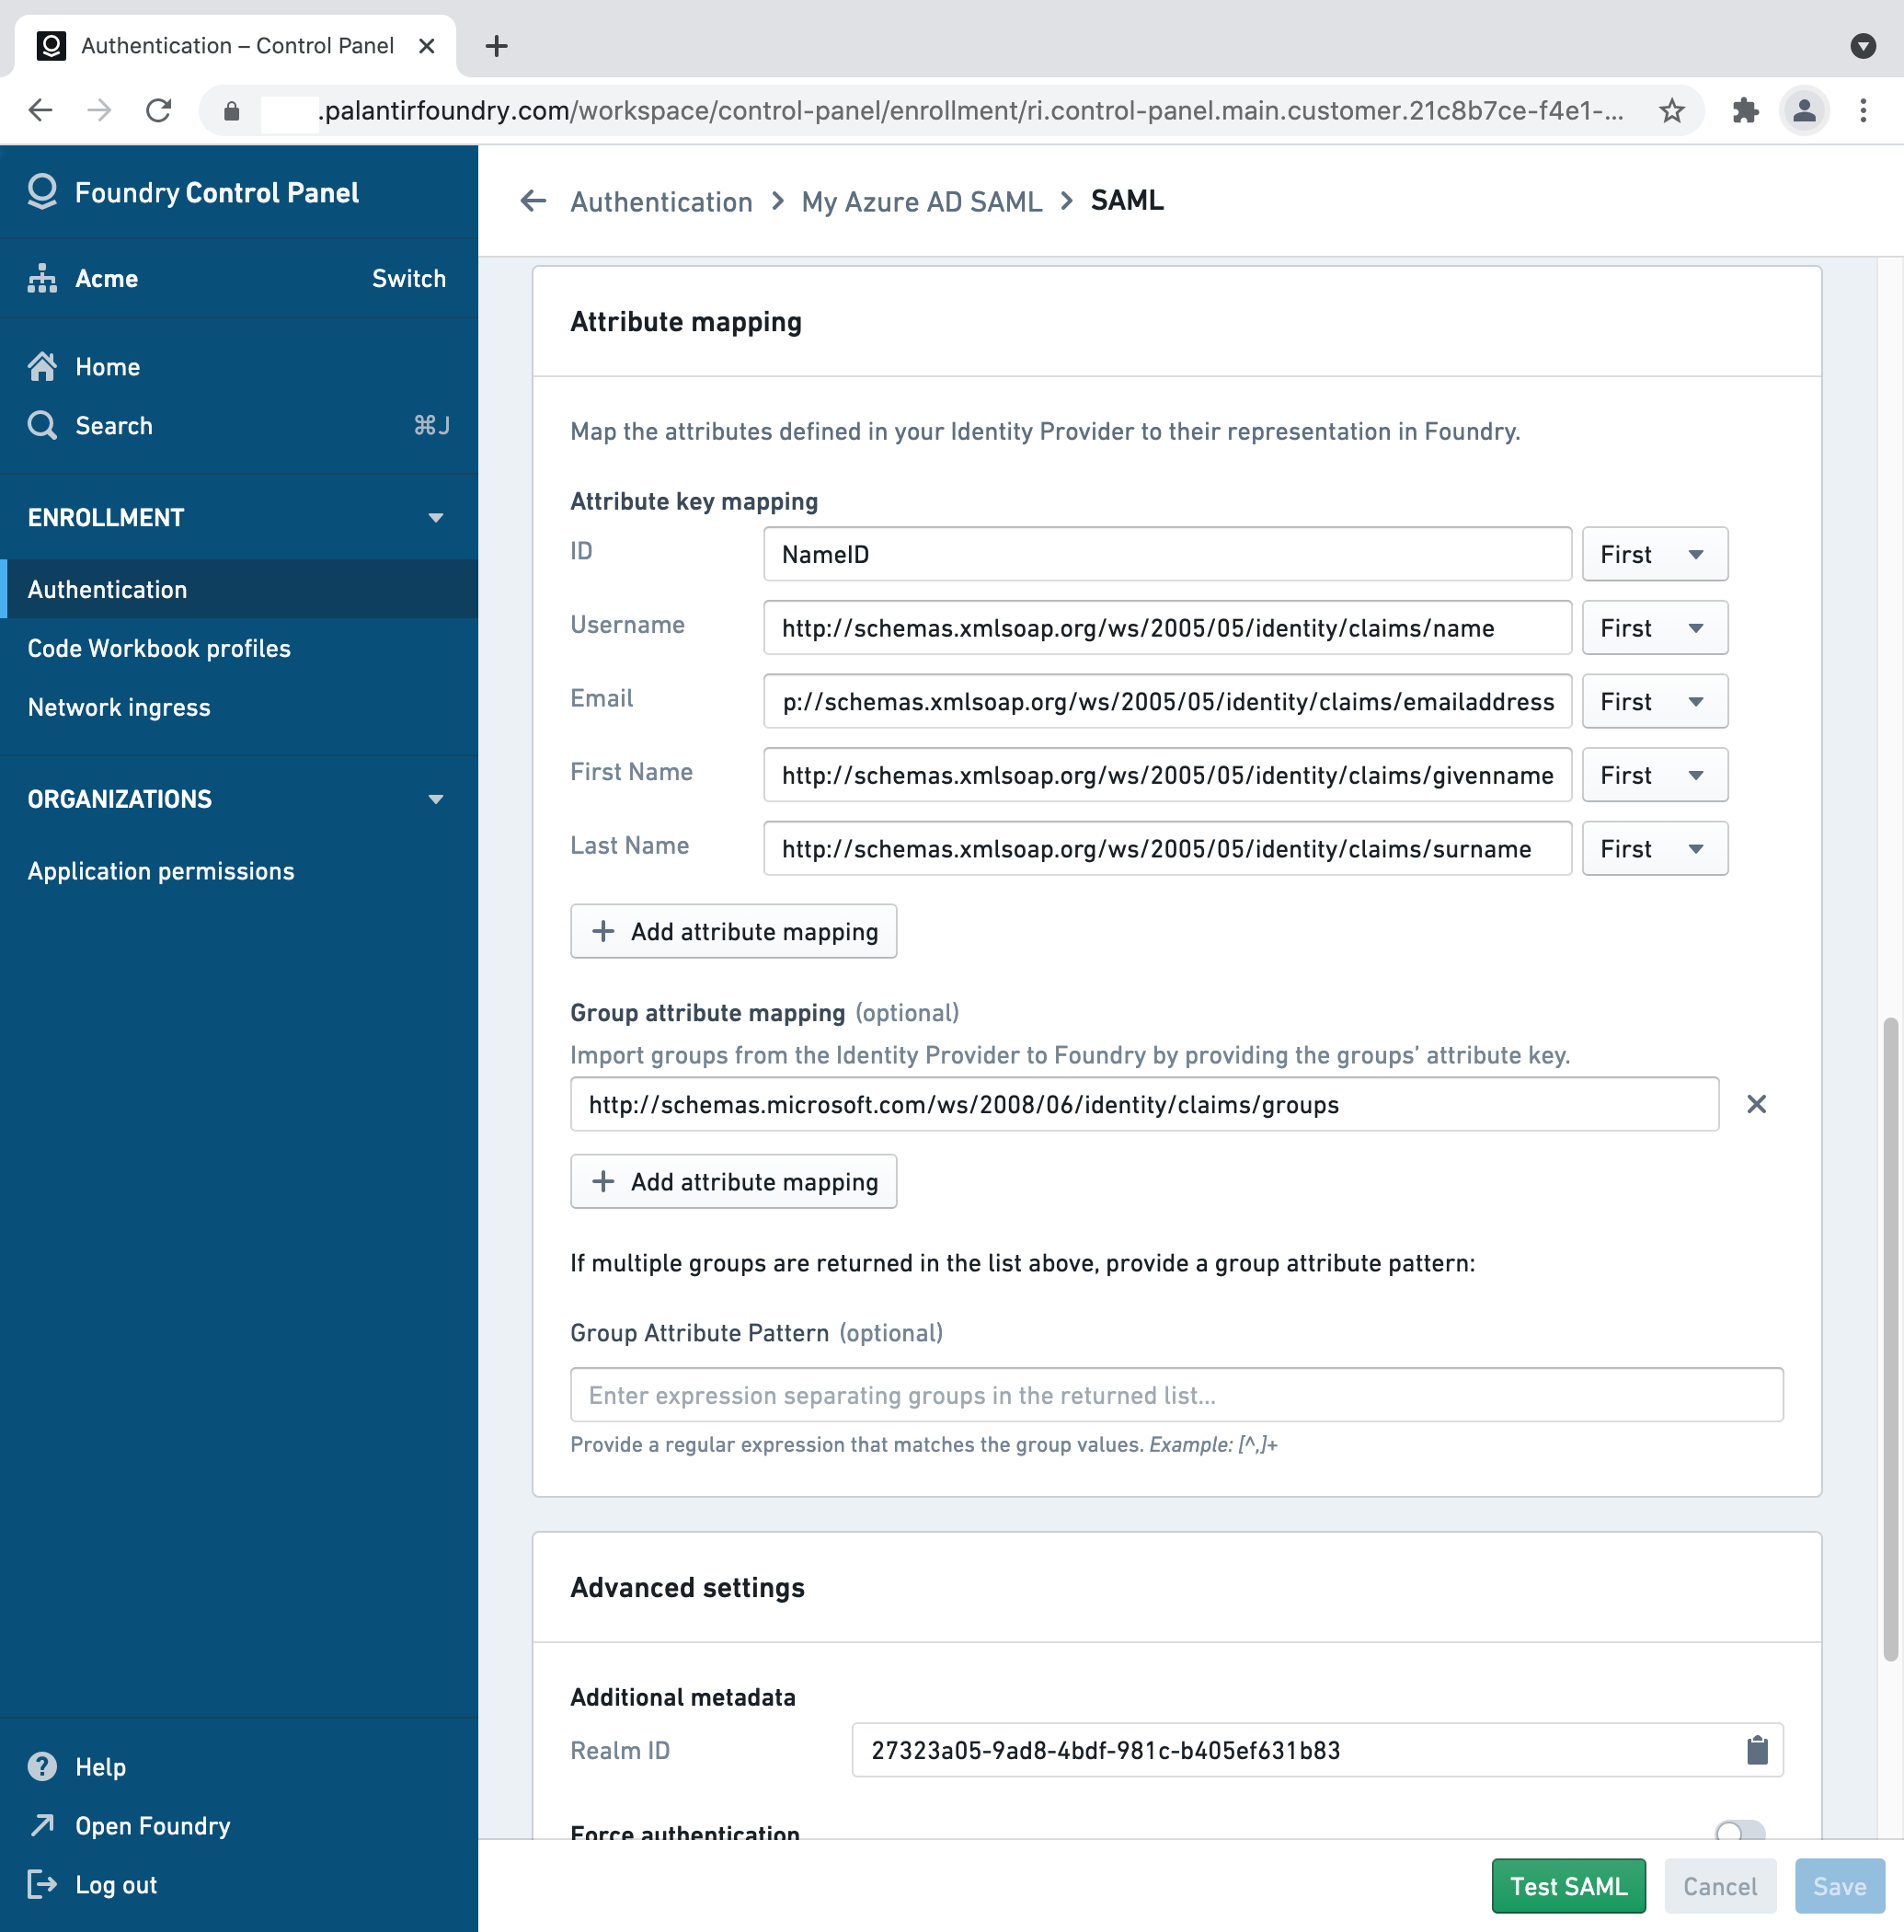
If you'd like to configure provider groups, select Add a group claim under User Attributes & Claims in the Azure Portal. In Foundry, add http://schemas.microsoft.com/ws/2008/06/identity/claims/groups as a Group attribute mapping, with no Group attribute pattern.
Identity provider metadata
In Azure AD, download your identity's provider metadata XML file by using the link next to Federation Metadata XML under SAML Signing Certificate, and upload it to Foundry in the Identity provider metadata block.

Finishing and saving
In Foundry, add email domains associated with this SAML 2.0 integration under Email domains.
Finish by saving your SAML 2.0 integration and proceed to multi-factor authentication.
中文翻译
为 Entra ID(Azure AD)配置 SAML 2.0 集成
本节包含针对 Entra ID(原 Azure AD)的具体步骤,用于配置 SAML 2.0 集成,作为更广泛的通过 SAML 2.0 进行端到端身份验证教程的一部分。
您也可以在 Microsoft 文档中找到快速入门指南 ↗。
如果您已收到用于配置初始 SAML 集成的 Foundry 设置链接,请跳至下一步。否则,您可以通过进入控制面板的 Authentication(身份验证)选项卡,并在 SAML 部分选择 Manage(管理)来添加新的 SAML 提供程序。
在 Azure Portal ↗ 中,选择 Microsoft Entra ID,然后选择 Enterprise Applications(企业应用程序),再选择 New application(新建应用程序)。搜索 Palantir Foundry,然后选择 Create(创建)。
创建完成后,选择 2. Set up single sign on(2. 设置单点登录)对应的 Getting Started(入门)框。
随后系统会提示您选择单点登录方法。选择 SAML。
SAML 集成元数据
在 Foundry 中,下载 SAML integration metadata XML(SAML 集成元数据 XML),在 Azure 中使用 Upload metadata file(上传元数据文件)上传该 XML,然后 Save(保存)。
属性映射
您可以在 Attribute mapping(属性映射)中为用户属性定义以下映射。如果使用 Foundry 设置链接,Azure 属性映射将自动预填。
- ID(标识符):
NameID - Username(用户名):
http://schemas.xmlsoap.org/ws/2005/05/identity/claims/name - Email(电子邮件):
http://schemas.xmlsoap.org/ws/2005/05/identity/claims/emailaddress - First name(名字):
http://schemas.xmlsoap.org/ws/2005/05/identity/claims/givenname - Last name(姓氏):
http://schemas.xmlsoap.org/ws/2005/05/identity/claims/surname
如果您希望配置提供程序组,请在 Azure Portal 中的 User Attributes & Claims(用户属性和声明)下选择 Add a group claim(添加组声明)。在 Foundry 中,添加 http://schemas.microsoft.com/ws/2008/06/identity/claims/groups 作为 Group attribute mapping(组属性映射),且不设置 Group attribute pattern(组属性模式)。
身份提供程序元数据
在 Azure AD 中,使用 SAML Signing Certificate(SAML 签名证书)下 Federation Metadata XML(联合元数据 XML)旁边的链接下载身份提供程序元数据 XML 文件,然后将其上传到 Foundry 中的 Identity provider metadata(身份提供程序元数据)模块。
完成并保存
在 Foundry 中,在 Email domains(电子邮件域名)下添加与此 SAML 2.0 集成关联的电子邮件域名。
最后保存您的 SAML 2.0 集成,然后继续前往多因素身份验证。