Update SAML provider in Control Panel(在控制面板中更新 SAML 提供商)
Moving from one SAML identity provider to another requires a workflow beyond creating and disabling SAML providers in Control Panel. You will need to complete the in-place SAML provider or external-to external SAML provider update process. When users log into Foundry using the new SAML provider, Foundry will provision a new, duplicate user account for them. Groups coming from the new provider will be duplicated as well. Some consequences of not performing a proper provider update include:
- Users will lose access to their previous home folder since they will get a new home folder.
- Users will lose access to anything that was shared with them, either directly or through groups coming from the previous provider.
- There will be duplicate users and groups in sharing dialogs, which can create confusion.
To prevent the above issues, users must be migrated from the old SAML provider to the new SAML provider before switching over to using the new provider. There are two options for this:
In-place SAML provider update
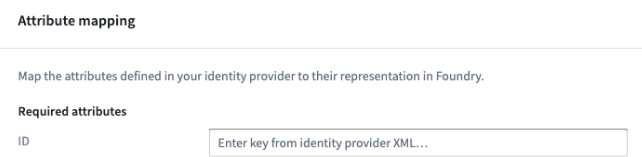
This is the simplest option and should be taken only if the current and target identity providers share the same attributes. In particular, the value to which the ID attribute maps must not change or users will get an entirely new account provisioned in Foundry.
:::callout{theme="neutral"} If the ID attributes of incoming users or groups in the new identity provider are different from existing ID attributes, follow the external-to-external SAML provider update process. :::
Follow these steps to perform an in-place SAML provider update:
- From Control Panel, navigate to the Authentication tab under Enrollment Settings. Find the SAML provider you want to update, then click on the Actions dropdown and select Manage.

In the SAML section, select Manage.

-
Download the SAML integration metadata XML. Update your SAML application on the identity provider side.
-
Under Identity provider metadata, upload your new identity provider federation metadata file to Control Panel.
-
Test that the new integration works as expected and that user attributes do not change and users do not get a new Foundry account provisioned.
External-to-external SAML provider update
Follow these steps to perform an external-to-external SAML provider update:
- From Control Panel , navigate to the Authentication tab under Enrollment Settings. Under Authentication providers, select Add provider and add the new provider.

Learn more about configuring SAML 2.0 integration to add a new SAML provider.
-
Test the new SAML integration using a test account.
-
Disable the integration temporarily to avoid having duplicate providers enabled at the same time.
-
Contact your Palantir representative for help migrating users from the old provider to the new provider.
中文翻译
在控制面板中更新 SAML 提供商
从一个 SAML 身份提供商迁移到另一个时,所需的工作流程不仅仅是创建和禁用控制面板中的 SAML 提供商。您需要完成原地 SAML 提供商更新或外部到外部 SAML 提供商更新流程。当用户使用新的 SAML 提供商登录 Foundry 时,Foundry 会为其创建一个新的重复用户账户。来自新提供商的群组也会被重复。未正确执行提供商更新可能导致以下后果:
- 用户将失去对其先前主文件夹的访问权限,因为他们会获得一个新的主文件夹。
- 用户将失去对之前通过直接共享或通过来自先前提供商的群组共享的任何内容的访问权限。
- 共享对话框中会出现重复的用户和群组,从而造成混淆。
为避免上述问题,在切换到使用新提供商之前,必须将用户从旧 SAML 提供商迁移到新 SAML 提供商。有两种方案可供选择:
原地 SAML 提供商更新
这是最简单的方案,仅当当前和目标身份提供商共享相同的属性时才应采用。特别是,ID 属性映射到的值不得更改,否则用户将在 Foundry 中获得一个全新的账户。
:::callout{theme="neutral"} 如果新身份提供商中传入用户或群组的 ID 属性与现有 ID 属性不同,请遵循外部到外部 SAML 提供商更新流程。 :::
请按照以下步骤执行原地 SAML 提供商更新:
- 在控制面板中,导航至注册设置下的身份验证选项卡。找到要更新的 SAML 提供商,点击操作下拉菜单,然后选择管理。
在 SAML 部分,选择管理。
-
下载 SAML 集成元数据 XML。在身份提供商端更新您的 SAML 应用程序。
-
在身份提供商元数据下,将新的身份提供商联合元数据文件上传到控制面板。
-
测试 新集成是否按预期工作,用户属性是否未更改,以及用户是否未获得新的 Foundry 账户。
外部到外部 SAML 提供商更新
请按照以下步骤执行外部到外部 SAML 提供商更新:
- 在控制面板中,导航至注册设置下的身份验证选项卡。在身份验证提供商下,选择添加提供商并添加新提供商。
了解更多关于配置 SAML 2.0 集成以添加新 SAML 提供商的信息。
-
使用测试账户测试新的 SAML 集成。
-
暂时禁用该集成,以避免同时启用重复的提供商。
-
联系您的 Palantir 代表,以获取将用户从旧提供商迁移到新提供商的帮助。