Create a sensitive data scan(创建敏感数据扫描)
Both one-time and recurring sensitive data scans are configured via the same user workflow. To begin, navigate to the Sensitive Data Scanner application and select Create new sensitive data scan. This will open an overview page explaining the steps in making a sensitive data scan:
- Select Resources to Scan: This section allows you to specify the datasets you would like to scan. See Selecting resources to scan for more details.
- Select Match Conditions: If the type of sensitive data you need to look for currently is not available as a match condition in your space, you can create a match condition from this section as well. See Create match conditions for more details.
- Select Match Actions: If the action you want Sensitive Data Scanner to take does not exist as an match action in your space, you can create a new match action in this section as well. See Create match actions.
- Review & Run: Final checks before creating a scan.
Selecting resources to scan
Resource types
Use the Resource types section to select one or multiple datasets, virtual tables, or media sets to scan. The Sensitive Data Scanner supports media sets that contain audio, document, or image file formats.

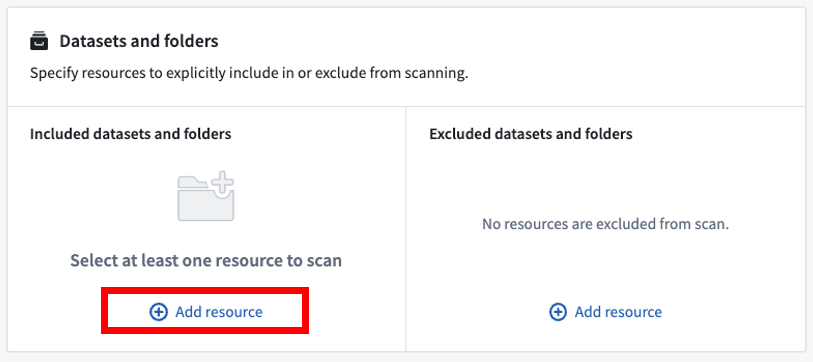
Included datasets and folders
You can explicitly include datasets or folders to scan by selecting Add resource under Included datasets and folders. If you add folders, all datasets within those folders will be scanned, unless they have been explicitly excluded. You must include at least one folder (including spaces/projects) or dataset in this section in order to proceed.
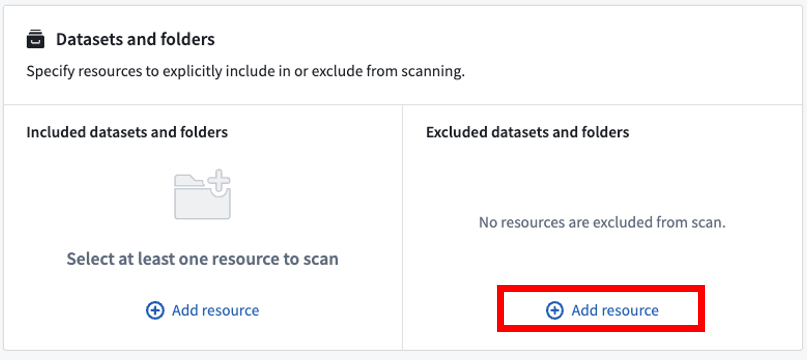
Excluded datasets and folders
Similarly, you can explicitly exclude datasets or folders to scan by selecting Add resource under Excluded datasets and folders. If you add folders, all datasets within those folders will be excluded from the scan unless they’ve been explicitly included. You are not required to explicitly exclude any resources (this section can be left empty).
In the rare case where a resource is both included and excluded, the most specific inclusion or exclusion will take precedence. For example, a dataset could be included, but it might be located in an excluded folder. In this case, the dataset (included) is more specific than the parent folder (excluded), so the dataset will be scanned.
Scan strategy
The following scan strategy options allow you to further refine the behavior of your sensitive data scan.
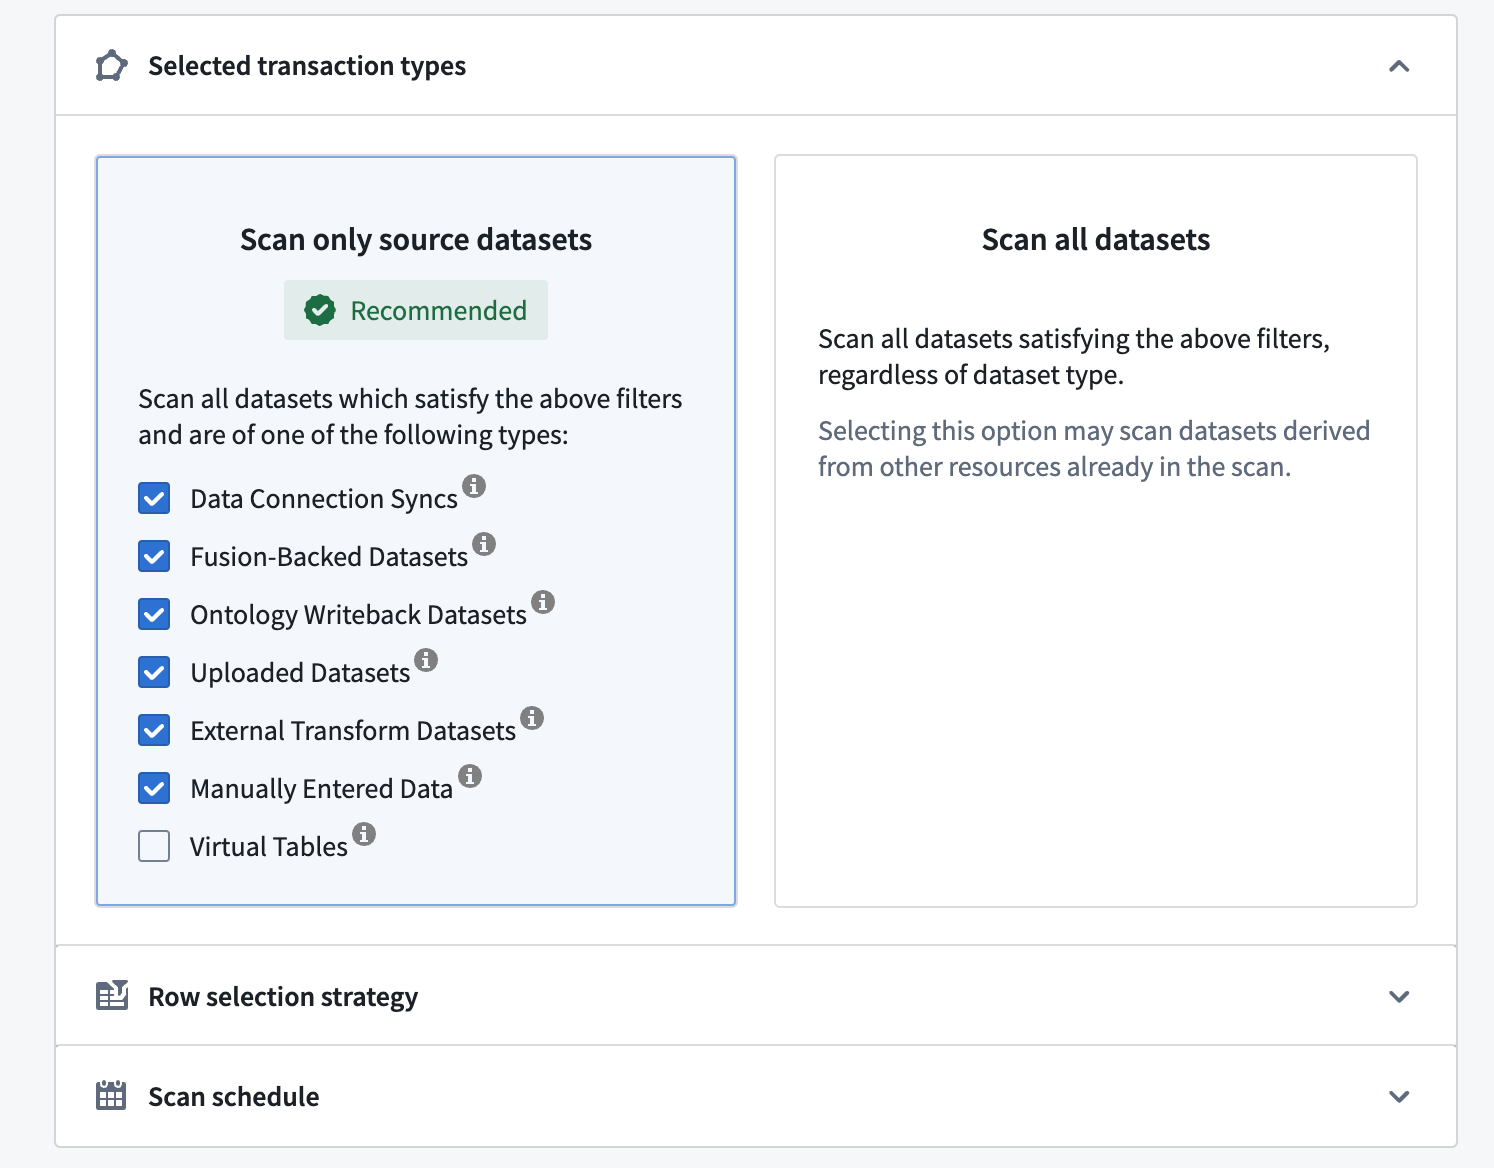
Selected transaction types
Sensitive Data Scanner allows you to specify which datasets to scan based on certain dataset attributes. There are two options:
- Scan only source datasets: Allows you to scan only the common source dataset types. These datasets generally represent new data in Foundry not derived from other datasets. Scan only source dataset is the recommended option as it allows you to find sensitive data by monitoring the “data boundary” in Foundry, without necessarily scanning all the datasets in your space.
- By (un)checking the checkboxes for the various resource types, you can also narrow down more precisely what types of datasets should/should not be scanned, such as Manually Entered Data, Uploaded Datasets, Data Connection Syncs, and more.
- You can also opt-in to scan virtual tables for PII. Virtual tables are pointers to tables in source systems outside of Foundry; this option enables you to scan federated data for PII. Please note that these source systems must be reachable at the time of the scan in order to succeed.
- Scan all datasets: Scans all datasets, including derived datasets. Since more datasets are scanned, this option requires more computational resources to execute than scanning only source datasets.
In the example below, Sensitive Data Scanner will scan only source datasets within the selected folder(s).
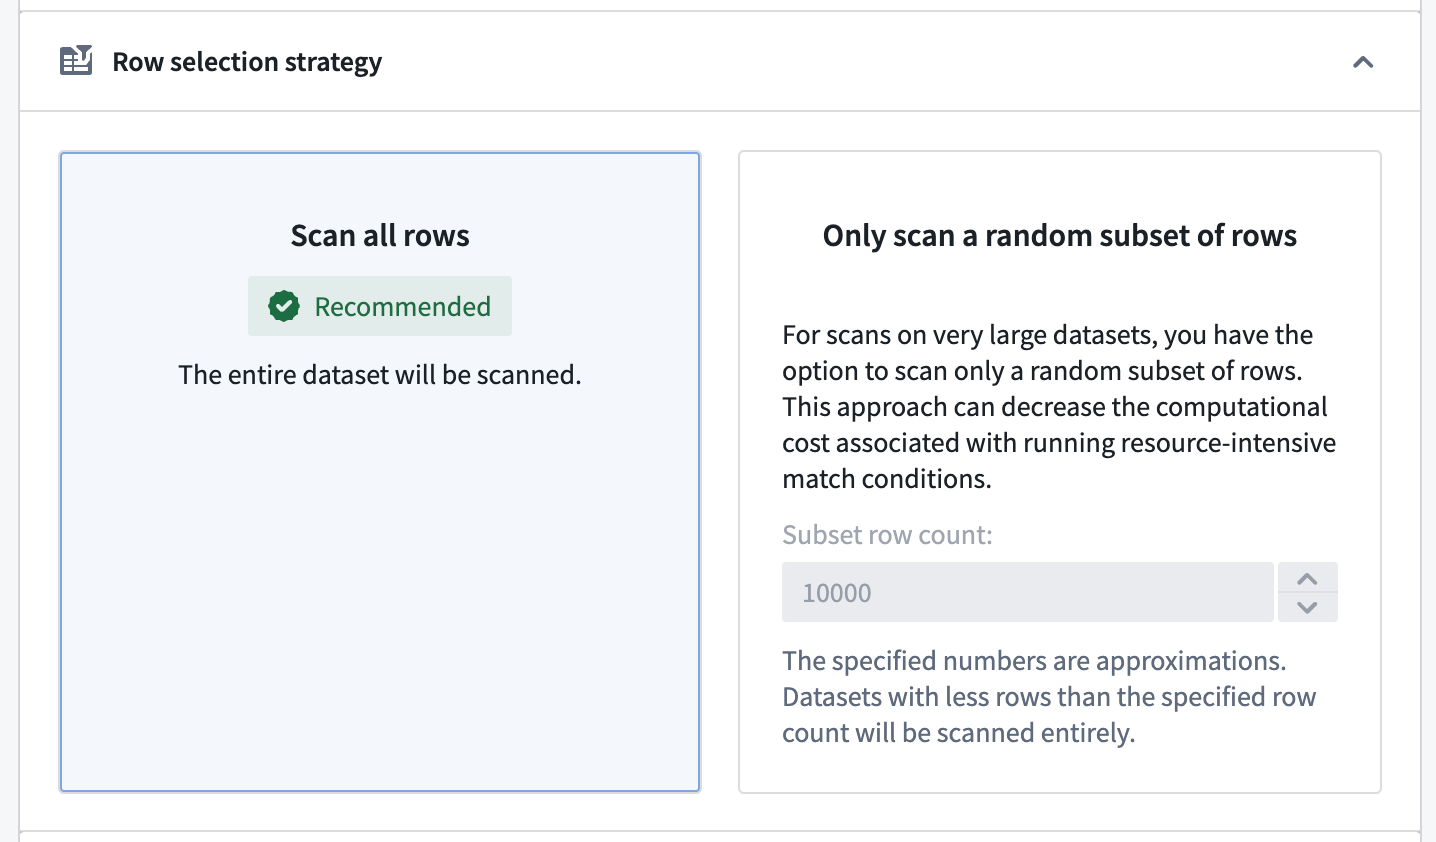
Row selection strategy
Additionally, you have the option to configure the number of rows to be scanned.
- The Scan all rows option will scan the entire dataset. This is generally the recommended option since only an exhaustive scan can guarantee that the scan result is correct, since all datasets containing values that trigger the selected match condition will be flagged. Note that this option can lead to long scan times, depending on the complexity of the configured match conditions and the size of your scanned datasets.
- The Only scan a random subset of rows option allows you to scan a randomly sampled subset of the rows instead of scanning the entire dataset. This approach can decrease the computational cost associated with running resource-intensive match conditions.
- Note: The specified number is an approximation, and datasets with fewer rows than the specified row count will be scanned entirely.
Scan schedule
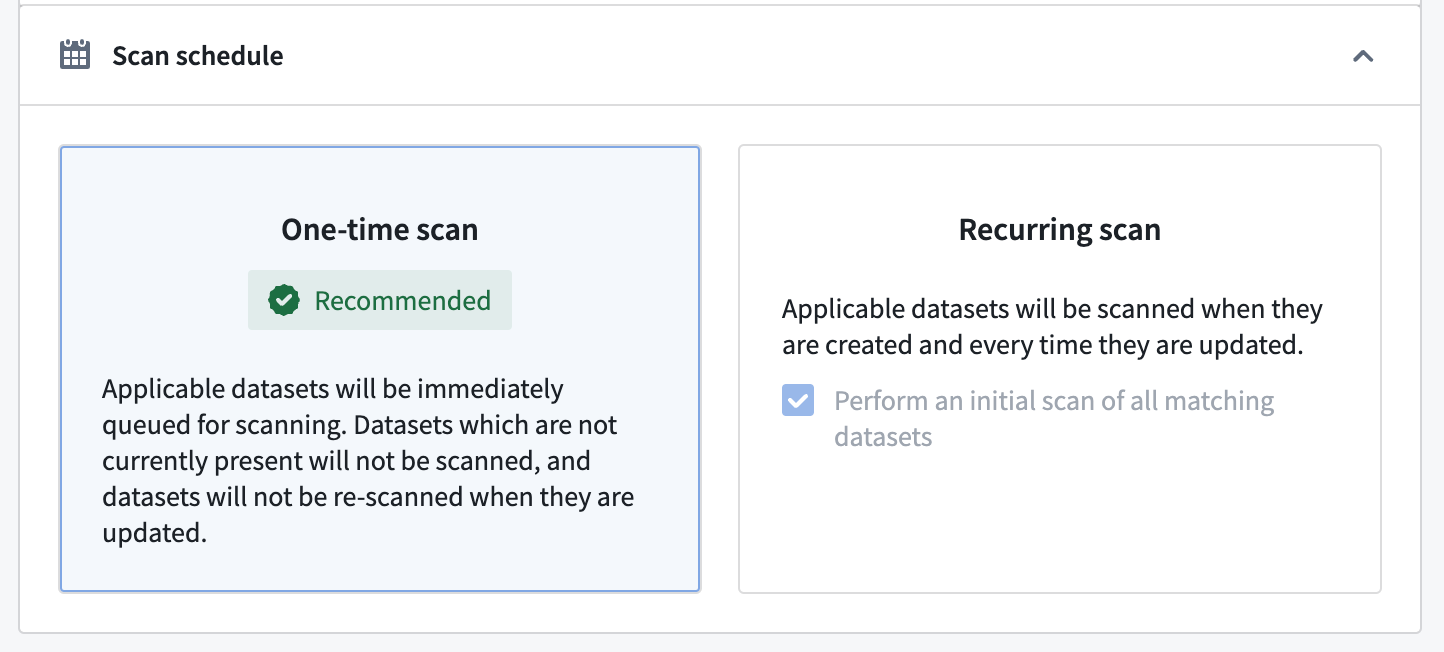
In the Scan Schedule section, you have two options to configure when the scan will run:
- One-time scan: A scan will run immediately on all datasets within the specified resource filter(s). Note that datasets that are updated, created, or added at a later time will not be scanned.
- Recurring scan: A scan will run periodically on all resources within the specified resource filter(s) on the selected schedule:
- Daily: Everyday at 00:00 UTC
- Weekly: Every Tuesday at 00:00 UTC
- Monthly: Every 1st day of the month at 00:00 UTC
- Continuous: Scans a dataset whenever new data is added to a given dataset within the specified resource filter(s).
:::callout{theme="neutral"} For recurring scans, you can select Perform an initial scan of all matching datasets to scan all current datasets immediately. This ensures that datasets are scanned even if they are not updated later. :::
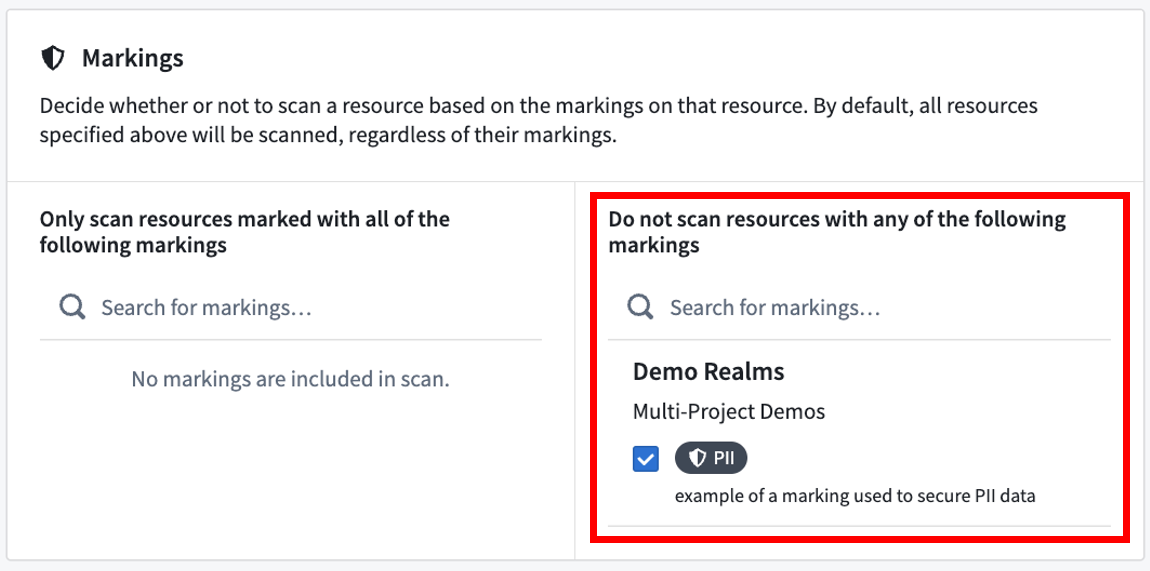
Included and excluded Markings
Similar to including and excluding datasets and folders explicitly, you can include and exclude datasets based on the Markings on those datasets. This is an advanced feature that is generally used to exclude datasets that already are protected. For example, in the screenshot below, we see that datasets marked with PII (Personally Identifiable Information) will not be scanned because this PII marking may have been applied after a match in a prior sensitive data scan.
Selecting match conditions
The first steps for creating a sensitive data scan are to select the specific match conditions you would like to look for, followed by the specific match actions that Sensitive Data Scanner should perform if a match is found.
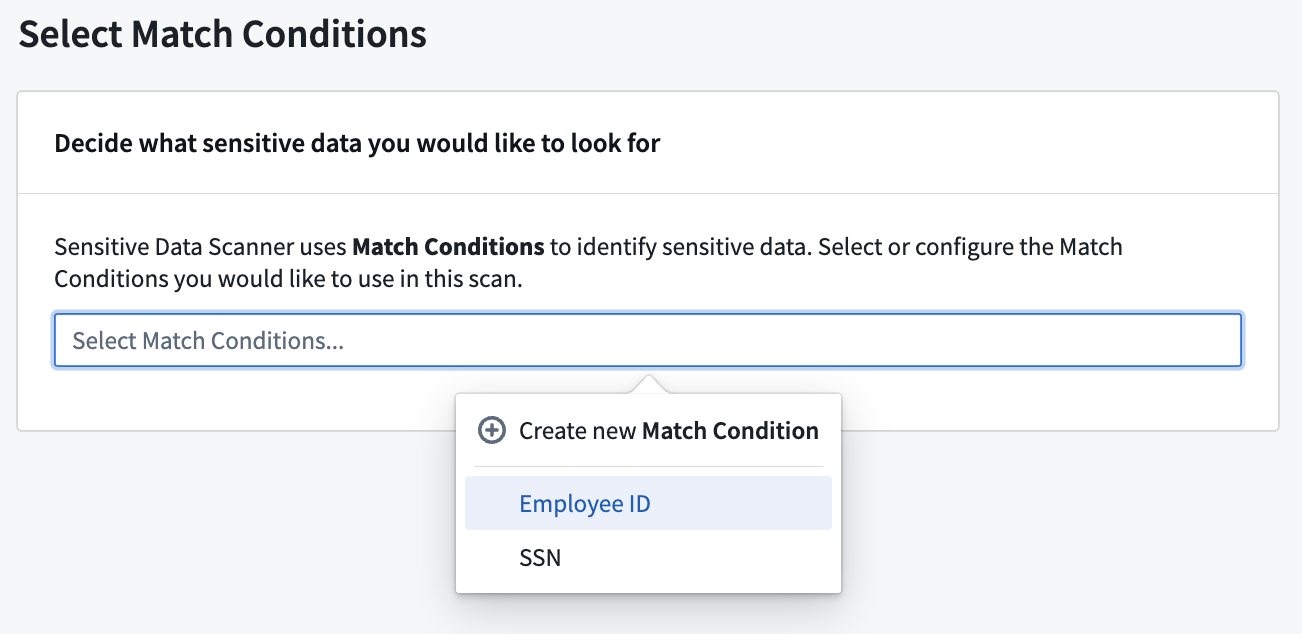
When choosing your match conditions, consider what sensitive data you want to look for and what match conditions are already available for your space. If the desired type(s) of sensitive data do not have a corresponding match condition, you can create a new match condition.
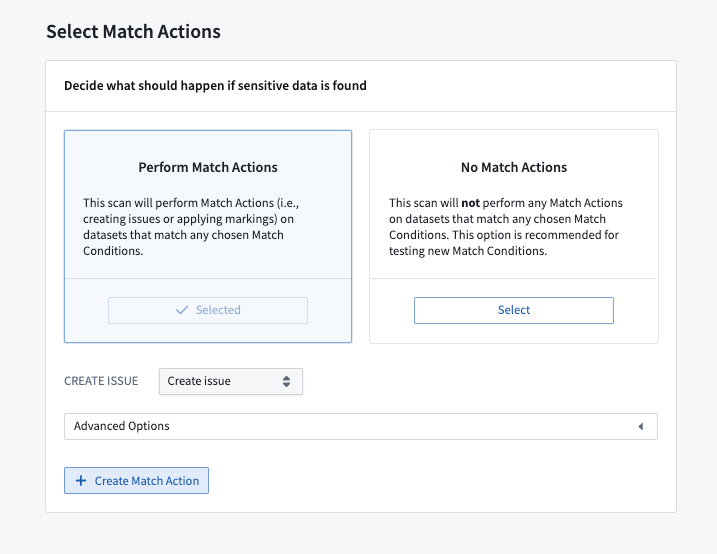
Selecting match actions
When choosing your match actions, consider the appropriate response to detecting your sensitive data. You can choose between three types of actions:
- Create issues: Inform a specified set of users that sensitive data was found.
- Apply markings: Place access controls on datasets with sensitive data.
- Obfuscate data: Encrypt or hash matched data using Cipher.
You can also choose to not apply any match action at all.
If the appropriate match action does not exist in your space, you can create one. See Create match actions for more details.
:::callout{theme="warning" title="Test your match conditions"} If your sensitive data scan involves a substantial number of datasets, it is advisable to test the match conditions before proceeding further. Misconfigured match conditions may generate false positives, leading to unwanted issues, markings on datasets, or obfuscated data. To test match conditions, select No Match Actions for your scan. Once the scan has finished and you have verified that the match condition aligns with the expected format of data, you can apply additional match actions from the scan's overview page.
Review Applying additional match actions for more details. :::
Review and run
In the final stage of creating an sensitive data scan, you can review the match conditions, match actions, and resources that you’ve selected for the scan.
At this step, Sensitive Data Scanner will also compute the datasets required for the scan based on the resource filters you chose when tuning your scan.

If you chose a one-time scan schedule, you can trigger the scan by selecting Run One-Time Scan.
If you chose a recurring scan schedule, you will also be able to add a name and description for the scan. You can then save the scan by selecting Save as Recurring Scan.
Applying additional match actions
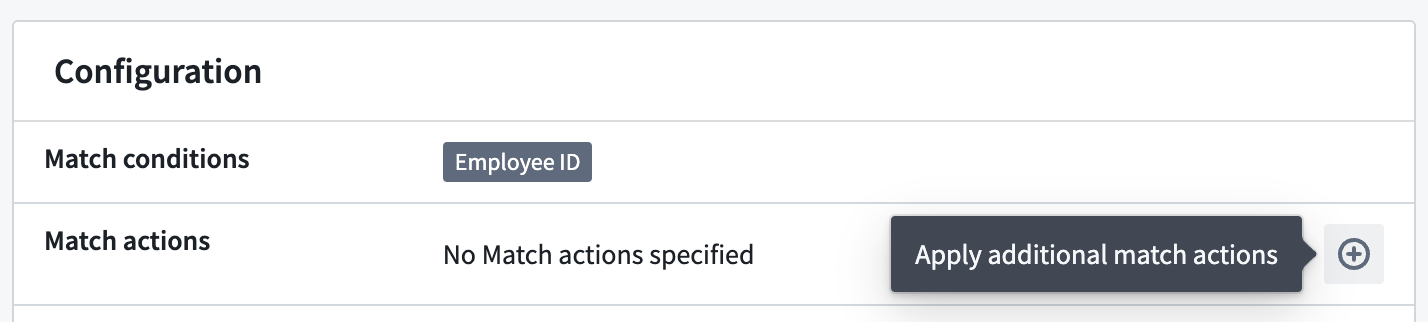
For inactive scans that were created within the past seven days, you can select additional match actions to apply to the sensitive data discovered by the scan.
:::callout{theme="warning" title="Recurring scans"} For recurring scans, additional match actions will only apply to matches that were identified up until the point at which the additional match action was selected. If the scan is reactivated later, any future sensitive data detected by the recurring scan will not automatically have the previously selected additional match actions applied. :::
View the status of the application of additional match actions at the bottom of a scan's overview page.

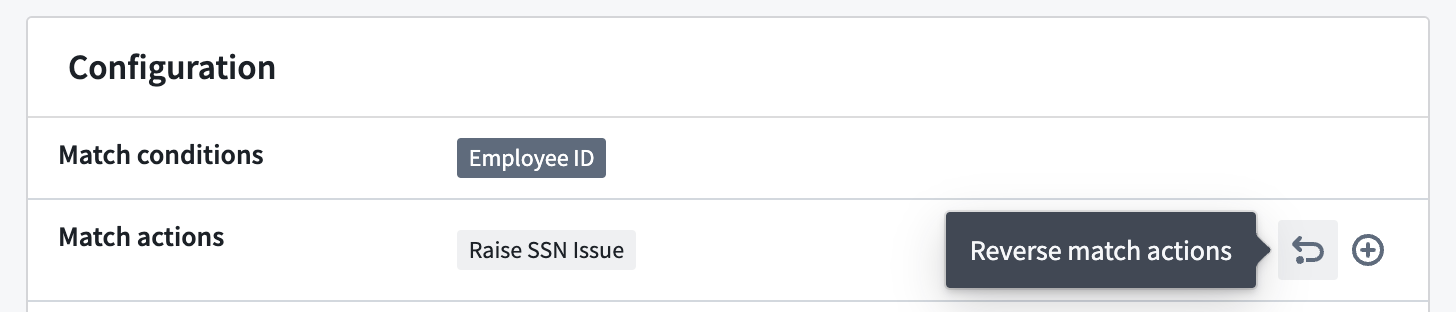
Reversing match actions
For inactive scans that were created within the past seven days, you can reverse match actions that were previously applied to the sensitive data discovered by the scan. For Create issues match actions, this will result in the deletion of issues created by the action. For Apply markings match actions, it will involve removing the markings that were applied by the action.
Note that obfuscate data actions cannot be reverted.
:::callout{theme="warning" title="Recurring scans"} For recurring scans, only the results of the actions up until the time the match action reversal was performed will be reversed. If the scan is later reactivated, any future sensitive data discovered by the recurring scan will still apply the match action if it was configured in the initial scan setup, even after being reversed. To stop the recurring scan from continuing to perform certain match actions when it is made active again, edit the recurring scan to remove the match action before reactivating the scan. :::
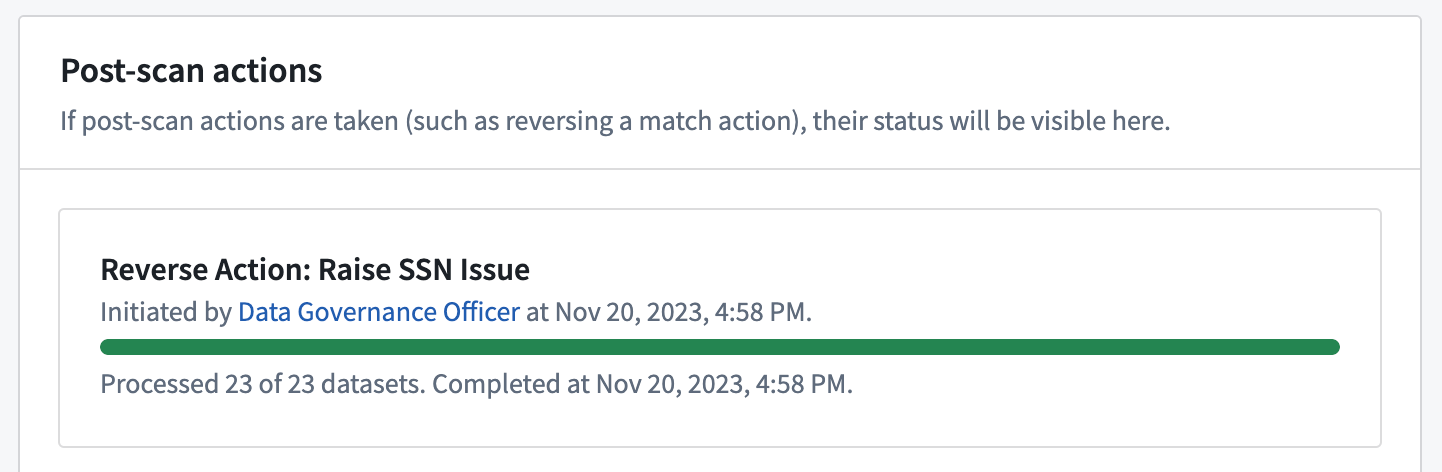
View the status of the reversal of match actions at the bottom of a scan's overview page.
中文翻译
创建敏感数据扫描
一次性扫描和定期扫描均通过相同的用户工作流进行配置。首先,导航至 Sensitive Data Scanner 应用程序,然后选择 Create new sensitive data scan(创建新的敏感数据扫描)。这将打开一个概览页面,说明创建敏感数据扫描的步骤:
- Select Resources to Scan(选择要扫描的资源): 此部分允许您指定要扫描的数据集。详情请参阅选择要扫描的资源。
- Select Match Conditions(选择匹配条件): 如果您当前需要查找的敏感数据类型在您的空间中不可用作匹配条件,您也可以在此部分创建匹配条件。详情请参阅创建匹配条件。
- Select Match Actions(选择匹配操作): 如果您希望 Sensitive Data Scanner 执行的操作在您的空间中不作为匹配操作存在,您也可以在此部分创建新的匹配操作。详情请参阅创建匹配操作。
- Review & Run(审查并运行): 创建扫描前的最终检查。
选择要扫描的资源
资源类型
使用 Resource types(资源类型) 部分选择一个或多个数据集、虚拟表或媒体集进行扫描。Sensitive Data Scanner 支持包含音频、文档或图像文件格式的媒体集。
包含的数据集和文件夹
您可以通过在 Included datasets and folders(包含的数据集和文件夹) 下选择 Add resource(添加资源) 来显式包含要扫描的数据集或文件夹。如果您添加文件夹,则该文件夹内的所有数据集都将被扫描,除非它们已被显式排除。您必须在此部分至少包含一个文件夹(包括空间/项目)或数据集才能继续。
排除的数据集和文件夹
类似地,您可以通过在 Excluded datasets and folders(排除的数据集和文件夹) 下选择 Add resource(添加资源) 来显式排除要扫描的数据集或文件夹。如果您添加文件夹,则该文件夹内的所有数据集都将从扫描中排除,除非它们已被显式包含。您不需要显式排除任何资源(此部分可以留空)。
在极少数情况下,如果某个资源既被包含又被排除,则最具体的包含或排除将优先。例如,一个数据集可能被包含,但它可能位于一个被排除的文件夹中。在这种情况下,数据集(被包含)比父文件夹(被排除)更具体,因此该数据集将被扫描。
扫描策略
以下扫描策略选项允许您进一步优化敏感数据扫描的行为。
选定的事务类型
Sensitive Data Scanner 允许您根据某些数据集属性指定要扫描的数据集。有两个选项:
- Scan only source datasets(仅扫描源数据集): 允许您仅扫描常见的源数据集类型。这些数据集通常代表 Foundry 中并非源自其他数据集的新数据。仅扫描源数据集是推荐选项,因为它允许您通过监控 Foundry 中的“数据边界”来查找敏感数据,而无需扫描空间中的所有数据集。
- 通过(取消)选中各种资源类型的复选框,您还可以更精确地缩小应/不应扫描的数据集类型范围,例如手动输入的数据、上传的数据集、数据连接同步等。
- 您还可以选择扫描虚拟表以查找 PII(个人身份信息)。虚拟表是指向 Foundry 外部源系统中表的指针;此选项使您能够扫描联邦数据以查找 PII。请注意,这些源系统必须在扫描时可访问才能成功。
- Scan all datasets(扫描所有数据集): 扫描所有数据集,包括派生数据集。由于扫描的数据集更多,此选项比仅扫描源数据集需要更多的计算资源来执行。
在下面的示例中,Sensitive Data Scanner 将仅扫描所选文件夹内的源数据集。
行选择策略
此外,您还可以配置要扫描的行数。
- Scan all rows(扫描所有行) 选项将扫描整个数据集。这通常是推荐选项,因为只有全面扫描才能保证扫描结果的正确性,因为所有包含触发所选匹配条件的值的数据集都将被标记。请注意,此选项可能导致扫描时间较长,具体取决于配置的匹配条件的复杂性和扫描数据集的大小。
- Only scan a random subset of rows(仅扫描随机行子集) 选项允许您扫描随机抽样的行子集,而不是扫描整个数据集。这种方法可以降低运行资源密集型匹配条件相关的计算成本。
- 注意: 指定的数字是一个近似值,行数少于指定行数的数据集将被完整扫描。
扫描计划
在 Scan Schedule(扫描计划) 部分,您有两个选项来配置扫描的运行时间:
- One-time scan(一次性扫描): 扫描将立即对指定资源筛选器内的所有数据集运行。请注意,之后更新、创建或添加的数据集将不会被扫描。
- Recurring scan(定期扫描): 扫描将按照所选计划定期对指定资源筛选器内的所有资源运行:
- Daily(每日): 每天 UTC 时间 00:00
- Weekly(每周): 每周二 UTC 时间 00:00
- Monthly(每月): 每月第一天 UTC 时间 00:00
- Continuous(持续): 每当指定资源筛选器内的给定数据集添加新数据时进行扫描。
:::callout{theme="neutral"} 对于定期扫描,您可以选择 Perform an initial scan of all matching datasets(对所有匹配的数据集执行初始扫描) 以立即扫描所有当前数据集。这确保即使数据集之后未更新,也会被扫描。 :::
包含和排除的标记
与显式包含和排除数据集和文件夹类似,您可以根据这些数据集上的标记来包含和排除数据集。这是一个高级功能,通常用于排除已经受保护的数据集。例如,在下面的屏幕截图中,我们看到标记为 PII(个人身份信息)的数据集将不会被扫描,因为此 PII 标记可能是在先前敏感数据扫描中匹配后应用的。
选择匹配条件
创建敏感数据扫描的第一步是选择您要查找的特定匹配条件,然后是 Sensitive Data Scanner 在找到匹配时应执行的特定匹配操作。
在选择匹配条件时,请考虑您要查找的敏感数据以及您的空间中已有的匹配条件。如果所需的敏感数据类型没有相应的匹配条件,您可以创建新的匹配条件。
选择匹配操作
在选择匹配操作时,请考虑检测到敏感数据后的适当响应。您可以在三种类型的操作中进行选择:
- 创建问题:通知指定的用户组已发现敏感数据。
- 应用标记:对包含敏感数据的数据集设置访问控制。
- 混淆数据:使用 Cipher 加密或哈希匹配的数据。
您也可以选择不应用任何匹配操作。
如果您的空间中不存在适当的匹配操作,您可以创建一个。详情请参阅创建匹配操作。
:::callout{theme="warning" title="测试您的匹配条件"} 如果您的敏感数据扫描涉及大量数据集,建议在进一步操作之前测试匹配条件。配置错误的匹配条件可能会产生误报,导致不必要的问题、数据集上的标记或数据混淆。要测试匹配条件,请为您的扫描选择 No Match Actions(无匹配操作)。扫描完成后,您已验证匹配条件与预期的数据格式一致,您可以从扫描的概览页面应用其他匹配操作。
有关更多详细信息,请参阅应用其他匹配操作。 :::
审查并运行
在创建敏感数据扫描的最后阶段,您可以审查您为扫描选择的匹配条件、匹配操作和资源。
在此步骤中,Sensitive Data Scanner 还将根据您在调整扫描时选择的资源筛选器计算扫描所需的数据集。
如果您选择了一次性扫描计划,您可以通过选择 Run One-Time Scan(运行一次性扫描) 来触发扫描。
如果您选择了定期扫描计划,您还可以为扫描添加名称和描述。然后,您可以通过选择 Save as Recurring Scan(保存为定期扫描) 来保存扫描。
应用其他匹配操作
对于在过去七天内创建的非活动扫描,您可以选择其他匹配操作以应用于扫描发现的敏感数据。
:::callout{theme="warning" title="定期扫描"} 对于定期扫描,其他匹配操作仅适用于在选择其他匹配操作之前已识别的匹配。如果稍后重新激活扫描,定期扫描检测到的任何未来敏感数据将不会自动应用先前选择的其他匹配操作。 :::
在扫描概览页面底部查看其他匹配操作的应用状态。
撤销匹配操作
对于在过去七天内创建的非活动扫描,您可以撤销先前应用于扫描发现的敏感数据的匹配操作。对于创建问题匹配操作,这将导致删除由该操作创建的问题。对于应用标记匹配操作,这将涉及移除由该操作应用的标记。
请注意,混淆数据操作无法撤销。
:::callout{theme="warning" title="定期扫描"} 对于定期扫描,只有执行匹配操作撤销之前的结果才会被撤销。如果稍后重新激活扫描,定期扫描发现的任何未来敏感数据仍将应用匹配操作(如果在初始扫描设置中配置了该操作),即使已被撤销。要阻止定期扫描在重新激活时继续执行某些匹配操作,请在重新激活扫描之前编辑定期扫描以移除该匹配操作。 :::
在扫描概览页面底部查看匹配操作撤销的状态。