Getting started(入门指南)
In this tutorial, you will install an alert inbox application using a notional datasource that contains car part issues, which we have provided as its own Marketplace product.
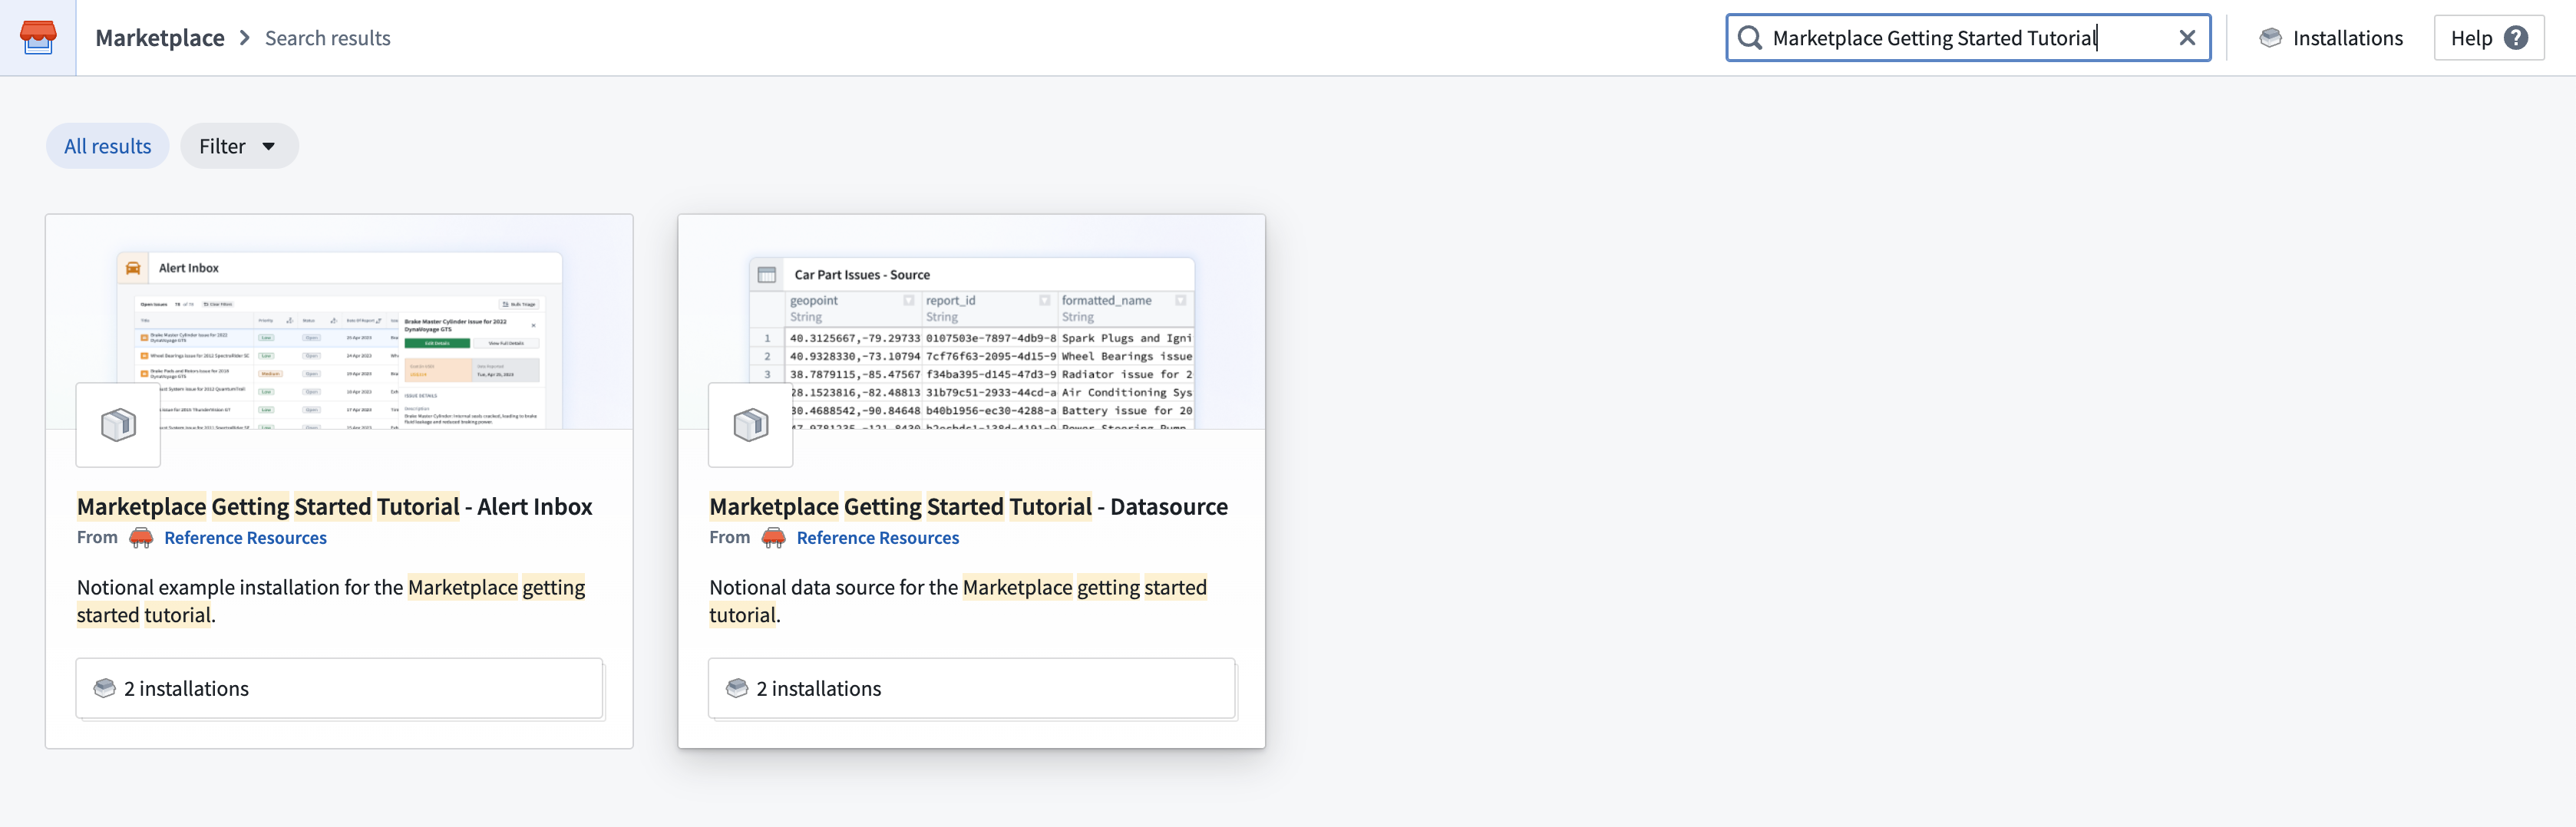
To begin, navigate to Marketplace on your Foundry instance and search for Marketplace Getting Started Tutorial - Datasource, as below. If you are not able to locate this product, contact your Palantir representative.
Install your datasource
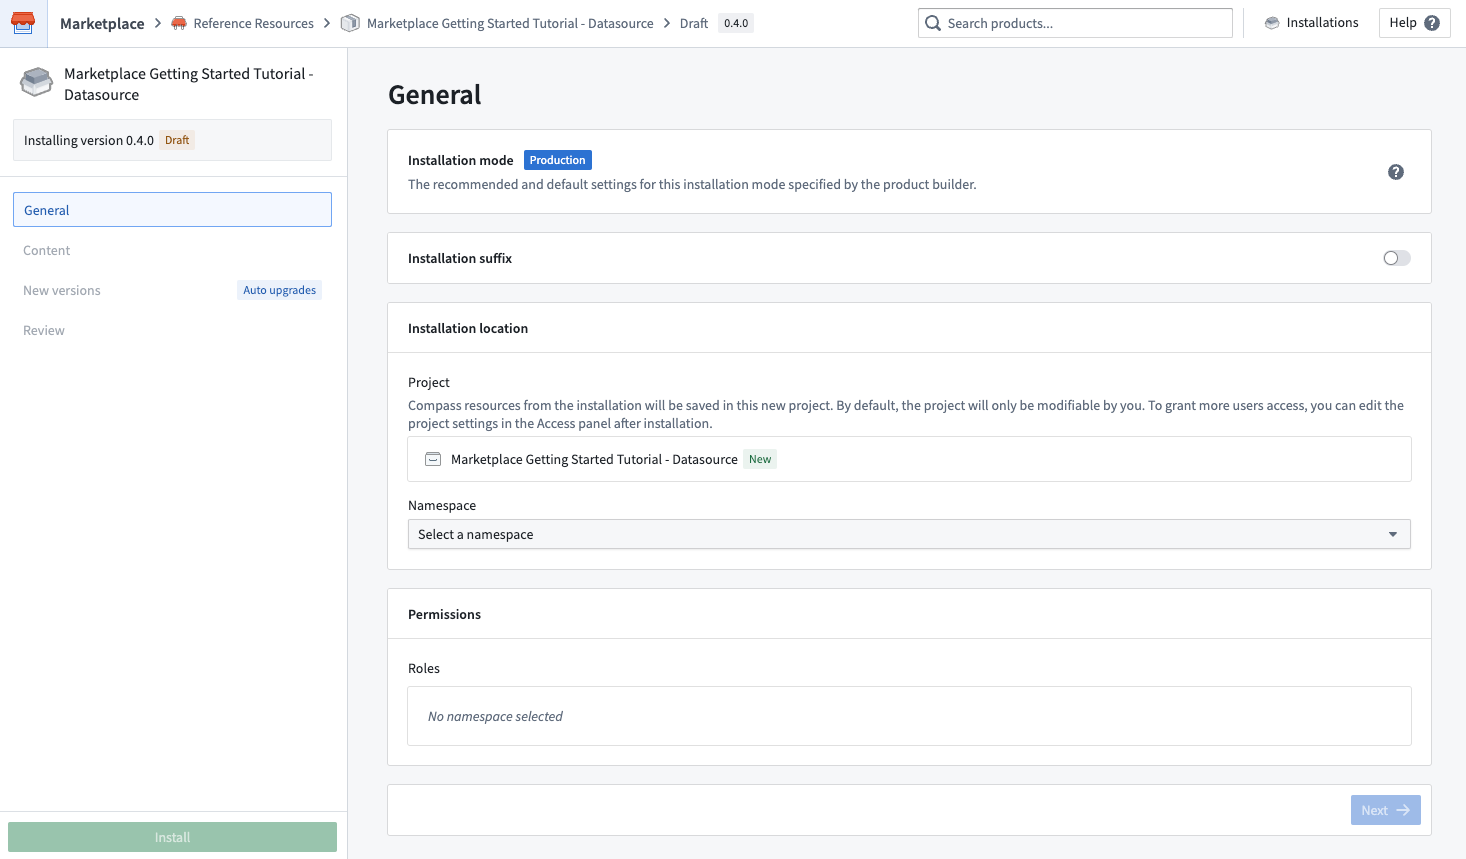
Once you have located the tutorial datasource, click Install in the top right corner. If someone in your organization has already created an installation that you have access to, you will instead see an Open and Install again button. In this case, select Install again to proceed with the installation.

When installing:
- Choose a project to install into. The namespace is derived from the location of the project.
- As the product only contains a dataset, an Ontology is not required.
- This product does not have any inputs, so you can skip all other steps and select Install at the bottom of the left panel.
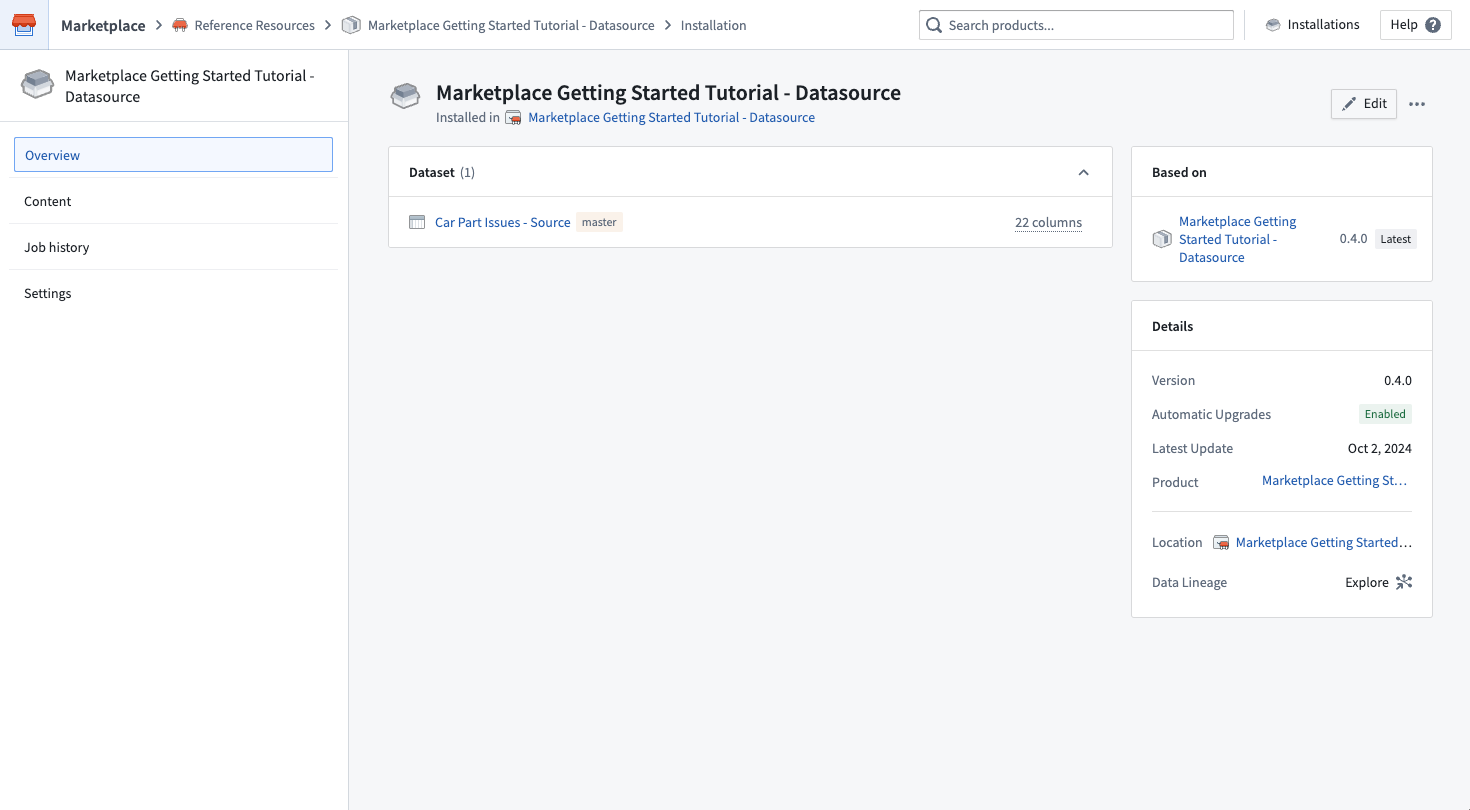
After beginning your installation, you will land on the installation job page. Once your installation is complete, select View installation in the upper right corner. From here, open up your Car Part Issues - Source dataset in a new tab. Return to the tab with your datasource installation.
Install your application
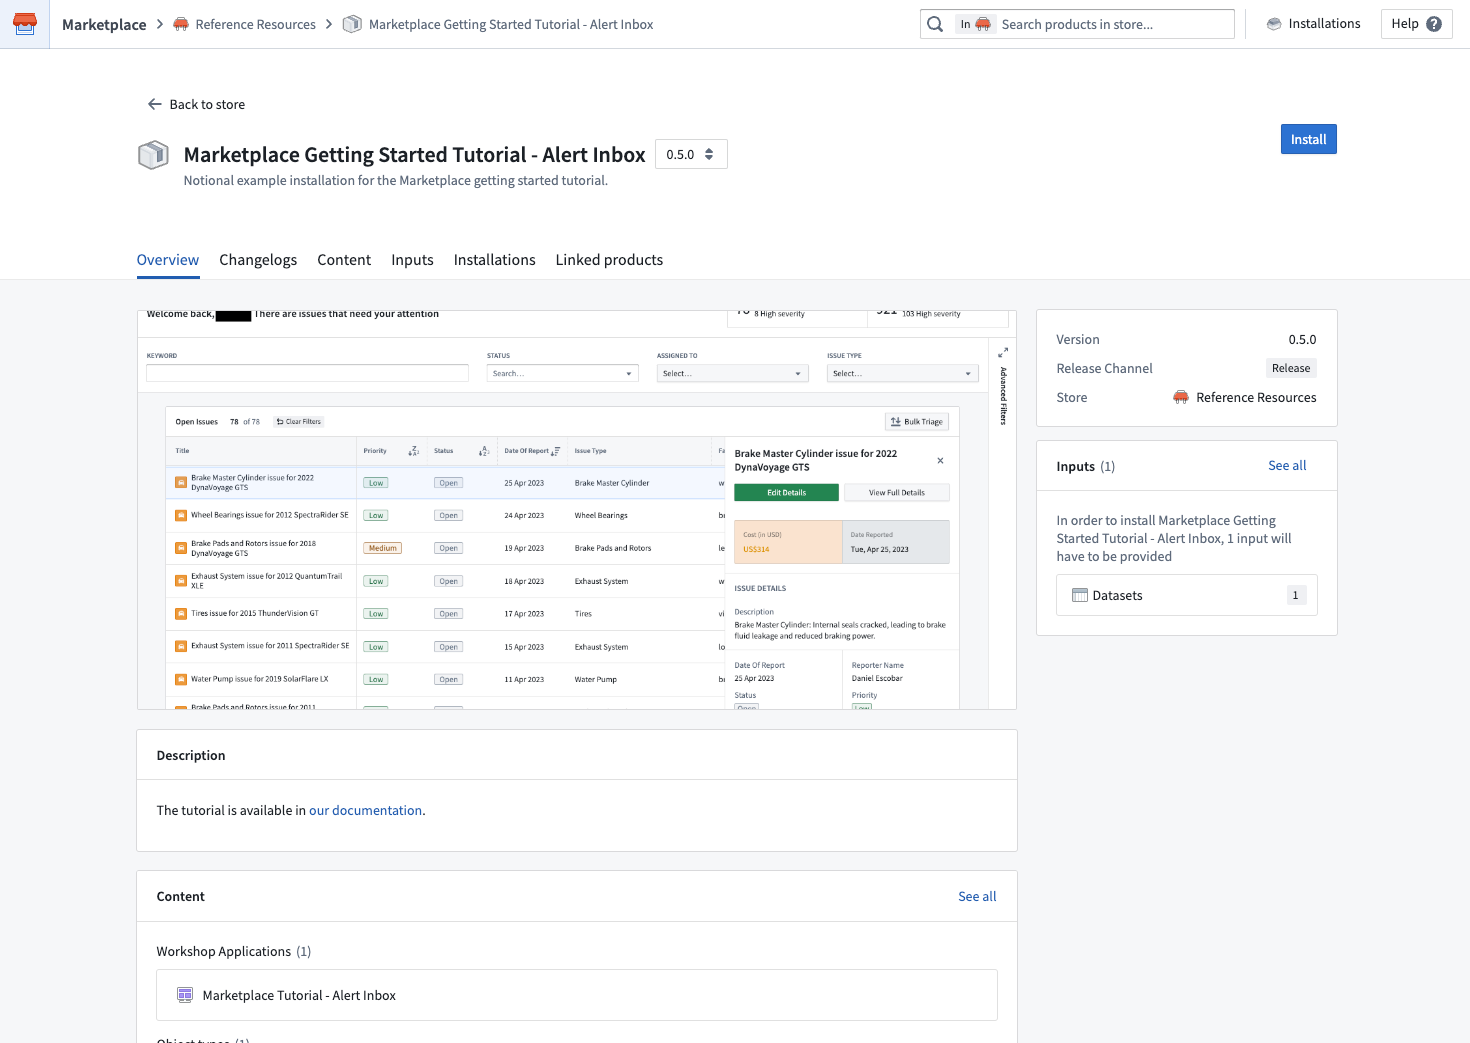
We will now begin installing our target application using our Car Part Issues - Source dataset as input. Using the product search bar in the header, search for Marketplace Getting Started Tutorial - Alert Inbox. This product also belongs in the Reference Resources store. Similar to the datasource product, click Install in the top right corner to begin installation, and if someone in your organization has already created an installation, select the Install again button to proceed with the installation.
General
- Choose a project to install into. The namespace is derived from the location of the project.
- Choose an ontology to install into. If you do not see the ontology you want, contact your platform administrator, as this means that you do not have permission to edit.
Inputs
Unlike your first installation, you will need to map an input to create the alert inbox application. This will be the Car Part Issues - Source that you have just installed, containing the notional issues data that will populate the alert inbox. To map this input:
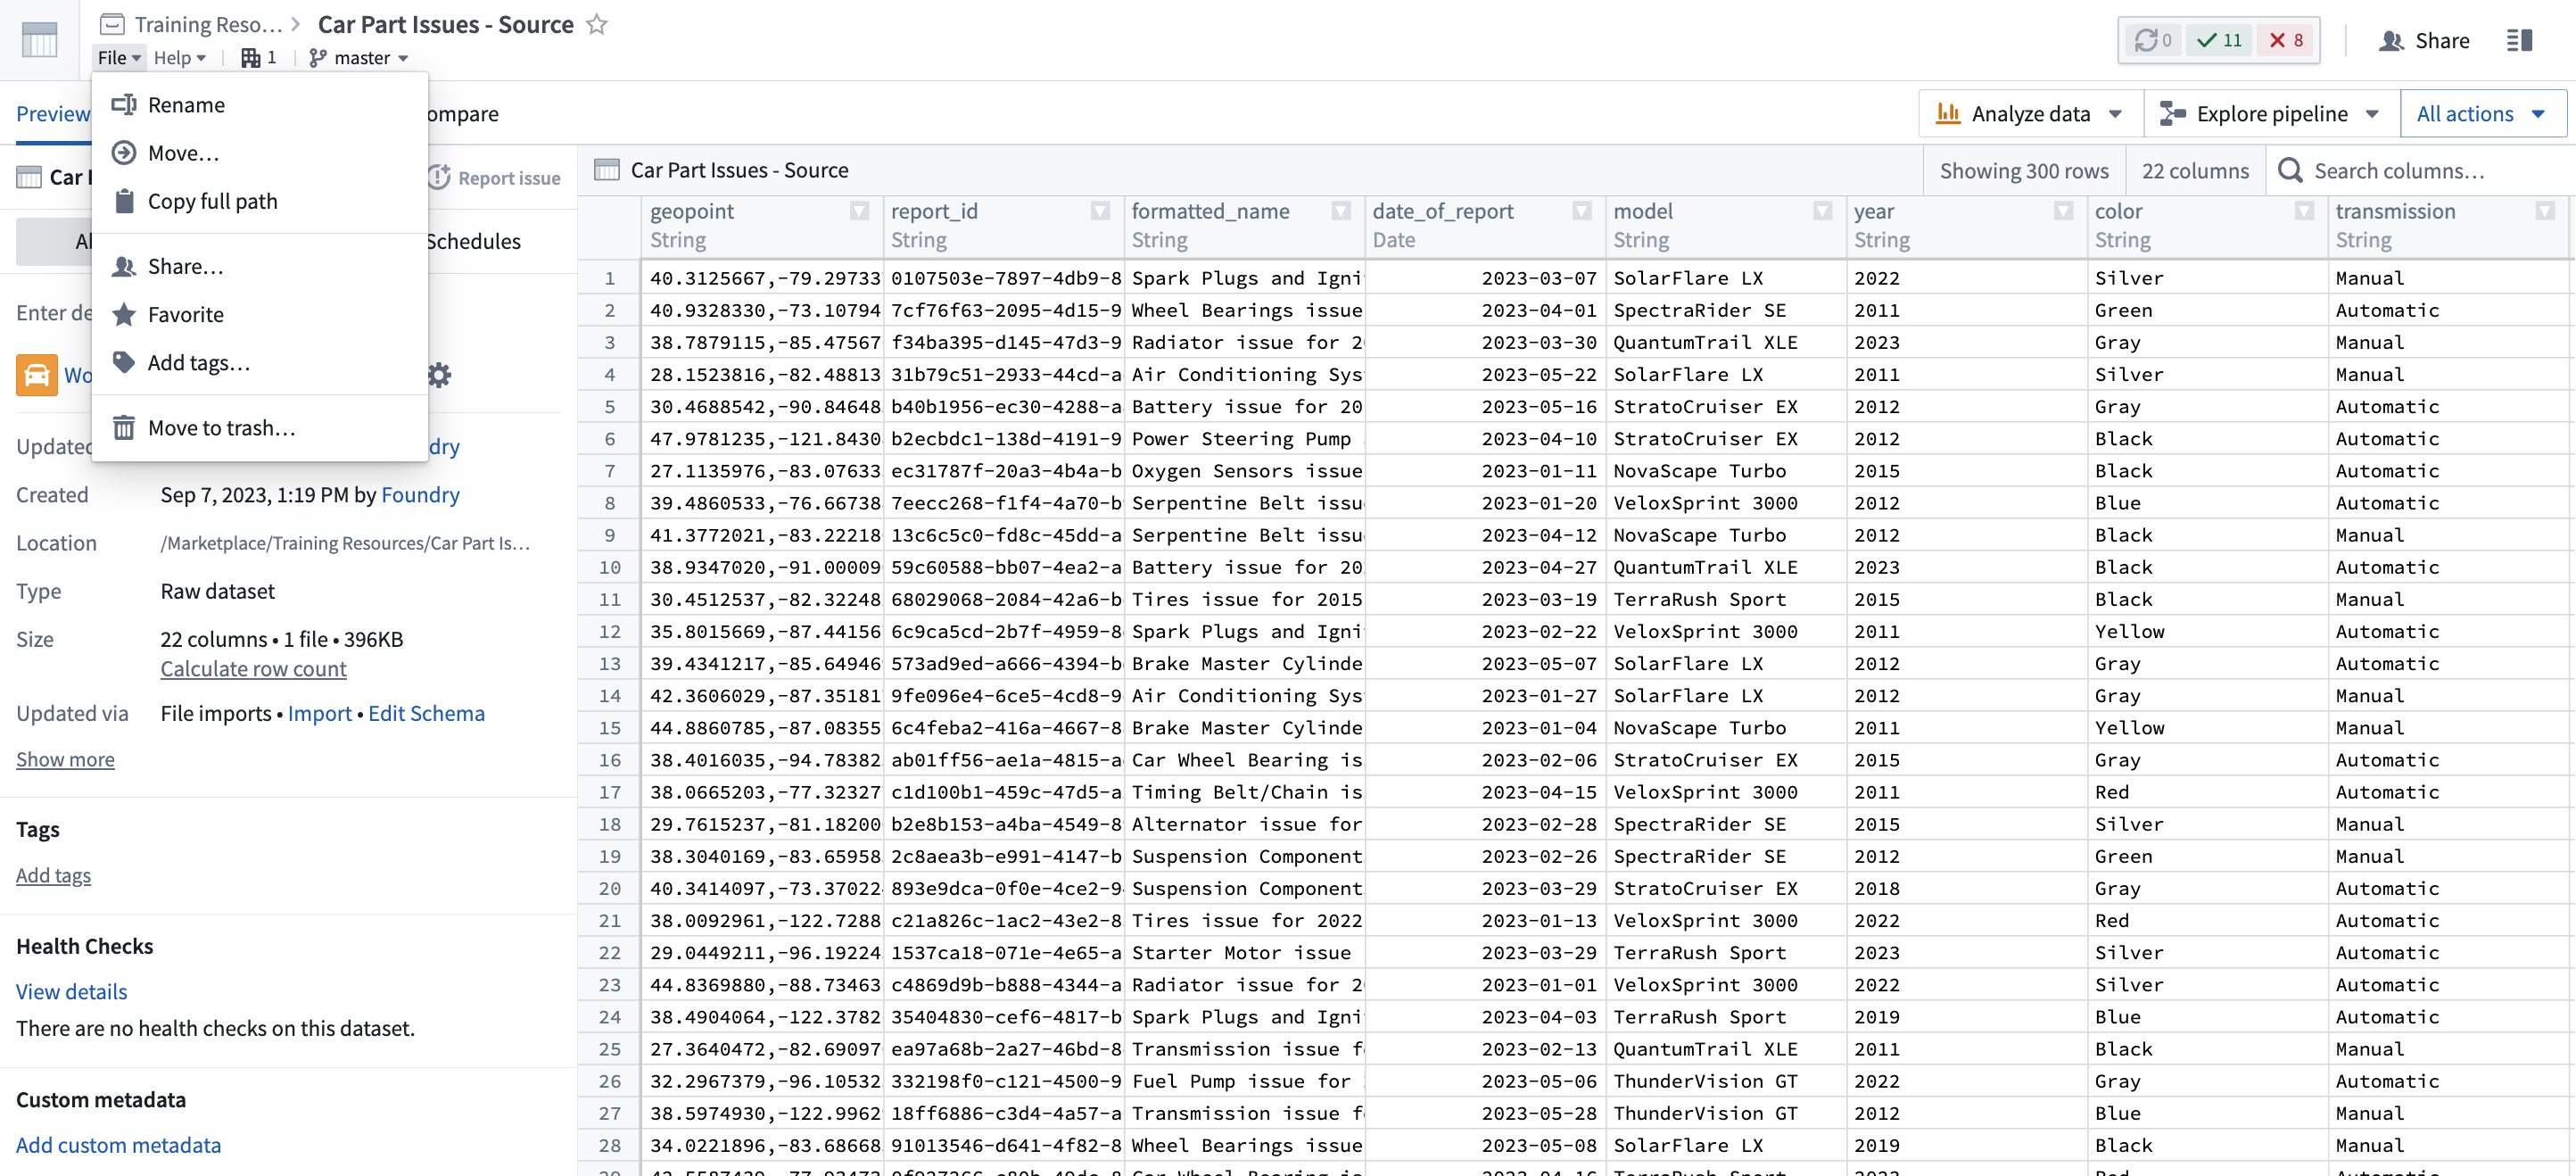
From the tab where you've opened the Car Part Issues - Source, copy the filepath by clicking File in the top left and then Copy full path as below.
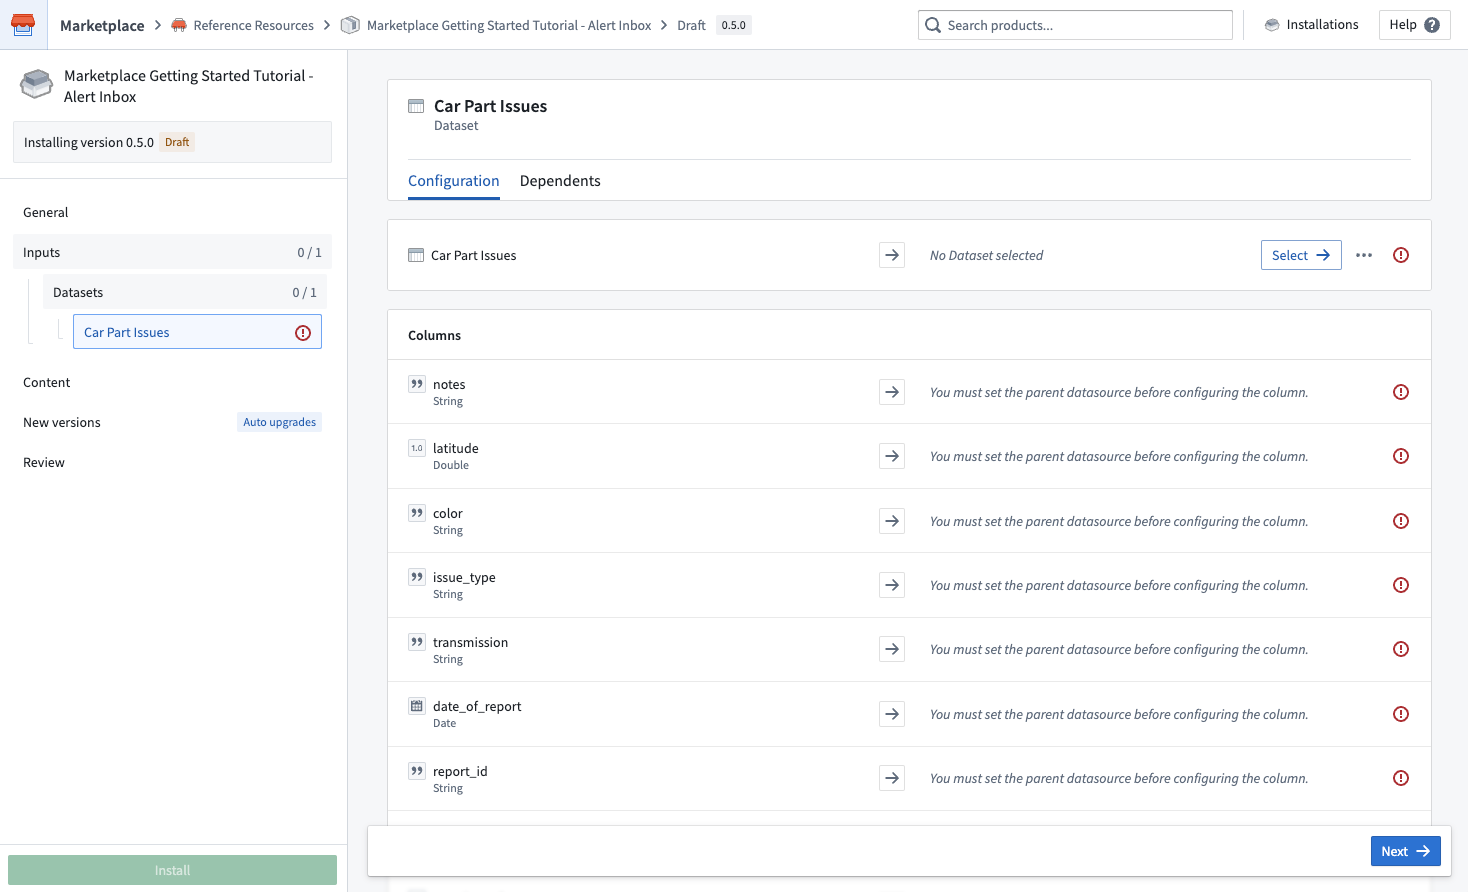
You now need to map your Car Part Issues - Source to satisfy the alert inbox product's one required input. To do so, return to your installation and click Select, and then paste the filepath you copied into search and select your dataset.
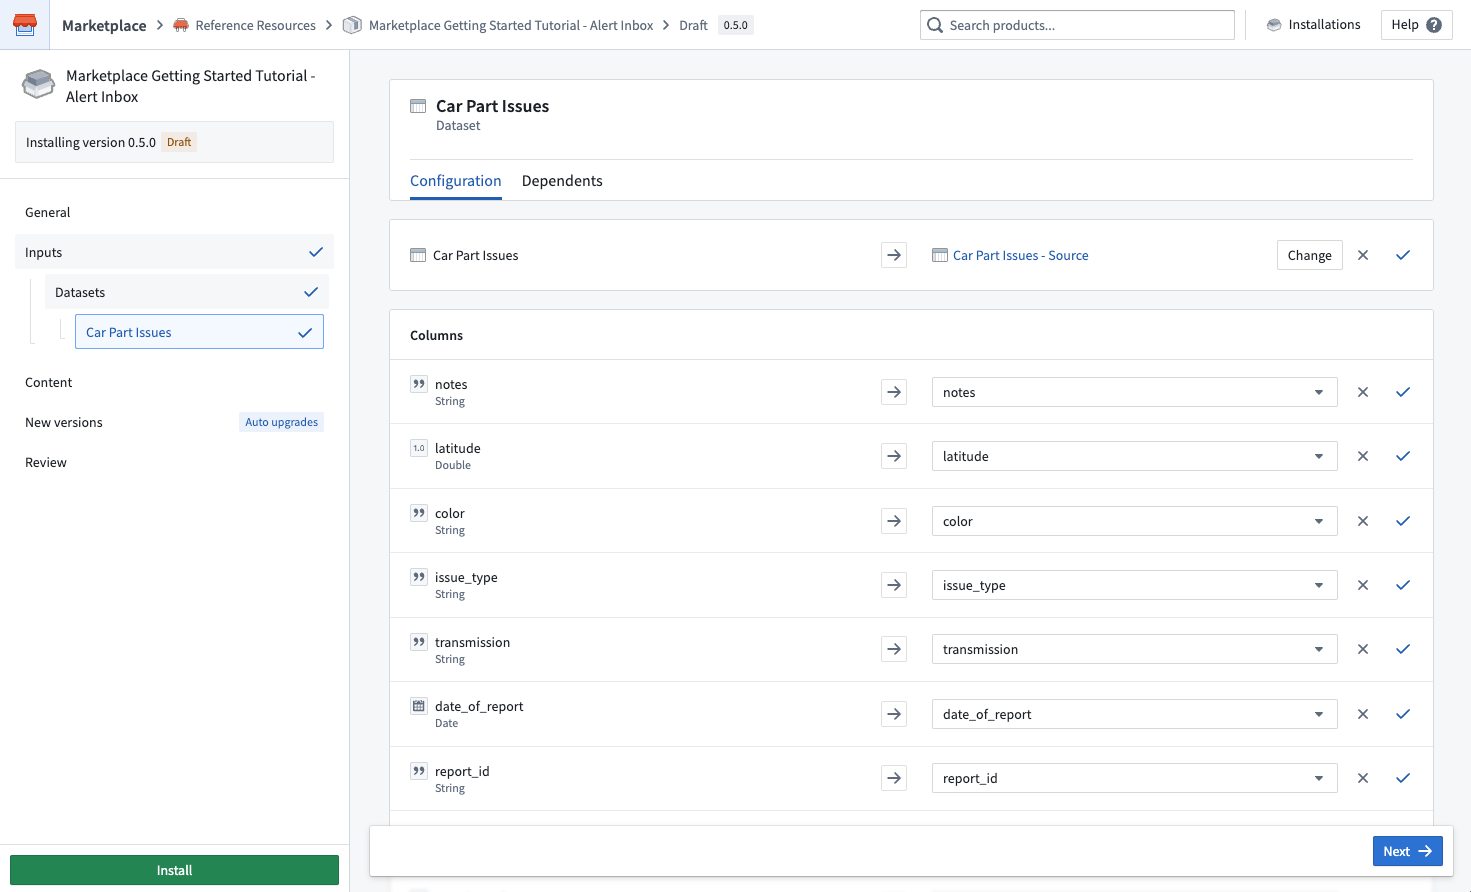
If all columns have mapped correctly, you will see a blue tick mark as below.
Content
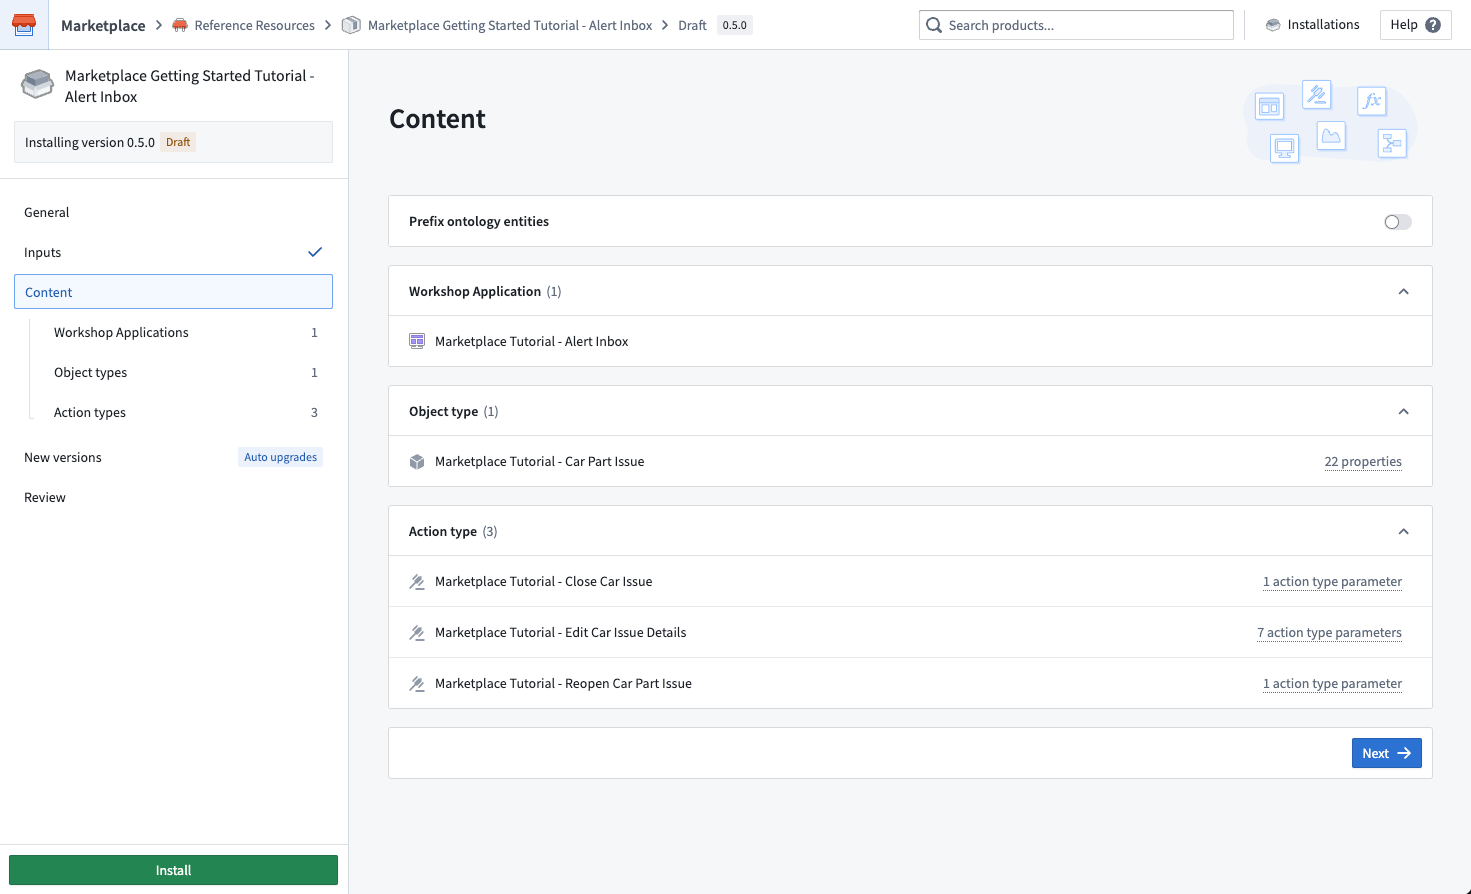
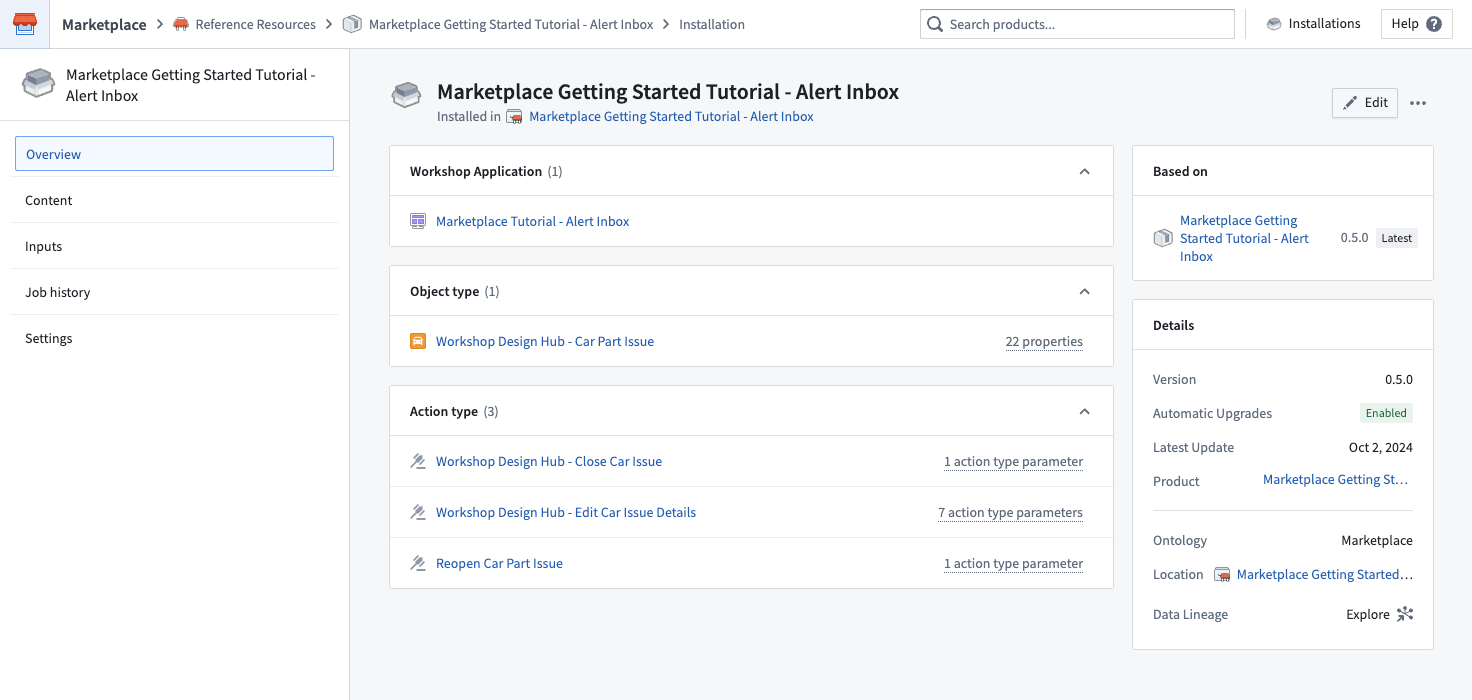
This step confirms what will be installed, in this case a Workshop application, an object type, and three action types.
Toggle on Prefix ontology entities to customize the names of your object types and actions. We recommend using your name for this tutorial.
New versions
You can skip this step for this tutorial. To read more about automatic upgrades, release channels, and maintenance windows, visit the installation documentation.
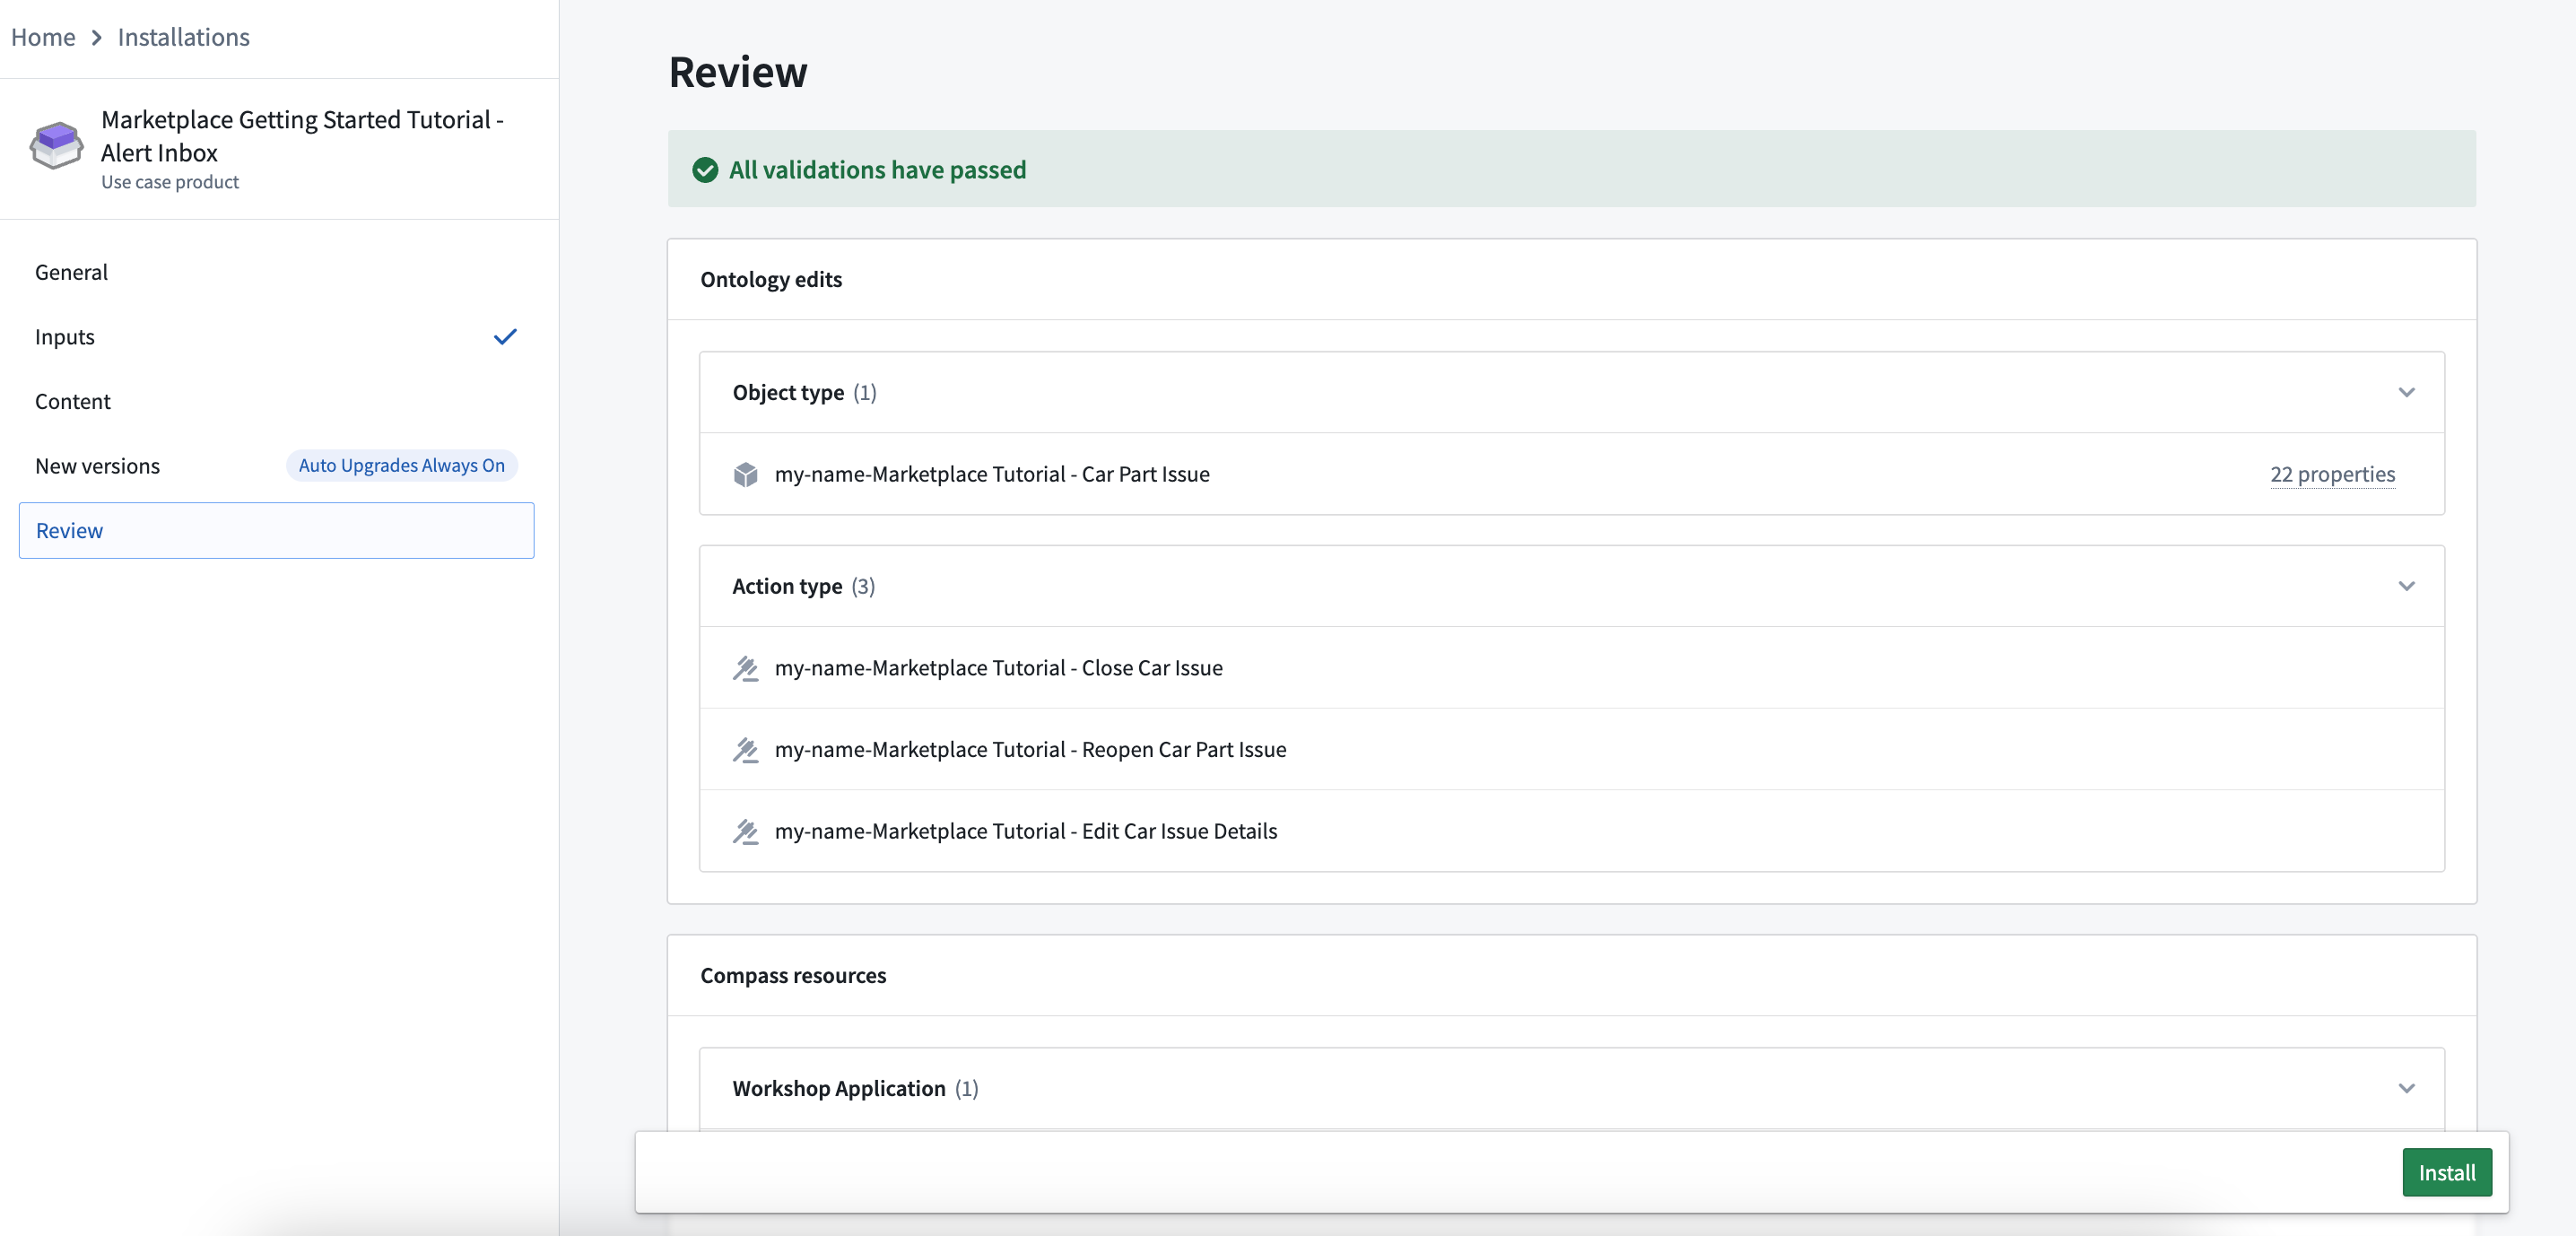
Review
Once your input mapping is complete and you are happy with your installation location and name customization, select Install.
Installation job
After beginning your installation, you will land on the installation job page. Once your installation is complete, select View installation in the top-right corner.
Open your application
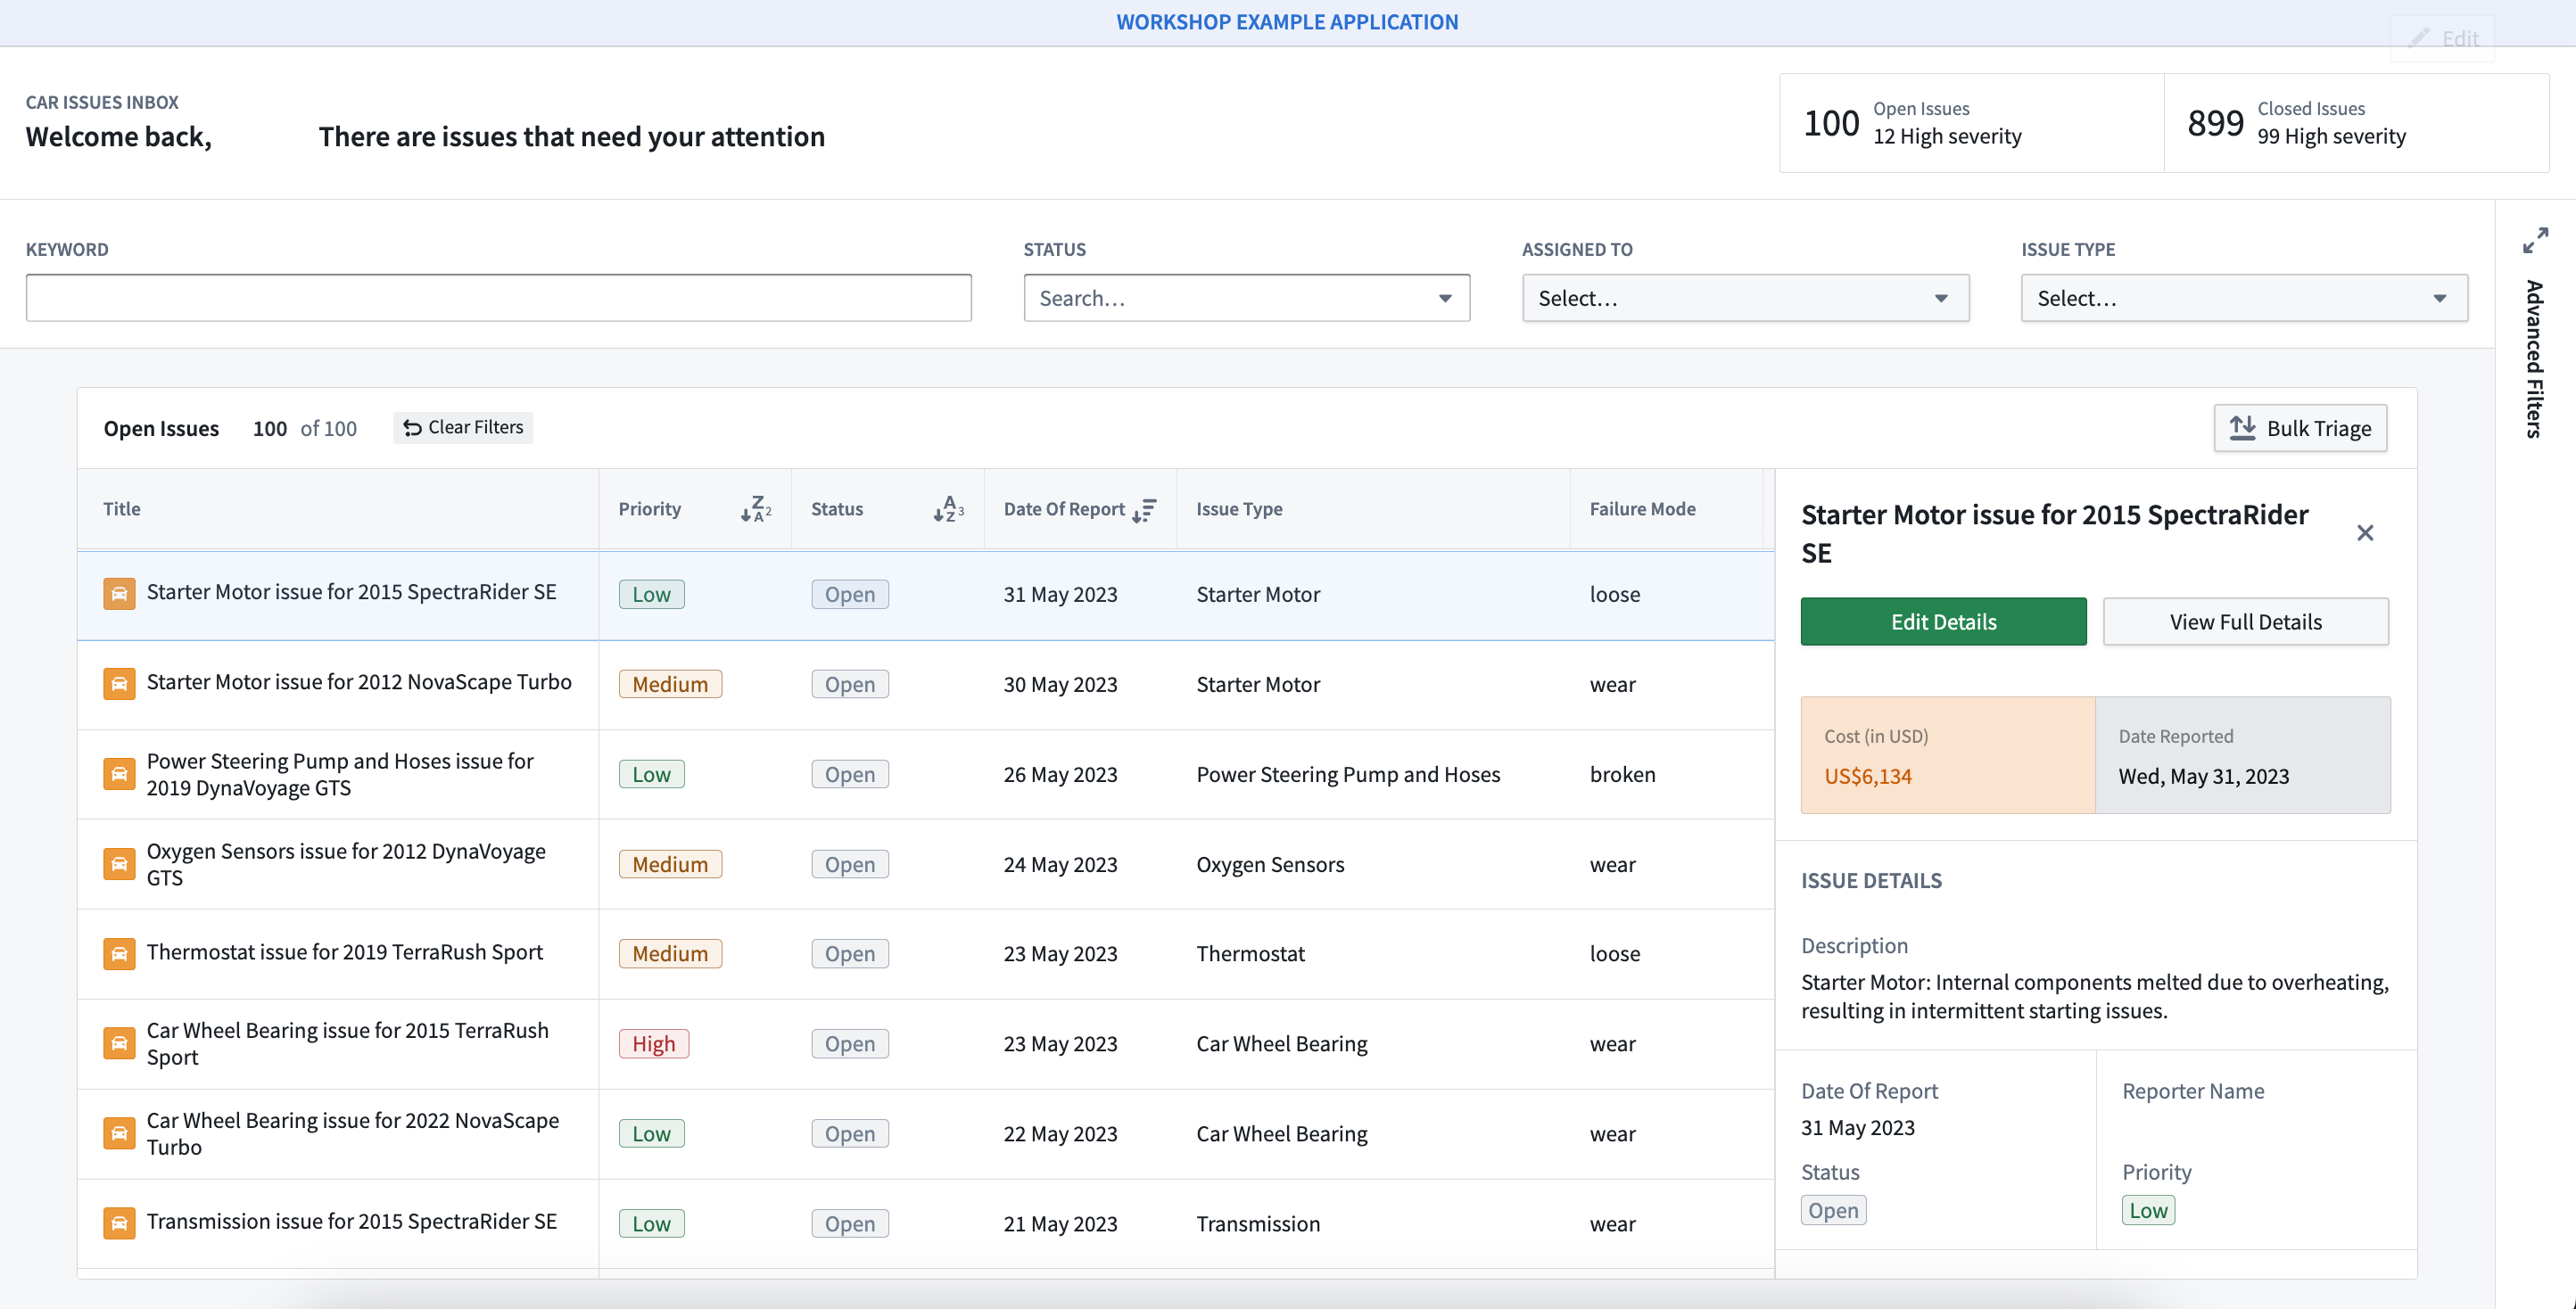
From your installation, open up your Marketplace Tutorial - Alert Inbox application in a new tab. It may take a few minutes for your Car Part Issue objects to index, before which your application will not be available.
You now have an alert inbox workshop application to help you triage your Car Part Issues - Source issues! As long as the required input columns are present, you can install this application again with any issues source to use it for new use cases.
中文翻译
入门指南
在本教程中,您将使用一个包含汽车零部件问题的模拟数据源(datasource)来安装警报收件箱(alert inbox)应用程序,该数据源已作为独立的Marketplace产品提供。
首先,导航至Foundry实例中的Marketplace,搜索 Marketplace Getting Started Tutorial - Datasource,如下图所示。如果找不到该产品,请联系您的Palantir代表。
安装数据源
找到教程数据源后,点击右上角的 安装。如果您的组织内已有人创建了您有权访问的安装,您将看到 打开 和 再次安装 按钮。在这种情况下,请选择 再次安装 以继续安装流程。
安装时:
- 选择一个项目进行安装。命名空间(namespace)源自项目所在位置。
- 由于该产品仅包含一个数据集(dataset),因此无需本体。
- 此产品没有任何输入(inputs),因此您可以跳过所有其他步骤,直接选择左侧面板底部的 安装。
开始安装后,您将进入安装作业页面。安装完成后,选择右上角的 查看安装。在此页面中,在新标签页中打开您的 Car Part Issues - Source 数据集。然后返回数据源安装的标签页。
安装应用程序
现在,我们将使用 Car Part Issues - Source 数据集作为输入,开始安装目标应用程序。使用顶部的产品搜索栏,搜索 Marketplace Getting Started Tutorial - Alert Inbox。该产品也属于 参考资源 商店。与数据源产品类似,点击右上角的 安装 开始安装;如果您的组织内已有人创建了安装,请选择 再次安装 按钮继续安装流程。
常规设置
输入
与第一次安装不同,您需要映射一个输入来创建警报收件箱应用程序。该输入将是您刚刚安装的 Car Part Issues - Source,其中包含用于填充警报收件箱的模拟问题数据。要映射此输入:
从您打开 Car Part Issues - Source 的标签页中,点击左上角的 文件,然后选择 复制完整路径,如下所示,复制文件路径。
现在,您需要映射 Car Part Issues - Source,以满足警报收件箱产品的一个必需输入。为此,请返回您的安装页面,点击 选择,然后将复制的文件路径粘贴到搜索框中,并选择您的数据集。
如果所有列都已正确映射,您将看到如下所示的蓝色勾选标记。
内容
此步骤确认将要安装的内容,在本例中包括一个Workshop应用程序、一个对象类型和三个操作类型。
开启 为本体实体添加前缀 以自定义对象类型和操作的名称。在本教程中,我们建议使用您的姓名。
新版本
对于本教程,您可以跳过此步骤。要了解更多关于自动升级、发布渠道和维护窗口的信息,请访问安装文档。
审查
当输入映射完成,并且您对安装位置和名称自定义感到满意后,选择 安装。
安装作业
开始安装后,您将进入安装作业页面。安装完成后,选择右上角的 查看安装。
打开应用程序
从您的安装页面,在新标签页中打开 Marketplace Tutorial - Alert Inbox 应用程序。您的 Car Part Issue 对象可能需要几分钟时间进行索引,在此之前应用程序将不可用。
现在,您拥有了一个警报收件箱Workshop应用程序,可帮助您对 Car Part Issues - Source 中的问题进行分类处理!只要存在所需的输入列,您就可以使用任何问题源再次安装此应用程序,以用于新的用例。