Install a product in Foundry Marketplace(在 Foundry Marketplace 中安装产品)
When you have found a product you would like to install, Marketplace will guide you through the process of mapping any required inputs to create the product's output content.
Installation guide
To begin installing a product, select the blue Install button in the top right corner of the Marketplace interface. If you already have access to an existing installation, this button will instead prompt you to Open, though you can select Install again if you prefer to install the product again (for instance, if you would like to create a new version with different inputs). If the product version is recalled by the publisher, the Install button will be disabled.
An installation draft will then be created and you will be presented with a guided installation process.
General
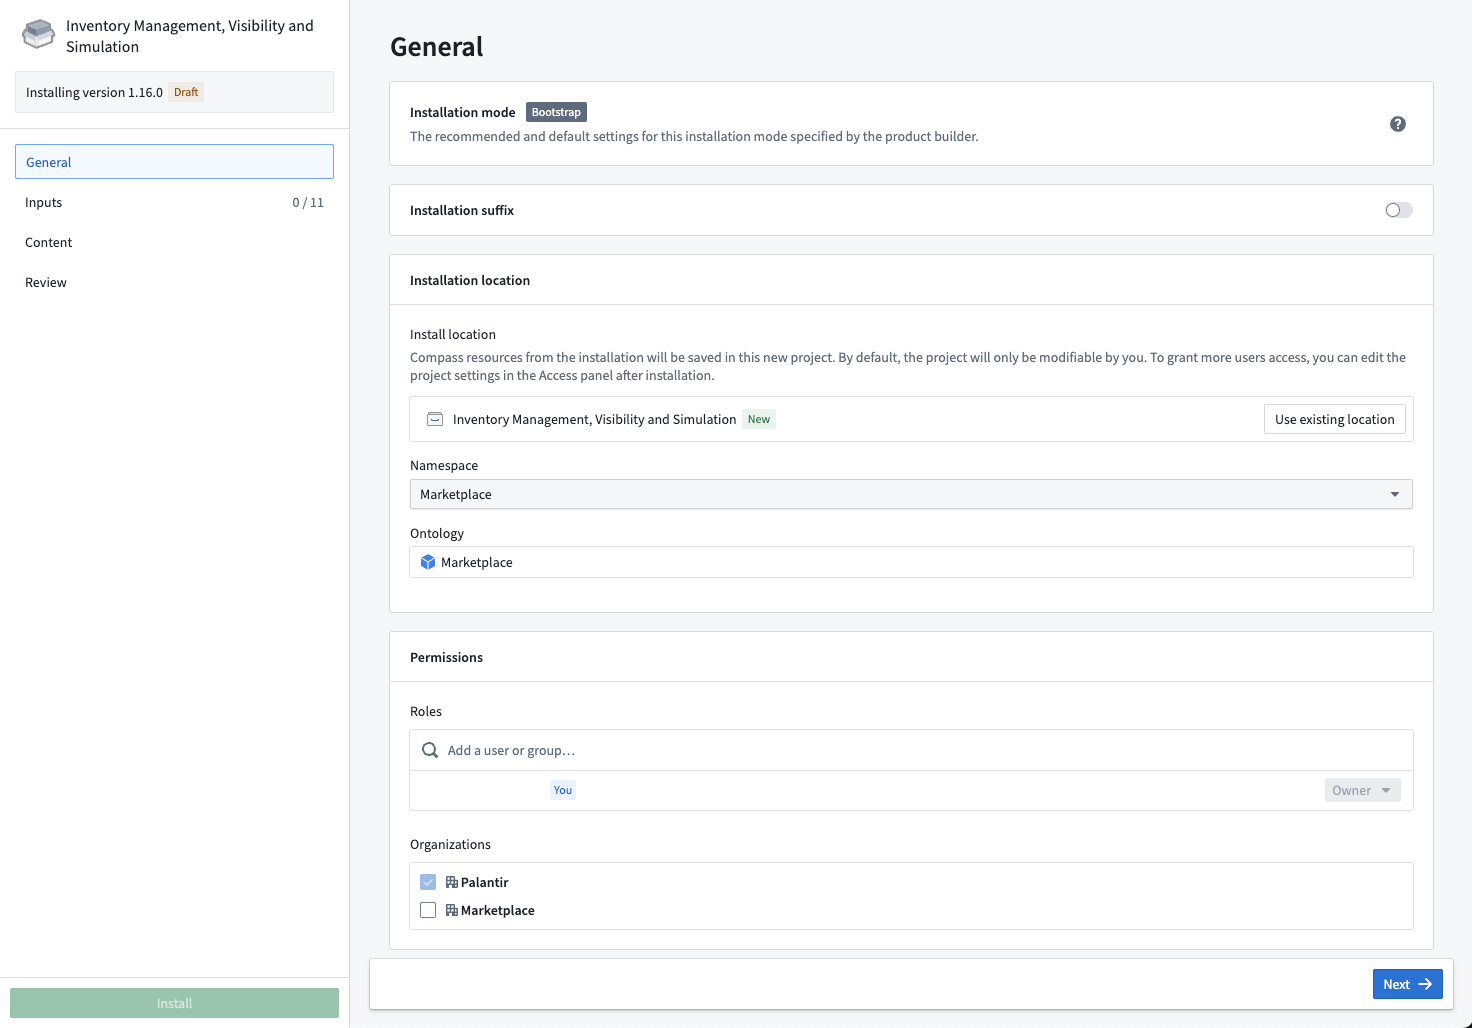
The first part of the installation process allows you to configure the name and installation location of a product.
- Installation mode: The default settings provided by the product builder. Products that have been created in Production mode are designed to be installed and upgraded without local changes to any given installation. Products that have been created in Bootstrap mode are designed to be installed and edited. See Installation location for more information on how this impacts available installation locations.
- Installation suffix: This is an optional configuration that enables you to customize the name of the project in which content will be installed; for instance, you might add a suffix of
testto a product created as a test. - Installation location: The following options allow you to specify where the product should be installed:
- Project or folder: The project or folder in which your installed resources will live. For Production mode and Singleton mode products, locking the project is encouraged to ensure safe upgrades. When locking, you will have the opportunity to map the roles on your project to Marketplace roles. You can unlock your project in Compass by navigating to Access > Settings > Advanced and selecting Unlock. For Bootstrap mode products, you can select either a project or a folder where you have edit access.
- Ontology: The Ontology in which any objects, links, actions, and functions will be created. If you do not see the Ontology you want, contact your platform administrator as this means you do not have permission to edit.
Inputs
Inputs are entities (such as objects or pipelines) relied upon by the content of a product. Inputs can be mapped to a product manually, using linked products, or by choosing an existing folder or legacy Foundry Template.
:::callout{theme="neutral"} Linked products automatically fulfill inputs using the content of another product. :::
Inputs overview

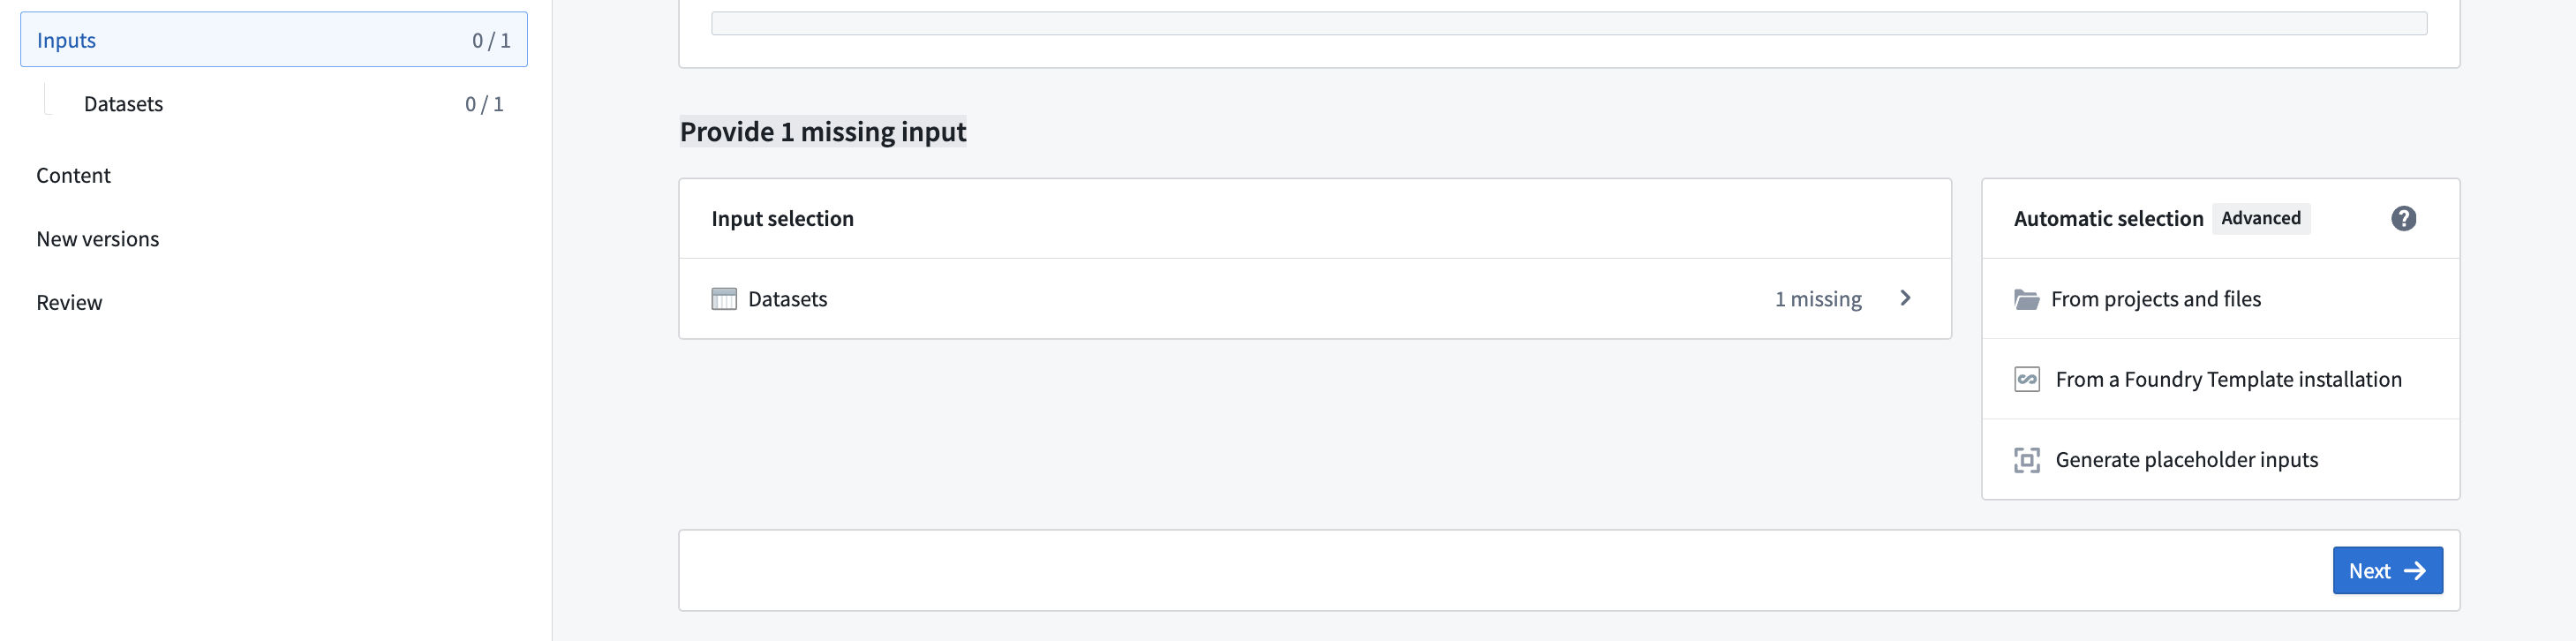
The Inputs overview page provides information about the inputs that are currently unmapped; these are referred to as "missing inputs".
You can choose content from an existing folder or a legacy Foundry Template to automap as inputs.
Input mapping
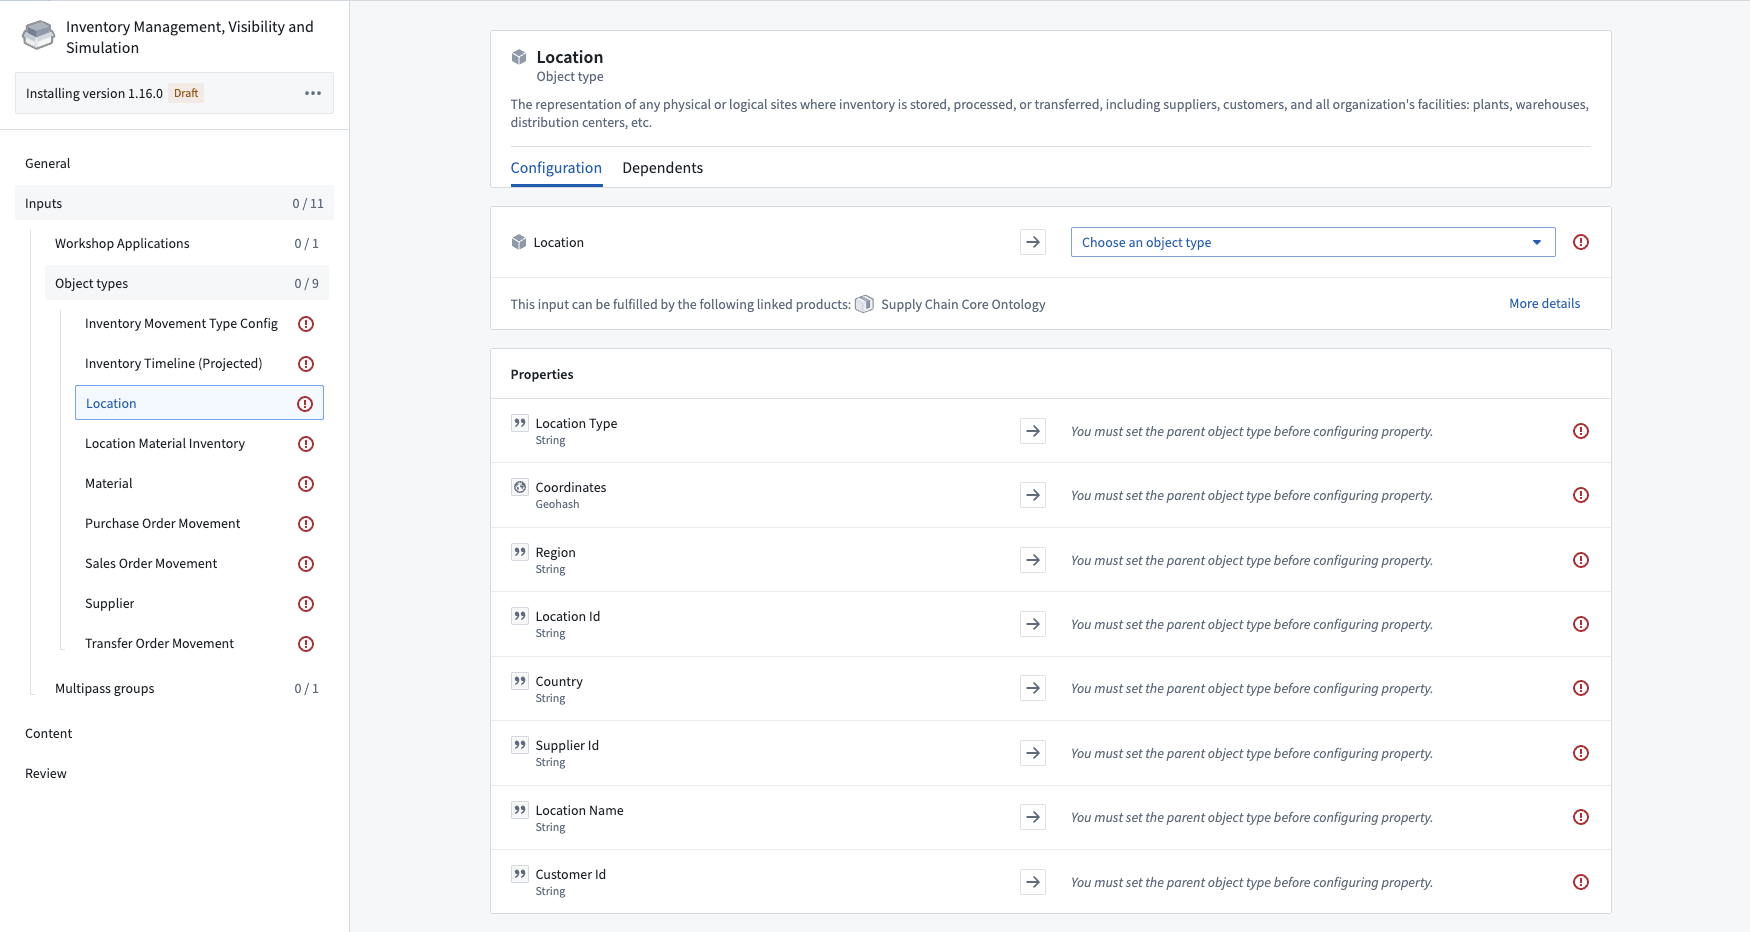
After the Inputs overview page, you will have a chance to select resources to fulfill each required input.
On the page for each resource, the Configuration tab allows you to set up each input, for instance by specifying column mappings between the input and the product.
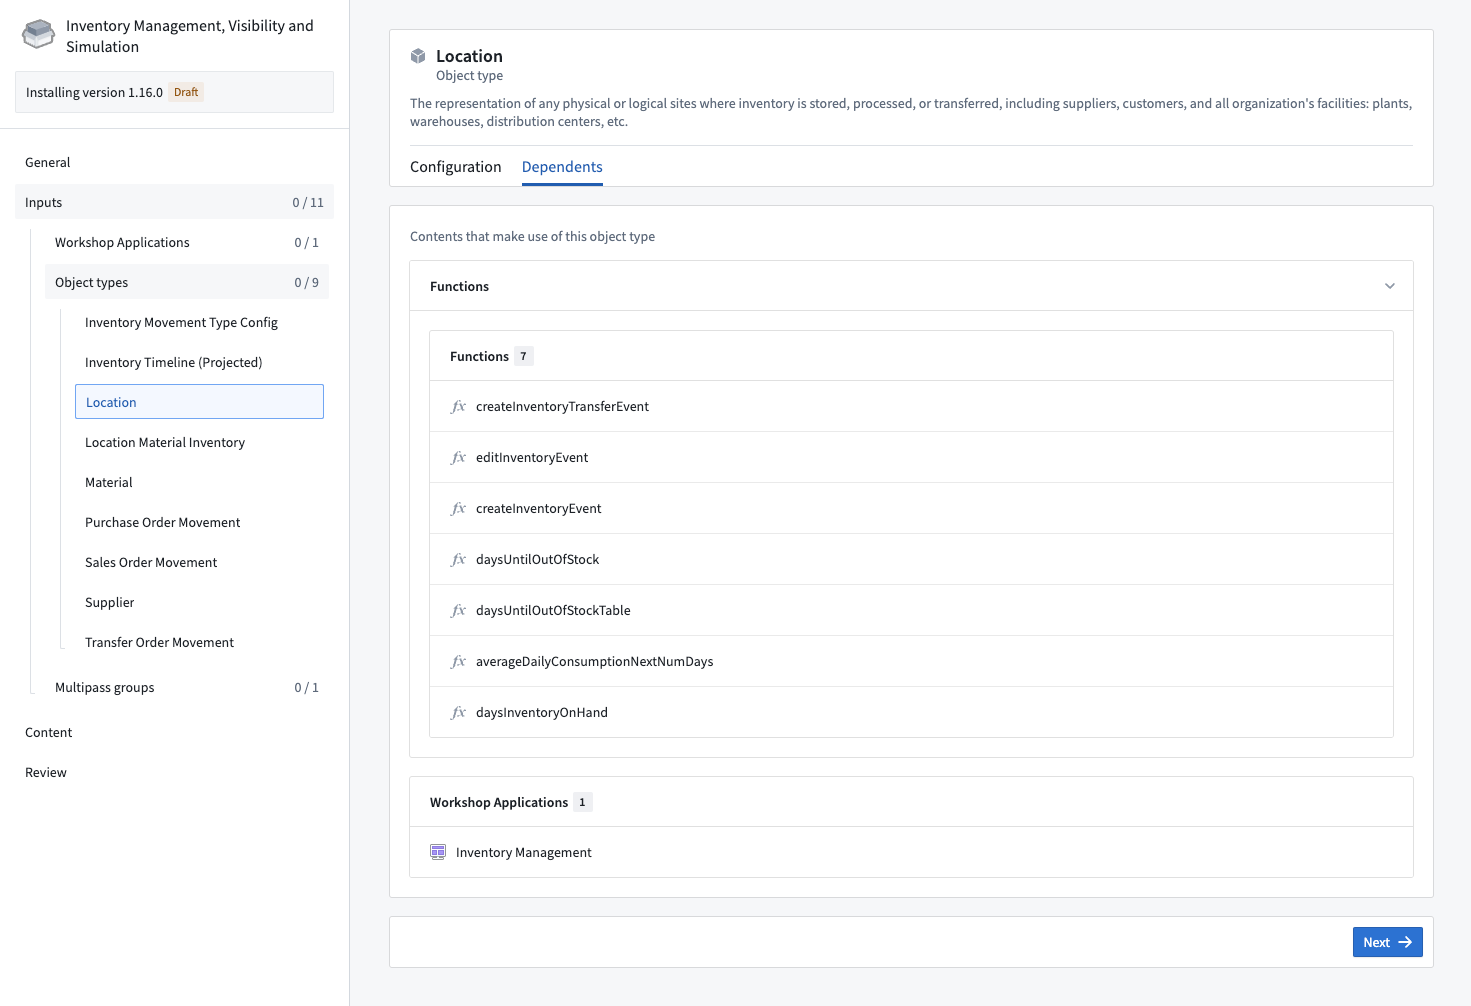
The Dependents tab provides information on why an input is needed by showing what content requires this input in order to install. For example, a Workshop application may require specific object types.
Placeholder inputs
To deploy Marketplace products before all resources are available, you can create temporary stub resources in a specified folder to continue with the installation. Dataset inputs are currently supported, with additional input types expected to be supported in the near future.
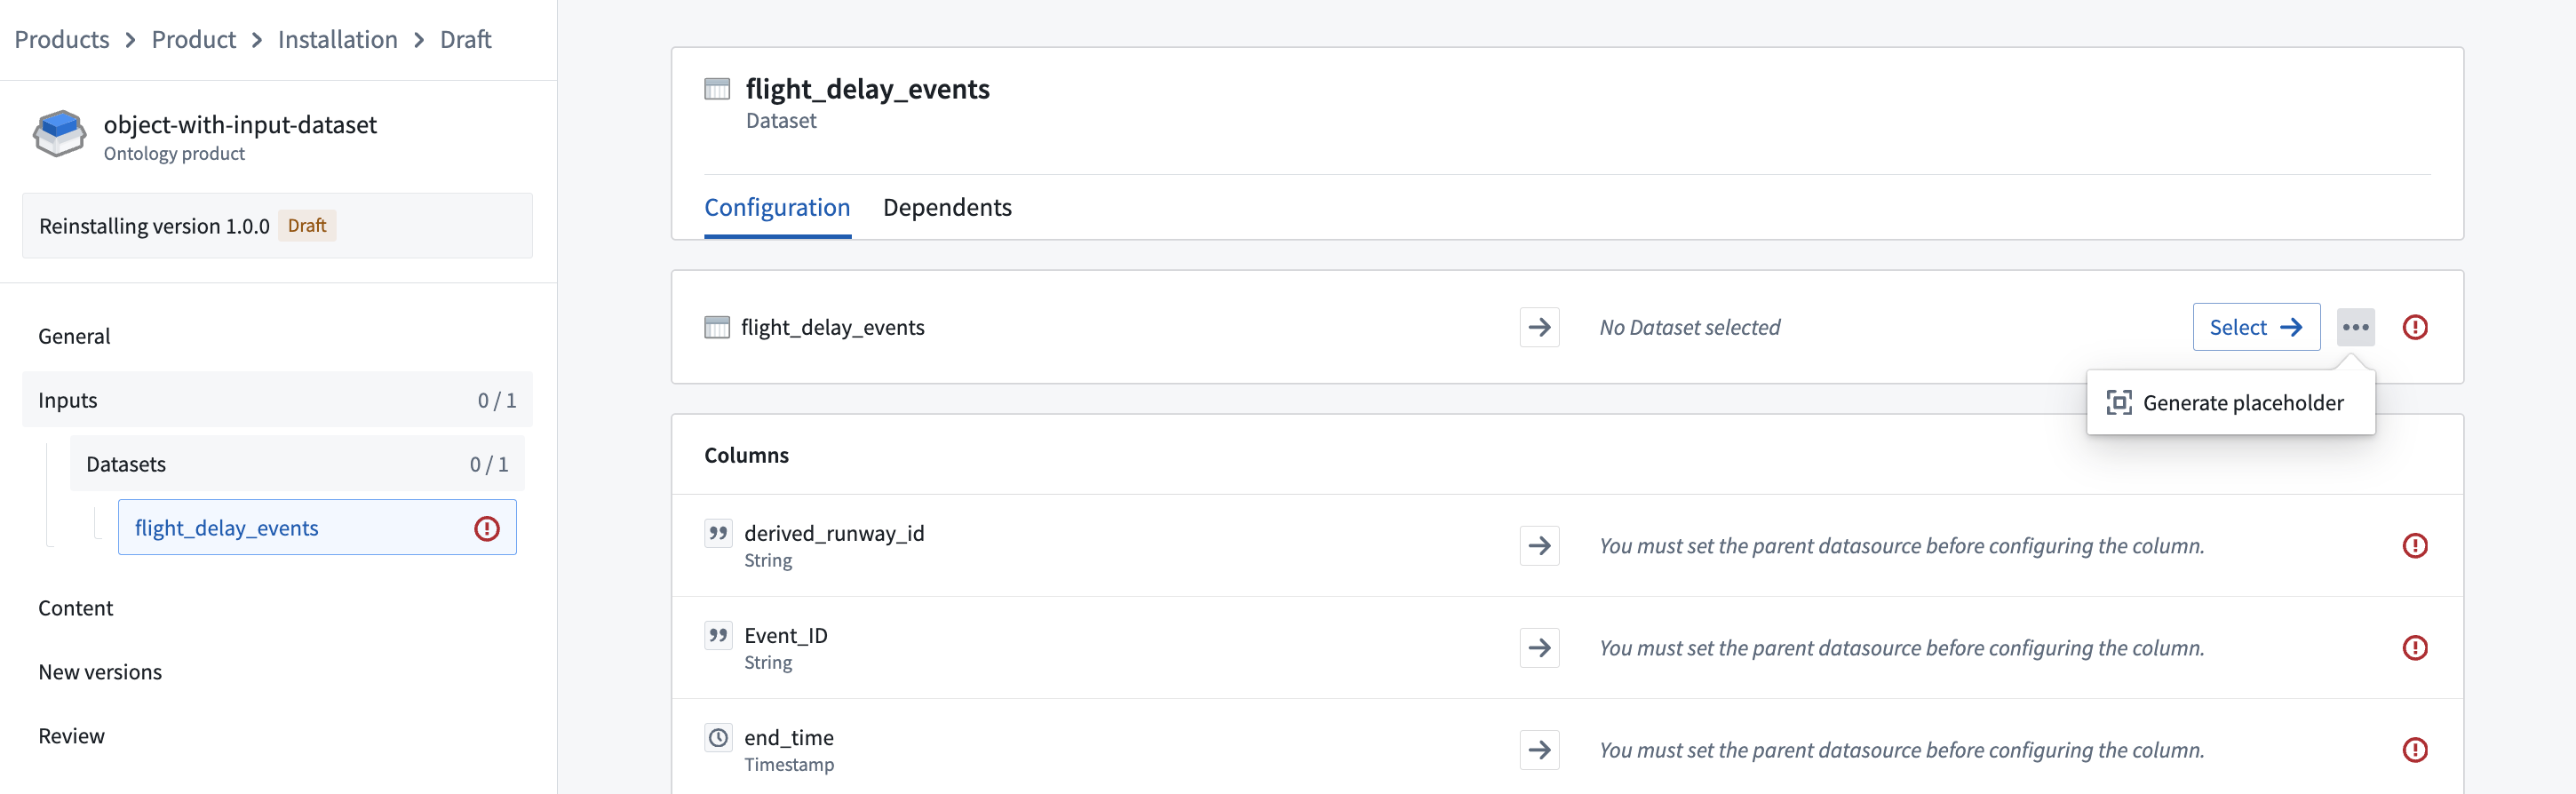
The option to generate placeholder inputs will be visible on the Inputs overview page if there are any supported but not yet fulfilled inputs. Selecting Generate placeholder inputs will generate placeholder inputs for every suitable input.
Alternatively, to generate a single placeholder input, select ... next to the input selector, then select Generate placeholder.
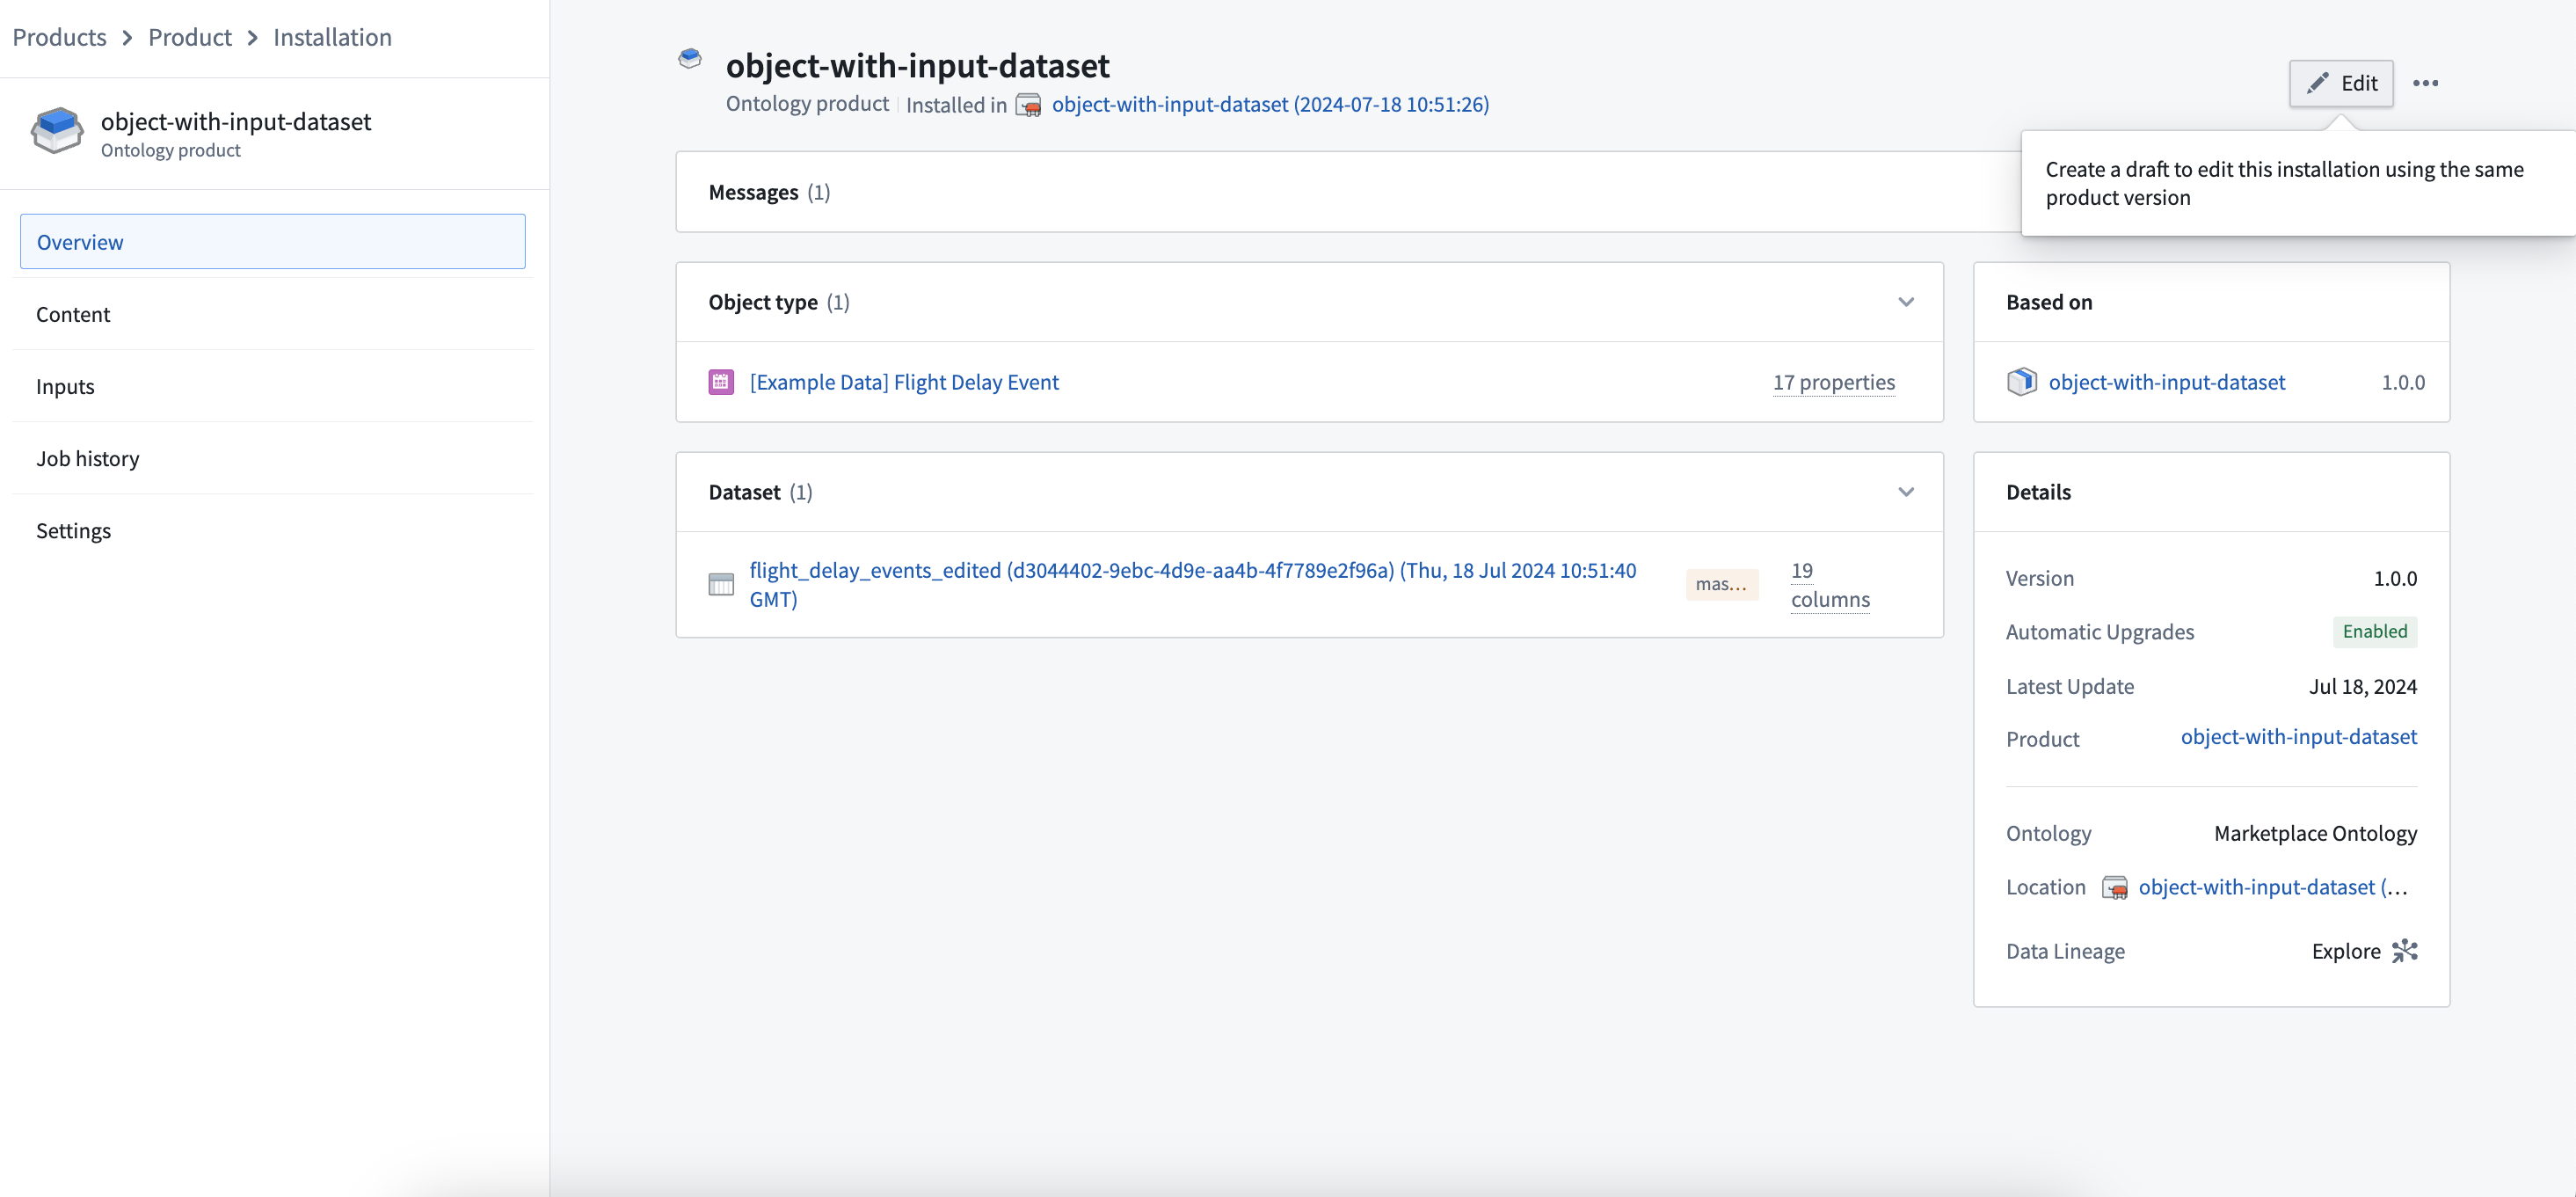
Once the actual resources become available, you can remap these inputs by navigating to the Installation page and selecting Edit.
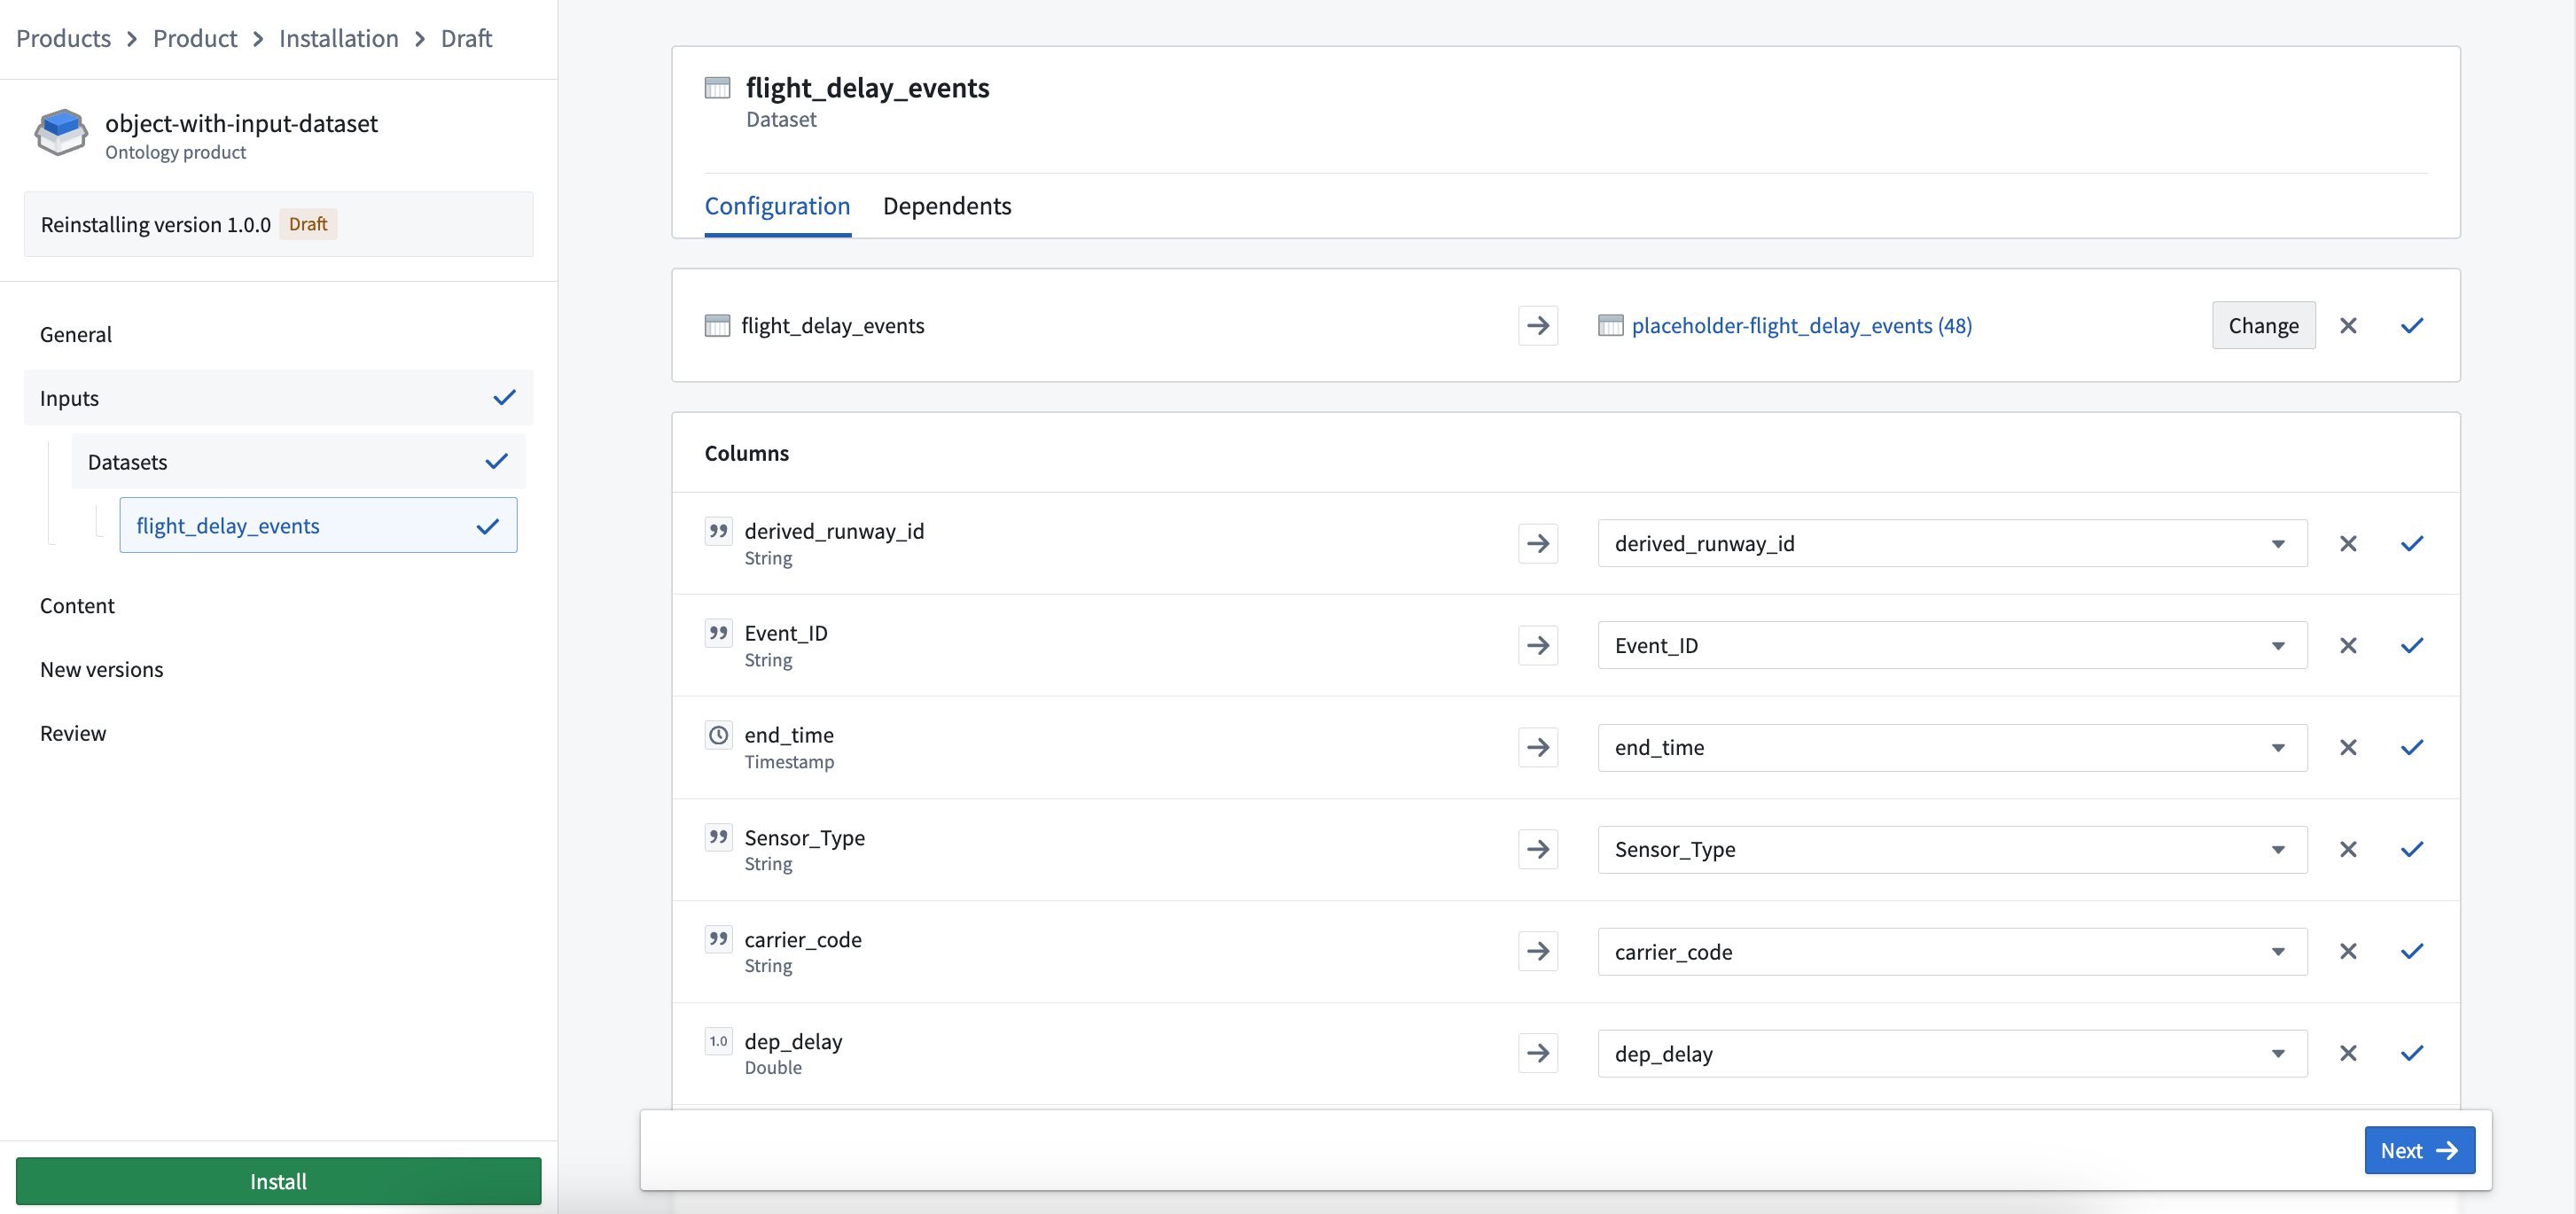
You can remap any existing placeholder input with the actual resource by selecting Change.
Not all products will require input mapping; for example, if a product provides only datasets as content, it may not need any inputs to be mapped. If input mapping is not required for your product, this step will be hidden.
Content
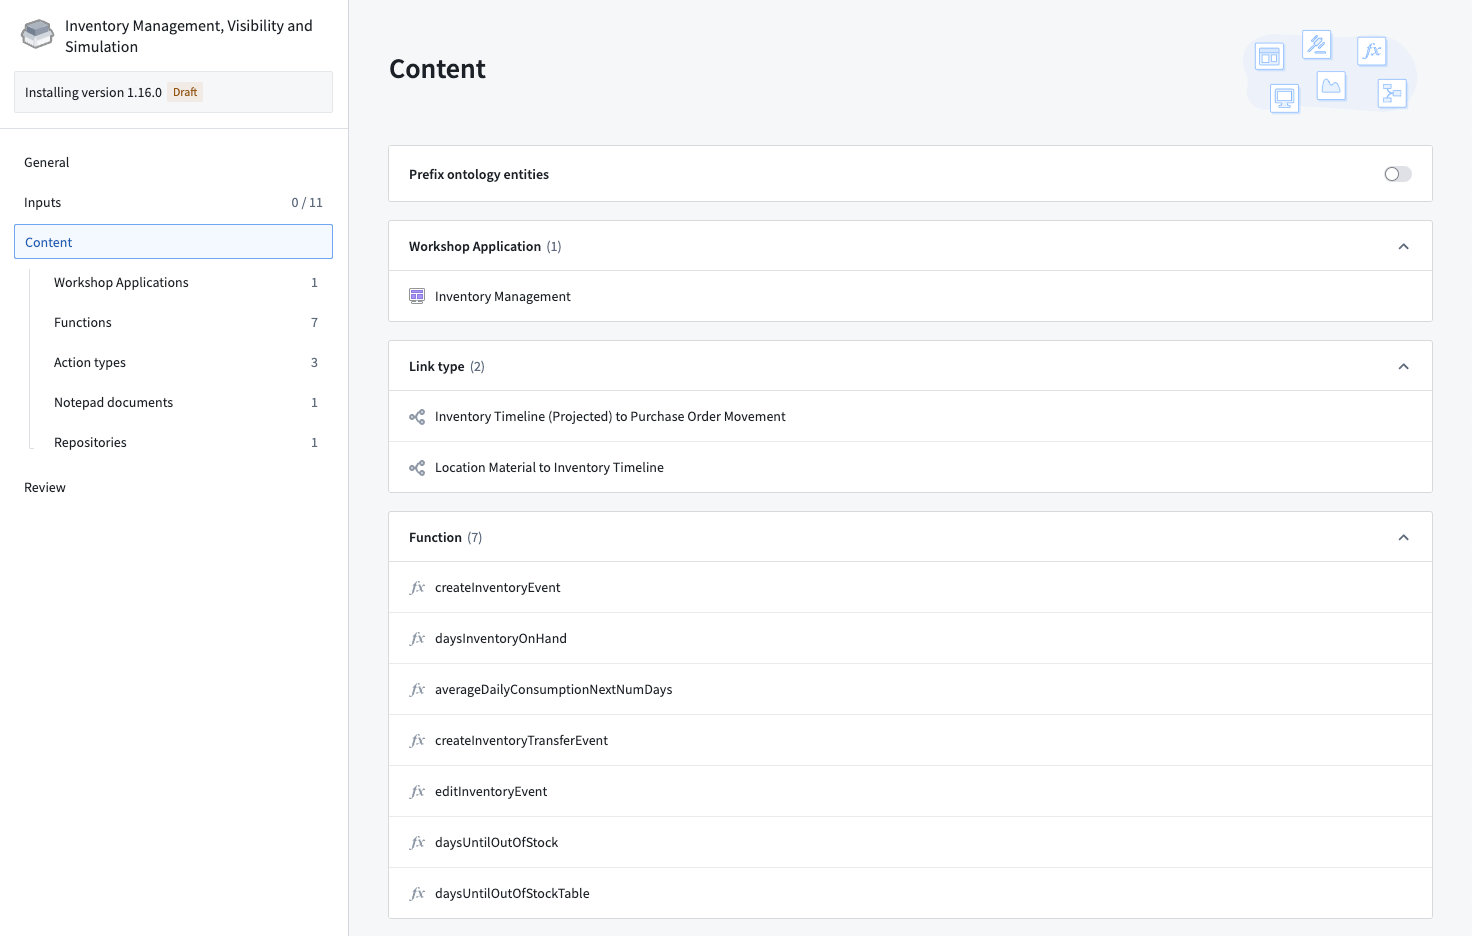
The Content page provides a summary of all resources that will be installed, such as applications, functions, link types, and action types.
Prefixing Ontology entities
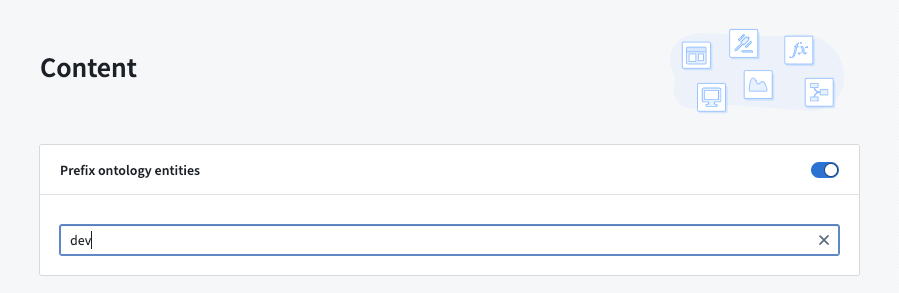
The Content page contains a toggle labeled Prefix ontology entities; similar to using an installation suffix to customize the name of the project in which your content will be installed, you can use the Prefix ontology entities toggle to customize the names of all object types, link types, and action types with a user-specified prefix (for example, DEV, which would prefix ontology entities with [DEV]).
New versions
When installing a Production mode product, you will have an additional installation step to specify release channels and maintenance windows for automatic upgrades.
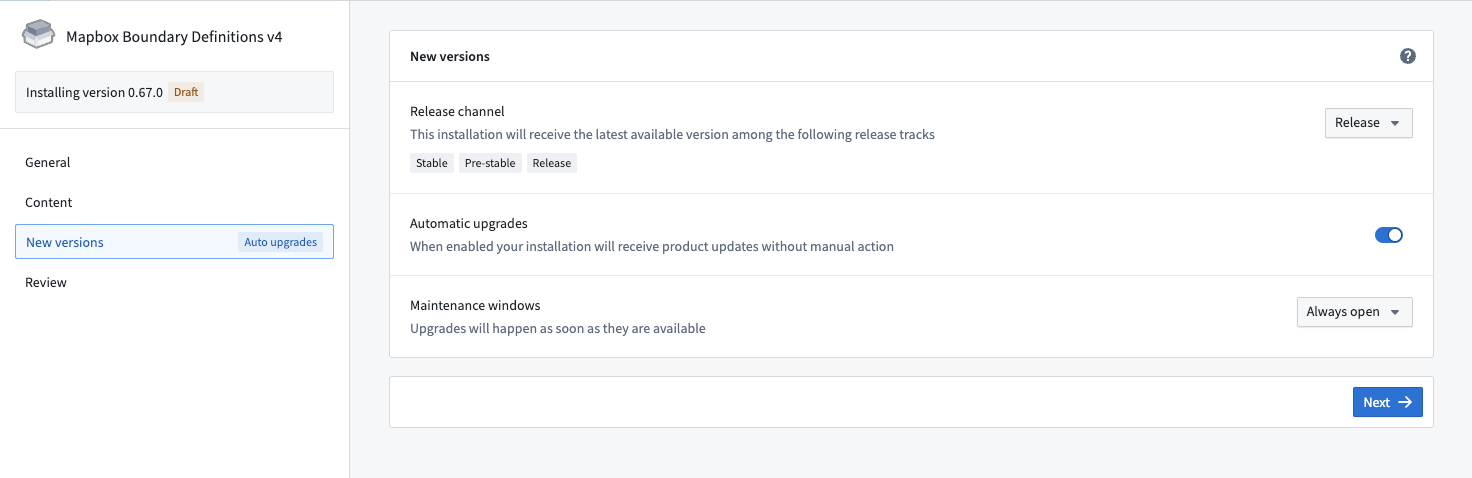
Read more about these settings in upgrades.
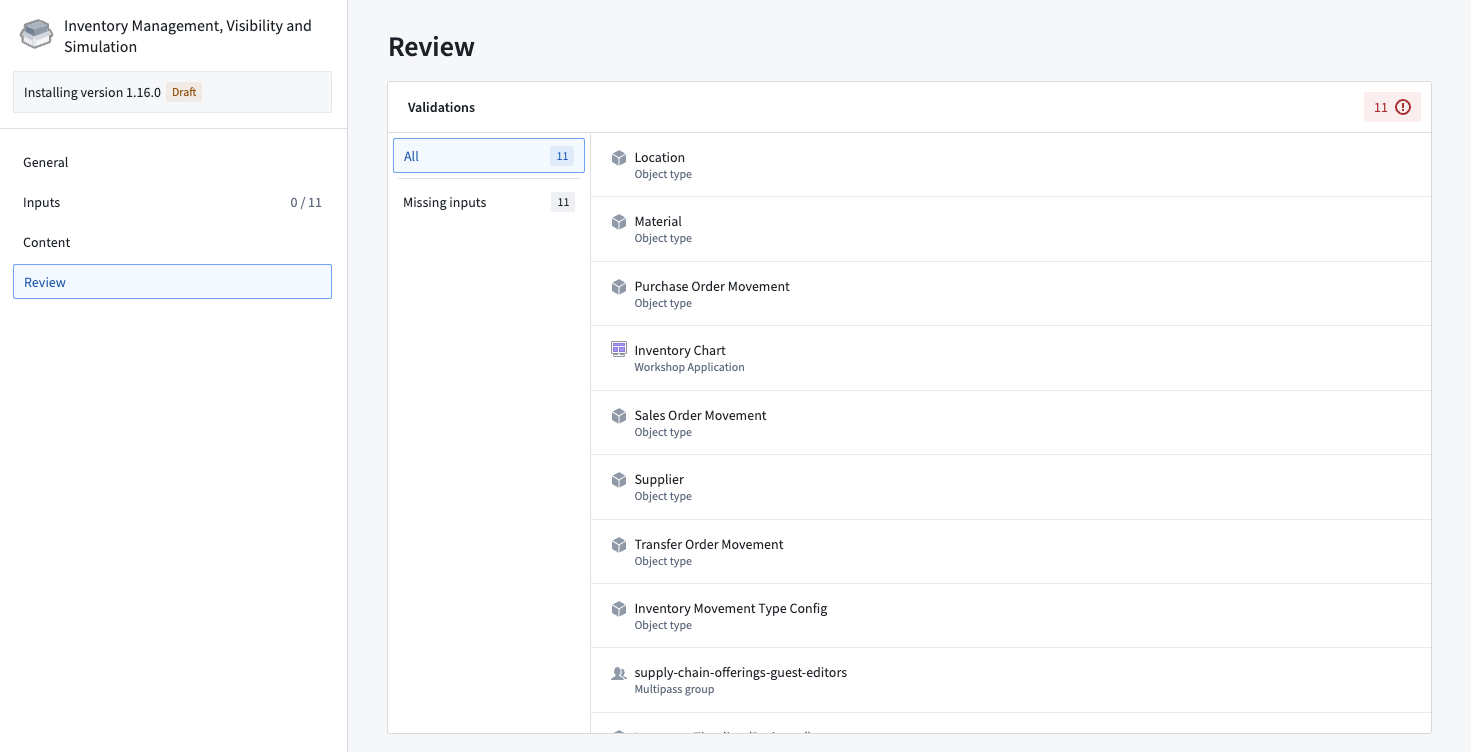
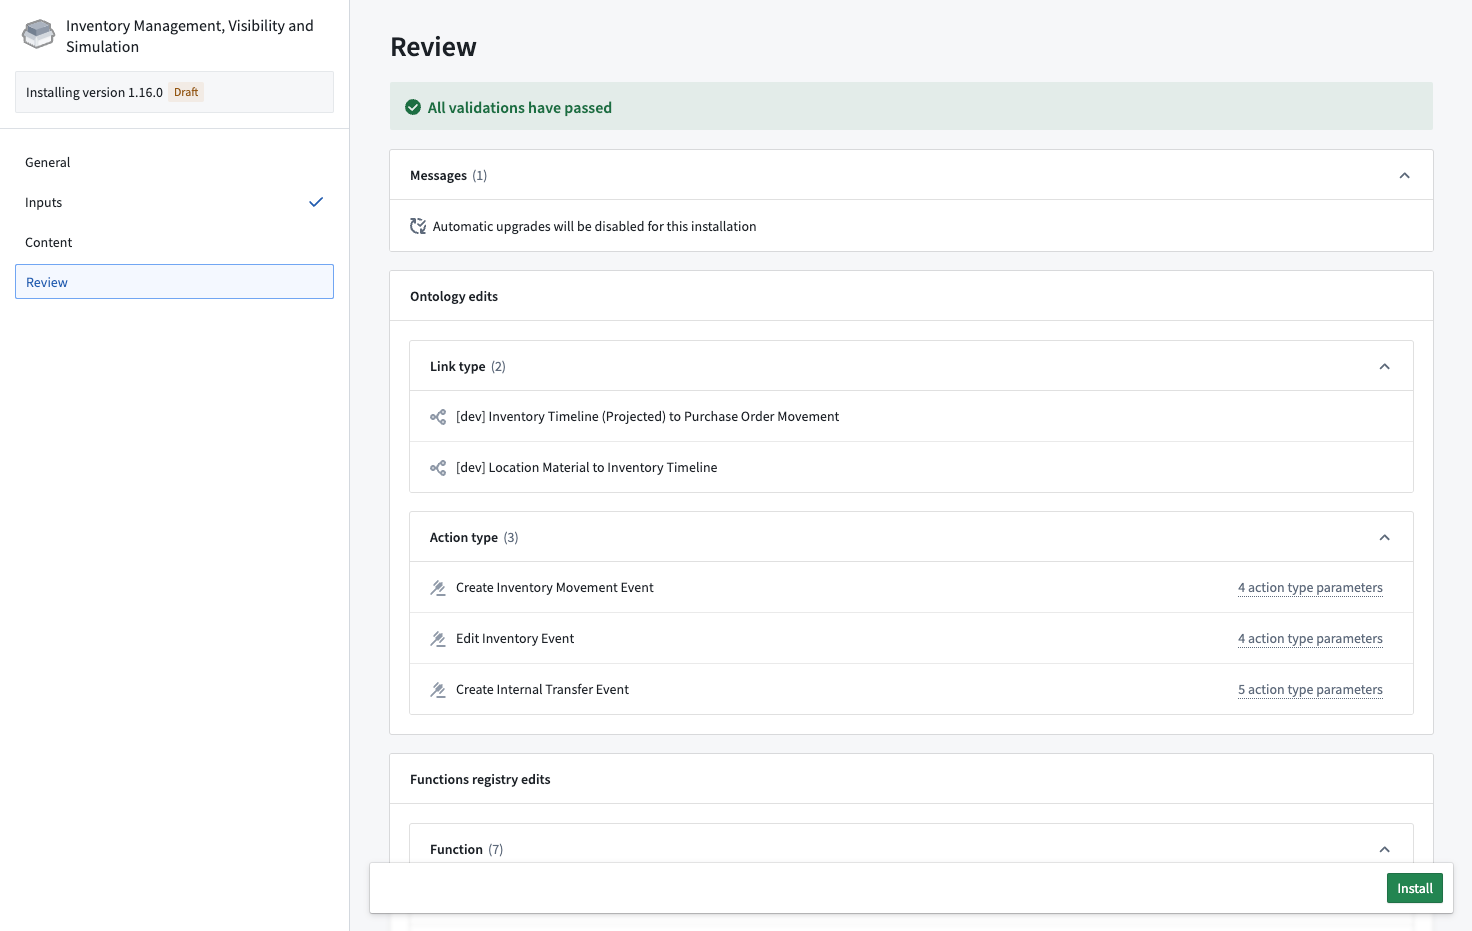
Review
The Review page surfaces any validation errors that must be resolved before installation. For instance, the installer might need to map a missing column in the clean dataset used as a required input before the installation will succeed.
Once all inputs have been mapped, you will be able to kick off an installation using the Install option. This submits the installation draft and a job starts running to create the resources. You will then be redirected to the job page, where you can see the job's progress.
中文翻译
在 Foundry Marketplace 中安装产品
当您找到想要安装的产品后,Marketplace 将引导您完成映射所需输入的过程,以创建产品的输出内容。
安装指南
要开始安装产品,请选择 Marketplace 界面右上角的蓝色 Install 按钮。如果您已有现有安装的访问权限,此按钮将提示您 Open,但如果您希望重新安装该产品(例如,想要使用不同输入创建新版本),也可以选择 Install again。如果产品版本被发布者撤回,Install 按钮将被禁用。
随后将创建一个安装草稿,并为您呈现一个引导式安装流程。
常规设置
安装流程的第一部分允许您配置产品的名称和安装位置。
- 安装模式: 产品构建者提供的默认设置。以 Production mode 创建的产品设计为无需对任何安装进行本地更改即可安装和升级。以 Bootstrap mode 创建的产品设计为可安装和编辑。有关这对可用安装位置的影响,请参见 安装位置。
- 安装后缀: 这是一个可选配置,允许您自定义安装内容的项目名称;例如,您可以为一个作为测试创建的产品添加
test后缀。 - 安装位置: 以下选项允许您指定产品的安装位置:
- 项目或文件夹: 您的已安装资源将存放的项目或文件夹。对于 Production mode 和 Singleton mode 产品,建议锁定项目以确保安全升级。锁定时,您将有机会将项目上的角色映射到 Marketplace 角色。您可以在 Compass 中通过导航至 Access > Settings > Advanced 并选择 Unlock 来解锁项目。对于 Bootstrap mode 产品,您可以选择您拥有编辑权限的项目或文件夹。
- Ontology: 将创建任何对象、链接、操作和函数的 Ontology。如果您没有看到所需的 Ontology,请联系您的平台管理员,因为这意味着您没有编辑权限。
输入
输入是产品内容所依赖的实体(例如对象或管道)。输入可以手动映射到产品,使用链接产品,或通过选择现有文件夹或旧版 Foundry Template 进行映射。
:::callout{theme="neutral"} 链接产品 使用另一个产品的内容自动满足输入要求。 :::
输入概览
Inputs 概览页面提供有关当前未映射输入的信息;这些被称为"缺失输入"。
您可以选择现有文件夹或旧版 Foundry Template 中的内容作为输入进行自动映射。
输入映射
在 Inputs 概览页面之后,您将有机会选择资源来满足每个必需的输入。
在每个资源的页面上,Configuration 选项卡允许您设置每个输入,例如指定输入和产品之间的列映射。
Dependents 选项卡通过显示哪些内容需要此输入才能安装,来提供为何需要该输入的信息。例如,Workshop 应用程序可能需要特定的对象类型。
占位符输入
要在所有资源可用之前部署 Marketplace 产品,您可以在指定文件夹中创建临时存根资源以继续安装。目前支持数据集输入,预计不久将支持更多输入类型。
如果有任何受支持但尚未满足的输入,Inputs 概览页面上将显示生成占位符输入的选项。选择 Generate placeholder inputs 将为每个合适的输入生成占位符输入。
或者,要生成单个占位符输入,请选择输入选择器旁边的 ...,然后选择 Generate placeholder。
一旦实际资源可用,您可以通过导航至 Installation 页面并选择 Edit 来重新映射这些输入。
您可以通过选择 Change 将任何现有的占位符输入重新映射为实际资源。
并非所有产品都需要输入映射;例如,如果产品仅提供数据集作为内容,则可能不需要映射任何输入。如果您的产品不需要输入映射,此步骤将被隐藏。
内容
Content 页面提供将安装的所有资源的摘要,例如应用程序、函数、链接类型和操作类型。
为 Ontology 实体添加前缀
Content 页面包含一个标记为 Prefix ontology entities 的开关;类似于使用安装后缀自定义安装内容的项目名称,您可以使用 Prefix ontology entities 开关,通过用户指定的前缀(例如 DEV,这将为 ontology 实体添加 [DEV] 前缀)来自定义所有对象类型、链接类型和操作类型的名称。
新版本
安装 Production mode 产品时,您将有一个额外的安装步骤来指定自动升级的发布渠道和维护窗口。
有关这些设置的更多信息,请参阅升级。
审核
Review 页面会显示任何必须在安装前解决的验证错误。例如,安装程序可能需要映射用作必需输入的干净数据集中缺失的列,然后安装才能成功。
一旦所有输入都已映射,您将能够使用 Install 选项启动安装。这将提交安装草稿,并开始运行作业以创建资源。然后您将被重定向到作业页面,在那里您可以查看作业的进度。