Create a peer connection(创建对等连接)
You can create and delete peer connections from Peer Manager.
Prerequisites
You must complete the steps below before you create a peer connection:
- Use the network ingress and network egress extensions in Control Panel to configure ingress and egress policies for the enrollments you will peer between.
:::callout{theme="neutral"} To establish a peer connection that exports data from your enrollment, your local enrollment must permit egress to the remote enrollment. Additionally, the remote enrollment must permit ingress from your local enrollment. The opposite is true if you are establishing a peer connection that imports data into your local enrollment from a remote enrollment. Your local enrollment must permit ingress from the remote enrollment, and the remote enrollment must permit egress to your local enrollment. :::
- Establish a connection between your enrollment and the remote enrollment directly from Peer Manager. If a network connection is available between the two enrollments, establish a Multipass exchanger (MPX) connection. If no network connection is available, establish a data relay connection over your enrollment's existing cross-domain solution.
- Ensure that you are a manager of the local space you wish to create a connection for.
- Set a platform title for your enrollment so remote peers can identify your enrollment.
Initiate the peer connection
To initiate a peer connection:
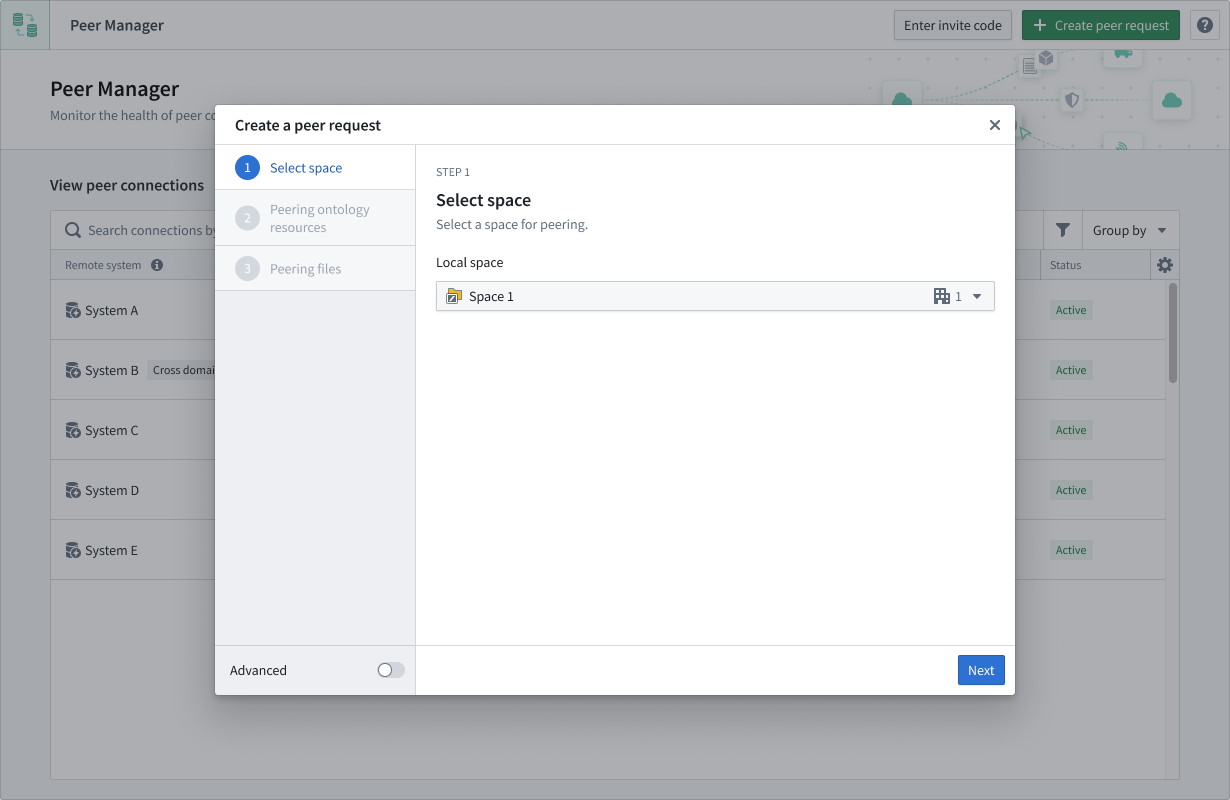
- Select Create a peer request from the top right of Peer Manager to launch the Create a peering request dialog.
- Identify your enrollment's space in the Select a space to peer dropdown menu.
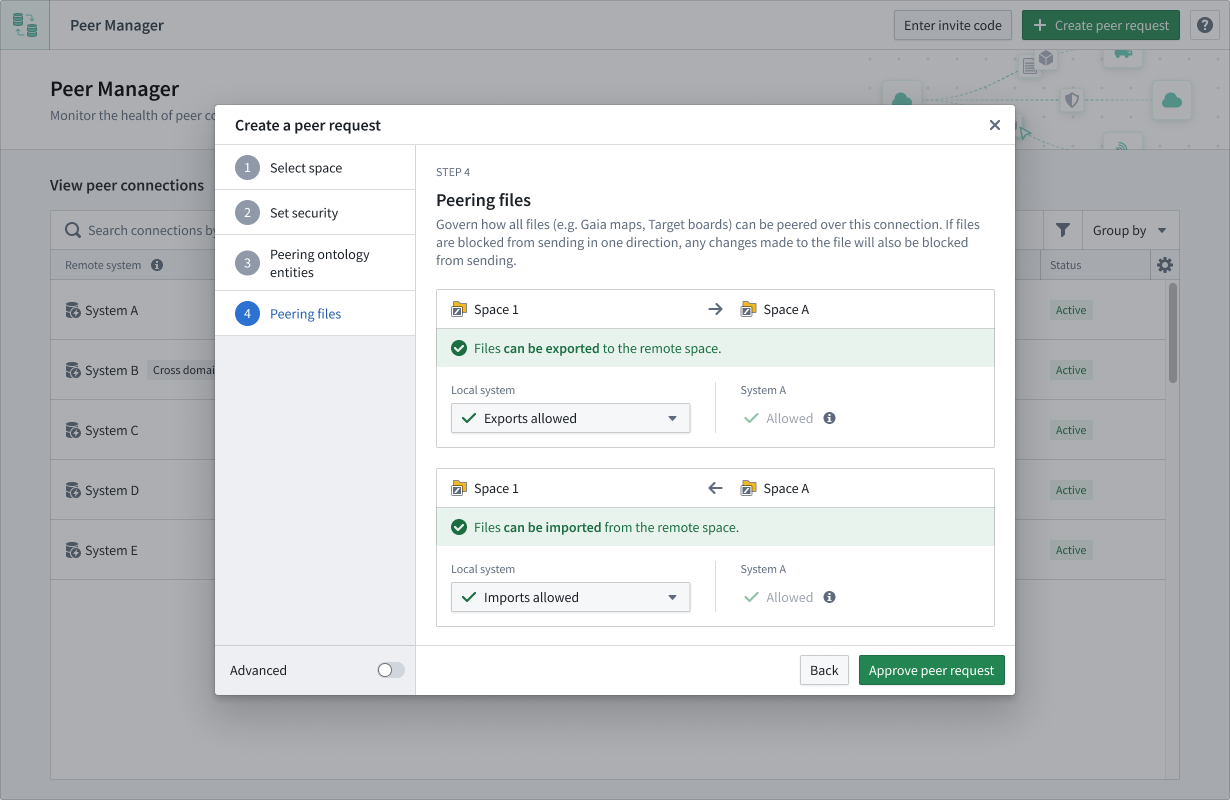
- Choose the data types to export, import, or both.
- Select Copy invite code.
- Share the invite code with an administrator on the peer enrollment, who will import the peer connection.
Import the peer connection
To import a peer connection after you receive an invite code:
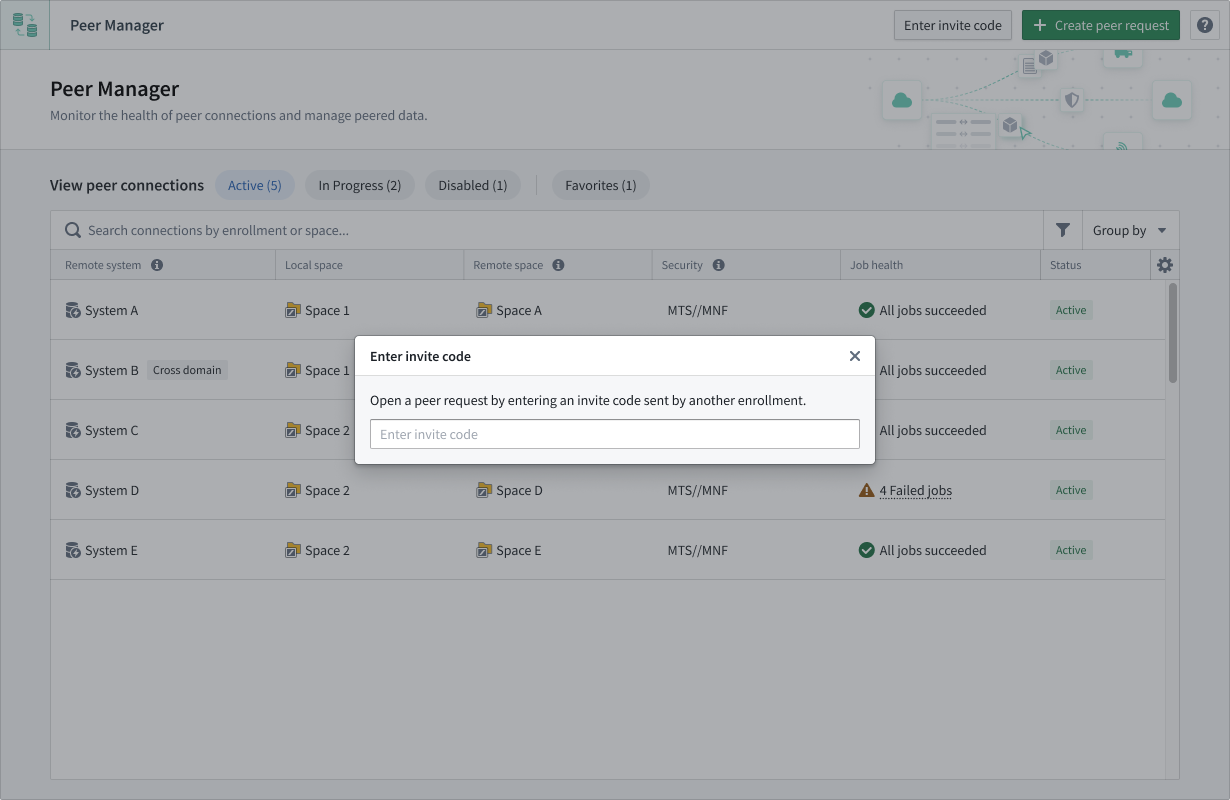
- Select Enter invite code to launch the Importing peer request popup window.
- Paste the invite code in the empty text box to render the Connection details panel of the popup window.
-
Identify the space on your enrollment to which you will accept peered objects or Artifacts from the Select a space to peer dropdown menu.
-
Select Set security to optionally set the security of the connection.
-
Select Approve request.
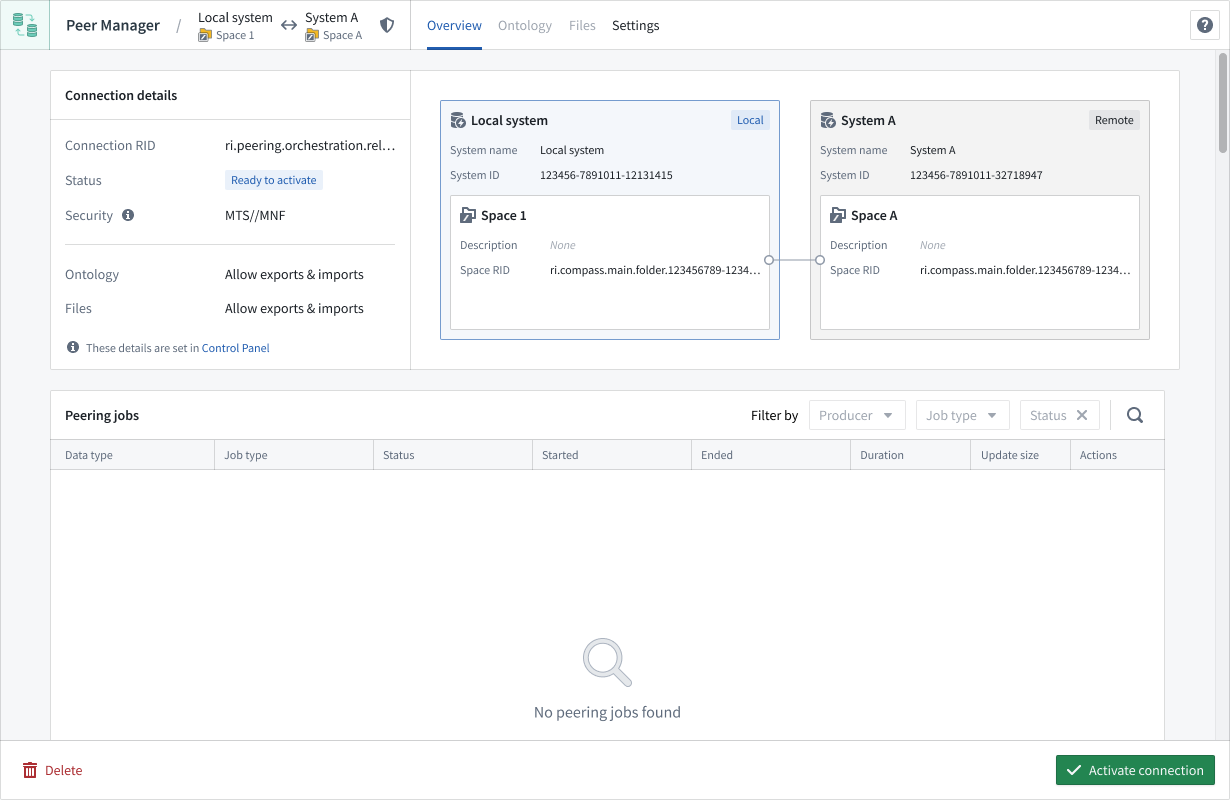
Activate the peer connection
After a peer request is accepted, the originator of the request must Activate the connection in the lower right corner of its right-hand panel.
中文翻译
创建对等连接
您可以通过 Peer Manager 创建和删除对等连接。
前提条件
在创建对等连接之前,您必须完成以下步骤:
:::callout{theme="neutral"} 若要建立从您的注册实例导出数据的对等连接,您的本地注册实例必须允许向远程注册实例出站。此外,远程注册实例必须允许从您的本地注册实例入站。如果您要建立从远程注册实例向本地注册实例导入数据的对等连接,则情况相反:您的本地注册实例必须允许从远程注册实例入站,而远程注册实例必须允许向您的本地注册实例出站。 :::
- 直接从 Peer Manager 在您的注册实例与远程注册实例之间建立连接。如果两个注册实例之间存在网络连接,请建立 Multipass 交换器 (MPX) 连接。如果没有网络连接,请通过您注册实例现有的跨域解决方案建立数据中继连接。
- 确保您是您希望为其创建连接的本地空间的管理员。
- 为您的注册实例设置平台标题,以便远程对等方能够识别您的注册实例。
发起对等连接
要发起对等连接:
- 从 Peer Manager 右上角选择 创建对等请求,启动 创建对等请求 对话框。
- 在 选择要建立对等的空间 下拉菜单中,确定您注册实例的空间。
- 选择要导出、导入或同时进行的数据类型。
- 选择 复制邀请码。
- 将邀请码分享给对等注册实例的管理员,该管理员将导入对等连接。
导入对等连接
收到邀请码后,要导入对等连接:
- 选择 输入邀请码,启动 导入对等请求 弹出窗口。
- 将邀请码粘贴到空白文本框中,以呈现弹出窗口的 连接详情 面板。
-
在 选择要建立对等的空间 下拉菜单中,确定您注册实例中将要接收对等对象或 Artifacts 的空间。
-
选择 设置安全,可选地设置连接的安全性。
-
选择 批准请求。
激活对等连接
对等请求被接受后,请求的发起方必须在其右侧面板的右下角 激活 该连接。