Getting started(入门指南)
:::callout{theme="warning" title="Carbon Permissions"} To configure a Carbon Workspace, a Foundry developer will need the correct permissions. :::
This guide demonstrates the creation of a simple Carbon workspace using resources from the Foundry Training and Resources Project, which is included as part of the Foundry platform. The end result is an aviation workspace designed for an airline analyst to review alerts related to the performance of particular flight routes. This workspace includes quick links to relevant applications and data, along with access to the analyst's favorite individual objects.
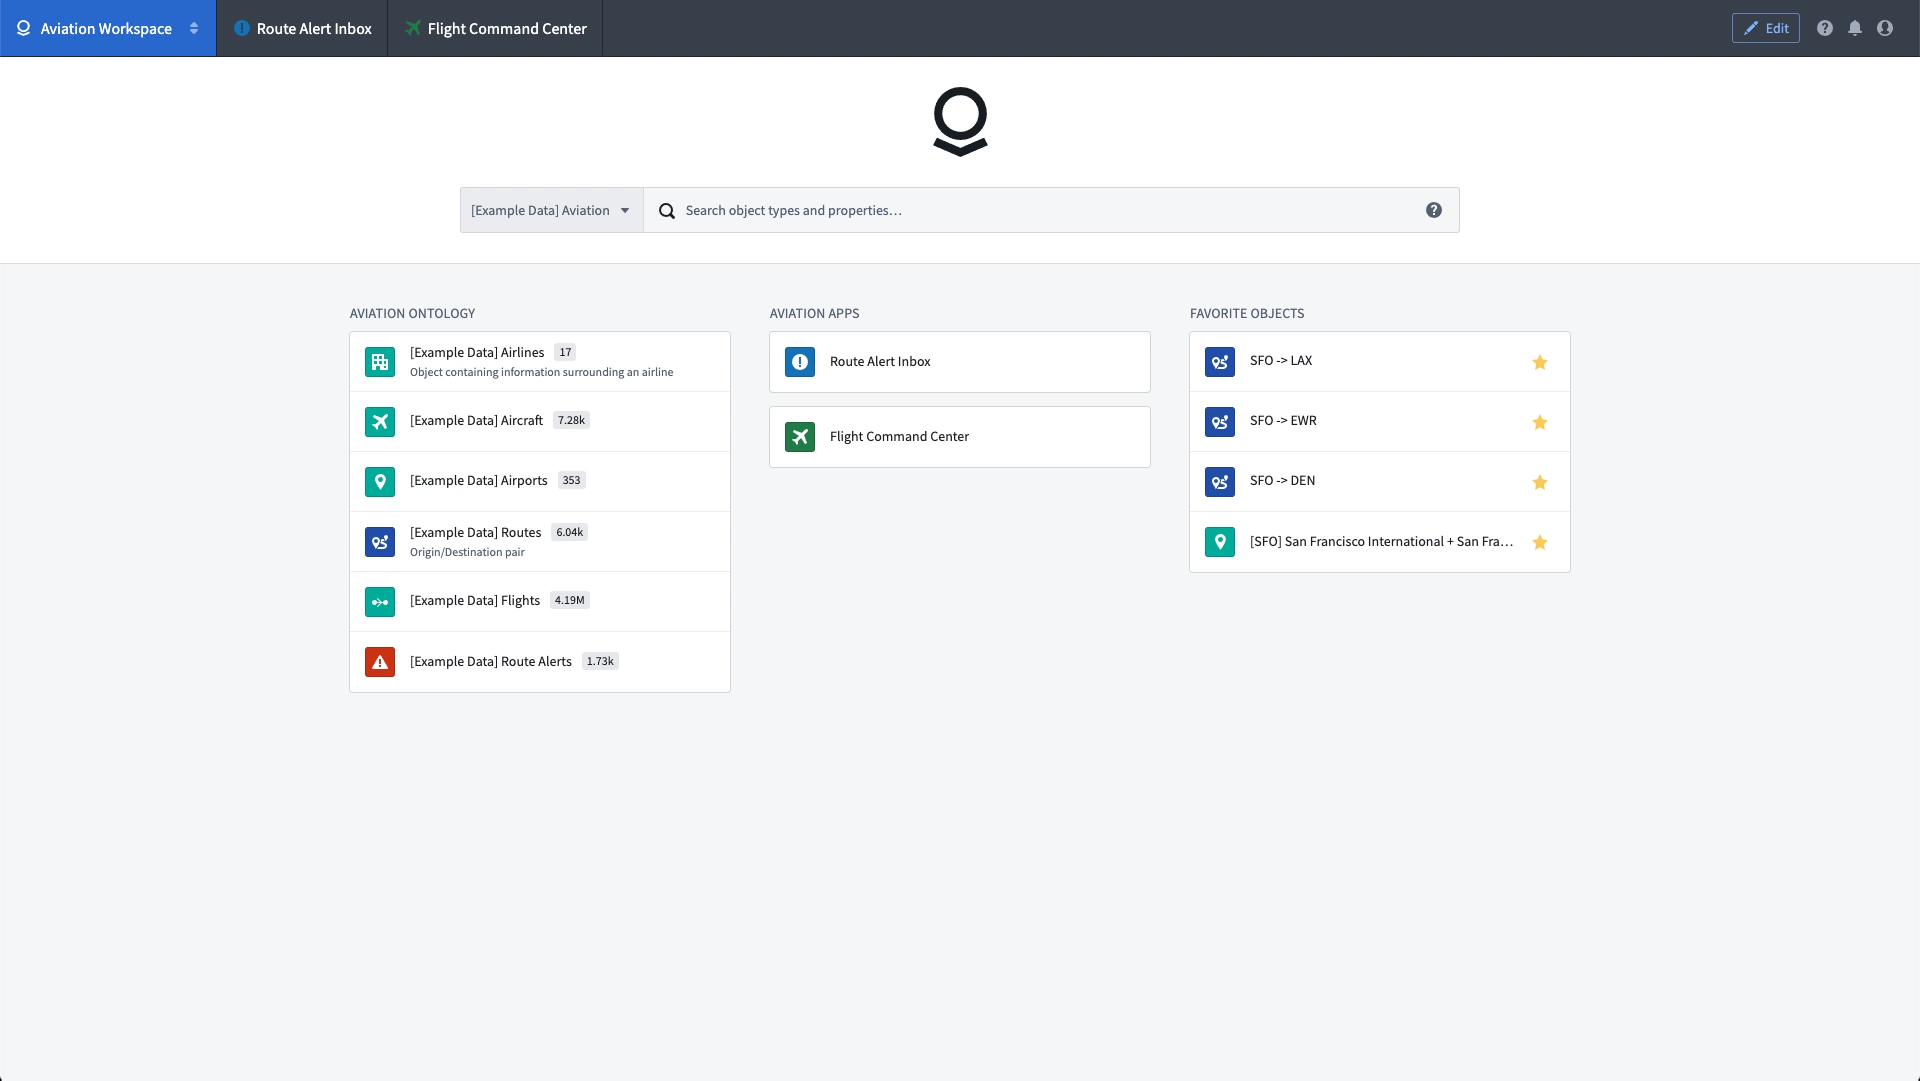
The example Aviation Workspace represents a bare minimum of Carbon configuration and is intended for use as a simple reference. The remainder of the Carbon documentation contains complete descriptions of available configuration options.
Create a new workspace
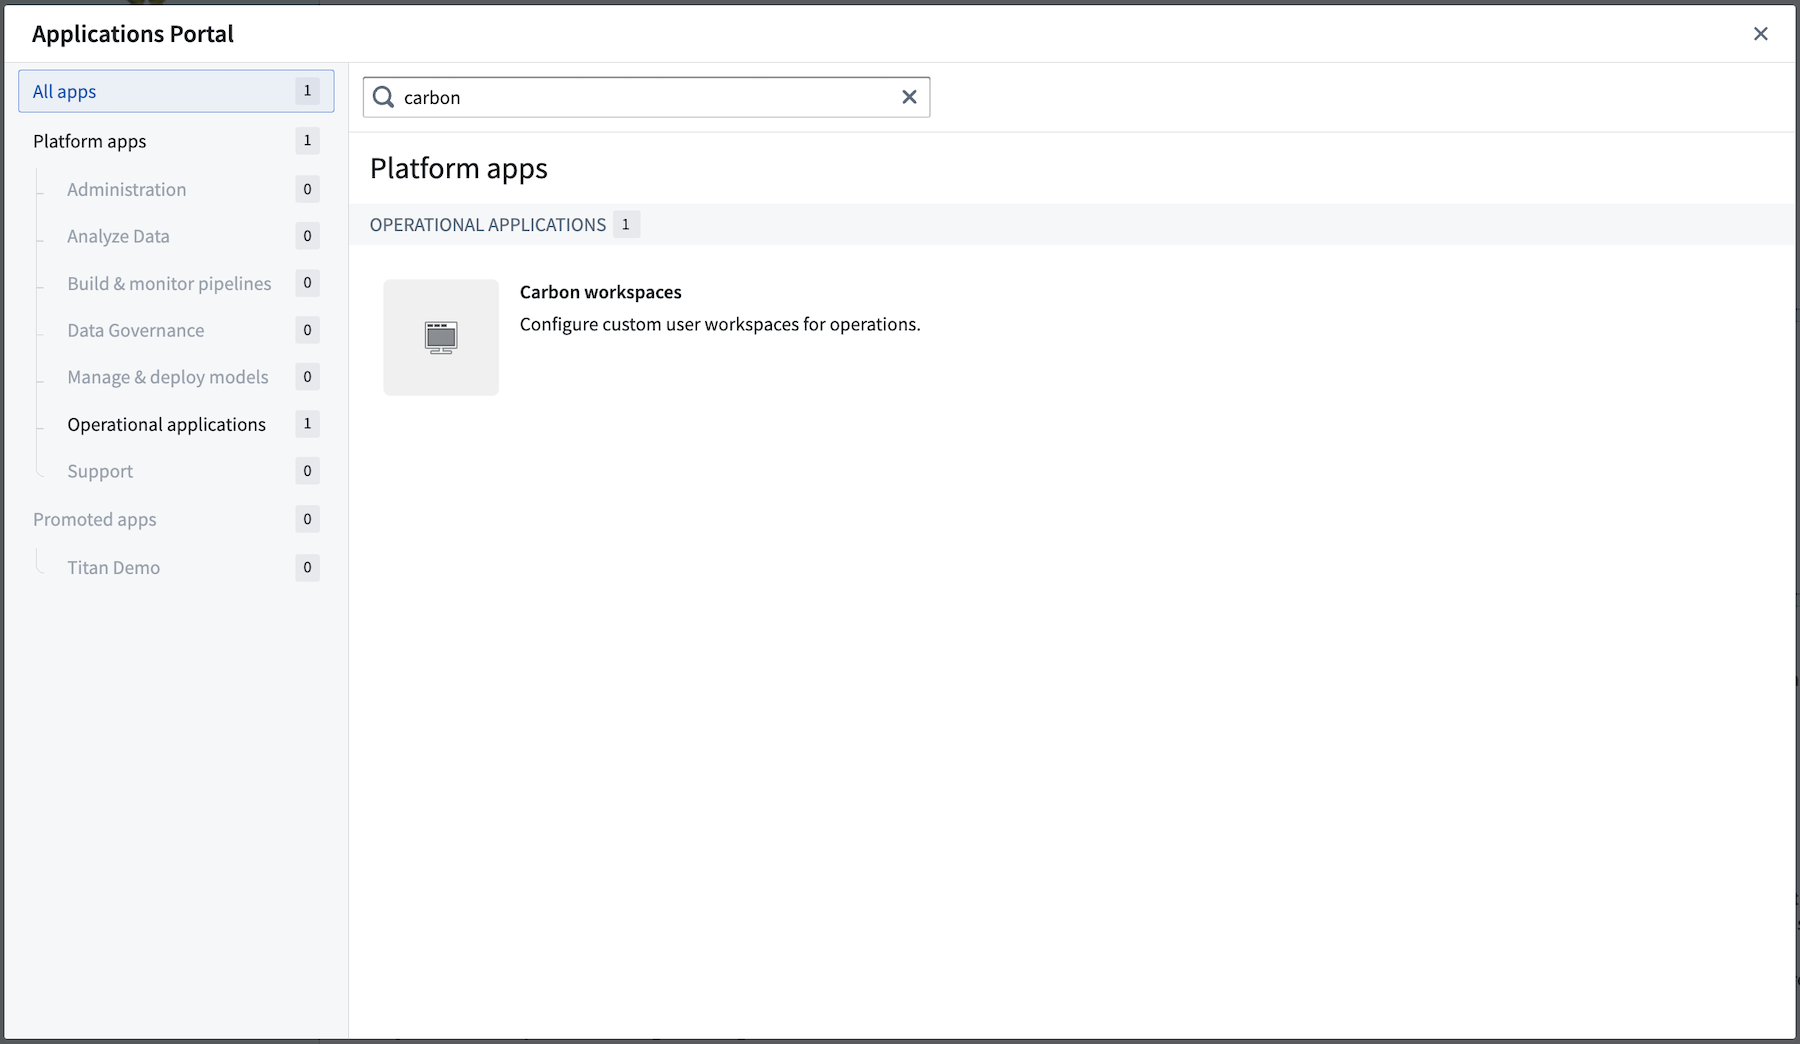
To configure a new Carbon workspace, first open Carbon workspaces from the Application Portal. Then, follow the instructions to create a new Carbon workspace.
Edit Mode Orientation
Each Carbon workspace has a set of four configuration tabs in the right sidebar:
- General: Control the metadata and global configurations for the workspace.
- Home: Manage the content of the landing page, including the logo, search, and column contents, or replace the home page with a custom resource.
- Menu: Choose the resources and links to populate the menu bar at the top of the Workspace.
- Access: Determine the workspace visibility from the launcher, the location where the workspace is stored, and default workspaces for user groups.
To begin, add a Name and Description in the General tab.

Update the home page
The default home page presents a three-column layout, where each column is populated with one or more blocks of featured items. Above the columns are an optional logo and the Object Explorer search bar.
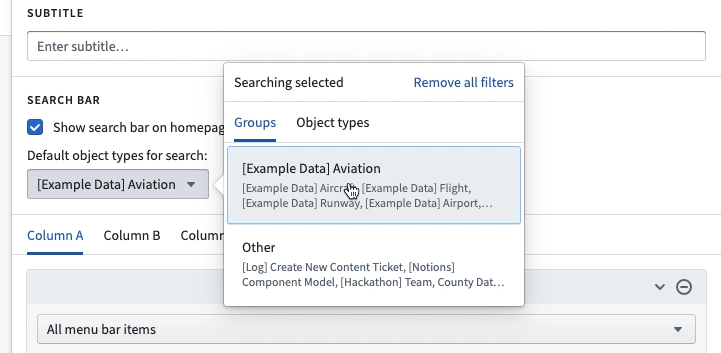
Before turning to the contents of the columns, let's restrict the object types that are searched from the search bar. If there are object type groups configured, choose from these in the Groups list or change to the object types list and choose one or more object types to restrict the search results.
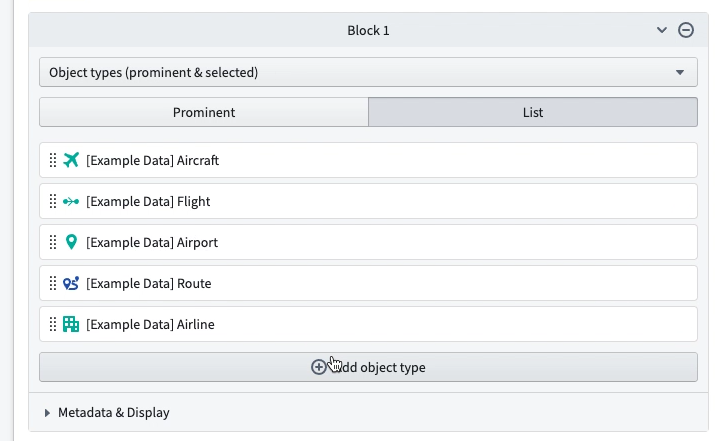
To turn to the home page content, in Column A, let's add a list of the relevant object types for this workspace, adding a new block for Object types (prominent & selected) and choosing the List option, which allows selecting each object type displayed automatically.
Update the Menu Bar
The Menu Bar holds links to Foundry resources that open within the context of the workspace. In this example, we add two Workshop modules, the Route Alert Inbox and the Flight Command Center. These Anchored Modules will be permanent tabs in the workspace. Additional resources can be added as New-Tab Modules, which will be available in a dropdown and open in a new tab when selected.
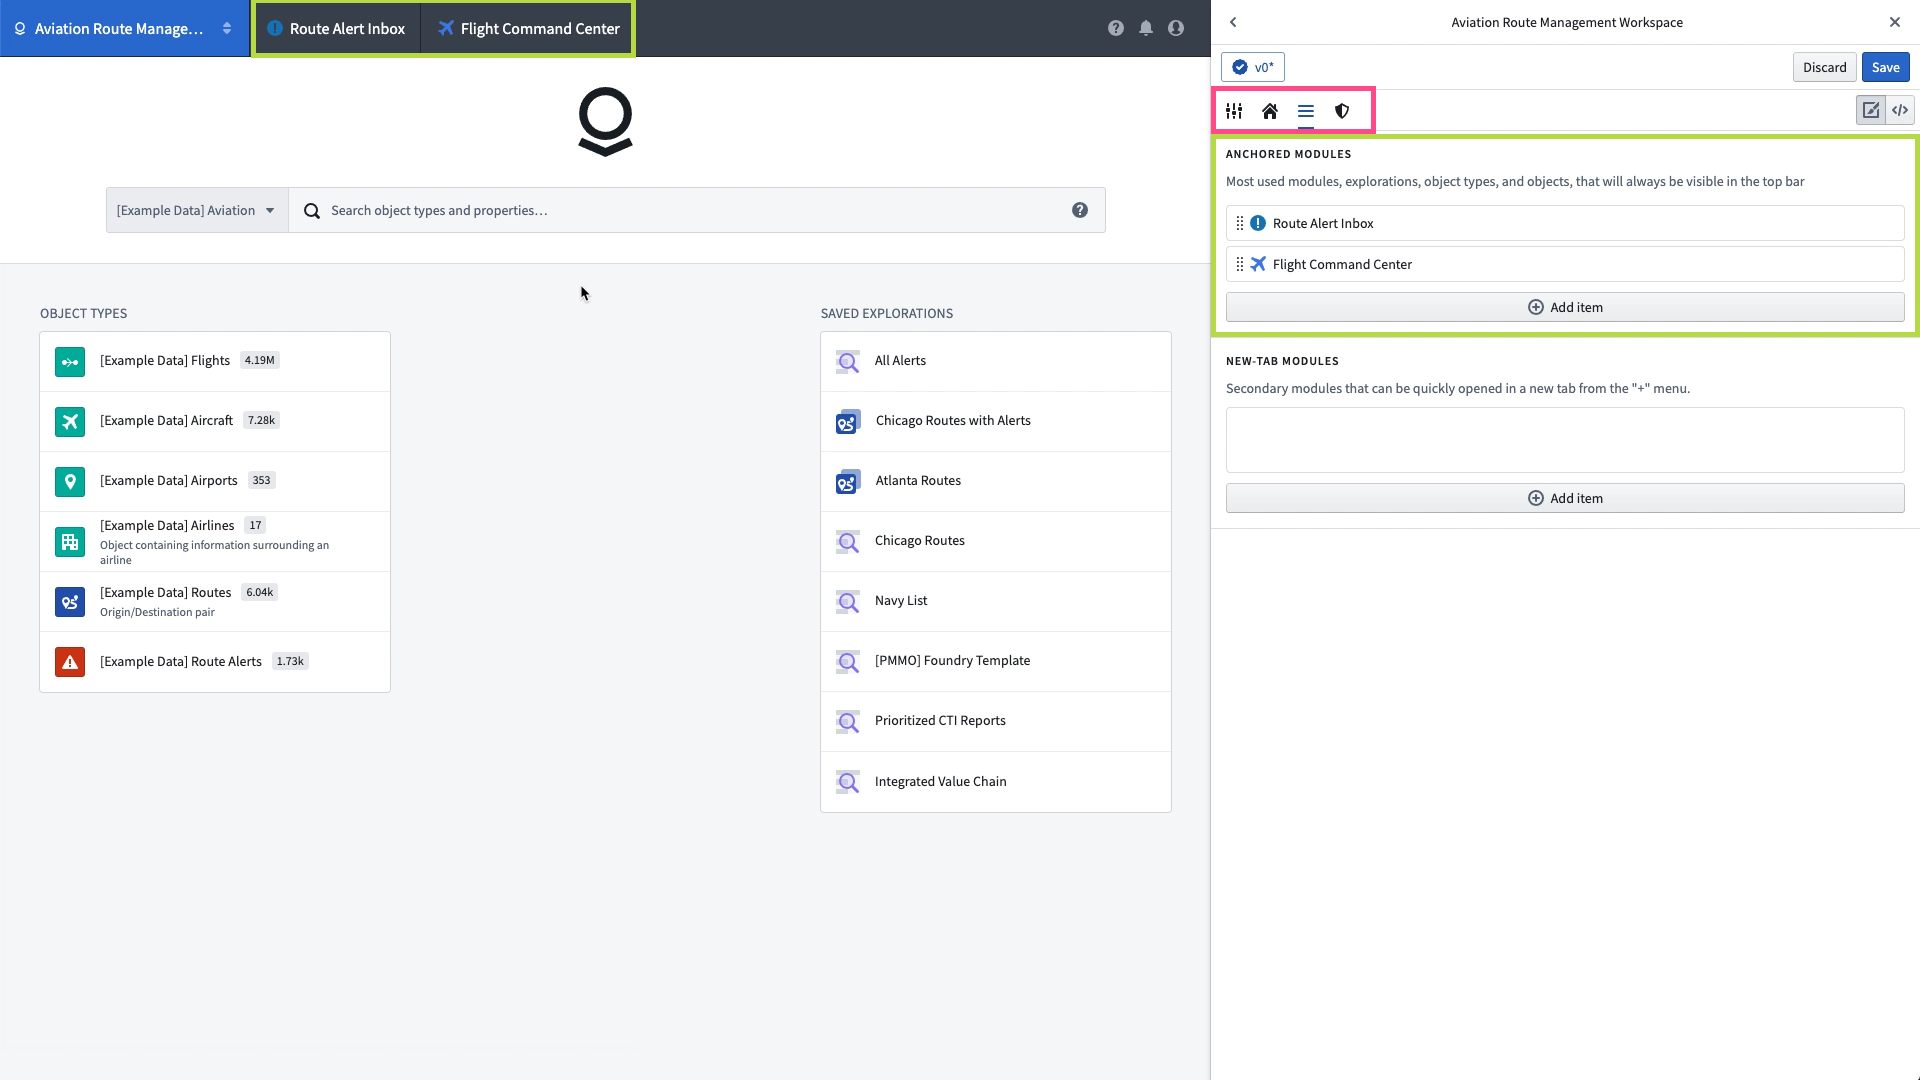
After updating the menu bar, return to the home page configuration and add a new block in Column B with the All menu bar items contents, which will automatically populate with any resources configured in the menu bar. These will populate after the workspace is saved.
Save the Workspace
In the upper right corner of the edit interface, click the Save button to save a new version of the workspace then click the x icon to leave edit mode and review the workspace as it will appear to users.
What's Next?
We now have a simple but functioning Carbon workspace. You can continue customizing this example workspace, manage its access controls, or connect it to other applications with the information in the links below:
- Customize the logo.
- Review the workspace visibility and permissions.
- Learn how to wire together navigation between resources for multi-app workflows.
中文翻译
入门指南
:::callout{theme="warning" title="Carbon 权限"} 要配置 Carbon 工作区,Foundry 开发者需要具备正确的权限。 :::
本指南演示了如何使用 Foundry 培训与资源项目中的资源创建一个简单的 Carbon 工作区,该项目是 Foundry 平台的一部分。最终成果是一个专为航空公司分析师设计的航空工作区,用于审查与特定航线性能相关的警报。该工作区包含相关应用程序和数据的快速链接,以及分析师常用单个对象的访问入口。
该示例航空工作区代表了 Carbon 配置的最低要求,旨在作为简单参考使用。Carbon 文档的其他部分提供了可用配置选项的完整说明。
创建新工作区
要配置新的 Carbon 工作区,首先从应用程序门户打开 Carbon 工作区。然后,按照说明创建新的 Carbon 工作区。
编辑模式介绍
每个 Carbon 工作区在右侧边栏中都有四个配置选项卡:
- 常规:控制工作区的元数据和全局配置。
- 主页:管理着陆页的内容,包括徽标、搜索和列内容,或者用自定义资源替换主页。
- 菜单:选择资源和链接以填充工作区顶部的菜单栏。
- 访问权限:确定工作区在启动器中的可见性、工作区的存储位置以及用户组的默认工作区。
首先,在 常规 选项卡中添加名称和描述。
更新主页
默认主页采用三列布局,每列填充一个或多个特色项目区块。列上方是可选的徽标和对象资源管理器搜索栏。
在关注列内容之前,我们先限制搜索栏中可搜索的对象类型。如果已配置对象类型组,可以从组列表中选择这些组,或者切换到对象类型列表并选择一个或多个对象类型来限制搜索结果。
接下来关注主页内容。在列 A 中,我们添加一个与此工作区相关的对象类型列表,新增一个 对象类型(突出显示与选定) 区块,并选择 列表 选项,这样可以自动选择每个显示的对象类型。
更新菜单栏
菜单栏包含指向 Foundry 资源的链接,这些资源将在工作区上下文中打开。在本示例中,我们添加了两个 Workshop 模块:航线警报收件箱和飞行指挥中心。这些固定模块将成为工作区中的永久选项卡。其他资源可以作为新标签页模块添加,这些模块将出现在下拉菜单中,并在选中时在新标签页中打开。
更新菜单栏后,返回主页配置,在列 B 中添加一个包含 所有菜单栏项目 内容的新区块,该区块将自动填充菜单栏中配置的所有资源。这些内容将在工作区保存后才显示。
保存工作区
在编辑界面的右上角,点击保存按钮保存工作区的新版本,然后点击 x 图标退出编辑模式,查看工作区在用户面前的显示效果。
下一步做什么?
现在我们已经拥有一个简单但功能完整的 Carbon 工作区。您可以继续自定义此示例工作区,管理其访问控制,或通过以下链接中的信息将其连接到其他应用程序: