Create a workspace(创建工作区 (workspace))
Each Carbon workspace is stored in Foundry as a separate file resource in a Project. Each workspace file has its own access permissions.
In order to create a new Carbon workspace, first enter edit mode via the Edit button on the right side of the Carbon menu bar.

:::callout{theme="neutral"}
For users without a default Carbon workspace, the edit button will not be visible. However, if they have the necessary permissions to create a Carbon workspace, they can access the editor side panel by navigating to workspace/carbon/edit in their URL.
:::
In the editor side panel that opens on the right, select the Create workspace button at the bottom.

Continue by naming your workspace and selecting where you want to store the resource.
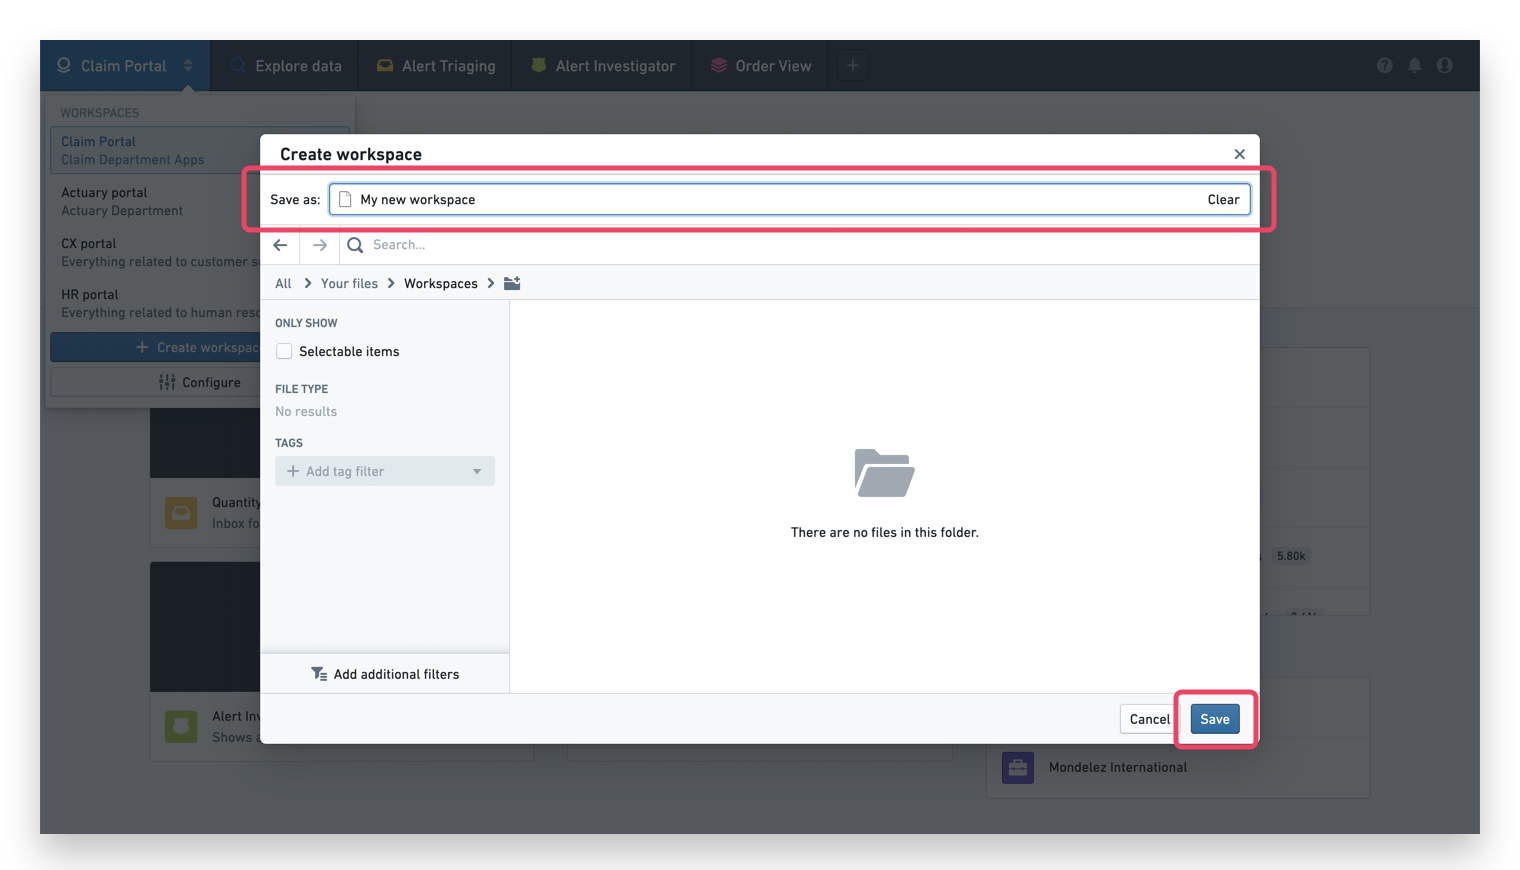
:::callout{theme="success" title="Tip"} We recommend placing the workspace in the same folder as the rest of the resources that you plan to include in your workspace. For example, place the workspace in the folder which includes all of the Workshop modules that you plan to expose in this specific workspace. This way, permissions set at the folder level can be applied to all of the resources. :::
After you've saved the workspace in a Project, you will be redirected to your newly-created Carbon workspace.
You can verify this by checking that the name of your workspace corresponds to the workspace name in the top left corner. You can now continue with configuring your workspace.
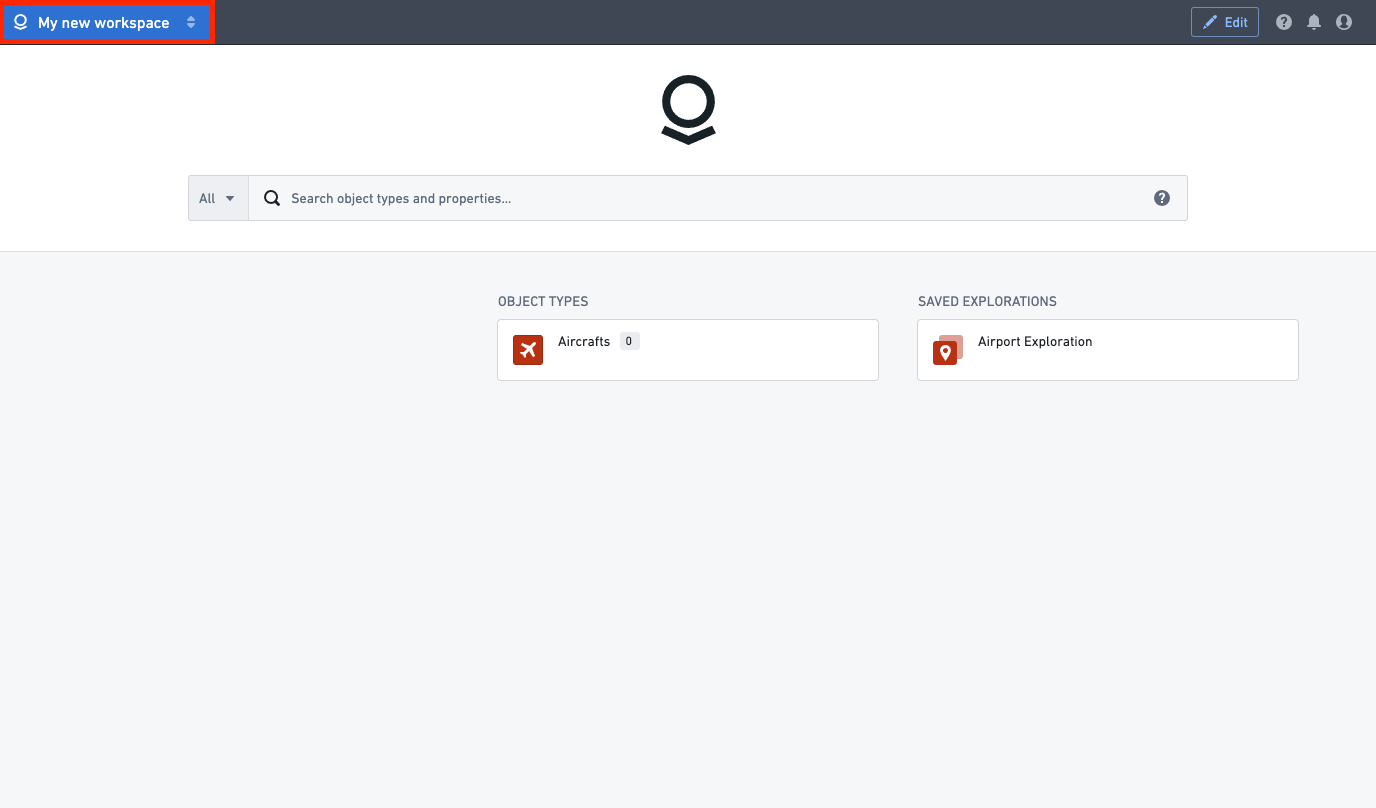
:::callout{theme="success"} Every new workspace is created with a default home page that includes a default icon, a search bar based on Object Explorer, and two columns, showing prominent object types (Column B, middle column) and saved explorations from Object Explorer (Column C, right column). :::
中文翻译
创建工作区 (workspace)
每个 Carbon 工作区在 Foundry 中均以项目(Project)内的独立文件资源形式存储。每个工作区文件拥有独立的访问权限。
要创建新的 Carbon 工作区,首先通过 Carbon 菜单栏右侧的编辑按钮进入编辑模式。
:::callout{theme="neutral"}
对于没有默认 Carbon 工作区的用户,编辑按钮将不可见。但如果用户拥有创建 Carbon 工作区的必要权限,可通过在 URL 中导航至 workspace/carbon/edit 来访问编辑器侧面板。
:::
在右侧打开的编辑器侧面板中,选择底部的创建工作区按钮。
接着为工作区命名,并选择资源存储位置。
:::callout{theme="success" title="提示"} 建议将工作区文件与计划纳入该工作区的其他资源放在同一文件夹中。例如,将工作区放置在包含所有计划在此工作区中展示的 Workshop 模块的文件夹内。这样,在文件夹级别设置的权限即可应用于所有资源。 :::
将工作区保存至项目后,系统将自动跳转至您新创建的 Carbon 工作区。
您可以通过检查左上角的工作区名称是否与您设定的名称一致来进行验证。接下来可继续配置工作区。
:::callout{theme="success"} 每个新工作区创建时均包含一个默认主页,该页面设有默认图标、基于对象浏览器(Object Explorer)的搜索栏,以及两列布局:中间列(B 列)展示主要对象类型,右侧列(C 列)展示对象浏览器中保存的探索结果。 :::