Create a product(创建产品)
This page contains instructions for creating a new product in Foundry DevOps. Users can browse and install available products via the Marketplace storefront. Read more about use cases for which you may want to create a product.
For instructions on packaging multiple products simultaneously, refer to Package multiple products.
Choose a store
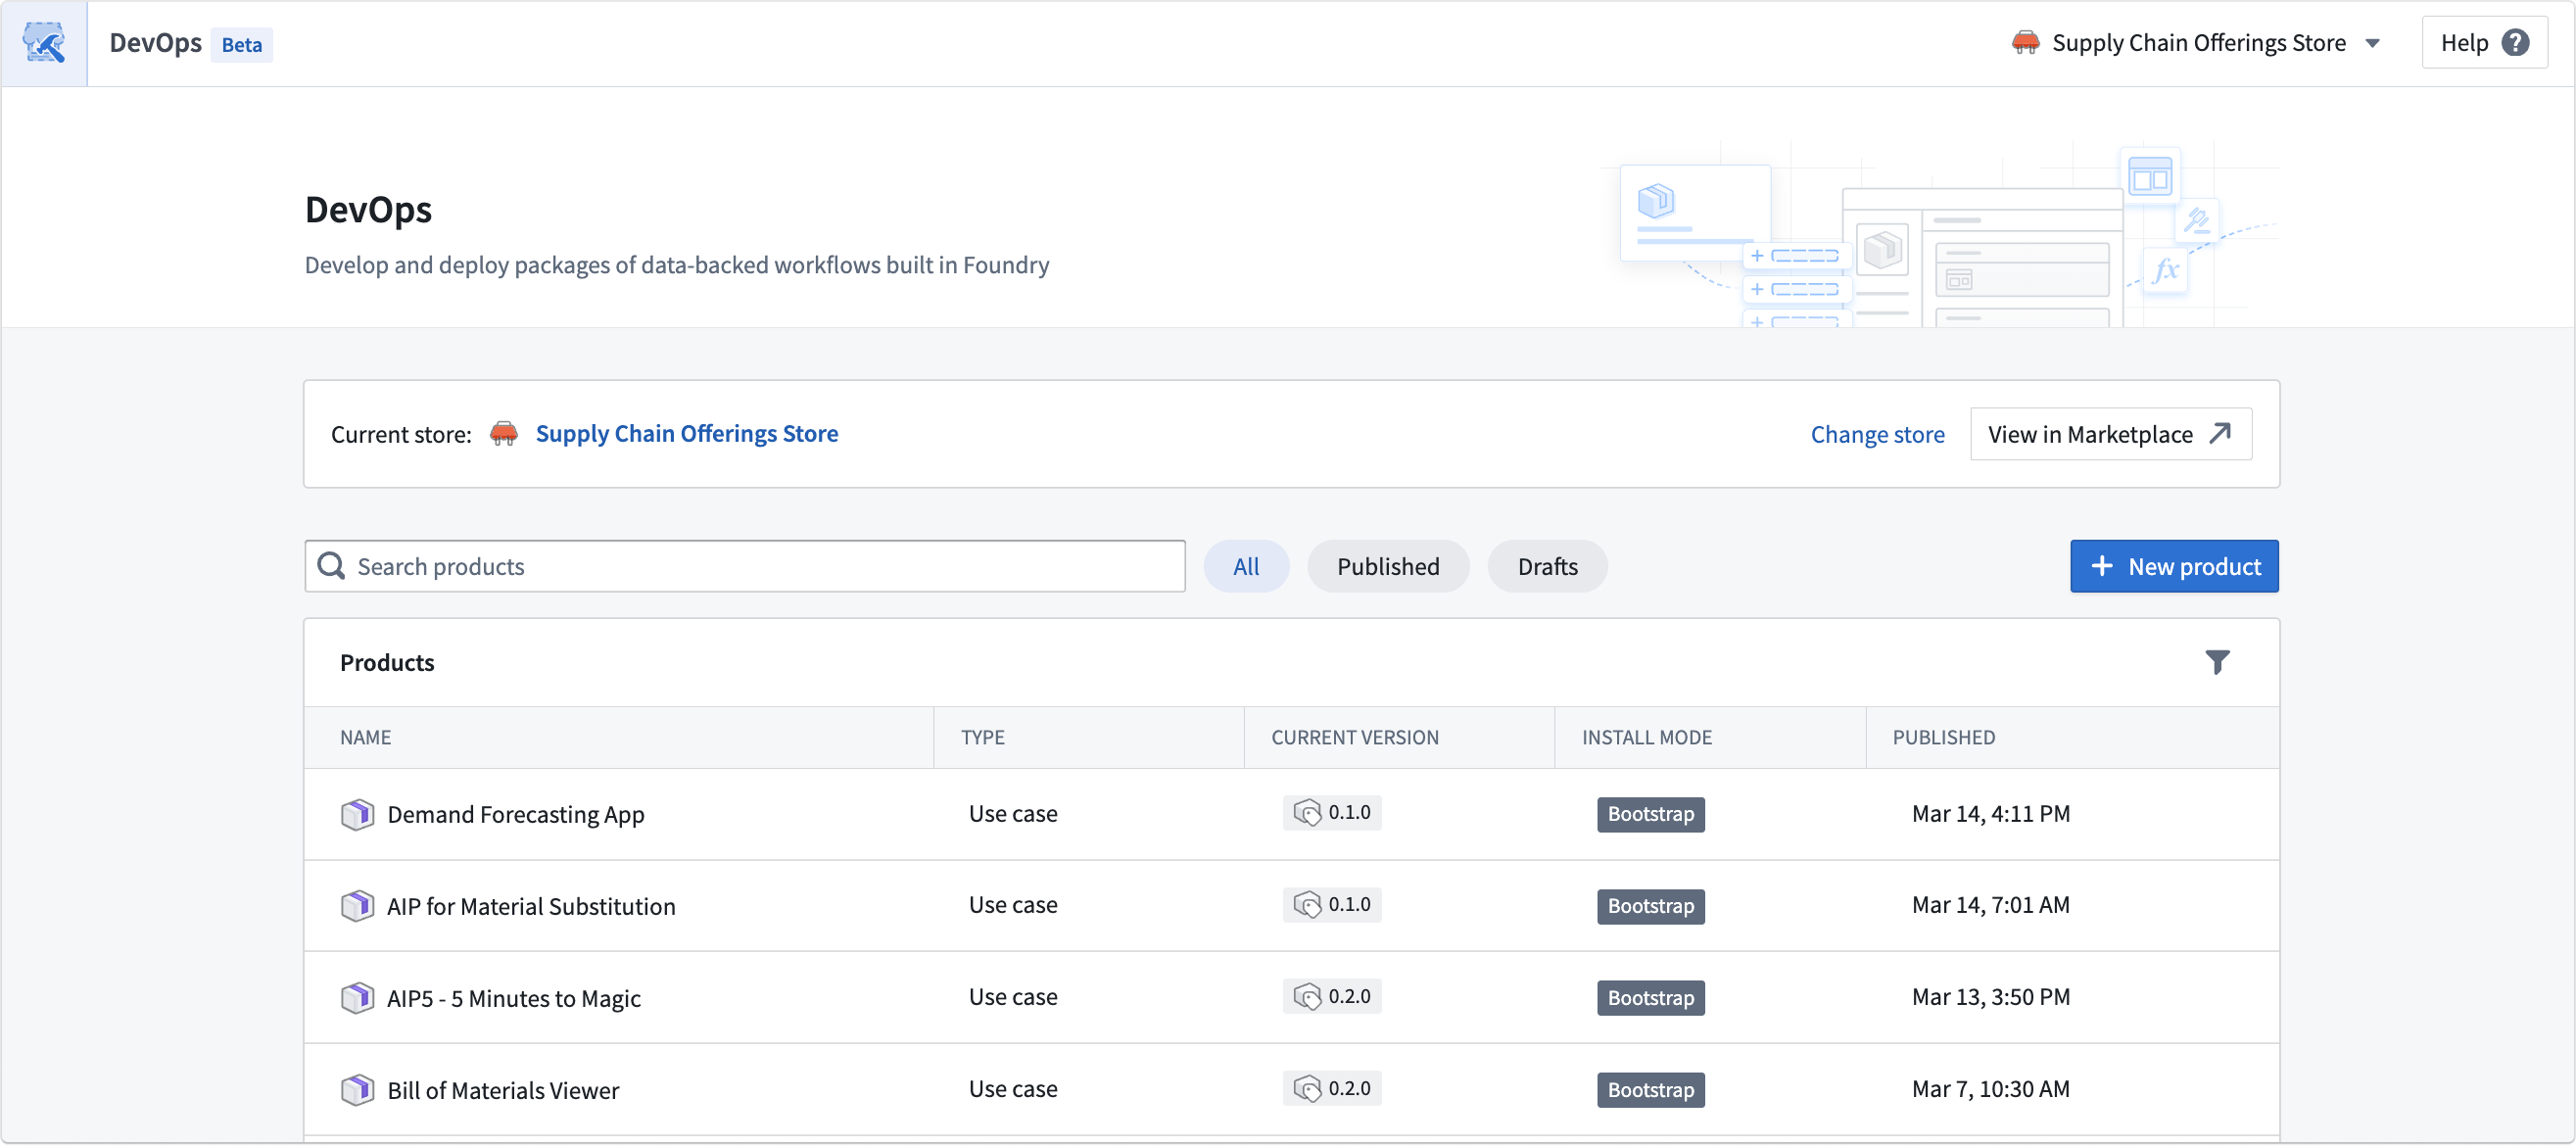
To create a new product, select a store in which to publish your product. To select an existing store or create a new one, select the Change Store option in the top-right.
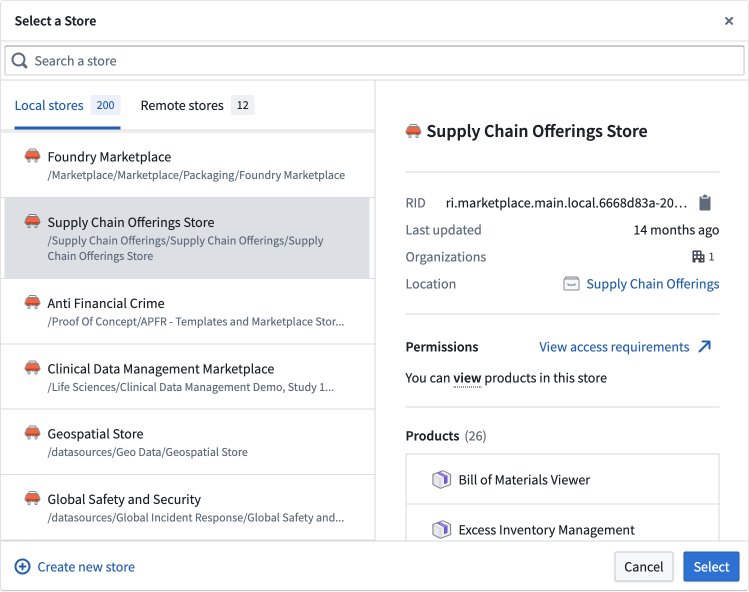
New stores are saved to a project and inherit the permissions of that project. Specifically, anyone with edit access to a store's project can create new products and edit existing products in that store, and anyone with view or edit access to the store's project can install products from that store.
After choosing a store, select New product or Create new group to begin creating your product.
Configure a new product draft
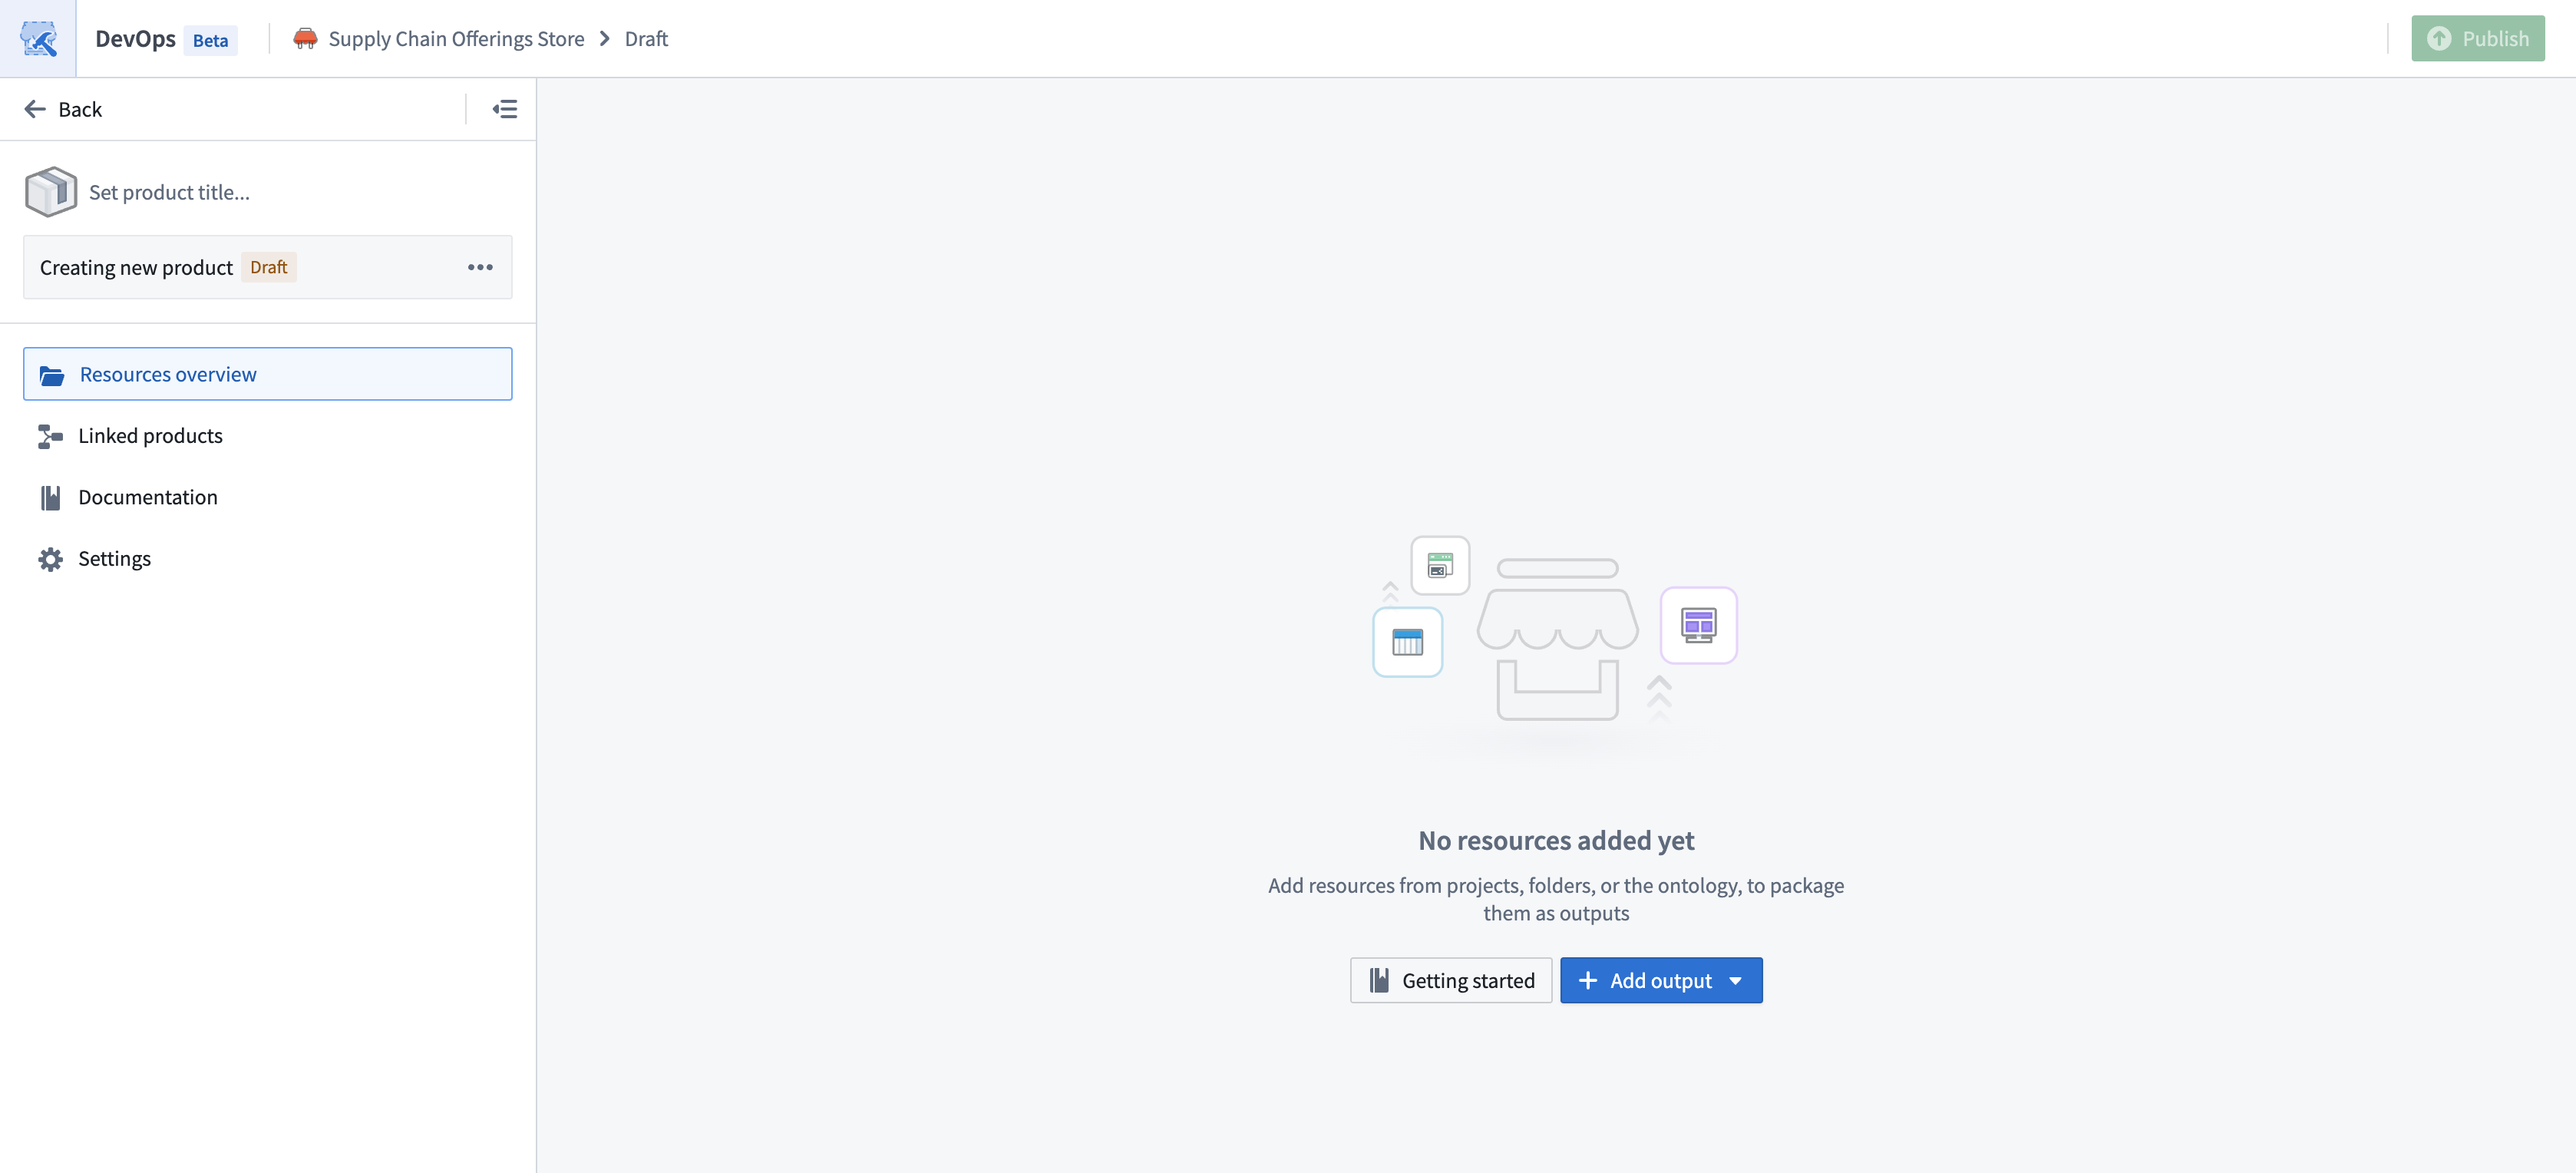
Provide a name for your draft product in the Set product title... input box in the top-left.
When starting a product draft, you can either:
- Add resources: Manually choose resources from projects, folders, or the ontology, to package them as outputs.
- Track a folder: The product will track a source folder. New versions of the product will automatically bring in new outputs from the folder.
In the example below, we choose to manually add resources. At any point, the draft can be migrated to folder tracking.
Add outputs
Choose Add output to select the outputs to include in your draft product; these outputs are the resources that Marketplace recreates when users install your product. You can choose Add files to select most resource types within the Compass filesystem. If a resource is not available to select through Compass, then DevOps provides its own selection option, such as Add ontology resources.

DevOps automatically identifies resource dependencies, so you should add the furthest downstream resources first. For example, if you want to package a Workshop application and four object types, you should only add the Workshop application.
DevOps also enables you to add outputs in bulk. For one-time bulk addition of outputs, select Add all files from folder. You can also use Add from Data Lineage and Add from Workflow Lineage to add resources from a graphical dependency view. For a more automated way of tracking outputs that syncs changes with the source folder as the product evolves, consider tracking a source folder.
After you add outputs to your draft product, select a resource to launch its Details panel on the right side of your screen.
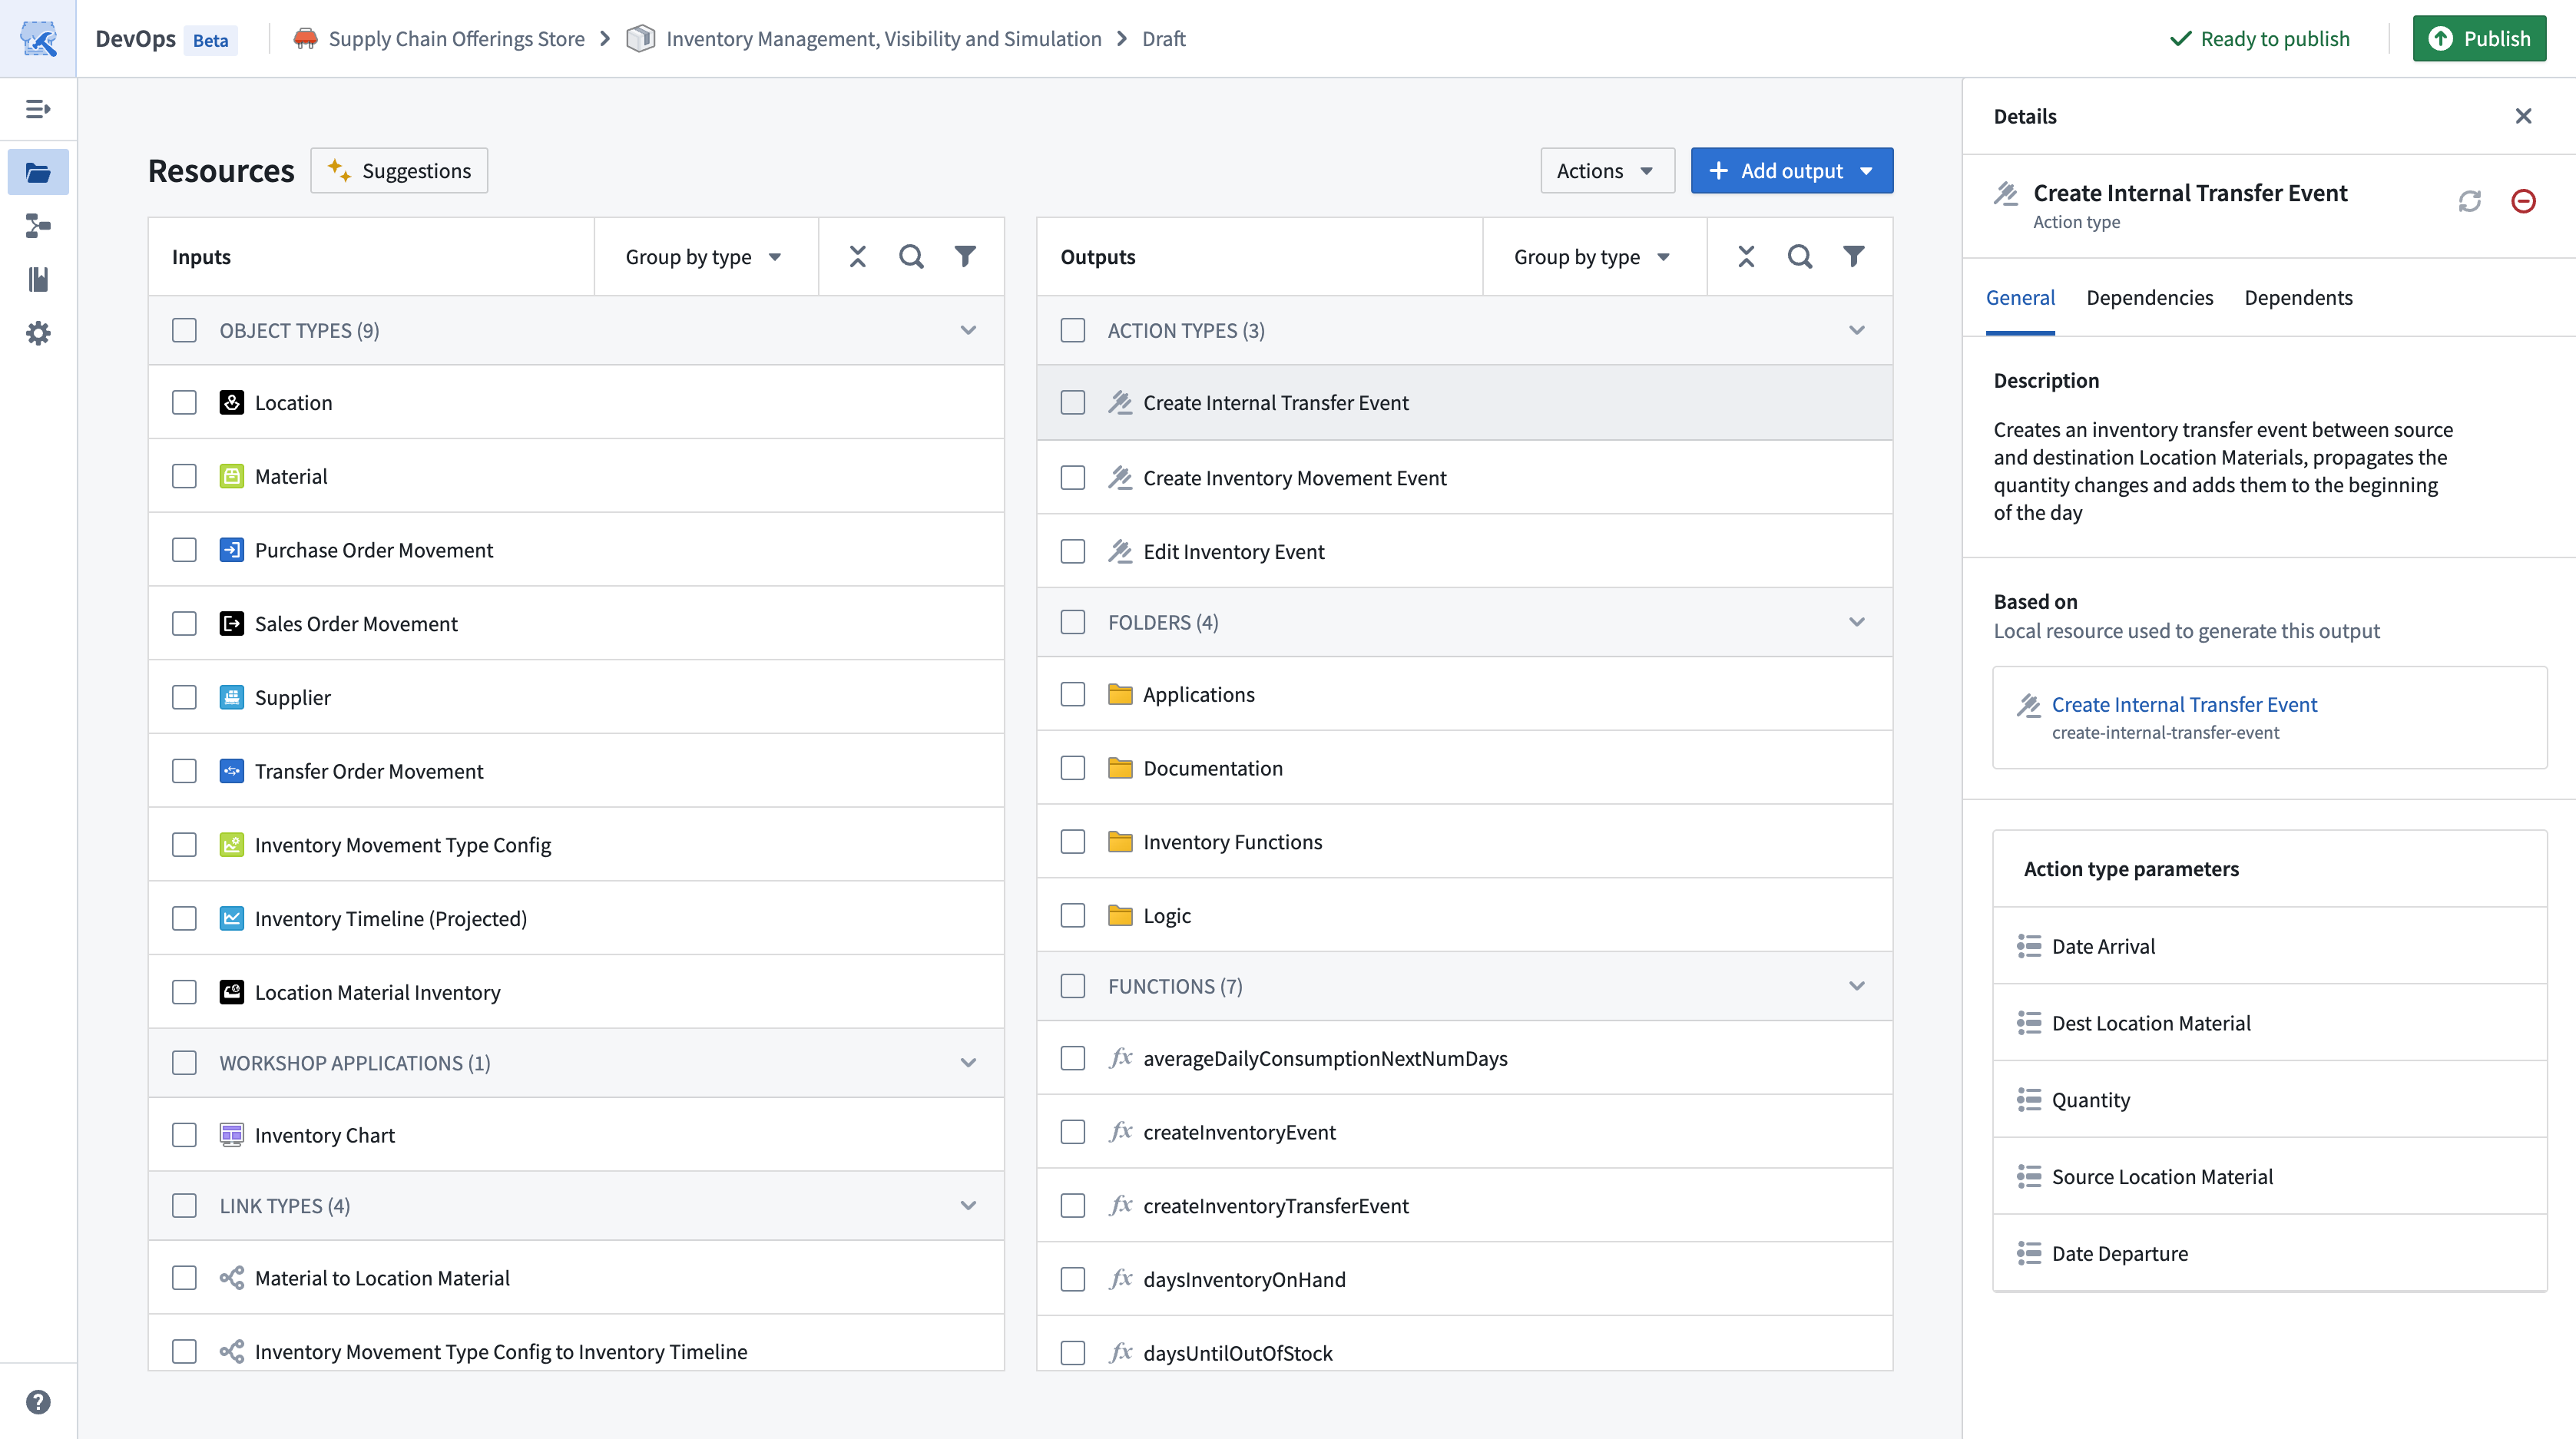
Select the Dependencies tab to review the output's dependencies, which DevOps also surfaces as inputs.
Add inputs
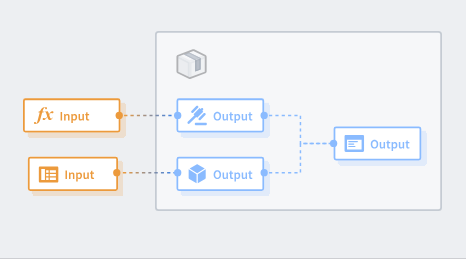
DevOps automatically surfaces output dependencies as Inputs as you add outputs to your draft product. Users who install your finished product must provide resources to satisfy each input.
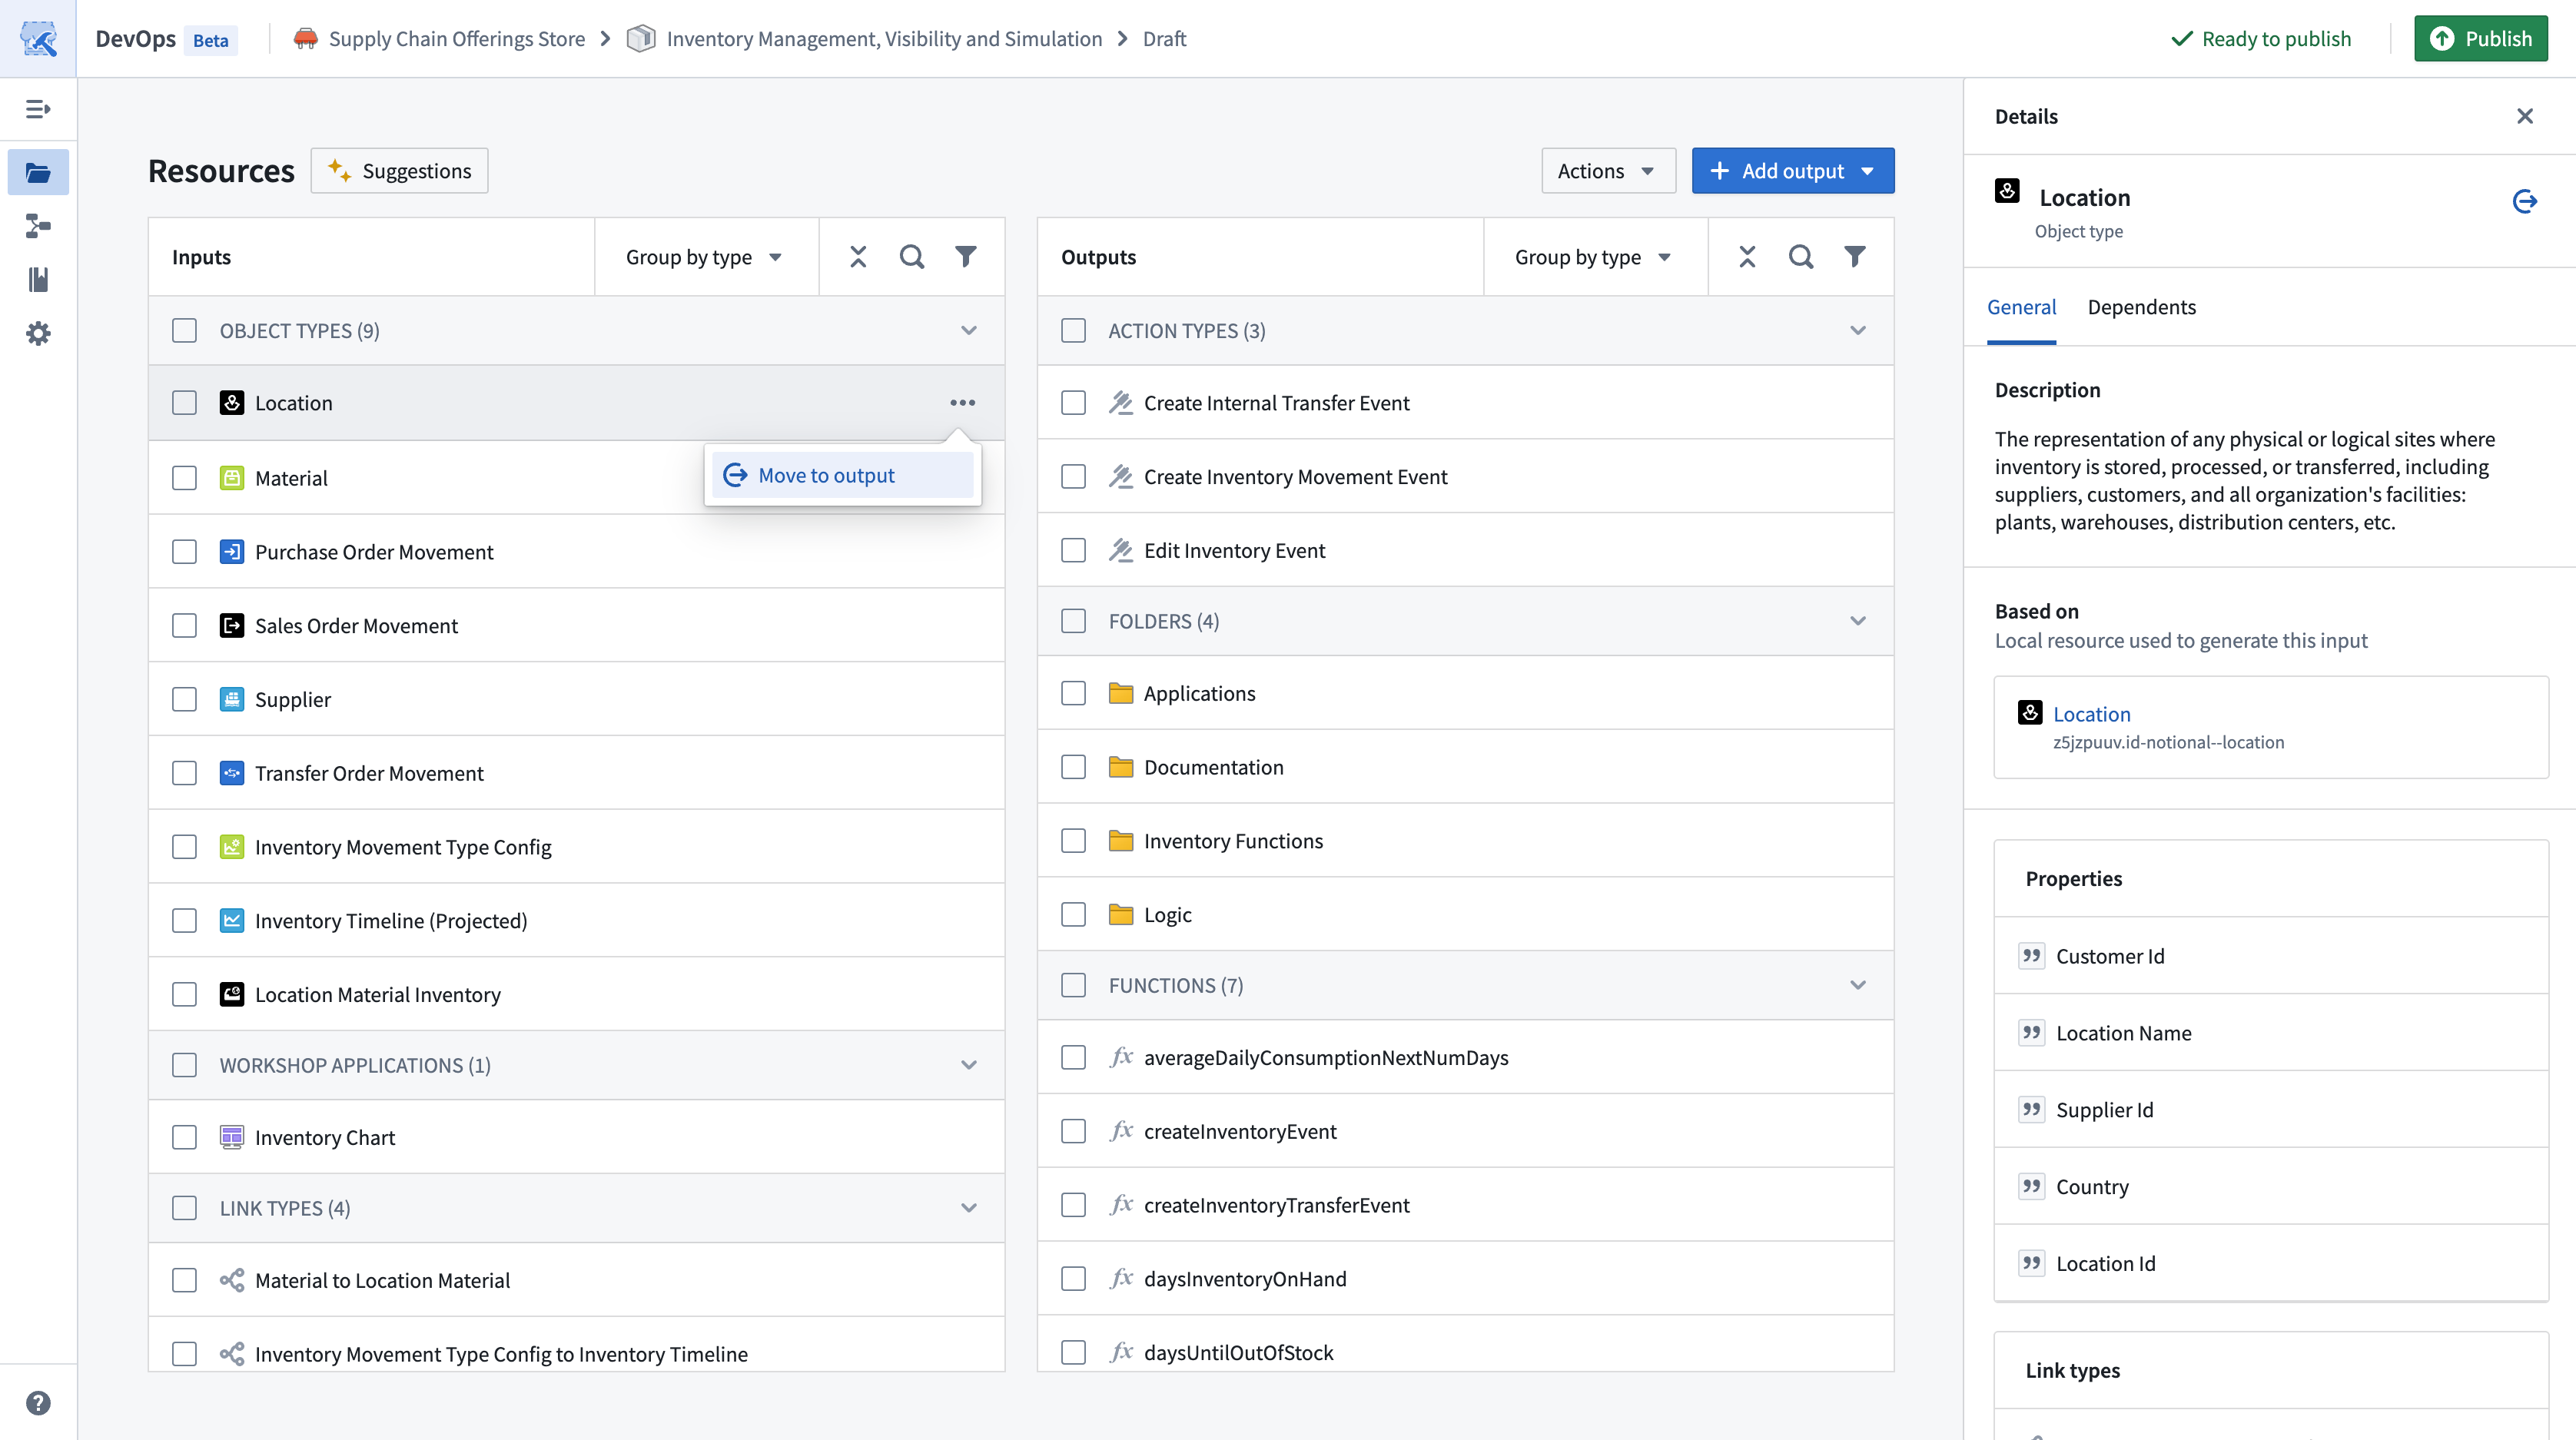
When designing your product, you can promote inputs for inclusion as outputs. Select the ellipsis icon before choosing Move to output on the input row to promote it to an output.
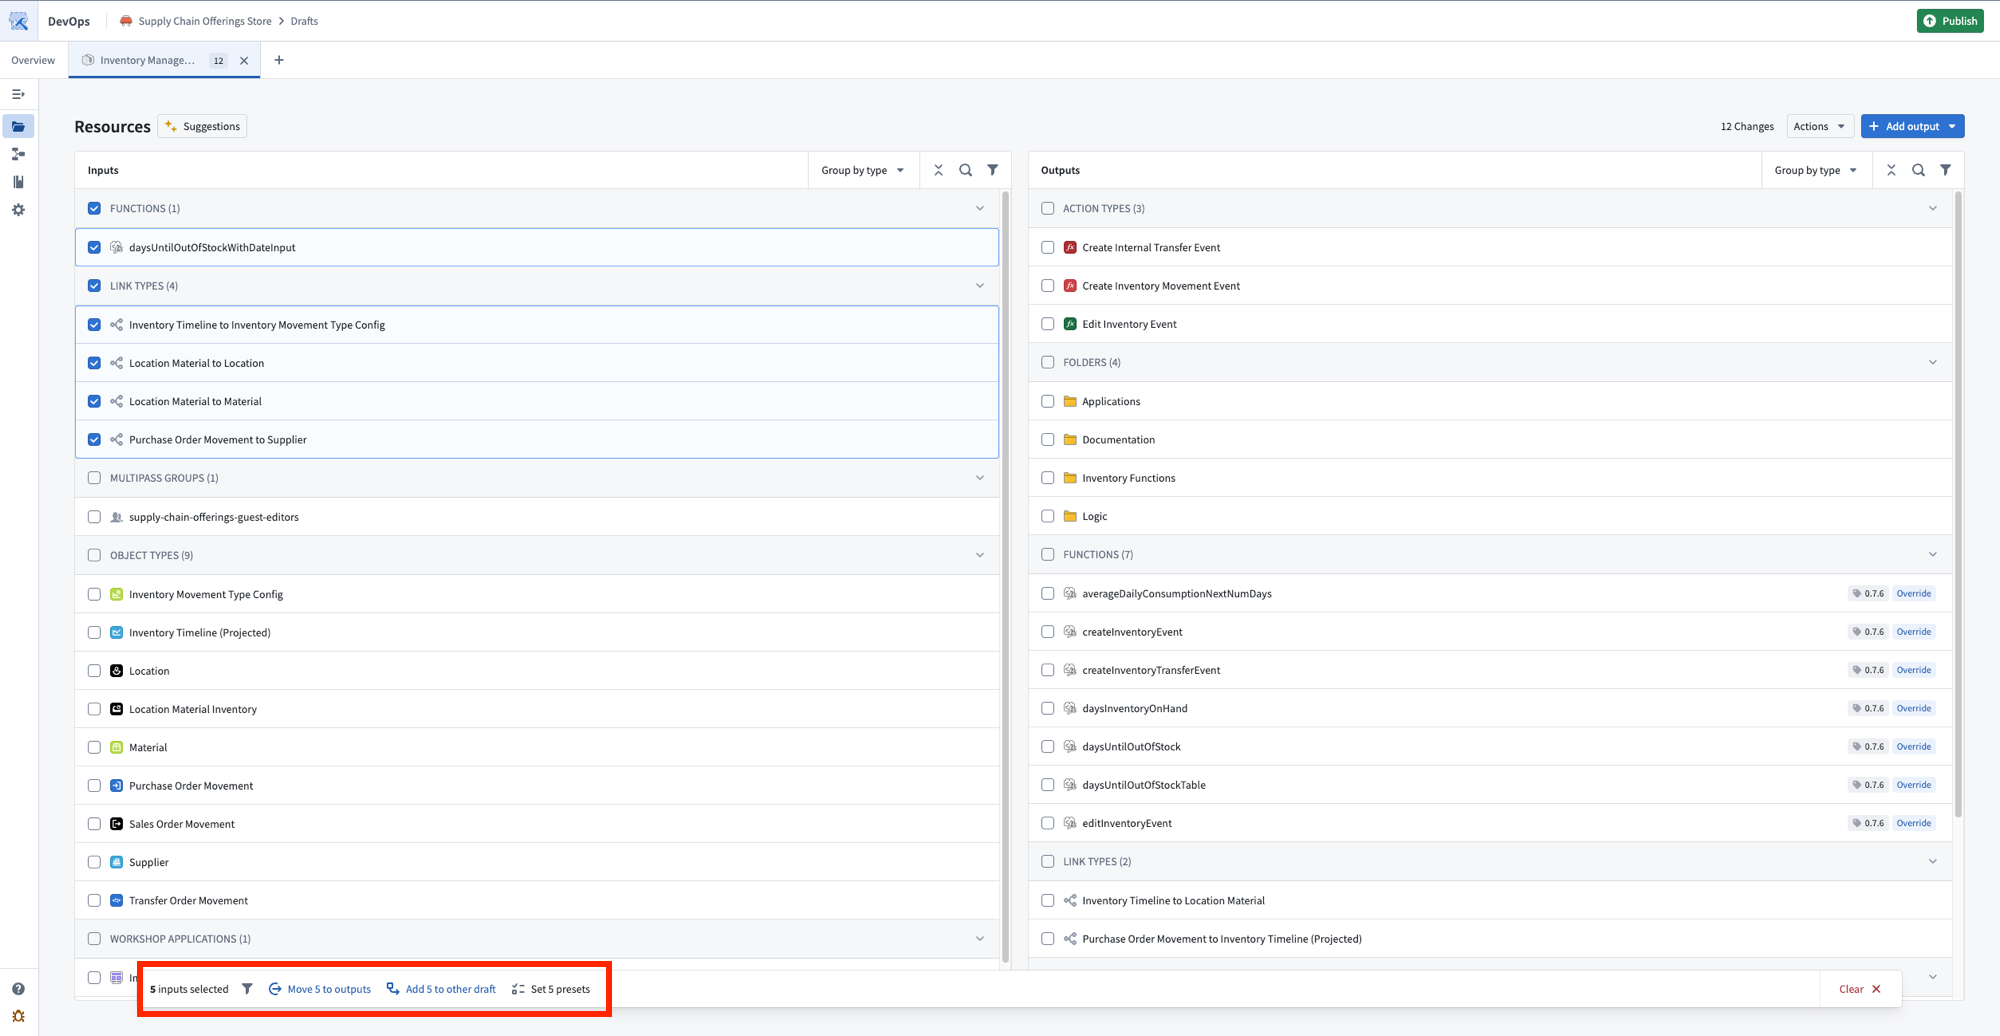
You can also move inputs to outputs in bulk by selecting multiple inputs and choosing Move {N} to outputs from the popup at the bottom of your screen.
As a general rule, if you want installers to provide their own version of a resource, such as their own dataset or object type, then you should list that requirement as an input. If you want your product to instead provide a resource for your installers, then you should promote the input to be an output.
If you iteratively promote all inputs to outputs, then users who install your product will not need to map anything during installation.
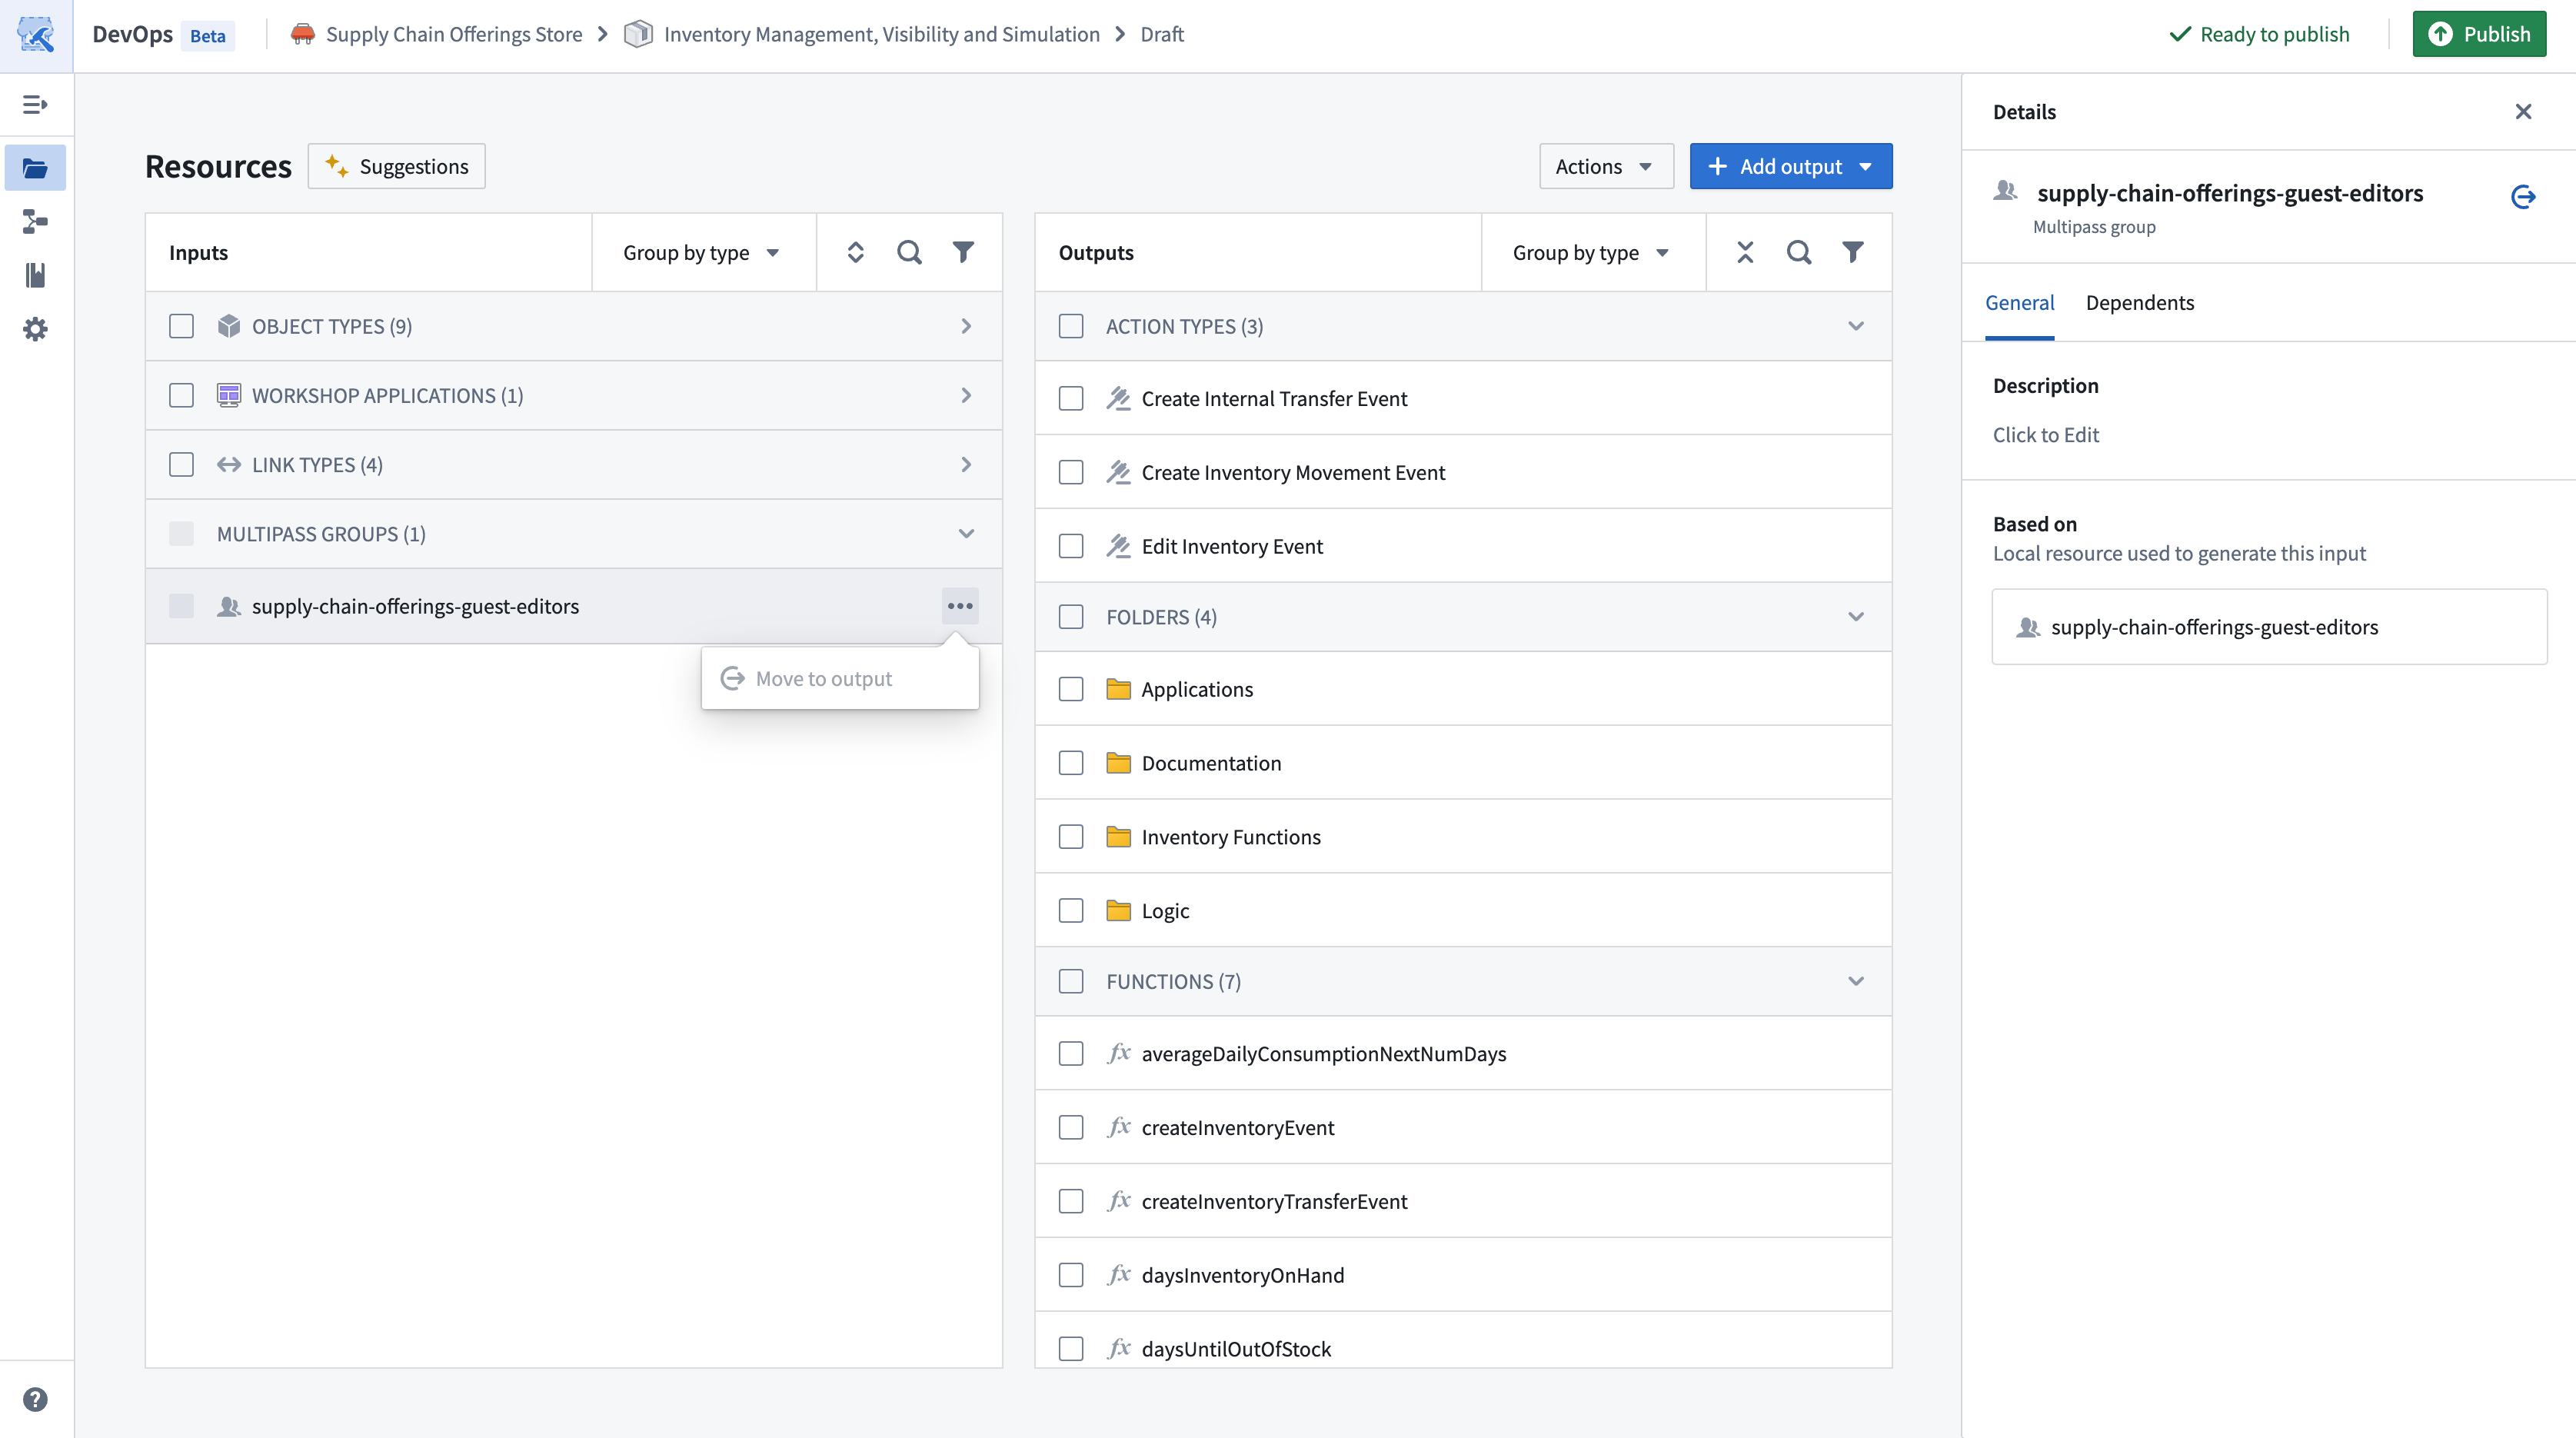
You cannot move certain input types, such as parameters or groups, to outputs since DevOps requires their configuration for installation.
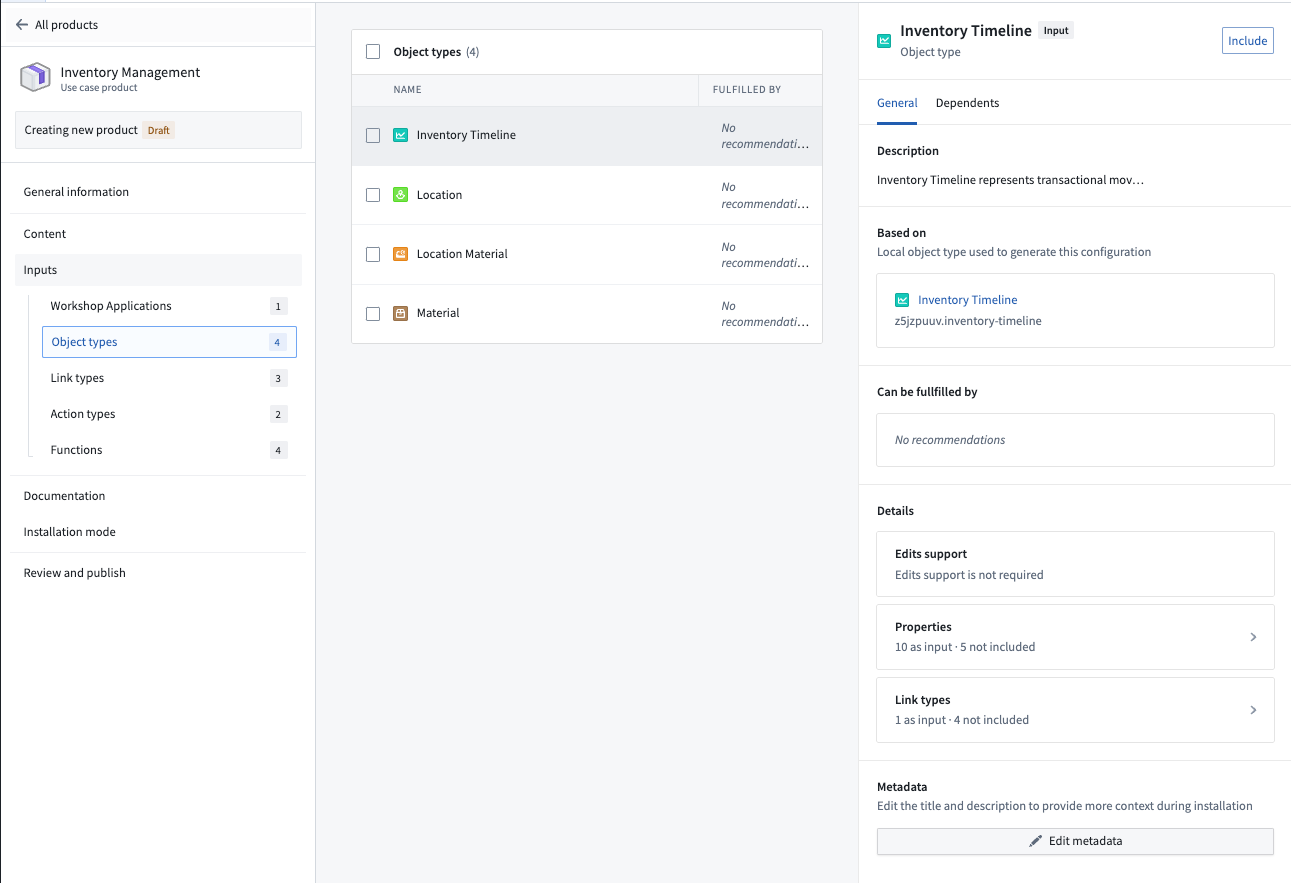
To view more information about a specific input, select the input to launch the Details panel. The Dependents tab includes information on which content resources require this input. From here, you can also configure presets for an input, which allow you to restrict the options of an input and provide a default to installers.
Manage inputs and outputs
DevOps provides multiple options to help you manage products with a large number of outputs. Use the Group by Folder option in the Outputs panel to preview outputs in their destination folders if you enable folder structure to replicate the organization of packaged resources during installation.
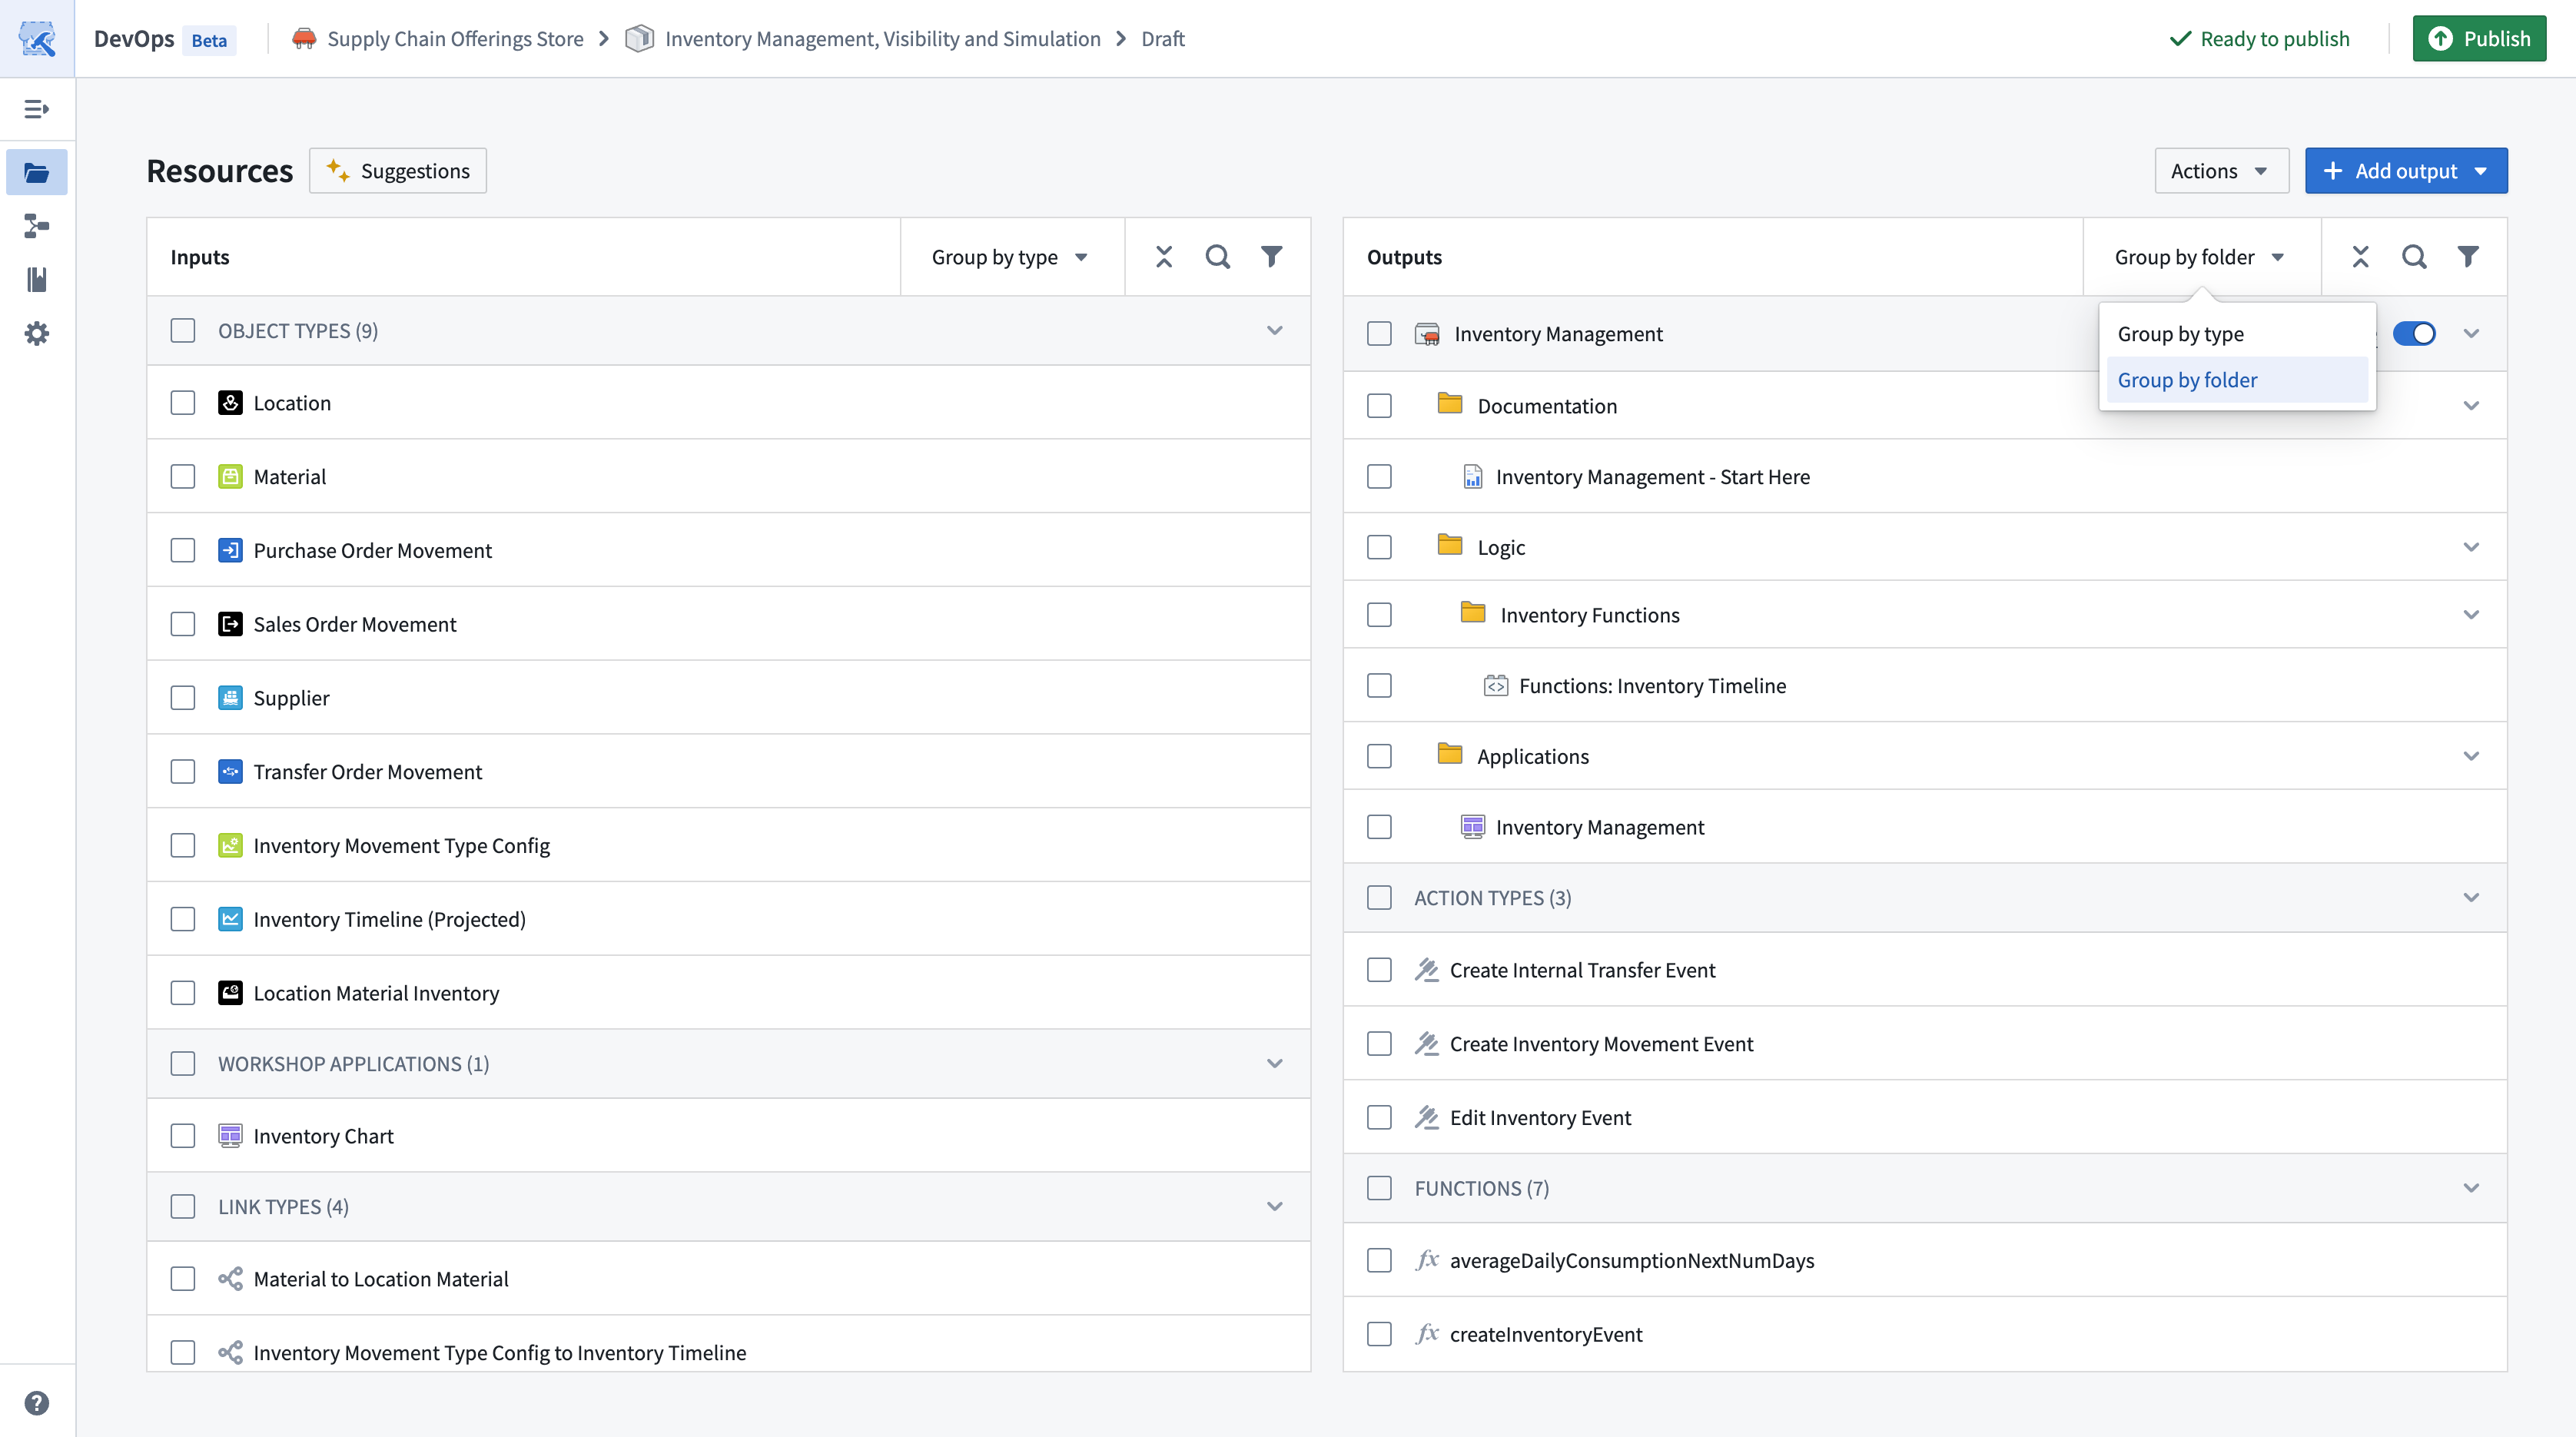
You can also select the filter icon in the ribbon of both the Inputs and Outputs panels to filter the resources they display. For example, this enables you to display only those resources that have an error message or are of a specific type.
Preview linked products
Select the Linked products tab from the left panel of your product to preview all available linked products, which can provide inputs for your products.
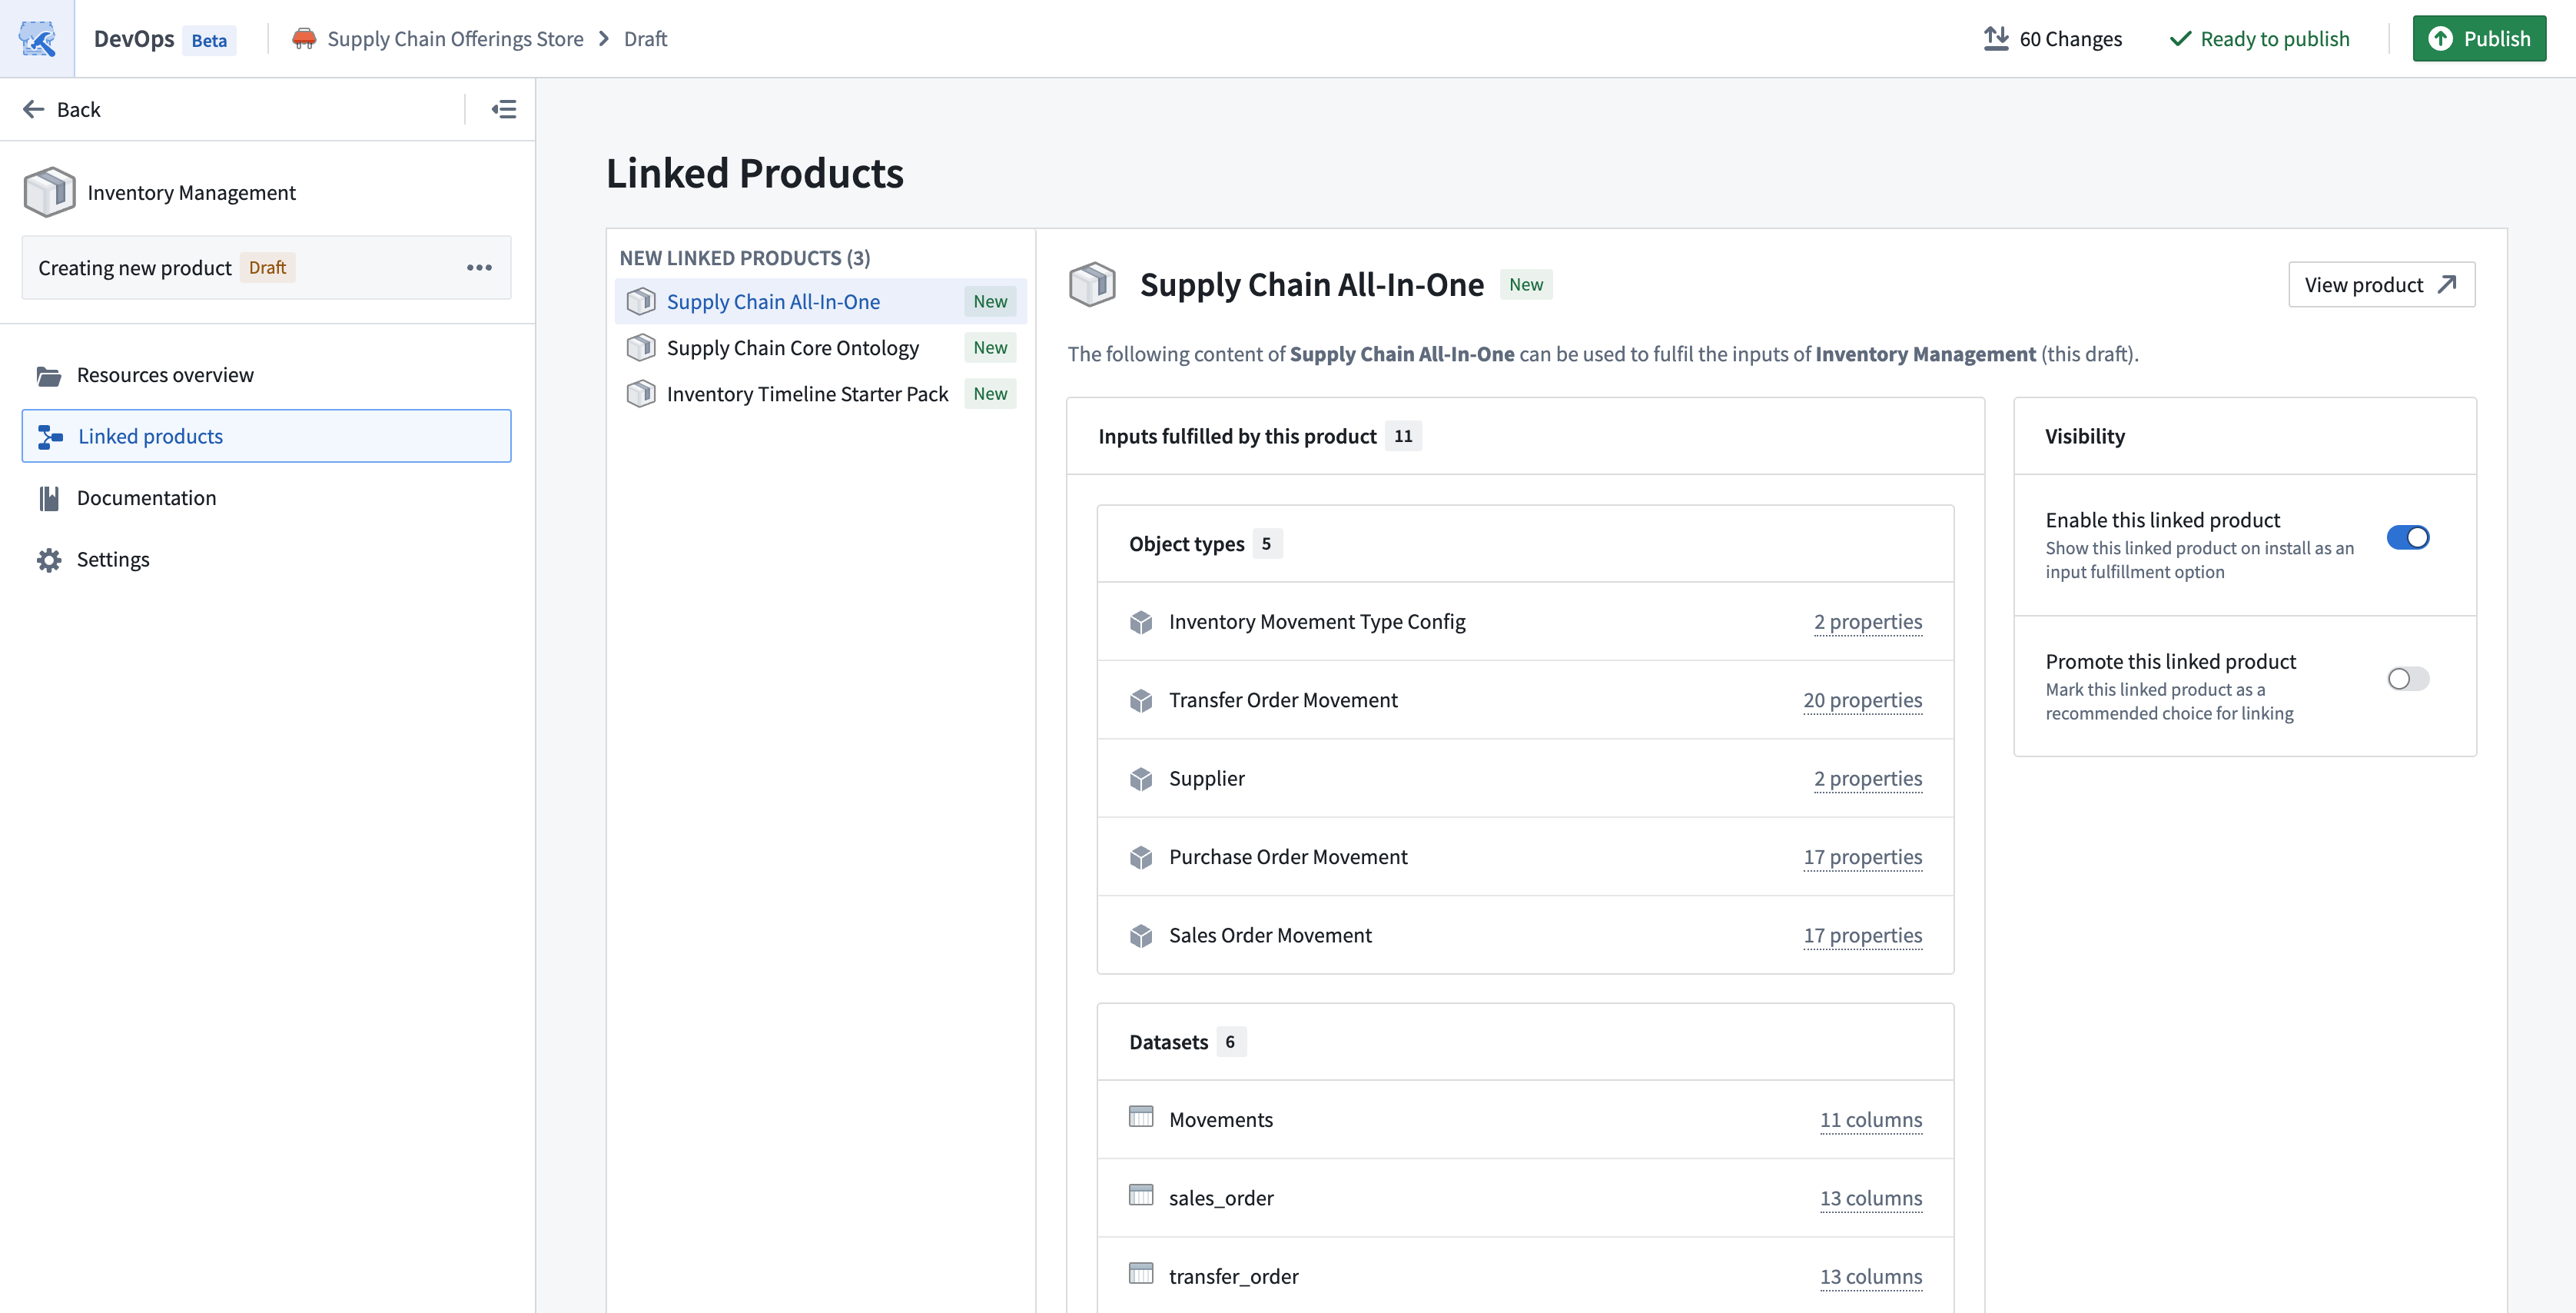
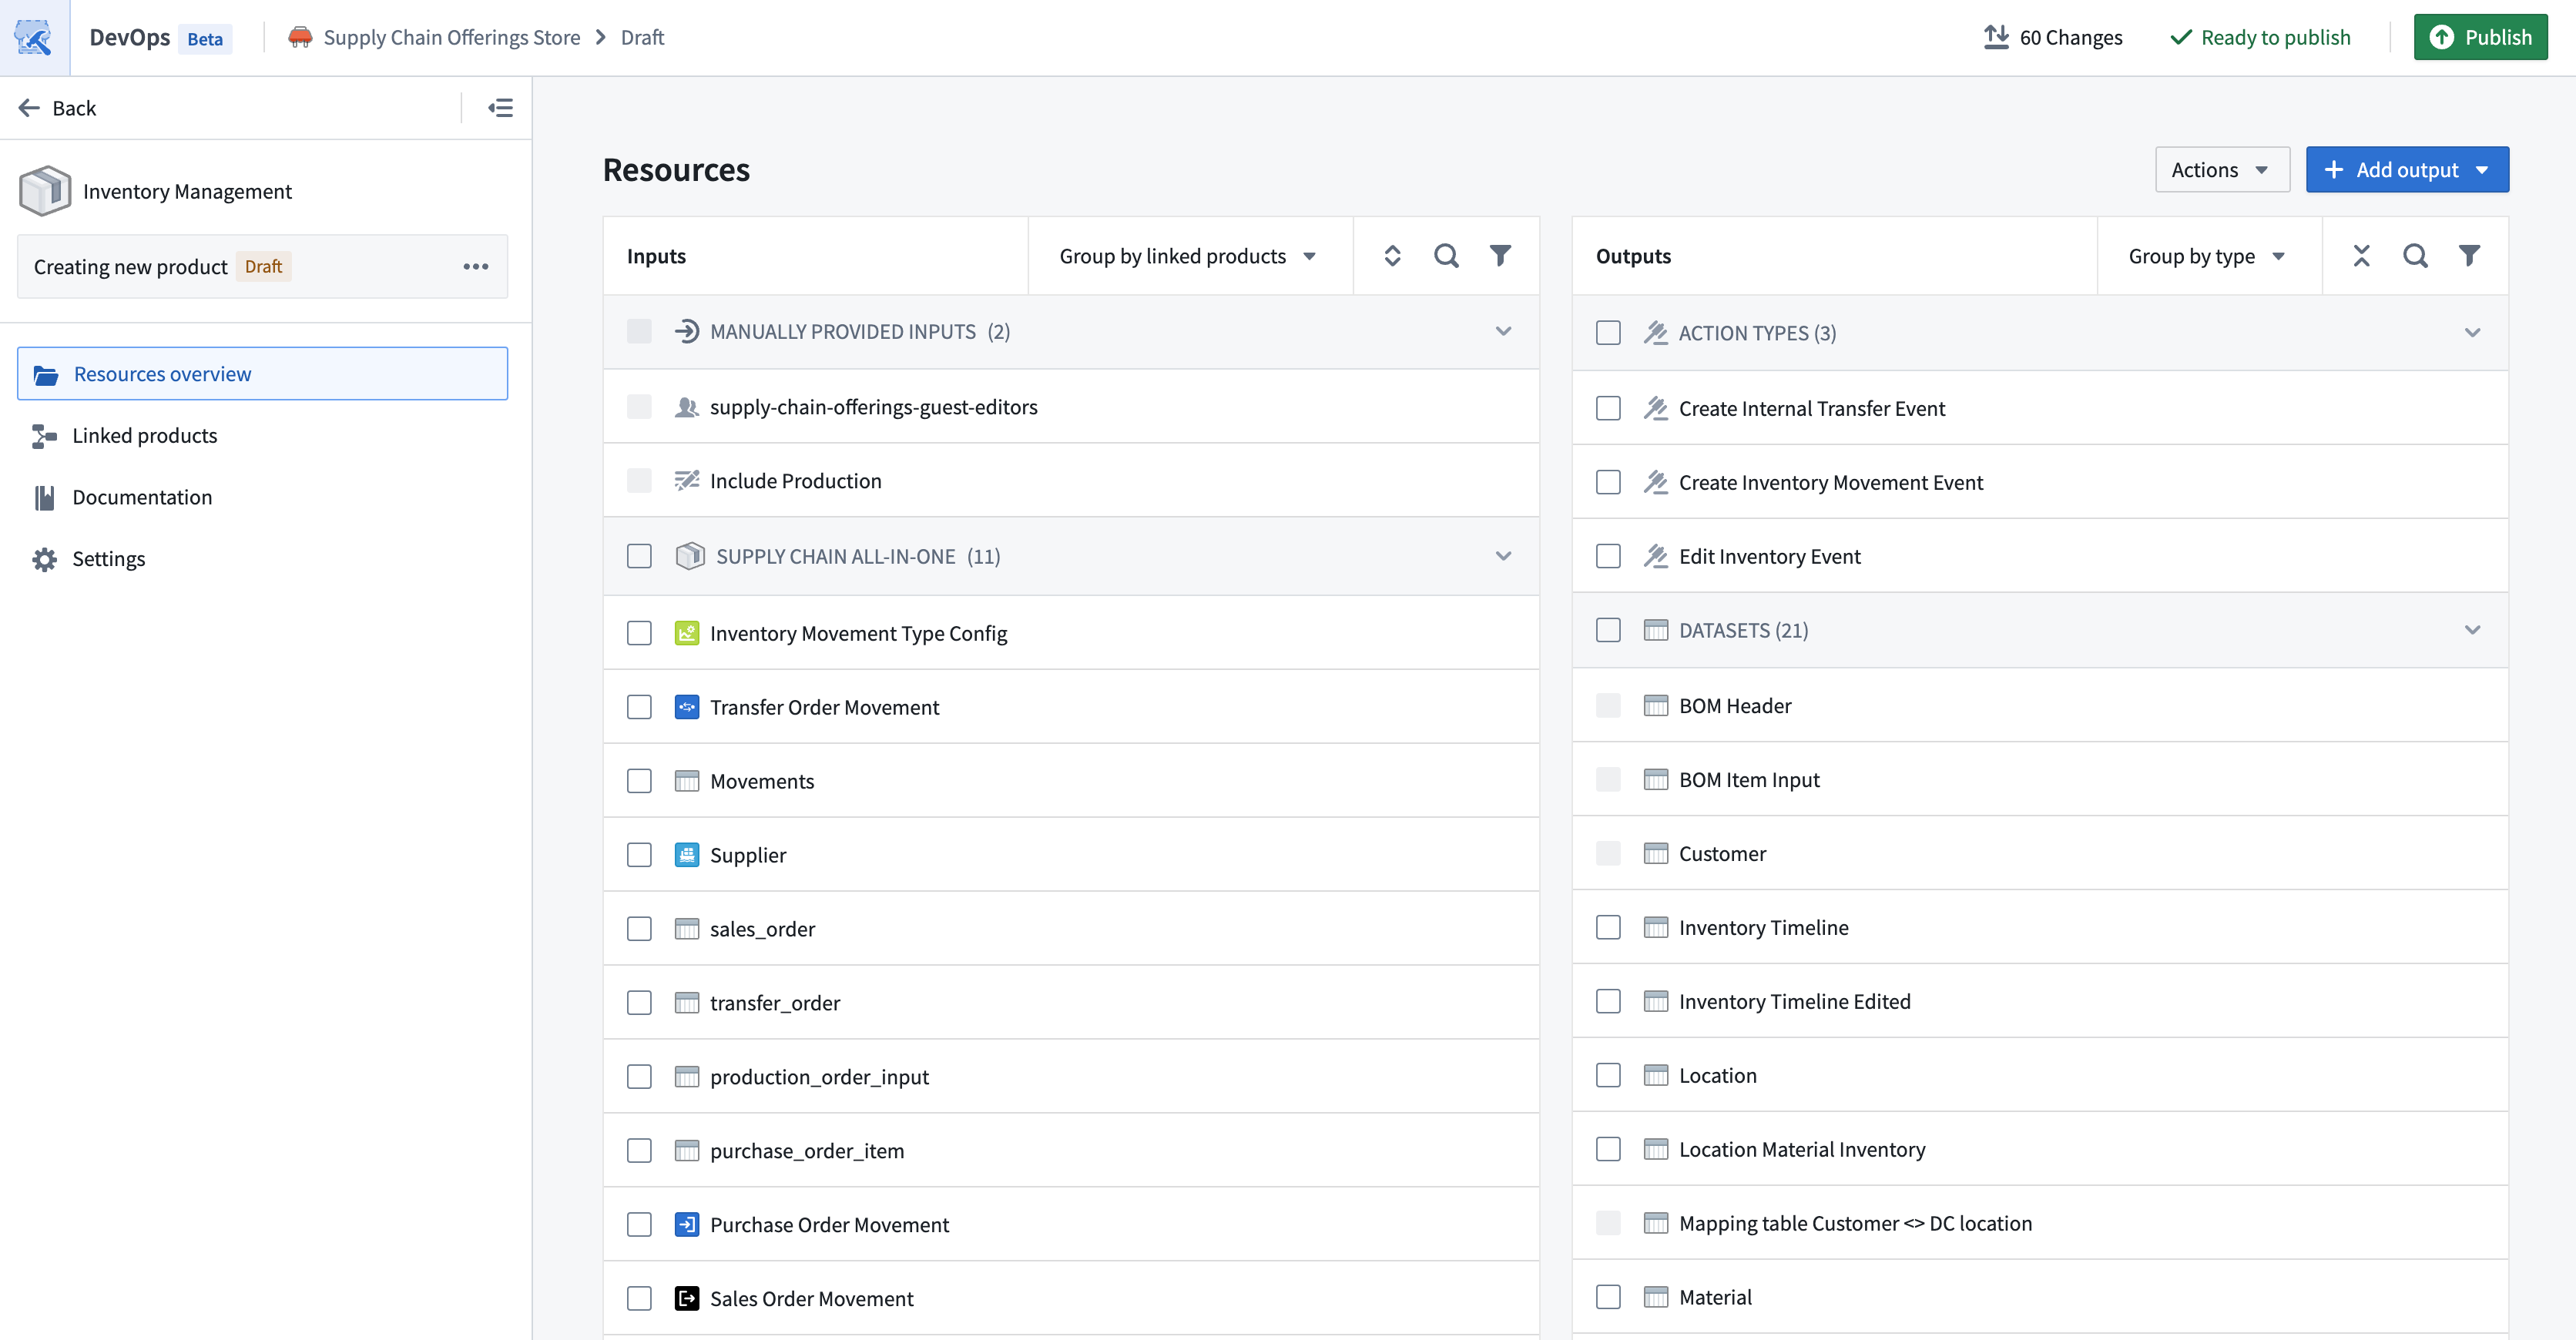
You can also use the Group by linked products option in the Inputs table to preview the inputs provided by each of the upstream linked products.
Add product documentation
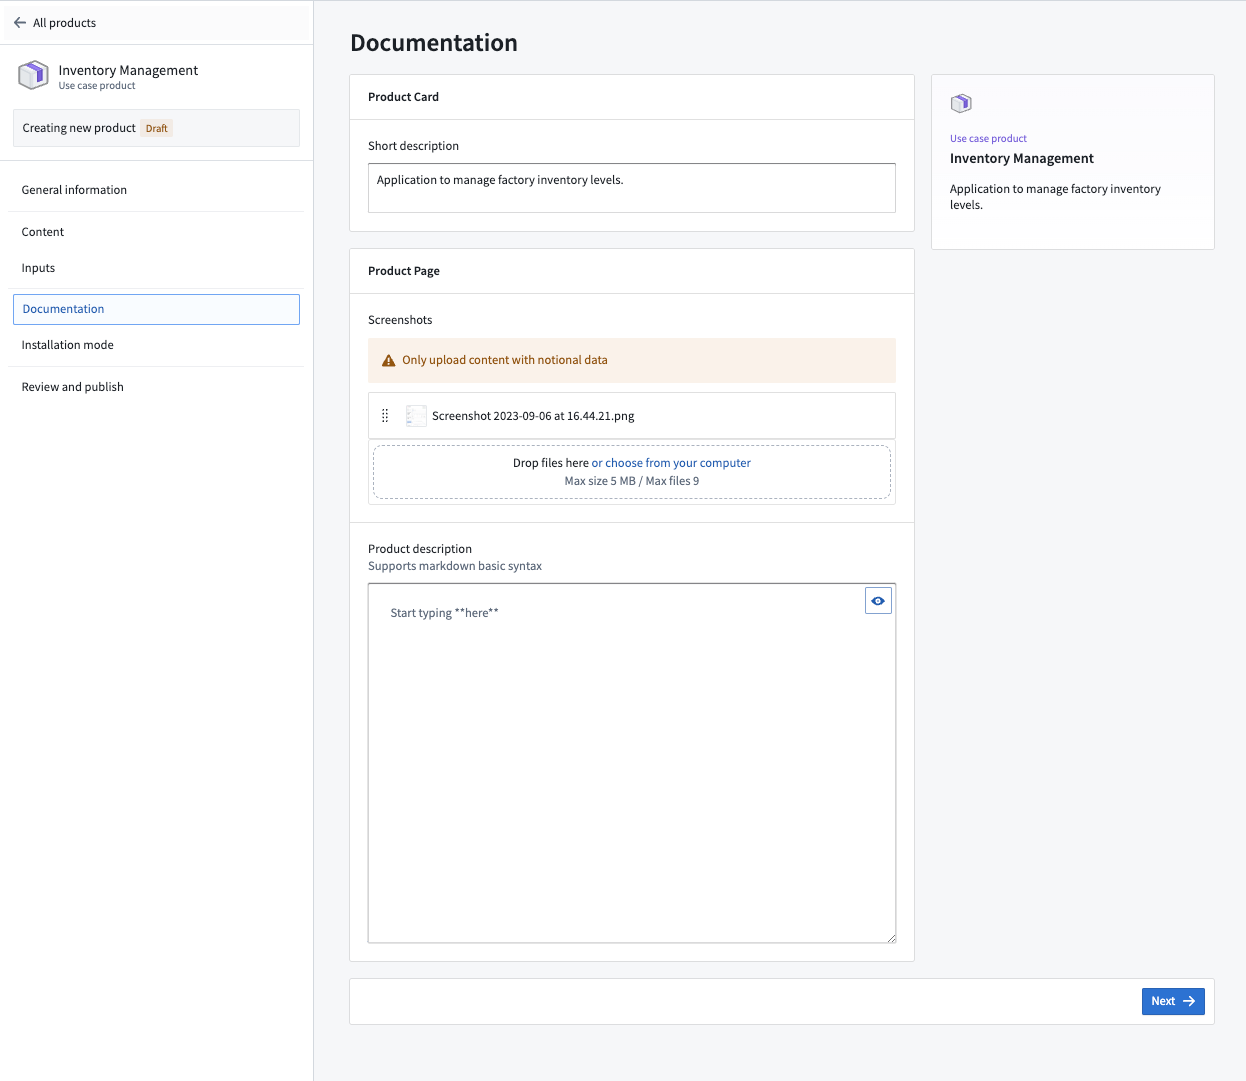
Select the Documentation tab from the left panel of your product to add information visible to users who are browsing products in the storefront. Use the Description section to write a short description of your product before adding an image to serve as its Thumbnail.
You can add additional Images as a preview of your product's content. Optionally, enter a longer Product description using Markdown ↗ syntax that contains detailed product use instructions.
Configure product settings
Select the Settings tab to configure additional product settings.
Folder structure
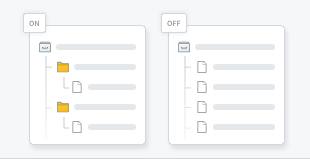
Enable folder structure by toggling on Folder structure to have DevOps create folders during installation that match the original organization.
DevOps packages folders up until the lowest common ancestor, which on installation will be replaced by the installation project.
:::callout{theme="note"} If your product's resources are organized within a dedicated folder or project, consider tracking a source folder for automated output management as your product evolves. :::
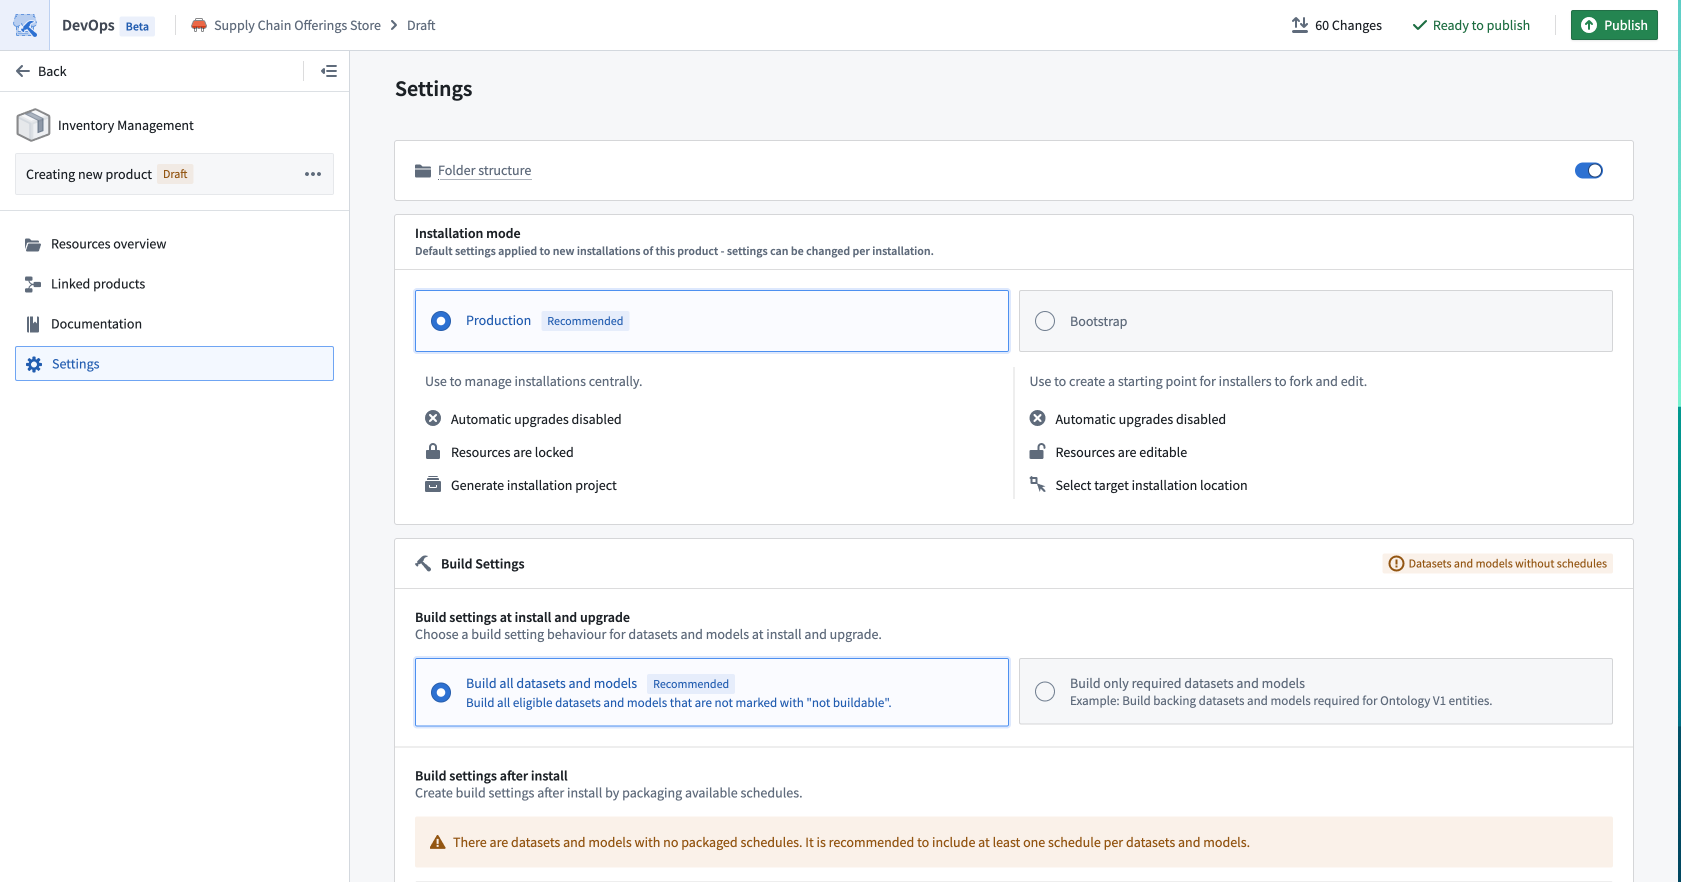
Installation mode
Use Installation mode to set the default settings for any installations of your product. These settings can be changed per installation.
- Production: Recommended when you want to manage all installations centrally and use features such as automatic upgrades. By default, installations have automatic upgrades disabled. Installers will be given the option to lock down their project to ensure safe upgrades.
- Singleton: The same settings as Production mode, with the restriction that there can only be one installation of the product per space and ontology.
- Bootstrap: Recommended when you expect that installers will use your product as a starting point for their own custom work. By default, installations have automatic upgrades disabled and installers can install into any location where they have edit access.
Build settings
Use Build settings to determine whether or not DevOps builds datasets and models automatically during the Marketplace installation job. This ensures that DevOps hydrates all datasets across the newly deployed resources upon job completion.
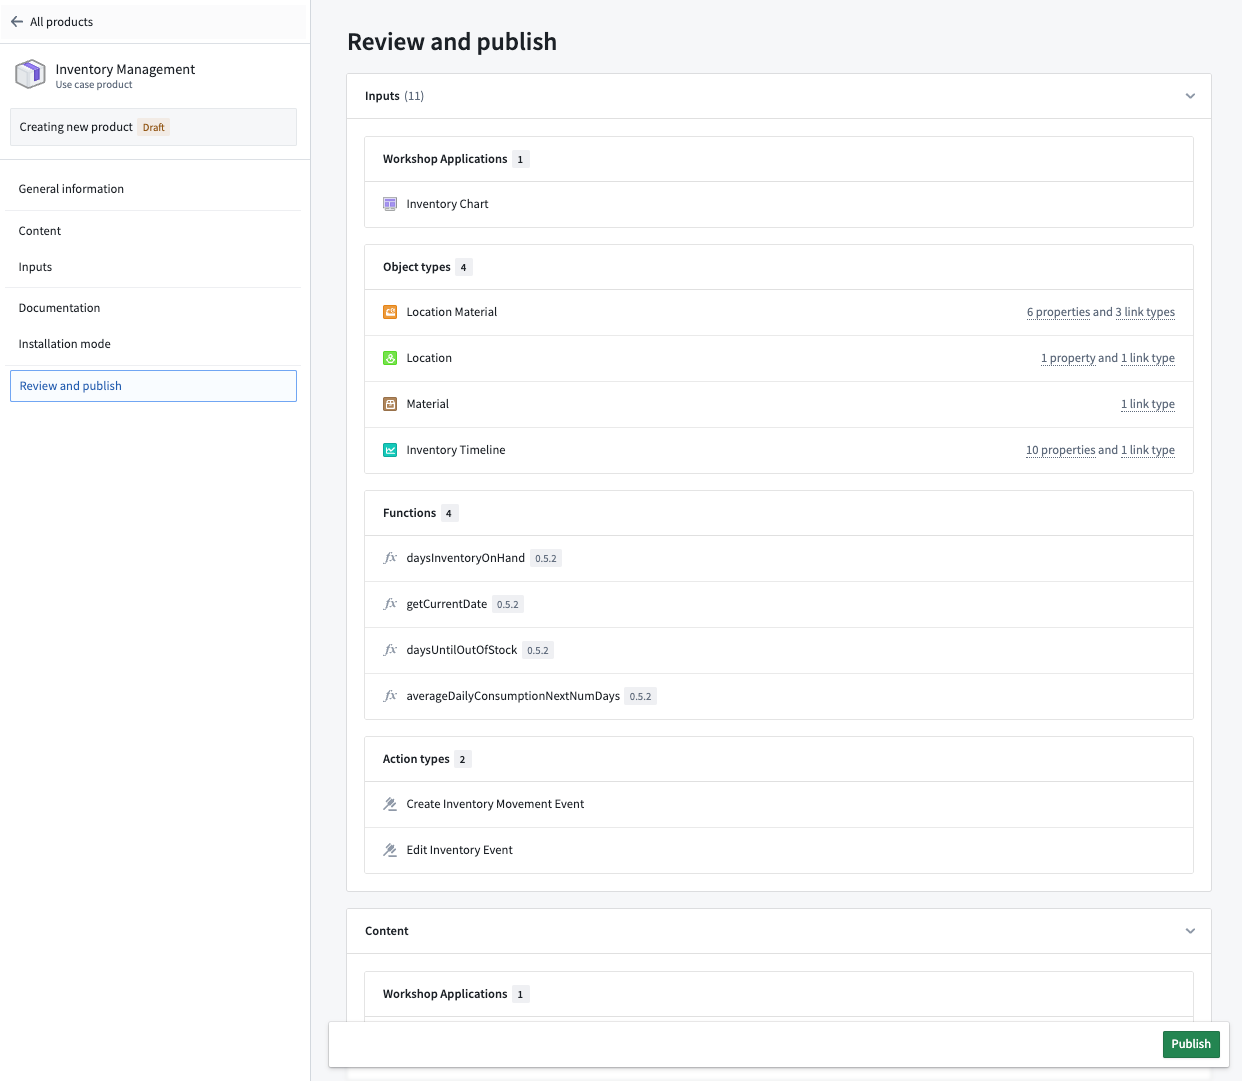
Review and publish
Once you are satisfied with your product, select Publish to make the product available in the storefront. This launches the Review Changes and Publish popup, where you can review changes in your product and add a Changelog description. Publishing may take up to a few minutes depending on your product's size.
中文翻译
创建产品
本文档包含在 Foundry DevOps 中创建新产品的说明。用户可通过 Marketplace 商店界面浏览和安装可用产品。了解更多关于可能需要创建产品的用例。
如需同时打包多个产品,请参阅打包多个产品。
选择商店
要创建新产品,请选择一个商店来发布产品。要选择现有商店或创建新商店,请点击右上角的更改商店选项。
新商店会保存到项目中并继承该项目的权限。具体而言,对商店项目拥有编辑权限的用户可以在该商店中创建新产品和编辑现有产品,而对商店项目拥有查看或编辑权限的用户可以从该商店安装产品。
选择商店后,点击新产品或创建新分组开始创建产品。
配置新产品草稿
在左上角的设置产品标题...输入框中为草稿产品命名。
开始产品草稿时,您可以选择:
- 添加资源: 手动从项目、文件夹或本体中选择资源,将其打包为输出。
- 跟踪文件夹: 产品将跟踪源文件夹。产品的新版本会自动引入文件夹中的新输出。
在以下示例中,我们选择手动添加资源。草稿随时可以迁移到文件夹跟踪。
添加输出
选择添加输出以选择要包含在草稿产品中的输出;这些输出是用户安装产品时 Marketplace 会重新创建的资源。您可以选择添加文件来选取 Compass 文件系统中的大多数资源类型。如果某个资源无法通过 Compass 选择,DevOps 会提供自己的选择选项,例如添加本体资源。
DevOps 会自动识别资源依赖关系,因此您应首先添加最下游的资源。例如,如果您想打包一个 Workshop 应用程序和四个对象类型,只需添加 Workshop 应用程序即可。
DevOps 还支持批量添加输出。如需一次性批量添加输出,请选择从文件夹添加所有文件。您还可以使用从数据沿袭添加和从工作流沿袭添加从图形化依赖视图中添加资源。如需更自动化的输出跟踪方式(随产品演进与源文件夹同步变更),请考虑跟踪源文件夹。
将输出添加到草稿产品后,选择某个资源可在屏幕右侧打开其详细信息面板。
选择依赖项选项卡可查看输出的依赖关系,DevOps 也会将这些依赖关系作为输入呈现。
添加输入
当您向草稿产品添加输出时,DevOps 会自动将输出依赖关系作为输入呈现。安装您最终产品的用户必须提供资源来满足每个输入。
在设计产品时,您可以将输入提升为输出。选择输入行上的省略号图标,然后选择移至输出即可将其提升为输出。
您还可以通过选择多个输入,然后从屏幕底部的弹出菜单中选择将{N}个移至输出来批量将输入移至输出。
一般规则是,如果您希望安装者提供自己的资源版本(例如他们自己的数据集或对象类型),则应将此要求列为输入。如果您希望产品为安装者提供资源,则应将输入提升为输出。
如果您迭代地将所有输入提升为输出,则安装您产品的用户在安装过程中无需映射任何内容。
某些输入类型(如参数或组)无法移至输出,因为 DevOps 需要其配置才能进行安装。
要查看特定输入的更多信息,请选择该输入以打开详细信息面板。依赖项选项卡包含哪些内容资源需要此输入的信息。在此处,您还可以为输入配置预设,从而限制输入选项并为安装者提供默认值。
管理输入和输出
DevOps 提供多种选项来帮助您管理包含大量输出的产品。使用输出面板中的按文件夹分组选项,可在启用文件夹结构时预览输出在目标文件夹中的位置,从而在安装过程中复制打包资源的组织结构。
您还可以选择输入和输出面板功能区中的筛选图标来筛选显示的资源。例如,这使您可以仅显示包含错误消息或特定类型的资源。
预览链接产品
从产品左侧面板中选择链接产品选项卡,可预览所有可用的链接产品,这些产品可以为您的产品提供输入。
您还可以使用输入表中的按链接产品分组选项来预览每个上游链接产品提供的输入。
添加产品文档
从产品左侧面板中选择文档选项卡,添加对在商店界面浏览产品的用户可见的信息。使用描述部分编写产品的简短描述,然后添加图片作为缩略图。
您可以添加额外的图片作为产品内容的预览。可选地,使用 Markdown 语法输入更长的产品描述,其中包含详细的产品使用说明。
配置产品设置
选择设置选项卡以配置其他产品设置。
文件夹结构
通过切换文件夹结构开关来启用文件夹结构,使 DevOps 在安装过程中创建与原始组织结构匹配的文件夹。
DevOps 会打包文件夹直到最低公共祖先,该祖先在安装时将被安装项目替换。
:::callout{theme="note"} 如果您的产品资源组织在专用文件夹或项目中,请考虑跟踪源文件夹以实现产品演进过程中的自动化输出管理。 :::
安装模式
使用安装模式为产品的所有安装设置默认设置。这些设置可以在每次安装时更改。
- 生产模式: 当您希望集中管理所有安装并使用自动升级等功能时推荐使用。默认情况下,安装禁用自动升级。安装者将可以选择锁定项目以确保安全升级。
- 单例模式: 与生产模式设置相同,但限制每个空间和本体只能安装一次产品。
- 引导模式: 当您希望安装者将产品作为自定义工作的起点时推荐使用。默认情况下,安装禁用自动升级,安装者可以安装到其拥有编辑权限的任何位置。
构建设置
使用构建设置决定 DevOps 是否在 Marketplace 安装作业期间自动构建数据集和模型。这确保 DevOps 在作业完成后跨所有新部署的资源填充数据集。
审核并发布
对产品满意后,选择发布使产品在商店界面中可用。这将打开审核更改并发布弹出窗口,您可以在其中审核产品中的更改并添加变更日志描述。根据产品大小,发布可能需要几分钟时间。